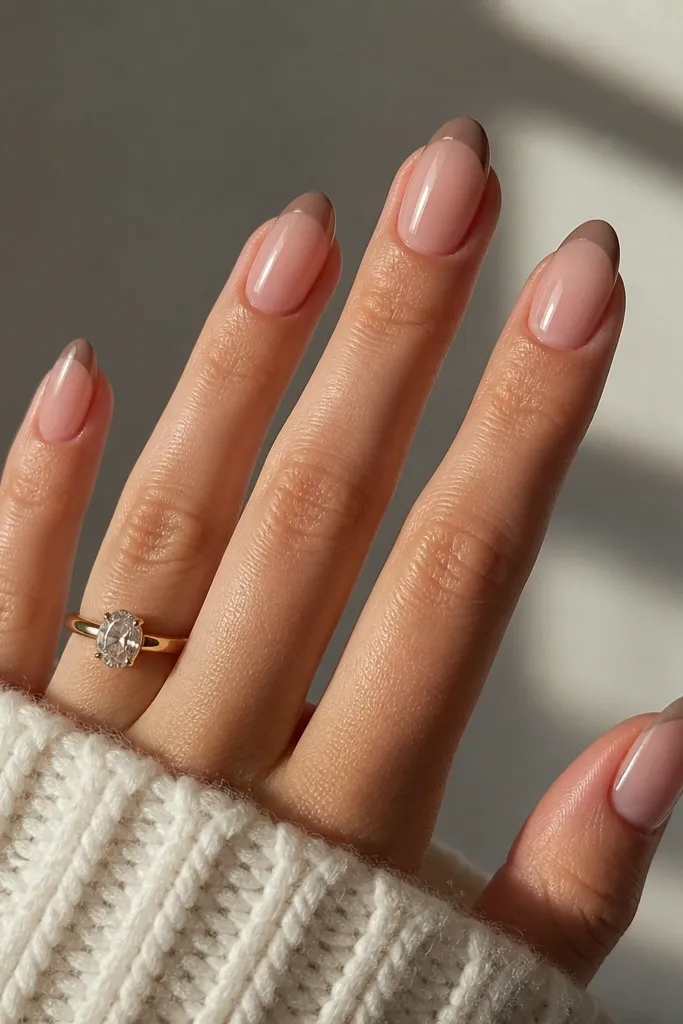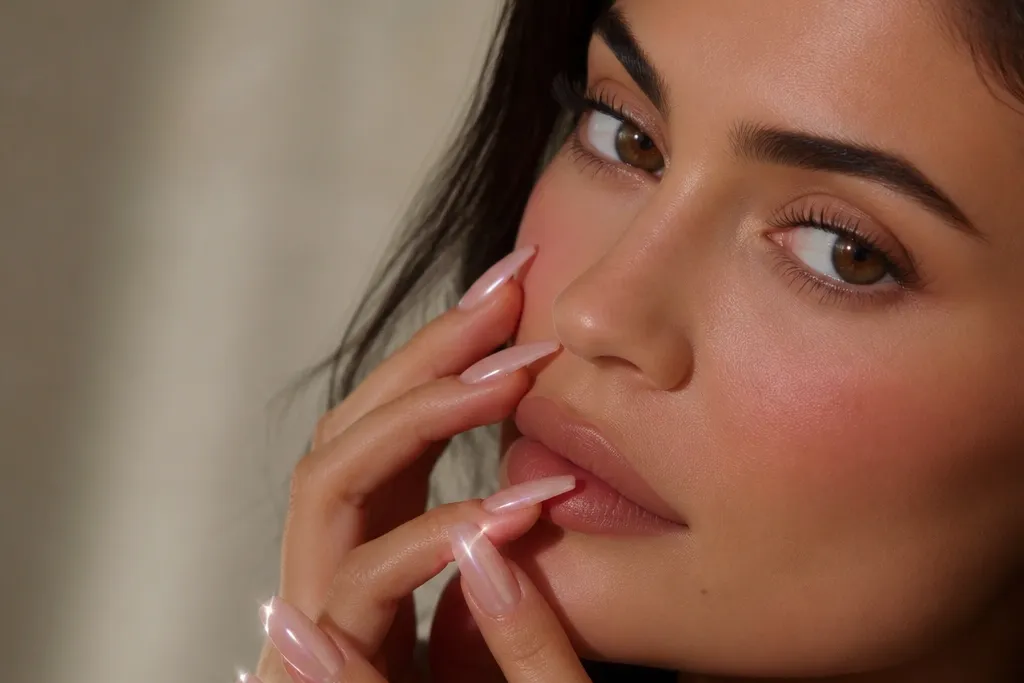
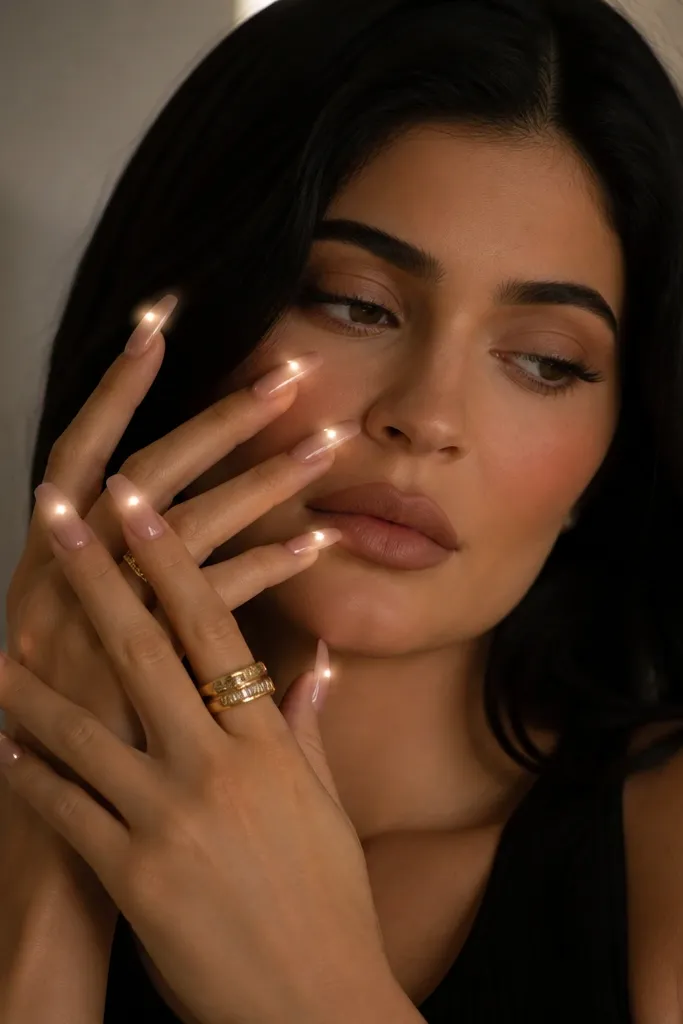
1. Sheer Baby Pink Almond With Micro-LED Halo Tip
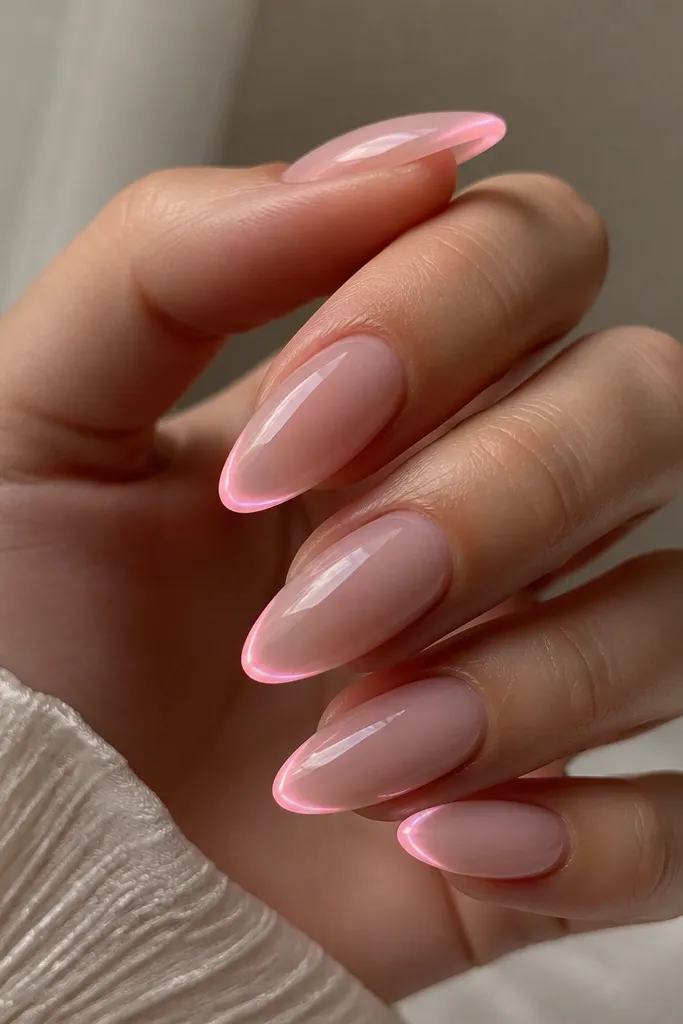
This set is the most Kylie-adjacent look I’ve done because it keeps the nail soft while the glow does the “wow.” The base is a sheer baby pink that lets your nail bed tone show through, then the LED sits just under the clear tip so it reads like a lit French outline. Almond shape makes the glow taper, which flatters hands with shorter fingers because the tip looks longer. It also works on deeper skin tones because the sheer pink still looks clean instead of chalky. For events, this is the one I reach for when I want glam without chunky glitter.
Start by prepping and filing the nails into a long almond shape, then buff lightly so the surface is matte. Apply a sheer baby pink builder gel in a thin coat and cure fully. Place a micro LED strip only across the last 2-3 mm of the nail area, centered, and tape the strip in place while you cure the first clear cap. Cap over the light with clear builder gel in two thin layers, curing each time, then top coat for a high-gloss finish. Finish by wiping with alcohol and cleaning the edges so the halo looks crisp instead of smeared.
If the LED glow looks too harsh, add a super-thin layer of sheer pink over the light before your clear cap so it glows pink, not white.
Avoid thick gel directly over the light — it creates a raised hotspot that shows in close-up photos.
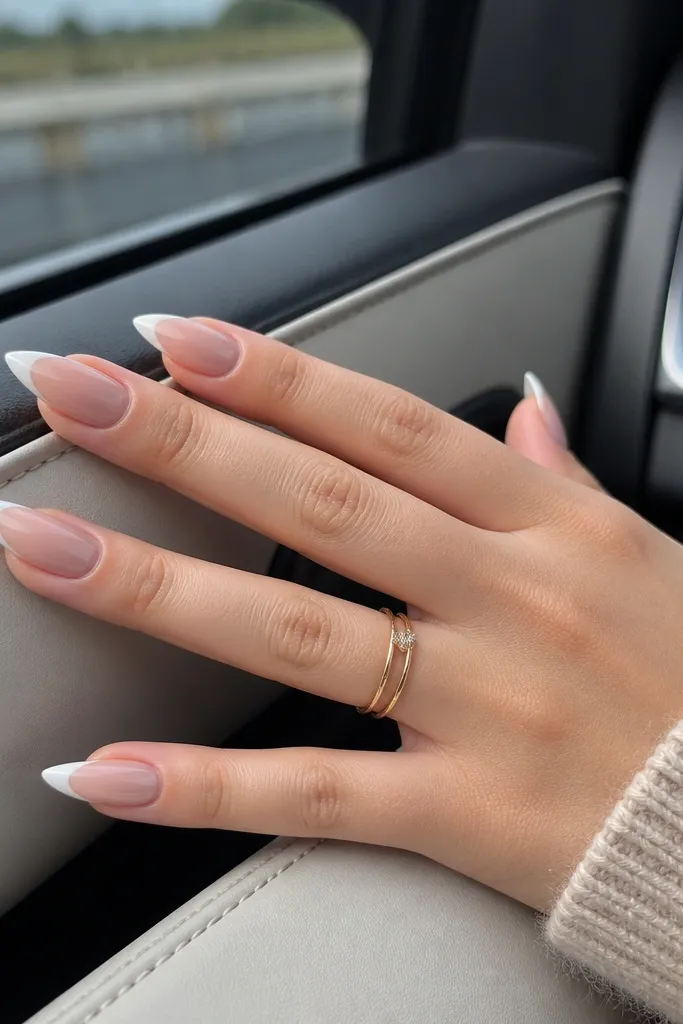
2. Milky Pink French With LED Smile Line
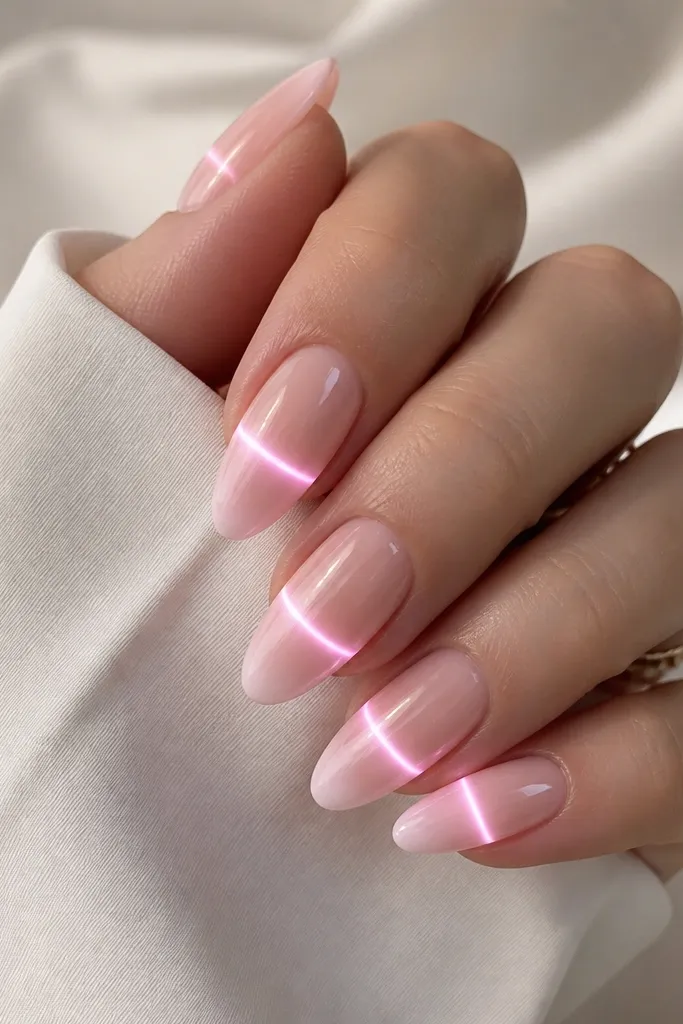
This is the “lit French” look and it reads expensive because the glow follows a familiar pattern. The milky pink French keeps the nail feminine, while the LED sits right under the painted smile line so the light looks like it’s coming from inside the nail. If your hands are more narrow, the band makes your nails look wider and more polished. If your hands are broader, the almond shape still keeps it elegant because the light line is controlled and not spread to the sides. Flash makes the band pop, but in normal lighting it still looks neat.
File nails into almond and push back cuticles cleanly, then apply a sheer base layer and cure. Paint a milky pink French tip in a thin arc, leaving a small gap where the smile line will sit. Place the LED strip so it aligns with that arc across the center of the nail, not near the sidewalls, and secure it with small pieces of gel tack if your system allows. Cover the whole smile-line area with clear gel, cure, then add a glossy top coat. When it’s set, clean up the cuticle edge with a fine brush dipped in acetone-safe remover.
Use a fine striping brush to keep the smile line symmetrical — asymmetry shows up fast once the light is on.
Skip placing the LED too close to the sidewalls; it makes the glow look like it’s leaking off the nail.
3. Pink Chrome Cloud Tips With Under-Glow LEDs
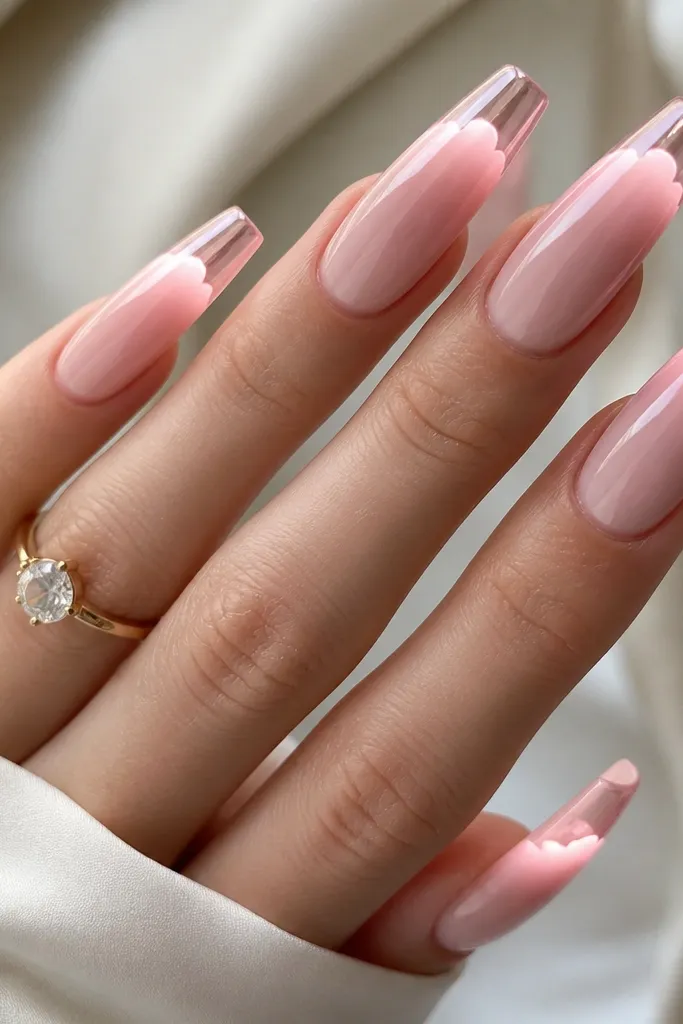
This one is for when you want the “Kylie mirror but softer” vibe. The pink chrome is applied only on the tips in cloud blobs, so it stays playful instead of heavy. The LED glow sits under the clear cap over the chrome area, which makes the chrome look like it’s lit at night. It flatters medium to long nail beds because the cloudy tips pull the eye upward. If your skin tone is warm, the pink chrome reads extra flattering; on cool undertones, it still works as long as the base is milky rather than lilac.
Editor's noteIf the chrome looks too reflective under lights, reduce the chrome coverage — leave more milky base visible between clouds.
Start with a pale milky pink base and cure it fully. Apply pink chrome to the tip area in uneven cloud shapes using a sponge applicator, then seal lightly with a thin clear gel. Position the LED strip under the cloud zone so it covers the center of the nail tip area, about 60-70% of the width. Cap with clear gel in one thin layer first, cure, then add a second thin layer for smoothness. Top coat with a thick glossy finish so the chrome and light look one smooth surface.
Skip thisDon’t buff the chrome too aggressively before capping; it dulls the cloud effect and the LED glow looks flat.
4. Bubblegum Pink Jelly Base With LED Dot Constellation
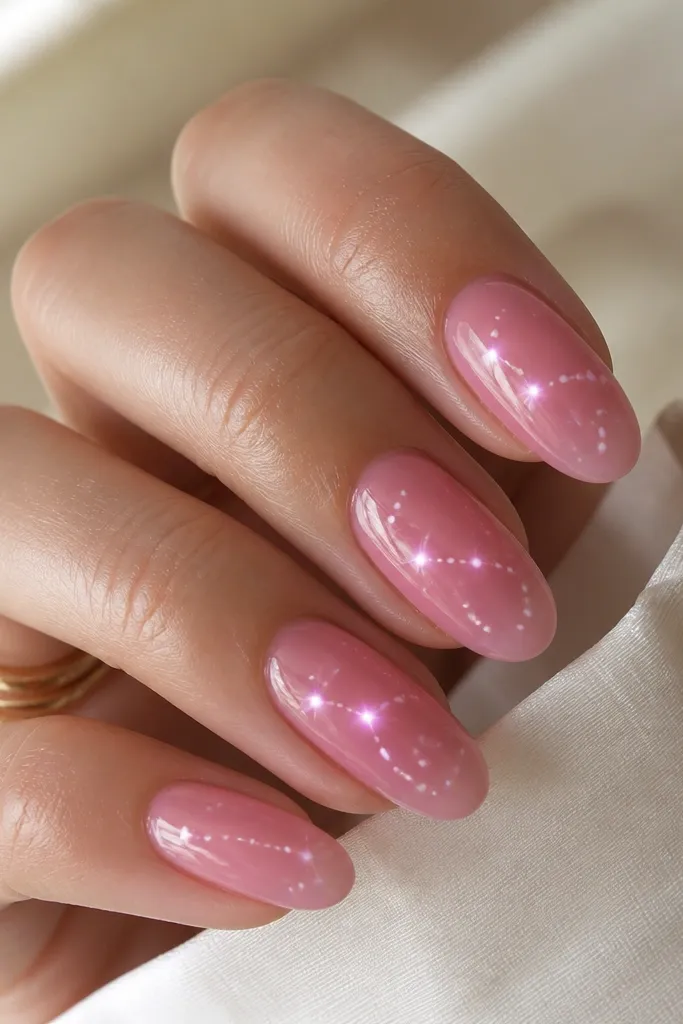
This design looks fun in person, not just in photos, because the jelly base makes the glow feel suspended. The bubblegum pink is semi-translucent, so the LED dots look like tiny lights trapped under candy glass. I like it for hands that need a little color warmth — it makes fingers look lively without turning neon. It also works for shorter almond or medium coffin because the dots are small and don’t widen the nail. For parties, the constellation reads playful and still feminine.
Editor's noteTurn the lights on after the first cap coat; if any dot looks dim, you can adjust placement before the final seal.
Build a bubblegum pink jelly layer with thin coats so it stays see-through, curing each layer. Mark where you want the LED dots — I place 3-4 dots per nail, with one in the center and one closer to the tip. Secure the micro LED dots under the clear gel so they sit flat; avoid stacking them. Cap with clear gel, then top coat twice: one normal gloss layer and one slightly thicker gloss layer for that jelly shine. After curing, wipe and check from the side for any edge lift.
Skip thisAvoid placing too many dots — the nail turns into a blinking mess instead of a constellation.
5. Pink Ombre Blush Fade With LED Edge Glow
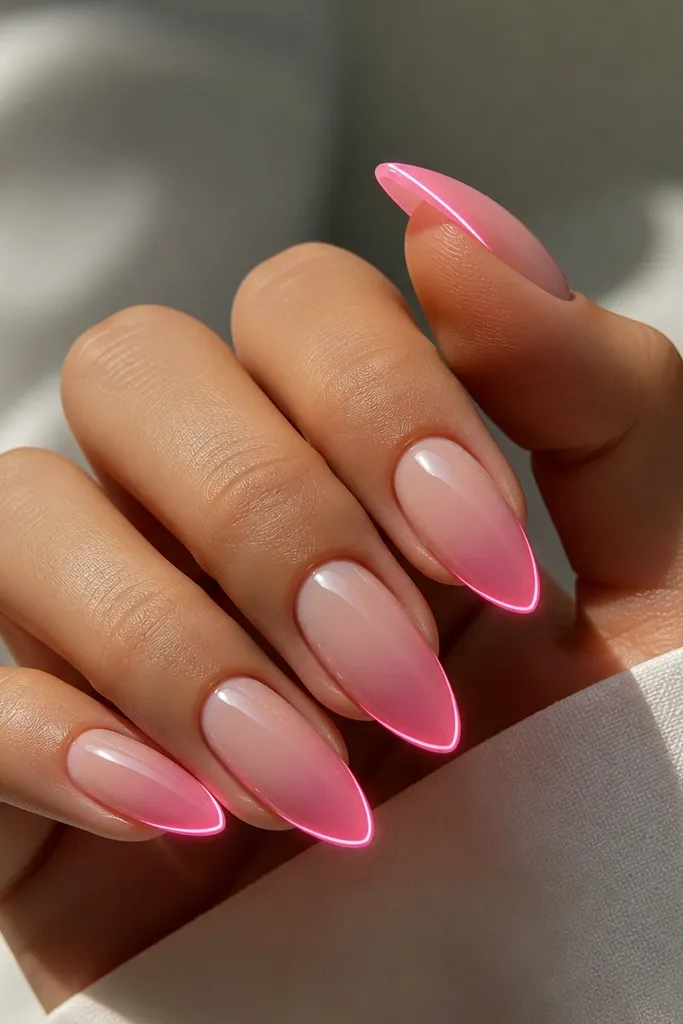
Edge glow is one of those tricks that makes nails look like they have jewelry lighting. The blush ombre stays soft and flattering, while the LED rim creates a clean outline that makes the nail shape look sharper. On smaller hands, the rim makes the nails look more defined without adding bulk. On longer nail beds, the ombre fade gives the light a path so it doesn’t look like a single sticker. This is also a great choice when you want the glow but hate busy art.
Editor's noteUse a matte file to remove any surface texture before top coat; texture makes the edge glow look fuzzy.
Start with a sheer pink base and cure. Sponge-blend blush to deeper pink at the tip using a makeup sponge, keeping the fade smooth and not streaky. Place a thin LED strip along the outer edge of the tip area, covering about the last 2 mm, and center it so it follows the almond curve. Cap with clear gel so the rim glow looks embedded, then top coat with a glossy finish. Clean the sidewalls with a small brush so the glow outline stays crisp.
Skip thisSkip thick ombre layers — they create uneven thickness that makes the LED line look wobbly.
6. Rosy Pink Heart Tips With LED Hidden Underlay
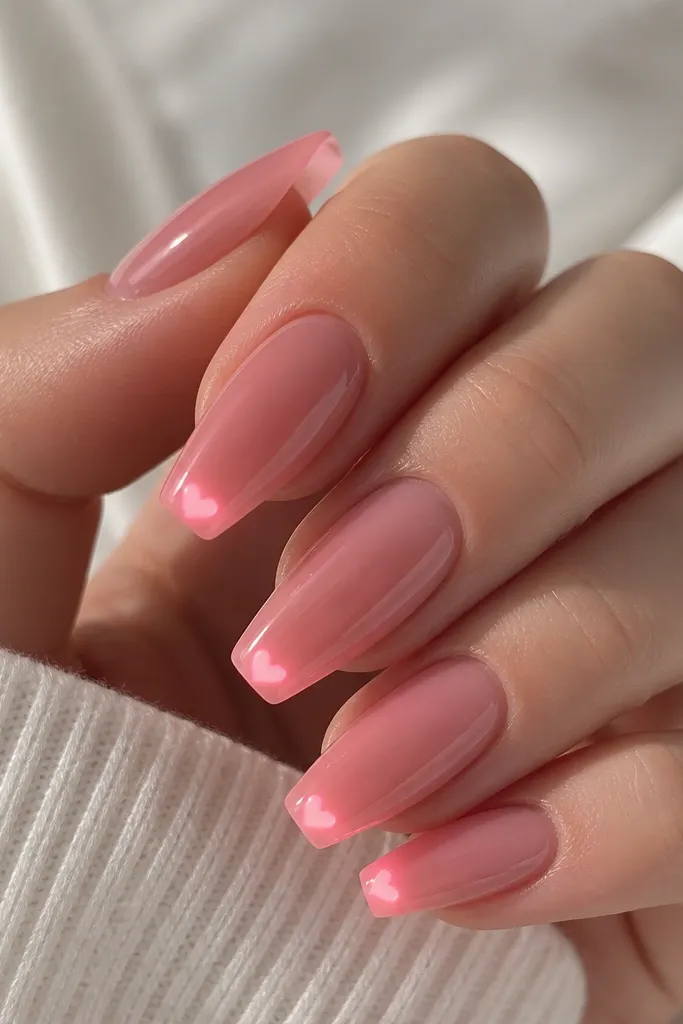
Hearts can look childish fast, so the key is scale and placement. Here the hearts are small and placed right at the tip center, and the LED glow is hidden under them to make the hearts feel like little love lights. The rosy pink base is slightly deeper than bubblegum, which makes the hearts look intentional instead of faded. Coffin shape adds attitude, but the heart placement keeps it sweet. This set looks great on medium skin tones and fair skin because the pink contrast stays visible without turning red.
Apply a medium rosy pink builder gel and cure. Paint tiny hearts at the tip using a dotting tool and a striping brush, keeping them under 2 mm wide. Position the LED strip under the heart zone so it sits behind the heart paint, then secure with gel tack while you cure a first clear cap. Add clear gel on top in thin layers until the surface is fully smooth. Finish with a glossy top coat and check that the hearts don’t look raised at the edges.
Make the heart line thicker than you think — thin heart outlines disappear once the LED is on.
Don’t put hearts all over the nail; one cluster per tip looks clean, four clusters looks chaotic.
7. Soft Pink Lace-Effect Over LED Glow
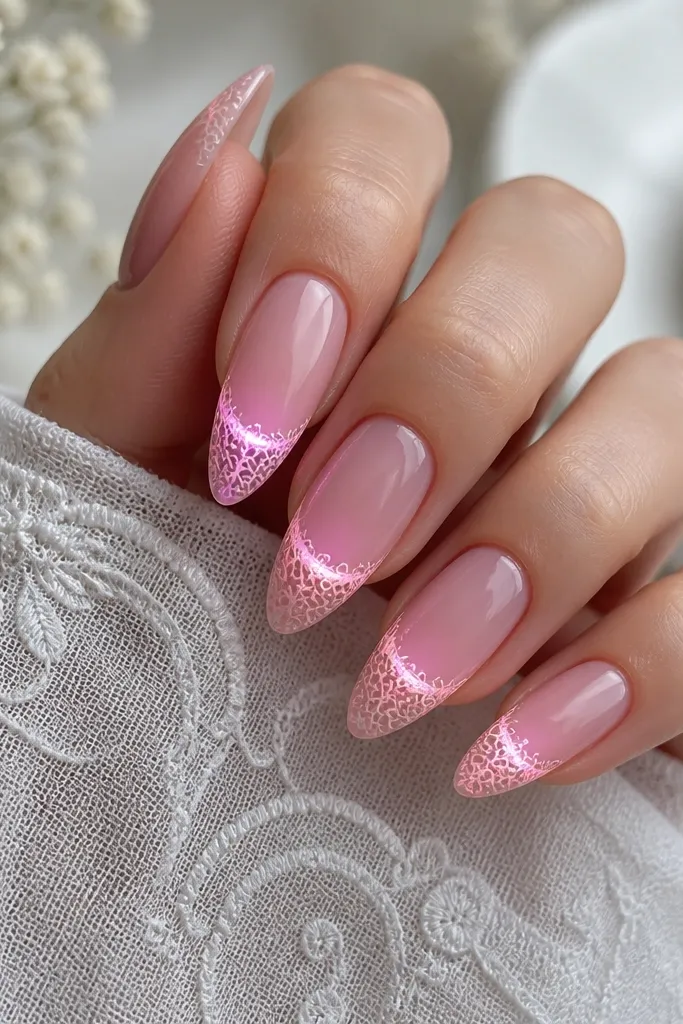
Lace on nails looks best when it’s delicate and placed where the glow can make it feel dimensional. The soft pink base keeps everything feminine, and the lace-effect stamping adds texture without taking over. With LEDs under the lace zone, the lines look like they’re glowing from beneath, so the pattern becomes the focus. This set flatters hands with slimmer nail beds because lace pulls the eye upward. It’s also perfect for weddings, showers, and romantic dinners where you want “pretty” more than “loud.”
Editor's noteChoose lace stamps with thin linework; thick lace turns into blobs once sealed over a light.
Start with a sheer-to-soft pink base and cure. Stamp a lace pattern near the tip using a white or very pale pink stamping polish, then seal lightly with a thin clear gel. Place the LED strip under the stamped area so it runs through the center of the lace, not the side edges. Cap with clear gel and cure, then add a glossy top coat that fully covers the stamp ridges. After curing, use a lint-free wipe and check edges for any trapped gel.
Skip thisSkip heavy glitter under lace — it fights the delicate pattern and makes the glow look muddy.
8. Pink Satin Sheen With LED Under-Curve
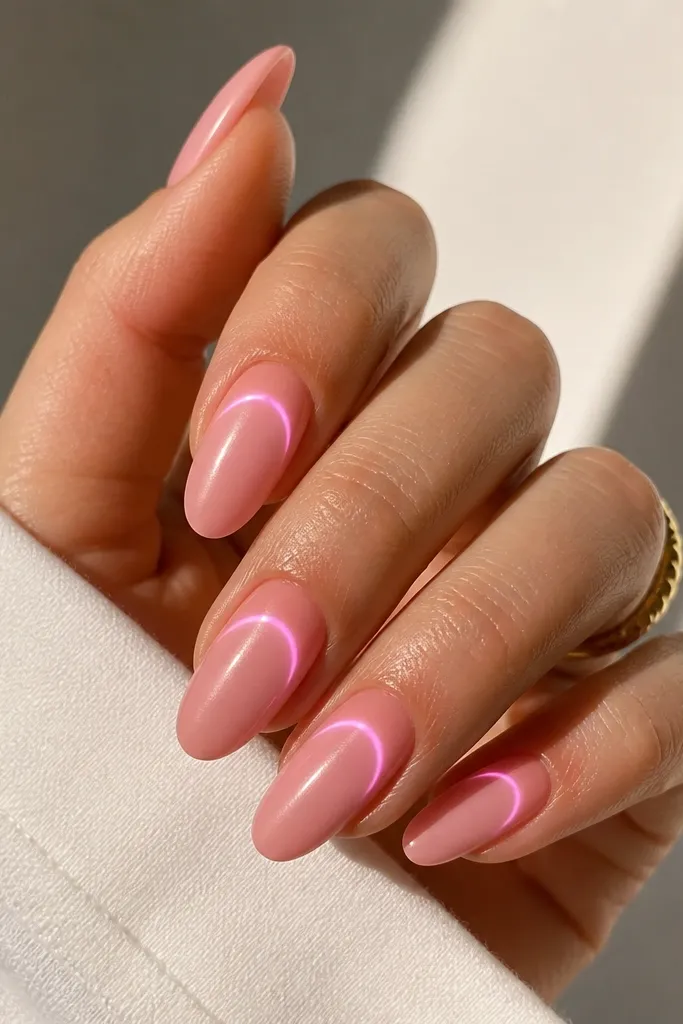
Satin finish is underrated for Kylie-style nails because it looks soft and expensive even when the light is on. This set uses a pink satin base so the LED glow looks like it’s diffused, not harsh. The LED under-curve follows the natural smile arc, which makes nails look shaped and tidy. It’s flattering on hands with cuticles that need cleanup because satin hides micro unevenness better than mirror shine. For daytime photos, this reads classy instead of party-only.
Buff nails lightly and apply a pink satin-finish gel as the base, curing it fully. Add a very thin clear layer where the LED will sit so the strip adheres smoothly. Place a thin LED strip under the smile arc area, keeping it centered and leaving a small gap from the sidewalls. Cap with clear gel in one thin layer, cure, then add a second thin clear gel layer to fully smooth. Seal with a satin-safe top coat if you have one; if not, use a glossy top coat only over the LED zone and keep the rest satin.
If you notice the glow looks too bright, switch to a diffused LED strip or reduce the exposed strip length by trimming it to 1.5-2 mm coverage.
Avoid full mirror top coat over a satin base; it turns into a weird hybrid that looks cheap.
9. Pink Glazed Donut Nails With LED Ring
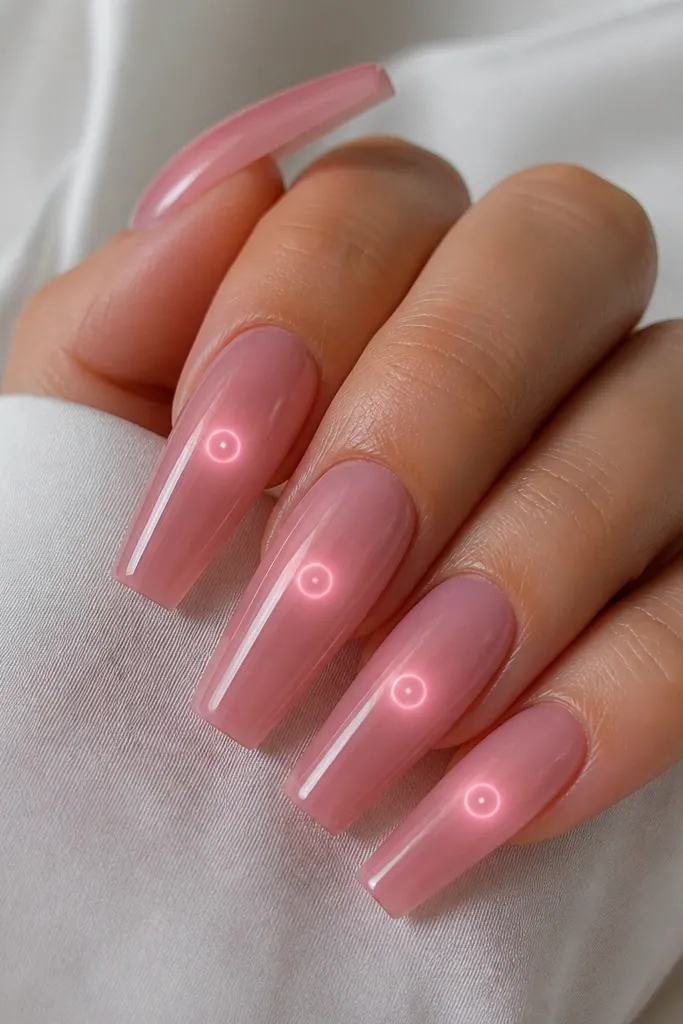
This is the “food dessert but on nails” look, and it works because the ring is centered and the base stays clean. The glazed finish is achieved with a glossy top coat and a milky pink base, so the surface catches light even when LEDs are off. The LED ring sits under the clear cap at mid-nail, so it looks like a luminous halo. It’s flattering on people who like a statement nail but don’t want rhinestones. This also looks great on medium-to-deep skin tones because the milky pink stays bright without turning gray.
Apply milky pink gel and cure. Use a glossy clear gel layer to create that glazed look, then cure again. Position a micro LED ring under the center area of the nail, making sure it’s flat and centered — I align it with the nail’s vertical axis. Cap with clear gel in thin coats until the ring is fully embedded and the surface is smooth. Finish with a high-gloss top coat and wipe the tacky layer clean.
Keep the ring diameter small (about the size of a pencil eraser on the nail scale) so it reads cute, not bulky.
Don’t place the ring too close to the cuticle; it can look like a misplaced sticker.
10. Pink Barbie Fade With LED Tip Spark
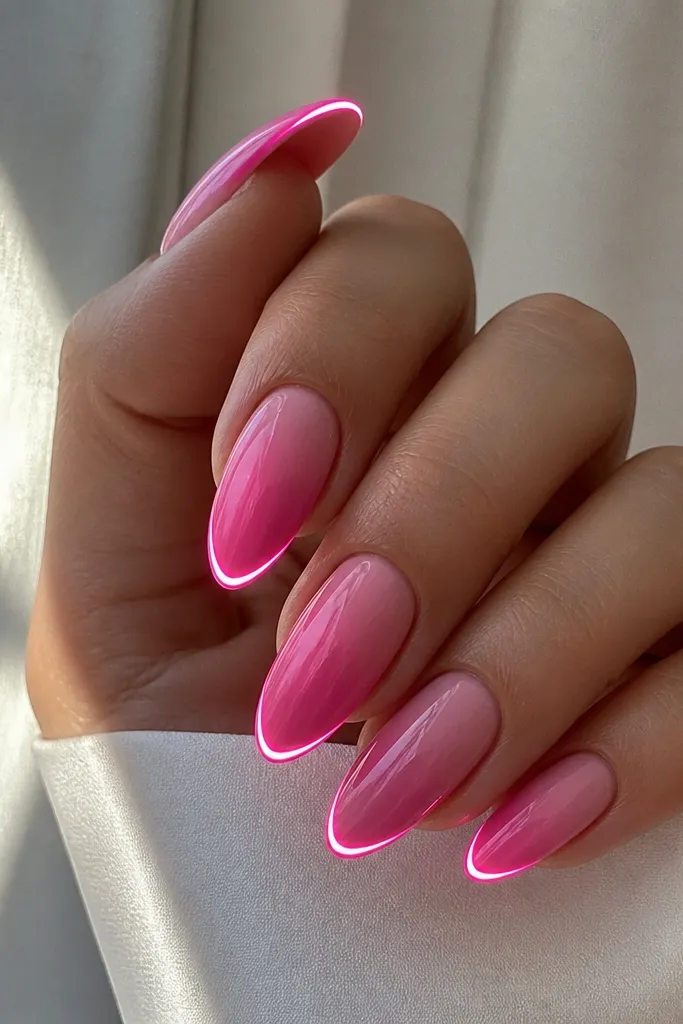
If you want the glow to look like a single “spark,” this fade + tip LED combo is the one. The Barbie pink is punchier than most Kylie-inspired sets, but the fade keeps it feminine instead of loud. The LED line hugs the tip edge, so photos make it look like a lit signature. This set looks amazing when you wear silver jewelry because the cool metal makes the pink look even cleaner. It flatters long nail beds and also looks good on shorter nails if you keep the glow line narrow.
Editor's noteUse a ruler-like visual check: the LED line should be straight when viewed from the front, not angled like a smile.
Start with a light base pink, then sponge or airbrush a deeper Barbie pink toward the tip for a smooth gradient. Cure fully. Place a narrow LED strip along the tip edge, centered, and secure it with tape or gel tack. Cap the LED with clear gel, keeping the thickness even so the line stays straight. Add a glossy top coat and check alignment by turning the finger under a lamp.
Skip thisSkip chunky glitter over the LED — it turns the glow into a yellowish haze.
11. Pink Jelly French With LED Center Strip
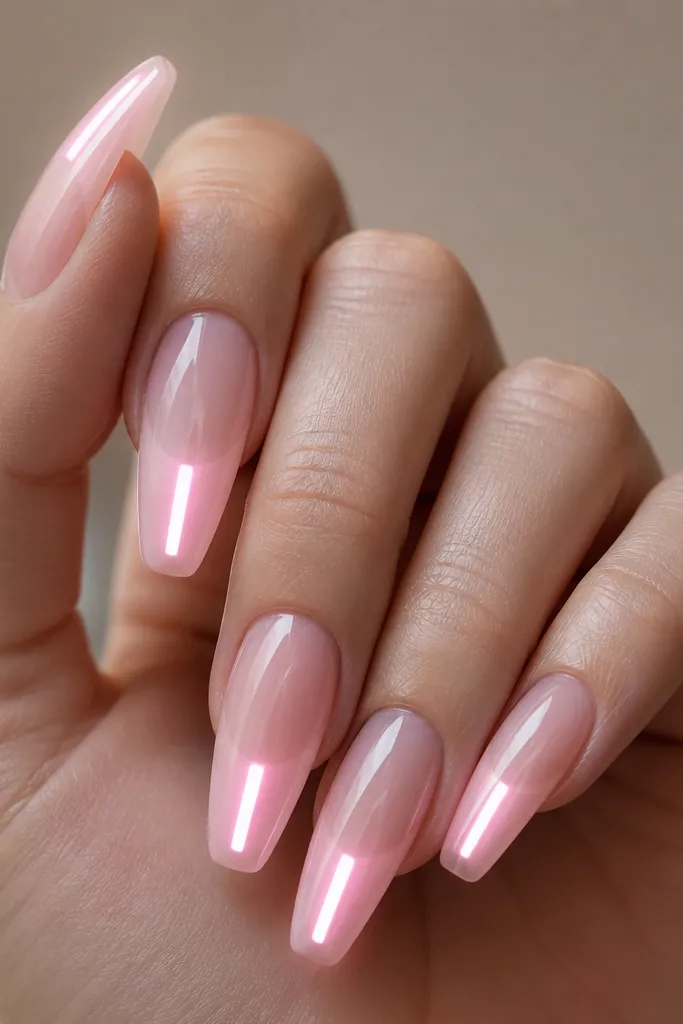
Center-strip LEDs look sleek and designer when the base is jelly and transparent. This set uses a jelly French tip so the pink stays bouncy and glossy, and the LED sits directly under the middle so it reads like a lit detail. It’s especially flattering on hands that have a slightly wider nail plate because the center glow visually narrows the nail. For anyone who hates busy art, this still feels special because the light is the decoration. It also looks good for birthdays and weekend outfits that are more casual.
Editor's noteIf the center strip looks too bright, reduce the strip length instead of sanding the gel — shorter is cleaner.
Build a sheer jelly pink base and cure. Paint a jelly French tip in milky pink, keeping the tip edge thin and even. Place the LED strip straight down the center of the nail tip zone, about 3-4 mm long, then tack it in place. Cap with clear builder gel, cure, then add a final clear gel layer to smooth. Top coat with a thick glossy finish so the jelly effect stays glass-like.
Skip thisAvoid painting the French too thick; thick gel makes the LED line look like it’s trapped in a mound.
12. Glossy Pink Ombré With LED Side Ribbons
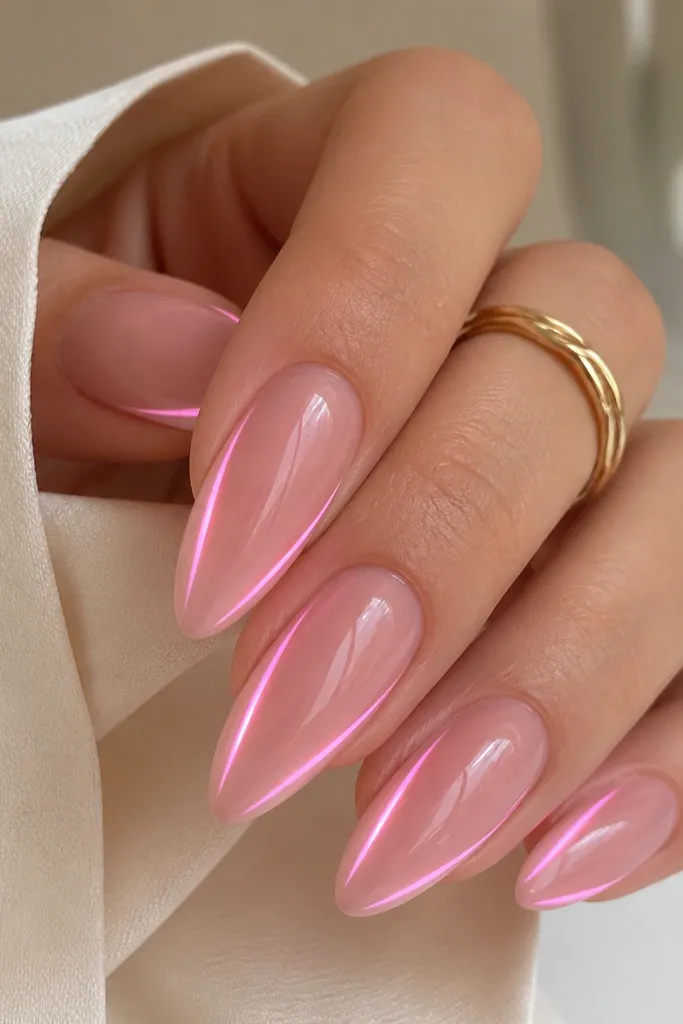
Side ribbons are my favorite when you want the glow but you want it to feel like part of the design, not a single gadget line. The pink ombré gives depth, and the LED sits just under the side areas so it frames the nail shape. This is flattering on hands with longer fingers because it adds width near the tip without changing the cuticle area. The look also works with soft outfits because the glow is controlled and not blasting straight forward. In photos, the side ribbons make the nails look like they’re moving even when you’re still.
Apply a sheer pink base and cure. Sponge-blend a deeper pink at the tip and blend back toward the cuticle, leaving a smooth gradient. Place two thin LED strips along the left and right side edges of the tip area, each covering about 2-3 mm. Make sure there’s a small gap between each strip and the center so the ombré stays visible. Cap with clear gel in thin layers, cure, then top coat for full gloss.
Use a cotton swab to remove any gel squeeze-out near the sidewalls before curing — cured gel there makes the glow look messy.
Don’t let the side LED strips overlap the center — that creates a thick “V” glow that looks bulky.
13. Pink Pearl Sprinkle With LED Base Glow
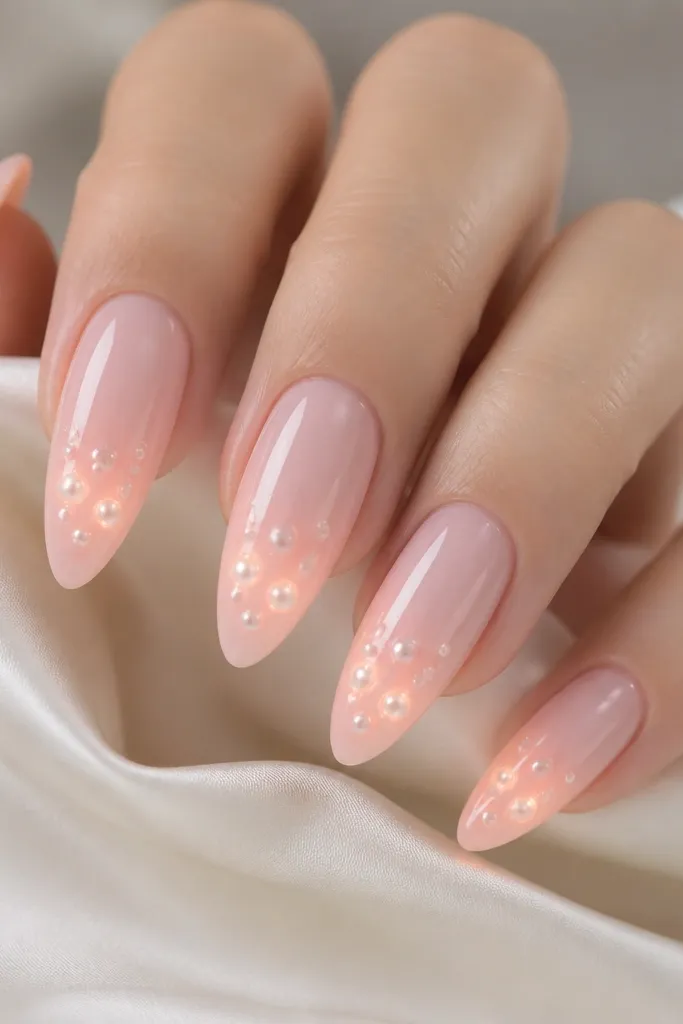
Pearls and lights together are a cheat code for making nails feel bridal and trendy at the same time. The trick is to use tiny pearls and keep the scatter light so the LED glow can still travel through the clear top coat. I use a pale pink base so the glow doesn’t turn the pearls gray or yellow. This set flatters short-to-medium nails because the glow starts lower and visually lifts the hand. If you wear gold jewelry, the pearls plus warm pink base look extra flattering.
Editor's noteChoose pearls that are small enough to sit flat, not domed — domed pearls create shadows that fight the glow.
Start with a pale milky pink base and cure. Place micro LED under the lower half of the nail — I keep it from touching the cuticle line by about 1 mm. Add tiny pearl beads sparingly using gel adhesive, then cure. Cap over pearls with a clear builder gel layer in thin coats, curing each time so the beads don’t pop up. Finish with a glossy top coat and wipe the tacky layer clean.
Skip thisAvoid stacking pearls too high; once the top coat levels out, the glow looks uneven.
14. Hot Pink Opal Sheen With LED Prism Line
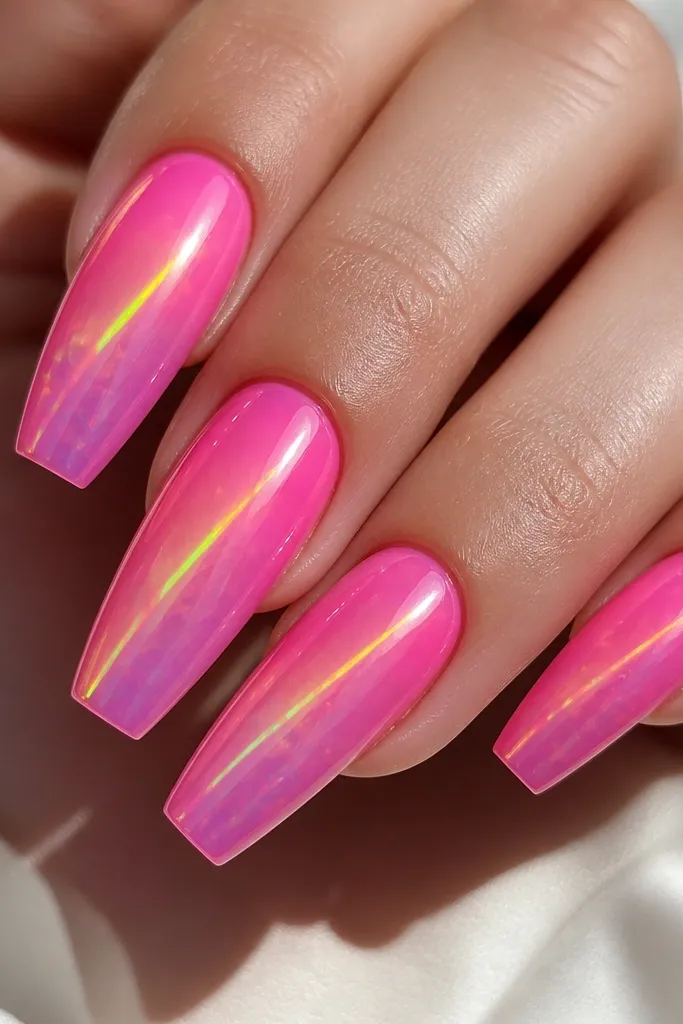
This is the “Kylie meets club lighting” version. The hot pink opal sheen gives you that shifting color without needing glitter, and the LED prism line adds a diagonal spark that looks like a camera flash trapped in gel. Diagonal lines flatter hands because they create movement across the nail instead of stopping the eye at the center. It’s best for medium-long nails and works on most skin tones because opal sheen shifts toward both cool and warm pinks. If you want something trendy that still looks feminine, this is it.
Editor's noteKeep the diagonal angle consistent across all nails; mismatched angles make it look accidental.
Apply a hot pink base gel and cure. Add an opal sheen product lightly over the top so it stays translucent, then cure again. Place a micro LED strip diagonally across the nail from about mid-side toward the tip center, then secure it flat. Cap with clear gel in thin layers until the diagonal line is fully embedded and smooth. Finish with a high-gloss top coat and cure thoroughly for the clean reflective surface.
Skip thisDon’t cover the LED with opaque pink — you lose the prism effect and the line turns dull.
15. Pink Velvet Matte Base With LED Gloss Window
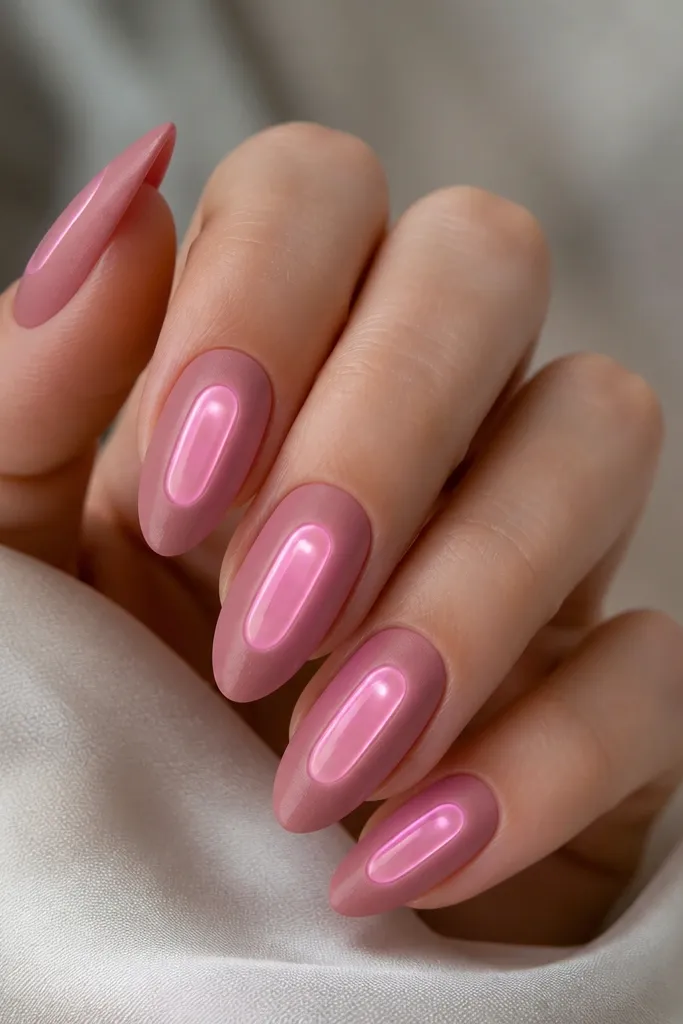
This combo is a little edgy but still very pretty because the matte velvet calms the light. The LED is sealed under a clear glossy window, so it looks like a lit display panel instead of a full-nail gadget. I love this on hands that get dry cuticles because matte hides tiny texture while the gloss window stays crisp. It flatters both short and medium almond shapes because the glow window is centered and controlled. For night events, it looks like jewelry on your fingertips.
Editor's noteUse a stencil or a strip of tape to keep the window shape even across nails.
Start with a pink velvet-matte gel base and cure it fully. Use a thin strip of gel to define a “window” area in the nail center where the LED will go, leaving matte around it. Place a micro LED strip inside the window area, then cap with clear gel only inside the window. Cure, then top coat glossy only on that window so it stays glassy while the rest stays matte. Clean the edges so the matte-to-gloss boundary looks sharp.
Skip thisAvoid glossy top coat over the whole nail — the matte contrast disappears and the set loses its special look.