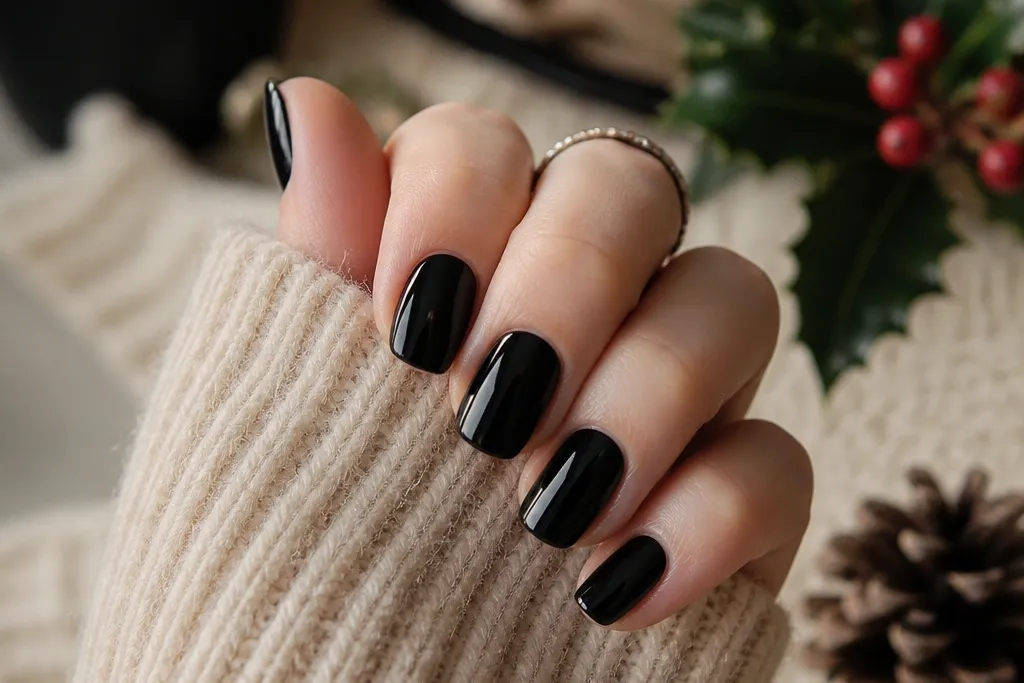

1. Espresso Black with Gold Micro-French Tips
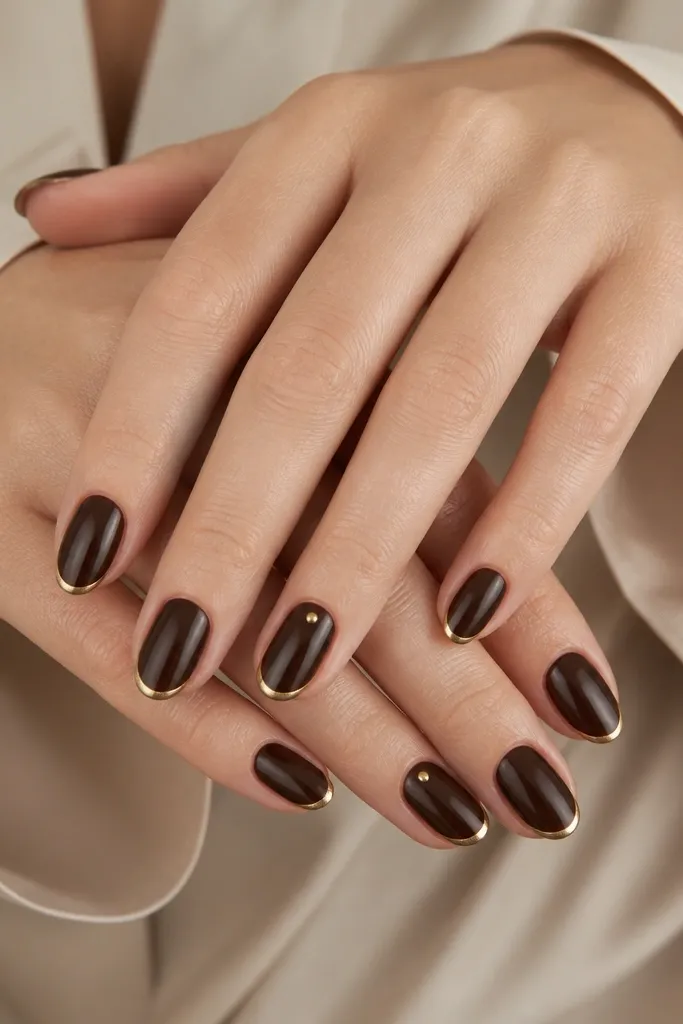
This is the black set I reach for when I want “Christmas but warm” without going full holiday cartoon. The espresso brown-black reads soft next to cozy knits, and the gold micro-French stays elegant because it’s a thin stripe, not a thick border. It flatters most hands, especially if your nail beds are short — the micro line visually stretches the nail. It also looks great on warm skin tones with gold jewelry and on neutral skin tones because the gold doesn’t clash.
Paint two thin coats of espresso brown-black, letting each coat dry fully. Use a striping brush or a French guide to add a gold line only at the very edge of the tip, about 1 millimeter tall, then cap the line with a second gold pass if you need it brighter. Keep the line slightly thinner on index and slightly thicker on ring finger for a natural “designed” look. Finish with a glossy top coat, and wipe the brush with acetone before you touch the cuticle so the gold stays clean.
Editor's noteIf your gold looks too yellow, mix it with a drop of clear top coat to make it look like warm foil rather than bright craft paint.
Skip thisDon’t make the gold tip wide — thick French lines on black can look heavy and less cozy.
2. Black Velvet Snow with Matte Cuticle Halo
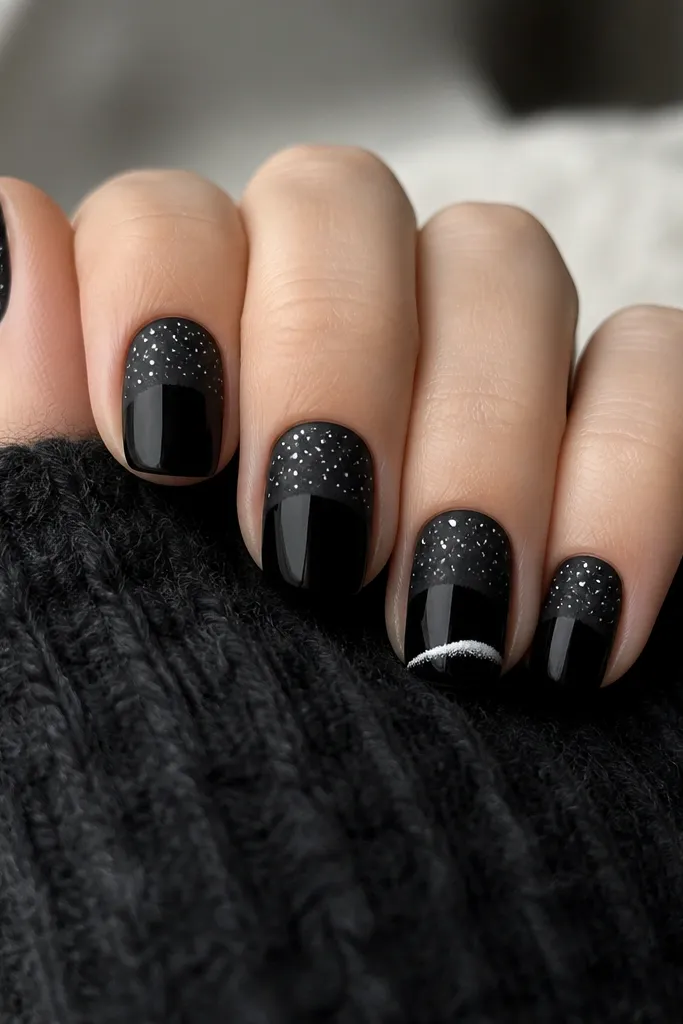
This one feels like a winter sweater texture. The black stays glossy for depth, but the cuticle halo is matte — so the set looks cozy and dimensional instead of flat. The snow specks are tiny on purpose; large snow blobs on black can look messy in photos. This design flatters hands with slightly wider nail beds because the matte halo draws the eye inward and makes the nail look more centered.
Start with two coats of glossy black, then let it set for a full 10 minutes so the next layer doesn’t drag. Tap a matte top coat only around the cuticle area — about a 2 millimeter crescent — using a makeup sponge or the foam tip of a cuticle brush. Add snow specks using a small dotting tool loaded with matte white polish or matte gel paint, keeping them clustered just above the cuticle. Seal with a glossy top coat on the rest of the nail, but avoid painting over the matte halo so it keeps its fuzzy look.
Use matte top coat on a sponge for the halo; brush strokes can leave streaks on black.
Don’t cover the entire nail with matte — you lose the cozy contrast that makes the snow pop.
3. Black Cherry Tips with Warm Red Punched Hearts
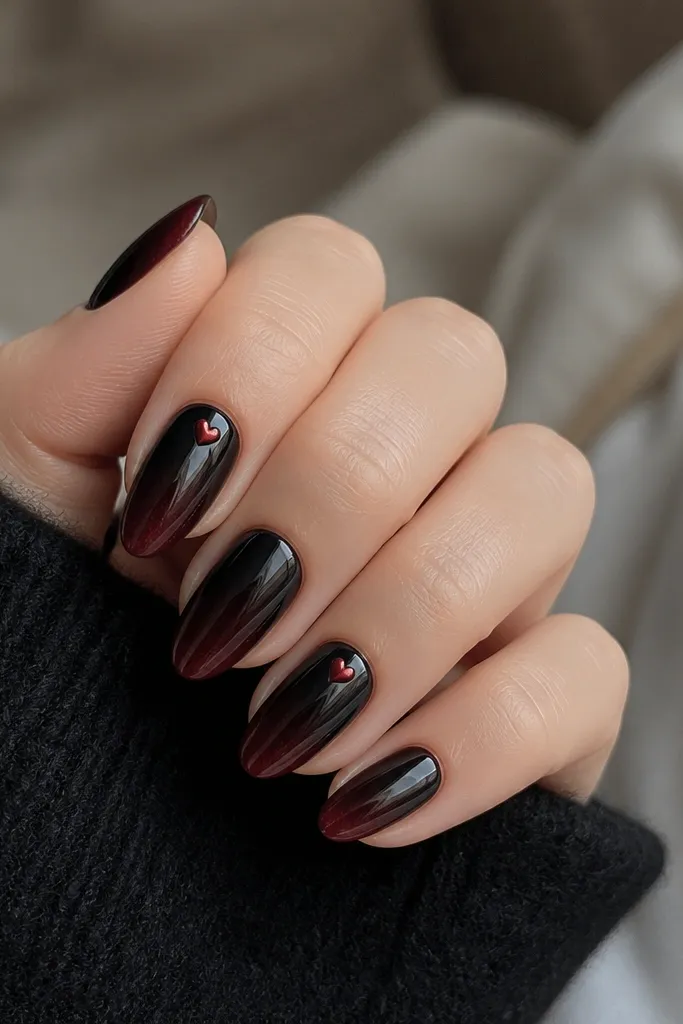
If you want cozy Christmas nails warm without gold, go for warm red against black. The cherry tips look like holly berries under lamplight, and the heart placement near the cuticle keeps it sweet instead of childish. This flatters hands with a little dryness because the glossy fade makes the nails look smooth and polished. Warm red also plays nicely with olive skin tones and peachy undertones, where pure red can sometimes look too harsh.
Paint the base with two coats of deep black, then create the cherry tips with a gradient sponge. Use a makeup sponge with a mix of warm red polish and a touch of clear to soften the edge, dabbing from mid-nail to the tip. For the hearts, use a dotting tool to place two small red dots, then connect them with a tiny curve using a liner brush. Keep hearts small — around 1.5 millimeters wide — and place them on two accent nails only. Finish with a glossy top coat, and wipe any red bleed with a fine brush dipped in acetone.
Let the gradient set before you add hearts; wet gradients smear when you touch them.
Don’t use neon red — it reads icy and cheap next to black.
4. Black Polish with Copper Foil Confetti Cuticle Line
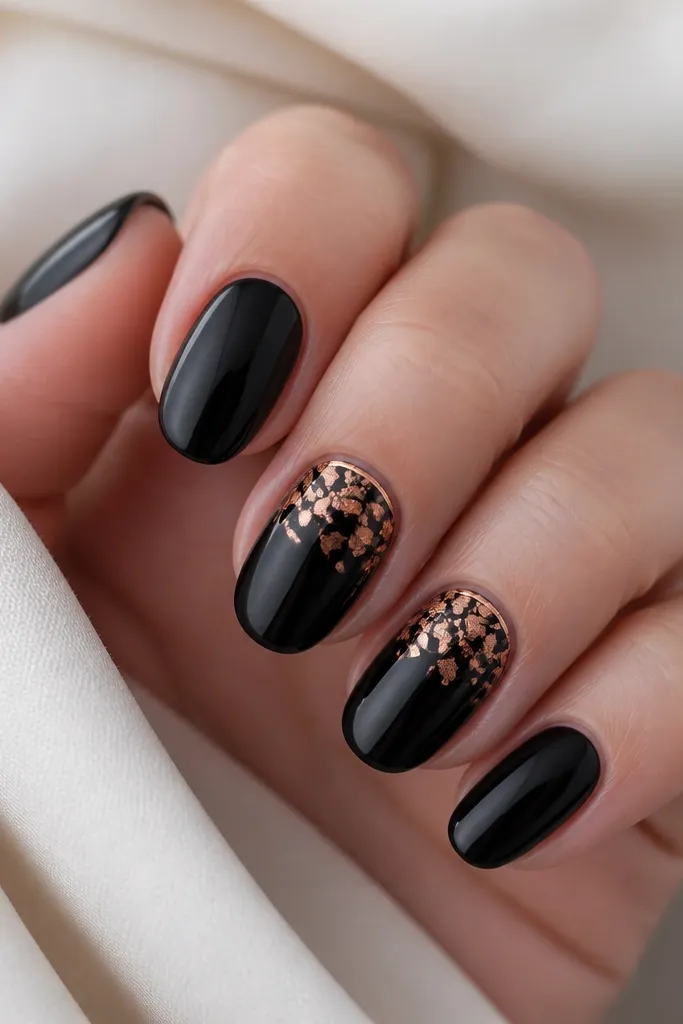
Copper makes black feel like holiday lights, not a funeral. The foil confetti is cozy because it’s irregular and thin; it catches light in small flashes when you move your hands. I like placing the foil at the cuticle line because it visually lifts the nail and makes short nails look intentional. This works especially well if you wear copper earrings or warm-toned jewelry, and it looks great on medium to deep skin tones because copper has enough warmth to glow.
Do two coats of glossy black and cure/dry fully. Brush a thin layer of tacky base near the cuticle — only a narrow 2 millimeter strip — and press small pieces of copper foil into it. Keep the foil pieces mixed sizes, but don’t cover the entire nail; leave 70 percent black for balance. Use a fine liner brush to tidy the edges and keep the foil line straight. Seal with a top coat that has good self-leveling so the foil doesn’t lift.
Press foil with a silicone tool, not your finger — skin oils can dull the copper.
Don’t flood the cuticle area with top coat before the foil is set; it can float and look messy.
5. Matte Black with Glossy Black Tip Snow Caps
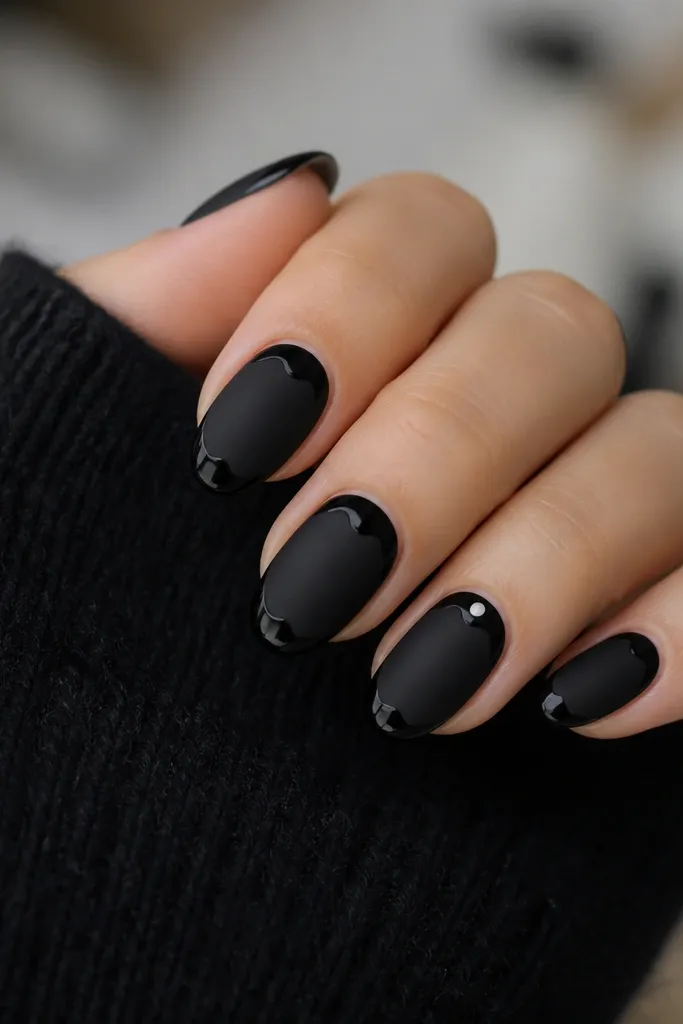
This design looks like fresh snow sitting on top of a warm boot. The matte base hides fingerprints and gives a soft winter feel, while the glossy “snow caps” add shine where light hits. It’s also forgiving because matte black hides tiny ridges better than glossy black. This looks great on short, wide nails because the cap shape creates a smooth top contour and makes your nail look neatly finished.
Paint two coats of matte black, then let it fully dry. With a striping brush, draw a curved mound at the tip — about 2 millimeters tall — using glossy black polish. Keep the cap centered and taper it slightly on the sides so it looks like snow settling. Add a tiny white dot only on one nail if you want a focal point; keep it under the glossy top coat so it stays crisp. Finish with top coat only over the glossy cap areas; avoid over-matting the base.
Editor's noteUse a small bead of glossy black on your brush for the cap so you can control thickness without streaks.
Skip thisDon’t make the caps too wide; wide caps turn into blobs and lose the snow illusion.
6. Black Base with Warm White Starburst Lines
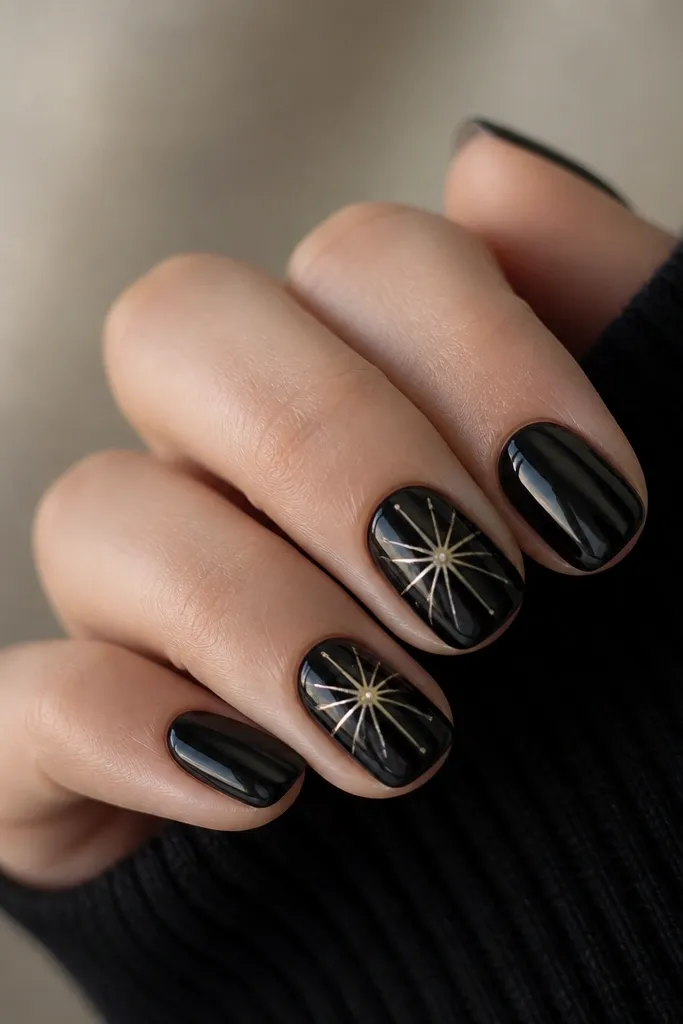
Starburst lines are the fastest way to make black feel festive without adding heavy glitter. Warm white keeps it cozy — it looks like indoor bulbs — while pure bright white can look too stark. I like placing the burst near the middle of the nail because it looks good in photos and doesn’t crowd the cuticle. This set flatters all nail lengths, but it’s especially flattering on short almond because the burst gives a focal point and makes the nail look longer.
Start with two coats of glossy black. On accent nails, place a tiny warm white dot with a dotting tool about halfway between cuticle and tip. Draw 6 to 8 thin rays from the dot using a fine liner brush, keeping the lines short and slightly curved. Vary ray length so it looks like light, not geometry. Seal with glossy top coat, and use a light touch near the cuticle so you don’t flood the lines.
If your warm white looks chalky, mix it with a drop of clear gel or top coat before painting the rays.
Don’t make the rays thick — they start looking like scribbles instead of twinkling lights.
7. Black Marble with Gold Vein Accent
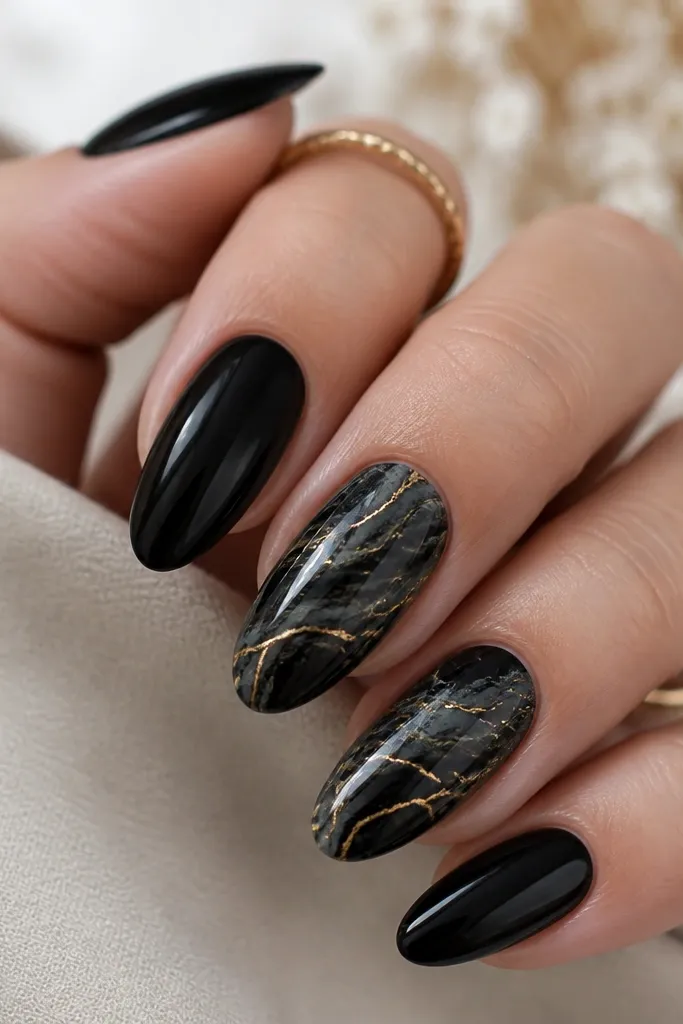
Marble looks fancy, but it can still be cozy when your palette is tight. I keep it warm by using black with gray-brown undertones, then adding fine gold veins instead of big chunks of gold. Marble also hides tiny application mistakes because the pattern breaks up uniformity. This works well for medium skin tones and darker skin tones because the gold line gives contrast without needing bright colors.
Paint all nails with solid glossy black first. For marble accents, add a thin layer of black gel or polish, then drag a small amount of gray-brown or charcoal along it with a toothpick to create swirls. While it’s still slightly tacky, paint a few thin gold veins using a liner brush — keep them 0.5 to 1 millimeter wide at most. Add one or two small branch veins near the tip so the pattern looks natural. Finish with a thick, glossy top coat and cap the free edge so it doesn’t catch on sweaters.
Editor's noteUse a toothpick for swirls; it gives a softer curve than a brush when you’re aiming for marble.
Skip thisDon’t do marble on every nail — the set stops reading as cozy and starts reading as busy.
8. Black Candy Cane Side Stripes
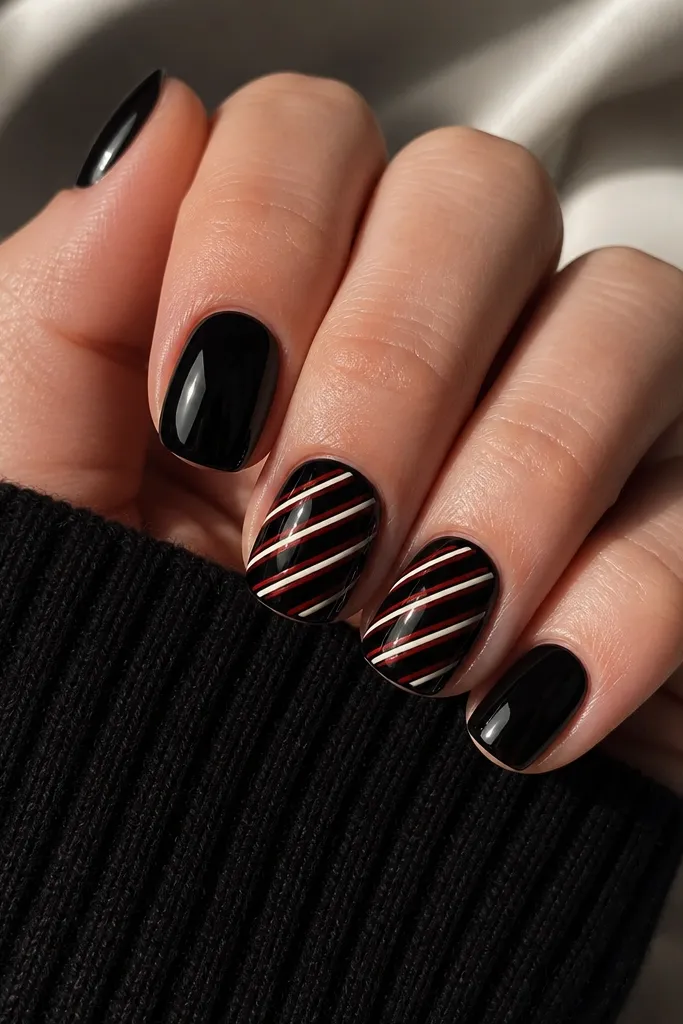
Candy cane stripes are classic, but on black they feel modern and cozy if you keep them thin. The diagonal placement makes your hand look longer, and the narrow red/white keeps it from looking like a kid’s craft. Warm white matters here; it reads like bakery frosting instead of icy snow. This design flatters straight nail beds and shorter widths because diagonal stripes create a visual “pull” toward the tip.
Start with two coats of glossy black. Use nail striping tape or a steady hand with a thin liner brush to place a diagonal guide from the lower sidewall to the tip. Paint a thin warm white stripe first, then add a thin red stripe beside it, leaving a narrow black gap between stripes. Remove the tape once the paint is tacky, not fully wet, so edges stay sharp. Seal with a glossy top coat, and run the brush along the sidewalls to stop lifting.
Editor's noteIf your red bleeds, clean your brush with acetone and let it dry — wet brush edges smear on black.
Skip thisDon’t use thick stripes; wide candy cane lines turn bulky and feel less cozy.
9. Black Galaxy Glitter with Warm Star Dust
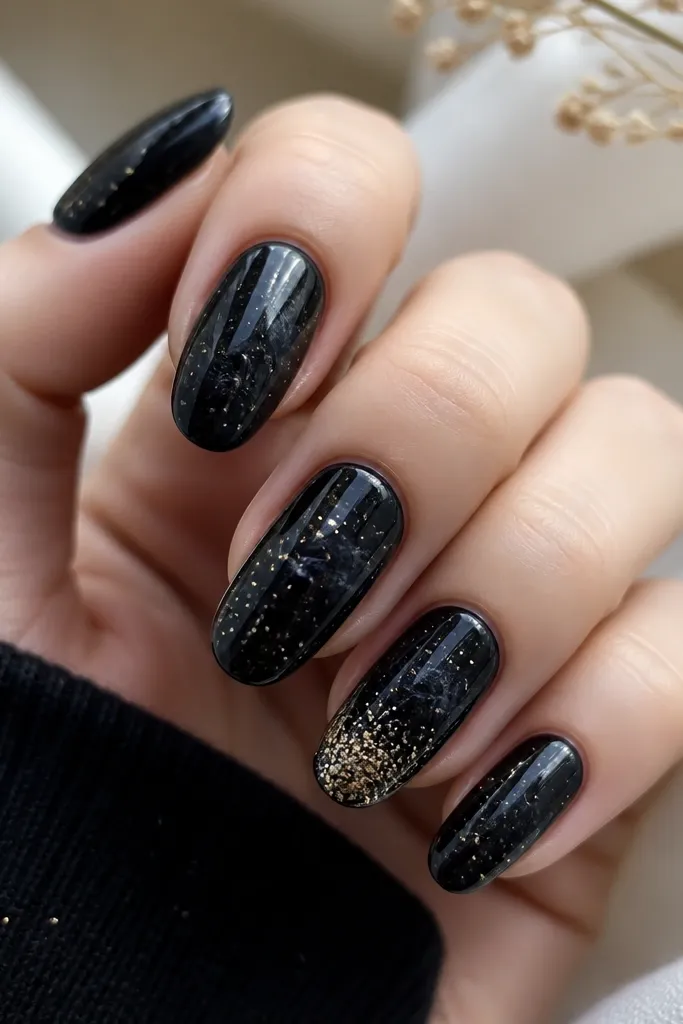
Galaxy nails look dramatic, but they still read cozy when the glitter is warm-toned and scattered. Warm gold and champagne glitter gives that “holiday lights” feeling, especially under indoor lighting. I keep the base black glossy so it looks like depth, not dust. This is great for party nights and holiday dinners because it photographs well without needing extra art.
Paint a glossy black base in two coats. Add a sheer layer of clear gel or top coat only on the area where you want star dust, then tap on warm gold and champagne micro-glitter with a small brush. Use a dotting tool to place a few larger glitter dots for “stars,” then drag a tiny amount of glitter outward with the tip of the brush for soft movement. On one accent nail, pack glitter more heavily near the tip but keep the cuticle clean. Cure/dry and then apply a thick glossy top coat to bury glitter and smooth texture.
Editor's noteMicro-glitter looks best when you tap it; brushing it spreads it into muddy patches on black.
Skip thisDon’t overdo glitter on every nail or it turns into a flat sparkle block.
10. Black Cuticle Bow with Warm Gold Bow Tie
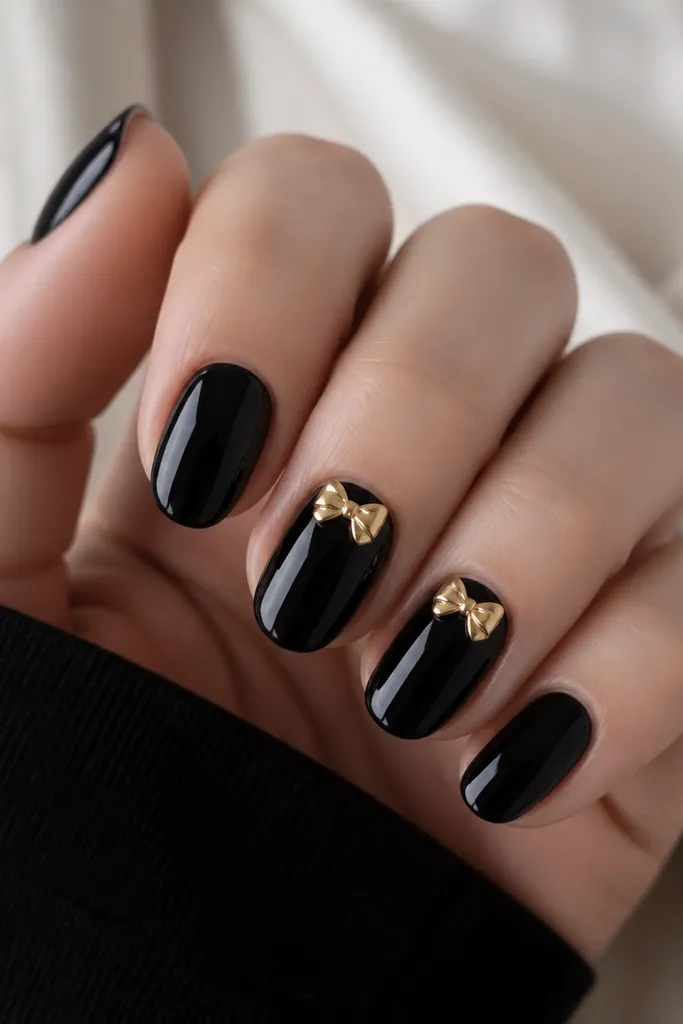
A tiny bow at the cuticle is the quickest way to make black feel like a holiday gift. Warm gold keeps it cozy and “wrap paper” pretty, and the cuticle placement makes the nail look dressed up without covering the whole nail. This flatters short nails because it creates a vertical focal point near the base. It also looks great on hands with more defined cuticles since the bow sits right where your nail naturally frames your skin.
Start with two coats of glossy black and let it dry completely. On accent nails, dab a small amount of tacky gel or cuticle glue exactly where you want the bow center. Place either a pre-made gold bow charm or sculpt a simple bow using gold gel: two small teardrop loops, then a tiny dot in the center as the knot. Keep the bow small — about the width of a pencil eraser. Seal with a top coat carefully around the edges so the bow stays raised just slightly and doesn’t smear.
Editor's noteIf you’re freehanding the bow, do the loops first, then add the knot last so it looks balanced.
Skip thisDon’t put the bow too far up the nail — it should sit at the cuticle, not become a sticker in the middle.