1. Red Velvet Tips with Clear Snow Glitter
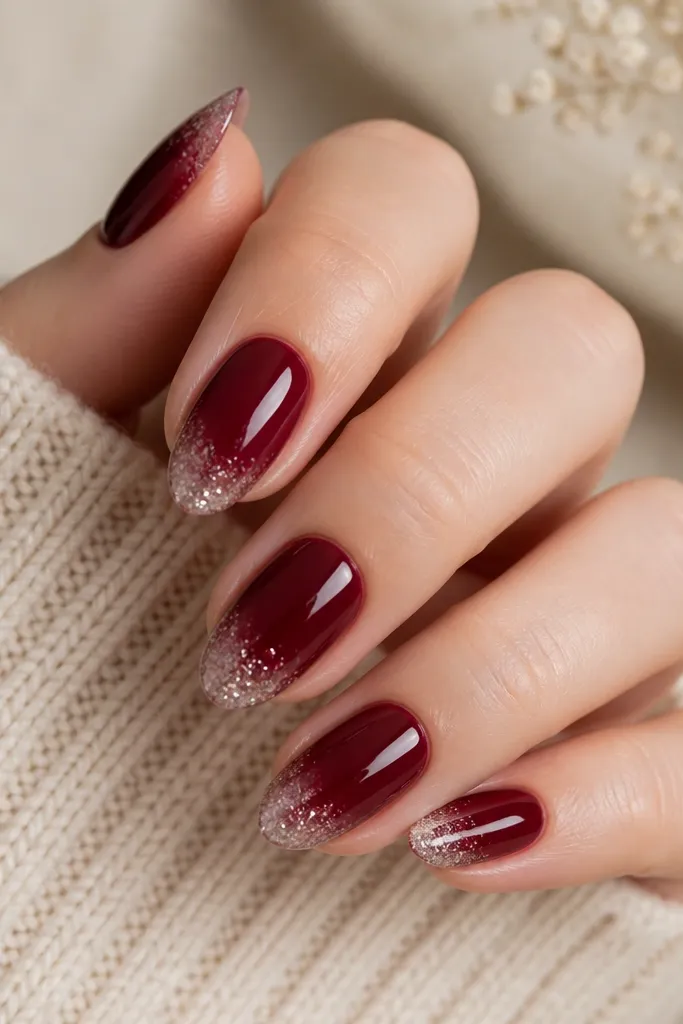
This set is the easiest way to make your nails look festive without drawing anything. Use a deep wine-red base (think burgundy, not bright cherry) and keep the glitter clear so it reads like winter, not candy. The ombre tip makes your nails look longer, especially on short almond or squoval shapes. It also looks great on warm and cool skin tones because the red has enough depth to stay flattering in indoor light. For Christmas parties, it hits that “holiday outfit” vibe without needing tiny art.
Start by filing nails to a gentle squoval or short almond shape and pushing back cuticles, then apply a rubber base coat. Paint two coats of deep wine-red, curing each coat fully. Next, sponge a clear glitter gel or fine clear glitter polish onto the free edge, then feather it upward slightly so it fades. Cure again, then apply a thick layer of glossy top coat, wiping the tacky layer if your system needs it.
If your glitter looks patchy, sponge it in thin layers and cure between layers instead of one heavy coat.
Skip white nail art over a streaky base — it makes the whole set look uneven and cheap.
2. Forest Green Micro-French with Gold Thread Line
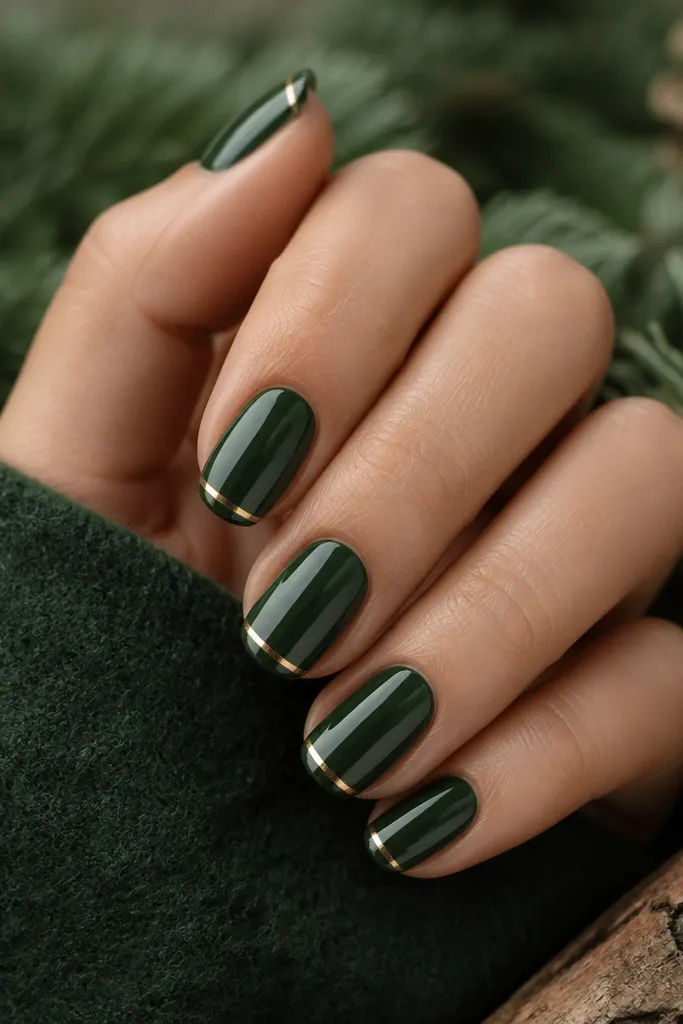
Micro-French looks fancy because it frames your nail instead of covering it. Forest green reads instantly wintery, and the thin gold line gives “ornament” energy without needing a snowflake. This flatters most hands because the design follows your nail shape and keeps the middle clean. On fair skin, the green pops; on deeper skin tones, the gold line adds contrast that makes your nails look sharp. It’s also beginner-friendly because straight tape lines are forgiving.
Apply a sheer nude or pale beige base coat for a clean foundation, then cure. Paint two coats of forest green, leaving a small gap at the tip if you want the micro-French effect to be sharper. Place striping tape where you want the tip line, press it down firmly, and paint over the area with green or gold depending on your plan. Peel tape while the polish is still slightly tacky (or after curing if using gel tape), then seal with a glossy top coat.
Use a striping tape width around 1-2 mm for micro-French so it looks delicate, not chunky.
Don’t wrap tape over the sides too much — it blurs the line and makes the French look rounded.
3. Champagne Chrome Star Accent
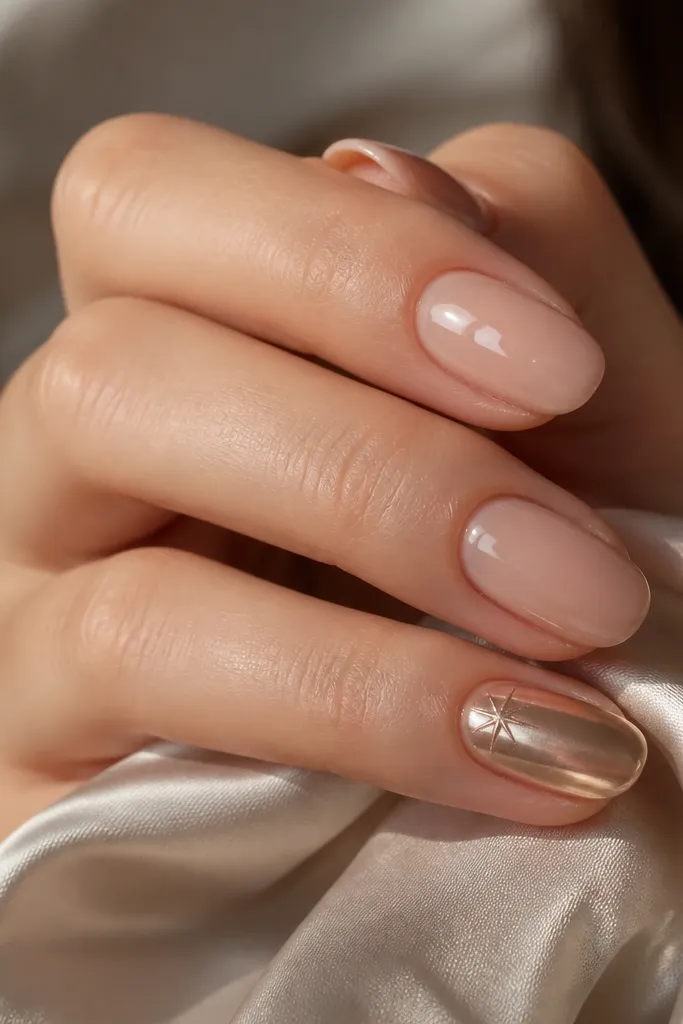
Start with a nude gel base (a milky pink-beige works well) and cure. Apply champagne chrome powder or chrome gel to the accent nail only, using a sponge applicator and pressing lightly to avoid patchiness. Add a small star decal or use a star-shaped stencil near the cuticle; press it flat and cure. Finish with a non-wipe or wipe top coat depending on your chrome system to lock in shine without dulling.
If you want winter Christmas nails that look expensive in photos, chrome does it fast. Champagne chrome is softer than bright yellow gold, so it doesn’t look harsh on fair or medium skin. Place the chrome on one or two nails and keep the rest nude — your hand looks polished instead of overloaded. The star near the cuticle area is small but instantly festive. I like this for holiday dinners because it matches warm lighting without turning brassy.
Skip thisAvoid rubbing chrome powder with a heavy hand — it creates bald spots.
Editor's noteIf chrome looks dull, apply top coat in two thinner layers instead of one thick layer.
4. Snowy White Half-Moon with Red Berry Dots
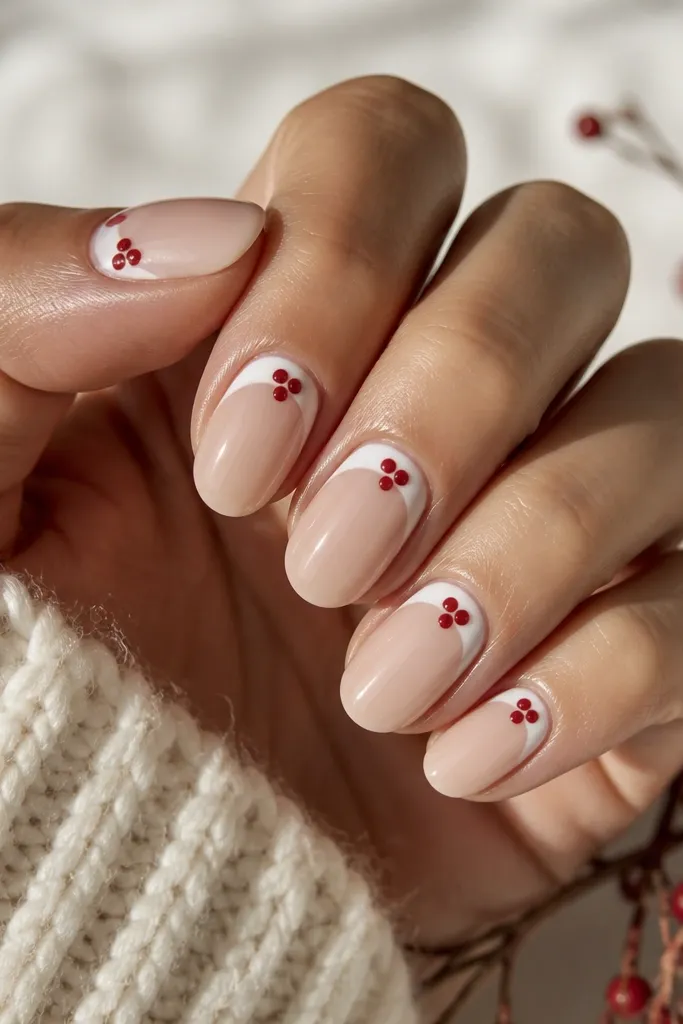
Apply a nude or sheer pink base and cure fully. Use a small brush or half-moon stencil to paint snowy white near the cuticle, keeping the shape rounded and even. With a dotting tool, add two to three tiny red dots on the white area, leaving a little negative space so they look like berries. Add one micro highlight dot in lighter red or a touch of white, then cure and seal with top coat.
Half-moon designs look neat because they’re contained to the cuticle area, where small details don’t need to be perfect. A snowy white half-moon reads like fresh winter air, and red berry dots add the Christmas cue. This is flattering on short nails because the design doesn’t require width — it sits in the natural nail base. It also works on both cool and warm undertones since the red is balanced by the white. I’ve worn this on hands that look dry in winter, and it still looks clean.
Skip thisDon’t drag white into the cuticle — keep the edge clean or it will look messy.
Editor's noteUse a gel red that is slightly translucent for berries, not a thick opaque red — it looks more realistic.
5. Glitter Fade Santa Belt Stripe
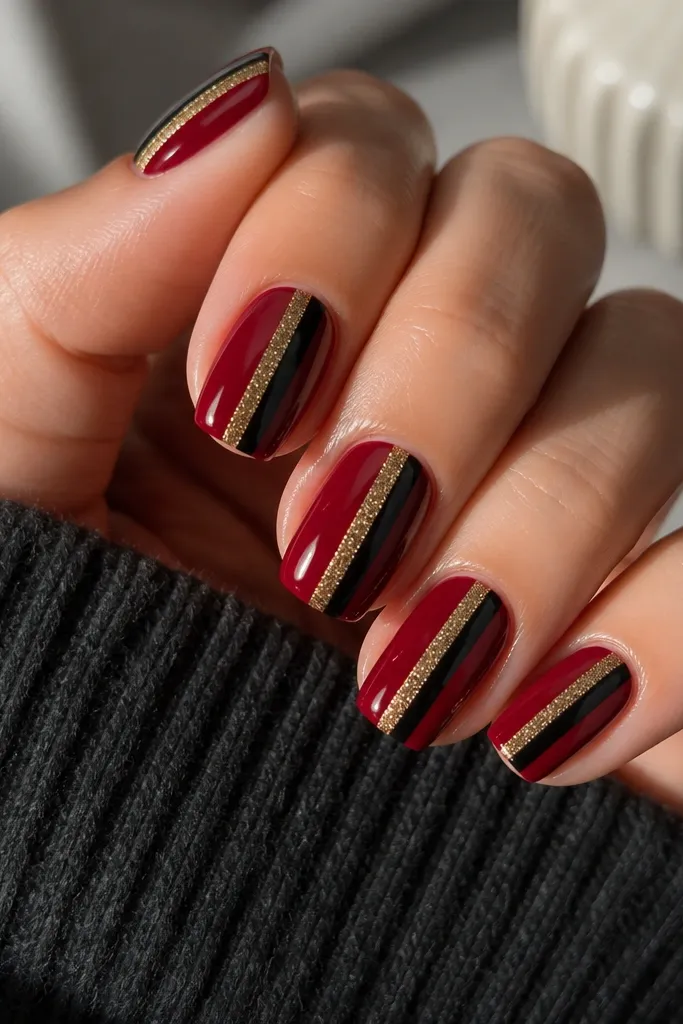
Paint two coats of deep red and cure. Place striping tape across the nail where you want the belt band, press it down, and paint the band with black gel or polish. Cure, then remove tape carefully. Apply a thin gold glitter line over the black band using a striping brush or tape and cure again, then finish with glossy top coat to smooth the glitter.
Santa belt nails are fun because the design reads like a single graphic line. Start with a deep red base, then place a black stripe in the middle and add a thin gold glitter stripe on top. This makes your nails look styled even if you only do it on one or two fingers; the rest can be solid red. It’s also great for beginners because you can tape the stripe with striping tape. The result looks bold for holiday parties and still wearable for everyday winter.
Skip thisSkip uneven stripe placement — if the band slopes on one nail, it looks accidental.
Editor's noteIf your tape leaves a ridge, add a thin gel top coat and cure before your final top coat layer.
6. Classic Red Plaid Accent with Tape
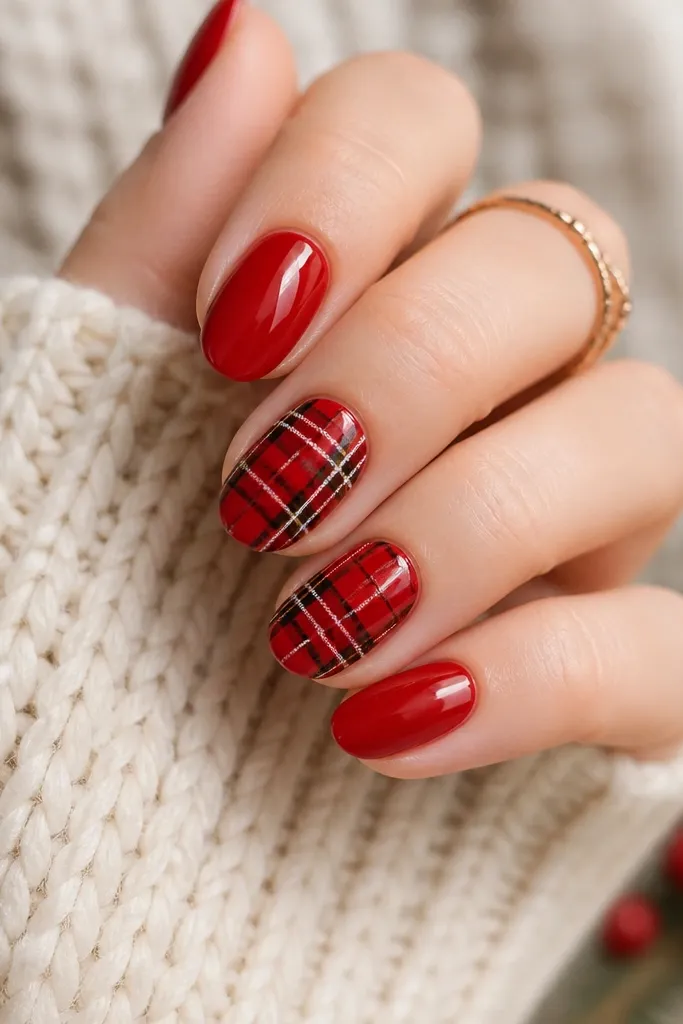
Start with a solid red base on all nails and cure. Choose one or two accent nails and apply a sheer base or keep the red as your base. Use striping tape to create vertical lines first, then cure or paint over and cure, remove tape, and repeat horizontally to form the grid. Add thin white lines on top of the plaid grid and a tiny black line to deepen contrast. Seal with a glossy top coat, pressing carefully around the edges so it doesn’t lift.
Plaid sounds hard, but tape makes it beginner-friendly. Red plaid nails look instantly winter Christmas because the colors are familiar and the lines are clear. I keep the plaid to two accent nails and do the rest in solid red so your manicure doesn’t look busy. This flatters nails of all lengths because plaid lines sit inside a defined grid. On hands with shorter nails, the plaid still looks balanced as long as the lines are thin.
Skip thisDon’t use chunky glitter plaid lines — they crack at the edges and look rough.
Editor's noteUse a thin striping tape (around 1-2 mm) so your plaid looks like fabric, not thick stripes.
7. White Snowline with Tiny Green Branch
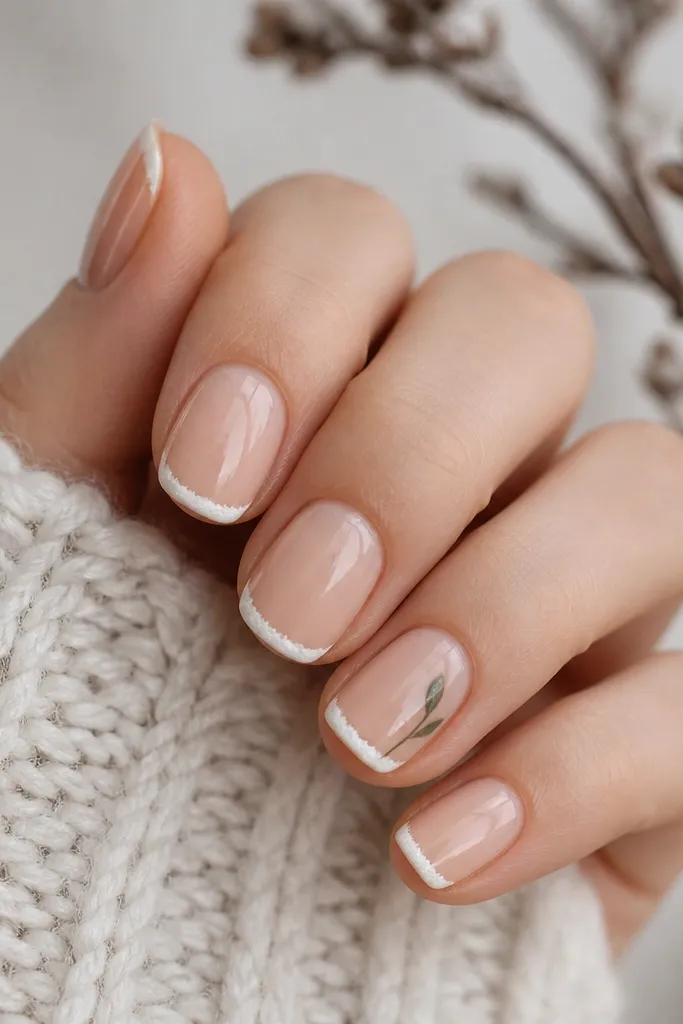
This design is subtle but reads seasonal fast. The snowline is basically a clean white curve at the tip, and the tiny branch gives you the Christmas “tree” cue. It flatters hands because it keeps the center of the nail calm and draws attention along the shape. Nude base keeps it wearable for winter work meetings. Green is a great choice if you don’t want red on every nail but still want a holiday vibe.
Apply a nude base and cure. Paint a thin white line across the tip using a striping brush, then soften it slightly by wiggling the brush at the edges so it looks like snow. With a liner brush and dark green, draw a short branch angled from one side toward the center. Add two tiny leaves by dotting and dragging lightly, then cure. Finish with glossy top coat, making sure the tip is fully sealed so the snowline doesn’t chip.
If freehand scares you, use a curved nail art stencil for the snowline and paint over it.
Avoid a thick white band — it looks like nail polish accident instead of snow.
8. Glazed Donut Nails in Cranberry and Vanilla
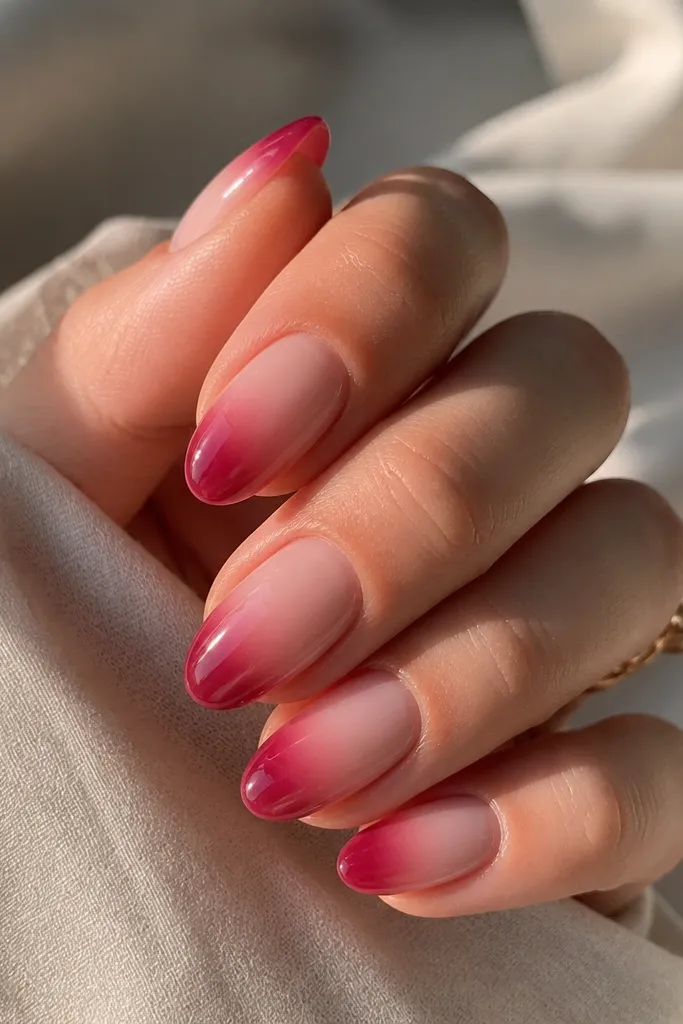
Start with a vanilla nude base (milky beige) and cure. Apply cranberry gel at the tip in a soft gradient using a sponge or makeup wedge, then cure. For the glaze look, apply a thicker gel topcoat or builder gel layer over the whole nail and cure until it self-levels. Wipe and finish with a glossy top coat that matches your system. Keep the gradient narrow on short nails so it doesn’t swallow the nail.
Glazed nails look trendy, but this version fits Christmas without trying too hard. Cranberry at the tips gives that holiday sweetness, while the vanilla base keeps it classy. The “glaze” effect comes from a thicker gel layer and a smooth gradient, not from complicated art. This is flattering on short nails because the focus is at the tip and the base stays light. It also looks good on hands with ridges because a gel glaze can level the surface.
Skip thisDon’t rush curing — under-cured glaze layers feel tacky and dent easily.
Editor's noteUse a sponge for the gradient — brush strokes show less on this design.
9. Black and Red Candy Cane Vertical Stripes
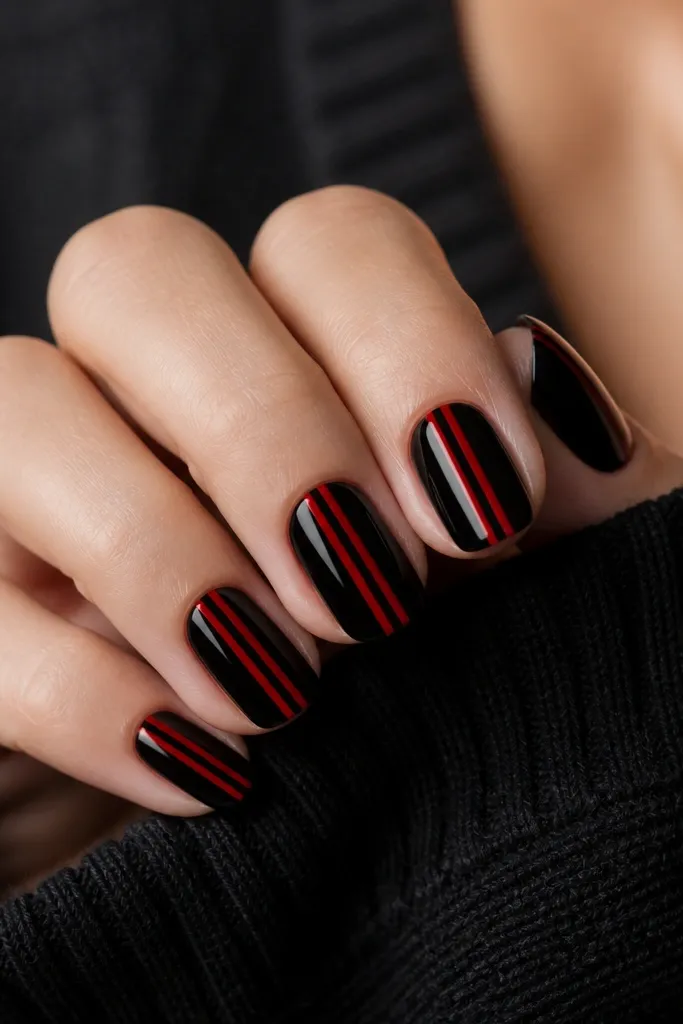
Paint a solid glossy black base and cure. Place striping tape vertically in the middle of the nail, leaving equal spacing on both sides. Paint red gel over the taped area, cure, then remove tape. Add a second thin red coat if you need full opacity, cure again, and finish with glossy top coat. If you want extra holiday vibe, do the stripes on four nails and keep one nail solid black.
Candy cane stripes look graphic and clean, which is why they work for beginners. A black base makes the red stripes pop hard under indoor lighting, and it looks bold without needing tiny details. This design is great for medium to long almond, but it also works on short squoval if you keep the stripes narrow. It flatters most skin tones because the contrast is high. I like wearing this when I’m dressing up and want my nails to look like part of the outfit.
Skip thisSkip thick stripes — they make the candy cane look like paint drips.
Editor's notePress tape down with a silicone tool or your fingertip — it prevents bleed under the edges.
10. Nude Base with Red Bow Decal and Micro Gold Confetti
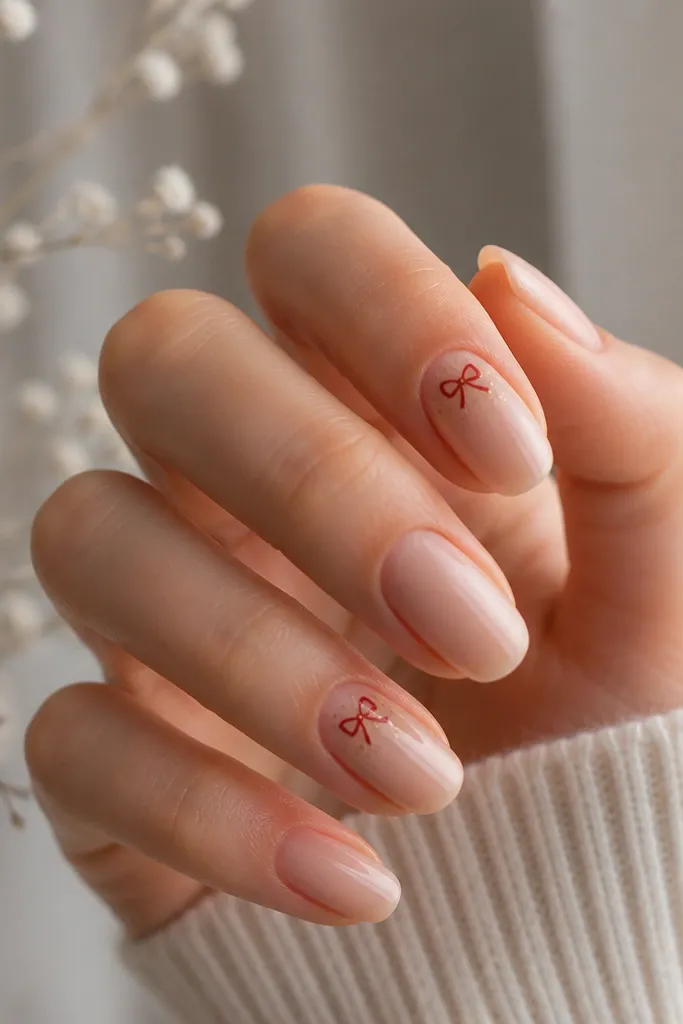
A bow decal is the fastest way to make Christmas nails look cute instead of spooky. Nude keeps it clean and makes your hands look longer, while the red bow adds a clear holiday cue. Micro gold confetti makes the bow look like it’s sitting on ornament shimmer without covering the whole nail. This is flattering on short nails and on hands where you want the manicure to look neat even when it grows out. It also looks great with cozy sweaters and holiday makeup.
Apply nude gel base and cure. Place a red bow decal on the accent nail near the cuticle area, slightly off-center so it feels playful. Add micro gold confetti around the bow using a fine dotting tool or a small brush with gel topcoat, then cure. Seal with a thin layer of gel top coat first, then a final glossy top coat. Avoid getting top coat under the decal edges — press it flat before sealing.
If the decal lifts, add a tiny dab of clear gel under the edge and cure again.
Don’t place the bow too close to the free edge — it will catch on hair and snag.
11. Icy Blue Glaze with Silver Foil Flakes
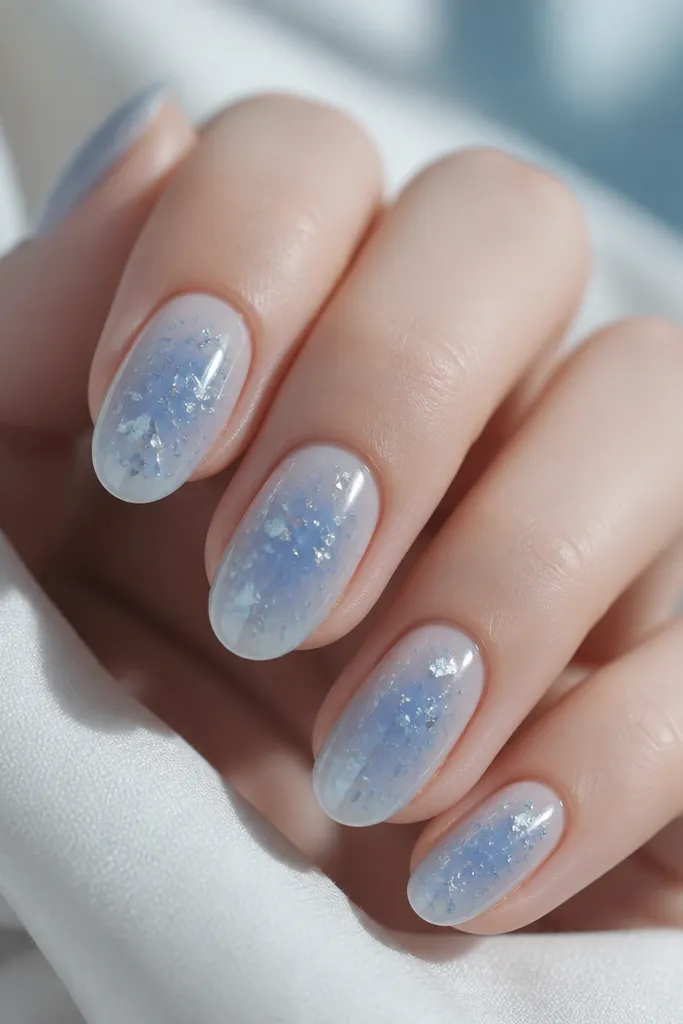
Icy blue nails look wintery in a way that red and green sometimes don’t. The glaze finish gives that frozen, smooth look, and silver foil flakes mimic ice crystals. This works especially well on fair to medium skin tones because the blue stays bright without going neon. On deeper skin tones, it still pops as long as you keep the base a true icy blue, not dusty gray. It’s a great option if you want “winter” more than “Santa.”
Start with a sheer icy blue base or a milky blue nude and cure. Apply a second layer of icy blue gel concentrated near the center, then brush it outward for a soft gradient. Press small pieces of silver foil flakes into a tacky layer (or into clear gel) and cure. Finish with a glossy top coat that is thick enough to smooth the foil texture so it doesn’t snag.
Choose foil flakes that are small (about the size of a grain of rice) for a cleaner ice-crystal look.
Skip chunky glitter with foil — it turns into a bumpy mess after a few days.
12. White Matte Snowflakes with Glossy Red Dot Centers
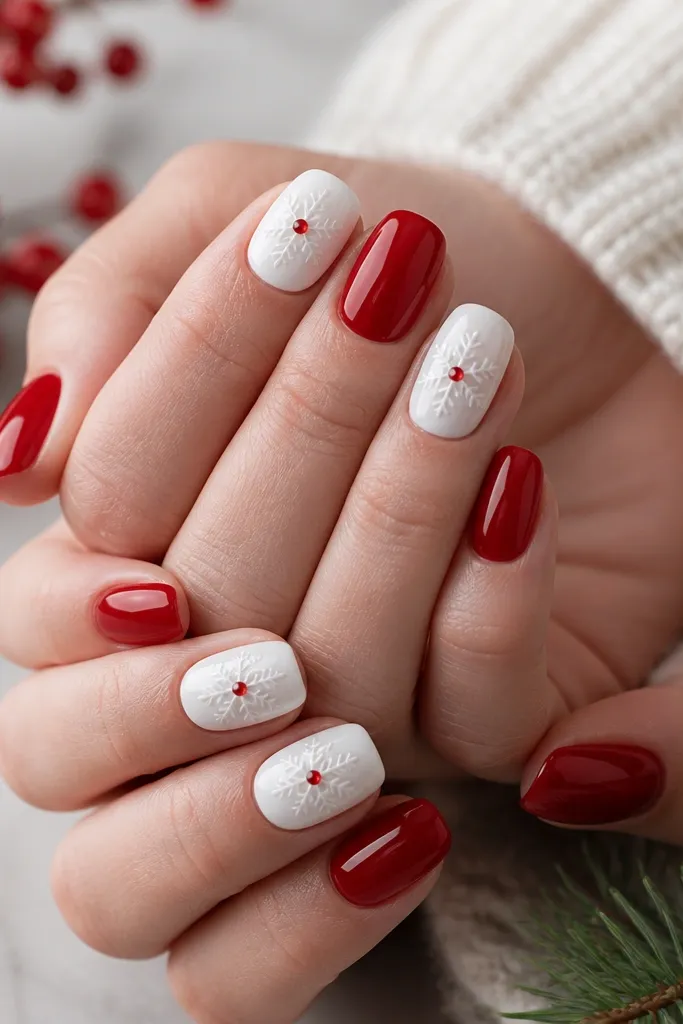
Matte snowflakes look like winter sweaters — soft and cozy. The trick is mixing matte and gloss so the design has dimension. Keep most nails glossy red for contrast, then pick two nails for matte white snowflakes. The glossy red dot centers pull focus right to the snowflake and make it feel festive. This is very flattering because matte hides minor texture and ridges better than glossy polish.
Paint all nails glossy red and cure. On two accent nails, apply a base coat, then paint matte white gel on top and cure. Add snowflake decals on the matte nails, pressing gently so they sit flat. Place a tiny glossy red dot in the center of each snowflake using a dotting tool with clear gel, cure, then seal with a matte top coat on the rest but a small gloss top coat just over the red dot area.
If decals look silver on top of matte, use white decals or paint the snowflake outline with a liner brush.
Don’t matte the whole snowflake after adding a glossy red center — it dulls the focal point.
13. Dark Chocolate Nails with Toasted Marshmallow Tips
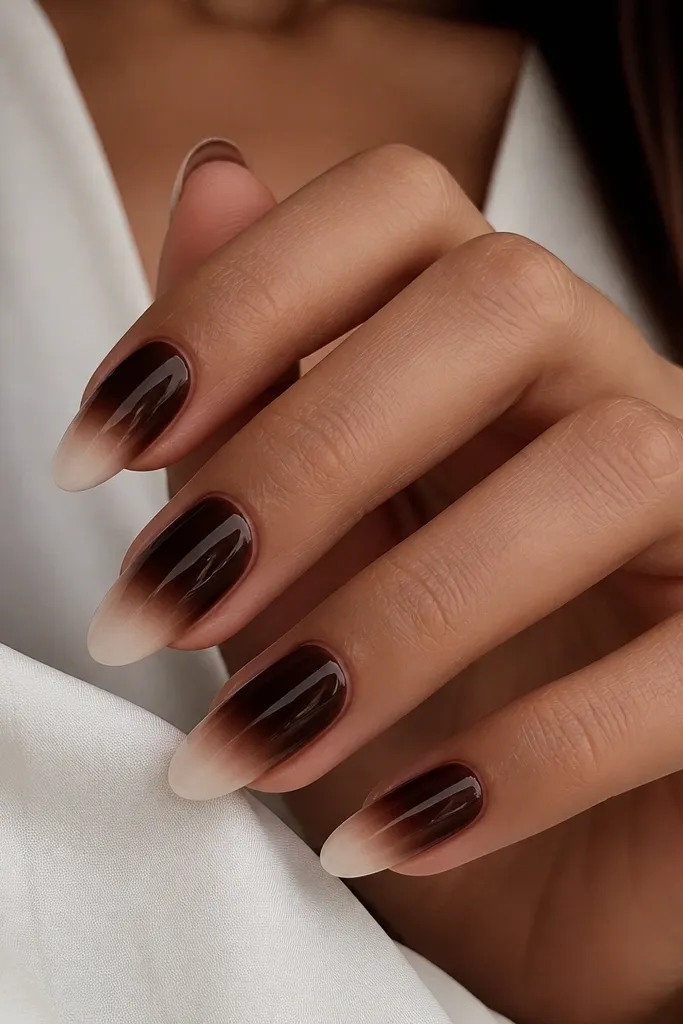
Start with a deep chocolate-brown base and cure, using two coats for full coverage. Create the marshmallow tips by sponge or brush-painting an off-white creamy gel at the tip and blending upward slightly. Keep the fade higher on short nails so it still looks intentional. Cure thoroughly, then apply a glossy top coat to make the brown look rich and the off-white look creamy. Clean up the edges with a small brush dipped in gel cleanser.
This is the holiday version of a neutral manicure. Dark chocolate brown feels cozy and wintery, and the off-white marshmallow tips look like sweet frosting without being childish. It flatters every skin tone because the colors are grounded and not too bright. On short nails, the marshmallow fade makes your fingertips look softer and more defined. I love this set for people who want Christmas vibes but hate bright red.
Skip thisAvoid greyish browns — they turn the whole set into “winter sad” instead of festive.
Editor's noteUse a creamy off-white, not stark white — it looks like marshmallow instead of snowbank.
14. Green and Red Swirl Accent with Clear Top Sparkle
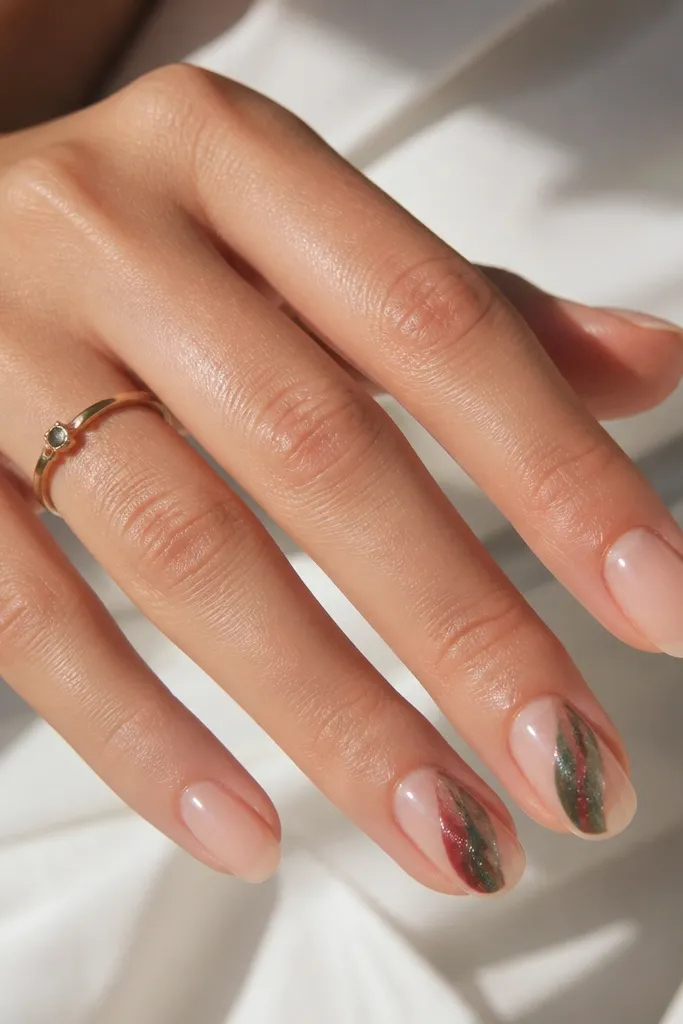
Swirls look like ribbon, which screams holiday without needing a perfect snowflake. Keeping the base sheer nude makes the swirl feel airy and modern. Use dark green plus classic red so the combo reads Christmas, not abstract. This flatters shorter nails because the swirl sits in the center and doesn’t require full coverage. It also works on hands with bitten nails because the sheer base makes regrowth less noticeable.
Apply a sheer nude base and cure. On accent nails, add a small amount of red gel near the center, then use a thin liner brush to pull it into a swirl. Repeat with dark green on the other side of the swirl so the colors interlock. Add a few tiny clear sparkles on top of the wet gel (or press micro glitter into a tacky layer) and cure. Seal with glossy top coat, dragging the brush from cuticle to tip to smooth the swirl lines.
For a beginner-friendly swirl, do two strokes only — one pull for red and one pull for green, then stop.
Don’t overwork the swirl — too many passes make it muddy and thick.
15. Sparkly Red Half-Cover with Black Side Frame
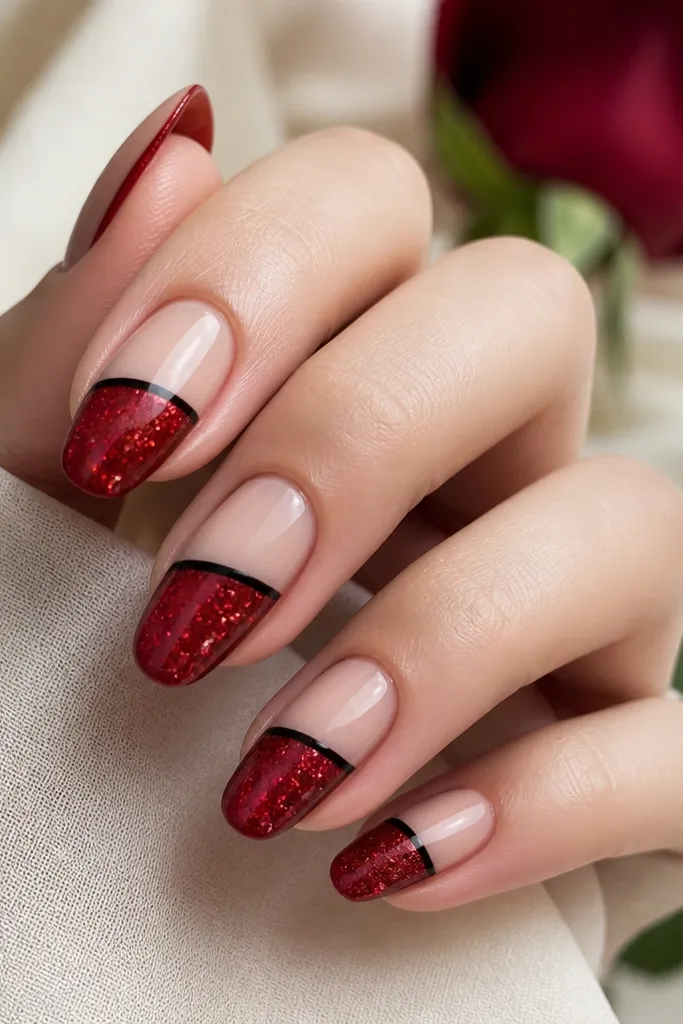
This design looks like holiday wrapping paper. The sparkly red half-cover gives you the festive sparkle immediately, and the thin black side frame keeps it crisp instead of messy. I love it for beginners because the “art” is basically two controlled placements: glitter on one half and black lines on the side. It flatters short nails because the glitter stops before the cuticle, so your nail bed still looks tidy. The black frame also makes your fingers look slimmer.
Paint nails with a sheer nude base and cure. Apply red glitter gel from about halfway up the nail to the tip, keeping the glitter edge straight or slightly curved. Cure and wipe if needed. With a thin liner brush, draw a hairline black frame along both sidewalls of the glitter area, then cure again. Finish with glossy top coat, focusing on sealing the glitter edge so it doesn’t catch or lift.
Use a nail art liner brush that’s 00 size or smaller — it makes the side frame look sharp.
Avoid thick black lines — they overpower the glitter and look like a messy border.