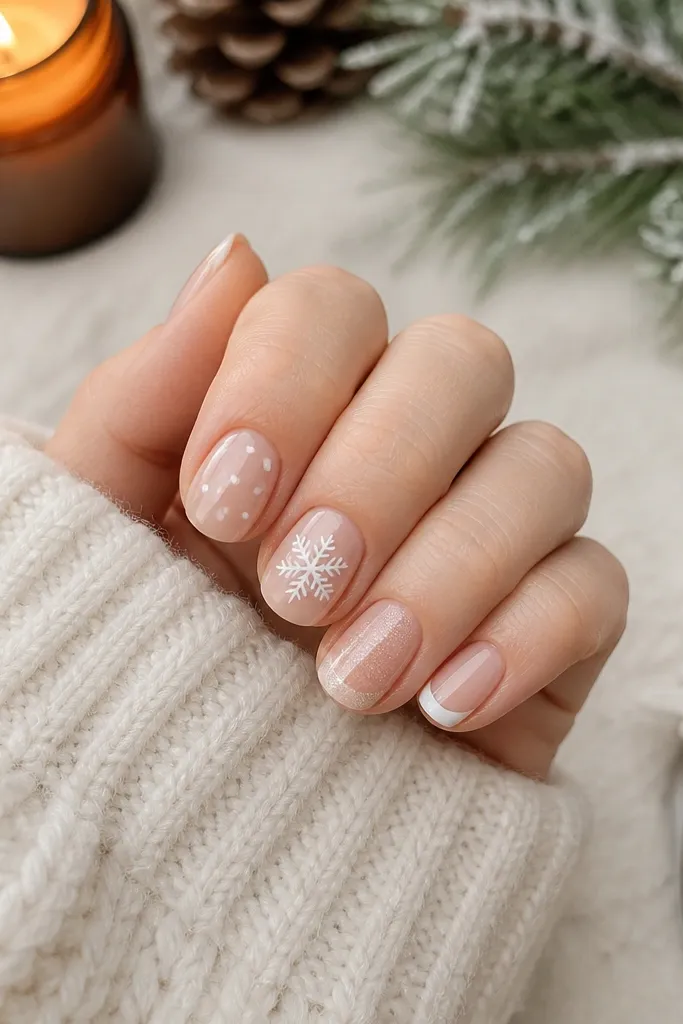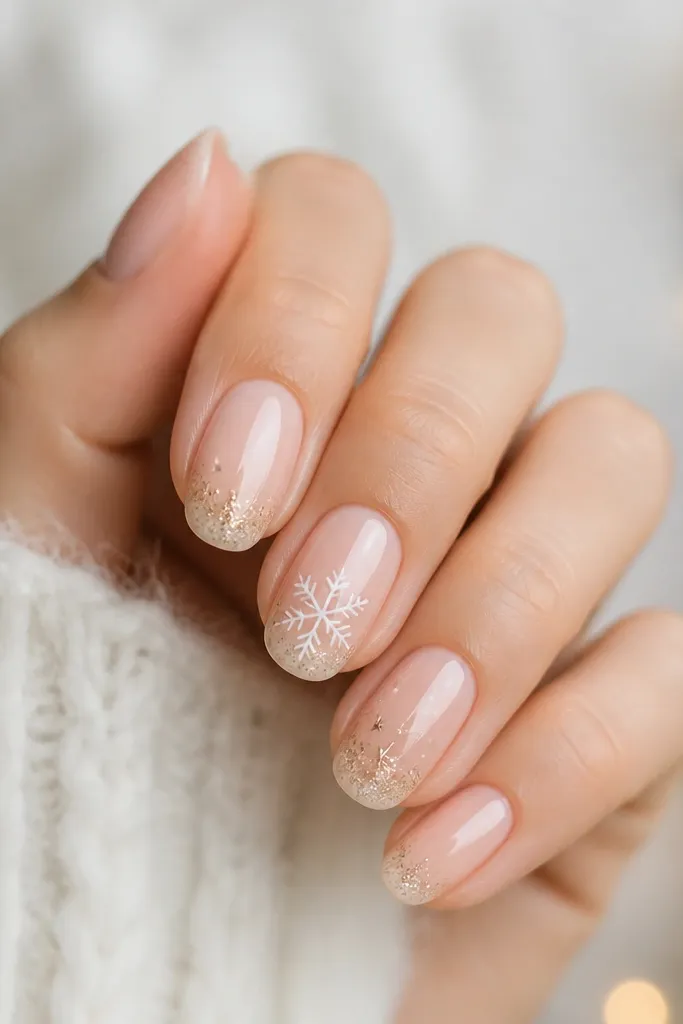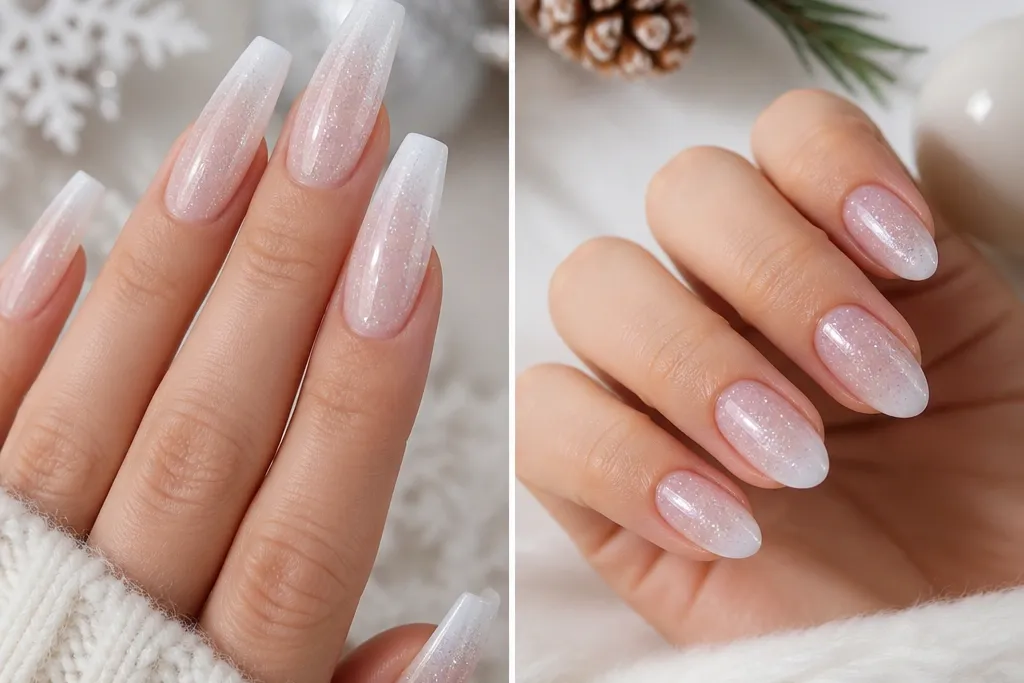
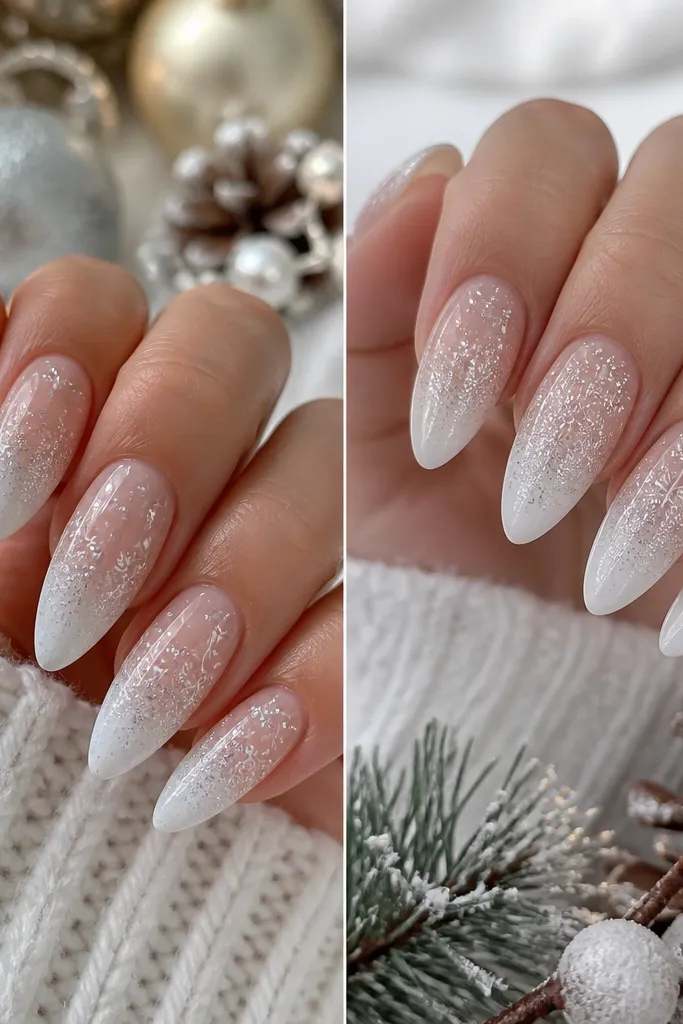
1. Icy Milky Ombre with Star Dust Tips (gel)
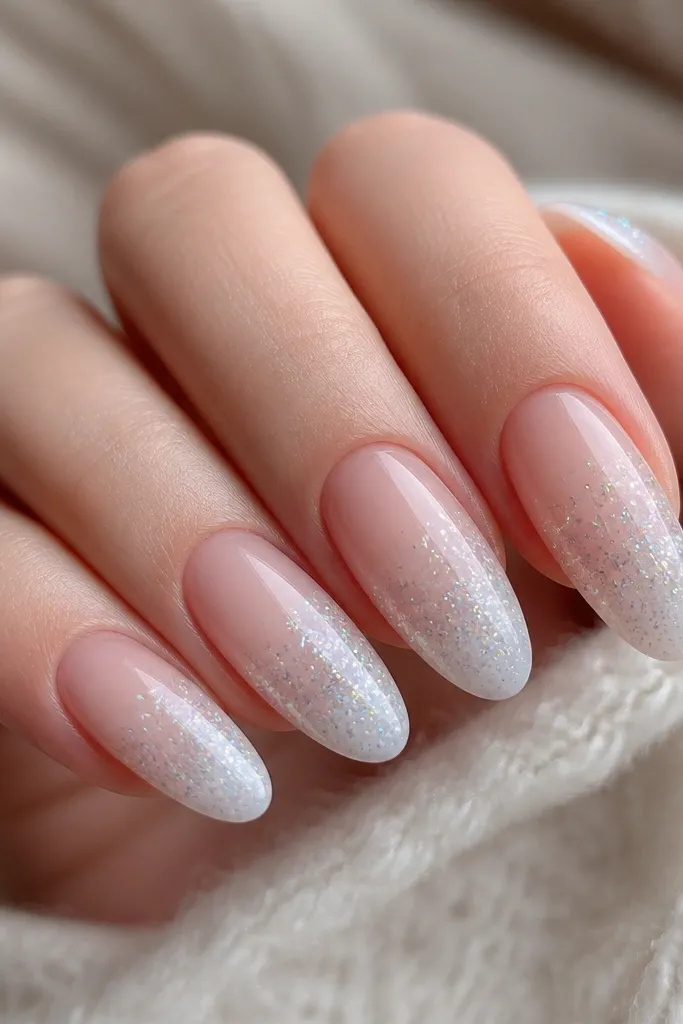
This set is the one I reach for when I want winter christmas nails acrylic vs gel to land on “soft and sparkly” instead of “holiday costume.” The base is milky nude — not pink — then it fades into icy white so your nails look naturally brighter. I concentrate fine holographic star dust on the outer third and feather it inward with a dry brush so it looks like frost drifting, not glitter sand. This flatters most skin tones because the milky base doesn’t fight warm or cool undertones. If your nails are short-to-medium, the icy tip placement makes your fingers look longer.
Start by pushing back cuticles and buffing a light shine off the nail plate, then wipe with alcohol. Apply a thin milky nude builder gel layer, cure, then sponge a sheer icy white gradient from mid-nail to the tip in two thin passes. Tap fine holographic micro-glitter mixed with clear gel onto the outer third only, then use a clean brush to feather the edge. Cap with a glossy gel top coat and cure fully, then inspect under a desk lamp to make sure the glitter zone feels flat when you run a cotton pad over it.
After curing, wipe with a lint-free pad and check for texture. If you feel any grit, add one extra thin top coat layer and cure again.
Avoid packing glitter all the way to the center of the nail — it makes ombre look harsh and can feel bumpy.
2. Cream Soda Ombre with Red Velvet Fade (acrylic)
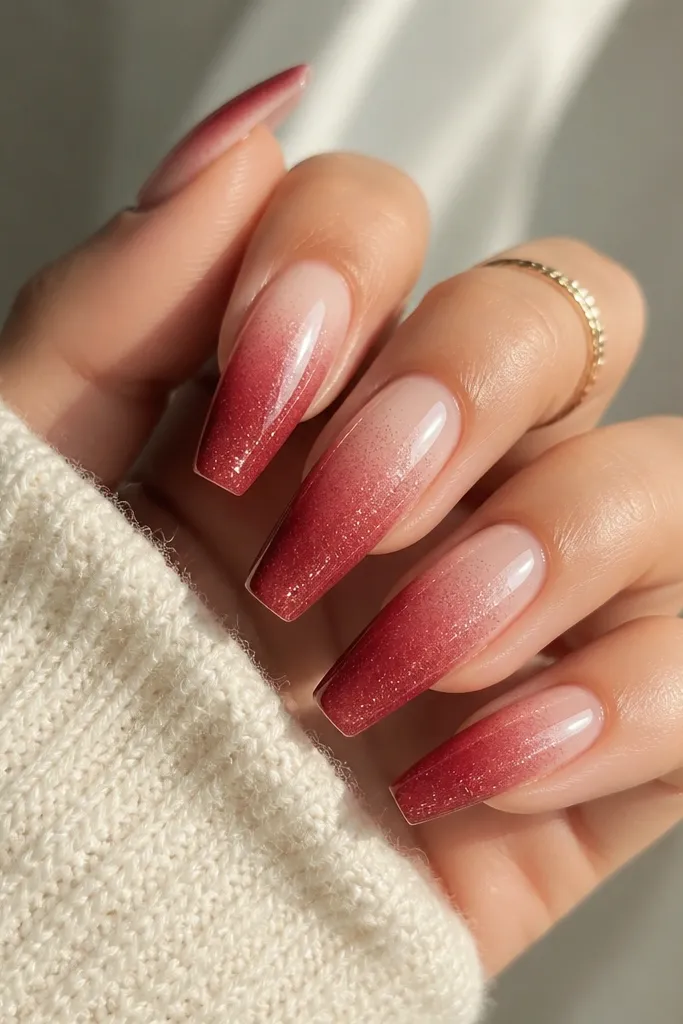
If you like holiday nails that still look clean, this acrylic ombre is my go-to. The base is a cream nude, then the fade moves into a muted red velvet — think cranberry that’s softened with white, not a bright stop-sign red. Acrylic grips the red fade well, so the gradient stays smooth even if you bump your nails. The shimmer is subtle and sits mainly in the transition area, which makes the red look dimensional. This one flatters fair to deep skin because the cream nude base bridges the undertone and keeps the red from turning orange.
Start by shaping and filing to a coffin silhouette, keeping the sidewalls crisp. Apply a base layer — either a clear acrylic base or a nude acrylic — then build a thin ombre using a cream powder transitioning into the red velvet powder. Blend with a damp brush and wipe the brush frequently so you don’t drag pigment streaks across the nail. Add fine holo shimmer into the middle fade, not at the cuticle. Finish with a clear top coat and file the shine level only after it cures so the surface stays glassy.
For a smoother red fade, keep your first red layer thin and build opacity gradually instead of going full color in one pass.
Skip super bright red with a sheer nude base — the fade looks patchy and cheap in indoor lighting.
3. Snowglobe Ombre with Clear Jelly Center (gel)
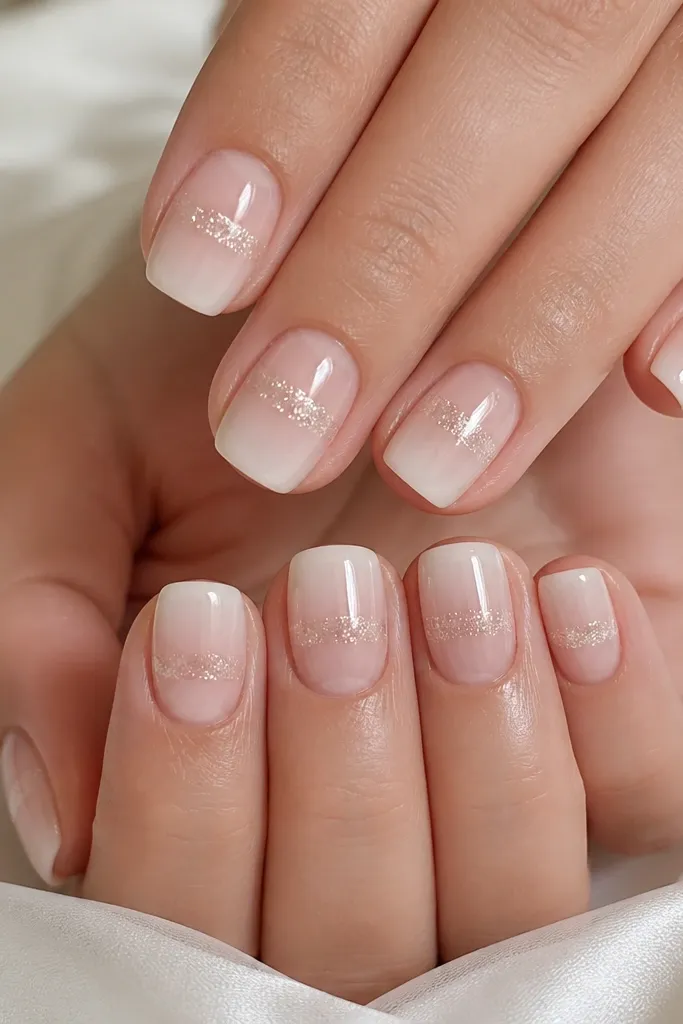
This design looks like a snowglobe because the center band is intentionally clear. You paint the ombre on the sides and edges, then leave a jelly window in the middle with a soft silver shimmer suspended inside. Gel is perfect here because you can layer translucency without making the nail thick. It’s flattering on shorter nails because the clear center visually adds length and keeps the look airy. If your skin is warm-toned, the icy white still looks clean thanks to the sheer nude base.
Start with a sheer nude base gel, cure, then sponge a soft icy white ombre from mid-nail to tip. Use a clean striping brush to define a clear jelly window down the center — about 1/3 of the nail width. Mix silver micro-shimmer into clear gel and place it inside that window, keeping it flat. Cap around the window with thin gel to lock everything in, then seal with a high-gloss top coat.
After curing, run a slow swipe of a cotton pad across the center band. If it drags, add a thin top coat only over the window zone.
Don’t flood the jelly window with glitter — too much sparkle makes it opaque and the snowglobe illusion disappears.
4. Holiday Champagne Ombre with Fine Gold Flakes (acrylic)
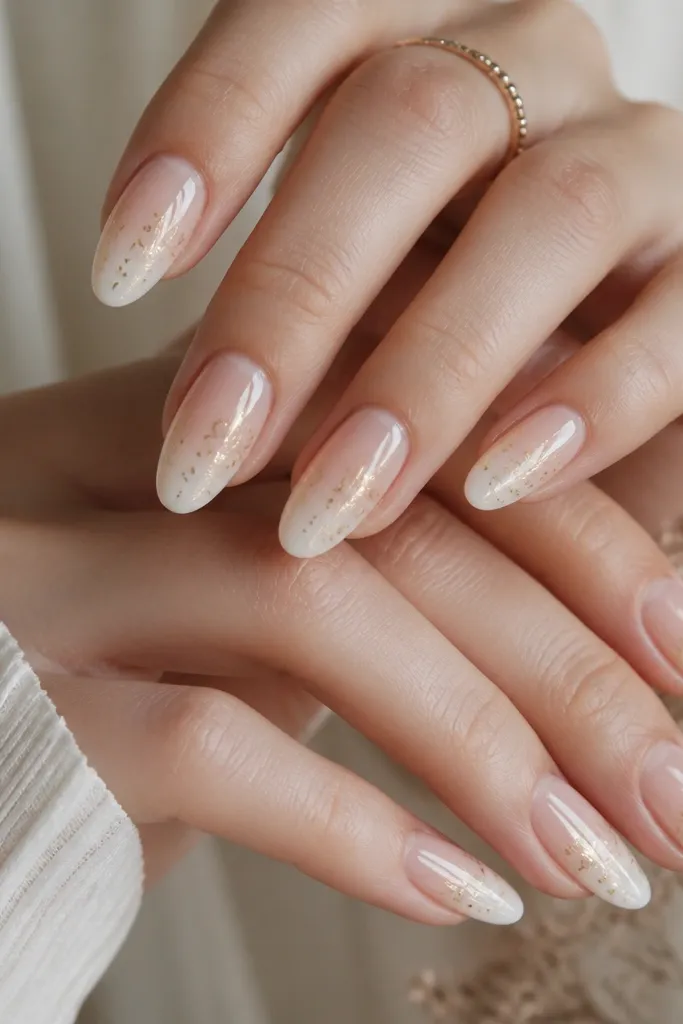
This is for when you want winter christmas nails that don’t go full icy. The base is champagne nude — slightly warmer than milky nude — then the ombre fades into soft white so it reads “celebration” instead of “snowstorm.” Acrylic helps the gold flakes sit without lifting because you can build a slightly firmer structure before you place the flakes. The gold flakes are fine and sparse, so they look like candle light catching on ice. It flatters medium to deep skin beautifully, but I’ve worn it on fair skin too and it still looks classy because the ombre stays bright.
Start with a champagne nude acrylic base, then blend into soft white at the tip using a damp brush technique. Keep the outer third slightly more opaque so the flakes have something to reflect. Press fine gold flakes into the outer third with clear acrylic monomer or a thin clear acrylic layer, then lightly cover with clear so edges don’t catch. File the top flush, then polish the shine with a gentle buff and finish with a gel top coat if you want extra gloss.
Use a makeup sponge to test opacity before you place flakes — you want the fade to be bright enough to reflect gold.
Avoid using chunky gold leaf pieces. They catch on hair and blankets and ruin the smooth feel.
5. Blue-Ice Ombre with Silver Line Accent (gel)
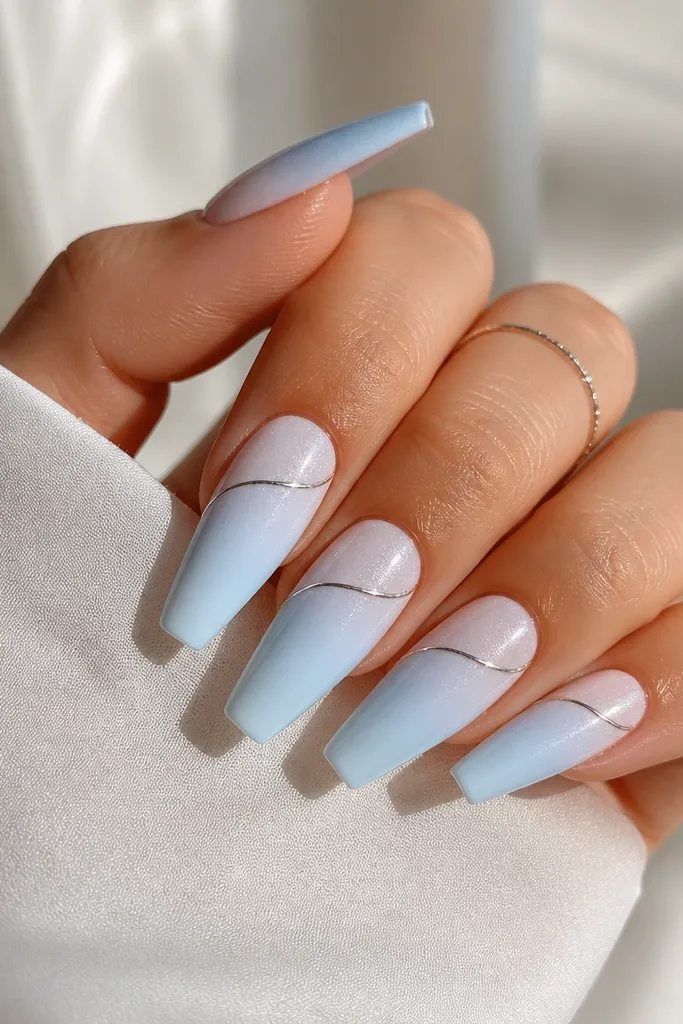
This one looks like winter glass. The ombre is a pale powder blue fading into white, and the sparkle is a light dusting of silver shimmer only where the blue meets the white. The silver chrome line is a skinny diagonal accent that breaks up the gradient so it looks styled, not simple. Gel gives you control for that line because you can place it precisely and cure without thickening. It flatters hands with longer nail beds because the diagonal line pulls the eye upward.
Start with a milky nude base gel and cure. Sponge pale blue onto the mid-nail and fade into white at the tip in two thin applications. Add silver shimmer at the transition area only, then wipe the nail edges so glitter doesn’t spill. For the accent, use a striping brush and chrome gel to draw a diagonal line from just above the smile line toward the outer third, then cure. Seal with a smooth top coat and cure fully, then check for any line edges by gently dragging a fingertip over the nail.
Editor's noteIf your chrome line looks too stark, soften it with a tiny amount of sheer top coat over the line before the final coat.
Skip thisDon’t put the silver line too close to the cuticle. It makes the nail look crowded and can draw attention to growth lines.
6. Rose Quartz Snow Ombre (acrylic)
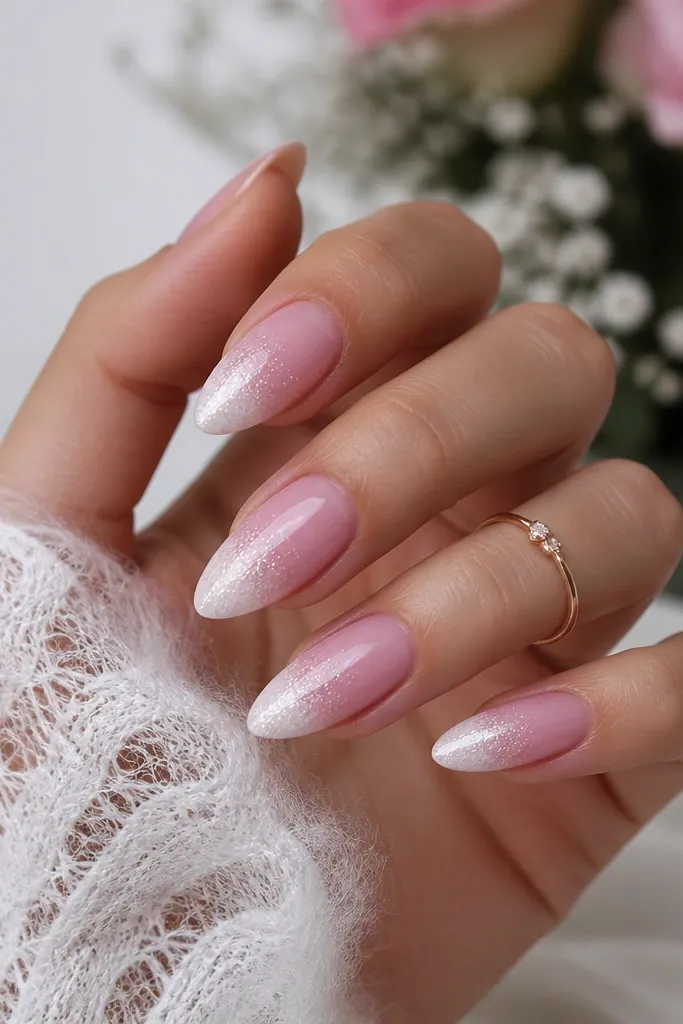
Rose quartz in winter is a cheat code for “pretty but wearable.” The base starts as sheer cool blush, then fades into frosty white so the pink doesn’t turn dusty. Acrylic holds the frosty tip opacity longer, which matters because winter light is harsh and you want the tips to stay bright. The shimmer is micro-ice crystals — think silver-pink reflect — placed mostly on the last third. This looks gorgeous on medium and deep skin, and it also works on fair skin if you keep the base cool, not peachy.
Prep and shape to almond, keeping the apex slightly forward for a smooth curve. Build a sheer cool blush acrylic base, then blend into frosty white at the tip. While the acrylic is workable, sprinkle micro ice crystal shimmer into the last third and gently press it down so it doesn’t sit on top. Cover with clear acrylic, then file and buff to a smooth surface. Finish with a high-gloss top coat and cure if you use gel top coat for shine.
Editor's noteKeep the pink-to-white transition gradual. A hard line makes it look like two separate polishes instead of an ombre.
Skip thisAvoid peachy rose bases — they look muddy against white tips.
7. Midnight Plum Fade with Frost Glitter (gel)
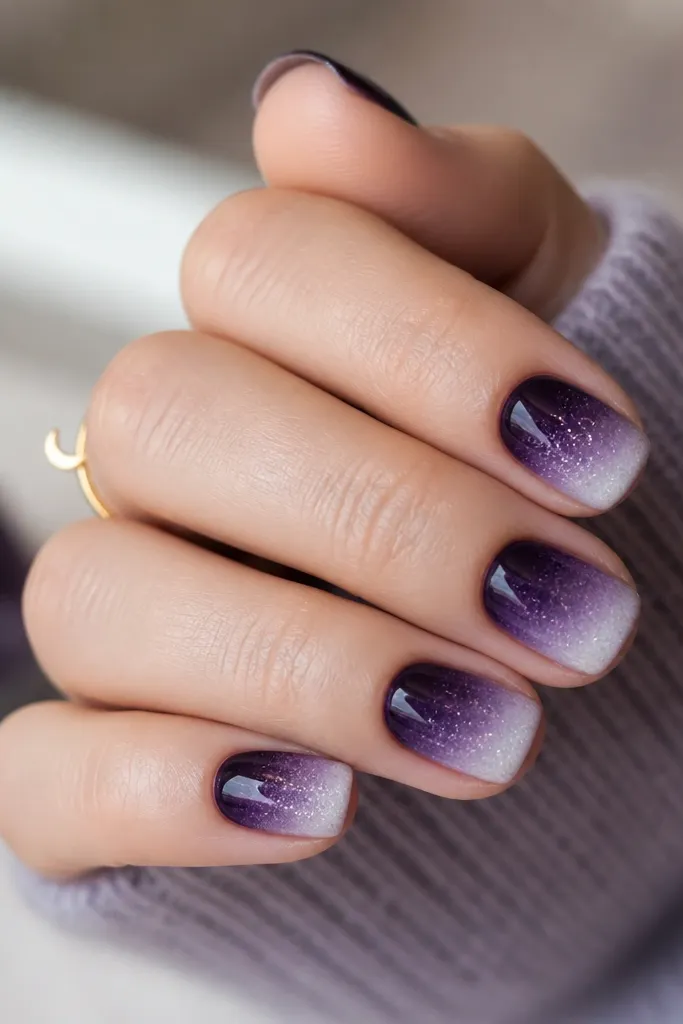
This is for people who want winter christmas nails that feel moody, not candy. The ombre starts at midnight plum and fades into smoky lavender, then ends with a sheer icy shimmer at the tip. Gel makes the fade look smooth because you’re building in thin layers — no heavy acrylic edge. The shimmer is fine and sits on top of the lavender-white transition so it catches light when you move your hands. It looks especially good if you wear dark sweaters or silver jewelry, because the plum echoes that winter palette.
Start with a thin base gel and cure. Sponge or brush midnight plum onto the mid-nail, fading downward toward the tip. Over the transition zone, add a very light haze of lavender so the plum doesn’t look like it stops. Then tap fine frost glitter mixed with clear gel onto the tip area and feather it up slightly. Seal with a glossy top coat in two thin coats, curing each time.
Use a makeup sponge for the first fade pass. It keeps the plum-to-lavender transition soft.
Don’t use chunky glitter on a dark ombre. The top coat turns grainy fast.
8. Classic Nude to Snow White French Ombre (acrylic)
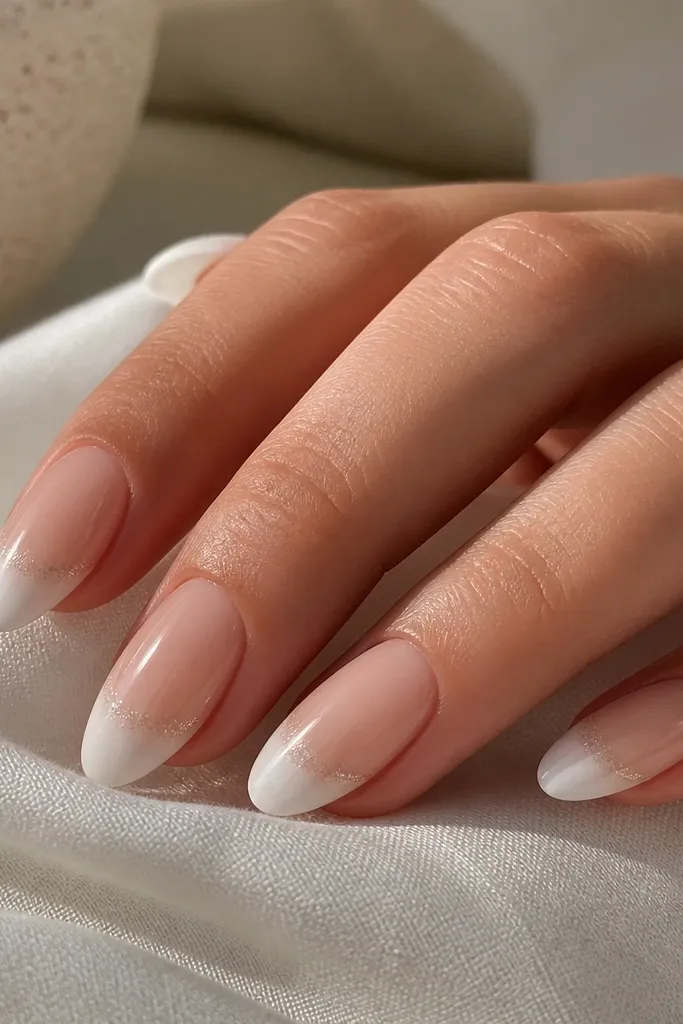
This is the “Christmas party but still office-friendly” option. The base is classic nude, then the tip area turns snow white with an ombre French shape instead of a hard line. Acrylic works well because the French tip opacity stays crisp and the nail looks neat even when your natural nail grows out. The sparkle is only at the fade edge as a thin shimmer halo, so it looks like light reflecting off snow. It flatters shorter nail beds because the ombre French keeps the tip bright without looking thick.
Shape to medium almond and prep the nail plate. Build a nude acrylic base, then blend snow white into the free edge, keeping the white strongest at the very tip. Maintain a smooth arc — the ombre should start around mid-nail and fade down. Mix a tiny amount of fine shimmer into clear acrylic and place it right where the nude meets the white, forming a thin halo. Cover with clear acrylic, file, then buff to a smooth finish and apply a glossy top coat.
Mark the start point of the French fade with a dot using a striping brush. It keeps both hands symmetrical.
Avoid a hard white line. If you can draw a straight edge, it’s too harsh for this style.
9. Evergreen Green Fade with White Snow Cap (gel)
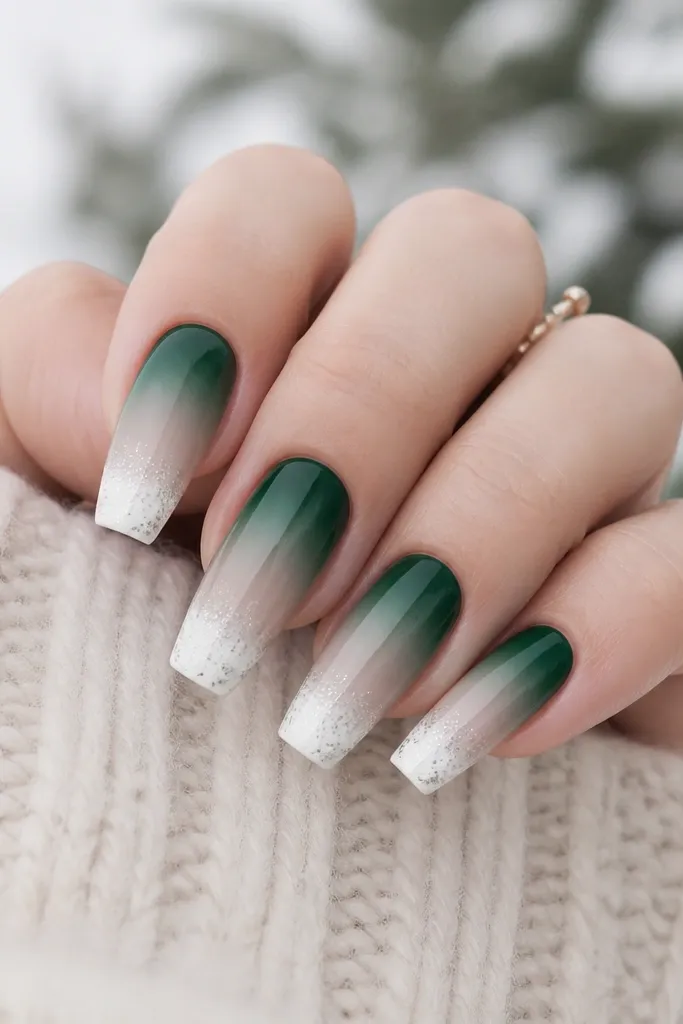
Green nails in winter can look cheap if the green is too neon. This evergreen fade stays grounded because it uses a deep evergreen — almost pine — that fades into sheer nude. The snow cap is white applied at the very tip, then lightly blended backward so it looks like a layer of snow melting slightly. Gel is great here because you can keep the cap thin and smooth, so it doesn’t feel like a sticker. This flatters hands with warm undertones because the nude base balances the green.
Start with a sheer nude base gel and cure. Sponge evergreen green onto the mid-nail and fade toward the cuticle, leaving the base sheer at the top. For the snow cap, apply opaque white gel to the outer 1/4 of the nail, then blend just 1-2 mm backward using a clean brush. Add a small pinch of silver micro-shimmer trapped inside the cap before curing. Finish with a glossy top coat, focusing on making the cap edges seamless.
Blend the snow cap with a dry brush, not a wet one. It prevents smearing and keeps the cap crisp.
Avoid neon green or too much green near the cuticle. It can look like leftover Halloween nails.
10. Champagne Nude Ombre with Red Candy Stripe Sparkle (acrylic)
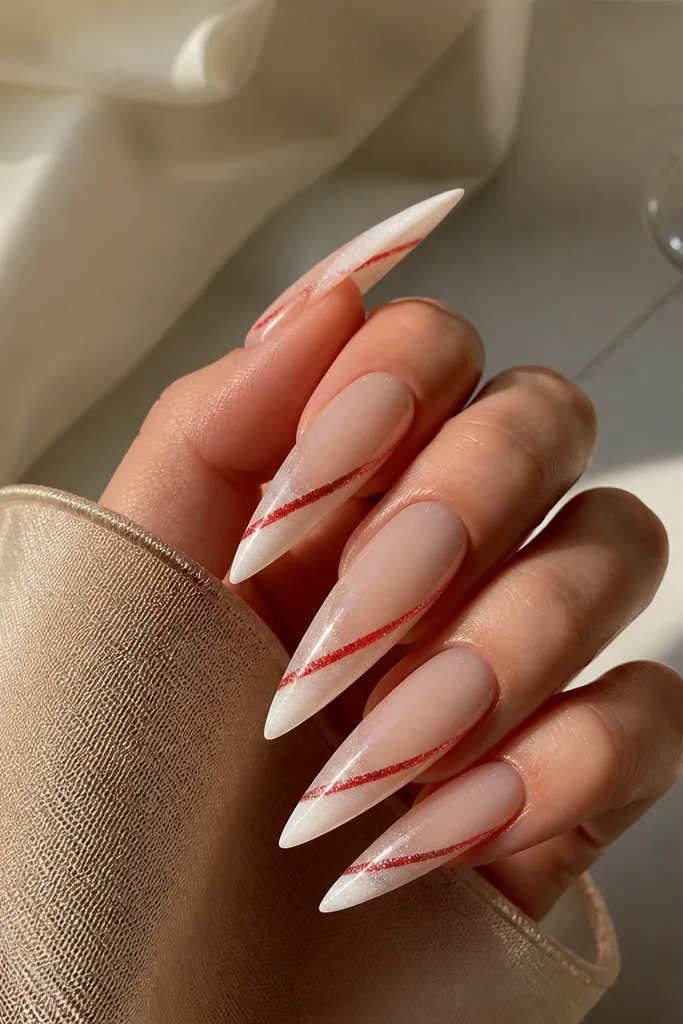
I love this when someone wants Christmas nails that still feel fun. The ombre starts in champagne nude, fades to soft white, and then you add a thin diagonal candy stripe in muted red. The sparkle is micro red shimmer around the stripe, so it looks like the stripe is lit from within. Acrylic gives you enough structure for stiletto shapes and keeps the stripe from sinking into a soft gel surface. This looks best on longer nail shapes and pairs well with gold rings.
Shape to stiletto and file the surface smooth. Build a champagne nude acrylic base, then blend into soft white near the tip. Use a fine liner brush to paint a thin diagonal red stripe over the white area, then sprinkle micro red shimmer around it while the acrylic is still workable or place shimmer mixed into clear acrylic on top. Cover with a thin clear layer, file smooth, and buff carefully so the stripe stays raised enough to catch light but not snag. Finish with a glossy top coat for a glassy shine.
Keep the stripe width under 1 mm. Thicker stripes read like nail art stickers, not candy cane detail.
Skip matte top coat here. The sparkle needs gloss to look like candy light.
11. Icy Pink Ombre with Holo Glitter Fade Line (gel)
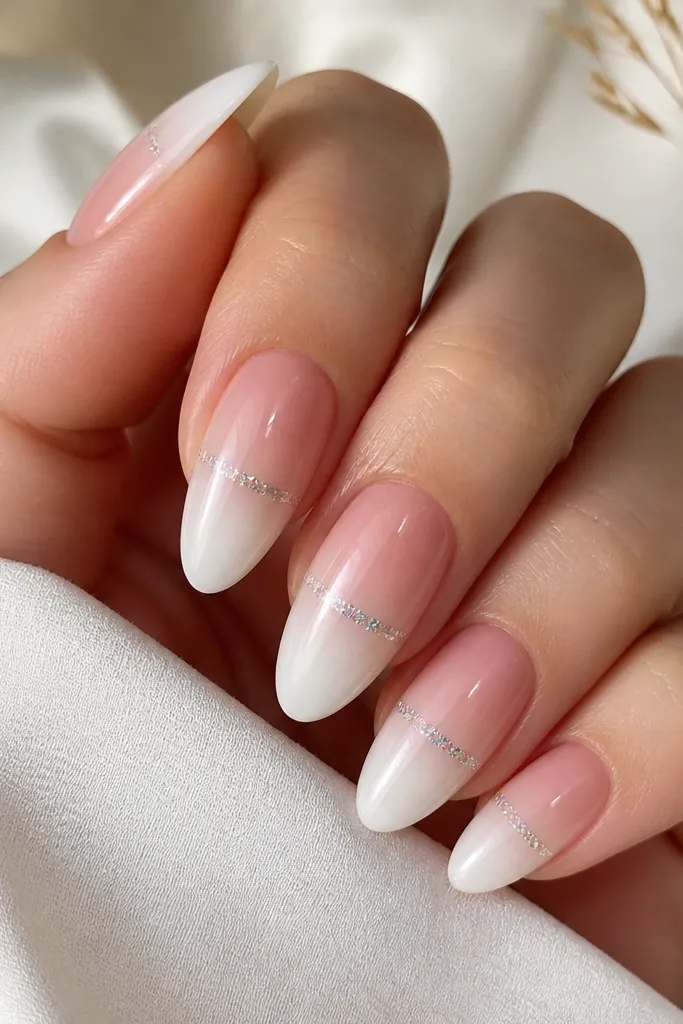
This is a clean, modern take on winter christmas nails that still reads festive. The ombre is icy pink into sheer white, so it stays soft instead of hot pink. The holo glitter is placed as one horizontal line across the center, then feathered so it disappears at the edges. Gel is perfect because you can create that thin line and keep the rest of the nail glassy and smooth. It’s flattering on short almond and medium almond shapes because the line visually widens the nail and balances proportions.
Start with a sheer nude-to-icy pink base gel, cure, then sponge icy pink into the tip area. Blend to sheer white at the very end with a second sponge pass. Mix holo micro-glitter into clear gel and paint a thin horizontal line across the nail at the center of the ombre. Use a clean brush to soften the line edges so it fades out rather than stopping abruptly. Seal with two thin top coats, curing each time, and cap the line lightly so it feels flat.
Editor's noteIf the line looks too bright, wipe the brush on a lint-free pad before placement. Less product gives that frosty glow.
Skip thisDon’t place the line too high toward the cuticle. It can make your nails look shorter.
12. Frosted Taupe Ombre with Pearl Micro-Dots (acrylic)
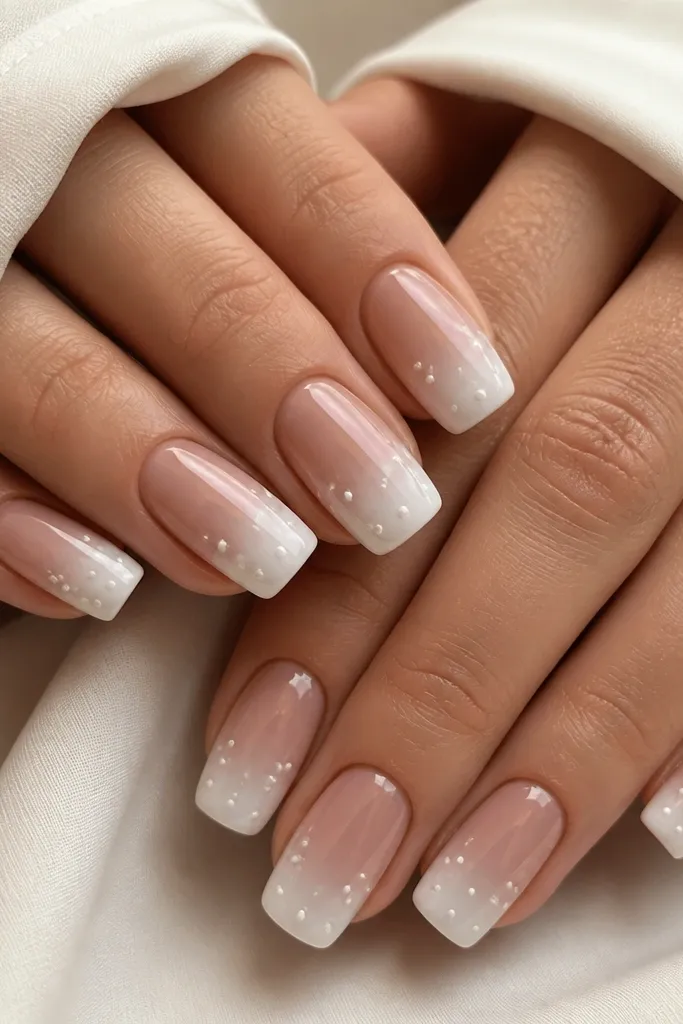
This design is subtle Christmas, the kind you wear to dinner and nobody thinks “nails” first — they just look polished. The base is frosted taupe (gray-beige), then it fades into frosty white at the tips. Acrylic helps keep the taupe opaque and smooth, so the ombre doesn’t go patchy. The pearl micro-dots are tiny and placed sparingly around the outer third, which gives a soft “ice pearl” look. It’s especially flattering if you wear neutral makeup and silver jewelry, and it works on both fair and deeper skin tones because the taupe stays balanced.
Shape to square medium and prep the nail surface. Build a taupe acrylic base, then blend into frosty white at the tips in a gradual fade. Place micro pearl dots (or tiny faux pearls) into the outer third with a small amount of clear acrylic so they sink slightly into the surface. Cover with clear acrylic and file so the pearls are smooth — you should not feel sharp edges. Buff and apply a high-gloss top coat, checking the surface texture with a cotton pad swipe.
Editor's noteIf pearls feel bumpy, file from the top lightly and re-seal with a thin glossy coat rather than adding more dots.
Skip thisAvoid big pearls on an ombre base. They overpower the gradient and look bulky.
13. Deep Burgundy Ombre with White Snowflake Stamp (gel)
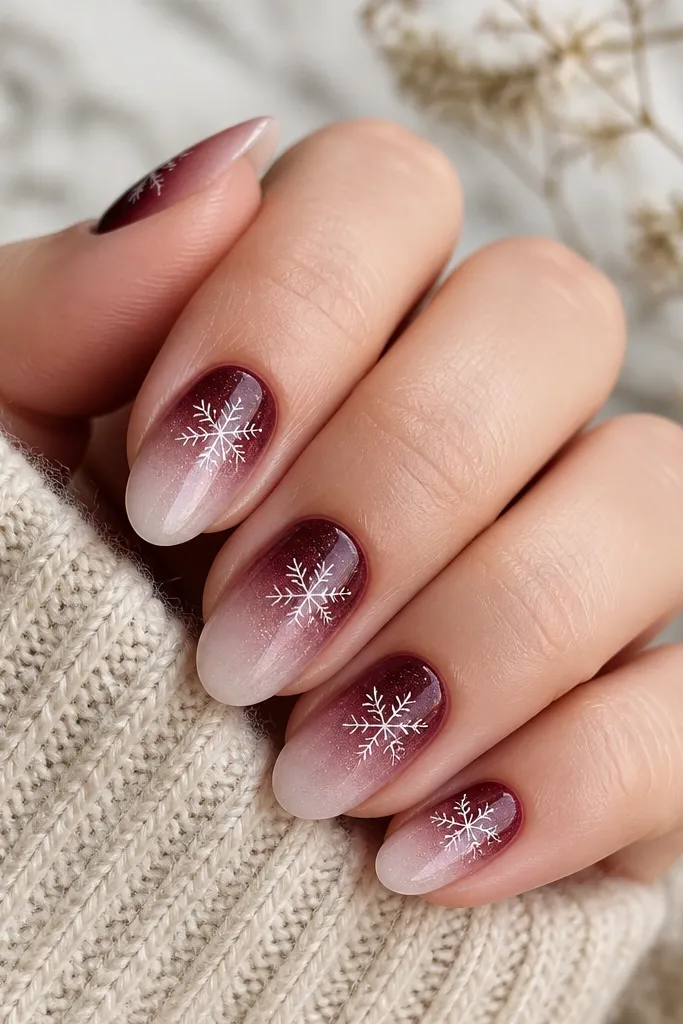
This is the Christmas set that looks like a sweater pattern, not like holiday sticker nail art. Start with deep burgundy fading into sheer white so the nails look rich but still wintery. Put a small white snowflake stamp or stencil pattern near the outer third, then add a dusting of silver shimmer underneath so it looks frosted. Gel is great because stamping needs crisp edges and thin layers to avoid lifting. It flatters short almond or oval shapes and looks especially good with red or burgundy lipstick.
Apply a sheer nude base gel and cure. Sponge burgundy onto the mid-nail and fade to sheer white at the tip in two thin passes. Add a light haze of silver shimmer in the outer third where you’ll place the snowflake. Use a snowflake stamp with white gel polish, then cure. Seal with a glossy top coat in one careful thin layer first, cure, then a second glossy layer.
Practice the stamp pressure on one nail tip plastic before you commit to your real nails.
Skip thick white gel for stamping. Thick stamping looks raised and peels from edges.
14. Champagne Gold Glitter Ombré Fade from Tip (acrylic)
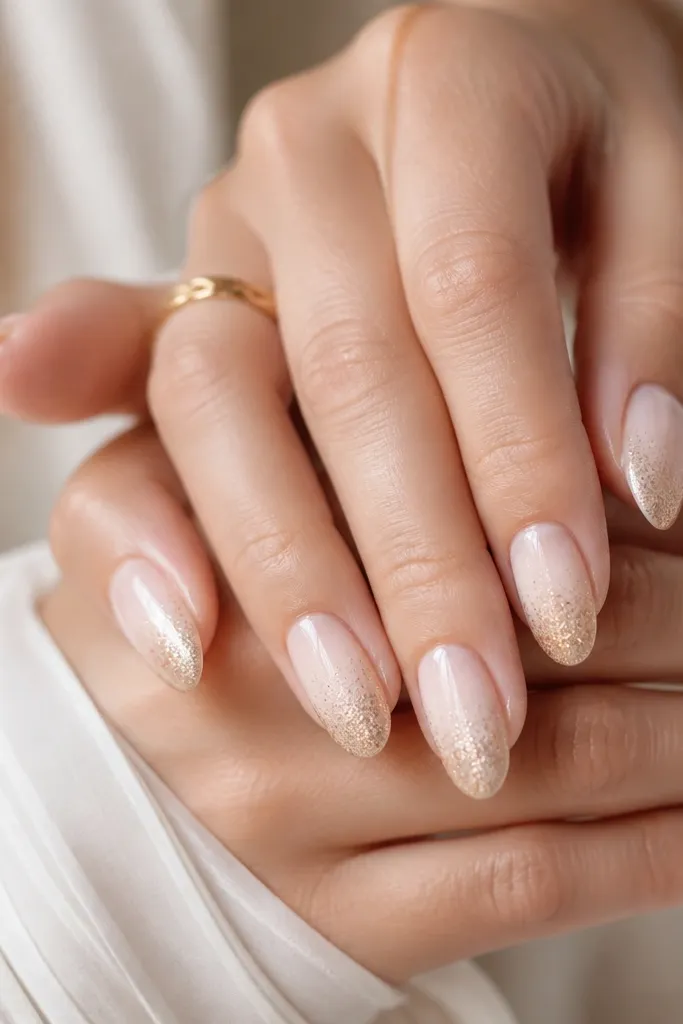
This is the “party lights” version of winter christmas nails acrylic vs gel. The base stays nude and milky so it doesn’t look messy, then the gold glitter starts at the tips and fades upward like warm glow on snow. Acrylic is strong enough to anchor glitter without feeling gritty, especially if you cap well. The gold is champagne, not bright yellow, so it looks flattering on a wide range of skin tones and works with both silver and gold jewelry. It also looks great on medium almond because the gold glow makes the nails look longer and more defined.
Prep and shape to medium almond, keeping the tip curve smooth. Build a nude-to-milky ombre with acrylic powder, keeping the white strongest at the last 1/4. Mix fine champagne gold glitter into clear acrylic and place it only at the tip, then blend upward about 2-3 mm with a brush. Cover with clear acrylic so the glitter is sealed under a smooth layer, then file flush. Buff for shine and finish with a glossy top coat.
When blending glitter upward, use fewer strokes — pressing too hard smears glitter and creates a hard line.
Avoid translucent glitter that’s too sparse. You want enough density at the tip for the ombre to read from across the room.
15. Ice Blue to Clear Gradient with Micro Snow (gel)
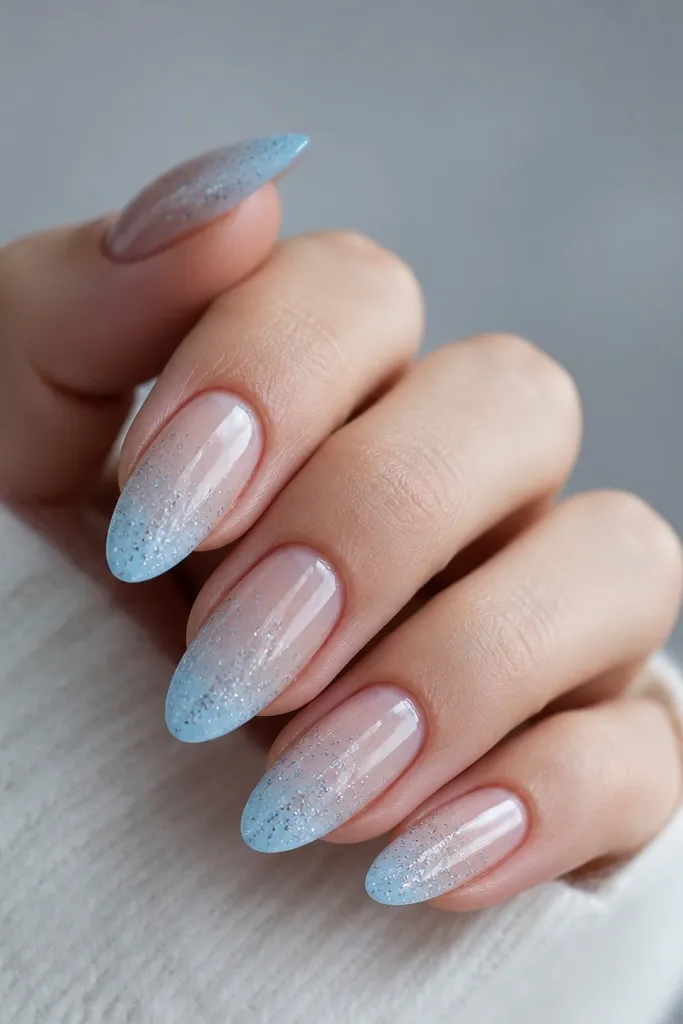
This one looks like your nails are full of winter air. The ombre goes from ice blue at the tip and outer edges into a clear jelly center, so the nail looks light and glassy. Gel is the right choice because the clear center needs translucency and a smooth, thin build — acrylic can thicken that area if you’re not careful. The micro snow is tiny silver shimmer scattered near the tip and kept sparse so it doesn’t feel gritty. It flatters hands that look best with a clean, minimal base, and it looks stunning on long ovals with thin, neat cuticles.
Start with a thin clear base gel, cure, then sponge ice blue onto the outer edges and tips only. Keep the center strip clear by using a clean brush to pull product away from the middle. Add micro silver shimmer mixed into clear gel at the very tip area, then cure. Cap with a glossy top coat, but keep your top coat application light across the clear center so it stays glassy. Check smoothness by running a finger from cuticle to tip; it should feel like one surface, not layered.
Editor's noteUse a wet wipe to clean your brush often. Dry brush hairs pull product and ruin the clear center line.
Skip thisDon’t overbuild the clear zone. Thick clear gel makes the nail look bulky and cloudy.