1. Mini candy stripe French tips
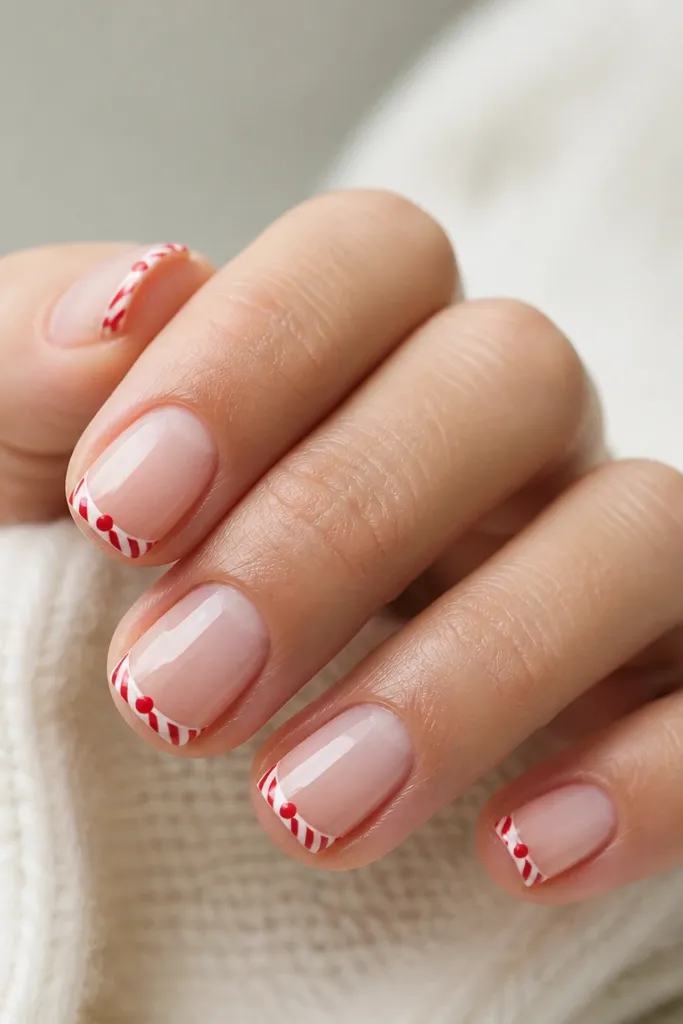
This design works on small nail space because the art sits only on the tip, so you’re not covering your cuticle area. I like a sheer pink base because it blends with most skin tones and makes the nail feel longer. The candy stripe reads festive without needing big bows or big snowflakes. It looks especially good if your skin is warm-toned because red pops cleanly against a rosy nude. Keep the stripes thin and straight — it’s the crispness that makes it feel “salon” instead of “messy.”
Start by painting two thin coats of a milky nude or sheer pink. Let it dry completely, then place a striping guide by holding a thin tape line along the tip edge for one nail at a time. Paint a thin white line at the tip, then add a red stripe next to it and repeat once more so the tip has a simple candy rhythm. While the stripe is still slightly tacky (gel) or fresh (regular polish), add one tiny red dot at the center of the tip using a dotting tool. Finish with a glossy top coat so the stripes look smooth.
If your red polish floods, thin it with a drop of enamel thinner or use gel red in a slightly thicker consistency for cleaner stripes.
Avoid thick stripes — they swallow the nail’s width and make short nails look even shorter.
2. Sheer snow globe with tiny flakes
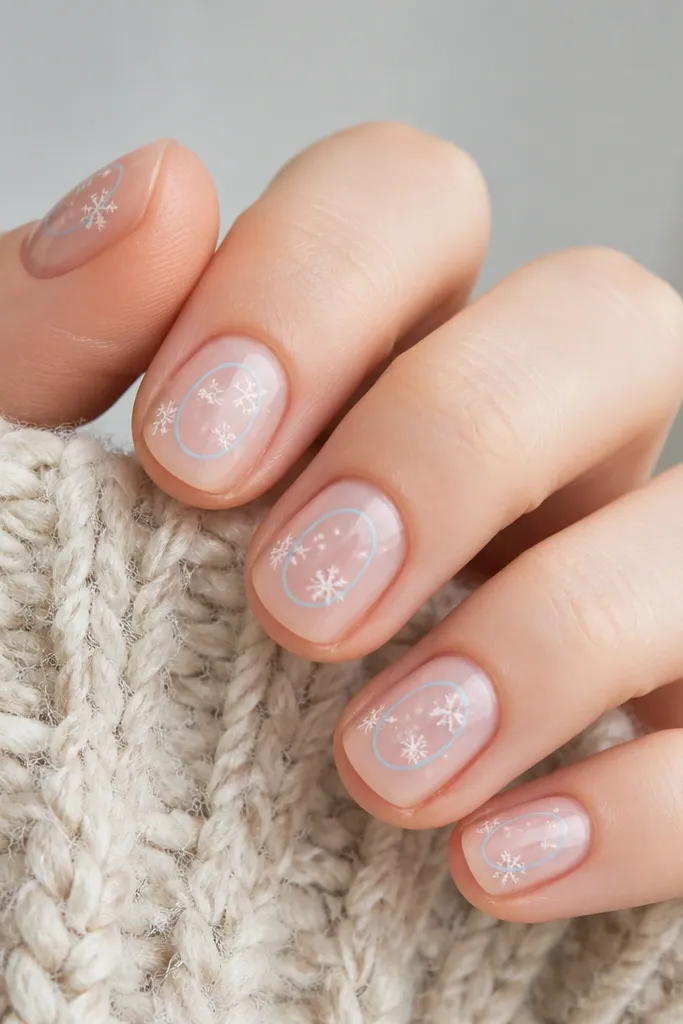
A snow globe layout is perfect for small space because it creates a focal “window” without covering the whole nail. I use a sheer base so the globe feels airy, not heavy. The light blue outline flatters cool skin tones and makes winter whites look brighter. If your nails stain easily, the sheer base hides it until the art draws attention. The key is tiny flakes — more flakes makes it crowded fast on short nails.
Start with two coats of sheer pink or sheer nude and let it dry fully. Use a thin liner brush to draw a soft oval in pale icy blue centered on the nail, leaving space around it for negative space. Add 2-3 snowflakes in white gel or white polish: one with six skinny arms, one partial, and one tiny dot-flake for variety. For gel, cure the outline and flakes, then add a clear gel layer to slightly “float” the flakes inside the globe shape. Seal with a glossy top coat for a glassy look.
Use a toothpick for the smallest dot-flakes so they stay crisp instead of smudging.
Avoid filling the globe solid white — it turns into a blob on short nails.
3. Red velvet matte with gold dot ornaments
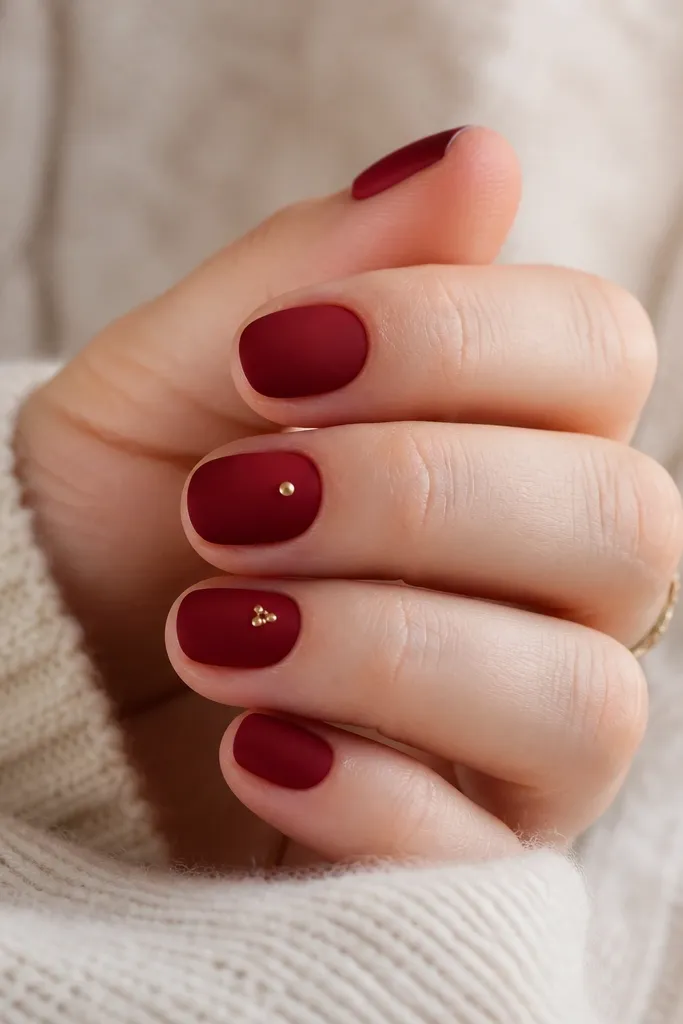
Matte red is the easiest “winter Christmas” win because it instantly looks like fabric. Deep cherry or wine-red matte flatters most skin tones, especially if you like bold color but don’t want heavy designs. The gold dots give you that ornament vibe without needing painted strings or bows. I use gold dot placement near the upper half because it visually lifts the nail. Keep the dots small — ornaments should look like jewelry, not stickers.
Editor's noteIf gold polish looks patchy, tap it on with the dotting tool instead of dragging.
Paint all nails with two thin coats of deep red matte polish or gel with a matte top coat. Once dry or cured, pick one or two accent nails for ornaments. Use a dotting tool to place 3-5 gold dots in a loose cluster near the cuticle on the accent nail, leaving a clear gap from the sidewalls. On another nail, place one gold dot centered slightly above mid-nail. Finish by keeping the rest matte and adding a glossy top coat only over the gold dots so they catch light.
Skip thisAvoid putting gold dots all over every nail — it makes short nails look busy and flat.
4. Forest green sweater nail with mini cuff
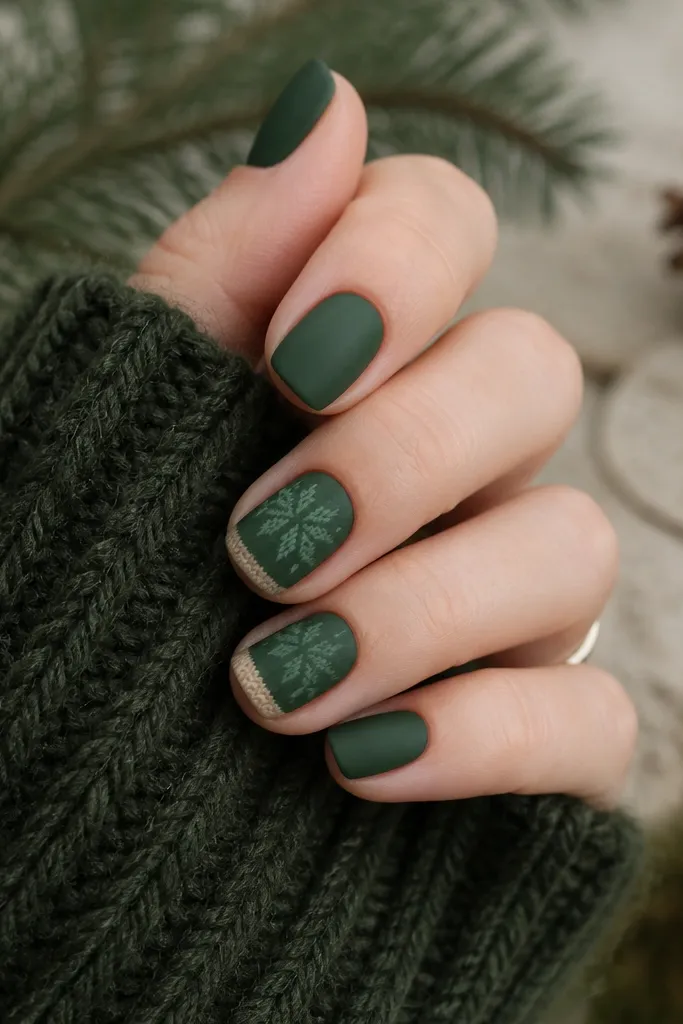
Sweater texture looks incredible on short nails because the pattern reads as cozy even when the nail art is small. Forest green is the winter Christmas color that feels different from the usual red and it looks great against fair and medium skin. I pair it with a lighter green knit and a beige cuff stripe so the manicure feels layered. The knit pattern flatters fingers that look a little slim because vertical texture draws the eye in. Keep the sweater element to one or two nails so the set stays clean.
Editor's notePractice the knit grid on a strip of clear plastic first so your stitches are the same size across nails.
Start with two coats of forest green matte. On accent nails, use a lighter green polish and a striping brush to paint three thin vertical lines down the center panel. Add short cross stitches between the lines to form a simple knit grid — keep it tight and small. Near the tip, add a thin beige stripe like a cuff, then paint one tiny notch on each side of the stripe so it looks folded. Seal with matte top coat over everything except the beige stripe if you want it slightly more defined.
Skip thisAvoid big chunky lines — sweater nails should look like knit, not like you smeared paint.
5. Classic red bow on nude base
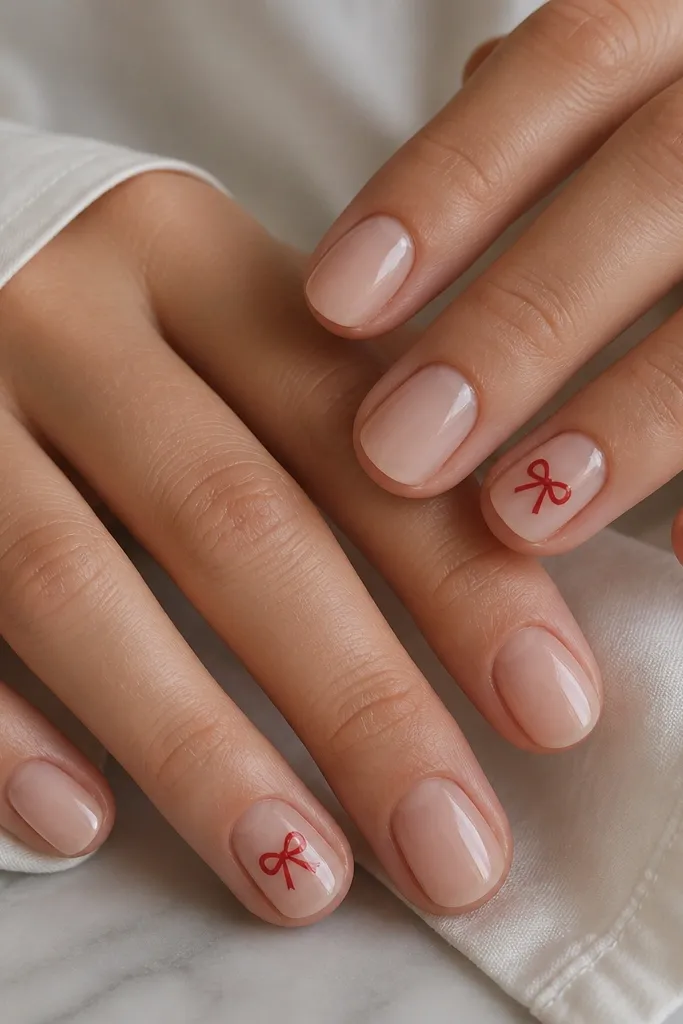
A bow is the easiest holiday symbol to make look expensive on small nail space because it has clear shapes: two loops and a knot. I use a nude-pink base so the bow sits cleanly without fighting your skin tone. Red bows look best when you keep them slightly off-center toward the cuticle, which makes the nail look longer. This design flatters hands with shorter nail beds because the bow’s vertical line gives direction. Keep the bow small — it should feel like a gift tag, not a full poster.
Editor's noteIf your bow loops merge, let the first loop cure/dry fully before adding the second loop.
Apply two coats of nude-pink or rosy sheer, then cure or dry fully. On accent nails, place two red teardrop loops: one on the left, one on the right, meeting at the center. Paint a tiny red knot in the middle, then use a thin white gel line just along the outer edge of each loop for a highlight. Add a small clear or nude dot under the knot if your bow needs a bit more dimension. Finish with a glossy top coat so the bow looks like it’s under a dome.
Skip thisAvoid drawing bows too low on the nail — it makes short nails look top-heavy.
6. Icy blue half-moon with silver shimmer
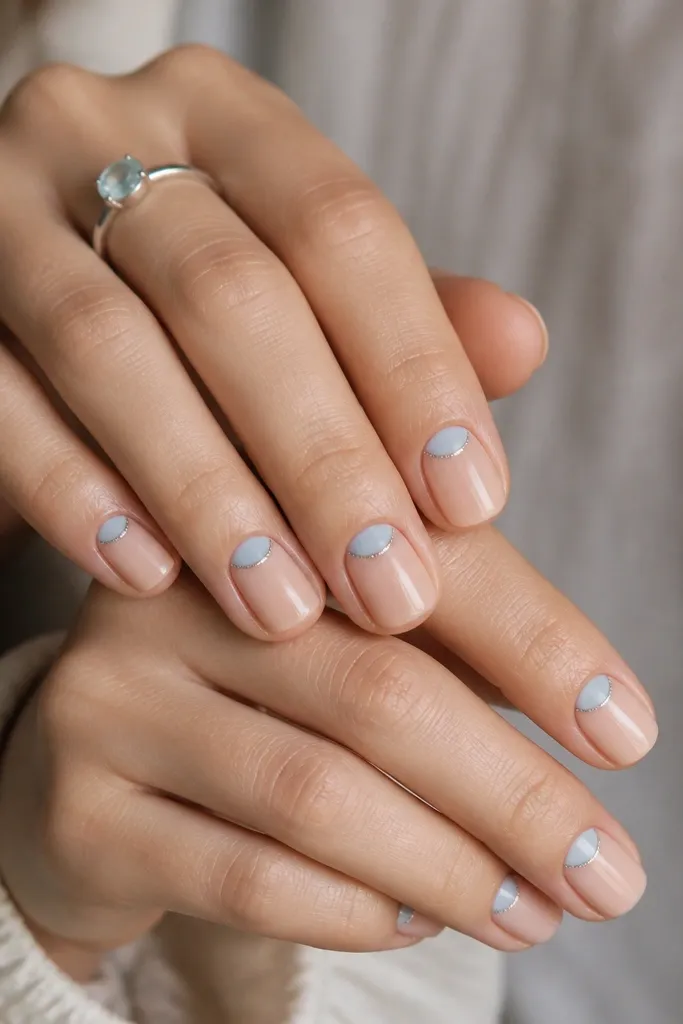
Half-moon designs work because they use the natural nail shape and keep the art near the cuticle, which is where your nail looks most defined. Icy blue is a strong winter color that looks good on both warm and cool skin because it’s bright but not harsh. The silver shimmer line makes it feel like jewelry, and it also adds contrast without needing more detail. This set looks clean for work because it’s festive but not loud. It’s especially flattering if your nails are narrow since the half-moon hugs the nail curve.
Start with a sheer nude base and apply two thin coats. Use a small sponge or a half-moon stencil to paint an icy blue half-moon directly under the cuticle line, keeping it thin enough to leave a gap at the sidewalls. Add a thin silver shimmer line around the icy blue edge using a liner brush. If you’re using gel, cure the half-moon and shimmer separately so the line stays sharp. Seal with a glossy top coat to smooth texture.
Use a makeup sponge for the icy blue so the color stays soft and doesn’t look streaky.
Avoid going too wide with the half-moon — it can make the nail look shorter on small nail beds.
7. White snowflake cluster with negative space frame
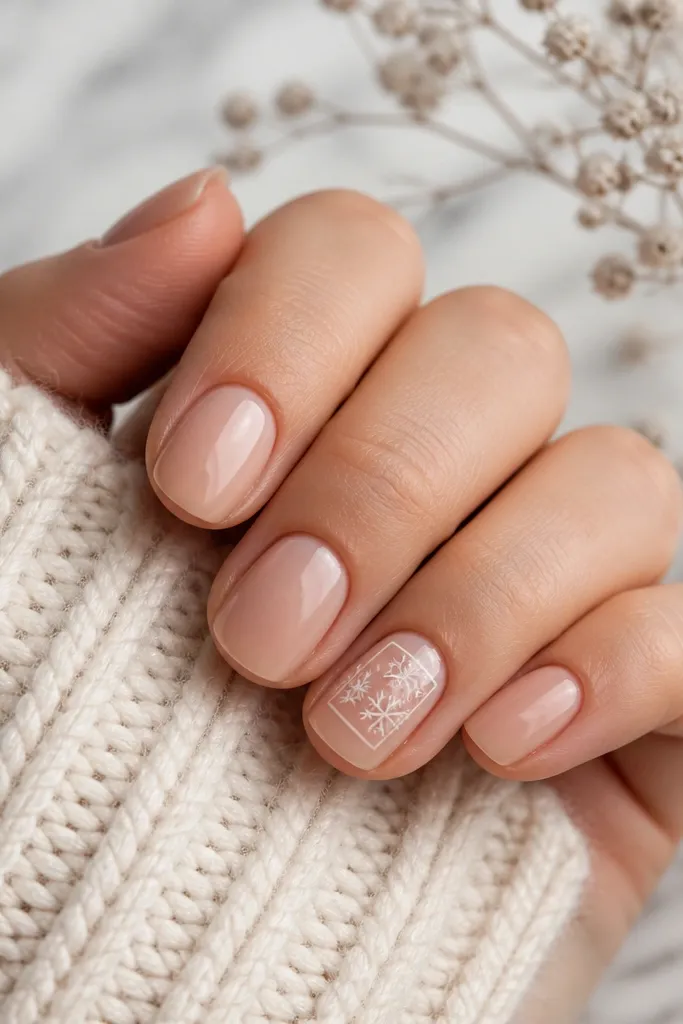
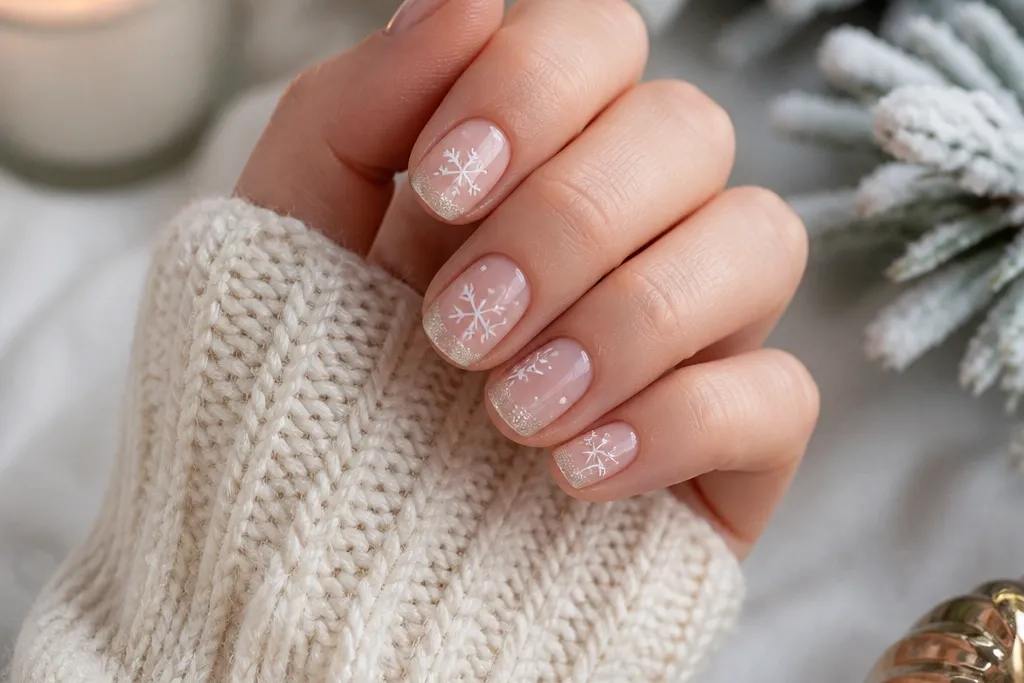
This is one of my favorite small-space designs because it’s basically a framing trick. The sheer base gives you breathing room, and the thin outline keeps the snowflakes from floating randomly. White snowflakes pop on both fair and deeper skin tones, especially if your base is milky instead of fully transparent. The frame makes the design look intentional, like a holiday print. Keep the snowflakes clustered in the center upper half so the nail doesn’t feel crowded.
Paint a sheer nude base in two coats. Choose one or two accent nails and draw a thin white rectangle outline around the center cluster, leaving open space at the corners. Add two snowflakes in white: one facing straight on and one slightly tilted, with 6 narrow arms each. Add a tiny dot trail — just 3 dots — around one edge of the snowflakes for movement. Cure/dry fully, then apply glossy top coat over the entire nail.
For snowflake arms, use the liner brush and drag once — then dot the tips. Don’t repaint the arms multiple times.
Avoid thick outlines — they look heavy on short nails and ruin the delicate snow effect.
8. Gold reindeer antler line art
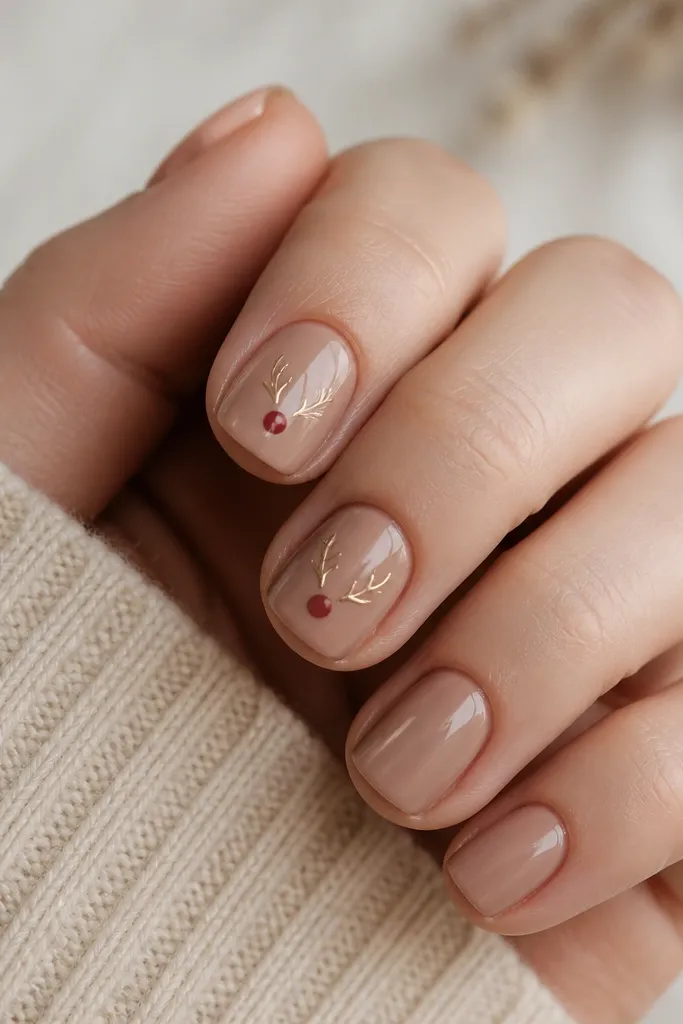
Line art is the best way to do Christmas on small space because it uses thin strokes, not big fills. Metallic gold antlers look classy and wintery, and the deep nude base keeps it from looking too bright. The red nose gives you a clear holiday focal point. This works well on medium to deep skin tones because gold warms the nail without clashing. It also looks great on hands with short nails because thin lines add height instead of width.
Editor's noteIf the gold line looks uneven, load less product on the brush and go slower — metallics show every lump.
Apply two coats of a deep nude or cocoa-toned sheer polish. On accent nails, use a 00 liner brush with metallic gold gel or polish to draw two antler branches: start from the center and split into two upward curves with small offshoots. Place a tiny red dot nose slightly below the antler center point. If you want extra detail, add two short lines for the mouth on one side only. Finish with a glossy top coat so the gold looks reflective.
Skip thisAvoid filling the antlers solid — it makes small nails look crowded.
9. Green and red plaid corner accent
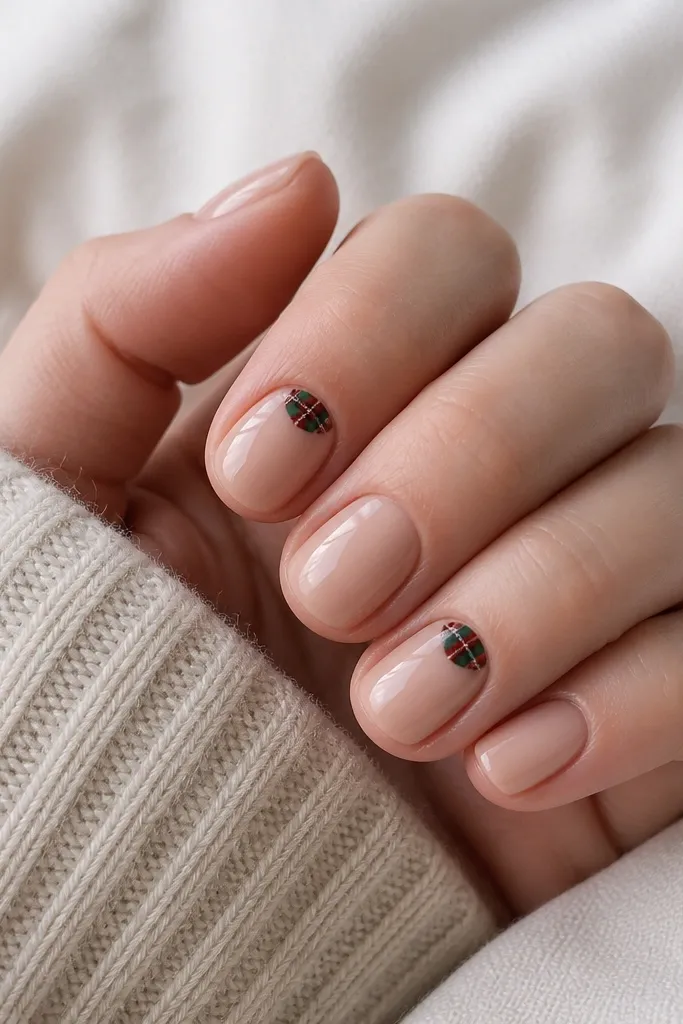
Plaid can look bulky, but a corner accent keeps it controlled. I use a sheer nude base so the plaid reads like a fabric swatch. Deep green and classic Christmas red create strong contrast, and the thin white lines prevent the plaid from looking muddy. This design is flattering on short nails because it stays in the upper corner and doesn’t fight your nail bed length. It also looks good on hands with wider nails because the plaid stays small and doesn’t spread across the sides.
Start with a nude sheer base in two coats. Pick two nails and draw a small square in the top corner near the cuticle using a thin liner brush. Paint vertical stripes in deep green and red, then add horizontal stripes to complete the plaid, keeping the lines narrow (about the thickness of a hair). Finish by adding one ultra-thin white line between the green and red sections so the colors separate. Seal with glossy top coat to make the plaid look like printed fabric.
Use nail tape to block off the square edges if your lines always drift.
Avoid covering the whole nail with plaid — it looks flat and too busy on small space.
10. Tiny ornaments vertical trio
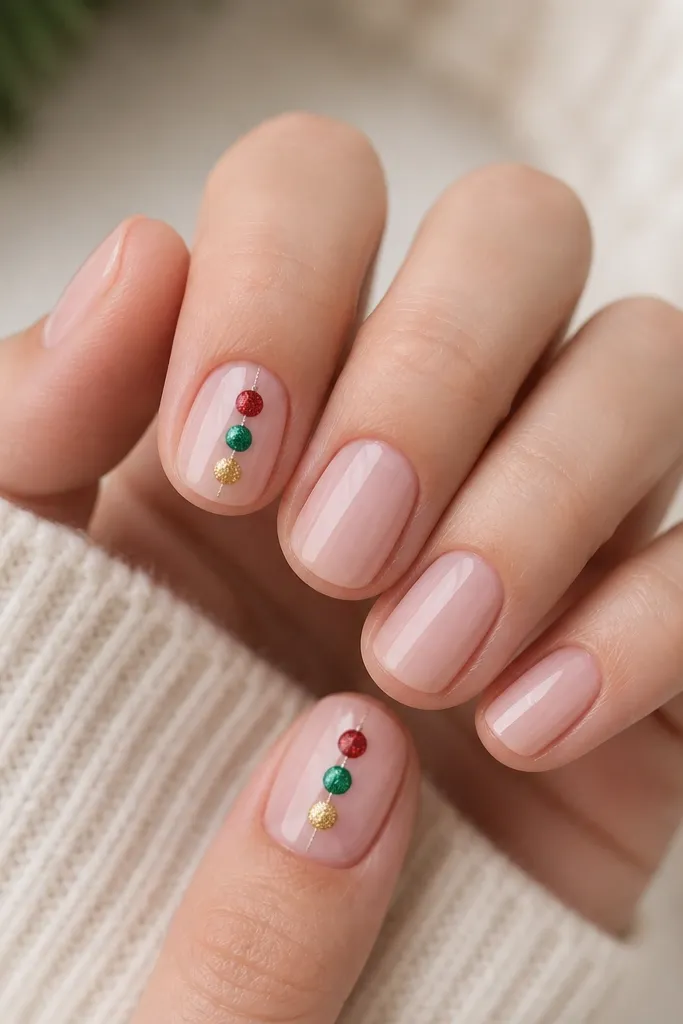
A vertical trio is made for short nails because you’re guiding the eye upward. Each ornament circle is small, and the connecting string lines add structure without taking up width. I like the color order red, green, then gold because it feels like classic tree ornaments. This looks great for fair to medium skin tones, but it still works on deeper skin when your base is milky nude. Keep the string lines thin and straight so they look like actual hanging ornaments.
Editor's noteUse a dotting tool with two different tip sizes so the top ornament is slightly smaller than the bottom.
Paint all nails with a milky nude or sheer pink base. On accent nails, draw a straight vertical guideline in pale gold or nude where the ornaments will stack. Place three small circles: top red, middle green, bottom gold, each about the width of a small dotting tool tip. Add tiny “string” lines from each circle to the next point above it. Cure/dry, then top coat glossy so the ornaments look like they have shine.
Skip thisAvoid circles that touch — a tiny gap makes them look like separate ornaments.
11. Icy ombre tips with silver snow dust
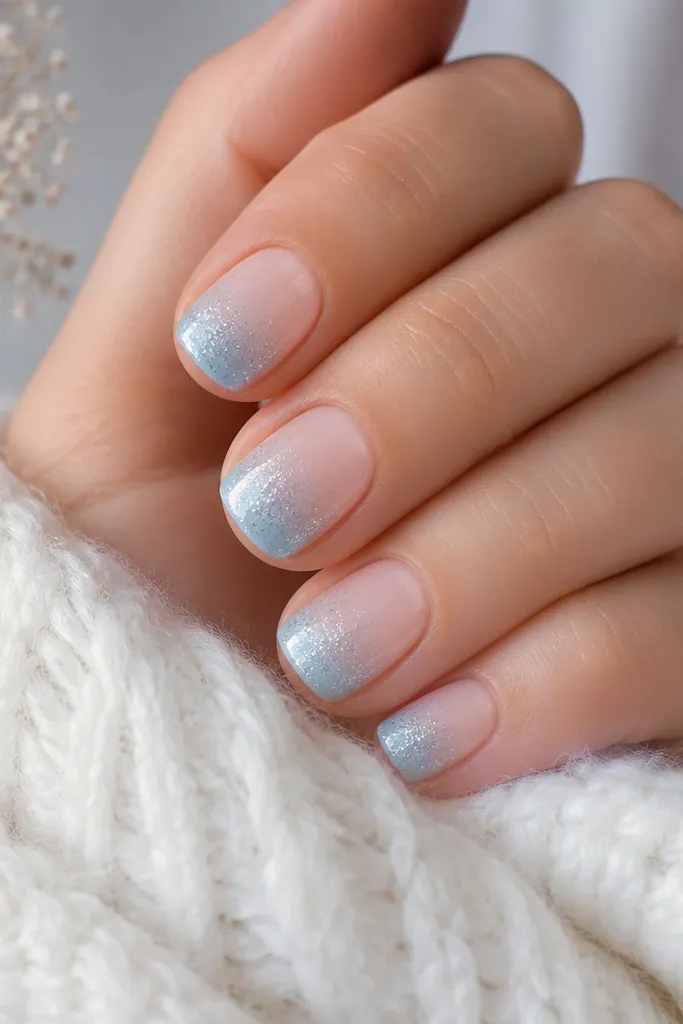
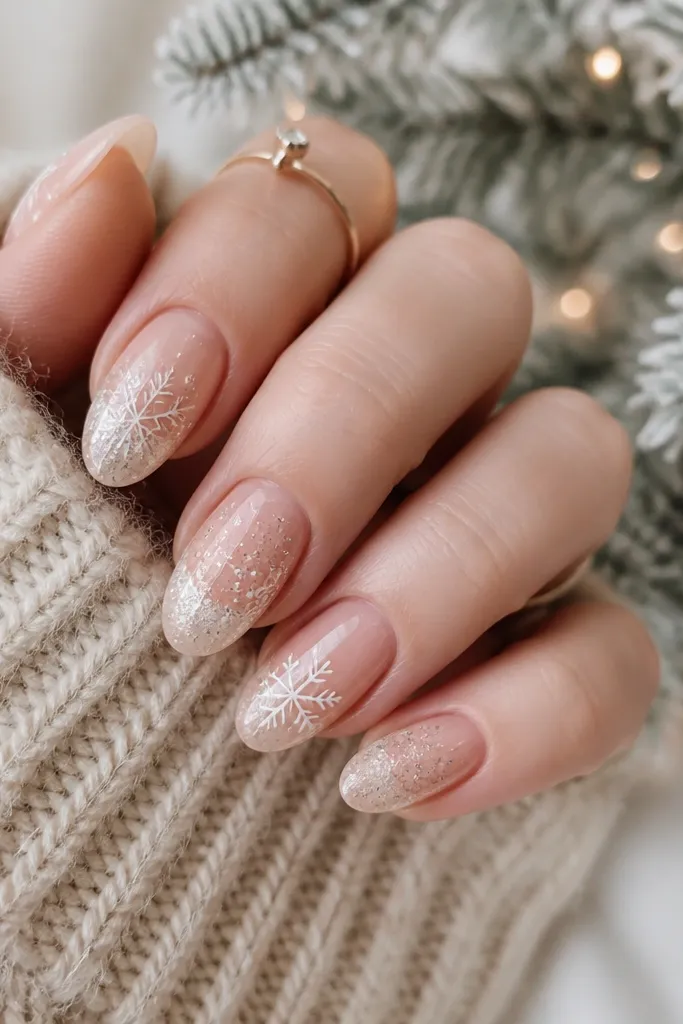
Ombre tips feel wintery without needing detailed art, and the gradient hides small imperfections that happen on short nails. Icy blue fades into clear or milky nude looks clean and gives that “frosted” vibe. The silver snow dust adds a sparkle that photographs well. This design flatters hands that look better with softer contrast — it’s festive but not loud. It also works if you don’t have steady hands because ombre forgives shaky edges.
Editor's noteUse a small makeup sponge and wipe excess paint off on paper towel so you get a smooth fade.
Start with two coats of nude or sheer pink. Sponge on icy blue at the tip — keep it concentrated at the very edge and fade upward into the nude, blending with a clean sponge as you go. While the tip is still slightly tacky, tap fine silver glitter lightly along the top edge of the ombre so it looks like snow landing. Avoid putting glitter all the way down the tip, or it will look gritty. Seal with a glossy top coat; if glitter texture feels rough, do a second thin top coat after the first sets.
Skip thisAvoid hard lines at the ombre border — it makes the manicure look blocky.
12. Matte black night sky with tiny star dots
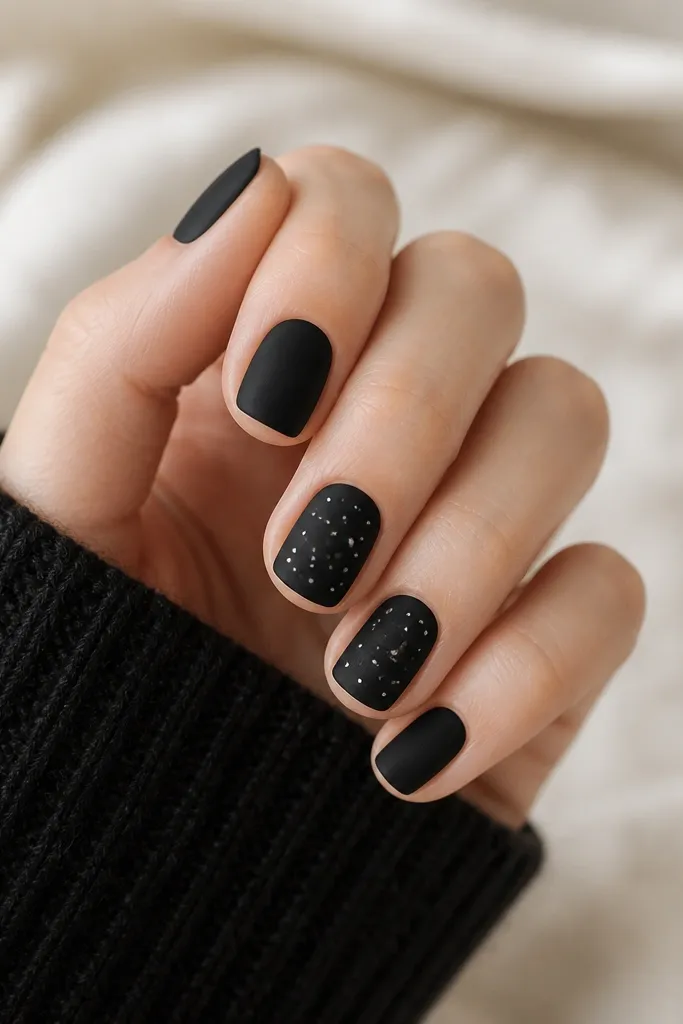
Night-sky nails look like winter magic without using typical Christmas colors. Matte black is the base, and it makes white and silver look crisp instead of chalky. This is flattering on almost every skin tone because the contrast is clean. If you want something holiday-adjacent for parties or New Year, this one hits. The design works on small nail space because stars are tiny and scattered, not huge and centered.
Apply two thin coats of matte black polish or gel, then cure/dry fully. Choose two accent nails and place a crescent moon using a small curved silver line near the upper third. Add 6-10 stars using a dotting tool: mix tiny white dots and a couple silver dots, leaving space between them. For a more starry look, drag a toothpick lightly from one dot to make a short sparkle streak, then top coat. Finish with matte top coat for the black, but add a glossy top coat only over the moon so it shines.
If stars smear, cure/dry a small area at a time so you aren’t working on wet polish.
Avoid big star shapes — they take over a short nail.
13. Red micro-floral holly accent
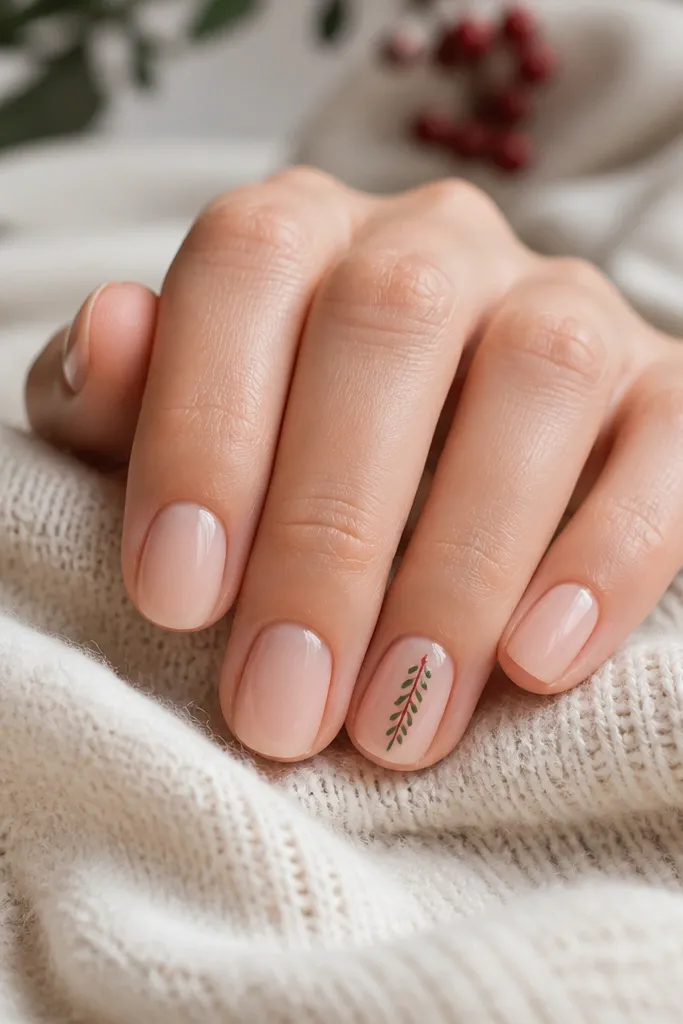
Micro holly sprigs look festive and still feel delicate on short nails. The nude base keeps everything looking clean, and the tiny red berries give Christmas energy without clutter. I use green that leans evergreen, not neon, so it looks natural. This design flatters hands that have shorter nail beds because the sprig’s vertical line lengthens the look. It also looks nice on medium skin tones because the berries pop without going too loud.
Paint a nude base in two coats. On one accent nail, draw a thin vertical line in evergreen green starting near the cuticle and stopping above the tip. Add small leaf shapes on each side of the line using a detail brush: two leaves at the top, one leaf at mid, one leaf at the bottom. Place tiny red berries at the ends of the leaves — dot three small circles for a simple cluster. Cure/dry, then seal with glossy top coat so the berries look juicy.
Use the same brush for leaves and berries by rinsing and drying it fully between colors so your greens don’t tint the reds.
Avoid large leaf clusters — they crowd short nails instantly.
14. Snowman one-eye minimal
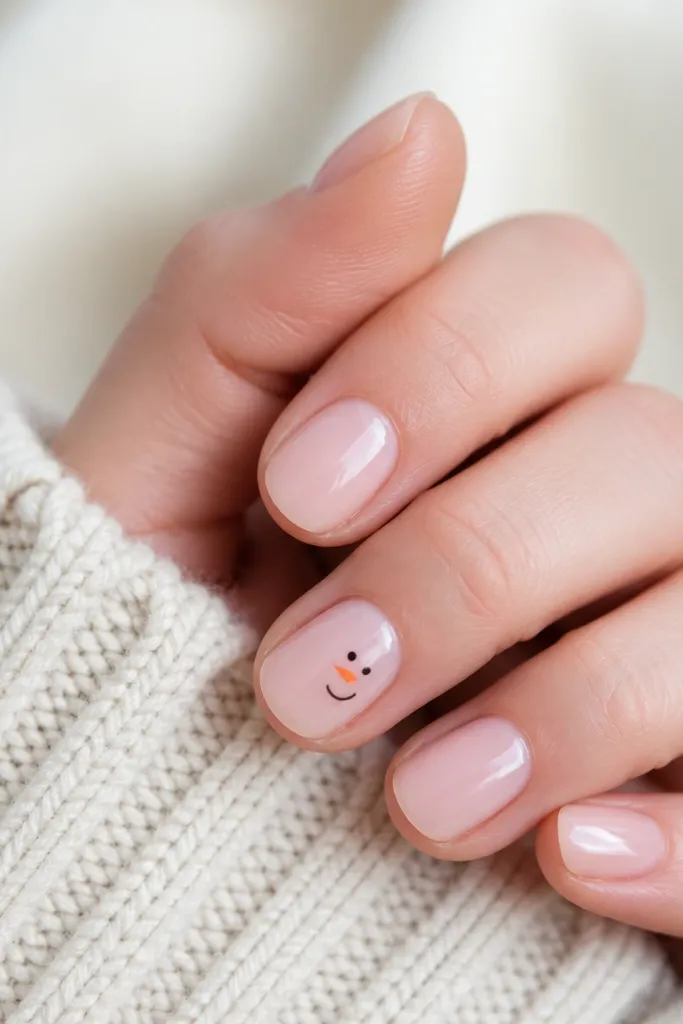
Minimal snowmen are a lifesaver for small space because you’re painting just enough to read as a snowman. The sheer base keeps it airy, and the tiny facial features do the work. I like this on fair to medium skin tones because it looks playful in photos. The one-eye detail feels cute without needing big body shapes, which would take up too much real estate. Keep the face centered and small, and the rest of the nails stay clean.
Editor's noteIf your orange looks too bright, mix orange with a tiny drop of red-brown until it looks like carrot, not Halloween.
Start with a sheer nude or milky pink base. On one accent nail, draw a small circle in white near the center — about the size of a pea from a distance. Add a single black dot eye slightly above center, then paint a tiny orange carrot nose pointing down. Finish with a thin curved smile in black and a small blush dot in pink on one cheek. Top coat glossy so the white looks smooth and the face stays crisp.
Skip thisAvoid adding buttons or a full scarf — it turns into a tiny cluttered drawing.
15. Silver half-snowflake at the side
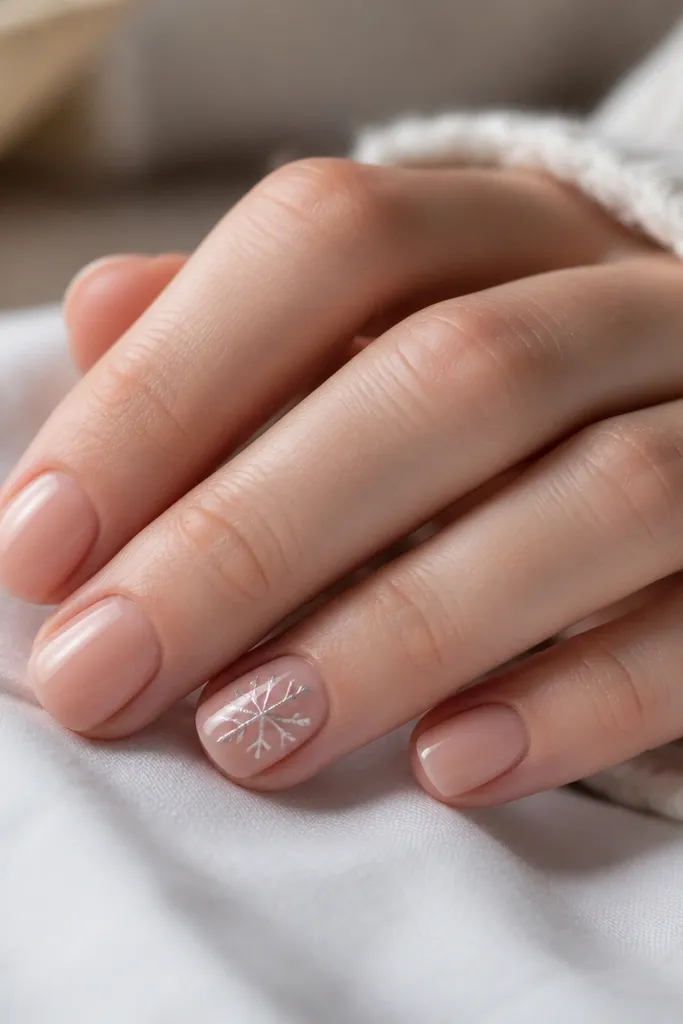
Side snowflakes work because negative space becomes part of the design, which is exactly what small nails need. Silver looks icy and special, and it flatters cooler undertones when paired with a milky nude base. This design also makes your nails look more narrow and tidy since the art doesn’t spread across the whole nail. I like it for hands that get smudges easily because the shape is simple and the edges are clean. Keep it to one accent nail or two at most so it feels intentional.
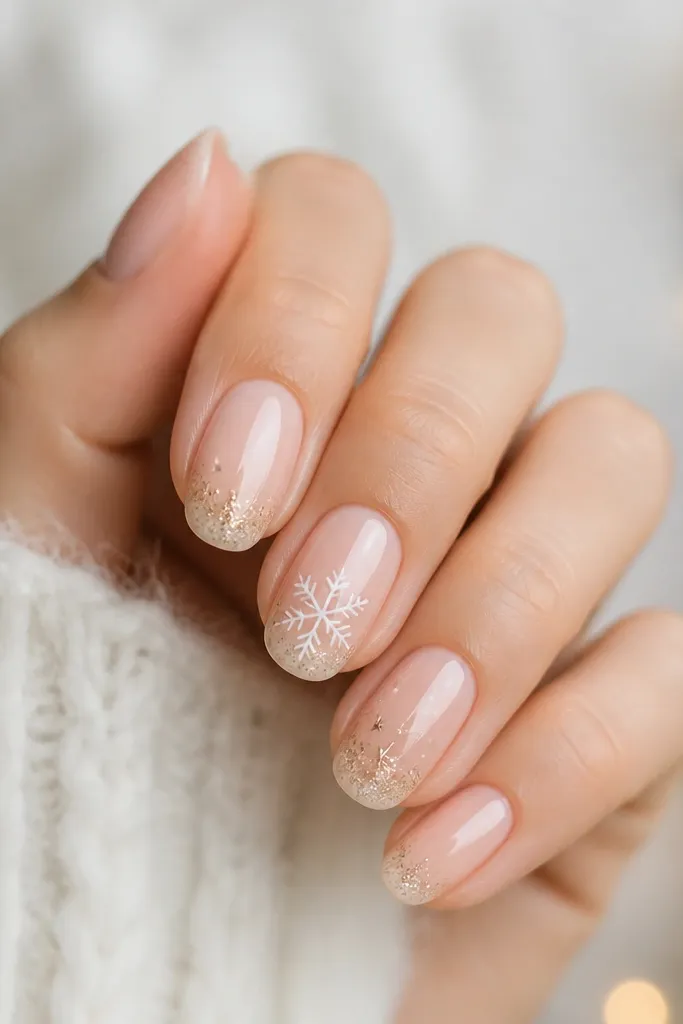
Apply two coats of milky nude. On an accent nail, place a silver snowflake only on one side of the nail — starting near the cuticle and stopping above the tip. Paint 3-4 main arms and a few small dots on the outer edges, then stop short so the other side stays negative space. Add one tiny silver dot at the center point to anchor the design. Cure/dry and seal with a glossy top coat to smooth the silver lines.
Use a silver gel with a slightly thicker consistency so it doesn’t run down the sidewall.
Avoid full snowflakes that wrap around the nail — they look cramped on short lengths.