1. Cranberry Glass French with Micro Gold Tips
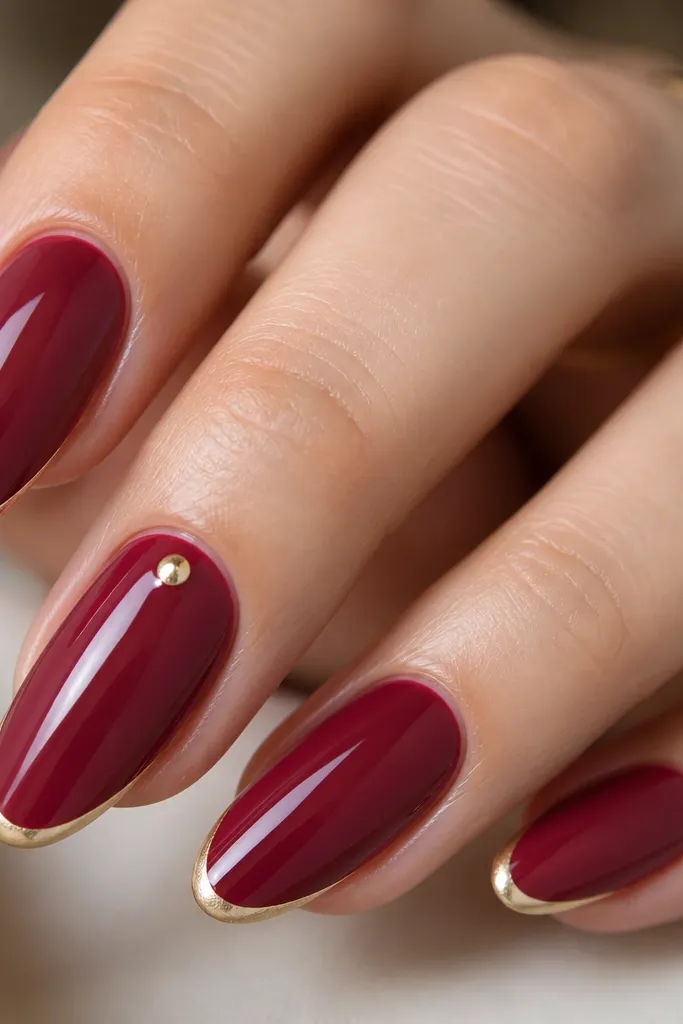
This one works because it looks like a classic manicure but with winter light. Use a cranberry that looks blue-toned next to your skin — it makes hands look cooler and cleaner in winter photos. The micro gold tips catch light without looking sparkly-for-sparkly’s-sake. It flatters short-to-medium lengths because the thin French line adds length without covering too much nail. For fair skin it brightens the hands, and for deeper skin tones it gives a high-contrast holiday glow that still looks refined.
Start by filing to an almond shape and pushing back cuticles, then apply a thin base coat and cure. Paint all nails with two coats of cranberry gel, curing fully between coats. With a striping brush, paint a super thin French line about 1-2 mm wide at the free edge, then blend it slightly into the tip with micro gold shimmer gel. Finish with a high-gloss top coat and cap the free edge on every nail. Add the one tiny gold dot near the cuticle on your ring finger only so the set has a focal point.
When you do the French line, hold your brush parallel to the nail so the line stays even. Cure a little longer than you think you need so the shimmer doesn’t smear under top coat.
Avoid thick glitter tips — they create ridges that catch on sleeves and look messy in daylight.
2. Forest Green Velvet Base with White 'Sweater' Stripes
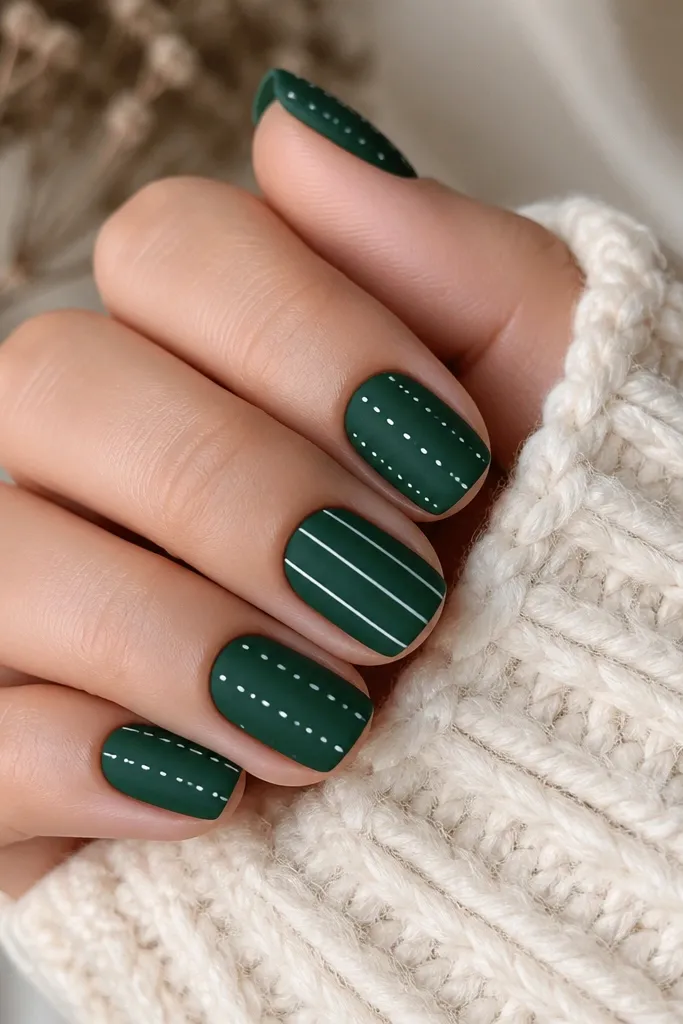
This design looks expensive because it mimics knit texture without actually needing fabric. The forest green reads rich in winter light, and the matte-velvet finish makes it feel cozy and styled. White stripes give a crisp contrast that makes the hands look tidy even when the nail beds are shorter. It flatters wider nail plates because vertical lines visually slim and lengthen. If you have warm undertones, the green still works — the key is using a true forest green, not a bright emerald.
Start with a matte-velvet gel base in forest green (two coats for full coverage), curing each coat. Use a striping brush and thin white gel to paint 2 narrow vertical stripes per accent nail, about 1-1.5 mm apart, starting just above the cuticle line and stopping 1-2 mm from the free edge. Add tiny white dot “knots” between the stripes on one nail only to break up the pattern. Cure again, then seal with a matte top coat for the velvet effect on most nails, but use a glossy top coat on just the stripe nails for a luxe contrast.
Editor's noteDo the stripes after your base is fully cured and cool; warm gel strings can look uneven. Clean up the stripe edges with a flat brush dipped in gel cleanser.
Skip thisSkip thick lines — wide stripes look childish fast on short nails.
3. Champagne Nude Base with Brown 'Bauble' Half-Moons
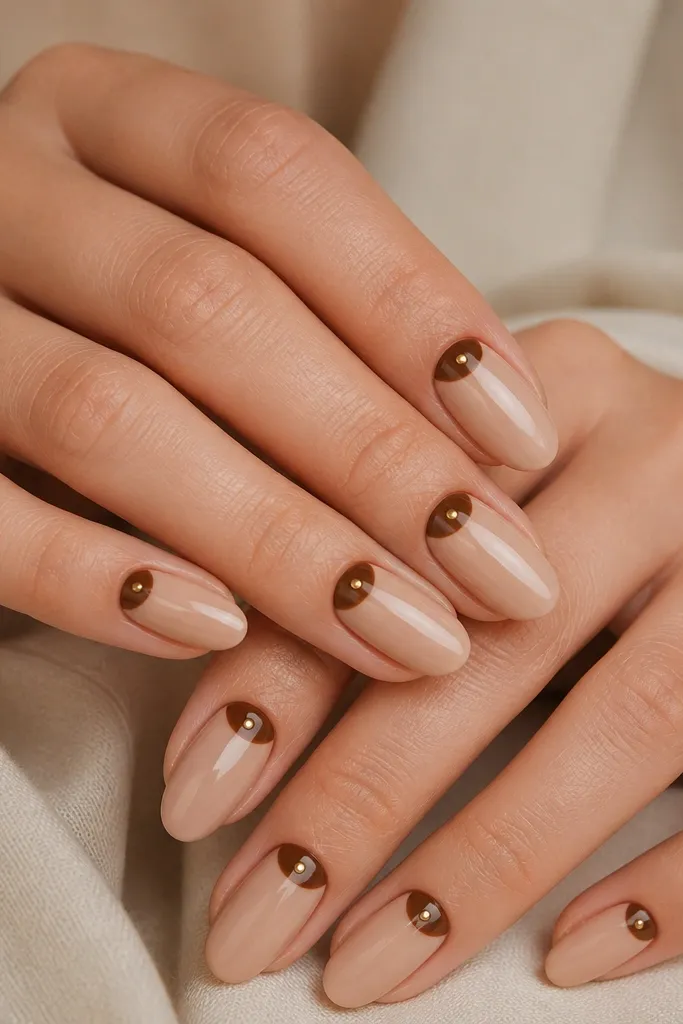
This is for when you want winter christmas nails aesthetic expensive look but you don’t want obvious red and snow everywhere. The champagne nude makes your nails look longer and cleaner, and the brown half-moons look like hanging ornaments without needing to paint full circles. The tiny gold dot gives the same effect as a real ornament cap, which reads polished in photos. It flatters almost every skin tone because the nude base sits in the “your nails but better” zone. If your hands get dry in winter, this one also hides small texture because the nude base is forgiving.
Start by picking a champagne nude close to your natural nail color, then apply two thin coats and cure. For the half-moons, use a fine liner brush and glossy chocolate-brown gel, placing the arc right at the cuticle and leaving a clean gap between the half-moon and the sidewalls. Add one tiny gold dot in the center of each half-moon using a dotting tool or the back of a bobby pin. Cure and then top coat everything with a thick, glossy layer for the “glass ornament” look. Keep the half-moons on two nails per hand so the set stays classy.
Editor's noteIf your nude base looks too pale, mix in a drop of light pink nude polish so it matches your skin undertone. Cap the half-moon edges with top coat so they don’t peel.
Skip thisAvoid painting full baubles — circles are where at-home manicures usually look wobbly.
4. Black Velvet Night Nails with Silver Star Dust
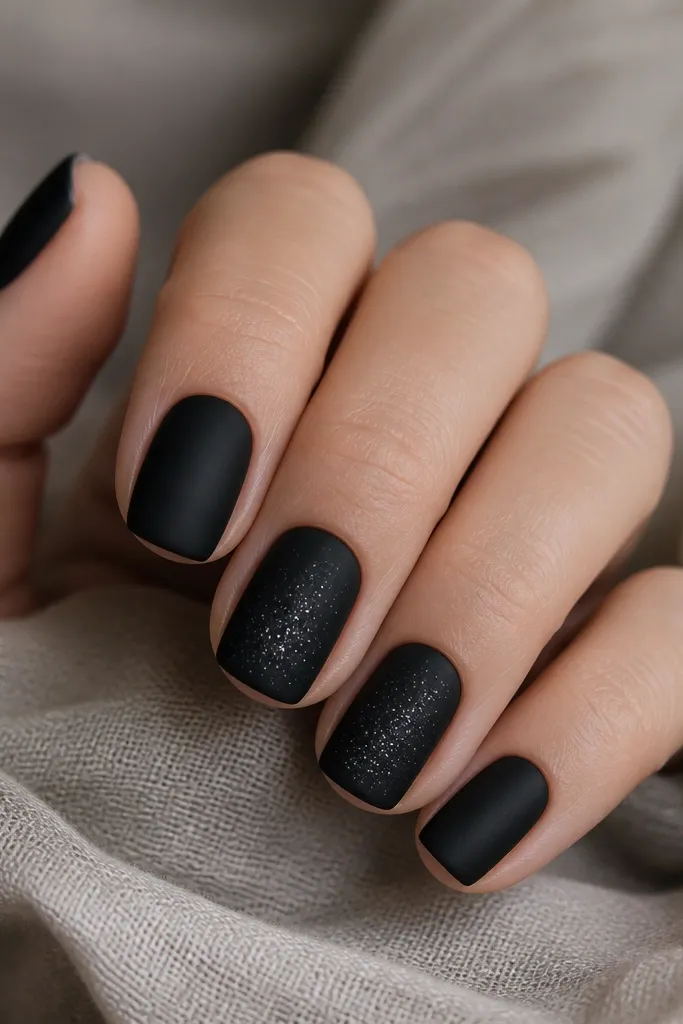
Black winter nails can look chic instead of goth when you pair matte with fine shimmer. The velvet matte hides minor surface imperfections, and the silver star dust looks like frost without chunky sparkle. This set flatters shorter nails because the shimmer is concentrated in the middle, which visually lifts the nail rather than widening it. For fair skin, the contrast makes your hands pop; for deeper skin, the matte black looks sleek and expensive. It’s also great for holiday parties where you’re wearing dark outfits.
Paint all nails with two coats of deep black matte gel, curing between coats. On two accent nails, apply a sheer black-to-clear gel layer in the center, then tap fine silver shimmer over it so it fades at the edges. Use a small sponge to dab the shimmer lightly — start with less and build. Cure, then seal with matte top coat on the black nails and a glossy top coat only over the shimmer area so it looks like it’s catching moonlight. Clean the cuticle line with a cotton swab before curing.
Editor's noteUse a makeup sponge for star dust — it prevents glitter from clumping into dots. If shimmer looks patchy, add one more thin sheer layer and re-tap.
Skip thisAvoid silver flakes or big glitter — they look like craft glitter on black.
5. Negative Space 'Mistletoe' V- French
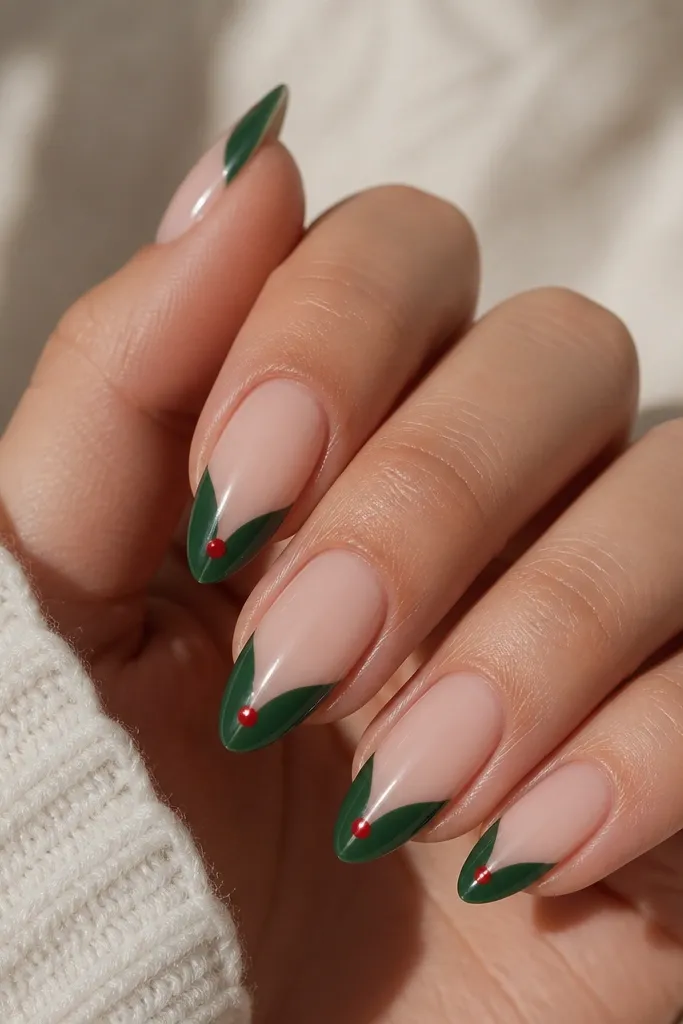
This one is clean and expensive-looking because the negative space does the work. The V shape makes the nail look longer and more sculpted, and the deep green reads holiday without needing a full pattern. The tiny red dot at the tip is like a berry — it gives the Christmas signal while staying minimal. It flatters all nail lengths, but it’s especially good if your nails are short because the V creates a visual lift. On warm or neutral undertones, the green looks crisp next to skin.
Apply a sheer nude base (one thin coat, cure, then add a second if needed). With a striping brush, paint deep green gel on both sides of the nail tip, leaving a sharp V-shaped gap in the center — aim for symmetry. Make the green tips meet about 1-2 mm from the free edge so the negative space stays intentional. Place one tiny red dot at the center of the V apex using a dotting tool, then cure. Top coat with a glossy layer, keeping the center negative space clean and unpainted.
Editor's noteLet the green lines dry slightly before placing the red dot; wet gel makes dots slide. Use nail tape to guide the V if you’re nervous about symmetry.
Skip thisAvoid filling the negative space — keeping it clear is what makes it look designer.
6. Powder Blue Snow Tip Fade with Clear 'Frost' Topcoat
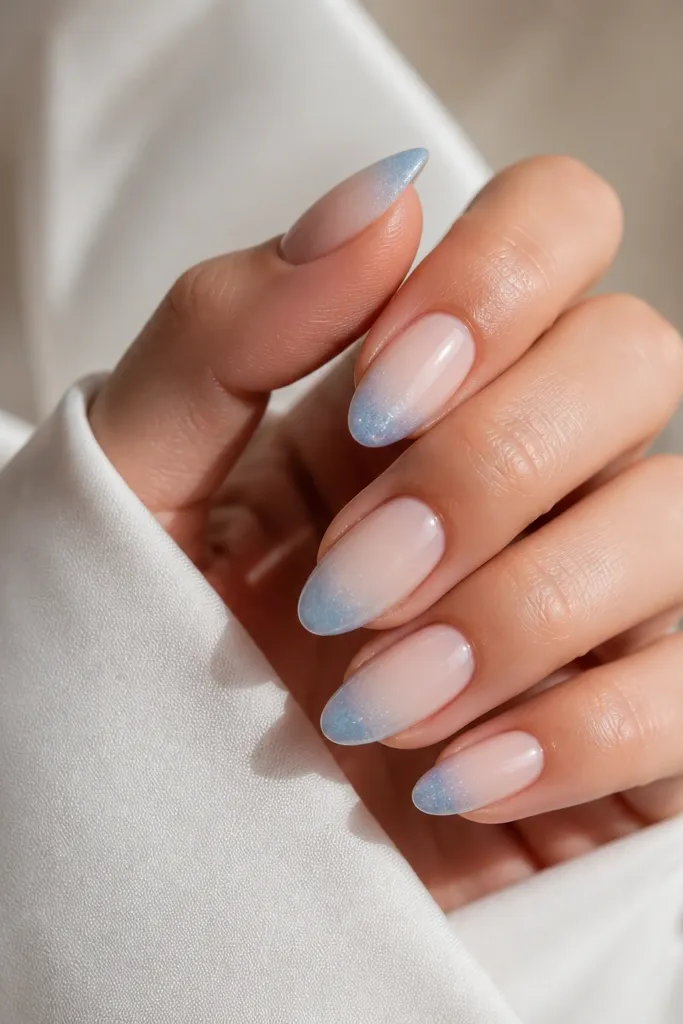
Powder blue reads winter instantly, but it looks expensive when the fade is smooth and the finish feels icy, not glittery. The milky nude base makes your nails look healthy and bright, and the tip fade creates dimension that photographs well under warm indoor lighting. The clear frost topcoat over the tips makes it look like frozen glass, which is the “expensive” trick. This flatters short hands because it brightens without adding heavy color blocks. If you have cool undertones, it looks extra harmonious; if you have warm undertones, the milky base keeps it from looking harsh.
Start with a milky nude gel base, then cure. For the fade, use an ombre sponge and powder blue gel to build color at the free edge — dab lightly and blend upward so the transition is invisible. Keep the fade narrow on short nails (about 2-3 mm) and wider on longer nails (4-5 mm). Once the fade is cured, apply a clear “frost” or crystal-clear gel only over the blue tip area, not the whole nail. Cure and finish with a glossy top coat over the frosted area so it looks like glass.
Wipe your sponge on a paper towel between dabs so you don’t get harsh bands. Cure each layer fully before adding the next so the fade stays smooth.
Avoid straight-line tips — a hard edge makes fades look cheap.
7. Red Velvet Base with One Clean Snowflake on the Ring Finger
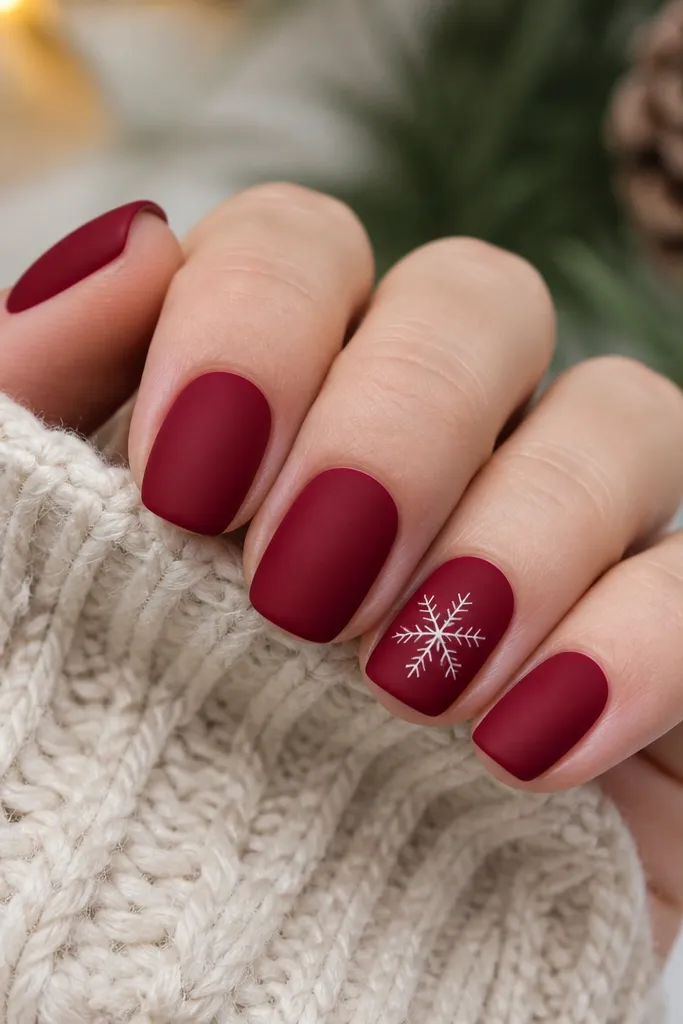
This is the holiday set I reach for when I want Christmas nails aesthetic expensive look without the “all-over holiday” chaos. Velvet red makes the manicure look richer than regular glossy red, and matte hides tiny imperfections. One snowflake on the ring finger is enough to read as winter, while the rest of the nails stay calm. It flatters short nails because the snowflake is centered and thin, so it doesn’t crowd the cuticle. It also looks great on medium to deep skin because the red doesn’t get washed out.
Apply a velvet-matte red gel in two thin coats and cure. Use a nail art brush to draw a snowflake on only your ring finger, placing it slightly above the center so it doesn’t touch the cuticle. Make the lines thin: six skinny arms with small branches at the ends, then add two tiny dots between arms for extra detail. Cure, then top coat all other nails with matte top coat and seal the snowflake nail with matte top coat as well, but do a light glossy top coat over the snowflake only if you want it to pop in photos. Clean edges with a small brush and gel cleanser before curing.
Editor's notePractice the snowflake on a scrap nail or swatch first — thin lines are all about control. If your snowflake looks thick, remove and redraw rather than covering it.
Skip thisAvoid multiple snowflakes per nail — they turn into a pattern instead of a focal point.
8. Gold Foil Cuticle Halo with Sheer Nude and Tiny Red Berry Tips
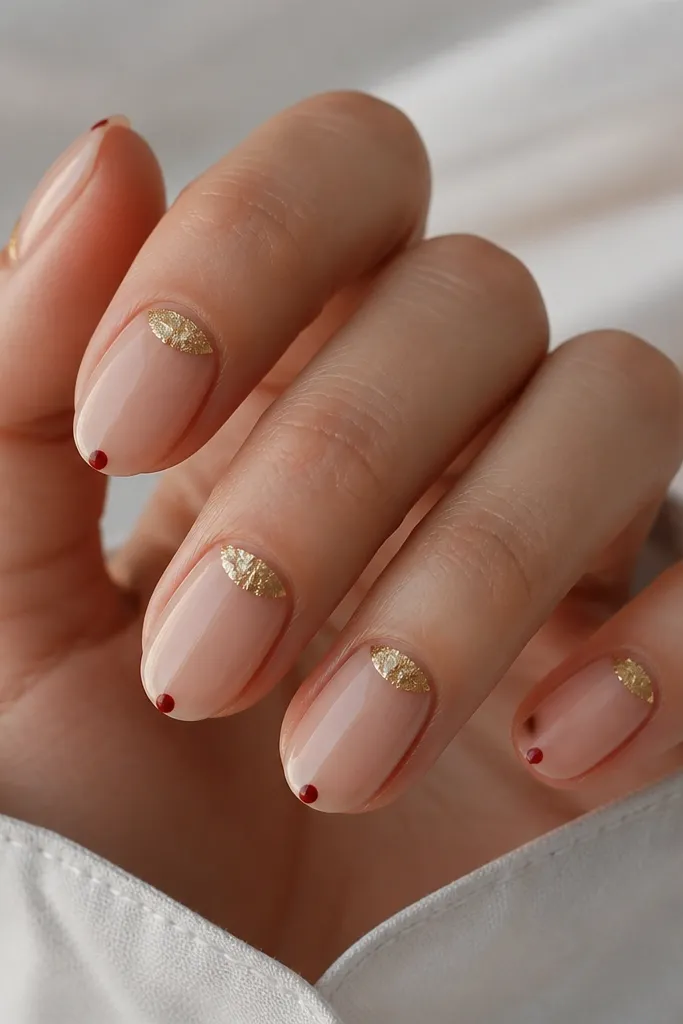
This design looks expensive because gold foil at the cuticle creates instant light without needing heavy artwork. The sheer nude keeps it wearable, and the tiny red berry at the tip tells you it’s Christmas without covering the whole nail. Gold foil also flatters different nail shapes because it sits near the cuticle, where the eye naturally rests. It works especially well if your nail beds are short since the sheer base visually lengthens. On fair skin, the foil adds warmth; on deeper skin, it adds a high-end contrast that still feels festive.
Start with a sheer nude base gel, cure it fully. Apply a thin layer of tacky gel or foil adhesive around the cuticle area — leave a small clean strip at the sidewalls so it doesn’t flood. Press gold foil pieces just into that cuticle zone and tap off excess with a dry brush. Then add one tiny red dot at the center of the free edge on each nail, and drag a second smaller dot slightly upward to make it look like a berry. Cure and finish with a smooth top coat, focusing on sealing the foil edges so they don’t lift.
Use foil adhesive sparingly; too much makes foil smear and look cloudy. Seal with two thin top coat layers instead of one thick layer.
Avoid putting foil across the whole nail — it looks flat and messy fast.
9. White Marble Tips with Green Micro Lines
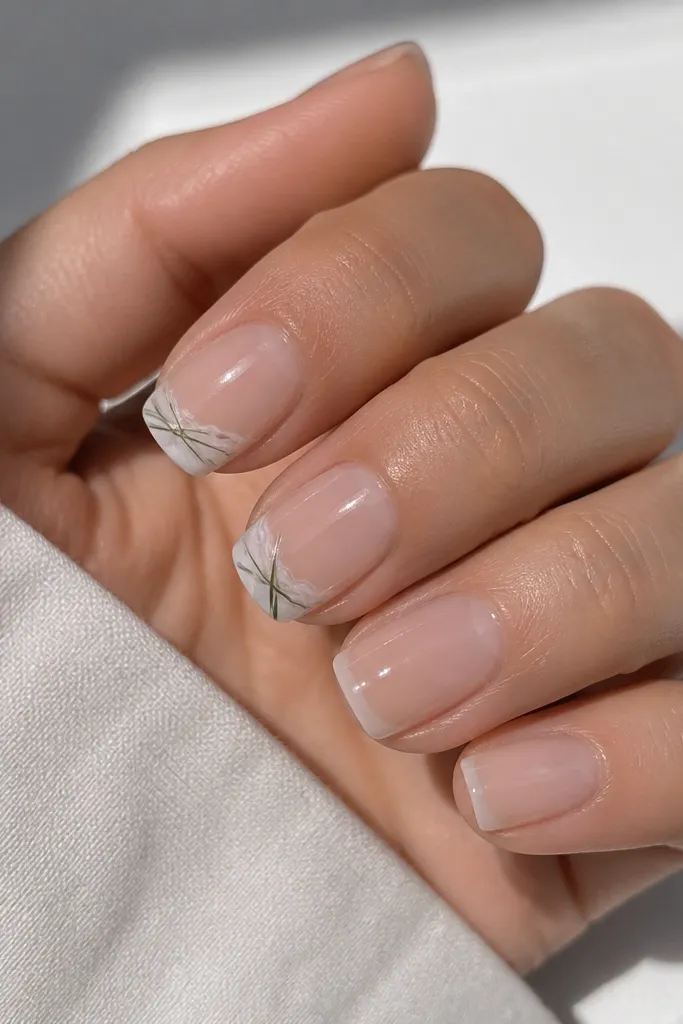
Marble tips look expensive when they’re controlled — not a full nail mural. The clear base keeps the design modern and light, and the white marble swirls create that “designer gel” look without clutter. Green micro lines add a mistletoe vibe while staying delicate enough for everyday wear. This flatters short nails because the marble effect stays at the tip, and the clear base keeps the nail from looking too heavy. It also works on any skin tone since you’re using neutral clear and crisp white.
Apply a sheer clear or jelly nude base, cure. On accent nails, sponge or brush on a translucent white at the tip, then use a thin brush to drag a few swirls through it with white gel. Keep the marble lines thin and spaced; you’re aiming for 3-5 swirls total, not a full network. Add green micro lines by drawing one thin diagonal line and one tiny cross line near the marble — keep them under 1 mm thick. Cure and top coat everything glossy, then wipe the brush clean often so the marble doesn’t get muddy.
Use a slightly translucent white for marble; opaque white makes it look like paint, not marble. If swirls look too strong, soften by adding a thin clear gel layer.
Avoid thick marble blobs — they look like frosting.
10. Champagne Glitter Half-Moons with Red Line Detail
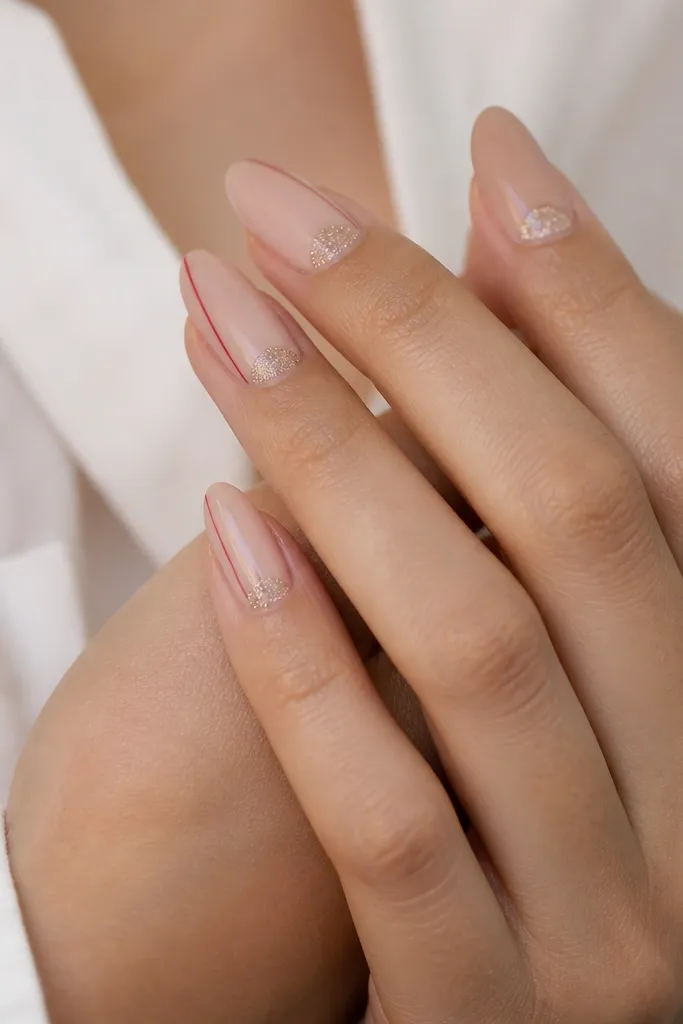
The trick here is placement. Champagne glitter in a half-moon at the cuticle looks like expensive nail jewelry, and it doesn’t overwhelm your nail bed. The sheer champagne base keeps it classy, while the fine glitter reads smooth and light-catching instead of rough. The thin red line detail adds Christmas energy without turning the whole set into a red-and-green theme. This flatters both short and medium lengths because the half-moon creates a lift at the base. On fair skin it looks glowing, and on deeper skin it looks like polished holiday chrome without being too loud.
Start with a sheer champagne nude base gel, cure. For the half-moons, use a small curved detail brush to paint a translucent gel shape at the cuticle, then press fine champagne glitter into it. Keep the half-moon about 2-3 mm tall so it doesn’t cover too much nail. On one accent nail per hand, draw a thin diagonal red line using a striping brush, starting near one sidewall and ending near the center — keep the line narrow. Cure and seal with a glossy top coat that fully smooths over the glitter so it feels even when you run your finger over it.
If the glitter feels gritty, add a second thin top coat layer and cure again. It makes the surface feel salon-smooth.
Avoid big chunky glitter half-moons — they catch light unevenly and look lumpy.