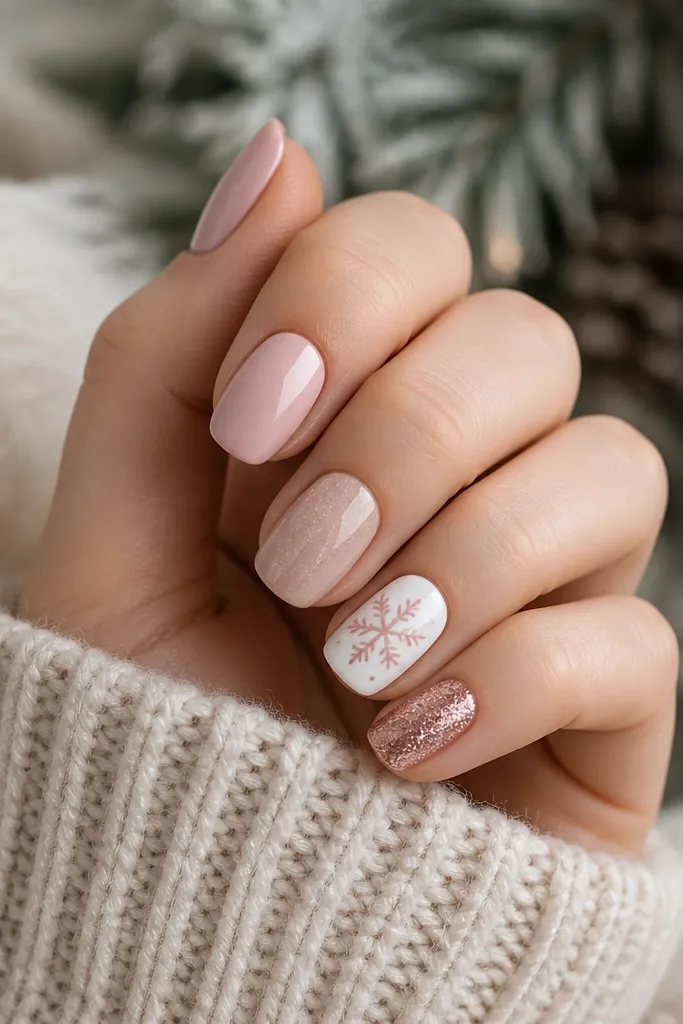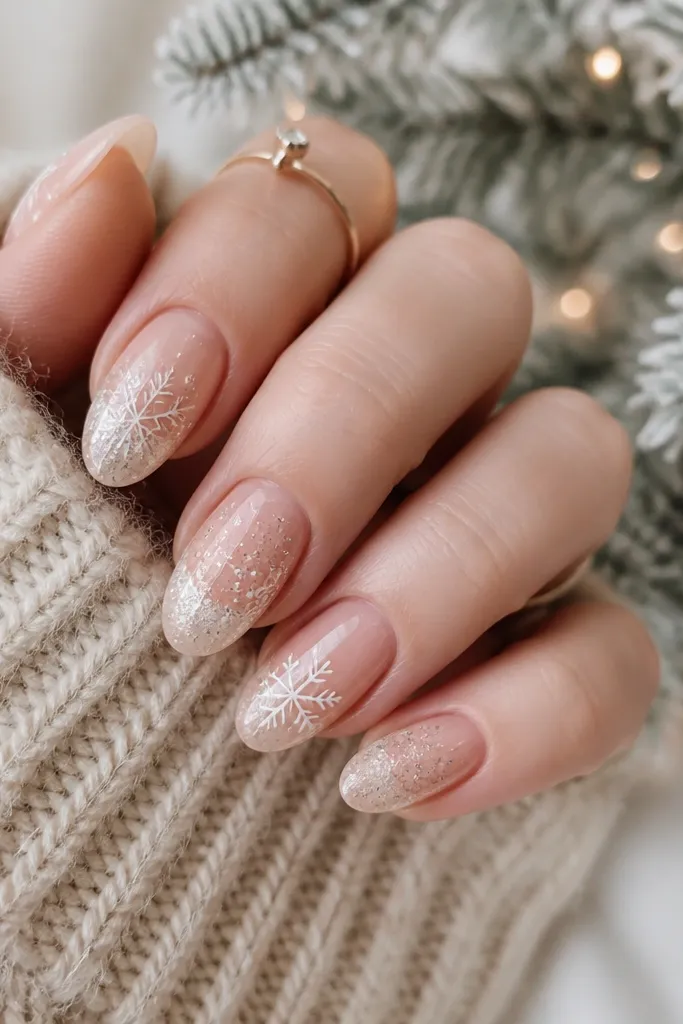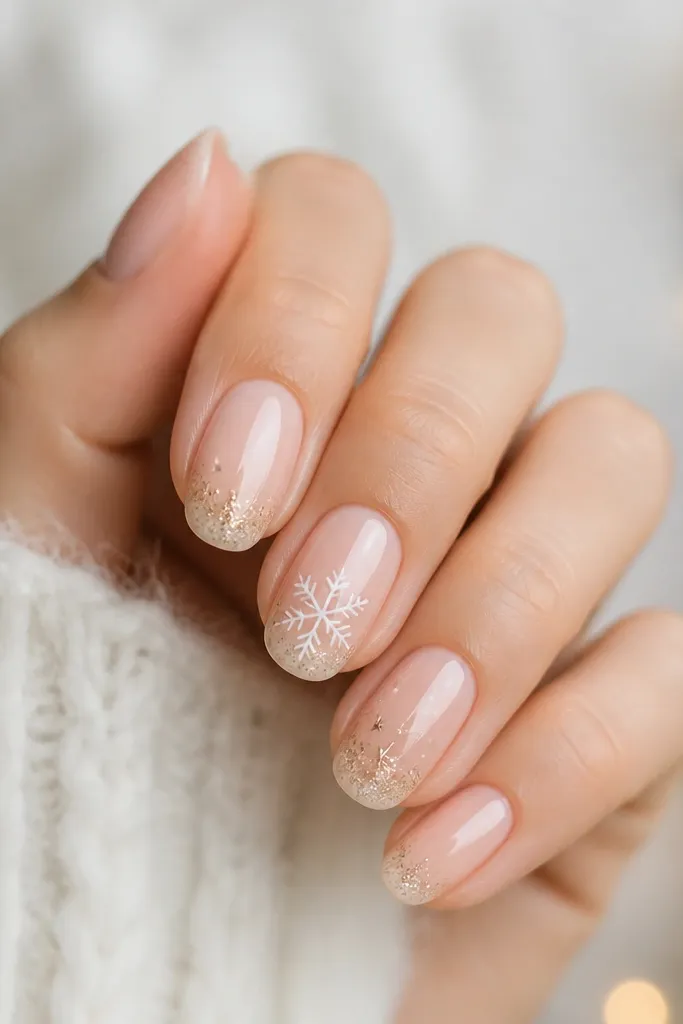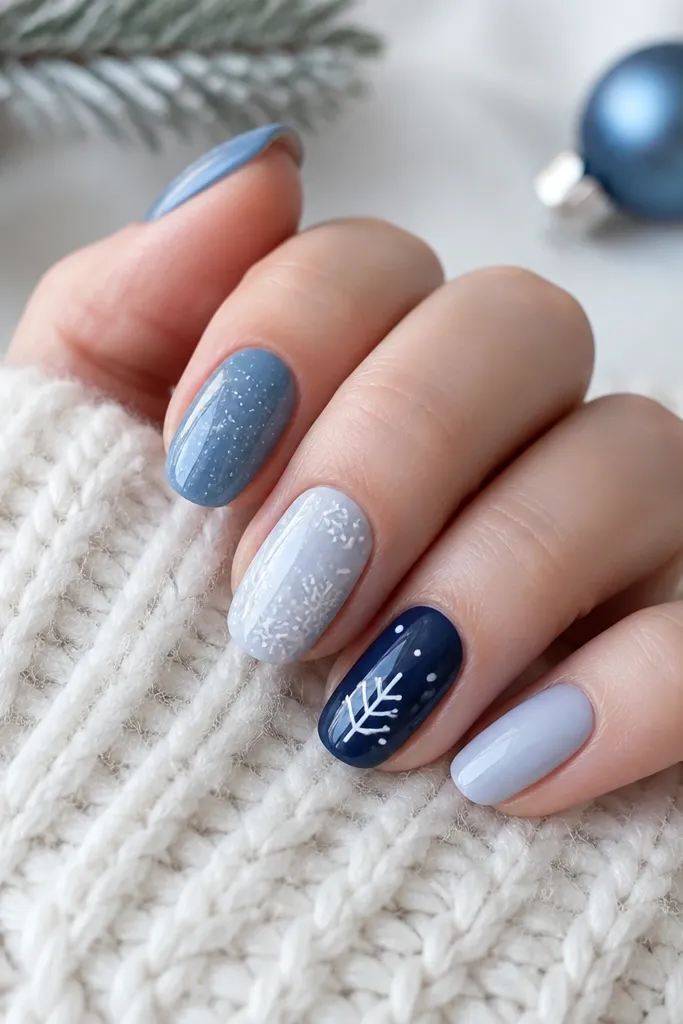
1. Sheer Frost Nude Half-Moons
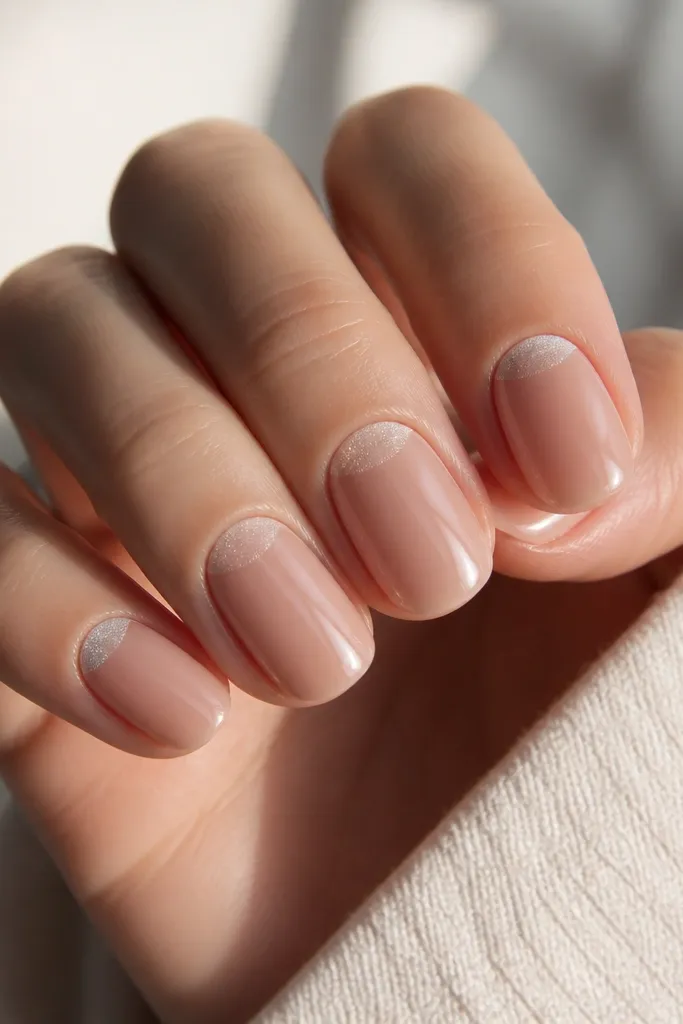
First, prep and buff your nails lightly, then apply a sheer nude gel base in two thin coats, curing each coat fully. Next, use a small half-moon stencil or freehand with a gel brush to paint a frosted white shimmer at the cuticle — keep it about 2 mm tall so it stays subtle. Clean the edges with a lint-free wipe and a tiny brush dipped in cleanser. Finally, seal with a glossy topcoat for a smooth glass finish.
This is my go-to winter Christmas nails year round all year look because it reads like “winter air” instead of full holiday glitter. Start with a sheer nude gel that matches your natural nail — I use a milky pink-beige so it looks healthy, not washed out. Then add a frosted white half-moon at the cuticle with a fine shimmer so the light catches when you move your hands. It flatters almost every skin tone because the colour sits close to your nail bed, and the contrast is gentle. Wear it for work, brunch, and even a low-key date night.
Skip thisAvoid using chunky white glitter for the half-moon — it makes the cuticle area look gritty fast.
Editor's noteIf your half-moon looks too opaque, thin the shimmer with a clear gel so you keep the frosty effect without blocking the nude.
2. Classic Red Micro-French Tips
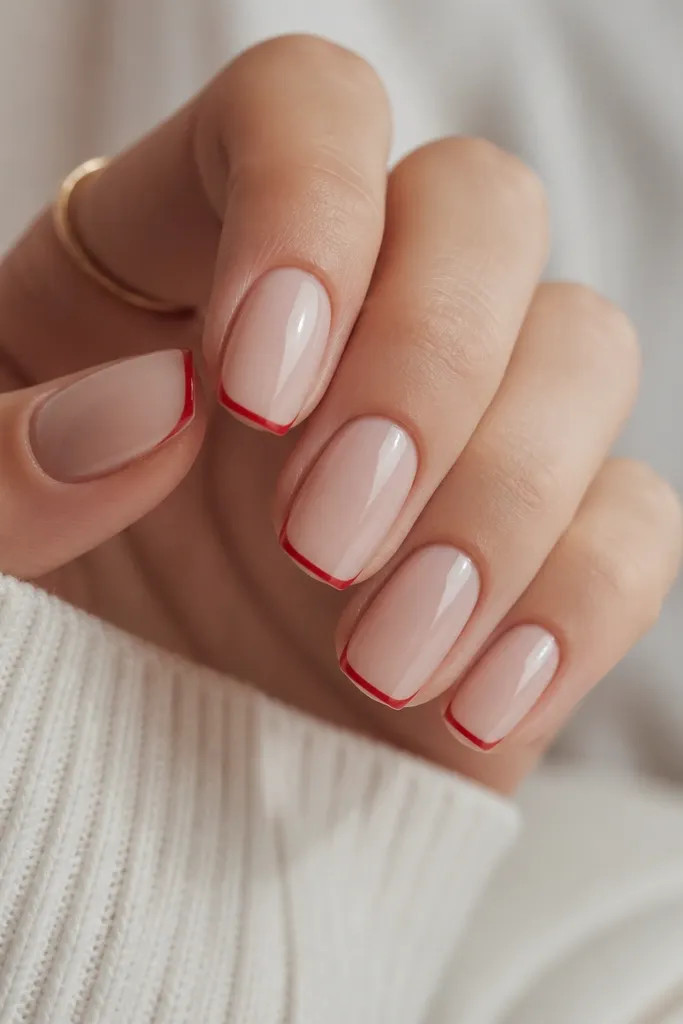
This design gives you the winter Christmas vibe without turning your nails into a holiday billboard. The anchor is classic red (not brick, not burgundy), and the holiday detail is a micro-French tip that stays light. I recommend a sheer nude base because it makes the red look brighter and more wearable in daylight. On fair skin it keeps your nails from looking too stark; on deeper skin tones it pops cleanly without needing extra sparkle. It also looks great with short to medium lengths because the line is thin.
Start by painting a sheer nude base in two coats, curing after each. Place striping tape about 1.5-2 mm from the free edge to create a micro-tip line, or use a very thin liner brush if you’re steady. Paint the exposed tip area with classic red gel, cure, then remove tape while the gel is still fully cured. Finish with a glossy topcoat, making sure the tip is sealed so it doesn’t catch on sweaters.
Keep the red line slightly curved to match your smile line — straight tape edges look mechanical.
Don’t go thicker than 2 mm for the tip or it stops reading “micro” and starts reading “overdone.”
3. Candy Cane Diagonal Stripe Accent
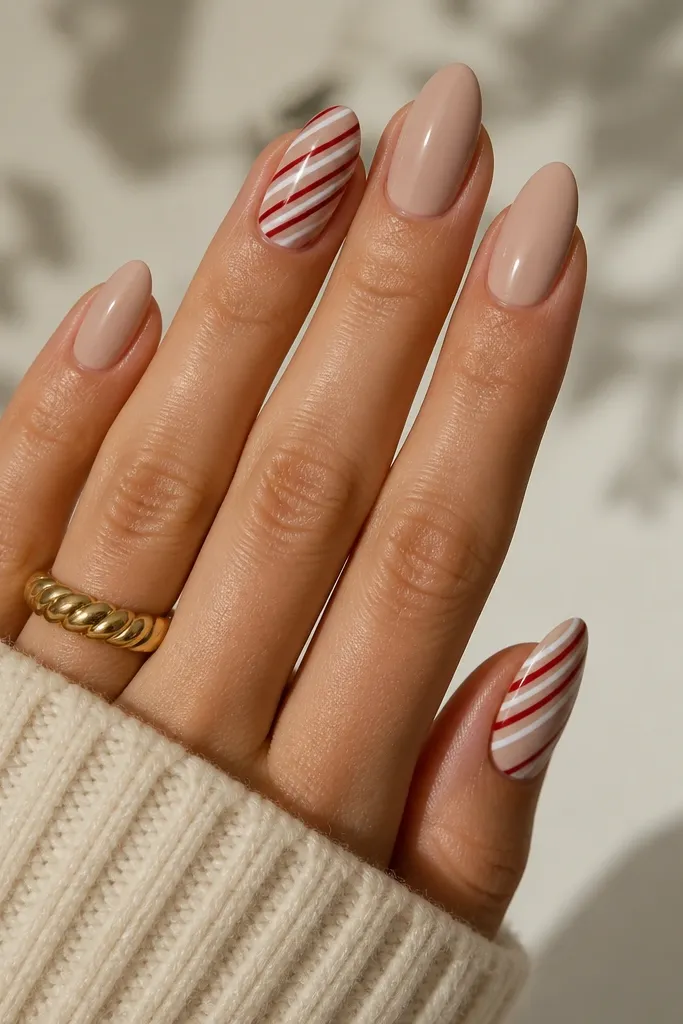
Candy cane stripes are instantly winter Christmas, but they can look childish if you cover every nail. This version keeps it grown-up by using diagonal stripes on just one or two accent nails and leaving the rest nude and glossy. The stripe itself is thin and crisp: white stripe next to red stripe with a clean negative space edge. It flatters long almond nails because the diagonal line lengthens the finger. For shorter nails, place the stripe slightly higher so it doesn’t squash your nail bed.
First, apply a creamy nude gel base in two coats and cure. Then on the accent nails, use striping tape to block a diagonal path from about 1/3 up the nail to the tip, leaving a narrow channel for the stripe. Paint the channel red, cure, remove tape, then cover the adjacent side with white gel and cure again. Finish by topcoating everything — two coats if you want the stripe to feel smooth under your fingers.
If you’re using tape, press it down firmly at the sidewalls so the stripe edges don’t bleed.
Avoid thick stripes — they look like nail art stickers instead of gel polish.
4. Frosted Silver Glazed Over Nude
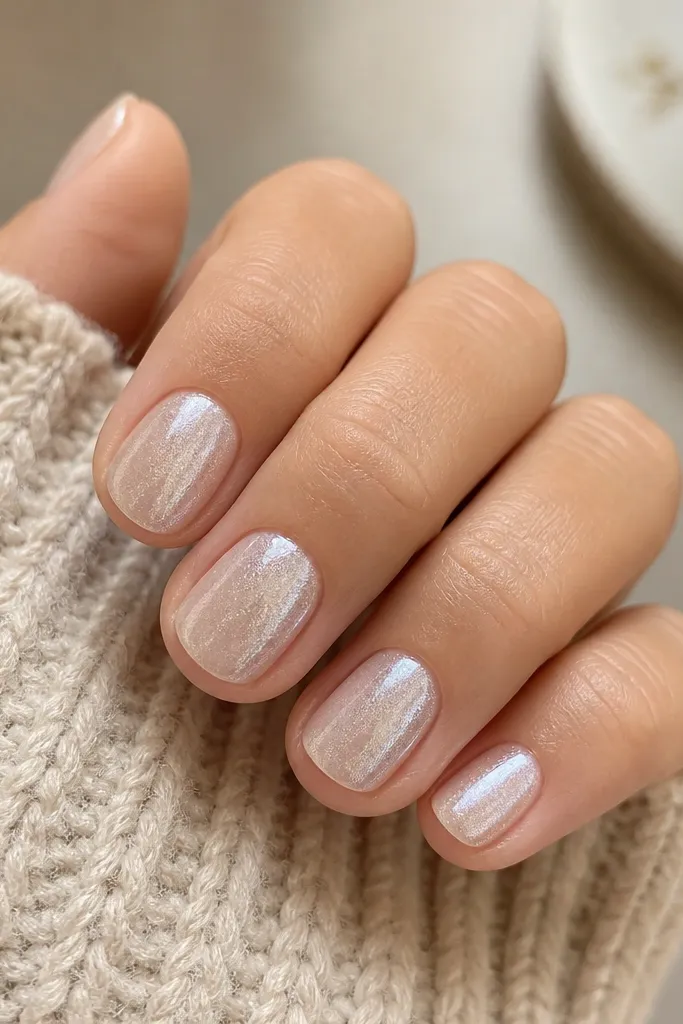
This is the winter Christmas nails year round all year pick for people who hate glitter fallout. The trick is using a sheer silver “glaze” shimmer over a nude base, not a full-coverage glitter. In person it looks like a frosted window — soft, reflective, and wearable. It works on any skin tone because the shimmer is cool and the base stays close to your natural nail. I like it best on short round and squoval nails because it doesn’t overpower the nail width.
Start with a nude base gel in two thin coats, curing fully. Apply a thin layer of sheer silver shimmer gel over the whole nail — you should still see the nude through it. Cure, then add a second shimmer layer only if you want more frost at the center. Seal with a high-gloss topcoat, keeping your brush strokes straight so you don’t streak the shimmer.
For extra “glaze” effect, use a non-wipe topcoat so the surface stays smooth and reflective.
Don’t use silver glitter topcoats with big flakes — they catch on fabric and look uneven quickly.
5. Deep Berry Velvet Matte with Gloss Stripe
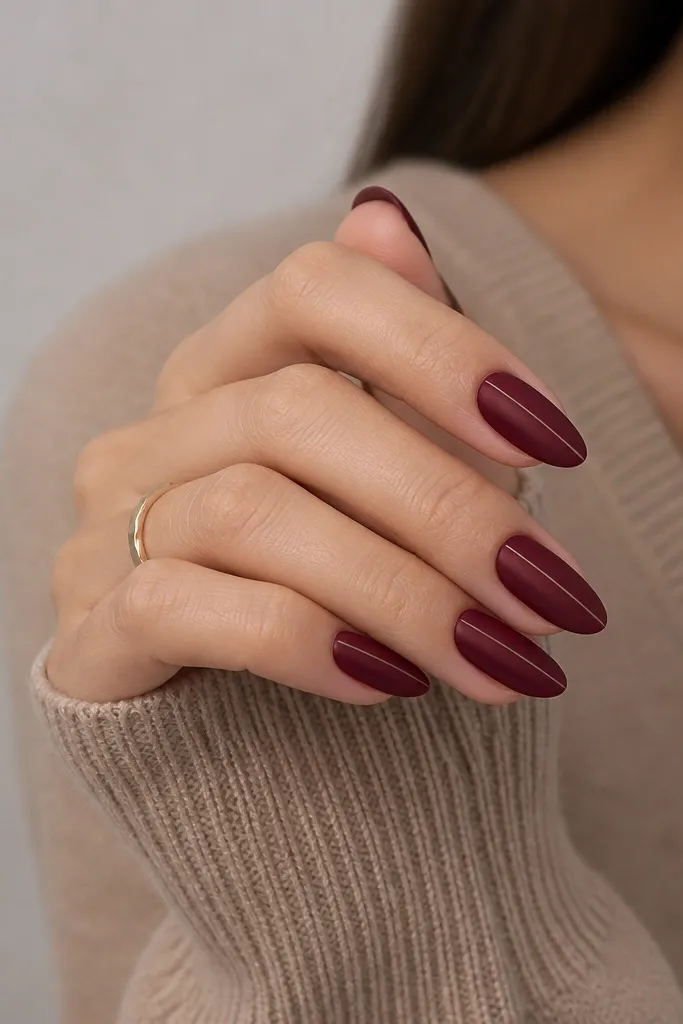
Paint two coats of deep berry gel and cure each coat. Let it cool, then apply a matte topcoat and cure. Using a gel liner brush, paint a thin vertical gloss stripe in the center on top of the matte — about 1 mm wide — and cure. Finish with a second gloss topcoat only over the stripe so the rest stays matte.
If you want winter Christmas nails year round all year but you don’t want sparkle, this is it. Deep berry gives you the holiday mood, and matte makes it feel cozy instead of loud. The one glossy stripe breaks up the matte so it still looks intentional and not flat. I’ve worn this on my own nails during winter and then kept it through spring because berry reads classy year round. It’s especially flattering on medium almond and squoval shapes because the stripe guides the eye down the nail.
Skip thisAvoid uneven stripe width — matte makes flaws more obvious.
Editor's noteUse a liner brush you only use for accents; cheap brushes leave hairs in matte.
6. Red and White Snowflake One-Spot
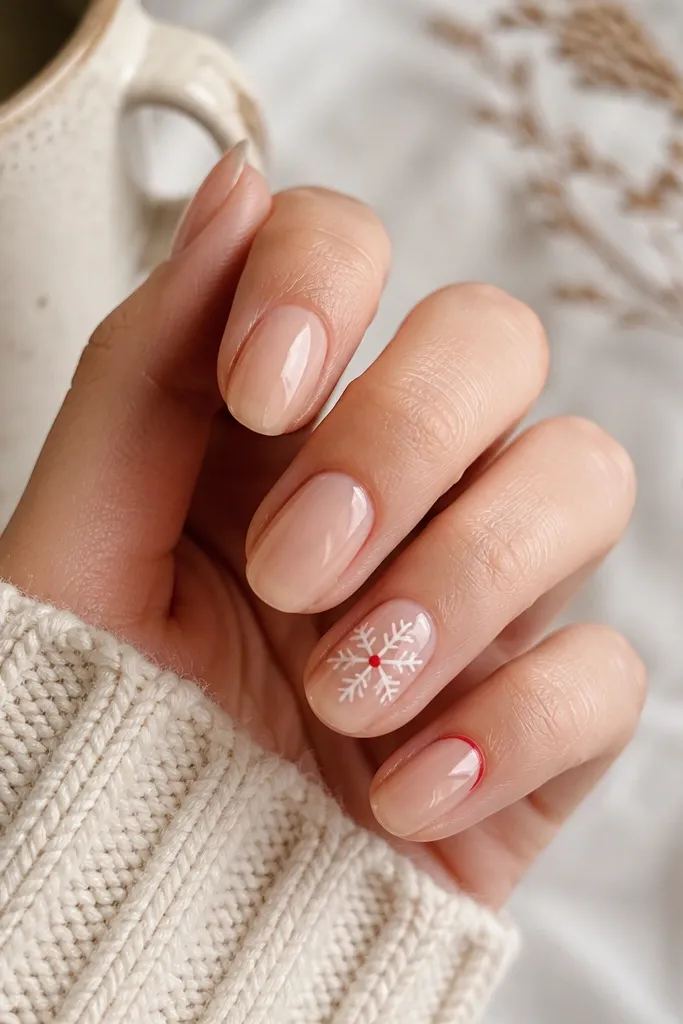
This design is for the minimalist who still wants winter Christmas. The base is sheer nude so it looks clean, and the snowflake is tiny — about the size of a pencil eraser. I use white gel for the snowflake and add one red dot in the center so it reads like a real winter ornament. It works on short nails because the art is small and placed near the center of the nail bed. Fair skin gets a bright contrast; deeper skin tones still pop because the nude base doesn’t wash out.
Start with a sheer nude base in two coats, curing each time. On the ring finger (or index and ring), dot the center with a small red gel dot, cure, then use a dotting tool or thin brush to draw the snowflake arms. Add 6-8 thin lines and tiny side branches, then cure. Topcoat all nails with a glossy finish, keeping the snowflake sealed so it doesn’t snag.
If your snowflake looks messy, draw the “arms” first, cure, then add the tiny side dots after.
Avoid full snowflake coverage — it looks like winter stickers and grows dull fast.
7. Emerald Green Sparkle Sidewall
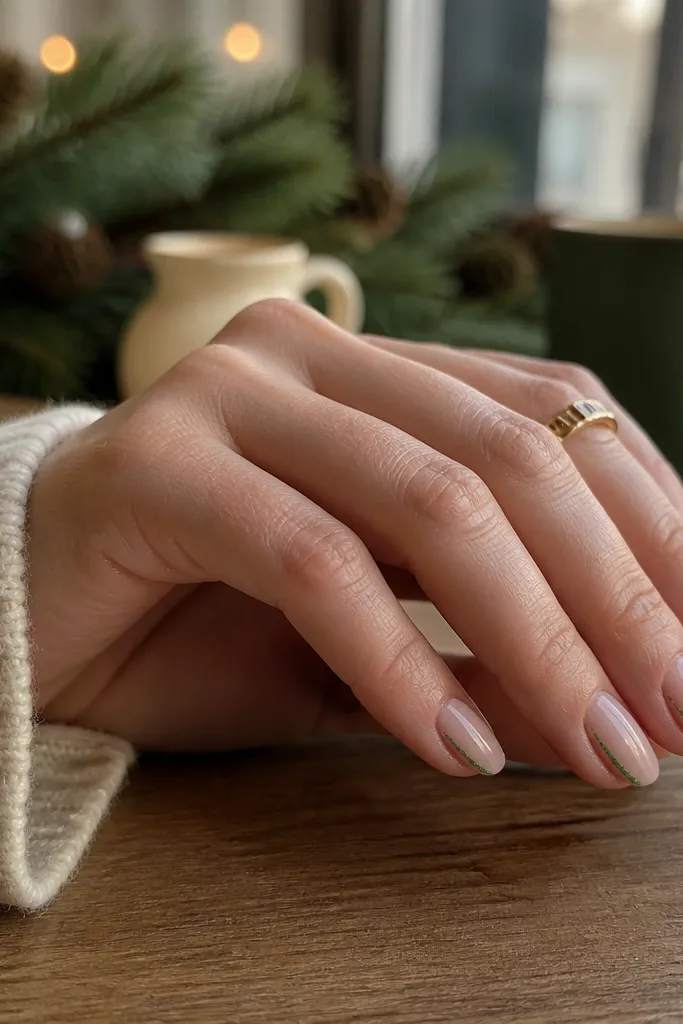
Apply a sheer nude base in two coats and cure. Using striping tape as a guide, place tape along one sidewall about 1 mm in from the edge. Paint a thin emerald micro-glitter gel along the exposed strip, cure, then remove tape. Seal with a glossy topcoat in two thin layers to smooth the glitter ridge and prevent snagging.
Emerald is the winter Christmas colour that feels grown-up to me. This look uses micro-glitter only on the sidewall, so it catches light without covering your whole nail. The nude base keeps it wearable year round all year even in office lighting, and the emerald line adds that holiday punch. It flatters hands with longer nail beds because the side placement makes fingers look slimmer. On shorter nails, keep the glitter line narrow — it keeps things from feeling crowded.
Skip thisDon’t put glitter on both sidewalls — it reads heavier and can look like you tried too hard.
Editor's notePress the sidewall tape flat with a fingertip so the glitter line stays straight.
8. Chocolate Brown Cocoa Chrome
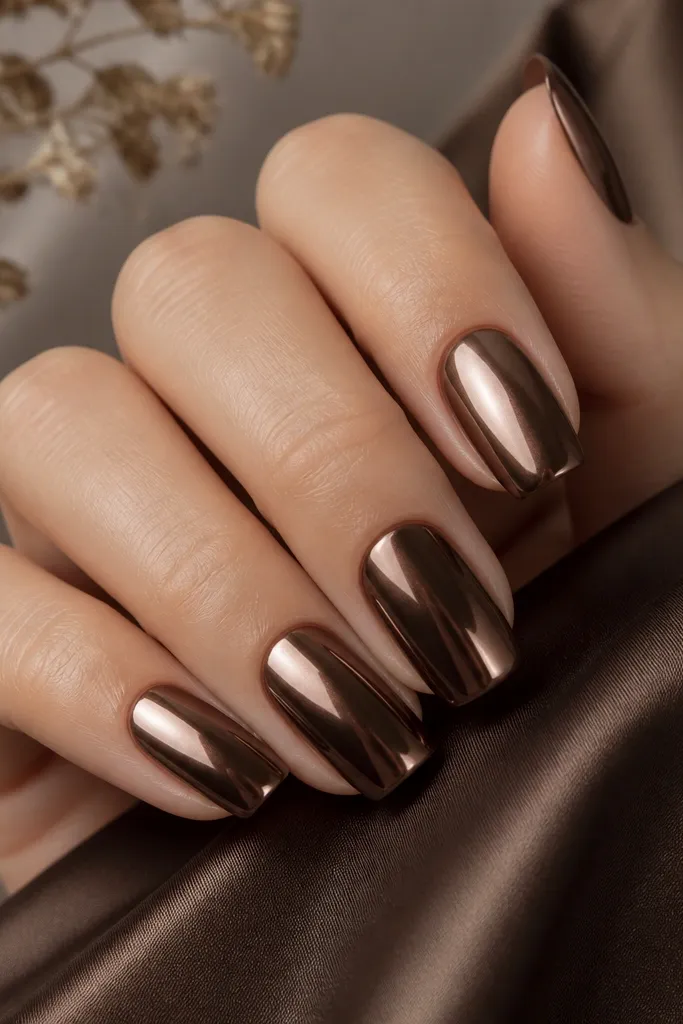
Start with two coats of deep chocolate brown gel, curing fully. Apply a chrome base layer (or a tacky gel layer, depending on your chrome system), then rub cocoa-brown chrome powder over the nail with an applicator sponge. Buff gently to remove excess and even out the reflection. Seal with a non-wipe topcoat made for chrome so you don’t dull the shine.
This is the winter Christmas nails year round all year set for people who want “cozy holiday” without red or green. Chocolate brown looks rich in winter light, and chrome powder gives it that ornament shine. I use a cocoa-brown chrome so it doesn’t turn orange or too gold, and it stays flattering across skin tones. It looks especially good on squoval and almond shapes because the metallic finish highlights the nail curve. It’s also forgiving — even if your base is slightly uneven, the chrome evens the look.
Skip thisAvoid cheap silver chrome on brown — it turns grey and looks muddy.
Editor's noteDo your chrome over a clean surface and wear a mask — the powder gets everywhere.
9. Sheer Red Jelly with Gold Specks
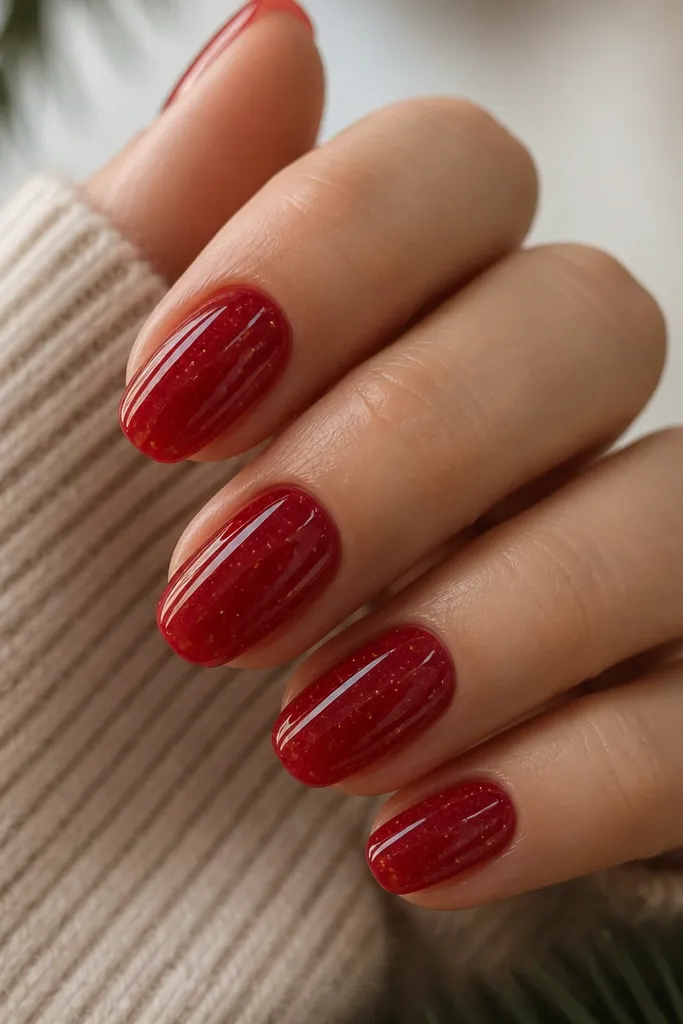
Apply a sheer red jelly gel in three thin coats, curing each time, so the depth builds without turning opaque. While the last coat is tacky, use a small brush to flick on gold micro specks — keep it concentrated near the center and lighter near the edges. Cure, then wipe if your system requires it. Finish with a glossy topcoat that gives you that rounded glass dome.
Jelly red is the secret to making winter Christmas nails year round all year look light instead of heavy. You get the red holiday mood, but the sheer base keeps the overall look airy. The gold specks are sparse — think “tiny lights,” not full glitter confetti. This flatters both cool and warm skin tones because jelly red shifts with your undertone. It also looks great on nails with natural ridges because the jelly finish smooths the visual texture.
Skip thisAvoid big chunky gold glitter — it makes the jelly look lumpy.
Editor's noteFlick specks with an old nail art brush — a new one will spray too much.
10. Winter White Marble Tip
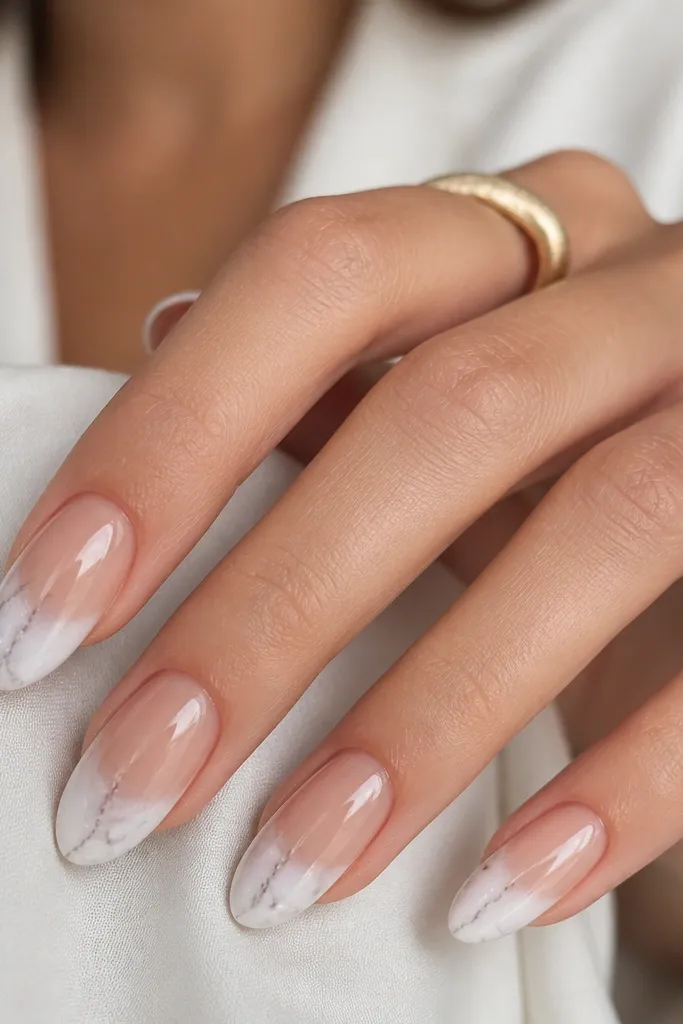
Marble tips feel wintery and expensive, and they’re a great way to do holiday nails without obvious holiday symbols. I keep the marble only on the tip so it stays wearable year round all year. The base is nude to keep your hands looking fresh, and the marble is winter white with grey veining so it doesn’t look like plain snow. This flatters short nails because the effect sits at the free edge and doesn’t crowd the cuticle. For almond and squoval, it looks extra clean because the marble follows the curve.
Start with a nude base in two coats and cure. Place a loose guide with striping tape at the tip area so you only paint the top third. Using a thin brush, paint white gel at the tip, then drag small amounts of grey gel through it with minimal pressure to create veining. Cure and then remove tape, seal with a glossy topcoat, and cap the free edge with extra polish so it lasts.
Practice one marble nail on a plastic swatch first — marble looks best when the veining is thin.
Avoid thick grey blobs — they turn into stains instead of marble.
11. Red Velvet French with Clear Top Coat
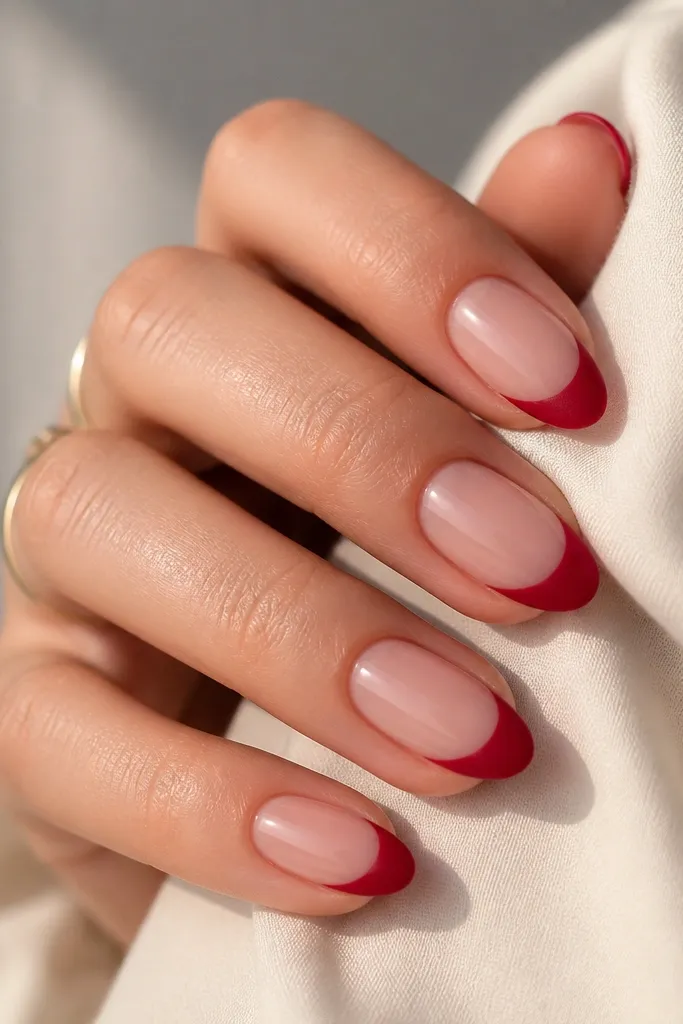
This design is winter Christmas nails year round all year for people who like red but hate full matte sets. You get the holiday cue through a French tip, then the matte finish stays only on the tip so it looks clean and intentional. The glossy nude base keeps your nails looking hydrated and smooth. It flatters short-to-medium nail shapes because the matte tip is crisp and the gloss base adds dimension. If you’re fair-skinned, the nude base prevents red from looking too harsh.
Apply a nude glossy gel base in two coats and cure. Use striping tape for a French line about 2 mm from the free edge. Paint the tip area with matte-finish red gel or apply a matte topcoat just to the tip after curing, then cure. Remove tape carefully and apply a glossy topcoat over the nude base only, leaving the tip matte for contrast.
If you can’t find matte red gel, paint glossy red first and matte-topcoat only the tip with a small brush.
Avoid matte on the entire nail — it makes the set look heavy and grows dull faster.
12. Evergreen Micro-Glitter Cuticle Glow
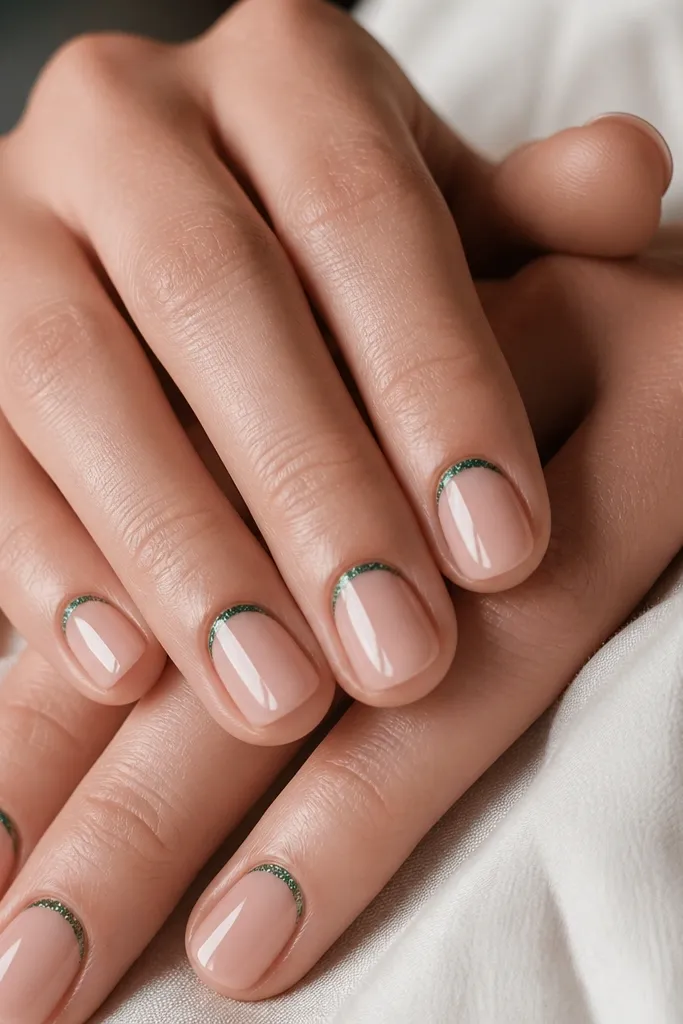
This is my “holiday but office-safe” option because the glitter is only at the cuticle line. Evergreen micro-glitter looks like tiny pine lights when it catches movement, but it doesn’t cover the nail surface. The nude base keeps it clean and makes your hands look put-together without needing nail length or heavy art. It’s flattering on both short and medium nails, and it looks great on everyday skin tones because the glitter band is thin. If you like subtle, this one hits the sweet spot.
Start with a sheer nude base in two coats, curing fully. Use a fine liner brush to paint a 1 mm band of evergreen micro-glitter along the cuticle curve, leaving a tiny gap near the sidewalls so it doesn’t flood. Cure, then clean any edges with a small brush and cleanser. Seal with a glossy topcoat, and cap the cuticle band lightly so it doesn’t lift at the edges.
For a softer glow, mix the evergreen glitter with a clear gel before applying.
Don’t overbuild the cuticle band — thick glitter makes it look like a grown-out mess.
13. Burgundy Diagonal Half-Glitter
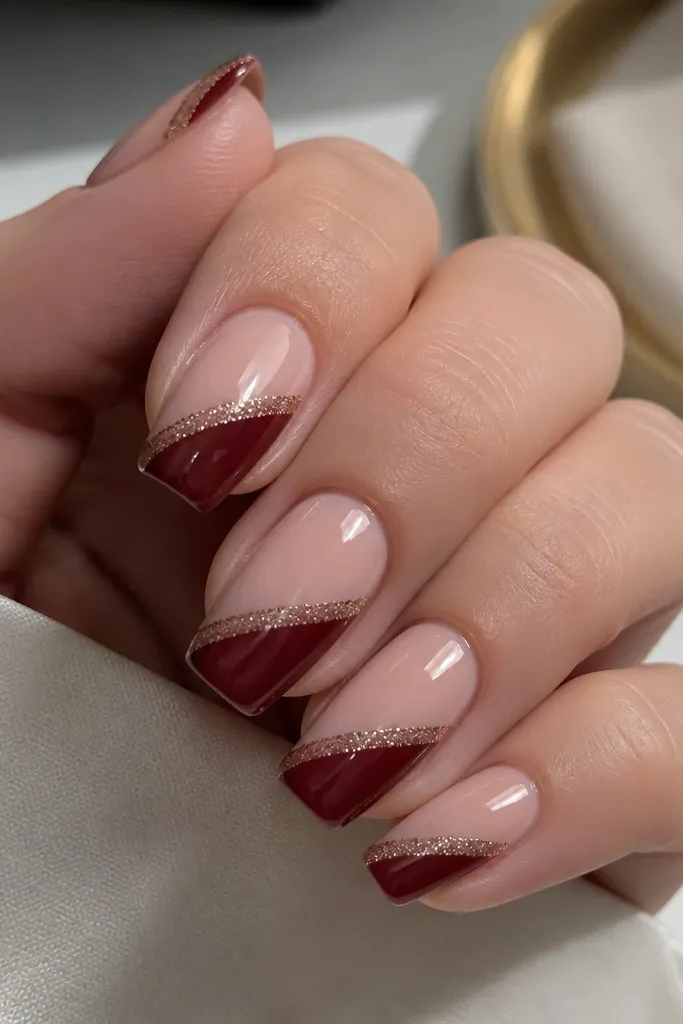
This one looks like holiday lighting in a geometric way. The anchor is burgundy, which reads winter without being the same as classic red. The diagonal panel keeps the design modern, and the glitter edge adds the Christmas feel without covering everything. It flatters medium squoval and almond shapes because the diagonal line creates length. On deeper skin tones, burgundy looks rich; on fair skin, it looks soft and not too harsh when paired with nude.
Paint a sheer nude base in two coats and cure. Place striping tape to form a diagonal line across the nail, starting near the cuticle on one side and ending near the tip on the other. Paint the exposed area burgundy gel, cure, then add a thin glitter gel strip right along the edge of the burgundy panel. Cure again and remove tape, then topcoat all nails glossy to blend the look.
Keep the glitter edge super thin — 0.5 to 1 mm — so it looks like a light reflection.
Avoid a wide diagonal glitter band — it turns into a chunky stripe.
14. Matte Milky Nude with Tiny Red Dot Constellations
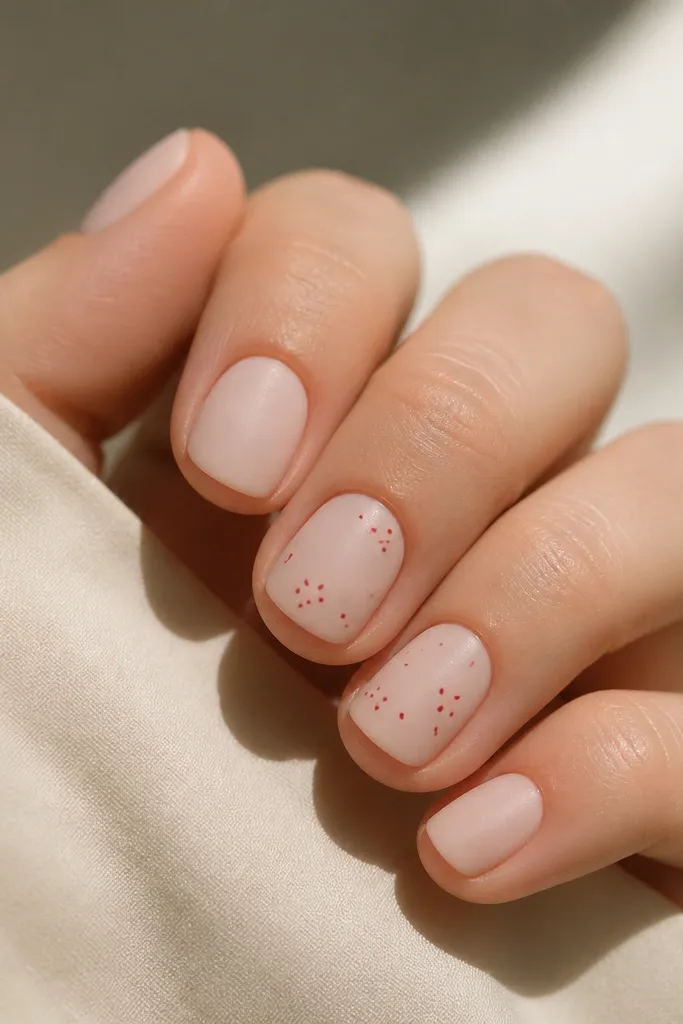
This is the winter Christmas nails year round all year set when you want “holiday mood” without obvious symbols. The matte milky nude base looks like winter fog, and the tiny red dot clusters feel like ornament lights in the distance. I place dots in a small pattern on just two nails, usually the ring and middle finger, so it stays subtle. It looks flattering on short nails because the negative space keeps the nail bed visible. It also looks great on skin tones that get washed out by bright reds.
Apply a milky nude gel base in two coats and cure. Add a matte topcoat and cure fully so the surface looks velvety. Using a dotting tool, place small red dots (pinhead size) in a loose constellation pattern on two nails — 4 to 6 dots per nail. Cure and then topcoat only the dots with a tiny dab of glossy topcoat if you want a little shine against matte.
Use a dotting tool with a super fine tip so your dots stay crisp, not smeared.
Avoid large dots — they look like paint splats on matte.
15. Silver Line Snow Cap on Nude
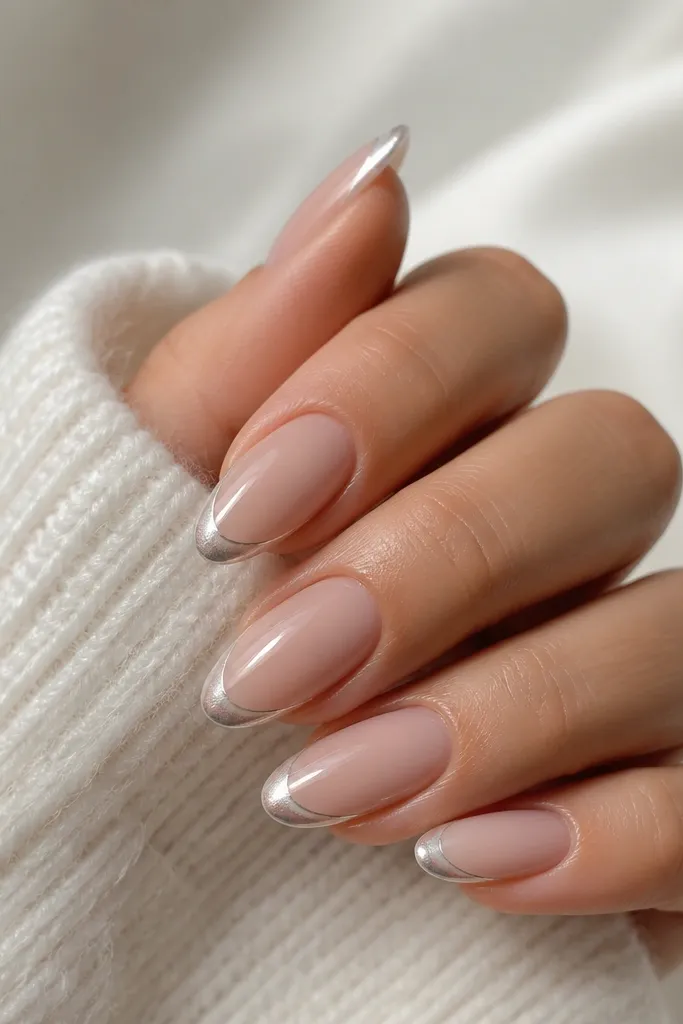
This design gives you a snow-on-the-tip effect that feels winter without needing full snowflakes. The nude base keeps it wearable, and the silver line at the very edge makes your nails look neat even when the design grows out. I like it on almond and squoval because the “snow cap” follows the tip curve. It flatters most skin tones since silver is neutral and the base is close to natural. For year-round wear, it reads like a clean winter accent rather than a holiday theme.
Start with a nude base gel in two coats and cure. Use striping tape to mark a thin guide at the tip edge, then paint a small snow cap shape just under the tape using white-silver shimmer gel. Remove tape and refine the edge with a liner brush. Add a thin silver line exactly at the free edge, cure, then seal with a glossy topcoat and cap the tip for durability.
If your silver line looks uneven, apply it last with a tiny brush and let the gel level itself before curing.
Don’t make the snow cap too tall — if it reaches halfway down the nail, it stops looking like a light dusting.