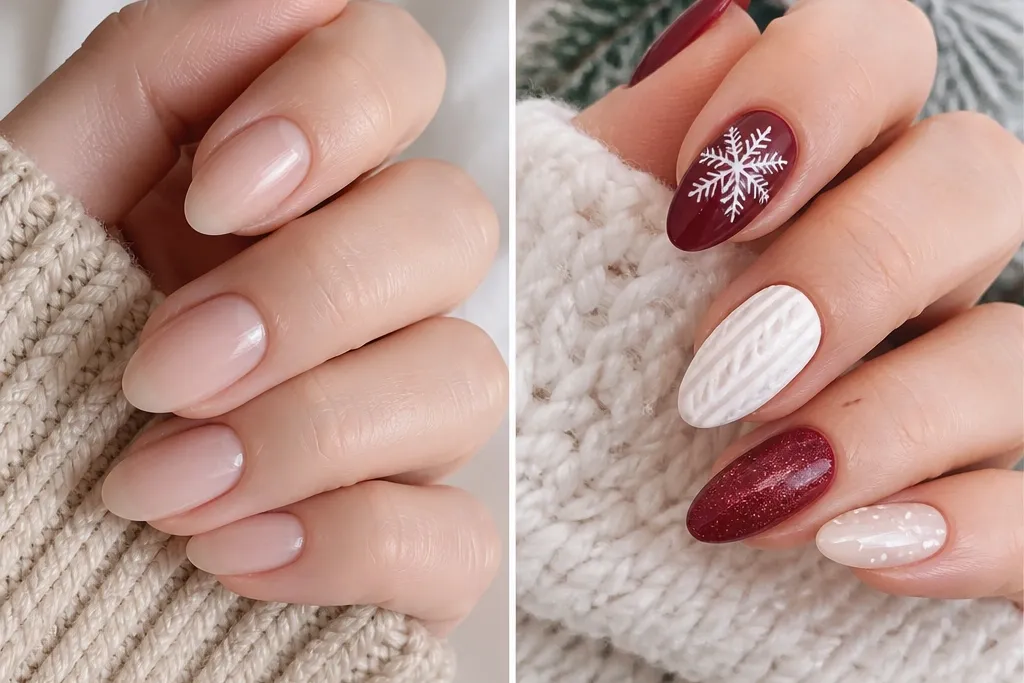
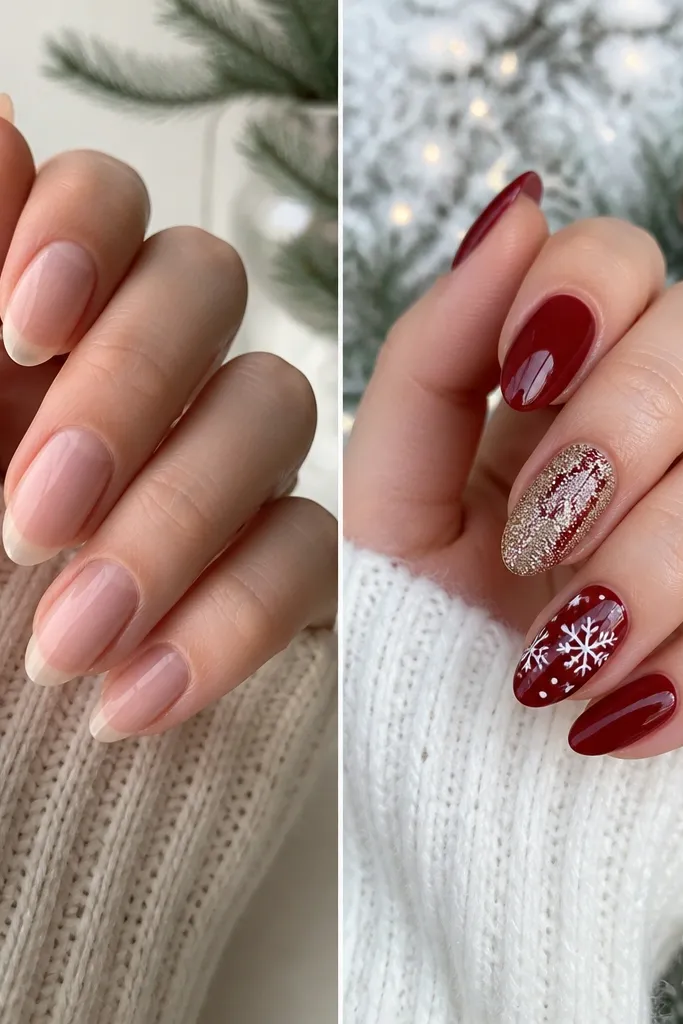
1. Icy Milky Nude Almond with Silver Snow Veins
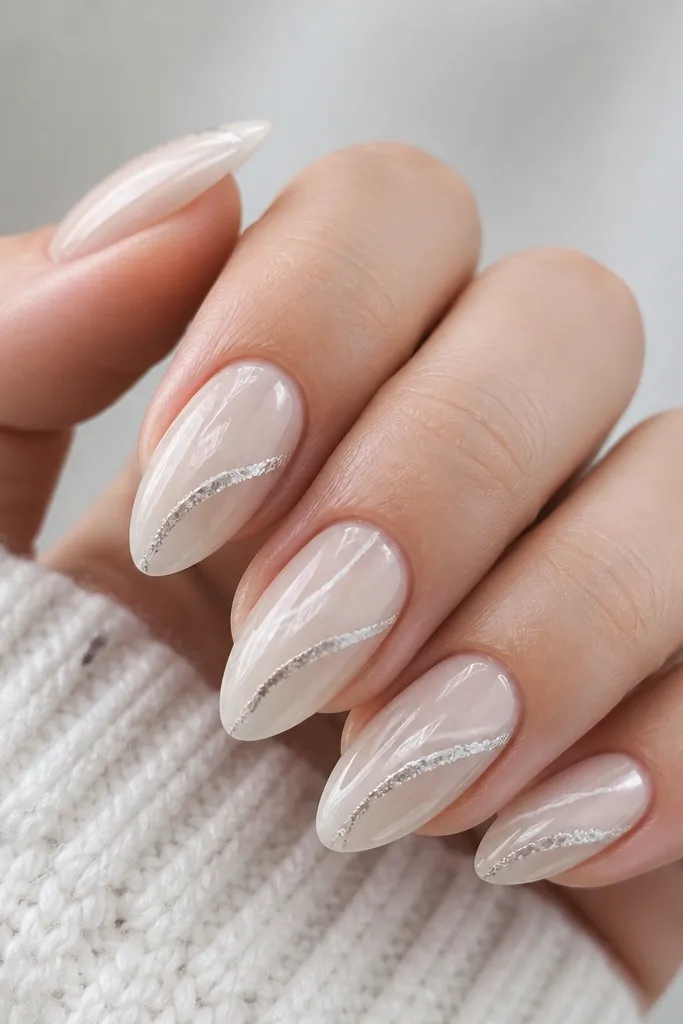
Start by pushing back cuticles and buffing the surface lightly so the milky base can grip. Apply a sheer milky nude in 2 thin coats, curing each coat fully; aim for an even, opaque layer without flooding the sidewalls. With a striping gel or thin brush, draw 2-3 diagonal “ice vein” lines per nail, then add a few micro-splits to mimic frozen cracks. Next, paint thin silver streaks over select white lines and keep them narrow. Finish with a thick glossy top coat and cap the free edge twice.
This set is my go-to when you want Christmas nails that still look clean in everyday lighting. The milky icy nude base keeps the nail looking healthy and bright, even if your natural nail bed is uneven. Silver snow veining adds a thin, icy contrast that doesn’t overpower your fingers. It’s flattering on most skin tones, but it really pops on cool undertones because the base has a pink-ice tone instead of a beige-yellow one. The almond shape makes the diagonal lines feel longer, so your hands look slimmer.
Skip thisDon’t blob the veins; thick lines look like “painted on” slush instead of ice.
Editor's noteUse a gel-based top coat if you want the lines to stay sharp — regular polish top coat can soften fine detail faster.
2. Cranberry Glass Almond with Gold Leaf Half-Moons
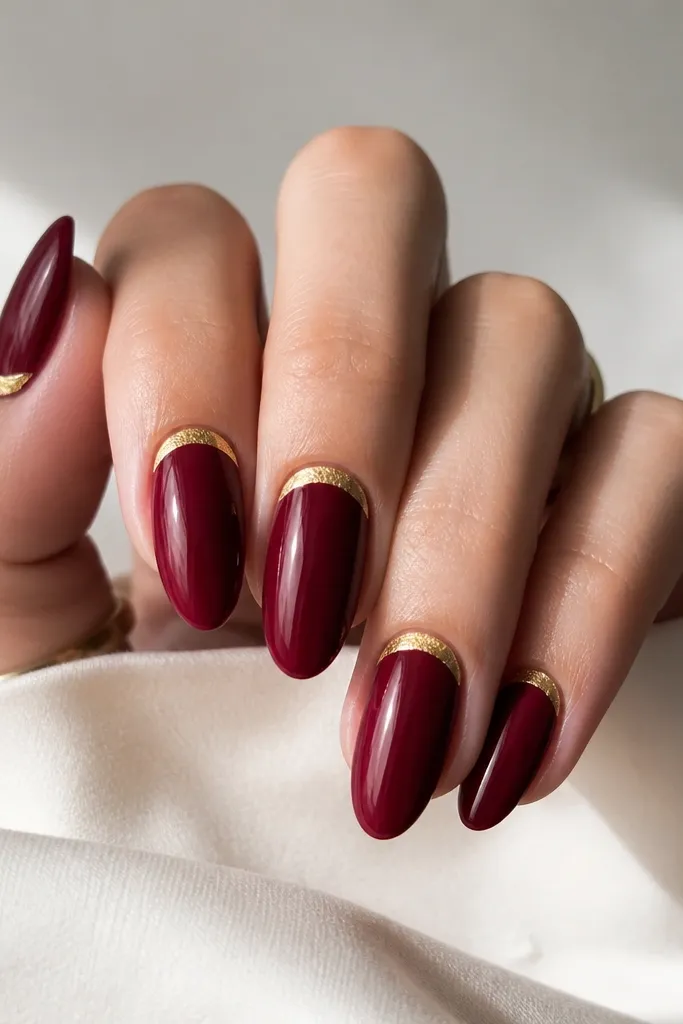
Apply a sheer nude or soft rose base coat, then layer cranberry gel in 2-3 thin coats until it’s fully opaque. Clean up the sides with a lint-free wipe soaked in cleanser so the red doesn’t flood the cuticle area. Tear small flakes of gold leaf and press them into half-moon shapes just above the cuticle line, leaving a small gap at the sidewalls. Seal the leaf with a thin layer of gel top coat, cure, then do a final thick glossy top coat. Cap the free edge so the gold doesn’t catch on sleeves.
Cranberry glass is the winter Christmas red that looks expensive without needing tiny nail art everywhere. The color is deep but not blackened, so it reads festive without turning goth. Gold leaf half-moons near the cuticle make the nail look lifted and tidy — they also visually balance the almond taper. I like this for medium to deep skin tones because the gold warms the red and keeps it from looking too sharp. On fair skin, the gold still flatters, but keep the leaf concentrated so the base stays the star.
Skip thisSkip a glittery top coat here; it makes the gold leaf look messy instead of crisp.
Editor's noteIf your gold leaf lifts, press it with a silicone-tipped tool for 10 seconds right after placing it.
3. Evergreen Ombre Almond with Matte Pine Tips
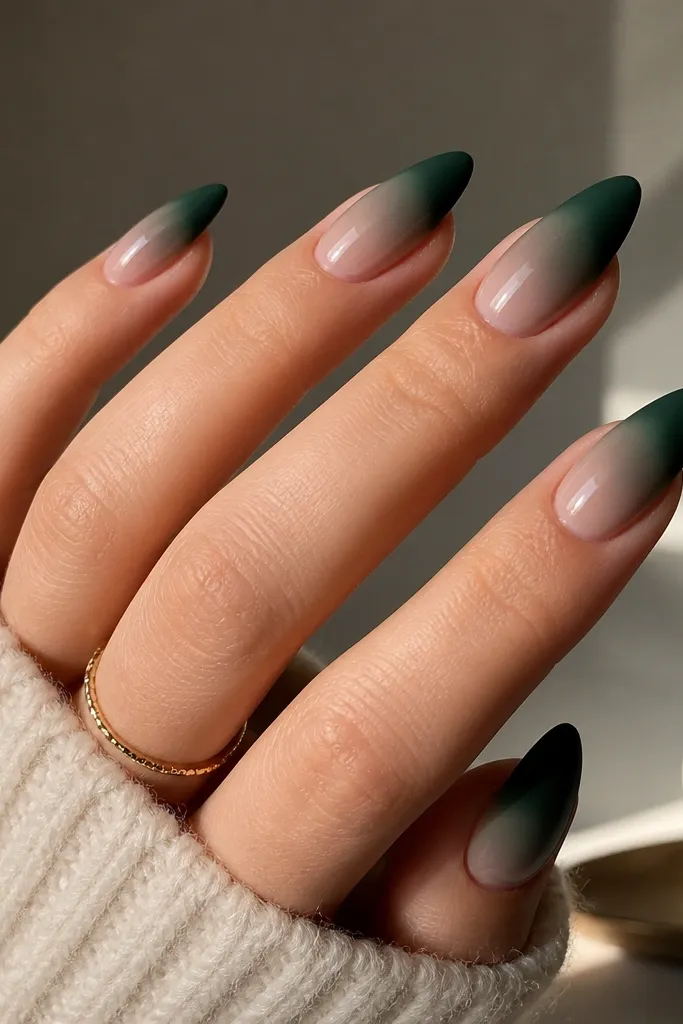
Start with a sheer nude base, then sponge or airbrush an evergreen ombre in thin layers, keeping the deepest green to the last 1/3 of the nail. Cure between layers so you don’t get streaks. For the matte pine tips, apply a matte top coat only to the tip area — use a small brush to draw a clean boundary around the ombre midpoint. Cure again and then add a glossy top coat only on the non-matte zone if you want extra shine. Finish by wiping the nail surface with cleanser so matte areas stay velvety.
This is Christmas nails that feel modern, not costume. The evergreen ombre gives you that wintry depth, and the matte pine tips stop the set from looking too shiny for daytime. I’ve worn this to a holiday party and had strangers ask if my manicure was “designer” because the texture contrast looks intentional. It’s especially flattering on shorter almond lengths because the gradient creates a longer visual path. Fair to medium skin tones look best with the nude-to-green transition; very warm undertones can lean more toward a slightly blue-green evergreen so it doesn’t turn muddy.
Skip thisDon’t matte the whole nail — a fully matte evergreen set can look heavy on the fingers.
Editor's noteUse painter’s tape as a boundary for the matte line; it makes the edge look salon-clean.
4. Champagne Nude Almond with Chic Red French Micro-Line
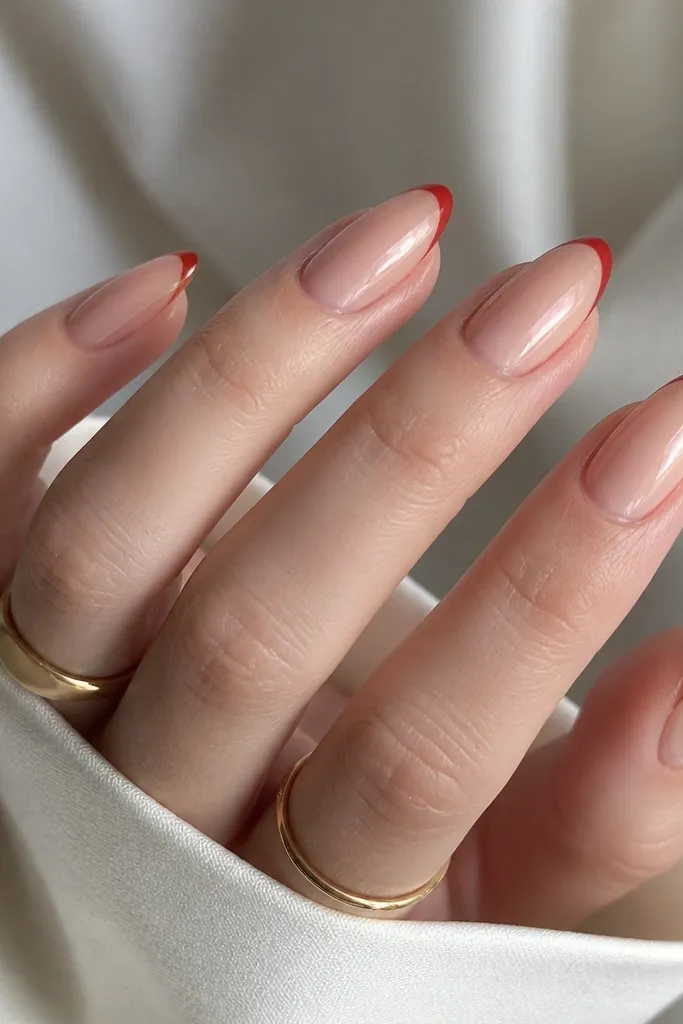
If you want winter Christmas nails that look polished without being loud, this is the one. The champagne nude base adds warmth and glow, and the red micro-line at the tip reads like a holiday accent rather than a full design. Almond shape matters here because the thin line tracks the taper, making the nail look longer and neater. This flatters hands with shorter nail beds because the nude base visually extends the nail. For cool undertones, choose a champagne nude that leans slightly pink, not yellow.
Prep and shape first, then apply a champagne nude in 2 coats for a smooth, even finish. Let it cure fully, then wipe tackiness if your system needs it. Use a striping brush or French guide to paint a super thin red line right at the free edge — keep it centered and don’t drag pigment down the sides. Add one more red coat only if the line looks translucent. Seal with a glossy top coat, cap the free edge, and cure long enough so the line doesn’t dull.
If your red bleeds, cure the first thin line for 10-20 seconds, then go back for a second pass.
Don’t make the French line too thick; thick red tips look boxy on almond.
5. Black Cherry Almond with Tiny White Snow Dots
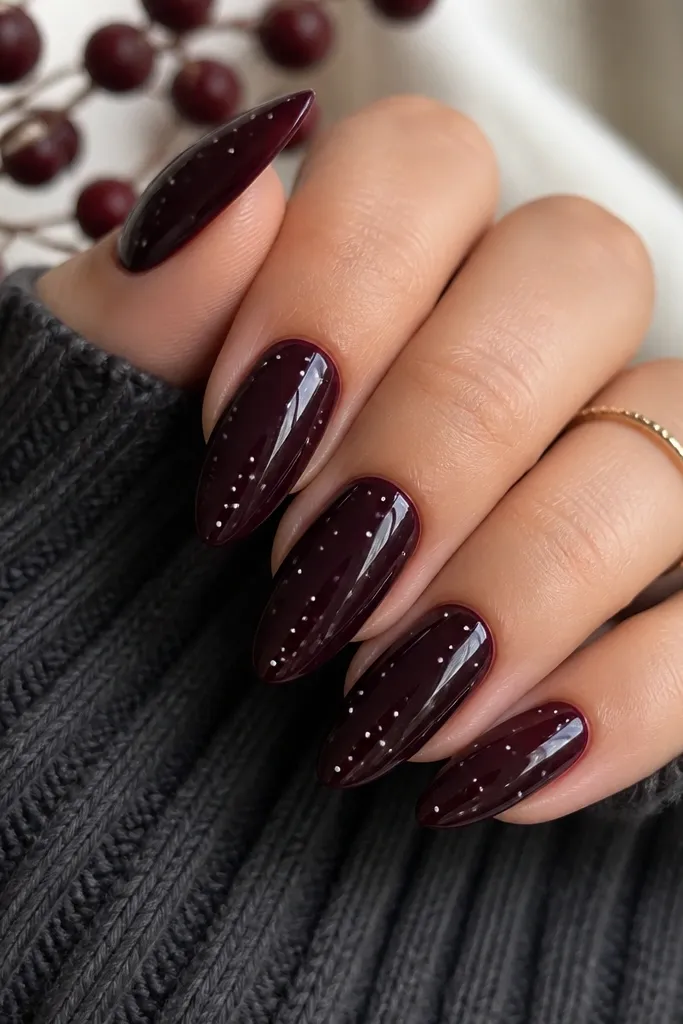
Apply a black cherry gel in 2-3 thin layers until it’s fully opaque, curing each coat. Use a dotting tool or the end of a bobby pin dipped in white gel for the dots. Place 4-6 dots per nail, with 1 cluster of 2-3 dots near the middle and a single dot closer to the tip. Keep dot sizes varied slightly — one small, one medium, one tiny — so it doesn’t look stamped. Finish with a glossy top coat and cap the free edge carefully so dots stay smooth.
Black cherry is a holiday color that feels dramatic without turning into plain black. The deep base makes the white dots look crisp, like fresh snow on a dark street. I like dot placement because it keeps the set airy; too many dots makes it look like random glitter fallout. This works across skin tones since the contrast is clear and the almond taper makes the dots look intentional rather than messy. If you have short nails, this set still looks long because the dots sit where your eye naturally reads the nail length.
Skip thisDon’t use chunky white glitter for the dots; it makes the snow look gritty.
Editor's noteDo the dots before top coat, then cure them thoroughly so they don’t sink into the polish.
6. Blush Milk Almond with Red Velvet Ribbon Bow
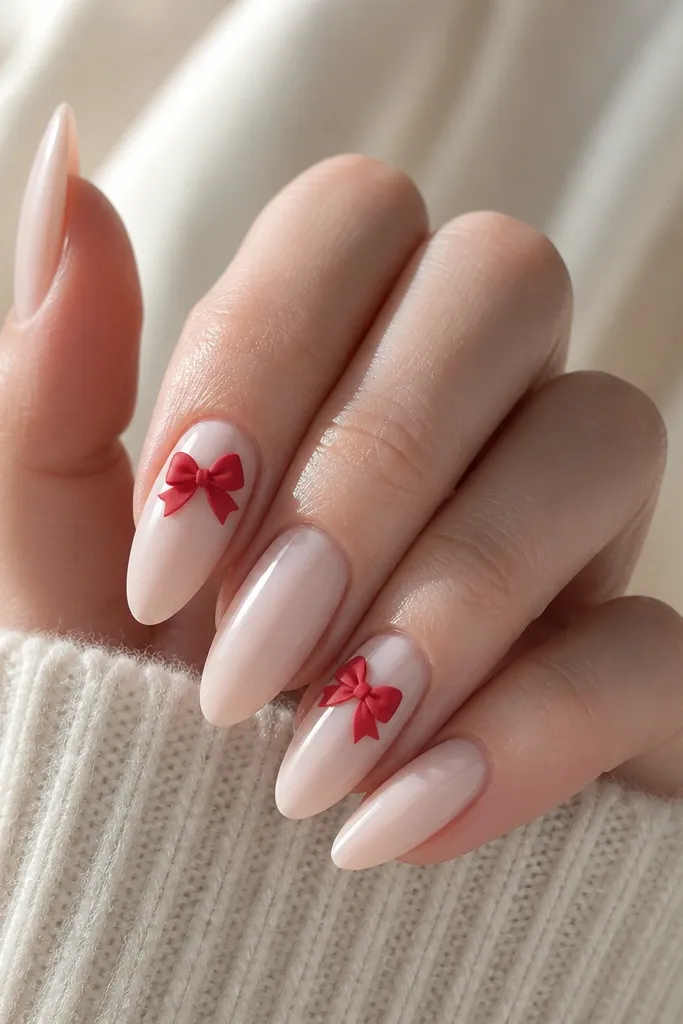
This is the “cute but grown” Christmas nail for dinners, photos, and gift-wrapping days. The blush milk base keeps everything soft, and the red velvet bow gives you that holiday signature without covering the whole nail. I use a matte or velvety finish for the bow so it reads like fabric instead of paint. Almond shape makes the bow look proportionate and not swallowed by the nail bed. It’s flattering on fair to medium skin tones because the blush doesn’t fight with your natural undertone.
Start with a blush milk base in 2 coats, making sure it’s opaque but still translucent enough to look like your nail bed. For the bow, paint a small V shape for the center knot, then add two loops on either side using a fine detail brush. Build the bow with 2 thin layers so edges stay sharp, then cure. If you’re using matte gel, apply matte only over the bow while keeping the base glossy. Seal with glossy top coat around the bow, and use a thin top coat on the bow edges if your matte product requires it.
Practice the bow on a spare nail tip first; the trick is getting the loops the same height.
Don’t put the bow on every nail — two accent nails make the set look intentional.
7. Iced Blue Almond with Aurora Chrome Stripe
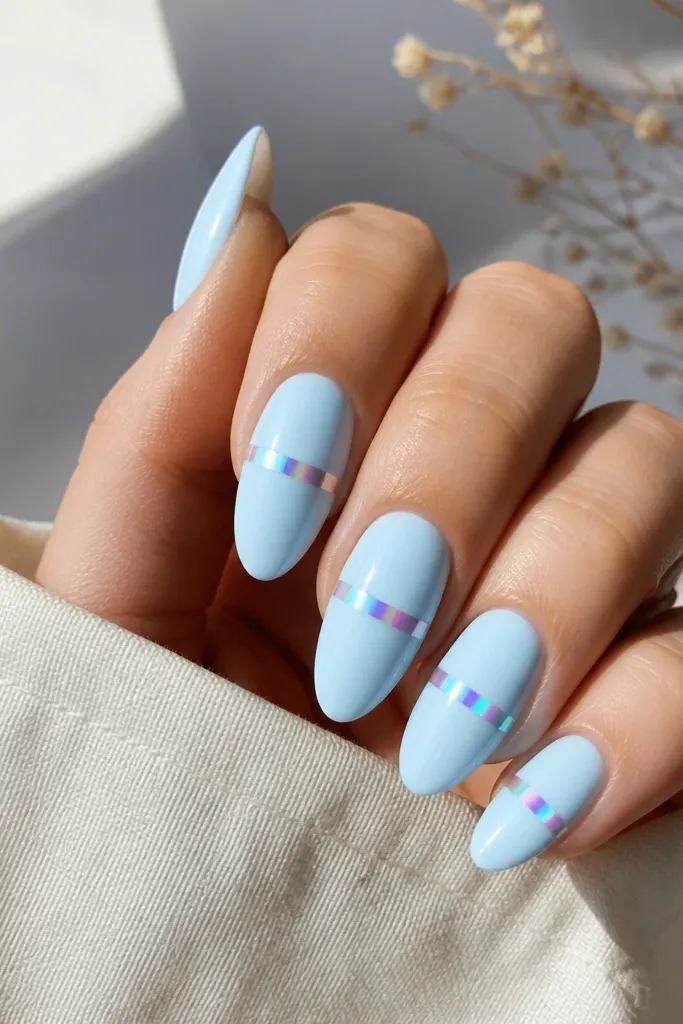
Apply an icy blue gel in 2 thin coats for a smooth, opaque base; cure fully and wipe tackiness if needed. Use a striping brush to paint a thin band of clear gel where you want the chrome stripe, then dab aurora chrome powder over it. Press lightly so the stripe is even, then brush off excess. Seal with a non-wipe top coat to keep the chrome from dulling. Cure and then add a second thin top coat only if your chrome system needs extra sealing for longevity.
Pale icy blue plus aurora chrome looks like winter light on water. The base is soft enough to be wearable, then the chrome stripe gives you that “before and after” wow because it catches movement. I like placing the stripe slightly below the center so the almond taper stays clean. This set is best on cool undertones and fair to medium skin because the blue stays fresh. If your skin is warm, choose an icy blue that has a hint of gray, not yellow.
Skip thisDon’t rub the stripe after curing; it smears chrome and ruins the clean line.
Editor's noteIf you want a stronger shift, do chrome over a darker underlayer — but keep it thin so it doesn’t turn muddy.
8. Snowglobe Clear Almond with Red Glitter Confetti
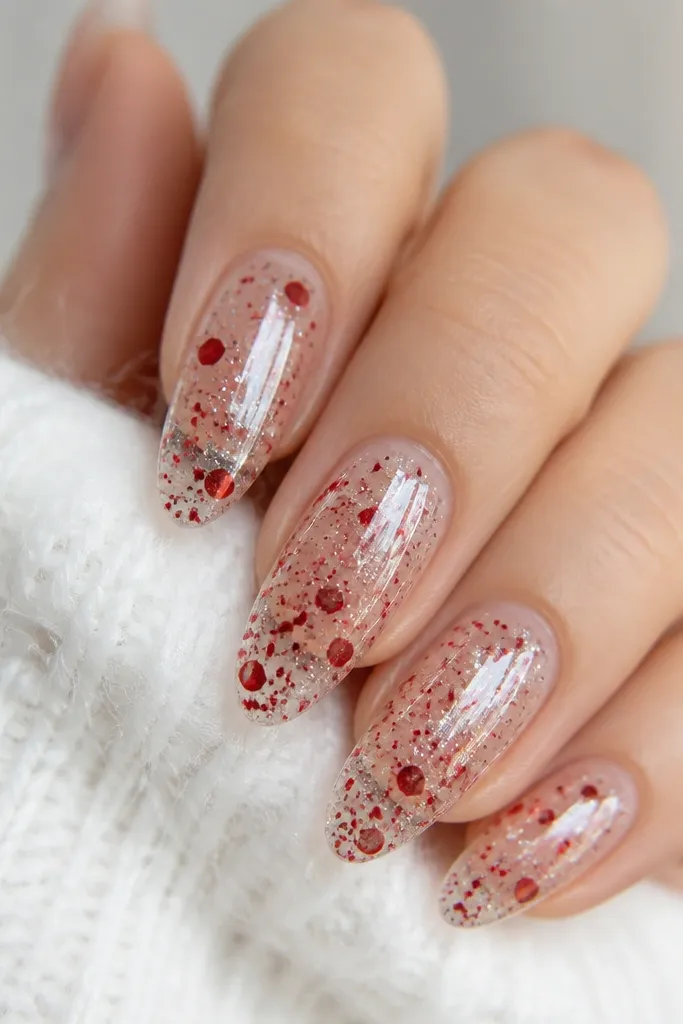
Start with a builder gel or clear base and create a smooth foundation; cure and shape your almond tip. Apply a jelly clear layer, then sprinkle ultra-fine red glitter and a few tiny silver pieces. Use a dotting tool to spread glitter so it looks even across the nail, not piled at the cuticle. Seal with another clear gel layer to fully encase the glitter, then cure. Finish with a thick glossy top coat and cap the free edge twice so the glass stays smooth.
Snowglobe nails look like you trapped holiday sparkle under glass. The trick is using a clear or jelly-like base so the glitter appears suspended, not stuck to the surface. Red confetti keeps the Christmas vibe strong while the clear base keeps it wearable. Almond shape helps because the glassy effect makes your nail look thicker and longer. This flatters hands where your nail bed is naturally uneven — the clear build smooths the look. It also looks amazing on photos because glitter catches light from multiple angles.
Skip thisDon’t skip the encasing layer; glitter that isn’t sealed feels rough and lifts faster.
Editor's noteUse ultra-fine glitter, not chunky — chunky shifts under the gel and looks like debris.
9. Green Tea Almond with White Lace Tips and Tiny Rhinestones
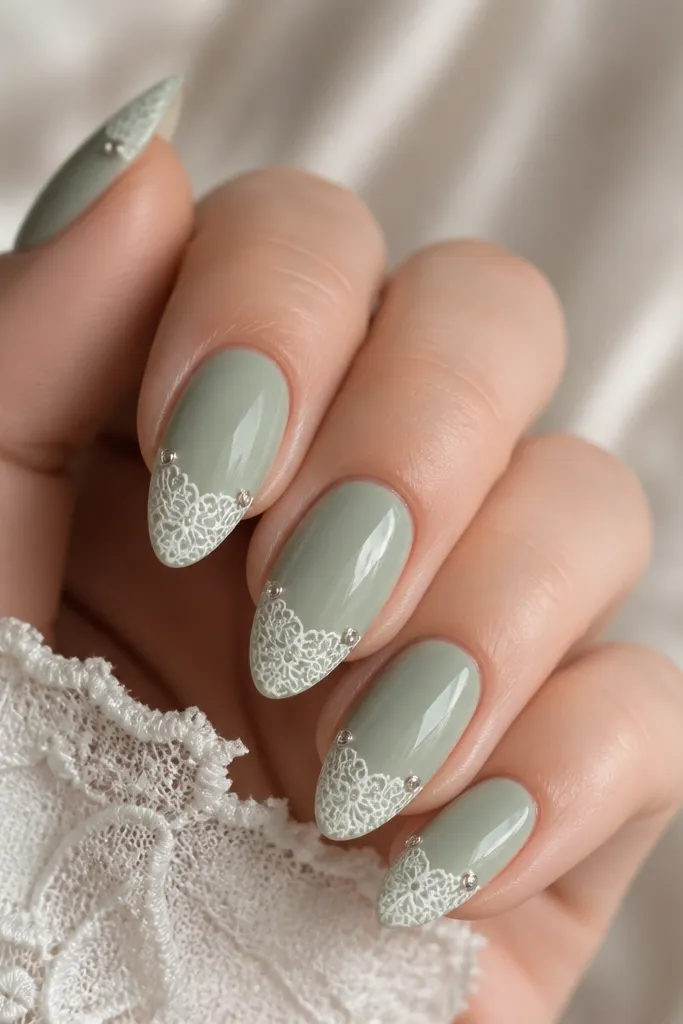
Apply a sage-green gel in 2 coats, curing each time until it’s smooth and opaque. Use a lace nail stamp or a thin lace stencil brush to paint the white lace just on the tip area, leaving the middle clear. If you’re hand-painting lace, start with the outline first, then add small loops and peaks. Place 1 micro rhinestone per accent nail using gel glue, then cure. Seal everything with a glossy top coat, and keep rhinestones fully covered so they don’t snag.
Soft sage plus lace tips gives you that winter elegance without going full holiday cartoon. The green tea base looks calm, and the white lace adds texture that reads like fabric. Tiny rhinestones at the lace corner make it feel special for parties and weddings, but keeping them small keeps it from looking cheap. Almond shape is key here since lace tips need a clean taper to look like trim, not blobs. This set flatters medium skin tones and also looks great on fair skin if your sage is slightly cool, not yellow.
Skip thisDon’t cover the whole nail in lace; it kills the airy look and makes the set feel heavy.
Editor's noteFor lace, use a gel that stays flexible; stiff white polish cracks on almond tips.
10. Rose Gold Almond with Star Foil Cuticles
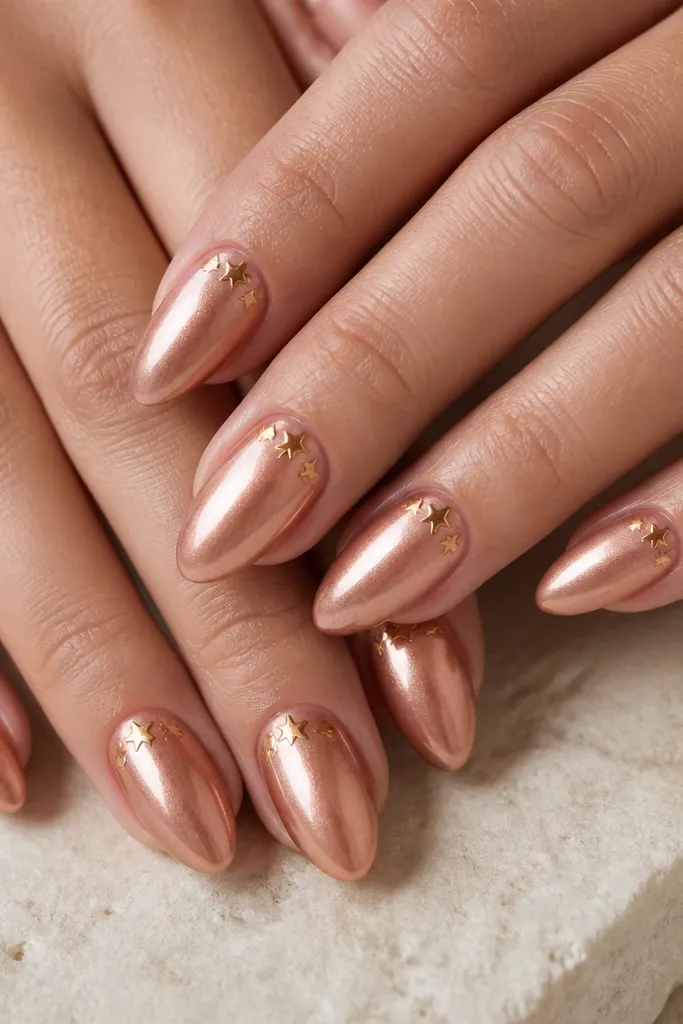
Prep and apply a sheer rose gold shimmer gel in 2 coats, building to full coverage while keeping it glossy. Use gel glue at the cuticle zone and place small star foil fragments with tweezers, pressing gently so edges stick. Leave a tiny bare gap at the sidewalls so the foil doesn’t creep. Cure, then apply a thin top coat to lock the foil in place. Finish with a final thick glossy top coat and cap the free edge so the foil stays sealed.
Rose gold shimmer is the holiday neutral that looks like jewelry. The base is warm, forgiving, and flattering on both fair and deep skin because the shimmer matches skin highlights. Star foil near the cuticle adds a playful Christmas detail without crowding the nail. I like star placement because it balances the almond taper and keeps the design feeling light. This set also hides minor nail ridges better than matte finishes, since shimmer reflects smoothly.
Skip thisDon’t use chunky foil flakes; they lift at the cuticle and snag on scarves.
Editor's noteIf the foil looks patchy, add a second tiny star on the opposite side of the nail for symmetry.
11. Velvet Red Almond with Black Cat-Eye Center Dot
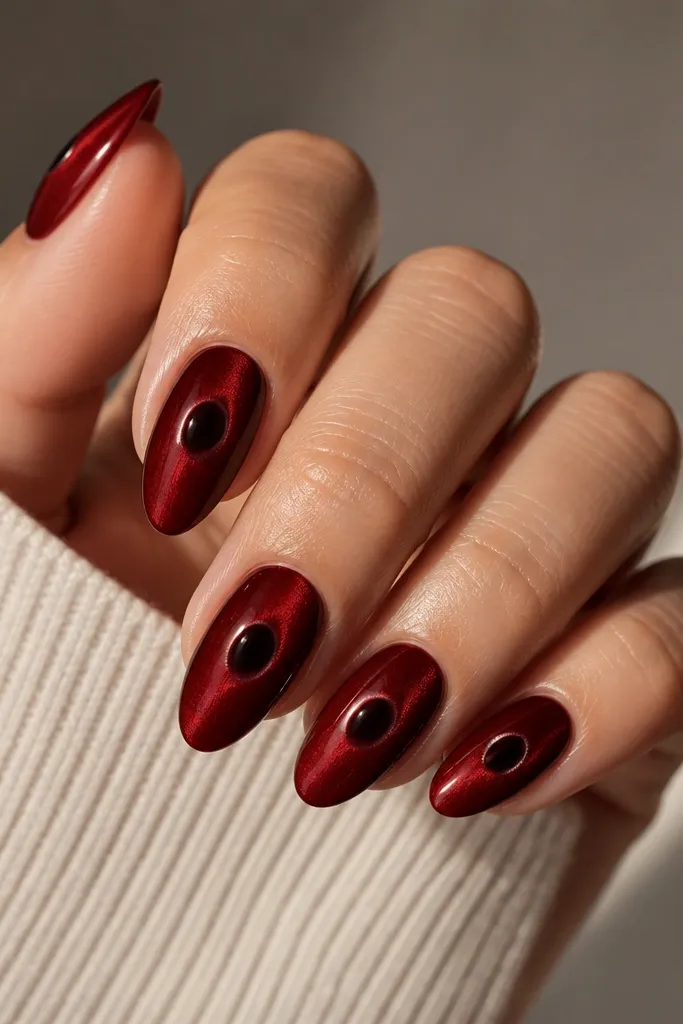
This one reads Christmas night out. The velvet red finish gives you a soft, fabric-like look that flatters fingers because it doesn’t show streaks like high-gloss. The black cat-eye center dot adds a little mystery, and the magnetic glow makes it look like a tiny ornament. Almond shape keeps the dot from feeling random — it sits naturally down the center line of the nail. This is a strong choice for warm and neutral undertones because velvet red has depth without looking bluish. It’s also great when you want holiday nails that don’t scream red-and-green.
Apply a velvet red gel in 2 thin coats, curing fully. For the cat-eye dot, apply a small amount of black cat-eye gel to the center line, then magnet it for 5-8 seconds so you get a subtle glow streak. Don’t spread it; keep it orb-sized, about the width of a pencil eraser. Cure and then apply a velvet-safe top coat if your system needs it; if not, use a soft sheen top coat so the velvet texture stays. Cap the free edge lightly so the velvet doesn’t get dragged.
Keep the cat-eye dot centered — even a slight shift makes the nail look uneven.
Avoid mirror top coat over velvet; it turns the fabric look into a flat plastic shine.
12. White Opal Almond with Green Gem Snowflakes
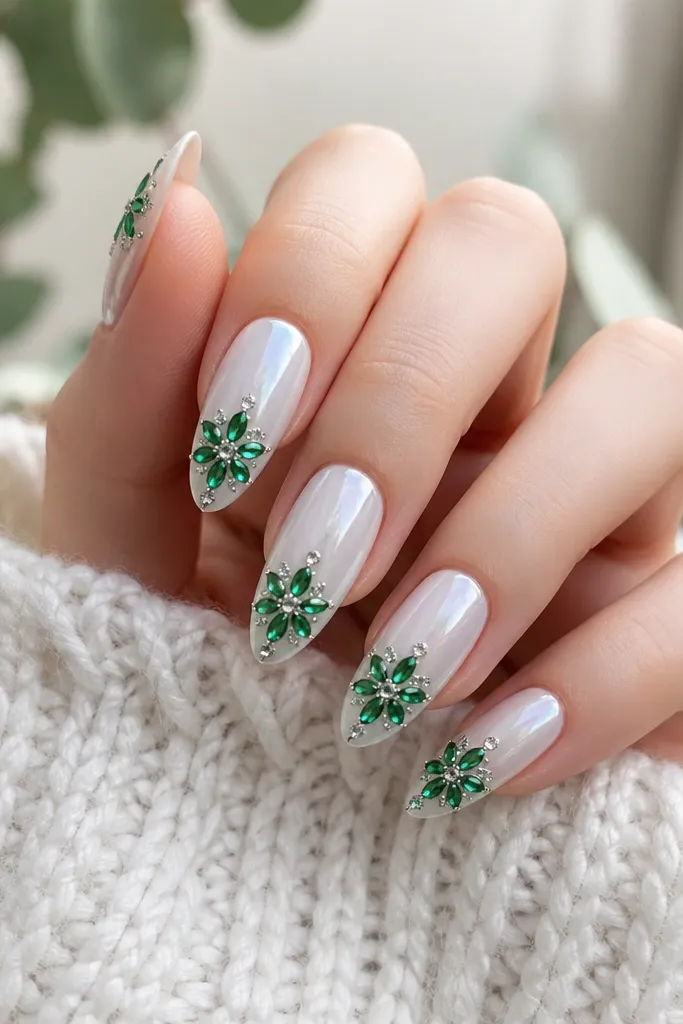
Apply a white opal gel in 2 coats, curing fully so it’s opaque and not streaky. Use a dotting tool to outline a tiny snowflake shape with clear gel near the tip on accent nails. Place small green rhinestones or flat-back gems at the “arms” and add clear micro crystals at the center. Cure, then seal with a thick glossy top coat, building coverage around the gems so they sit smooth. Cap the free edge so the tip stays snag-free.
White opal makes winter nails look like frosted glass, and it works with almost any skin tone. Adding green gems gives you a Christmas color pop that still looks clean because the base is neutral. I like the snowflake placement near the tip because it makes the almond point feel intentional, like a charm. The gem cluster adds dimension without needing a full paint job on every nail. Fair skin looks bright and fresh with this, while medium to deep skin gets a crisp contrast that doesn’t go dull.
Skip thisDon’t add gems on every nail; two or three accent nails look more expensive.
Editor's noteChoose flat-back gems with a small profile; tall stones rock the nail and catch on hair.
13. Matte Cocoa Almond with Gold Drip Cuticle
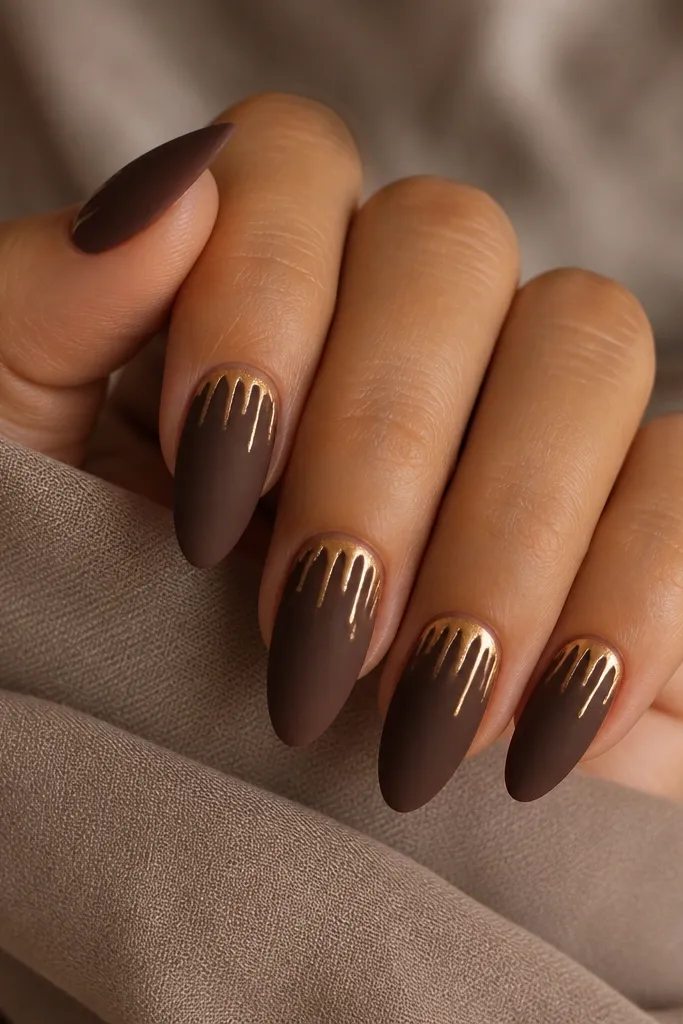
Cocoa-brown is a winter Christmas nail color that feels cozy instead of loud. Matte cocoa makes your hands look soft and warm, and the gold drip at the cuticle looks like holiday icing without needing a full design. Almond shape matters because the drip lines naturally follow the taper and look like they’re flowing down a cone. This is flattering on warm undertones and also works on neutral skin when your brown leans slightly reddish rather than gray. It’s also a good choice if bright reds always look too harsh on your skin.
Start with a cocoa brown gel and apply 2 thin coats, curing each time. Finish with a matte top coat over the whole nail so the surface looks velvety. For the gold drip, apply a thin gel line at the cuticle and pull it down 2-3 mm in one or two strands per nail. Sprinkle gold foil dust or paint gold chrome over the gel line, then cure. Seal with a glossy top coat only over the drip areas if you want the gold to stay shiny, and keep the rest matte.
Use a tiny brush for the drip; wide strokes make it look like smudged nail polish.
Don’t skip matte top coat; a glossy cocoa base makes the set look like regular brown polish.
14. Deep Burgundy Almond with Teal Glitter Inner Tips
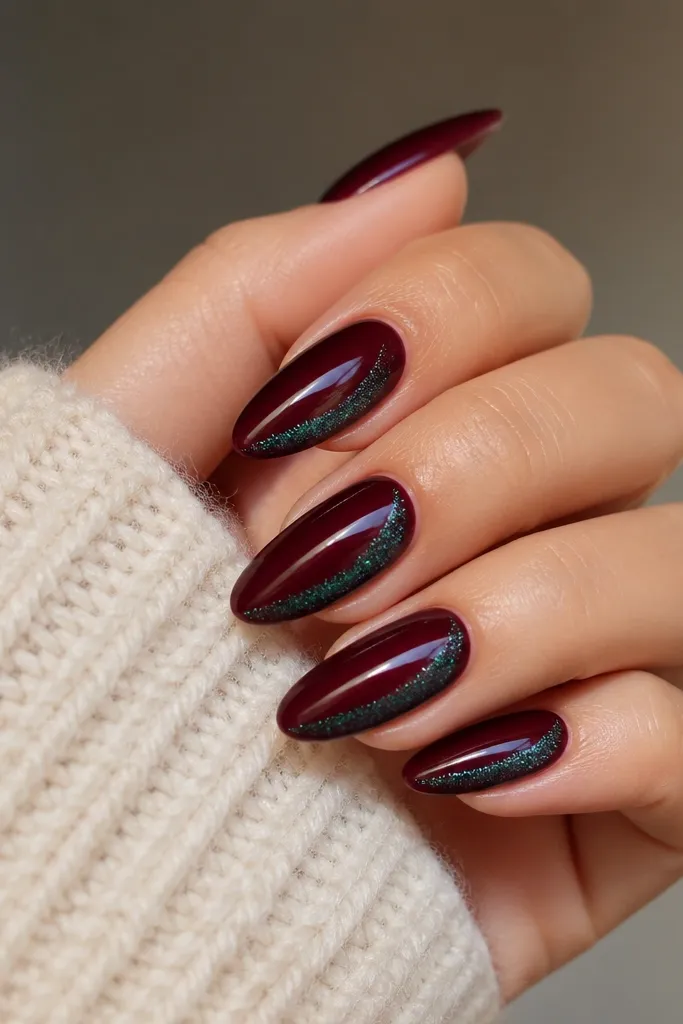
Apply deep burgundy gel in 2-3 thin coats for full opacity, curing each layer. After it’s cured, use a fine liner brush to paint a thin crescent of clear gel along the inner side of the tip on each nail. Press teal ultra-fine glitter into the gel and tap off excess. Cure, then seal with a glossy top coat, making sure the glitter is fully covered so it doesn’t snag. Cap the free edge on the outer side only lightly so the inner glitter stays smooth.
This set is for people who love Christmas color but hate full glitter coverage. Deep burgundy is classic and flattering because it looks clean and rich, and the teal inner-tip glitter adds a cool winter accent that feels unexpected. The “inner tip” placement makes the nail look longer, since your eye reads the curved glitter along the almond edge. I recommend this for neutral to cool undertones because teal doesn’t fight the red. On warm undertones, choose a teal that leans more green than blue so it doesn’t look icy.
Skip thisDon’t place glitter over the outer tip edge; it catches on coats and looks uneven.
Editor's noteKeep the glitter line thin — a narrow inner highlight looks like jewelry, thick coverage looks messy.
15. Creamy White Almond with Red Berry Stems and Green Leaf Accents
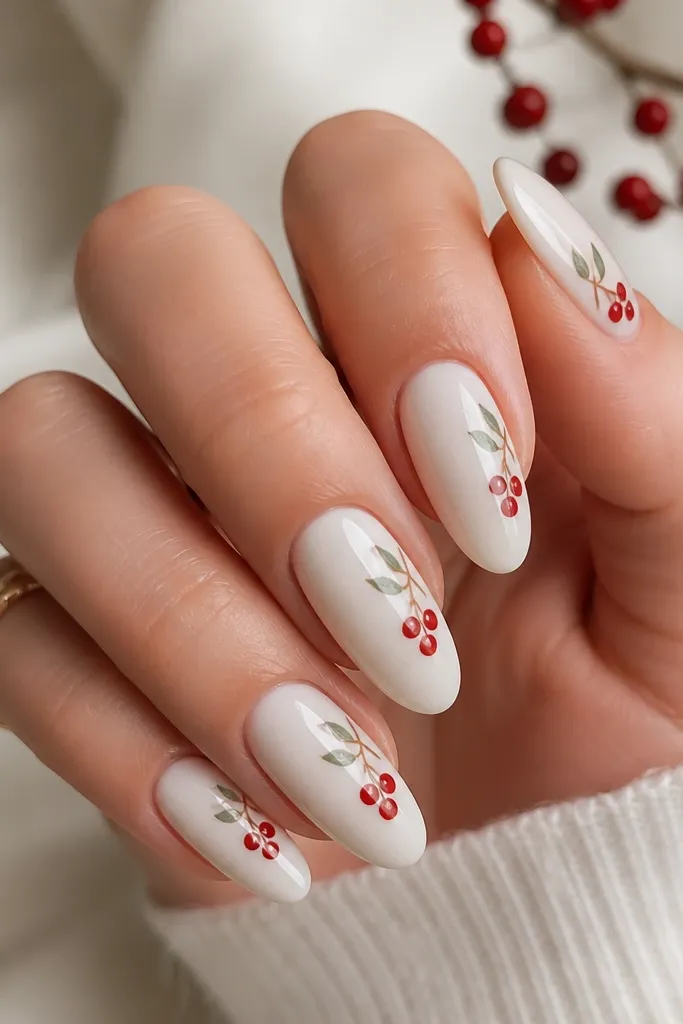
Apply creamy white gel in 2 coats, curing fully; keep it opaque but smooth so the art has a clean surface. With a thin detail brush, draw a diagonal stem line and add 3-5 tiny berry circles along it using red gel. Add small green leaf shapes at the berry cluster using a fine brush, keeping leaves small and pointed. Cure, then add a clear gel glaze over the berries if you want a slightly domed, juicy look. Seal with a glossy top coat and cap the free edge to prevent lifting.
Creamy white is the cleanest base for classic Christmas berries. It makes red look brighter and keeps the whole set from feeling heavy. The berry stems and tiny green leaves read like a wreath detail, but diagonal placement keeps it modern and flattering on almond. This is perfect when you want a “winter christmas nails before after transformation” look that still looks neat in close-up. It flatters fair, neutral, and medium skin because the creamy white matches the natural nail bed tone when you choose the right opacity. Almond shape keeps the diagonal art from crowding and makes the nail point look intentional.
Skip thisDon’t use chalky white; it makes the berries look flat and older.
Editor's noteUse a small brush dampened with cleanser to tidy berry edges before curing.