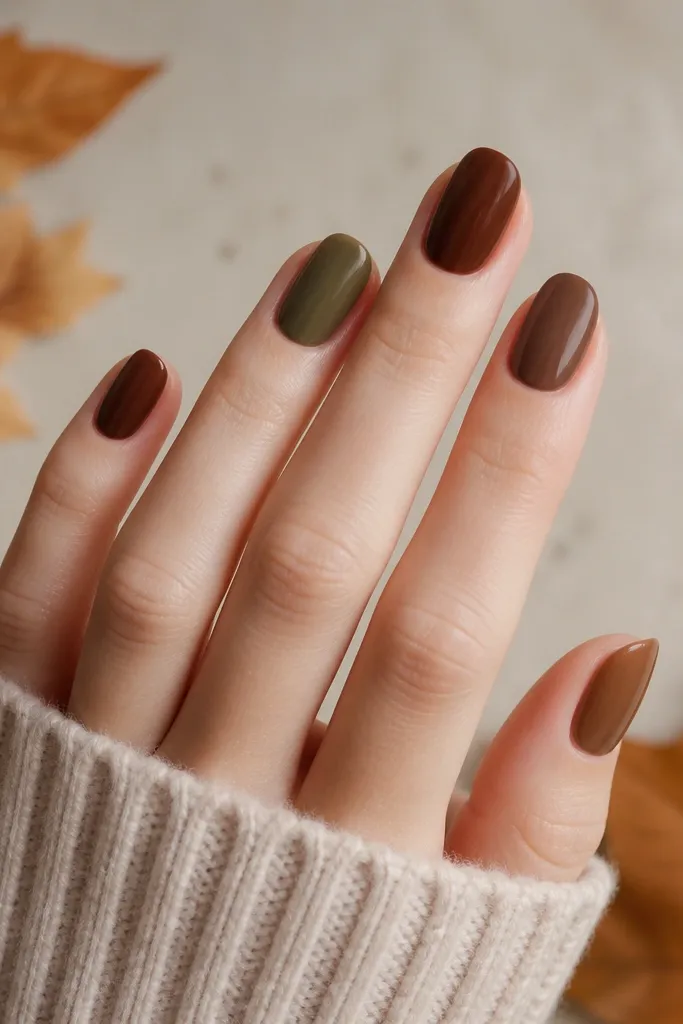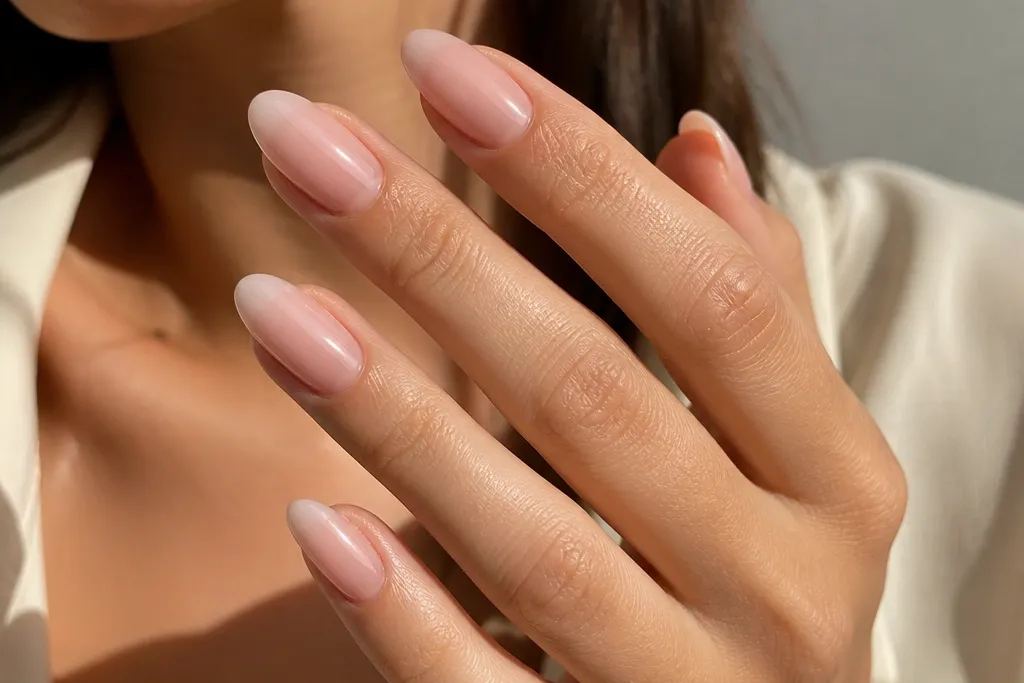
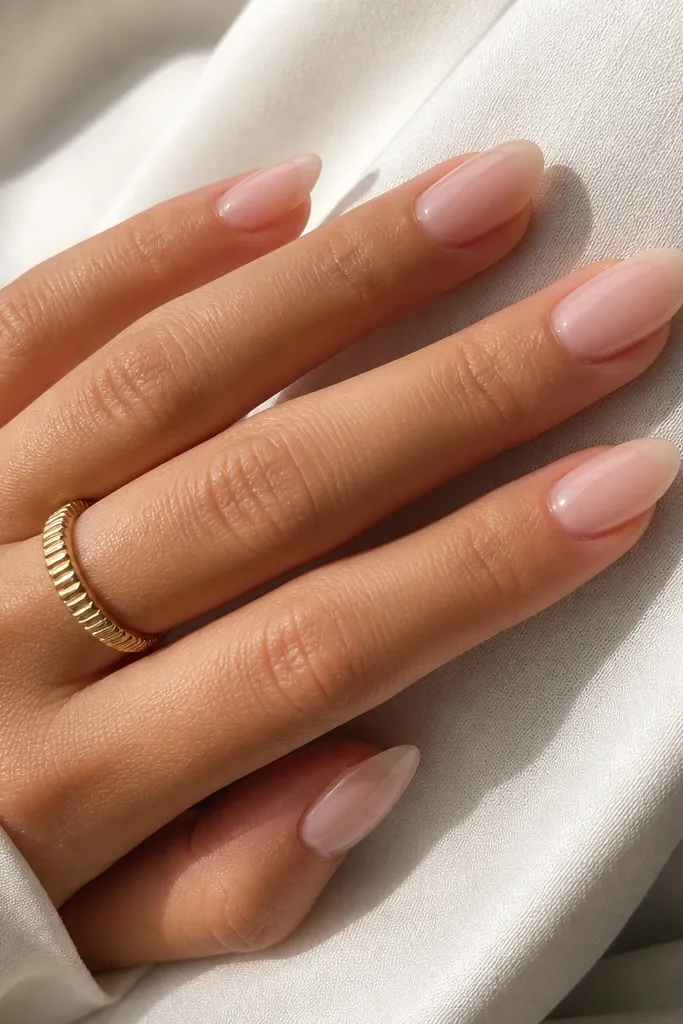
1. Creamy Nude BIAB with Micro French Almond
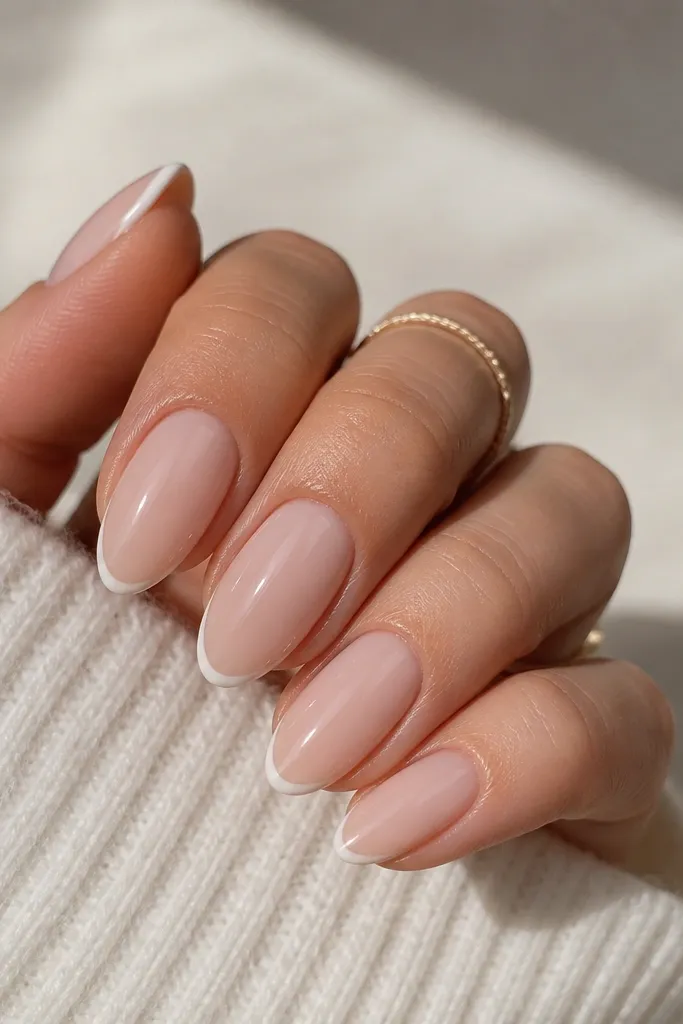
Start by prepping the nail surface and applying a primer if your system uses one. Build BIAB to a soft almond shape, then keep the apex a touch higher at the center so the nude looks rounded, not flat. Apply 2 thin coats of the creamy nude, cure each time, then use a striping brush to paint a micro French line about 1 mm wide at the tip. Keep the line from touching the sidewalls — I leave a tiny nude margin on both sides. Finish with a glossy top coat in one even layer.
This is the almond flattering starter set that never looks messy. The base is a creamy nude BIAB that matches a “skin-like” tone but with a slightly warm undertone, so it looks smooth against most skin colors without going gray. The micro French is the flattering trick: the line is thin and centered, so your eye reads length instead of width. I’ve done this on clients with short nail beds and it still looks elongated because the white stays away from the side edges.
Skip thisAvoid a thick French band — it widens the almond and makes the nails look blunt.
Editor's noteIf your white French looks chalky, mix a tiny drop of clear into your white gel to make it flow like paint.
2. Chocolate Toffee Ombré Almond Fade
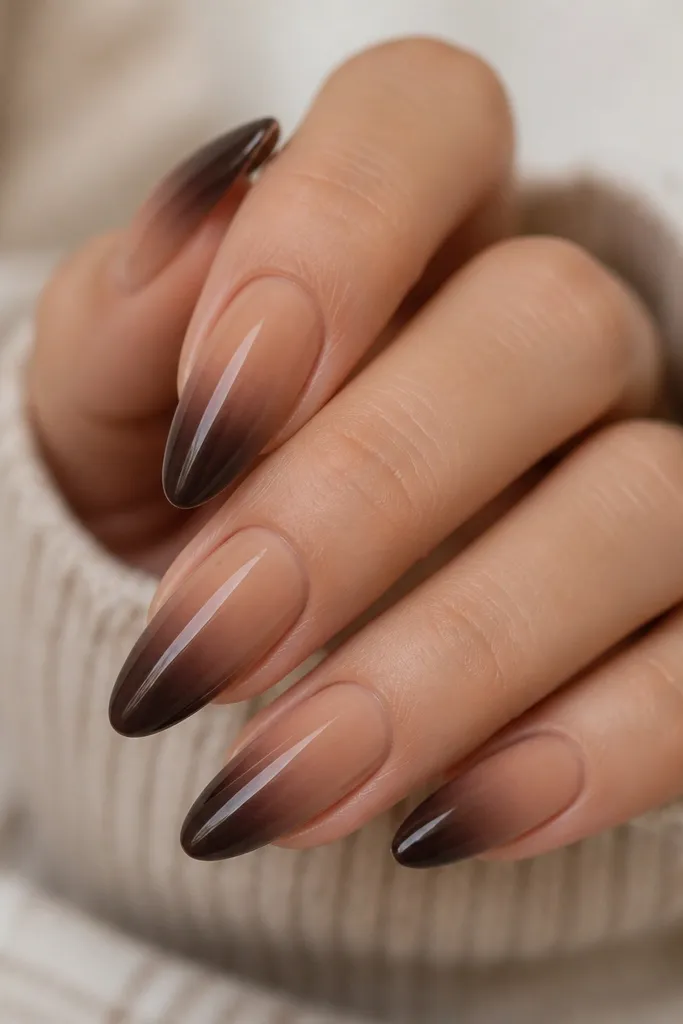
Start with a sheer warm nude BIAB base and cure. Sponge or brush-blend a toffee nude into the first third of the nail so the cuticle area stays light. Then blend chocolate brown into the last third, keeping the darkest point right at the tip and slightly tapering up the sides. Use a clean brush with a little slip gel to smooth the transition line after each blend. Seal everything with a glossy top coat and cure fully.
Brown ombré looks expensive when it’s blended high enough to create a smooth “light to dark” reading. The flattering part is where the darker color lands: it’s concentrated at the tip and fades as it moves toward the center, so the nail looks longer and slimmer. I like warm toffee near the cuticle because it flatters both cool and warm skin tones — it doesn’t turn gray. This set is perfect for fall outfits, but I’ve worn it year-round because it photographs clean.
Skip thisSkip a straight horizontal fade line — it reads like a block and ruins the almond length effect.
Editor's noteBlend in thin layers — two light blends beat one heavy layer every time for ombré.
3. Powder Pink BIAB with One-Side Crystal Spark Track
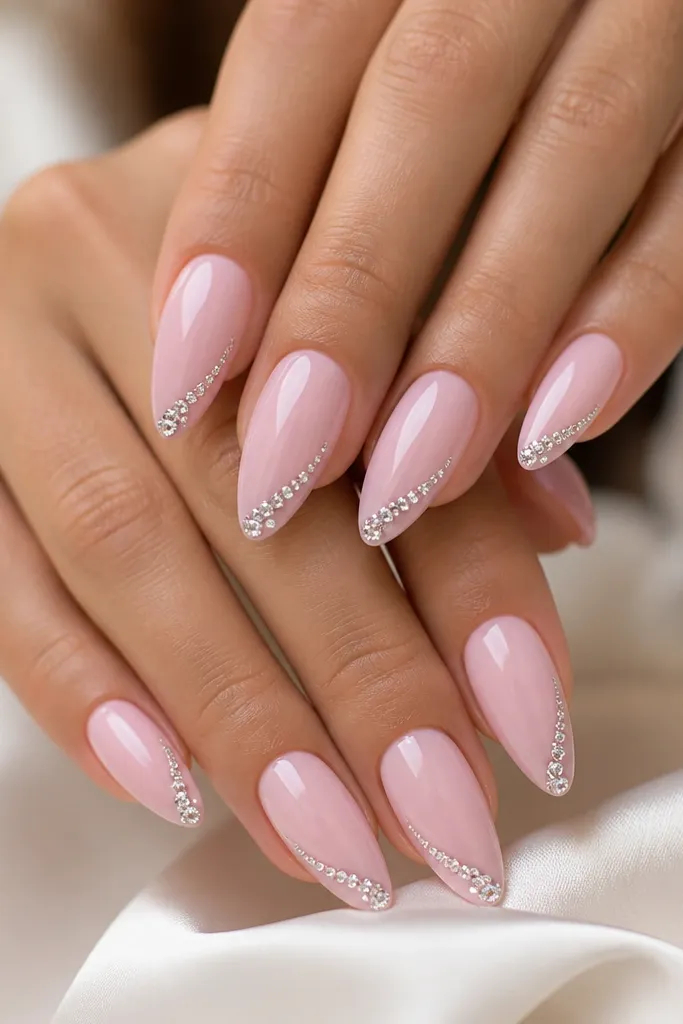
Apply a sheer powder pink BIAB layer and cure. Build a slightly higher apex so the nail catches light evenly, then cap the free edge lightly before curing. After color, place micro crystals using a dot of thick builder gel on a diagonal line that runs from the center third toward the tip. Keep the track narrow — about 1/3 the nail width at most — and leave the opposite side clear. Finish with top coat, but use a thin brush to avoid flooding between stones.
This design flatters because it creates a visual “pull” toward the tip without covering the whole nail. The powder pink base keeps it gentle and wearable, while the crystals add light that makes the nail look more dimensional. I’ve seen this work especially well on hands that look a little dry or have shorter nail beds, because the center sparkle draws the eye upward. The one-side placement also keeps the nail from looking bulky — it’s controlled shine, not full coverage.
Skip thisAvoid putting crystals all the way to the sidewall — that makes almond look wider.
Editor's noteFor a clean crystal edge, pick stones with similar size and align them with the nail’s natural curve.
4. Sage Green Sheer BIAB with White Leaf Vein Art
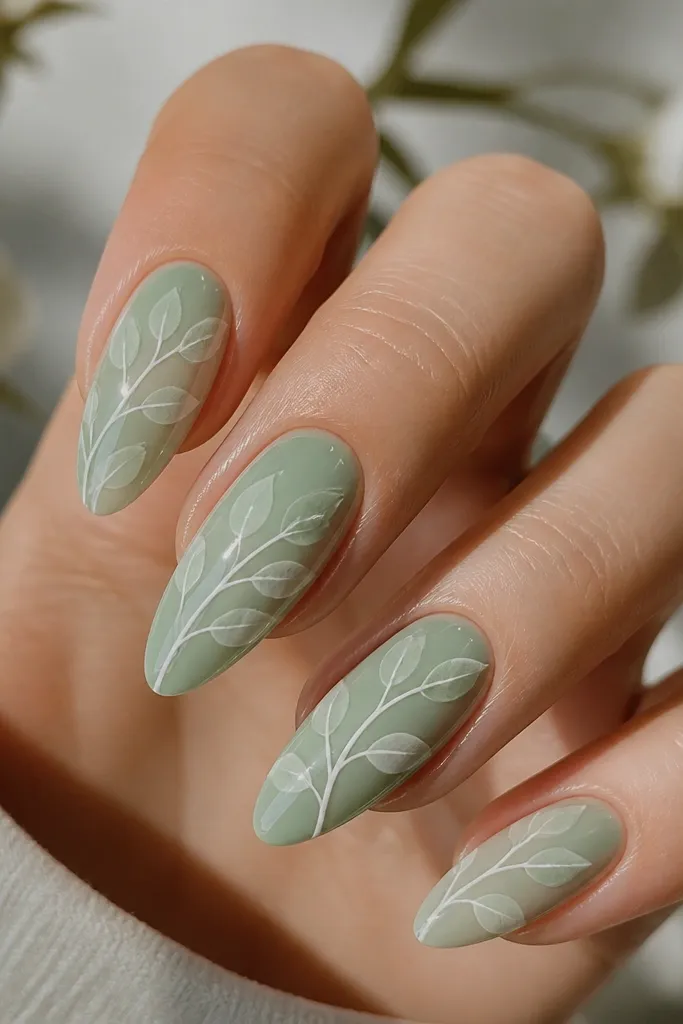
Start with a sheer sage BIAB base and cure, then apply a second thin layer if you want slightly more coverage. Use a fine liner brush to paint delicate white vein lines starting near the center third, not at the cuticle. Add leaf shapes with thin, semi-transparent strokes so the sage shows through. Keep all main lines within the center width of the nail and taper the ends near the tip. Seal with top coat in two thin passes: one to lock in the art, another for a smooth glass finish.
Sheer sage is one of those flattering shades that doesn’t fight your skin tone. I use a translucent BIAB tint so the nail still looks light at the cuticle, which helps the almond shape read longer. The white leaf vein art gives movement and keeps the design from looking like a sticker. Because the leaf lines come from the center and curve outward, they visually narrow the sides and make the nail look sculpted.
Skip thisDon’t make the leaves too wide — wide art spreads the visual weight and kills the almond slimming effect.
Editor's noteMix your white with a drop of clear gel so the lines stay soft instead of opaque and chunky.
5. Burgundy BIAB with Negative Space Half-Moon Cuticle
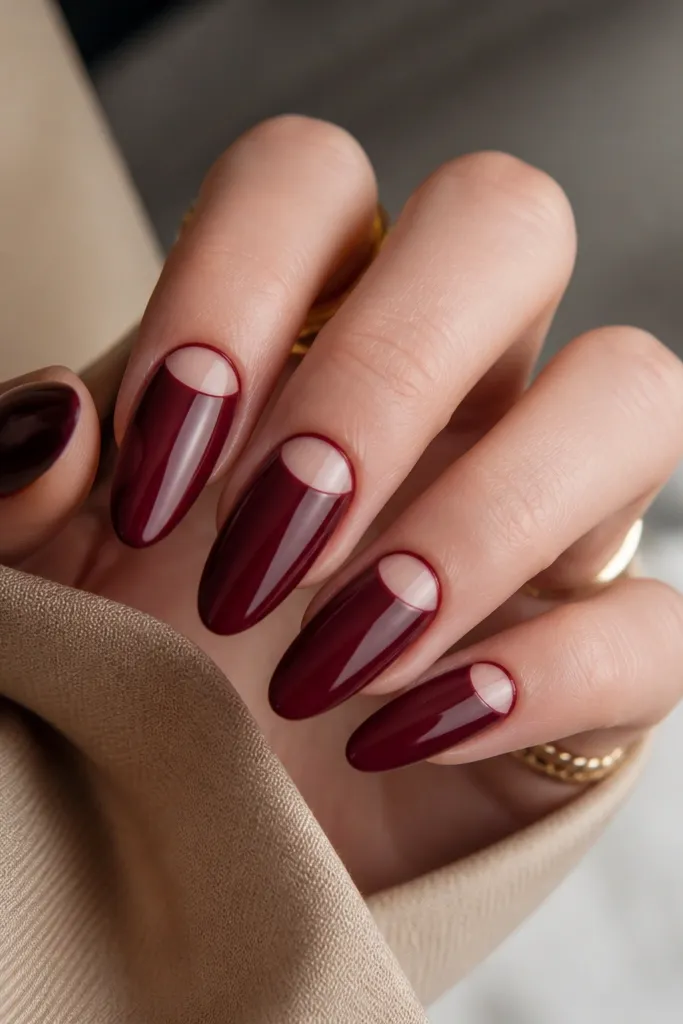
Start by building BIAB shape and curing, then apply a sheer nude base so the negative space has a consistent base color. Paint burgundy across the nail but stop short of the cuticle by 1-2 mm, leaving a half-moon area unpainted. Use a small gel brush to sharpen the burgundy edge around the half-moon so it looks intentional. Cure, then add one more thin burgundy coat only on the areas that need it. Finish with a glossy top coat and cap the sides lightly to prevent lifting.
Negative space half-moons are flattering because they create a “frame” that lifts the cuticle area instead of covering it. Burgundy can look heavy, but this design keeps it elegant by leaving a clean nude window at the base. The almond shape works with the half-moon: the curve matches the nail bed, so your eye reads a longer nail. I’ve done this for date nights where people want drama without chunky glitter.
Skip thisAvoid messy cuticle coverage — smudged negative space makes it look like a rushed DIY.
Editor's noteUse a thin striping brush to trace the half-moon edge — it gives you that salon-crisp curve.
6. Milky Pink BIAB with Thin Gold Foil Spine
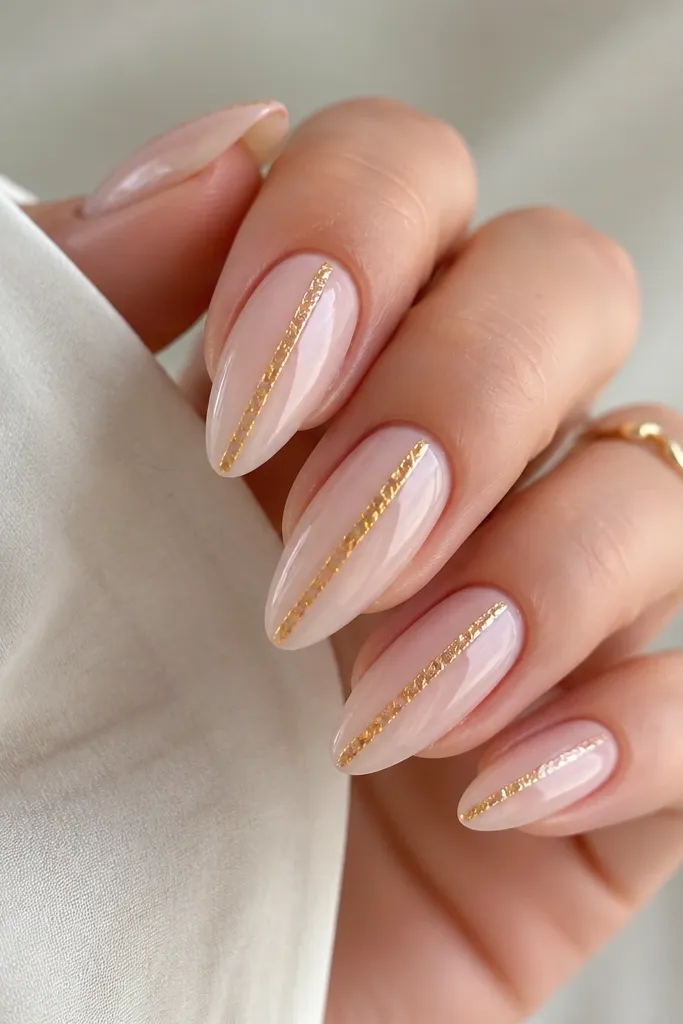
Gold foil on a milky pink base looks flattering because it adds shine in a narrow column. The center spine draws the eye straight up, which makes almond nails look longer and slimmer. I like this for everyday because the base is soft, and the foil doesn’t cover the whole nail. It also flatters hands with warm or neutral skin tones because the pink is milky rather than rose-red.
Apply milky pink BIAB in two thin layers, curing each time, and keep the cuticle area clean. Add a thin line of foil transfer gel or tacky base gel down the center of the nail. Press gold foil onto that line, then peel to leave only the center spine. If you want extra control, use a brush dipped in clear gel to tidy the foil edges. Seal with a glossy top coat, and cure fully.
Tear the foil into narrow strips before applying so you don’t end up with a wide gold blob.
Skip thick foil coverage — it lifts and makes the almond look uneven.
7. Royal Blue BIAB with Soft White Cloud Tips
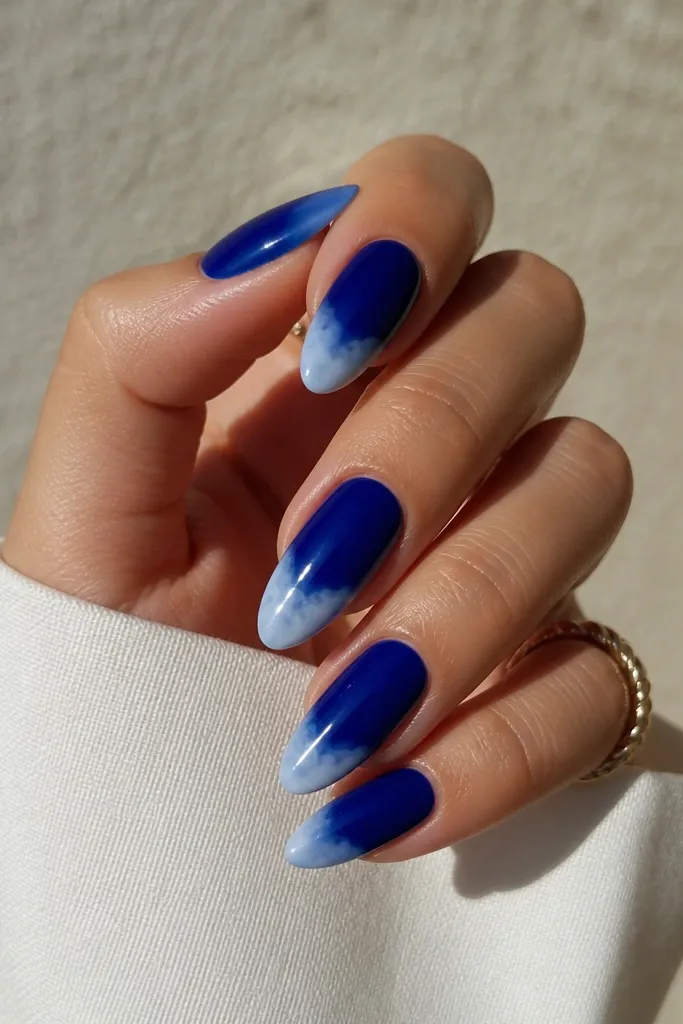
Start with a smooth royal blue BIAB base and cure. Add a sheer top gel layer if your system needs it for better blending, then sponge or brush a thin layer of white where you want the cloud tips. Blend the white into the blue using a damp brush or a small blending sponge, keeping the cloud edge irregular but controlled. Build a second white pass only if the tip needs more brightness. Finish with glossy top coat to smooth the gradient.
Cloud tips make royal blue feel lighter and more wearable, which is exactly what almond needs to stay flattering. The darker base anchors the nail, while the soft white at the tip brightens the silhouette. I’ve seen this look great on fair skin and deeper skin tones because white clouds create contrast without needing extra decoration. The key is blending the cloud edge so it looks airy, not like a sticker.
Skip thisAvoid a crisp white tip line — it turns into a chunky French and widens the nail visually.
Editor's noteUse less product than you think for the first cloud layer — you can always add, but you can’t un-blend.
8. Black Cherry BIAB with Tiny Red Dot Confetti
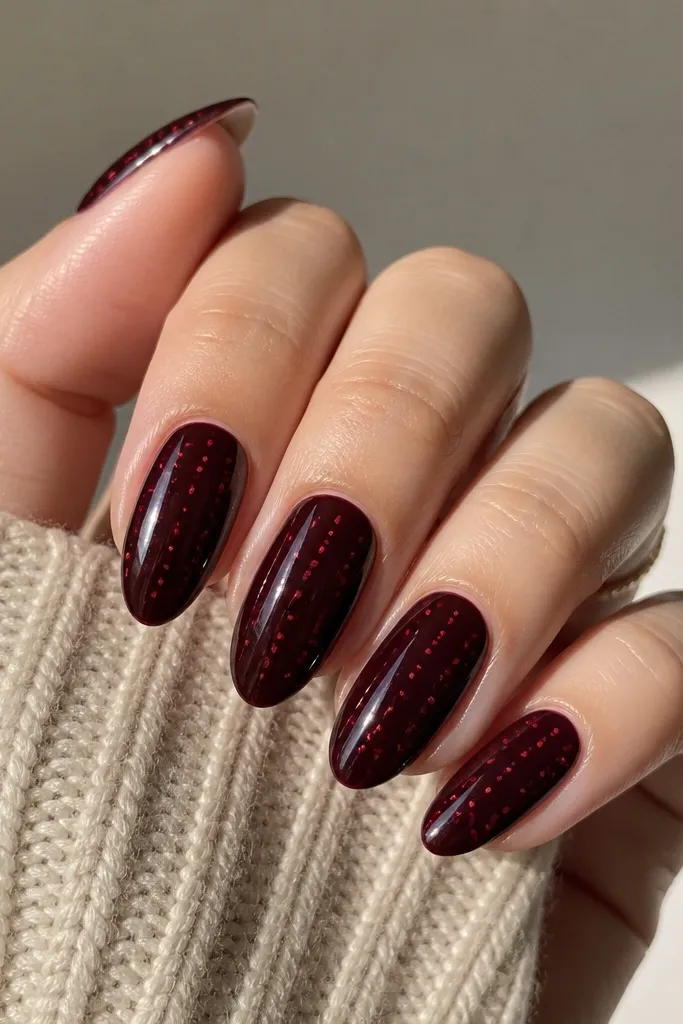
This set is flattering because the dots are tiny and spaced, so they don’t create a thick block of color. The base is black cherry — deep enough to look sleek, but still in the red family so it flatters most skin tones. I like placing dots on the center third and tapering toward the tip, because it keeps the sides clean and makes the almond look narrow. It also hides minor imperfections better than high-contrast designs.
Apply black cherry BIAB in two thin coats, curing each time, and cap the free edge. Use a dotting tool to place tiny red dots mixed with a clear gel so they sit slightly translucent. Plan the layout: start with 3-5 dots in the center third, then add 1-2 near the tip on each nail. Keep the dots away from the sidewalls by at least a dot’s width. Seal with top coat, and check under a lamp to make sure none of the dots are smeared before curing.
If your dots look too round and raised, use a thinner gel and cure for a slightly shorter time, then top coat again.
Avoid large dots — they make almond look like it’s wearing polka-dot tips.
9. Champagne Nude BIAB with Opal Chrome Halo
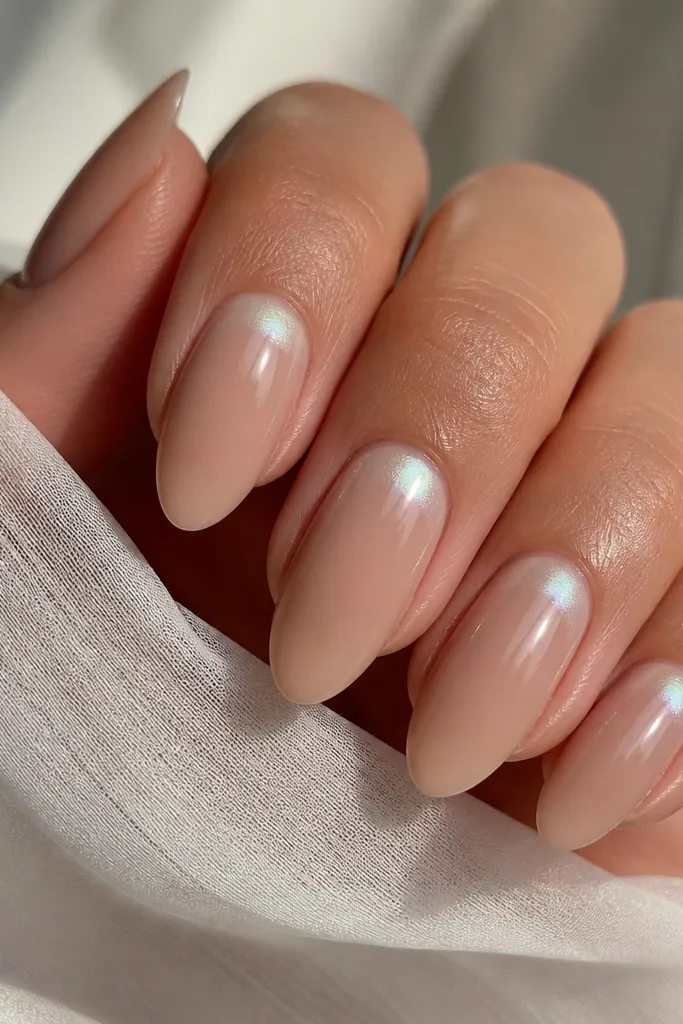
Start by applying a champagne nude BIAB base and curing, then keep the surface smooth with a gentle buff. Apply a thin layer of tacky gel around the cuticle area, staying within a 1-2 mm radius of the nail bed curve. Tap opal chrome powder lightly with a soft applicator, then brush away excess so it forms a soft ring. Add a second light pass only where you want more glow. Finish with top coat, but use a top that doesn’t kill the chrome effect too much — I stick to a glossy top designed for chrome overcoats.
Opal halos are flattering because they brighten the cuticle area without adding width. The champagne nude base gives warmth, while the chrome mist ring creates a “lifted” look that makes nails look healthier and longer. This works especially well if your natural nails have a bit of discoloration near the cuticle, because the halo draws attention upward. The halo stays light, so it doesn’t overpower the almond shape.
Skip thisSkip full chrome coverage — it can make almond nails look thicker than they are.
Editor's notePractice the halo radius on one nail first — 1 mm too wide changes the whole look.
10. Teal Glass BIAB with Silver Foil Flake Corners
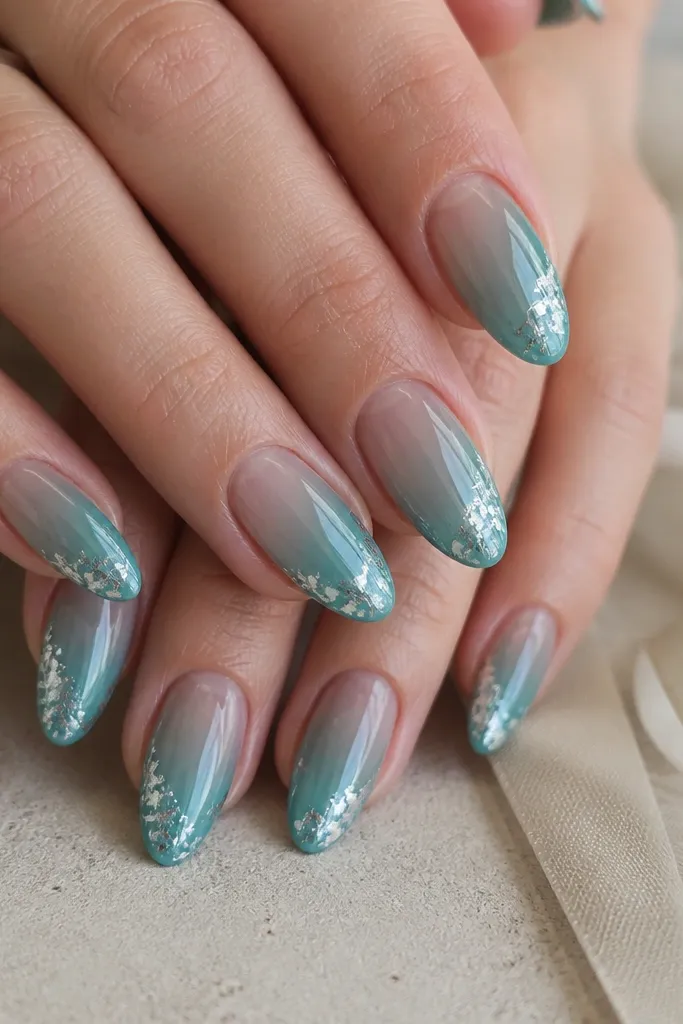
Apply teal glass BIAB in thin layers so the nail stays translucent, and cure each layer. Use a small brush to place thick clear gel only at the outer corner zones near the tip, leaving the center third untouched. Press silver foil flakes onto those gel spots, then tap off excess so flakes don’t spread. Add a second thin clear gel layer over the foil to anchor it, then cure. Finish with a glossy top coat that smooths over the foil edges.
Glass teal with corner foil is one of my favorite ways to get sparkle without bulk. The teal base is see-through enough that the almond still reads as a smooth silhouette. Foil flakes in just the outer corners add a crisp highlight that makes the sides look sharper, which is flattering. I’ve used this for clients who want something fun but still clean for work.
Skip thisAvoid scattering flakes across the whole nail — it turns into a bulky glitter sheet.
Editor's noteKeep foil flakes smaller than a grain of rice — big flakes make the almond look lumpy.
11. Rose Quartz BIAB with Clear Swirl Lines
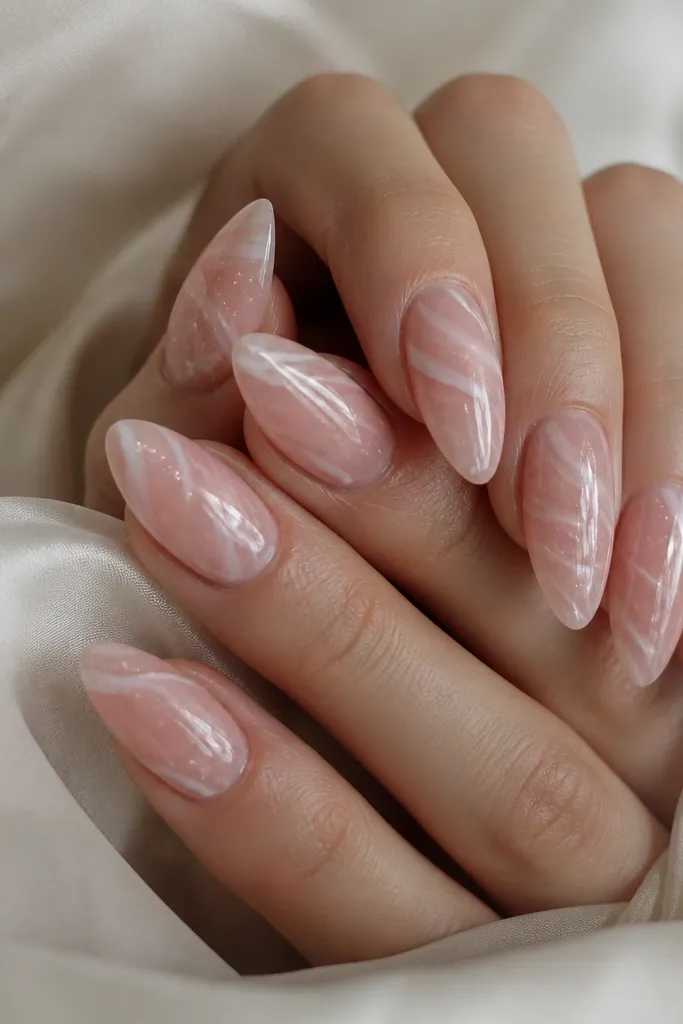
Rose quartz marbling is flattering because it stays soft around the edges, so almond tips don’t look harsh. The clear swirl lines give movement and a “real stone” vibe without heavy pigment. I like this on medium and deep skin tones because the rose stays milky instead of turning neon. If you’re someone who hates stark contrast, this design hits that sweet spot.
Start with a semi-translucent rose quartz BIAB base and cure, using two thin layers for depth. Mix a clear gel with a tiny amount of shimmer if you want the stone effect, then draw thin swirl lines with a fine liner brush. Keep the swirls mostly in the center third and let them taper as they approach the tip. Cure, then add a thin top gel to smooth the surface over the swirls. Finish with glossy top coat for that wet-stone look.
If your swirls look too thick, drag the brush lightly with less gel — the clear lines should look like glass, not frosting.
Skip opaque pink marbling — it looks flat and widens the almond.
12. Peachy Nude BIAB with Thin Copper Side Stripes
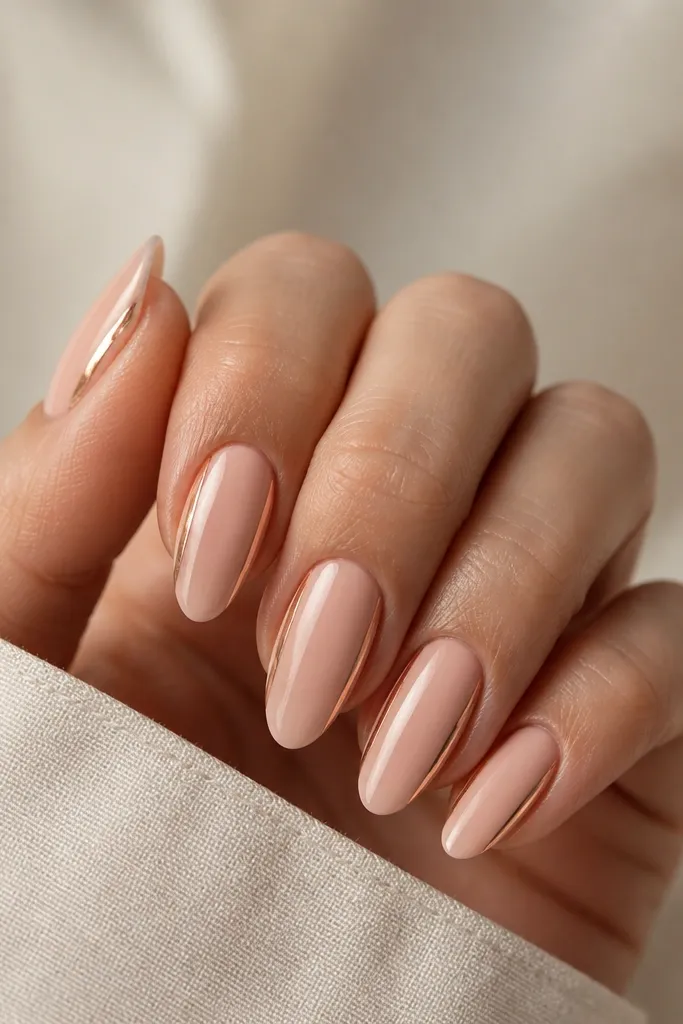
Apply peachy nude BIAB in two thin layers and cure. Use striping tape or a steady hand to mark two lines near each outer edge, keeping them about 1-2 mm away from the sidewall. Paint copper metallic gel down the lines, then remove tape carefully after curing or before top coat depending on your method. Keep the stripes short — stop them a few millimeters before the very tip so the nail still looks long. Seal with glossy top coat, then cap the edges to keep the stripes from lifting.
Copper side stripes are flattering because they create a vertical line effect while keeping the center clean. The peachy nude base warms up the look and makes your nails look like they match your skin, which is the biggest compliment I hear with almond sets. On almond shapes, thin stripes near the outer edges look like a slimming contour. I’ve done this for people with wider nail beds, and it visually narrows them without needing a darker base.
Skip thisAvoid thick stripes — they read like borders and make almond nails look wider.
Editor's noteIf you freehand the lines, rest your pinky on the finger next to it so your wrist doesn’t float.
13. White BIAB with Latte Speckle and Almond Tip Center Dot
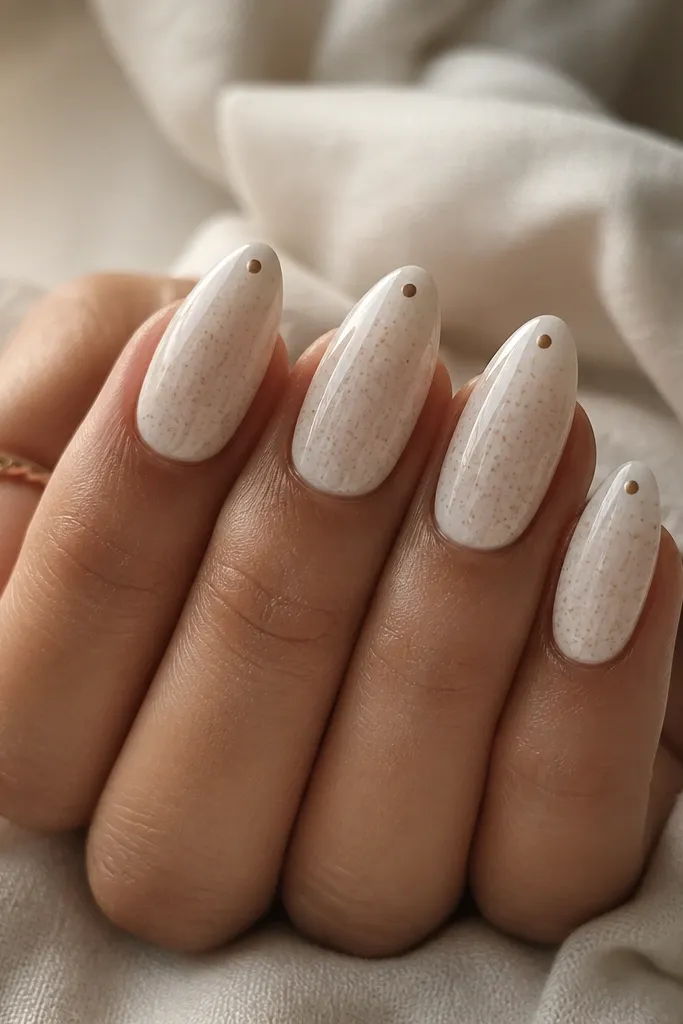
This design is flattering because the speckles are small and uneven, which avoids the “block of pattern” problem. The creamy white base brightens the nail and makes the almond shape look clean, while the latte speckle adds warmth so it doesn’t look stark. The single center dot near the tip gives a focal point that makes the nail look longer. I like it for spring and summer because it still feels fresh without turning into plain French.
Start with a creamy white BIAB base and cure, then add a second thin coat for full coverage. Use a stiff toothbrush or speckle brush to flick latte-brown pigment across the center third, keeping density lighter near the cuticle. Add one small center dot near the tip using a dotting tool, then cure. Use a fine brush to tidy any specks that wander too close to the sidewalls. Finish with glossy top coat so the speckles look embedded, not sitting on top.
Test the speckle density on a practice nail — one extra flick can make it look messy on almond.
Skip big splatters — they turn the almond tip into a wide visual blob.
14. Lavender Smoke BIAB with Translucent Grey Gradient Tips
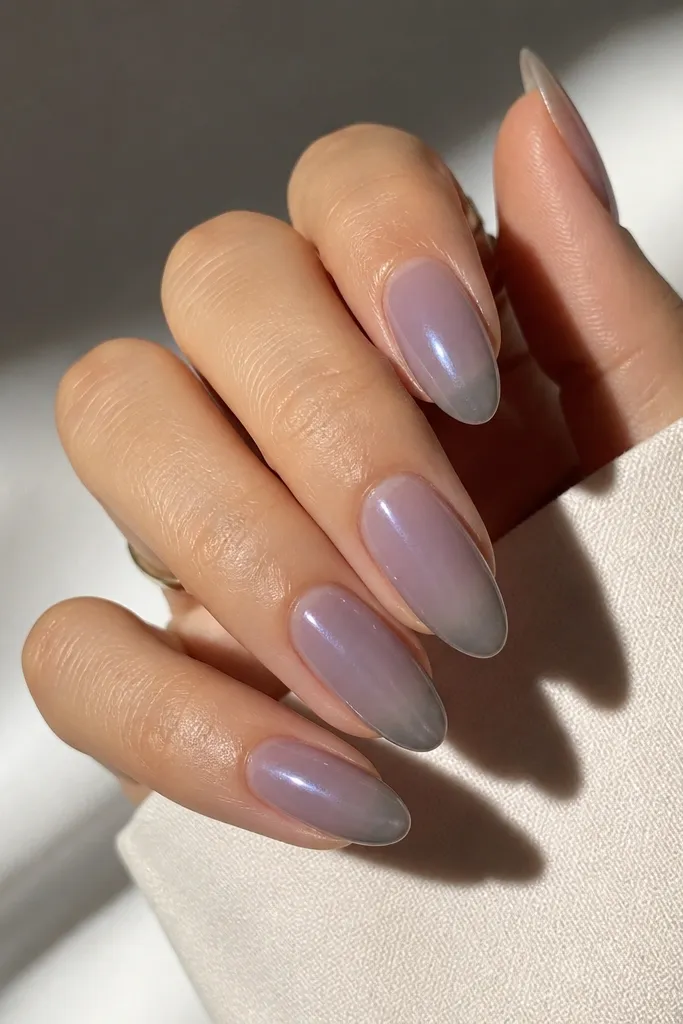
Apply lavender smoke BIAB in two thin layers, keeping it sheer enough that the nail still looks glassy. Cure and then lightly buff only if you have texture, then wipe dust. Blend translucent grey at the tip starting about 1/3 up from the tip, keeping it lighter in the middle and slightly darker toward the outer edges. Use a sponge for a smoky fade, then smooth the blend with a brush that has a tiny bit of slip gel. Top coat with a glossy finish in two thin layers if the gradient needs extra leveling.
Lavender smoke is flattering because it’s light at the cuticle and airy at the edges, which makes almond look refined. The translucent grey gradient at the tips adds depth without making the nail look heavy like full dark tips. This combo flatters people who love color but don’t want bright brights, and it also works on different skin undertones because the grey cools the lavender. I’ve worn this to events where I needed something photo-friendly but not loud.
Skip thisAvoid opaque grey tips — they make the almond look shorter and thicker.
Editor's noteIf the grey turns patchy, add more slip and blend from the center outward — don’t keep layering in the same spot.
15. Clear Jelly BIAB with Red Jelly Heart at the Cuticle Apex
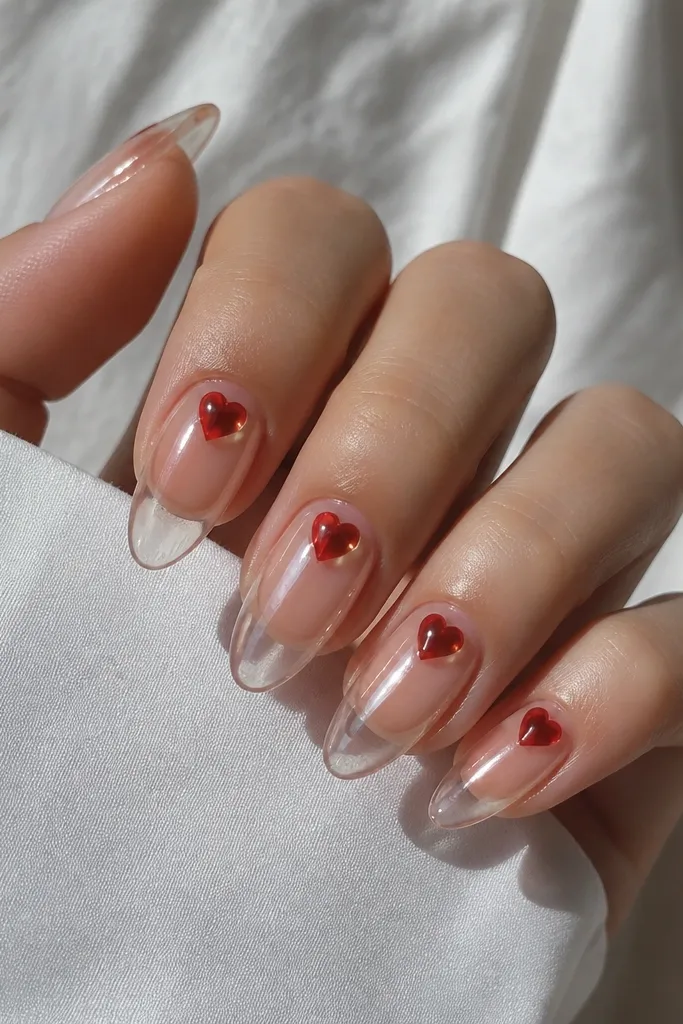
Build your almond shape with clear jelly BIAB and cure, then cap the free edge lightly. Add a thin layer of clear top gel to make a smooth surface for the heart detail. Create a small red jelly heart using a gel in a heart stamp or freehand with a dotting tool and liner brush, placing it centered about 2-3 mm below the cuticle line. Cure and then add one more thin clear gel layer over the heart to embed it. Finish with glossy top coat to lock everything in and keep it looking glassy.
A clear jelly base is the most flattering option when you want your nails to look clean and lengthened. The nail bed stays bright because there’s no heavy pigment near the cuticle, and that makes almond tips look longer. The tiny red jelly heart at the cuticle apex gives a sweet focal point without spreading color across the sides. I recommend this for shorter nail beds because the art sits high and keeps the visual weight near the base.
Skip thisAvoid painting the heart too close to the sidewalls — it will pull the nail outward visually.
Editor's noteMake the heart smaller than you think — on almond, a big heart reads like a sticker and widens the look.