
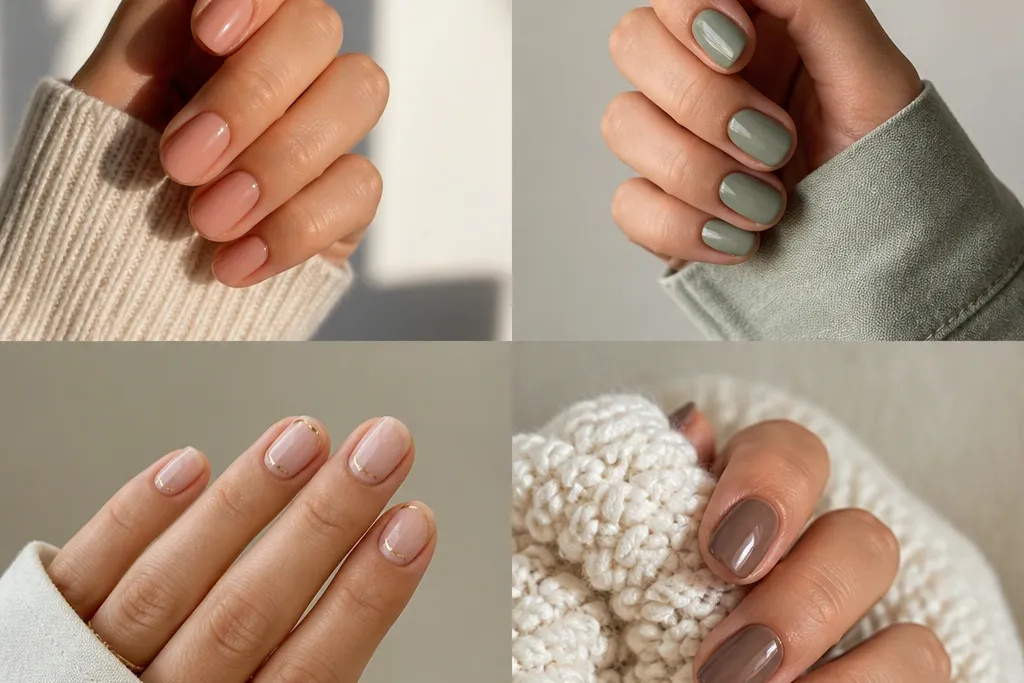

1. Milky Nude with a Thin Champagne Arc
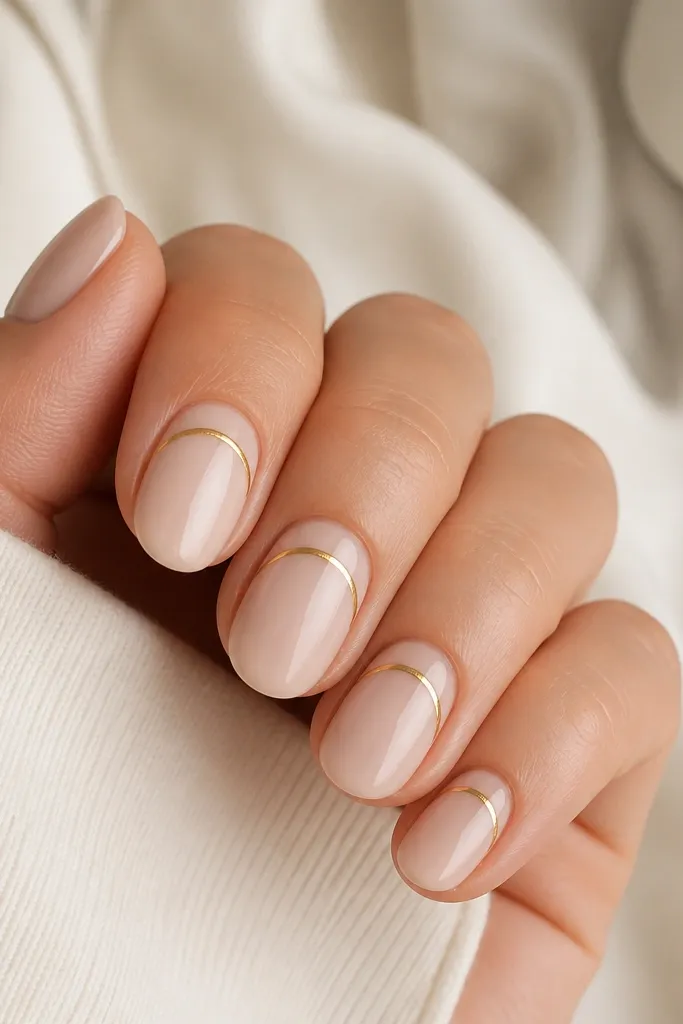
Start by painting two thin coats of milky nude, then let it dry fully. Use striping tape or a steady freehand with a 000 brush to draw a thin arc across the middle of the nail, leaving a small gap above the arc from the cuticle. If you’re using tape, place it first, press the edges down, paint champagne-gold polish over it, then peel the tape while the polish is still slightly tacky. Finish with one glossy top coat so the arc looks smooth and glassy. Keep the arc centered on each nail so your short ovals keep their symmetry.
This design is the one I reach for when I want “pretty” without the risk of clutter. The milky nude base is a sheer pink-beige that lets your nail bed show through, so the nail looks longer and smoother. The champagne arc is thin and bright enough to catch light, but it stays narrow so short oval proportions stay balanced. I’ve worn this on cool-toned and warm-toned skin and it always looks clean, especially with gold jewelry. It’s also a great pick for work because it reads like a nail shape detail, not a theme.
Skip thisDon’t place the arc too close to the cuticle — it makes short nails look shorter.
Editor's noteIf your arc looks too thick, redo it with a thinner brush instead of trying to cover it. A clean line beats a perfect line every time.
2. French Fade with Blush Tips
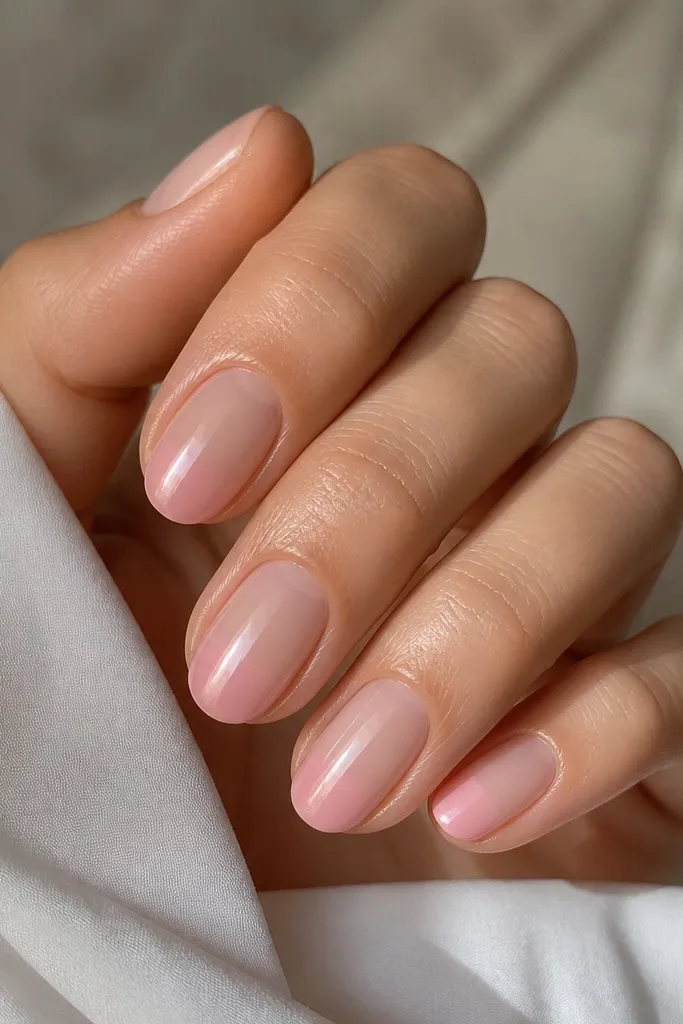
Paint two coats of sheer nude and let them dry. Load a sponge or makeup wedge with blush pink polish and dab it lightly starting about 1/3 up from the tip, then blend toward the free edge. Use a clean brush dipped in acetone to sharpen the sides of the nail if the sponge spreads too far. Add one more very light blush coat only where the fade needs more color, then seal with glossy top coat. Keep the blush area narrower than the nail width so the tips don’t look blocky.
A French fade is my favorite “short oval” trick because it visually stretches the nail without adding length. The key is that the tip color starts higher than you think and fades downward, so the eye reads one smooth shape. Blush pink is flattering on almost every skin tone and looks especially good with warm gold rings and beige outfits. This design also hides minor brush strokes because the fade blends them in. It feels feminine without looking like a themed manicure.
Skip thisSkip the straight white French line — hard edges make short ovals look chopped.
Editor's noteFor a softer fade, use a slightly sheer polish or water the blush tint just a touch. It should look like a whisper, not a solid paint edge.
3. Olive Micro-Check Accent on Clear Base
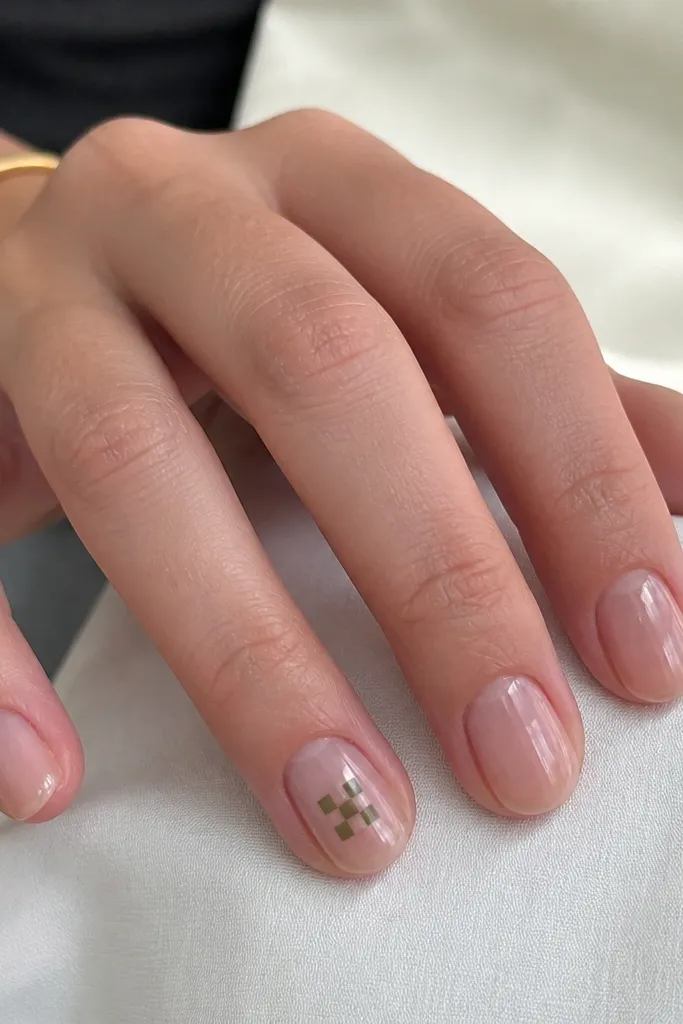
Start with a clear jelly polish in two thin coats so it looks see-through but even. Pick one accent nail, usually the ring finger, and place a small grid about the size of a pea in the middle of the nail. Use a dotting tool or toothpick to add olive micro-squares — make them 3 to 4 rows by 2 to 3 columns, keeping the grid centered. Add a second layer of tiny squares only if the first one looks streaky, then top coat over the whole nail. If you want it sharper, outline the grid lightly with a dark olive gel liner.
This one is for when you want something modern but still easy to wear. A clear jelly base gives you the same “healthy nail” look, while the micro-check pattern adds detail without taking over the whole nail. Olive reads cool and earthy, which makes skin tones look brighter, especially if you wear neutrals or denim. Because the pattern is small and centered, the short oval shape stays crisp. It’s also beginner-friendly compared to big nail art because you only need to place tiny squares accurately.
Skip thisDon’t put the check pattern too close to the sidewalls — it will look messy on short ovals.
Editor's noteUse a reference photo on your phone and count squares as you paint. That counting keeps your grid from drifting.
4. Iced Lavender Half-Moon
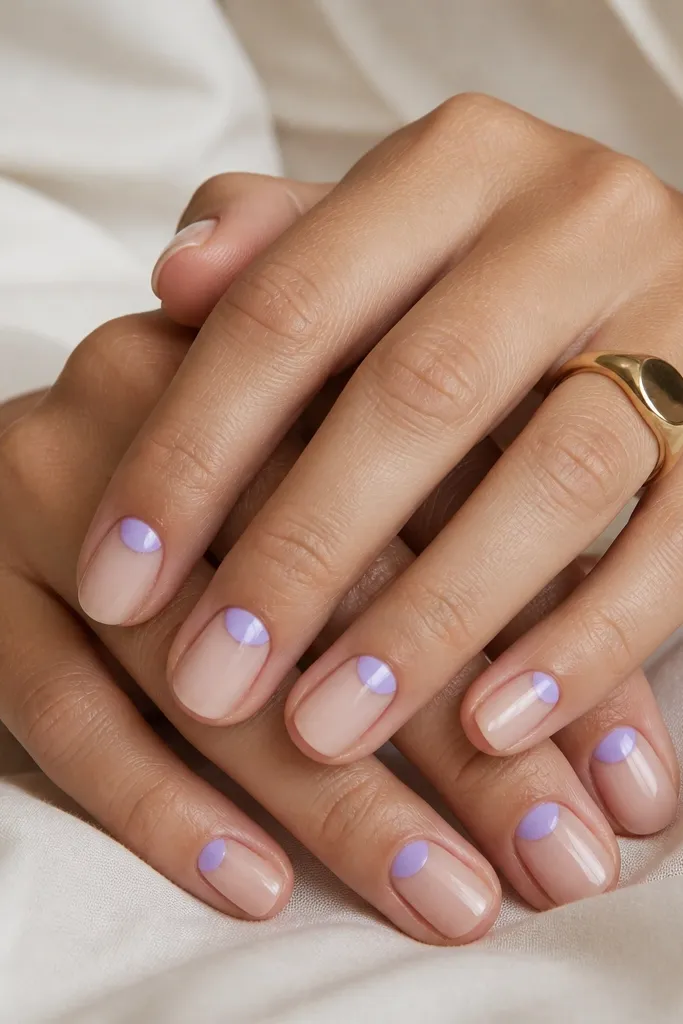
Paint two coats of sheer nude and let them dry until tack-free. Place a half-moon sticker or use a small curved stencil at the cuticle area, centered on the nail. Paint iced lavender over the stencil, then remove the sticker while the polish is still slightly tacky for a clean edge. If you’re freehanding, use a 000 brush and paint the curve first, then fill in carefully. Finish with glossy top coat, and cap the tip lightly so it wears evenly.
Half-moons are a fast way to make short nails look intentional. Iced lavender at the cuticle area frames your nail bed and draws attention to the shape, not the length. The sheer nude base keeps it light and wearable, while the cool lilac tone makes hands look fresh. This works great if you have slightly wider nail beds because the half-moon creates a defined center. It’s also forgiving: even if your line isn’t perfect, the cuticle placement hides small unevenness.
Skip thisDon’t make the half-moon too big — a giant cuticle shape can overpower short ovals.
Editor's noteIf your half-moon bleeds, wipe the brush with acetone and clean the edge immediately before it dries.
5. Charcoal Pinstripe with Nude Base
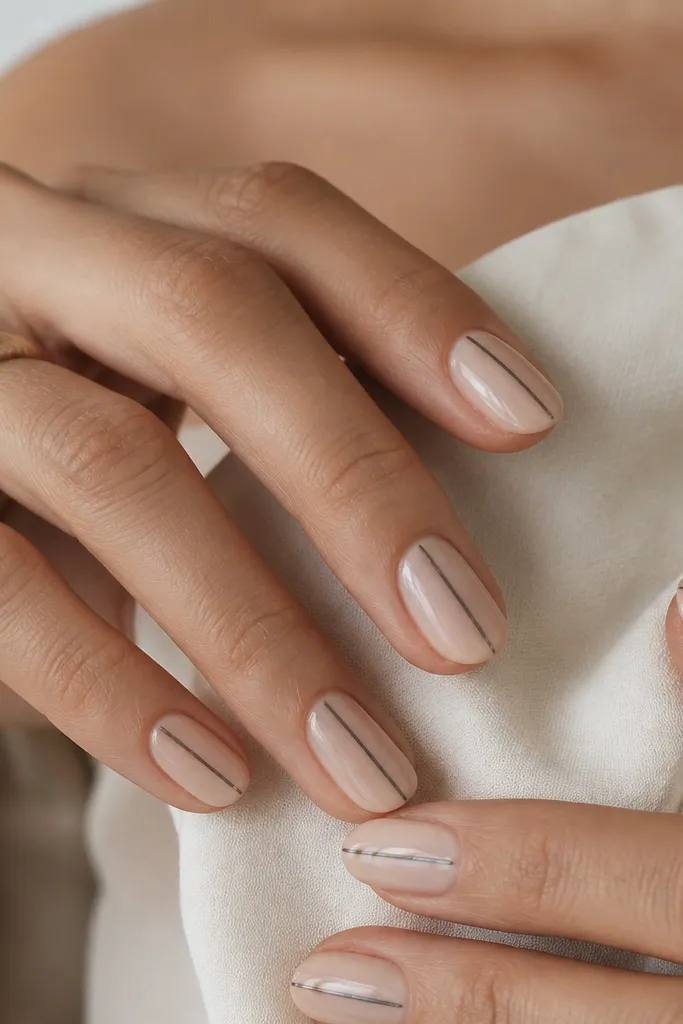
Apply two coats of nude polish that matches your skin tone in warmth, then let it dry. Use a striping brush or nail vinyl strip to place a thin charcoal line down the center; keep it under 1 mm. Press the vinyl firmly if you’re using it, then paint charcoal over it and remove the vinyl after a few minutes. If you’re freehanding, use a guide dot at the cuticle and at the tip so your line stays straight. Seal with a glossy top coat that covers the line edges so it feels smooth.
Vertical pinstripes make short oval nails look longer because the eye tracks from cuticle to tip. Charcoal is the secret here: it’s dark without being harsh like black, and it looks modern with everything. The nude base should be sheer enough that it blends with your nail bed, not a thick opaque beige. This set flatters medium to deep skin tones because the contrast is crisp and clean. I also love it for people who dislike glitter — this is sharp, not sparkly.
Skip thisSkip chunky stripes — thick lines make short ovals look stubby.
Editor's noteCap the stripe with top coat by dragging the brush from cuticle to tip once. It smooths tiny ridges.
6. Terracotta Marble Swipe (One Accent Nail)
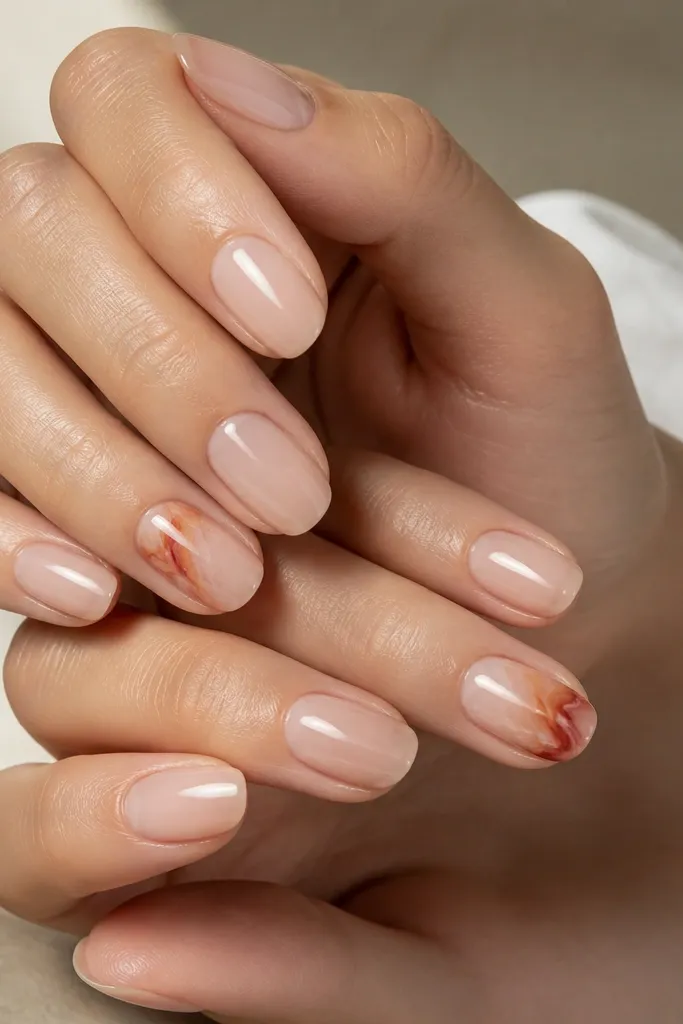
Paint all nails with milky nude in two coats. On the accent nail, sponge a very light base of milky white or pale beige, then drag a thin brush loaded with terracotta polish in soft, diagonal swipes. Add a few smaller streaks with burnt orange and a tiny touch of brown near the center to mimic veining. Use a clean brush to blur edges lightly while the polish is still workable. Finish with glossy top coat, and drag the brush over the accent until it looks uniformly smooth.
Marble looks expensive because your brain reads it as texture, not a flat color. Terracotta and burnt orange are warm and flattering, especially on hands with cool or neutral undertones since the warmth balances your skin. Keeping marble on one or two nails is how you keep the set wearable and not busy. The base matters: a milky nude makes the marble look like it’s “inside” the nail rather than sitting on top. This is my go-to for weekends because it looks artsy even when the nail length is short.
Skip thisDon’t cover the whole nail in thick swirls — dense marble can look muddy on short ovals.
Editor's noteIf your marble looks too bold, add a thin milky layer over it after it dries. It mutes the contrast fast.
7. Teal Jelly Glow with One Star Dot
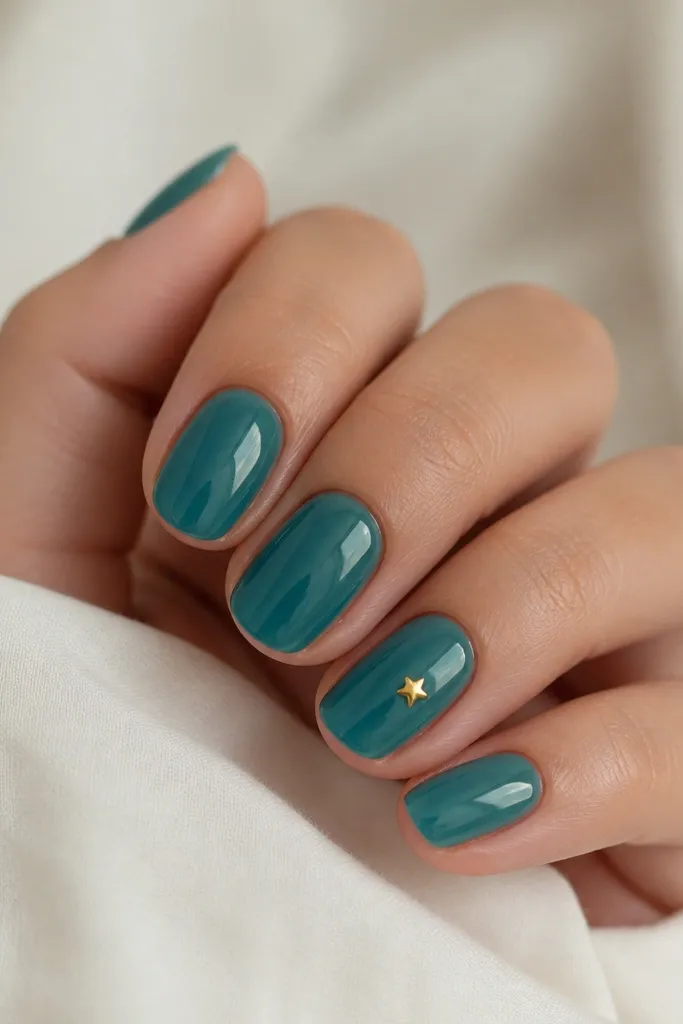
Jelly polish is the easiest way to make a budget manicure look like it has depth. Teal jelly looks stunning because it’s translucent, so it shifts with the light and makes your nails look juicy. The single gold star keeps it playful without turning it into a full-on theme manicure. I’ve worn this with both silver and gold jewelry; teal still looks good either way, but gold looks warmer and more “cozy.” This design is also great for short oval nails because the transparency avoids that heavy, blocky look.
Apply teal jelly polish in two thin coats, letting each coat settle so it doesn’t flood the cuticle. On the ring finger, place a tiny gold star dot using a nail charm or a star-shaped stamp. If you’re painting the star, use a toothpick to dot the center first, then add four points with a 000 brush. Keep the star centered and small — about the width of your pinky nail’s top ridge, not bigger. Finish with glossy top coat, and cap the free edge so it stays smooth.
For the jelly look, avoid thick coats. Thin coats build that glow without streaks.
Don’t add multiple stars — the set turns busy fast on short ovals.
8. Black Lace Outline with Sheer Pink Base
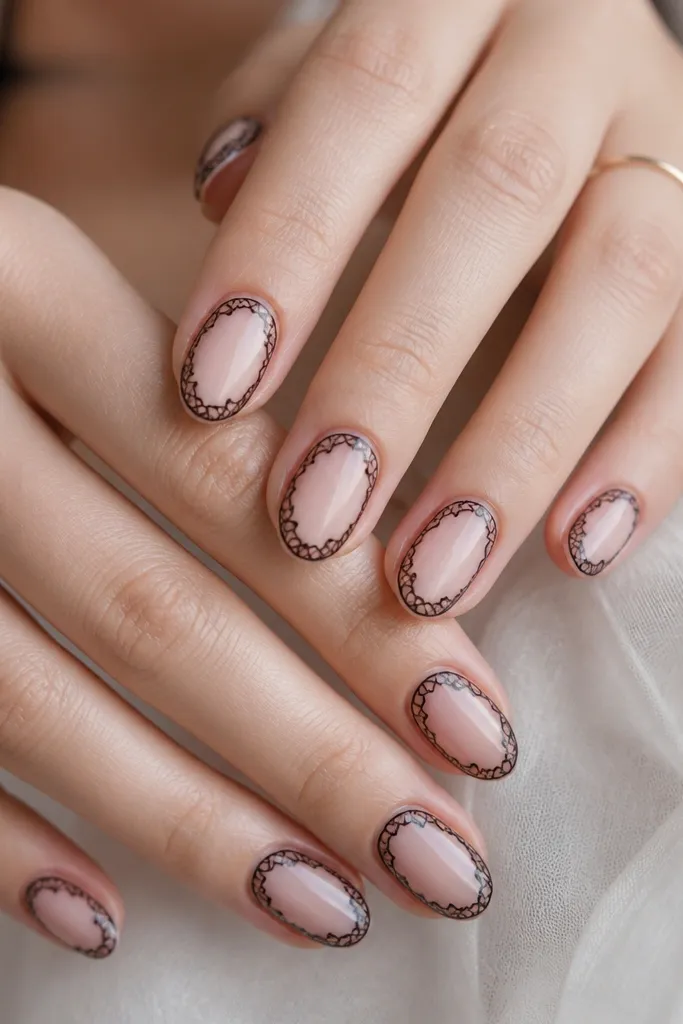
Lace outline nails look delicate, but they don’t have to be hard. A sheer pink base keeps it romantic, while a thin black outline gives the “lace” effect without filling the nail with heavy pigment. This works especially well if you want something goth-leaning but still wearable for daytime. The outline also helps short oval nails look more defined, because it frames the shape rather than expanding it. I’ve done this for events where I needed the manicure to look good in low light, and the glossy top coat makes the black line pop.
Paint a sheer pink polish in two coats and make sure it’s even near the cuticle. Use a lace nail stamping plate or lace vinyl if you have one; if not, use a fine black liner brush to draw a curved border that follows the sides and tip. Leave the center mostly clear so the lace reads as an outline, not a full pattern. Add tiny connecting loops near the top and bottom edges to mimic lace texture. Seal with a glossy top coat, and clean the border edges with a flat brush and acetone after the top coat sets slightly.
If you’re freehanding, start with three points: left side, right side, and tip center. Connect them slowly for a steady outline.
Don’t fill the whole nail with black lace — it makes short ovals feel heavy.
9. Creamy Nude with Gold Foil Corner
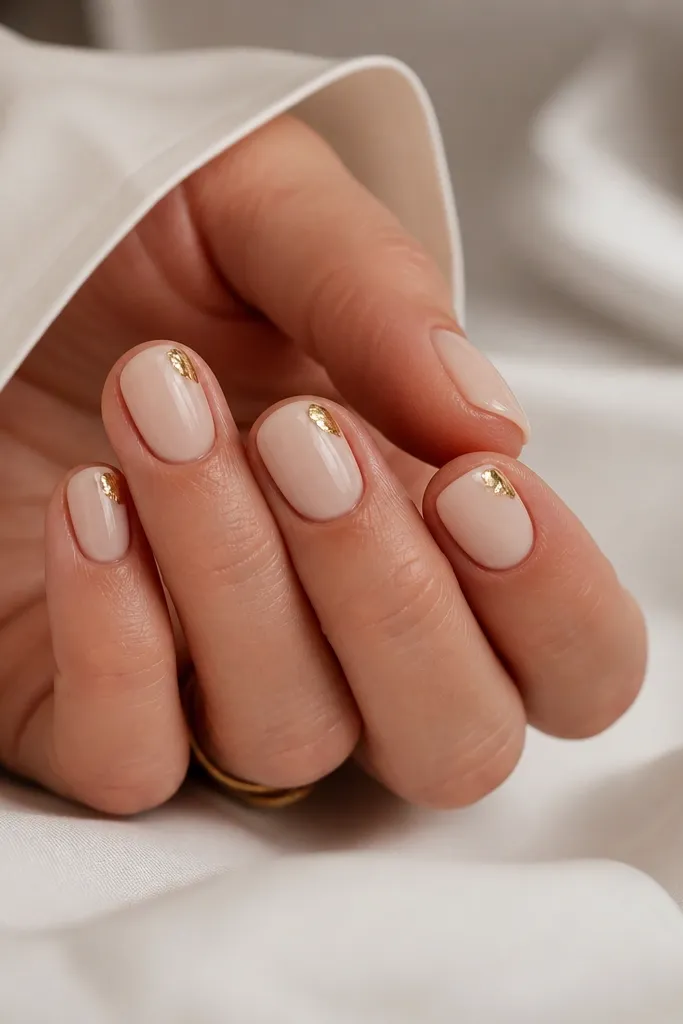
Foil corners look expensive because they create a sharp focal point with minimal effort. A creamy nude base keeps the nail soft, while gold foil at the corner adds light where it counts — near the cuticle, which is where the eye starts. This design flatters nearly everyone because nude is neutral and the foil is bright without being neon. It also looks good on short oval nails because the foil is small and angled, which makes the nail look slightly more elongated. I like it for spring and summer, but I’ve worn it in winter too with sweaters and it still works.
Start with a creamy nude polish and paint two coats, keeping it smooth at the cuticle. Apply a small amount of foil adhesive or gel tack near the top outer corner — the corner closest to your ring finger side of the nail. Press gold foil into the tack area using a small makeup sponge or foil applicator, then tap off the excess. For a cleaner edge, trim the foil with a small brush dipped in acetone after it’s set. Finish with glossy top coat, but be gentle around the foil so it doesn’t lift.
Use foil pieces that are already small. Big sheets make the corner look like a sticker instead of a foil detail.
Don’t place foil in the exact center — corner placement is what keeps the look elegant on short ovals.
10. Sage Green Dot Cluster on Nude
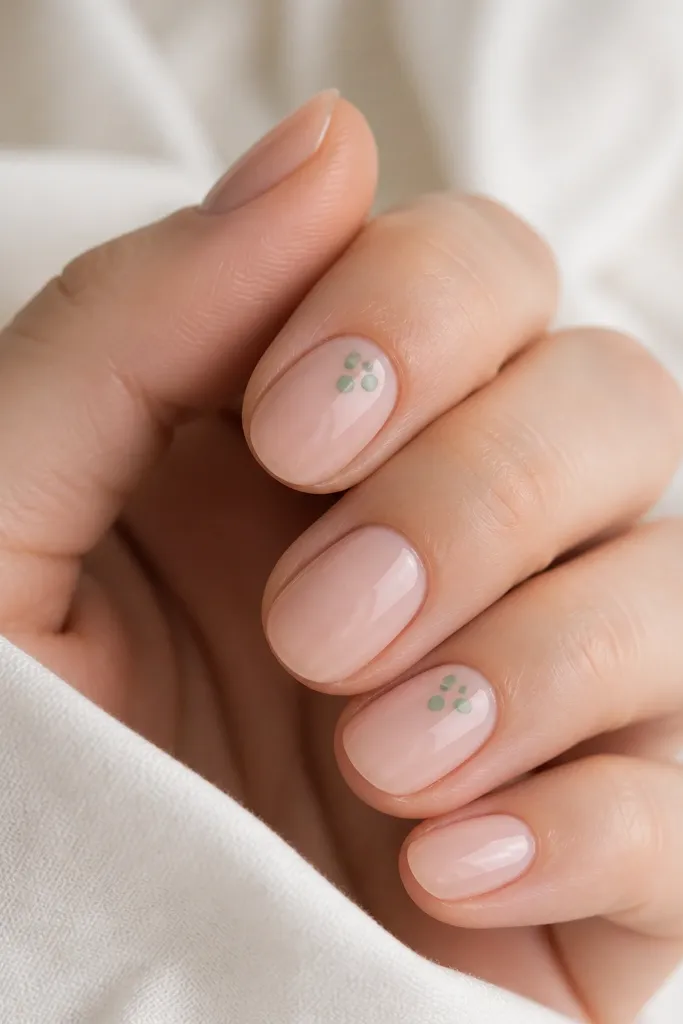
Paint all nails with nude base polish in two coats. Pick one or two accent nails and place a dot cluster near the cuticle, leaving a small gap from the skin line. Use a dotting tool to add 6-9 sage green dots in a loose triangle arrangement — larger dots at the center, smaller ones toward the sides. Clean up any stray dots with a cotton swab dipped in acetone before they dry fully. Seal with glossy top coat, and make sure the dots feel smooth under the brush so they don’t catch on fabric.
Dot clusters are the easiest nail art that still looks hand-done. Sage green is soft and flattering, and the dots create a gentle texture that doesn’t overwhelm short nails. Keeping the cluster near the cuticle makes the nail look fuller at the top, which balances the taper of an oval shape. This design looks great with both casual outfits and office basics because it’s colorful but not loud. If you’re worried about nail art looking childish, sage dots feel mature and calm.
Skip thisDon’t spread the dots across the whole nail — it shrinks the nail visually on short ovals.
Editor's noteIf dots look uneven, reload the dotting tool and let each dot sit for a second before lifting. That pause makes perfect circles.



