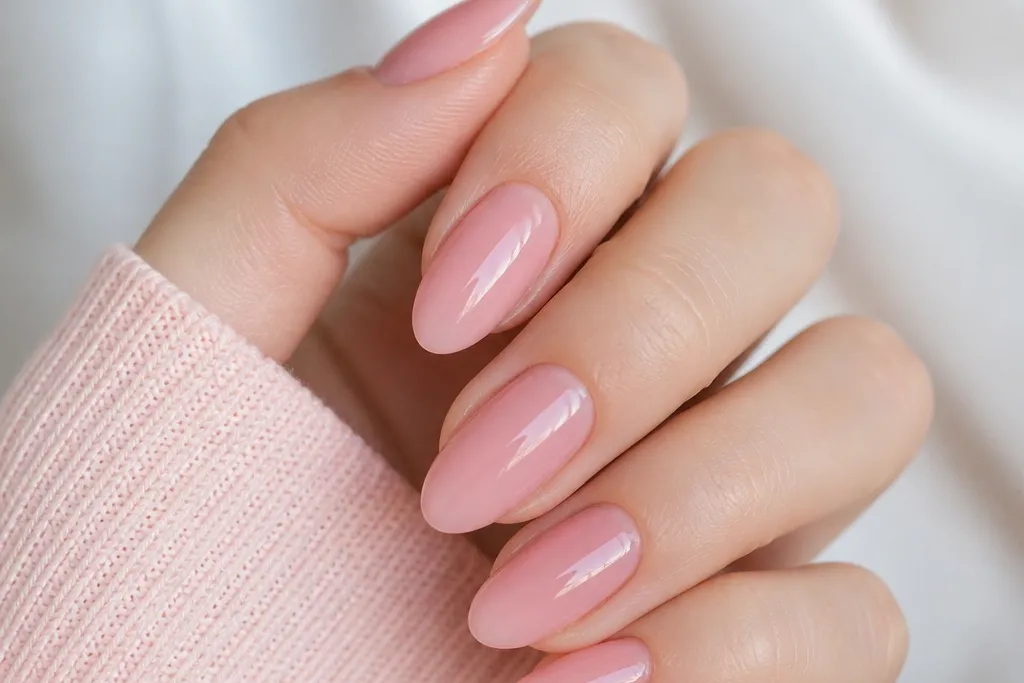

1. Ballet Pink Cream with Micro-Glaze Shine
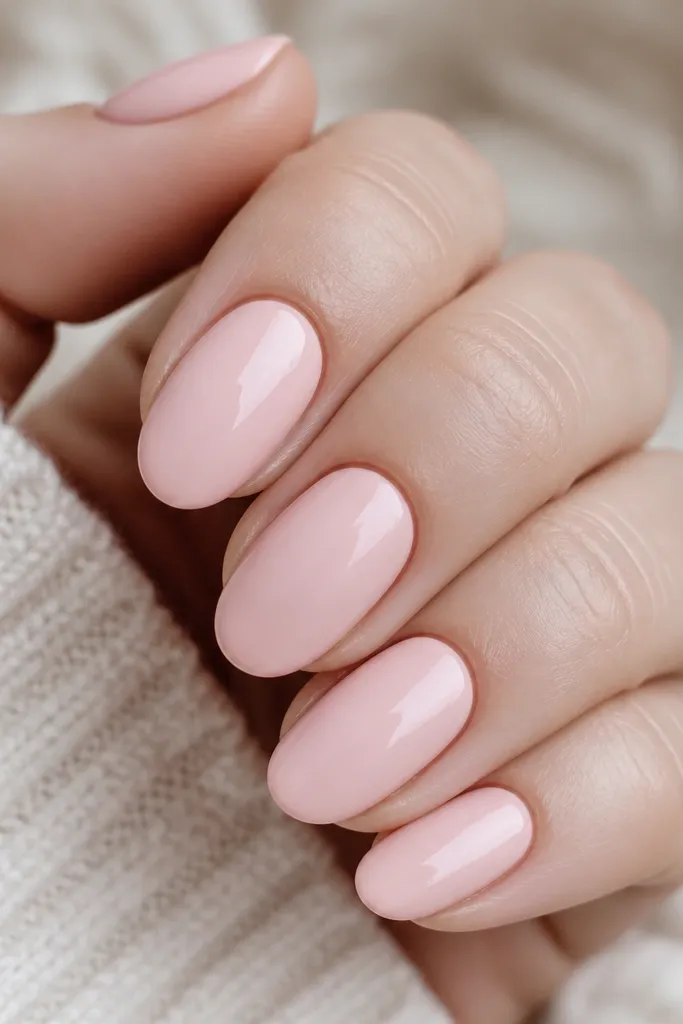
This is the set I reach for when I want easy pink almond nails for beginners that still look expensive. The shade is a true ballet pink — pale enough to brighten your hands but opaque enough to hide staining. I love it on light to medium skin tones because it makes the nail bed look longer. On deeper skin tones, the same cream pink still works, but I pick one with a touch more pigment so it doesn’t wash out. Finish matters too: a slightly “glazed” gloss gives that healthy nail look without looking thick.
Start with a thin base coat and cure fully if you’re using gel. Apply the ballet pink in two coats, keeping each coat narrow at the sidewalls so you don’t flood the cuticle. Use a flat brush and pull the color from the center to the right and left edges with one smooth pass per side. If you see streaks, don’t add a thick third coat — do a very thin second top-up only where it’s patchy. Finish with a high-gloss top coat, then cap the free edge with a tiny swipe of top coat.
Editor's noteAfter curing, wipe with a lint-free pad and a gel cleanser so the surface stays crisp and reflective.
Skip thisSkipping a sidewall cleanup at the end makes the set look bulky and messy.
2. Blush Pink French Tips on Almond
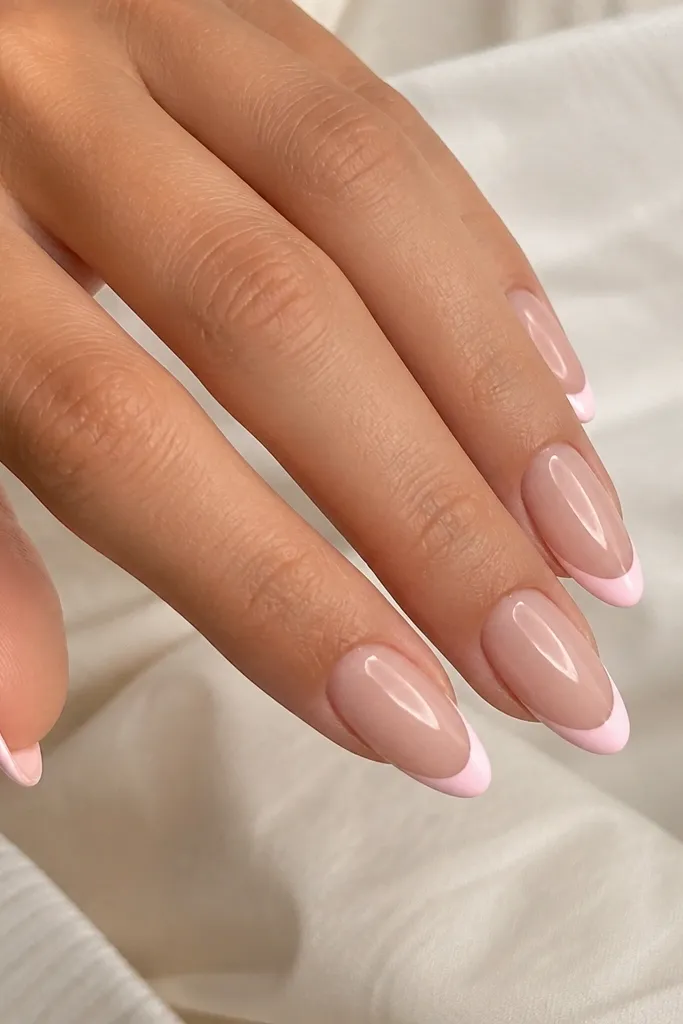
This French is softer than a white tip, so it flatters basically every hand. I use a nude-pink base that matches your skin depth, then paint the tip in blush pink so it looks like a natural highlight. It’s especially flattering if your nail beds look short because the thin tip line visually lifts the length. The almond shape makes the French curve look intentional, not rounded off. For workdays and weddings, this design always looks polished without being loud.
Paint your base nude-pink in two thin coats, curing between coats. For the French, use either a guide strip or a thin striping brush — I prefer a striping brush because you can control the curve. Place the tip line about 1/8 inch from the end and draw a smooth arc from one sidewall to the other. Fill the tip area with blush pink, keeping the center slightly thicker than the edges. Top coat everything and cap the free edge for chip resistance.
Hold your hand under a lamp while you paint the smile line — the light makes uneven curves obvious instantly.
Painting the tip too wide makes almond nails look stubby.
3. Pink Jelly Almonds with Clear Halo Tips
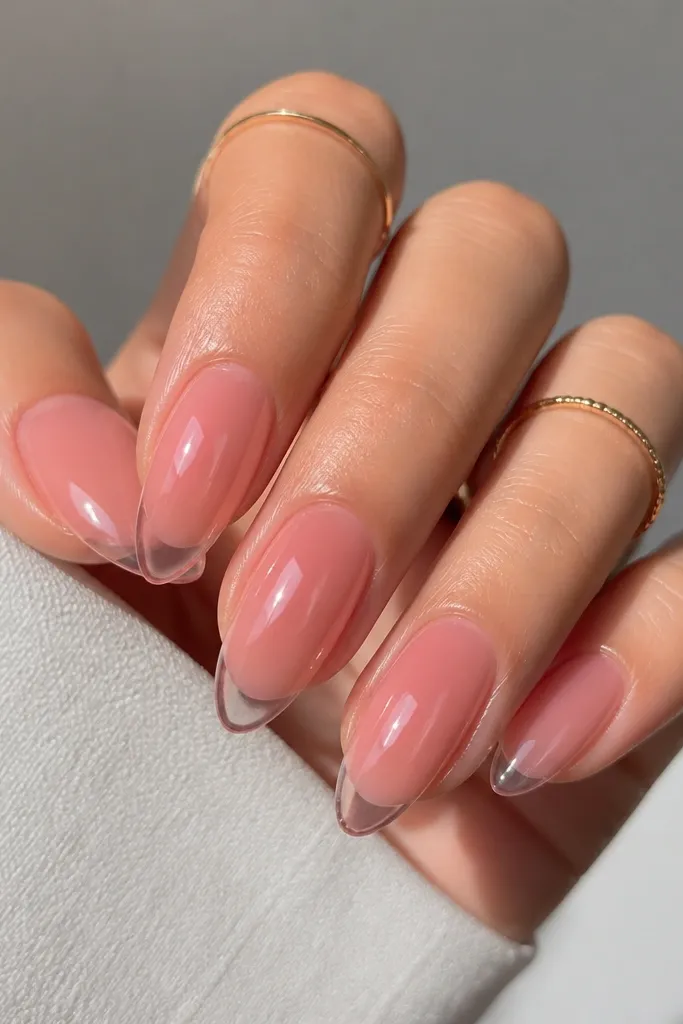
Jelly pink is the easiest way to make your nails look “naturally pretty” because it blends with your nail bed. The halo tip effect makes the almond tip look longer without adding bulk. I like this set on medium and deeper skin tones because the translucency creates depth instead of looking chalky. On fair skin, it still works, but you want the jelly pink to be slightly warm so it doesn’t look icy. This design also hides minor ridges because the jelly finish smooths visually.
Start with a clear base or builder gel for strength, then apply one thin layer of pink jelly. For the halo, keep a tiny gap at the very tip — about the width of a match head — and leave it clear or use a sheer nude. Add a second jelly coat to build color in the middle, still avoiding that tiny halo area. Cure well, then top coat generously to level the surface. If you get bubbles, pop them with a clean needle before curing.
Editor's noteIf your jelly is too sheer, layer two thin coats instead of one thick coat — thick gel cures unevenly.
Skip thisFilling the entire tip with opaque pink kills the halo and makes the almond look shorter.
4. Nude-Rose Ombré Fade into Pink Almond Tips
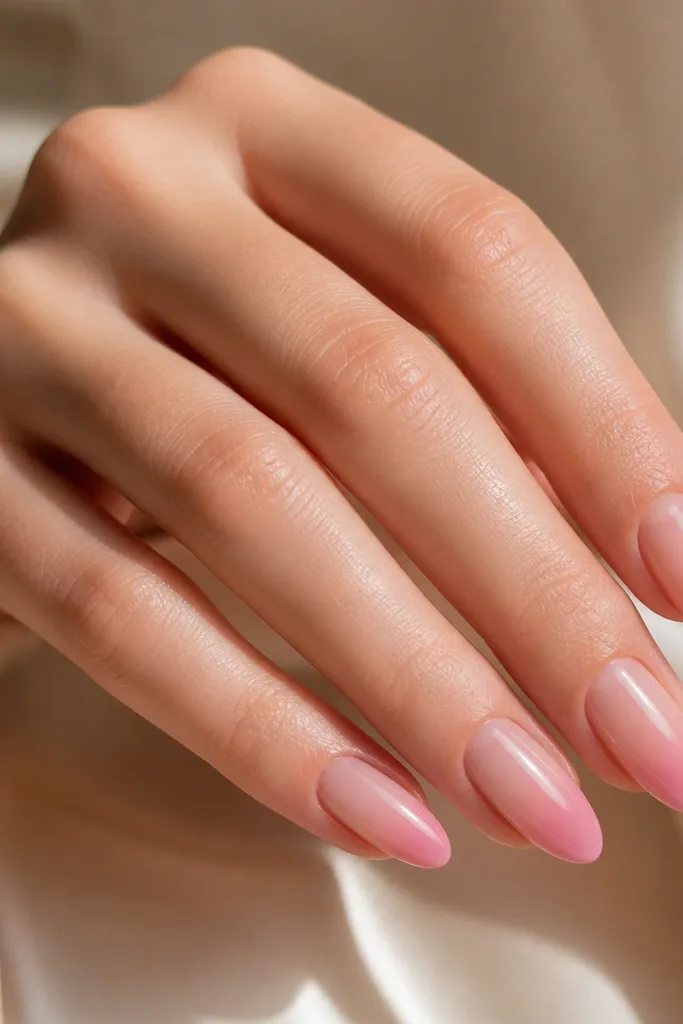
Ombré is forgiving because the fade hides small application mistakes. I do this with a nude-rose at the cuticle and a richer pink at the tip, so your nails look like they’re naturally blushing. This flatters hands that have visible nail lines because the gradient draws attention upward. It also looks great on short almond nails because the fade creates a longer vertical line. The key is smooth blending — when it’s blended, it looks intentional, not like a smudge.
After base coat, sponge a nude-rose near the cuticle using a makeup sponge cut into a small wedge. Tap off excess on a paper towel, then lightly sponge the center upward — leave the bottom more sheer. Next, apply a stronger pink to the tip area and sponge just the edge where the color meets the nude-rose. Use a thin brush to clean up the sidewalls after blending. Top coat with two thin layers if your sponge finish looks slightly textured.
Practice the fade on one nail first — once you see how your sponge spreads, you’ll match the rest quickly.
Going too dark at the cuticle makes the set look top-heavy.
5. One-Line Pink Cuticle Detail
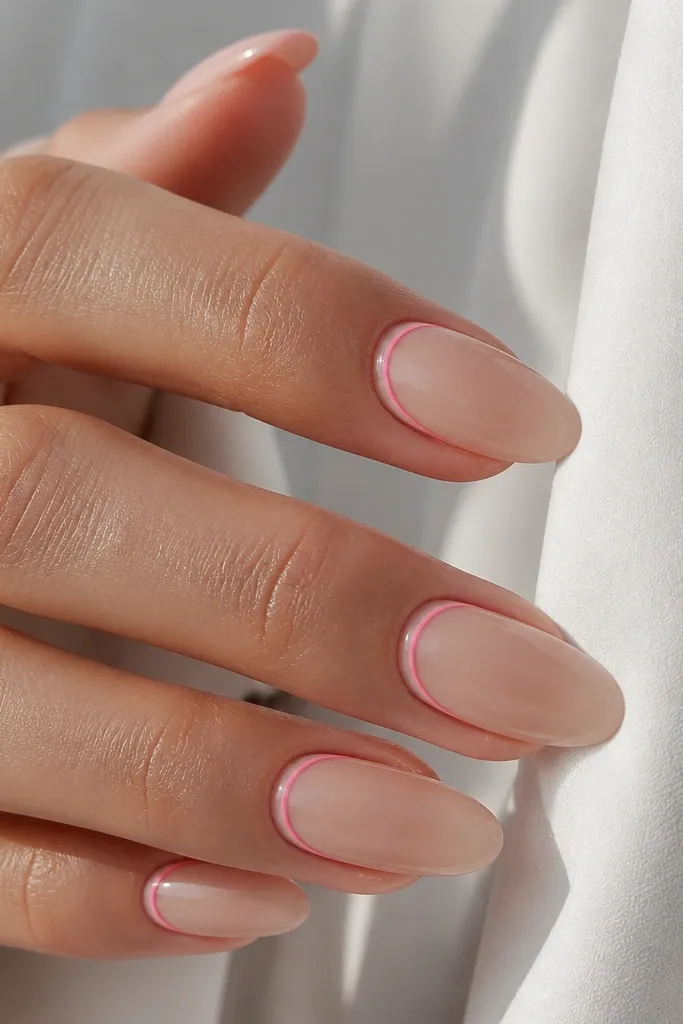
This is my go-to “I did my nails but I didn’t overthink it” design. A thin cuticle line gives that lifted, tidy look even if your cuticle area isn’t perfect yet. I use a sheer nude base so the line stands out, then draw a single hot-pink or fuchsia line that follows the natural cuticle curve. It looks great on all skin tones because the nude base adjusts, while the pink line adds contrast. For photos, it makes your hands look longer because the eye tracks along the nail bed.
Paint a sheer nude-pink base in two thin coats. Use a striping brush to draw a thin line starting at one sidewall, curving along the cuticle, and ending at the other sidewall. Keep the line thickness like a hair — if it’s wider, it will look cartoonish. Fill nothing else; just let the line sit on top of the nude base. Seal with top coat, and cap the line edges with a careful pass so it doesn’t catch on hair or clothing.
Editor's noteIf your brush drags, wipe it once on the bottle lip so you get a crisp, thin stroke.
Skip thisPainting the line too close to the skin makes it look messy and can lift at the cuticle.
6. Pink Almonds with Tiny White Dot Constellations
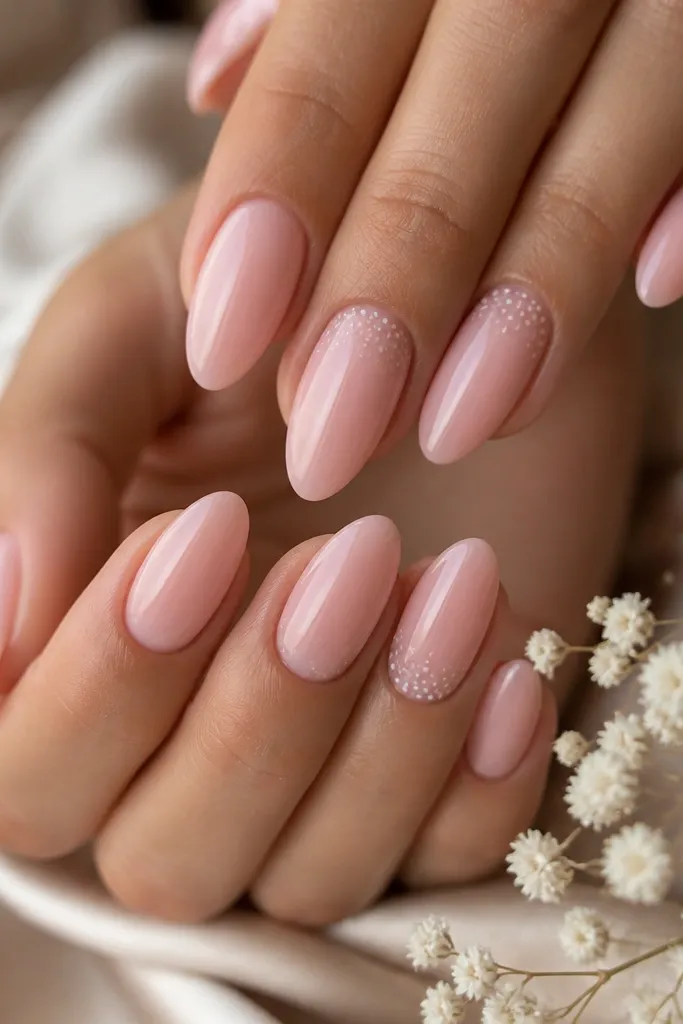
Dots are the fastest way to make pink almond nails look playful without looking childish. I use a creamy baby pink base, then add 3 to 6 tiny white dots on one or two nails only. The dot cluster near the cuticle makes the nail bed look fuller and gives a “designed” look. This set flatters hands with short almond nails because dots create a visual focal point. It also looks cute with silver jewelry and everyday outfits.
Apply your baby pink base in two thin coats and cure fully. Dip a dotting tool (or a toothpick with the tip trimmed) into white gel or polish and dab three to six dots near the cuticle — not across the middle. Leave small gaps between dots so they look like separate stars. After placing dots, cure again if using gel. Finish with top coat and cap around the dot edges so the design doesn’t snag.
Editor's noteUse a smaller dotting tip than you think — tiny dots look chic; big dots look sticker-like.
Skip thisPutting dots on every nail makes it look busy fast.
7. Glossy Pink Almonds with Thin Silver Side Stripes
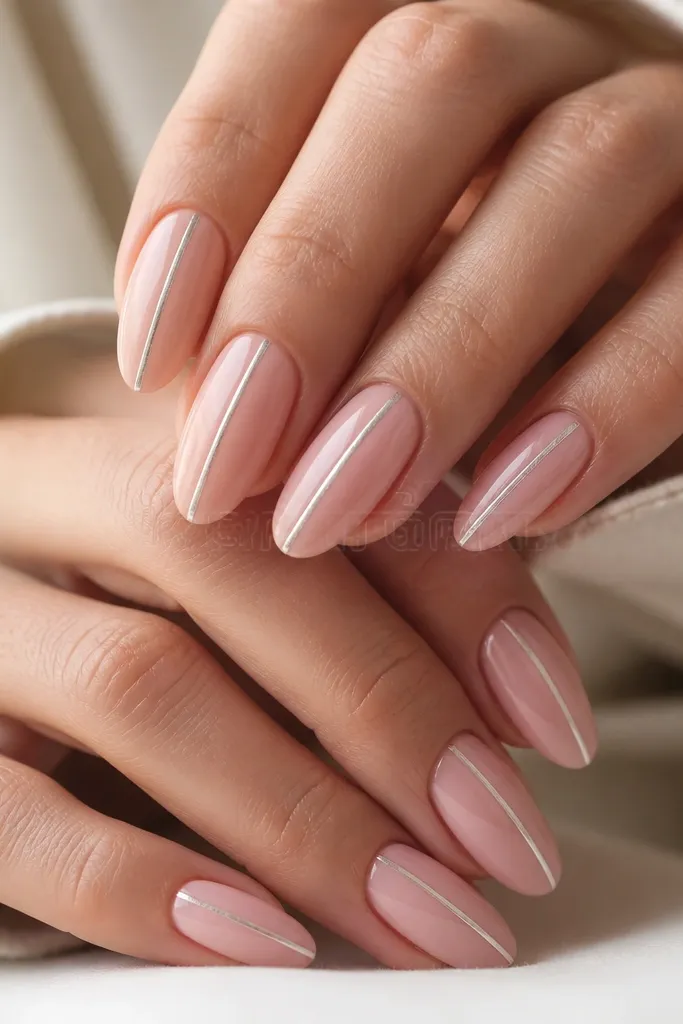
A single metallic stripe makes your pink look sharper and more “intentional” without adding thick art. I like silver here because it cools down the pink and makes it look fresh, not warm and dusty. This design flatters most nail lengths, but it’s especially good on medium almond because the stripe guides the eye down the taper. If you wear silver rings or a watch, it matches instantly. For beginners, the trick is using a striping tape or a super-thin brush so the stripe stays straight.
Paint two coats of glossy pink — I use a satin-to-gloss gel so it levels well. Place a striping tape strip down the nail center, then remove it halfway if you want a slightly imperfect “hand-drawn” look. If you’re painting instead, use a thin striping brush and draw one steady line from near the cuticle to the tip. Cure, then remove tape immediately if it’s tacky. Apply top coat carefully over the stripe so it blends into the surface.
Editor's noteIf your stripe wobbles, fix it with a tiny brush dipped in cleanser before curing.
Skip thisSkipping top coat over metallic lines can leave texture that catches on fabric.
8. Hot Pink Accent Tip with Sheer Nude Base
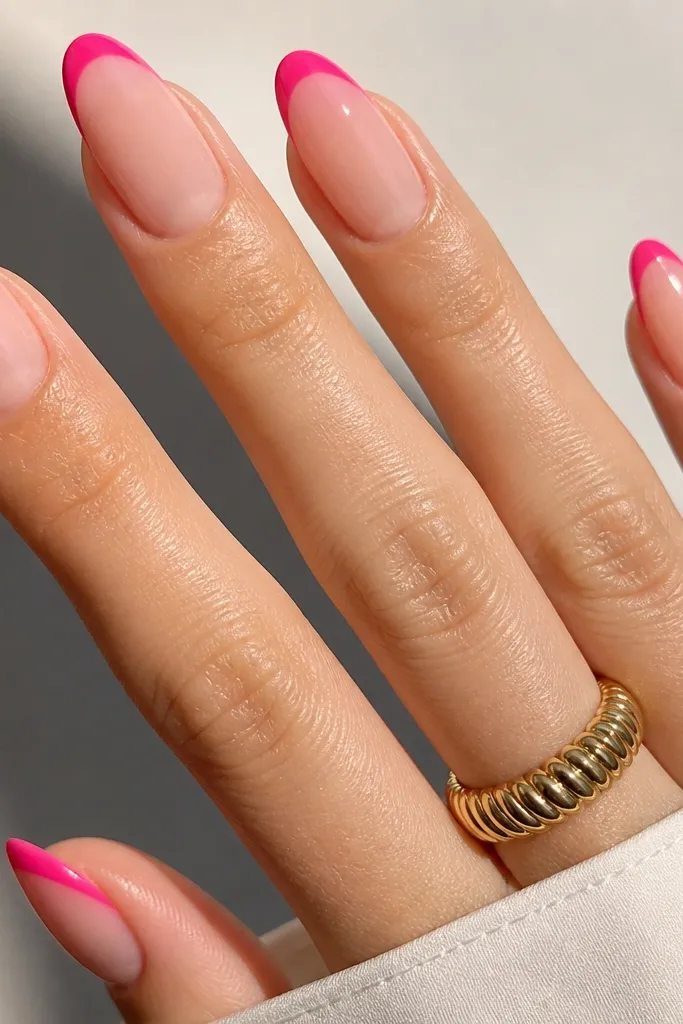
This set looks bold but it’s actually simple because the design is only on the tip. The sheer nude base keeps it flattering and beginner-friendly, while the hot pink band gives that punchy feminine look. I use a narrow band so the almond taper still reads clearly. It flatters short almond nails because the accent is only at the very end — it doesn’t swallow the nail. If you like pink but don’t want full pink coverage, this is the compromise I wear constantly.
Start with a sheer nude base in two thin coats. For the accent, paint a hot-pink strip that sits right at the edge, about 1 to 2 millimeters tall. Use a striping brush and keep the band straight across — then slightly taper it at the sides to match the almond shape. Let it cure, then top coat twice so the band blends smoothly and doesn’t chip at the edge.
Choose a hot pink that is slightly creamy, not neon — neon can look harsh on camera.
Making the accent band too tall turns it into a chunky French.
9. Dusty Rose Marble Swirls on Two Nails
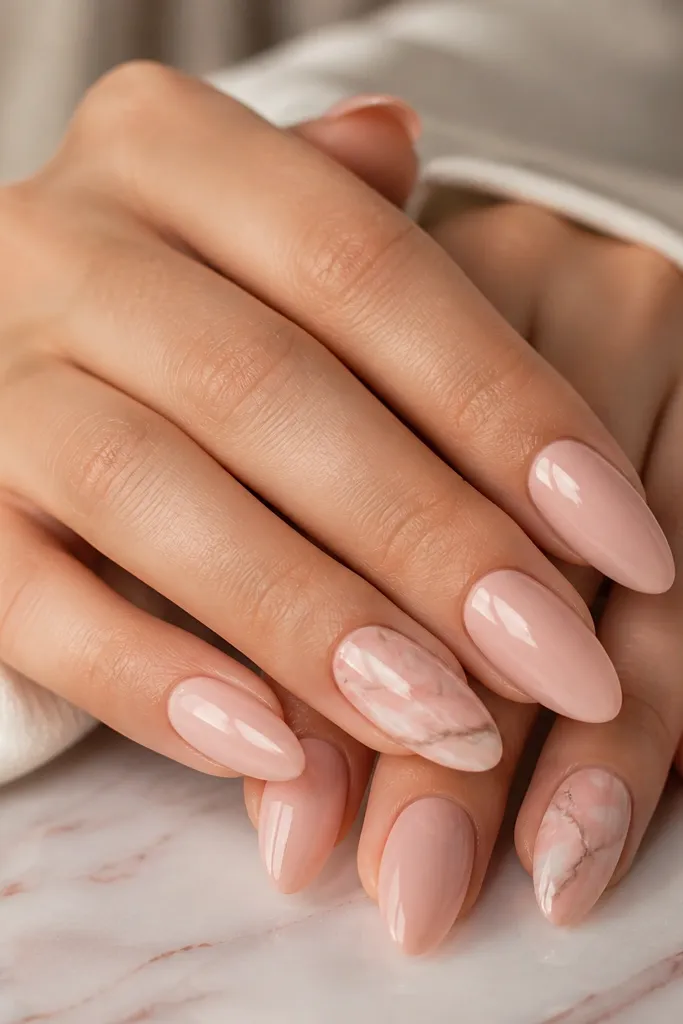
Marble sounds hard, but you can do a beginner version by placing swirls only on two nails and using thin lines. I use dusty rose and pale pink, then add a soft gray-rose line so it looks like stone instead of random scribbles. This set is flattering because most nails are solid and calm, while the marble nails give interest. It looks great on hands with warm undertones because dusty rose reads natural. For events, it looks “styled” without needing heavy rhinestones.
Paint all nails with a nude-pink base in two coats. On two accent nails, add a thin layer of pale pink, then drag dusty rose polish lightly through it with a thin toothpick. Create 2 to 3 swirls per nail, keeping the lines thin and letting some base peek through. Add a tiny touch of gray-rose on the swirls and drag once more to blend. Top coat over everything, and cap the marble edges carefully.
Do the swirls quickly — if the layer dries too much, the drag lines won’t spread smoothly.
Marbling on every nail makes it look messy and hard to read.
10. Pink Almond Nails with Diagonal Blush Ribbon
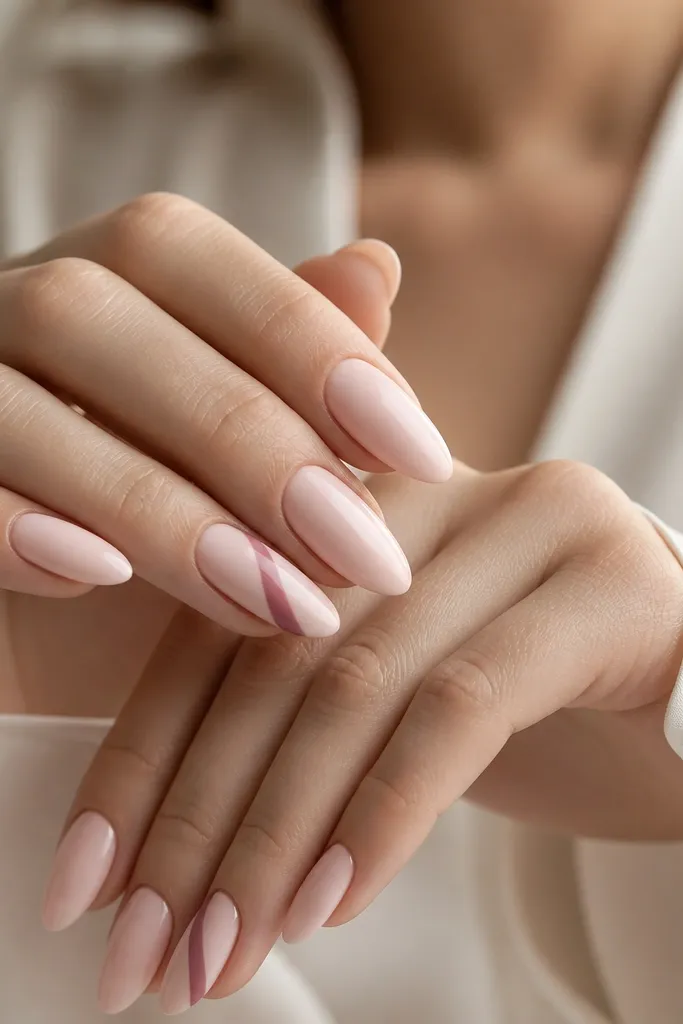
A diagonal ribbon is a clean way to add design without tiny details. I use a sheer blush base and then a slightly deeper pink ribbon that runs diagonally, which makes the nail look longer and slimmer. This is great if you want a chic manicure that doesn’t look like stickers. It flatters hands with wider nail beds because the diagonal line visually narrows the shape. Pair it with gold jewelry if your undertone is warm.
Apply a sheer blush base in two thin coats. On two accent nails, place a small strip of striping tape on a diagonal — start near the lower side of the cuticle and end near the upper tip. Paint over the exposed area with deeper pink, cure, then remove the tape while the gel is still tacky or right after curing depending on your system. Clean the edges with a brush dipped in cleanser. Finish with a glossy top coat to smooth the ribbon edges.
Editor's noteKeep the ribbon thickness around a third of the nail width — wider looks heavy on almond.
Skip thisLetting the ribbon touch the cuticle skin makes it look sloppy.
11. Pink Almonds with Tiny Heart Near the Cuticle
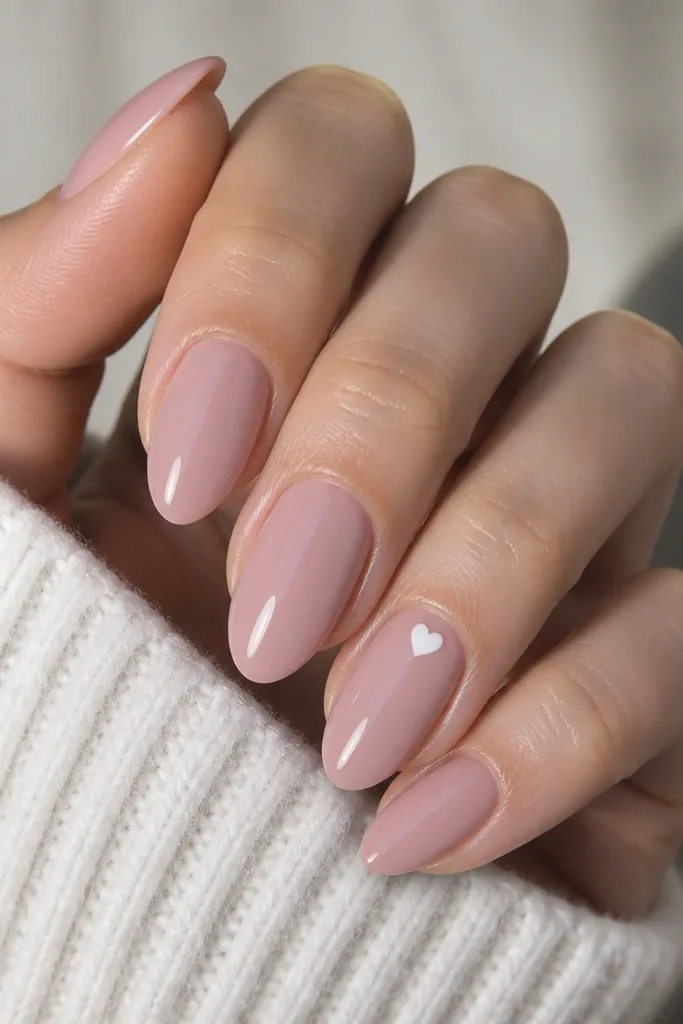
This is the romantic version that still feels wearable. The heart goes near the cuticle because it looks delicate and keeps the rest of the nail clean. I use a white heart on a creamy baby pink base, which reads sweet but not cartoonish. This style flatters short almond nails because the heart anchors the nail bed area and makes the shape look balanced. If you’re doing nails for a date or Valentine season, this one gets compliments fast.
Paint all nails with a creamy baby pink in two coats. Choose one accent nail per hand. Using a dotting tool, place two tiny dots close together, then drag the tip of a toothpick to connect them into a heart shape. Clean the heart edges with a tiny brush and cleanser. Cure and then apply top coat twice so the heart is sealed and doesn’t lift.
If your heart looks uneven, add a tiny dot on the “missing” side before curing and top coat over it.
Making the heart too big — tiny hearts look classy.
12. Pearlized Pink Almond Nails with One Gemline
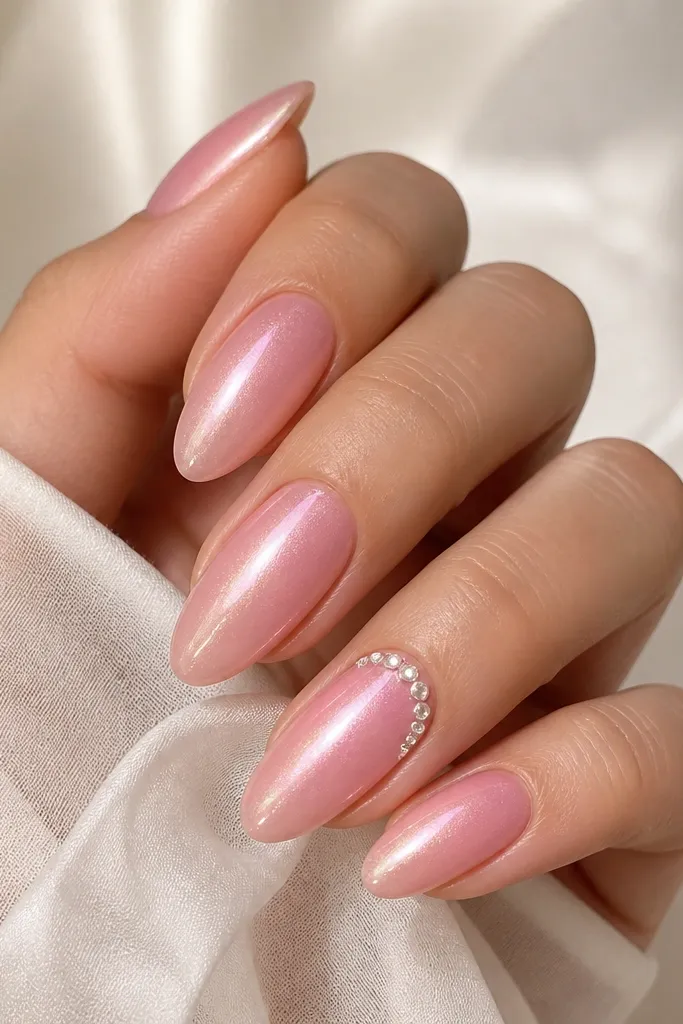
Pearlized pink looks fancy because the shimmer shifts as you move your hand, and it hides minor texture. I pair it with a single gemline so you get sparkle without turning the nails into a full rhinestone set. This works on fair, medium, and deep skin because pearl pink is soft and reflective, not harsh. The side placement is key — it frames the almond taper and looks modern. For weddings, holiday dinners, or photos, it reads feminine instantly.
Apply a pearlized pink gel in two thin coats and cure thoroughly. On one accent nail, pick a placement: either a short gemline along the cuticle curve or a line on one side. Use a dot of clear gel to “glue” 3 to 6 rhinestones, pressing each one lightly with tweezers. Keep the stones small — think 1.5 to 2mm — so they sit flat. Cure and then top coat carefully, using a thin brush to cover the stone edges without flooding the cuticle.
Editor's noteSeal rhinestones with top coat in two layers so they stay smooth and don’t snag.
Skip thisUsing big chunky stones — they make beginners' placements look uneven.
13. Soft Pink Almonds with White Lace-Like Tips (Stencil)
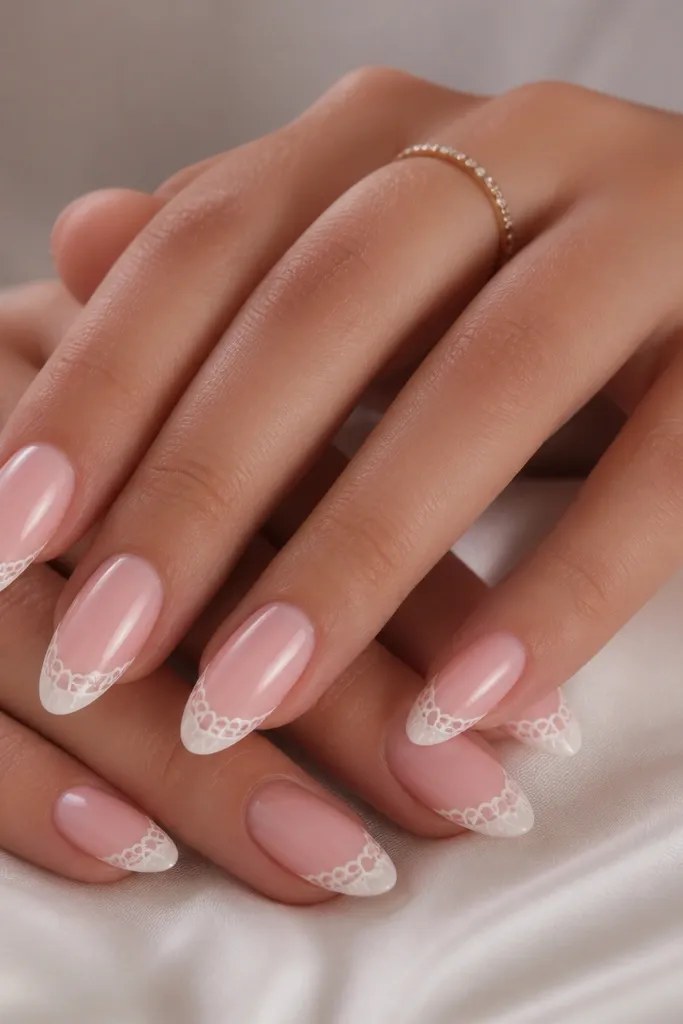
Lace tips sound complicated until you use a tip stencil or lace transfer sheet. I keep the lace only on the tip area so it looks intentional and doesn’t cover the whole nail. The contrast between soft pink and crisp white makes your almond shape look sharper. This set is flattering on every skin tone because lace is high-contrast and clean. It also hides tiny imperfections in the tip edge because the pattern breaks up lines.
Paint a soft pink base in two thin coats and cure. Place a lace tip stencil aligned with the almond tip — press it flat so the edges don’t bleed. Sponge or paint white over the stencil lightly, then peel the stencil carefully. If you’re using transfer, rub gently with a cotton pad and peel while slightly tacky. Seal with a top coat that’s a bit thicker so the pattern feels smooth, then cap the free edge.
Use a small foam applicator instead of a full brush so lace edges stay crisp.
Overloading the stencil — thick white paint bleeds and looks muddy.
14. Glossy Pink Almond Nails with Nude Micro Lines
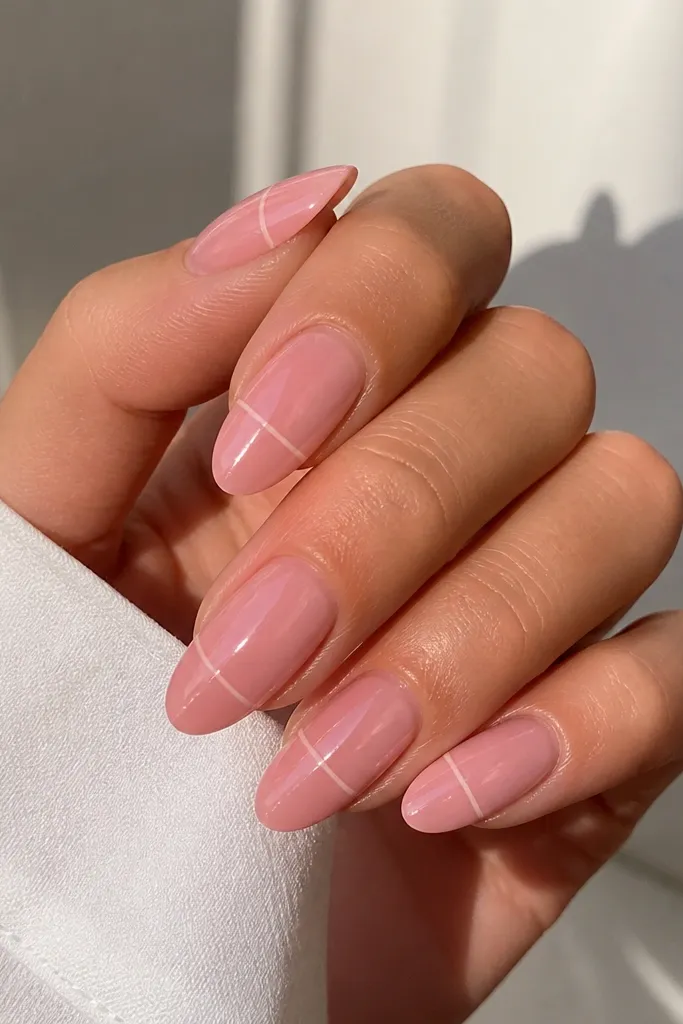
Micro lines make a manicure look designed without needing art skills. I use a nude-beige line because it blends with your skin tone and keeps the set soft. The placement near the middle makes the almond taper look longer — the lines draw the eye down. This works especially well if your hands have dry cuticles because the nude line draws attention away from the cuticle area. It’s also a great choice when you want something feminine but not overly sweet.
Paint a glossy pink base in two coats and cure. Using a thin striping brush, draw one micro line vertically near the center on each nail, or only on two accent nails if you want it calmer. Add a second line at a slight angle crossing it, keeping the lines hair-thin. Cure again, then top coat twice for a smooth finish over the lines. If the line sits raised, do a light top coat and cure, then add a second top coat after it levels.
Keep your brush load tiny — wipe most product off before you touch the nail.
Drawing thick lines — thick lines look like marker, not nail art.
15. Pink Almonds with Soft Rose Confetti Glitter Fade
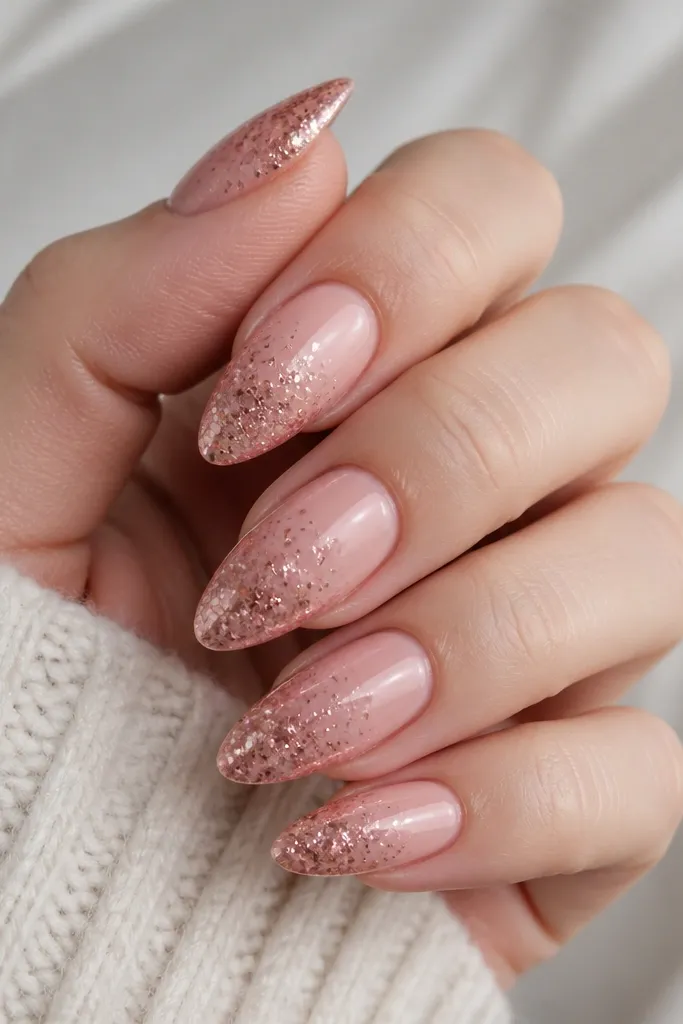
Confetti glitter looks best when it’s faded, not packed in one thick layer. I use soft rose glitter that matches the pink base so it looks like sparkle, not glitter chunks. This is flattering because the glitter concentrates at the tip, making the nail look longer and more dimensional. It also hides tiny chips because glitter breaks up the light reflection. For beginners, it’s easier than full glitter nails and it grows out gracefully.
Apply your soft pink base in two coats and cure. Dab rose confetti glitter onto the tip area only, using a makeup sponge or a flat glitter brush — press lightly so you don’t spread glitter everywhere. Blend the glitter upward with one light swipe so the fade looks smooth. Cure, then apply a gel top coat that’s clear and thick enough to encapsulate the glitter without leaving gritty bumps. Cap the free edge so the glitter doesn’t shed.
Editor's noteIf the glitter looks patchy, add a second very light glitter layer only at the tip edge, then top coat.
Skip thisPacking glitter too close to the cuticle — it looks heavy and messy as it grows out.