
1. Creamy Nude with Micro-White Half Moon
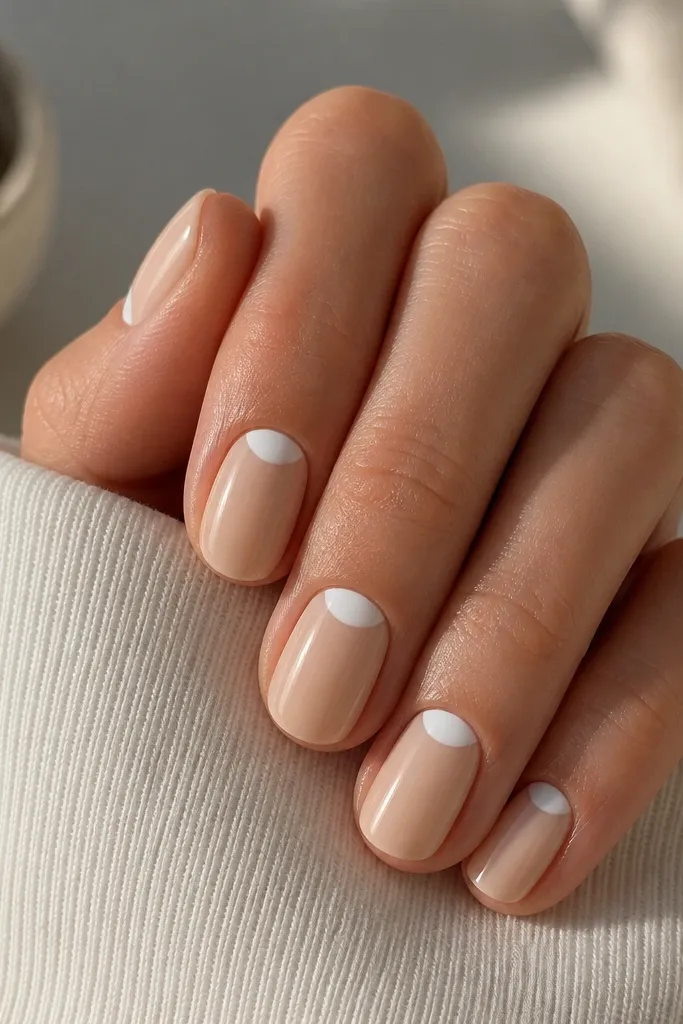
Start with a creamy nude base that matches your skin undertone — I like beige-nude for warm tones and pink-nude for cooler tones. The micro half moon at the cuticle makes your nails look freshly manicured without widening the nail. White gel for the half moon should be opaque in one or two thin coats, because short nails show patchiness fast. This design flatters everyday wear, looks great on hands that show a bit of dryness near the cuticle, and it makes fingers look longer by keeping the rest of the nail uninterrupted. It’s also forgiving for beginners because the half moon only needs a small, centered curve.
Editor's noteUse a dotting tool to place the two ends of the half moon first, then connect them with a short curve.
First, prep and shape to a true short oval, then apply a thin base coat and two coats of creamy nude, letting each coat dry fully. Next, place a tiny arc of white gel right at the cuticle line — aim for about 1/8 of the nail width, centered and not touching the sidewalls. Cure, then clean up the edges with a small brush dipped in acetone if needed. Finish with one glossy top coat, and add a little extra over the center so the half moon looks smooth instead of raised.
Skip thisAvoid drawing the half moon too wide; it makes short oval nails look shorter.
2. Blush Pink with Gold Foil Cuticle Stripe
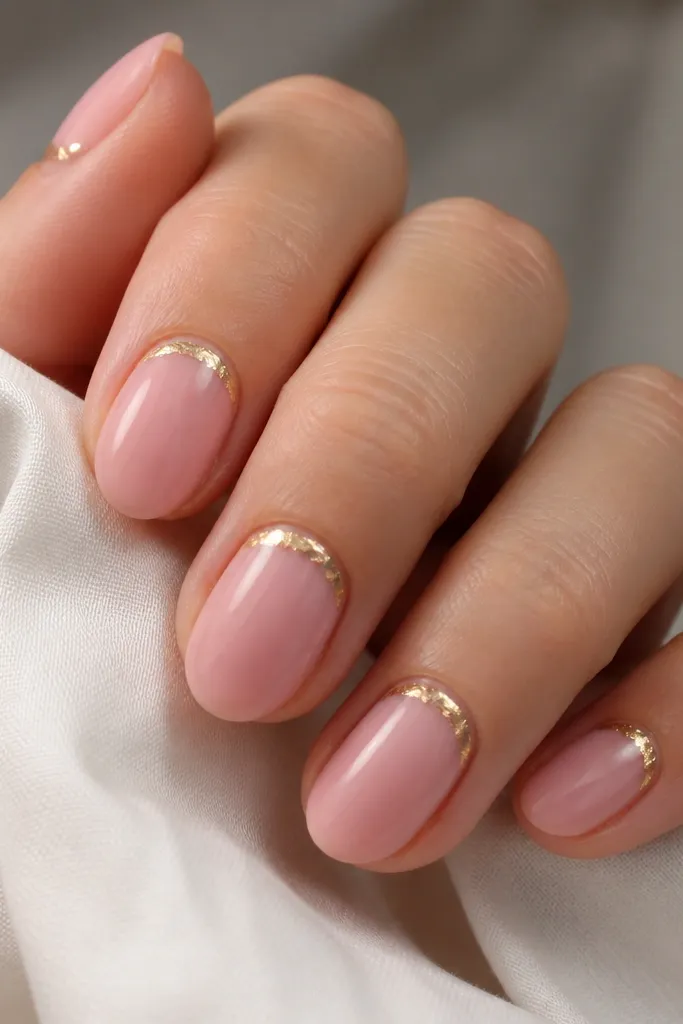
Blush pink is my go-to base for short ovals because it visually warms the nail without overpowering it. The gold foil stripe sits right at the cuticle, which draws the eye upward and makes the nail bed look a touch longer. I prefer foil flakes over solid gold paint because flakes look dimensional and hide tiny uneven spots. This combo is flattering on medium to light skin tones and looks especially good when your jewelry is gold. It also works for both casual days and dressed-up nights because the sparkle stays subtle.
Start by painting two thin coats of blush pink, then cure. Tear a small piece of gold foil and press it gently along the cuticle line using a thin layer of tacky gel (or foil glue) so it grips. Keep the stripe narrower than the nail width — around 1-2 millimeters — and stop it before the sidewalls. Cure again, then seal with a glossy top coat in two passes: one thin coat, one slightly thicker coat over the center.
If the foil lifts at the edges, go back with a tiny amount of tacky gel just under the lifted part.
Skip thick gold paint here; it can turn chunky on short nails.
3. Sage Green Gloss with White Center Line
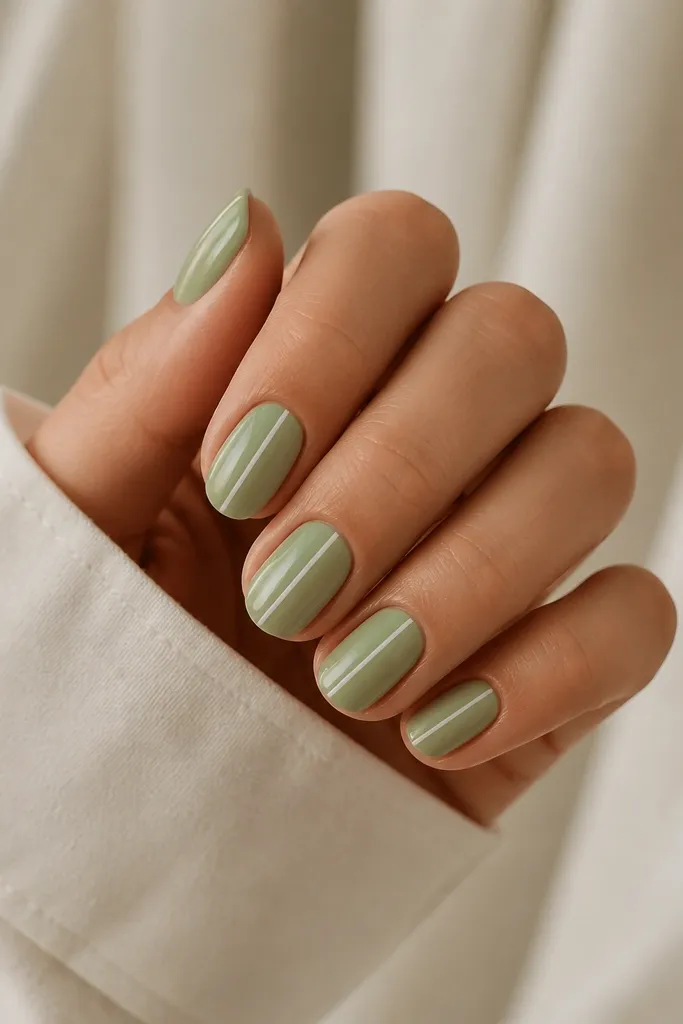
Sage green looks fresh on short ovals because it’s soft enough to avoid harsh contrast. The thin white center line gives a “lengthening” effect without needing a full ombre. Use white gel that is creamy and opaque, not chalky polish, so the line stays crisp. This design flatters hands with longer fingers because it adds a clean focal point, and it also works on shorter fingers because the vertical line pulls the eye upward. It’s one of the best starter nail arts for beginners because you only need to place one line accurately.
Apply a base coat, then two coats of sage green for full coverage. With a fine liner brush, draw a single vertical white line starting about 1 millimeter below the cuticle and stopping about 2 millimeters above the tip. Keep pressure light so the line is thin, about the width of a hair. Cure and finish with a glossy top coat, making sure the top coat lightly covers the line so it doesn’t snag.
Rest your pinky finger on the table while painting — it steadies your hand for straight lines.
Don’t let the line touch the cuticle — a tiny gap looks cleaner and more intentional.
4. Chocolate Brown Glaze with Shimmer Top
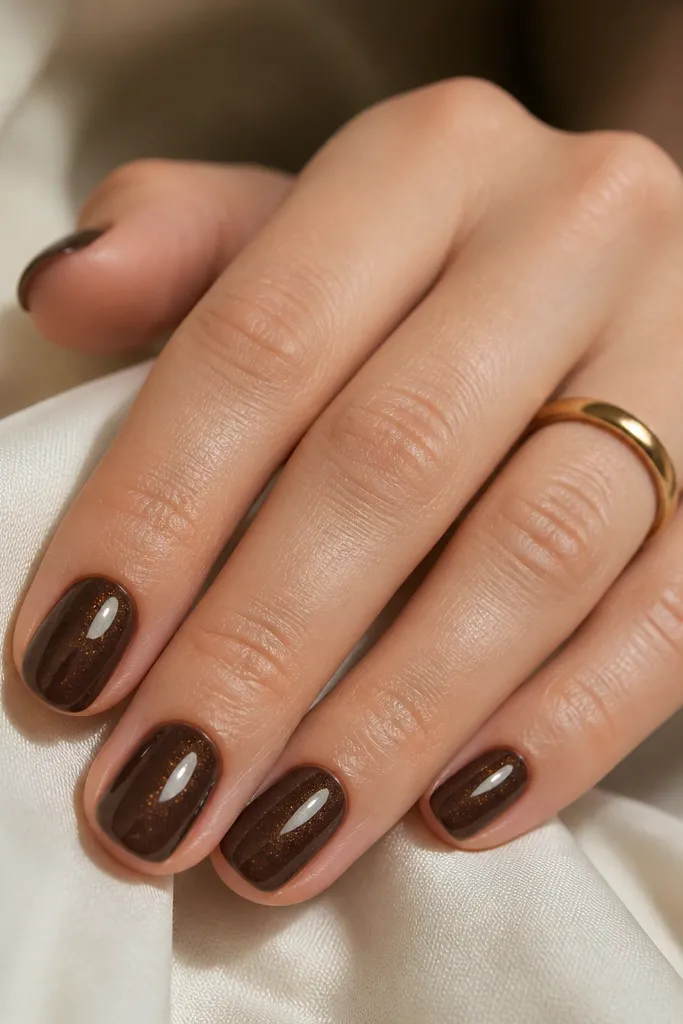
Chocolate brown is grounding and looks expensive on short oval nails when you use a glaze finish. The trick is choosing a brown that isn’t too black — think cocoa, not espresso. Then you add a fine shimmer top coat that looks like light catching on glass. This design flatters medium to deep skin tones because the brown warms the hand, and it also looks great when you wear gold or tortoise-shell accessories. It’s low-effort nail art because the “pattern” comes from the shimmer, not from tiny brush details.
Editor's noteIf your shimmer top coat looks patchy, apply it with a gentle swipe and avoid going back and forth too many times.
Start with a base coat, then paint two thin coats of chocolate brown gel polish. After curing, apply a shimmer top coat in a thin layer first — you want it to stay subtle — then add a second slightly thicker layer only if you want stronger sparkle. Cap the free edge with the top coat so it stays smooth on short nails. Finish with one final glossy top coat for a clean mirror shine.
Skip thisAvoid matte top coats with dark brown — they can make the nails look dull and flat.
5. White Confetti Dots on Nude Base
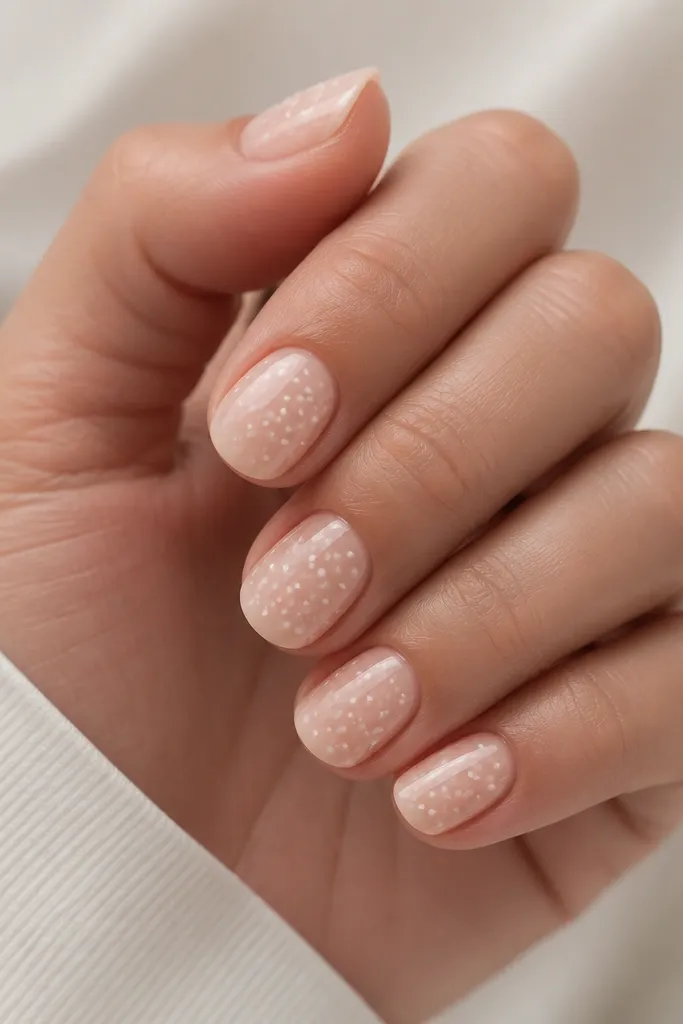
This is the design I recommend when someone wants “cute but not complicated.” A nude base keeps everything flattering, and white confetti dots add movement without taking over the nail. Use dots of different sizes so it looks like real confetti, not a grid. On short oval nails, the scattered placement keeps the nail from looking “short and wide” because there’s visual texture across the top half. It looks good on almost every skin tone and works for spring, summer, and everyday wear.
Editor's noteIf dots look too heavy, wipe your brush or dotting tool on a lint-free wipe before picking up more gel.
Paint two coats of nude base and cure. Dip a dotting tool in white gel and place dots mainly in the upper half of each nail, leaving some negative space near the cuticle and sides. Use 6-10 dots per nail depending on nail width, and vary sizes by using a smaller tip for tiny dots. Cure and seal with glossy top coat, then do a careful edge cap so the dots don’t catch.
Skip thisDon’t place a dense cluster near the cuticle; it can make the area look crowded.
6. Navy Tips with Soft Pink Base
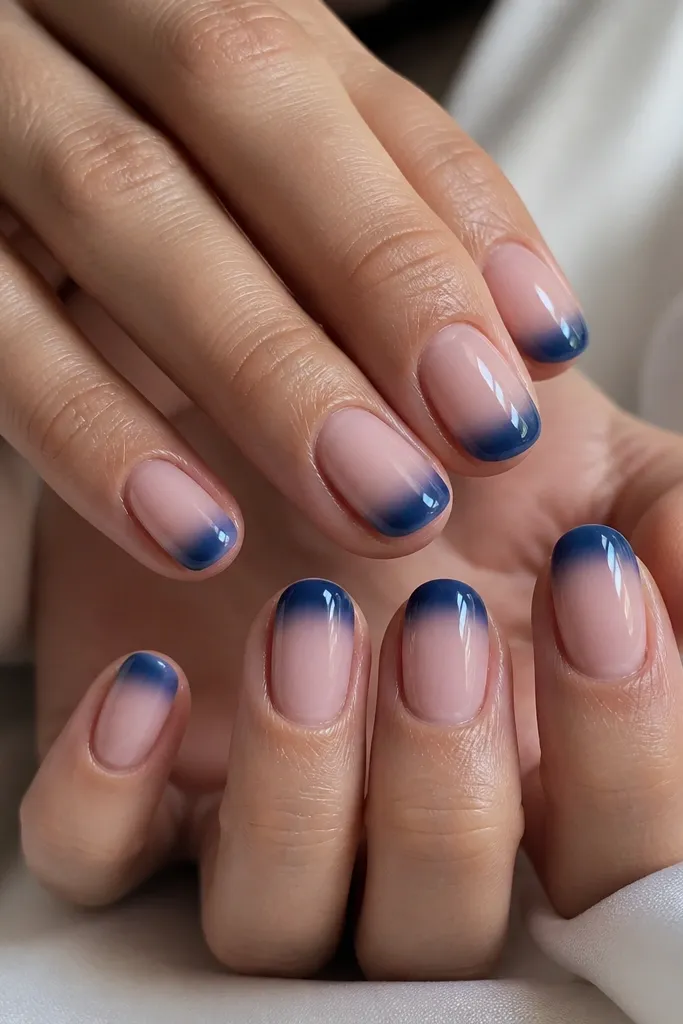
Think French tips, but made friendlier for short oval nails. A soft pink base keeps the look feminine, while navy tips add contrast that still reads clean. The key is blending or keeping the tip line soft so it doesn’t look like a hard sticker. This combo flatters fair to medium skin tones, especially if you wear blue denim or gold jewelry. It’s also a great option for beginners because you only need to control the tip shape, not draw detailed art.
Editor's noteUse a thin brush and keep your first navy layer light — you can build opacity on the second coat.
Start with a pink base — two coats, fully opaque. For the tips, either use a French guide sticker or freehand with a liner brush: paint navy starting about 1-2 millimeters below the free edge and follow the oval curve. If you want a softer look, add a second layer of navy and lightly blend the edge with a clean sponge. Cure, then top coat glossy and cap the tips.
Skip thisAvoid thick navy at the very edge; it can look bulky on short nails.
7. Clear Jelly Rose with Floating Pearl Accent
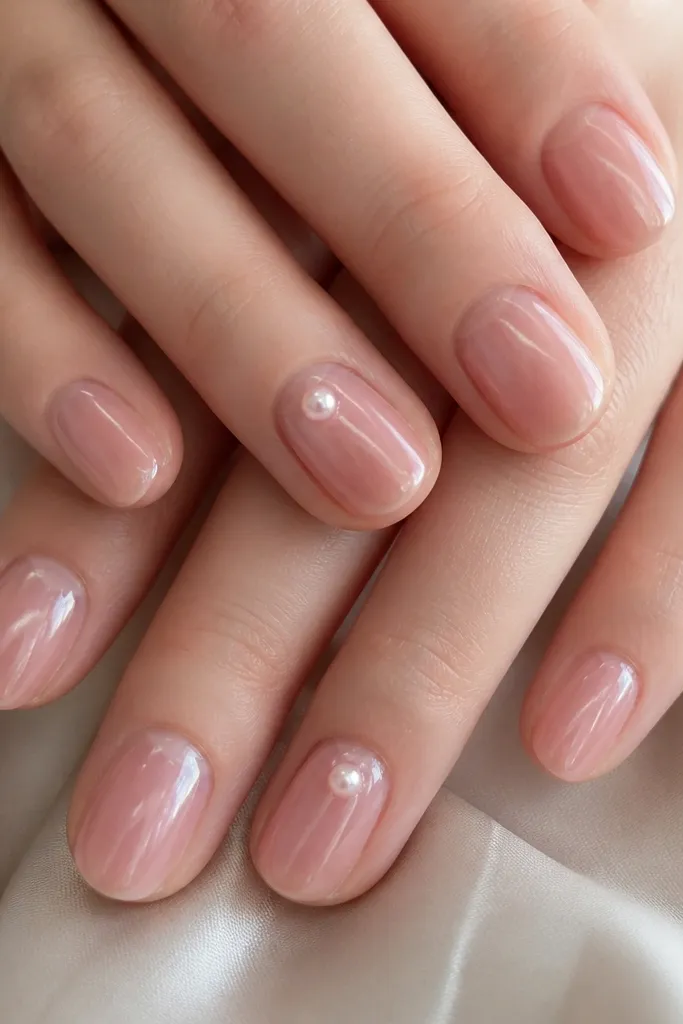
A clear jelly rose base makes short oval nails look hydrated and glossy, like your natural nail but better. The floating pearl accent adds a focal point without covering the whole nail. I like placing the pearl slightly above center, not right at the cuticle, because it creates a “lift” effect. This design looks amazing on pale to medium skin tones and works for date nights, weddings, and holiday parties. It’s a little more advanced than dots, but beginners can do it if they secure the pearl with gel and seal it properly.
Editor's noteIf your pearl sits too high, add a thin gel “bridge” around it and cure again to flatten the top.
Apply a clear jelly base (or clear base mixed with a rose tint) in two thin layers for a glossy look. On your accent nails, apply a tiny dab of clear or matching gel where you want the pearl, then place the pearl and press gently. Cure, then brush a thin layer of gel over the pearl to fully lock it down, making sure the edges are smooth. Finish with a glossy top coat and cap the free edge so nothing catches.
Skip thisSkip skipping the gel seal around the pearl — loose gems snag and lift fast.
8. Black Micro-Flowers on Sheer Pink
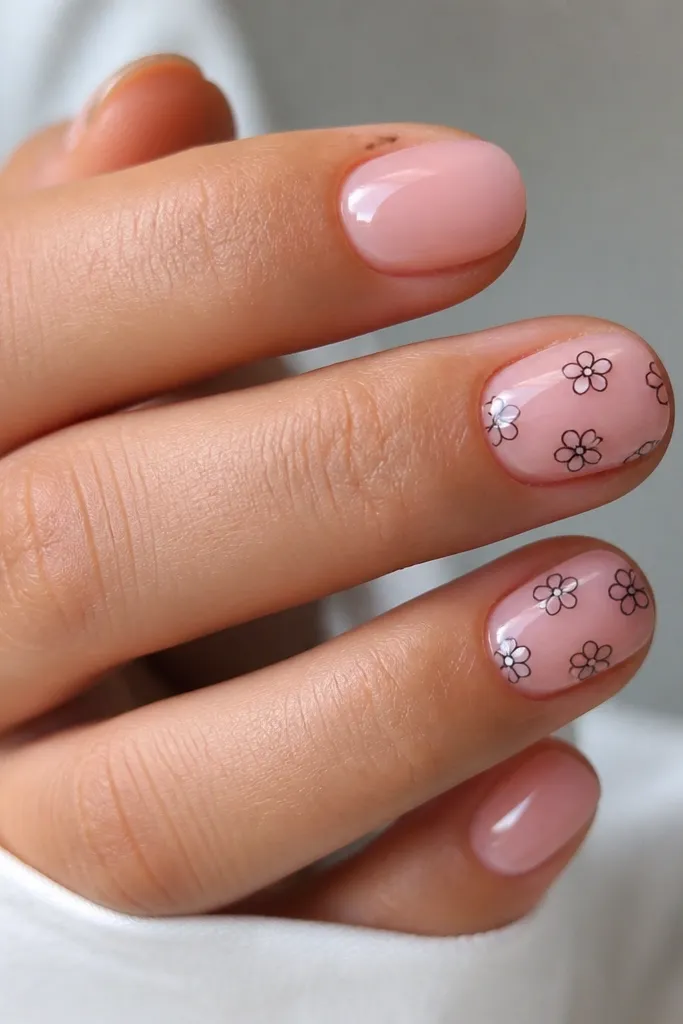
Sheer pink gives you a clean base, and black micro-flower line art looks crisp on short ovals. Tiny flowers keep the design delicate instead of bulky, and black outlines make it readable even at short length. This set flatters cool undertones and looks great when you wear black eyeliner, silver rings, or monochrome outfits. It also works well for beginners because you’re drawing small shapes, not covering the whole nail. The style reads artsy but still polished.
Editor's notePractice flower centers on a paper card first so you get the dot size right.
Paint sheer pink in two coats, curing each time, and leave the cuticle area clean. Using a fine liner brush or nail art pen, draw 1-2 tiny flowers per accent nail: a small circle center and 4-5 short petal lines around it. Keep flowers spaced so there’s negative space between them. Cure, then apply a glossy top coat carefully over the line art so it stays smooth and doesn’t look raised.
Skip thisDon’t draw thick outlines — heavy lines make micro art look messy on short nails.
9. Pastel Ombre Peach to Pink
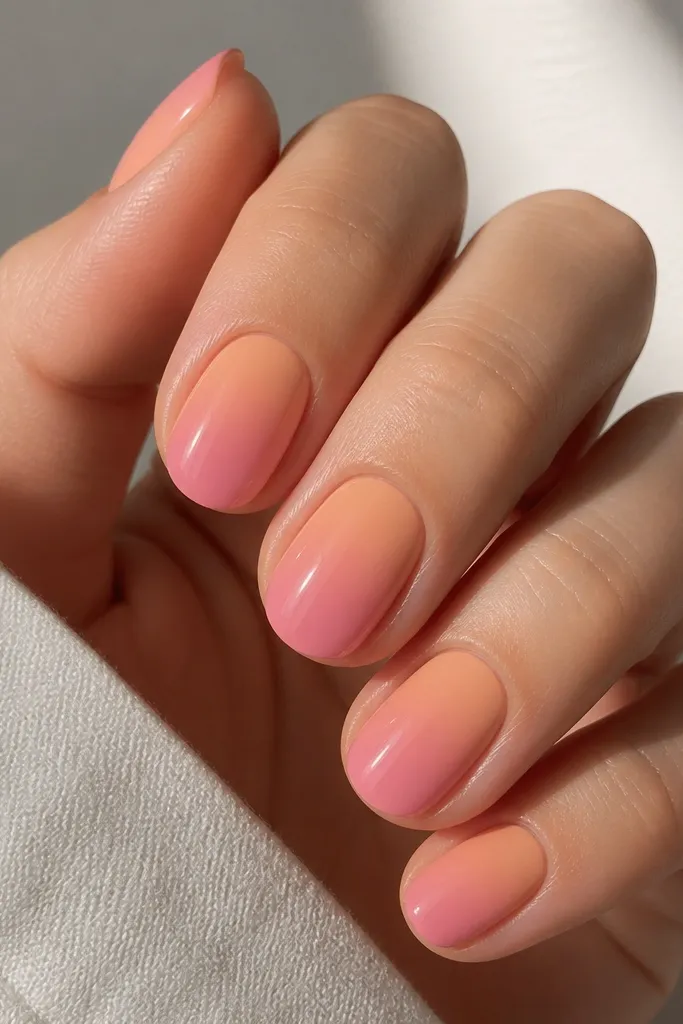
Ombre looks gorgeous on short oval nails because the curved tip helps the gradient blend smoothly. Peach to pink is forgiving and flattering — it works on warm and neutral skin tones and looks like natural color shift. Beginners should choose pastel shades because they blend easier than high-contrast neons or dark-to-light combos. The result is airy and chic without needing any extra art. It’s also a good option when your nails are short but your cuticles need a little visual smoothing.
Editor's noteFor cleaner edges, use a thin brush dipped in acetone to clean around the sidewalls after the first cure.
Start with a base coat, then sponge a peach shade near the cuticle area using a small makeup sponge. Blend the sponge upward and slightly downward toward the center, then sponge pink from the mid to the tip. Keep the gradient soft by wiping off excess product on the sponge edge before you touch the nail. Cure, then seal with a glossy top coat in two thin layers to smooth the sponge texture.
Skip thisAvoid overloading the sponge — too much product creates gritty texture on short nails.
10. Taupe Micro French with Glossy Nude Edge
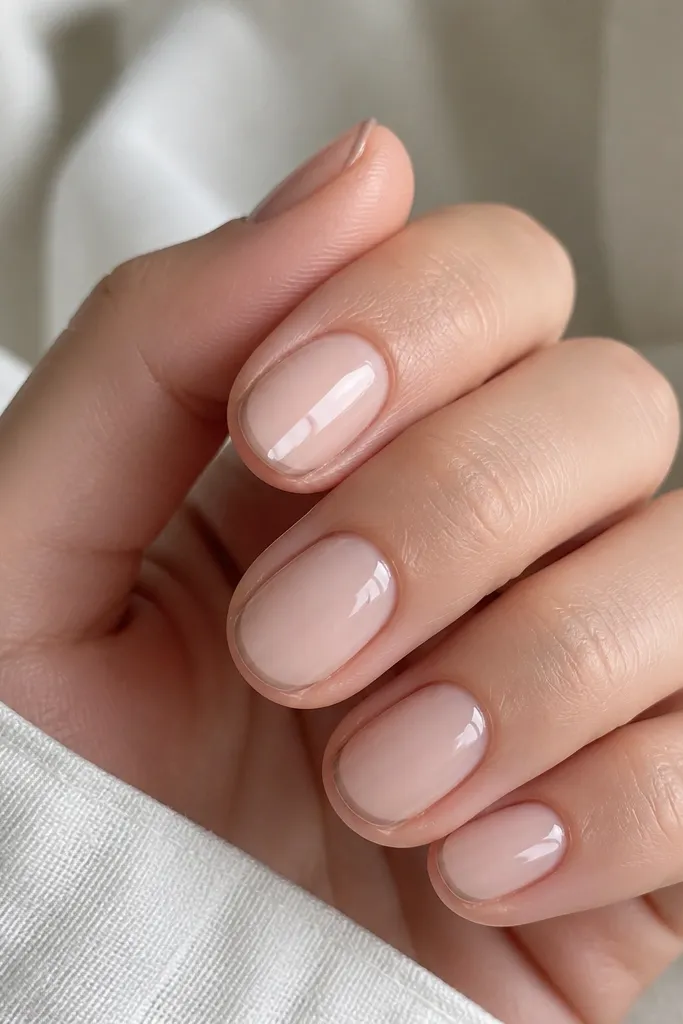
A micro French is the easiest way to look “done” without heavy nail art. Taupe French lines are softer than classic white and look great on short oval shapes because the thin line makes fingers look longer. I like a sheer nude base so the taupe stays the star. This style flatters almost every skin tone, especially if you like neutral outfits. It also hides tiny imperfections because the line is thin and placed near the free edge.
Apply a sheer nude base in two coats and cure. For the micro French, paint a thin taupe line following the oval curve of the tip — keep it about 1 millimeter thick. Leave a small gap between the taupe line and the nail edge so it looks sharp, not filled in. Cure and finish with a glossy top coat, then cap the free edge so the line stays crisp.
Use striping tape as a guide: place it 1-2 millimeters above the tip line and paint over it for instant symmetry.
Don’t fill the entire tip — the micro line is what keeps the look elegant.
11. Teal Marble Swirl on Clear Base
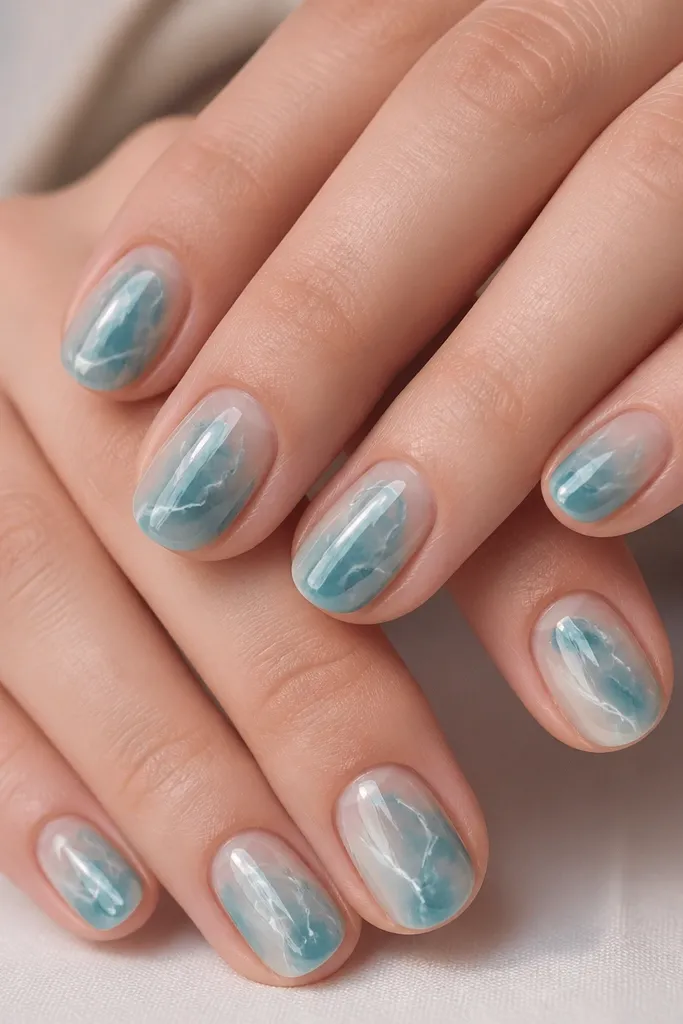
Marble works on short ovals when the lines are thin and the base stays sheer. A clear base makes the teal look glassy, and thin white veins keep it from looking like a blob. I like teal marble for medium to deep skin tones because it pops without looking harsh. The swirl placement should stay centered so the nail doesn’t look crooked. This design looks high-end for parties, but it still feels wearable because the base is light.
Editor's noteIf your veins get too thick, wipe your brush and drag the white gel lightly to thin it out before curing.
Start with a clear base or sheer nude tint, then cure. Add a thin teal swirl line using a liner brush, then use a small amount of white gel to create vein-like strokes that branch off. Keep swirls mainly in the top half and let them fade as they approach the sides. Cure fully and seal with glossy top coat in two layers to smooth the lines and make it look like marble under glass.
Skip thisAvoid filling the whole nail with marble color — short nails need air so the pattern reads.
12. Rose Chrome Accent on One Nail
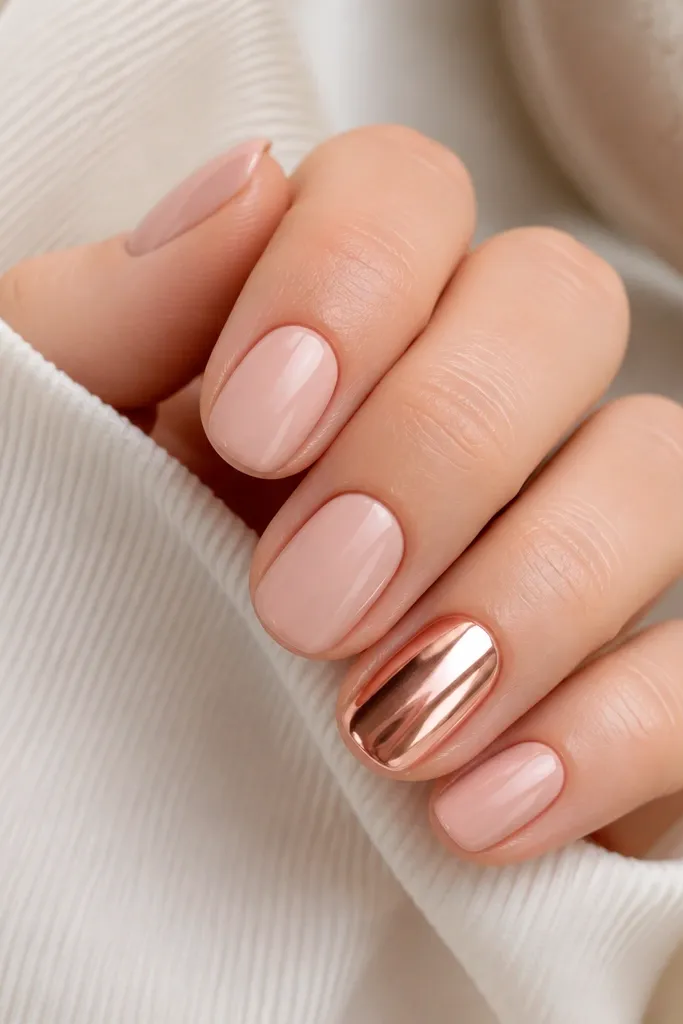
This is a clean way to use chrome without making every nail loud. A blush nude base looks natural, and a rose chrome accent nail adds that reflective pop that catches light when you move your hands. I place the chrome on the ring finger — it balances the set and looks intentional. Rose chrome flatters warm undertones and looks amazing with gold jewelry and peachy makeup. On short oval nails, chrome makes the nail look smoother and slightly longer because the reflection runs across the surface.
Editor's noteKeep chrome away from the cuticle by 1 millimeter so it doesn’t lift and peel at the edges.
Paint all nails with blush nude in two thin coats and cure. On the chosen accent nail, apply a chrome base layer (or black/gray gel if your chrome requires it), cure, then rub rose chrome powder onto the surface using an applicator sponge. Press gently and buff lightly so the finish is even, then seal with a chrome-safe top coat in one thin layer. For the other nails, finish with regular glossy top coat.
Skip thisDon’t use regular thick top coat over chrome — it kills the shine.
13. Black and White Checker Pinstripe
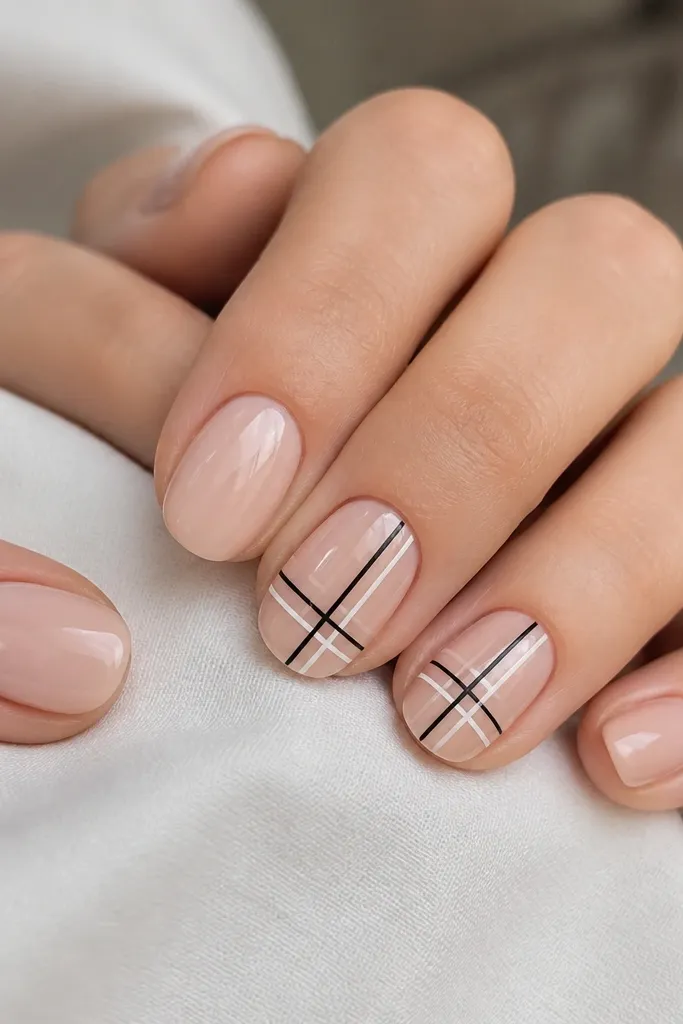
Checker patterns look fun, but they get messy fast on short nails. The fix is using a pinstripe approach: thin lines, small squares, and only on one or two nails. A nude base keeps it chic and makes the pattern look like nail art, not wallpaper. Black and white is high contrast, which can make short nails feel wider if you overfill, so keep the checker area limited to the top half. This style looks great for casual streetwear and also works for monochrome outfits.
Editor's noteUse nail striping tape to map the grid first — remove tape immediately after painting the first color while it’s still slightly workable.
Start with nude base in two coats and cure. On accent nails, use a striping brush to draw a vertical guideline down the center, then draw two short horizontal lines across the top half to form small rectangles. Add alternating black and white fills inside those small squares using gel polish or nail art paint, letting each color set before moving on. Cure, then apply glossy top coat carefully over the checker so the lines don’t smear.
Skip thisAvoid large checker blocks — they overpower short oval nails.
14. Emerald Green with Tiny Clear Gemline
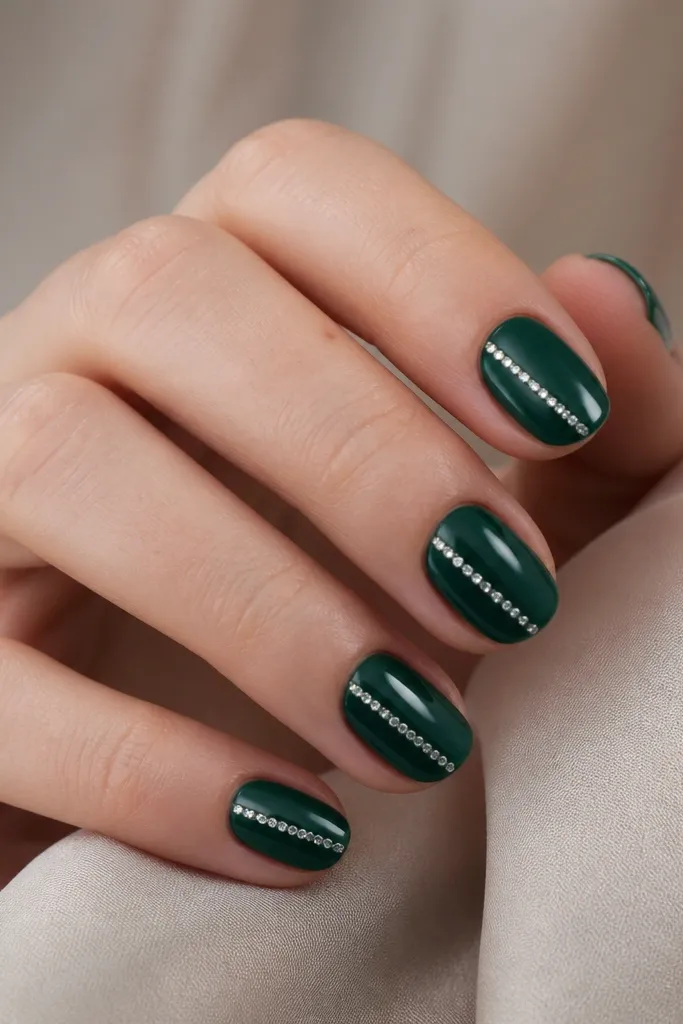
Emerald green looks rich without being heavy, especially on short oval nails. A tiny clear gemline adds sparkle without turning the nail into a glitter bomb. I place the gems diagonally because it creates a slimming angle — straight lines can make short nails look blocky. This design flatters medium to deep skin tones and looks stunning with warm gold rings. It also gives you a clear focal point that feels special even with short length.
Apply two coats of emerald green and cure. Pick one nail pattern direction: start placing a line of tiny clear gems slightly above the center near the cuticle and angle down toward one side, stopping before the tip. Use a dot of clear gel to place each gem, spacing them about 1 millimeter apart. Cure, then seal with a glossy top coat in two thin layers so the gems sit flush and the surface stays smooth.
If gems look uneven, press them with a silicone-tipped tool and check from the side under bright light.
Skip big gems — they look chunky on short oval nails.
15. Mocha Nude with Matte Top and Glossy Speckle
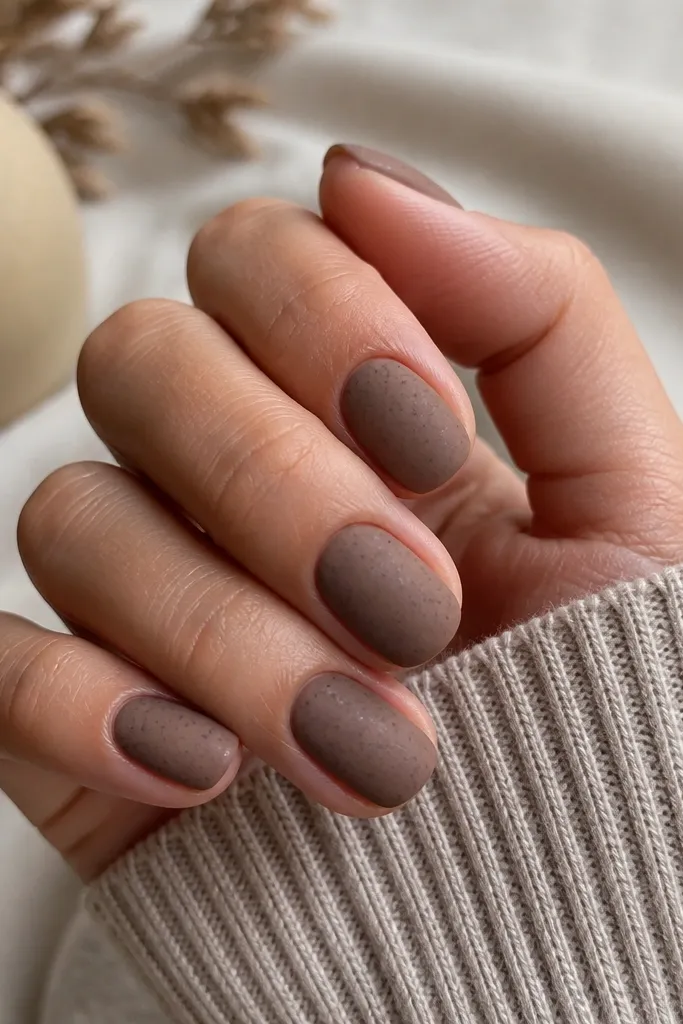
Matte plus glossy speckles is a texture trick that makes short oval nails look styled even when the base is simple. Mocha nude flatters a wide range of skin tones and looks great with autumn colors, but it also works year-round. The speckles should be small and glossy so they pop against the matte without looking like glitter. This design reads modern and clean, and it’s perfect if you like a less shiny manicure but still want interest. I’ve done this on myself when my nails look a little dry — matte hides minor surface texture better than full gloss.
Editor's noteUse an old nail art brush and keep it slightly damp-free so the speckles are crisp dots, not blobs.
Paint mocha nude in two coats and cure. Apply matte top coat over the whole nail and cure again. Then add tiny speckles using a fine brush loaded with clear or nude-tinted glossy gel — tap lightly to create dots across the top half only. Cure and finish with one more thin glossy top coat only over the speckles area if you want extra shine, then avoid rubbing the rest to keep the matte.
Skip thisDon’t put speckles too close to the cuticle — the contrast can look harsh.