
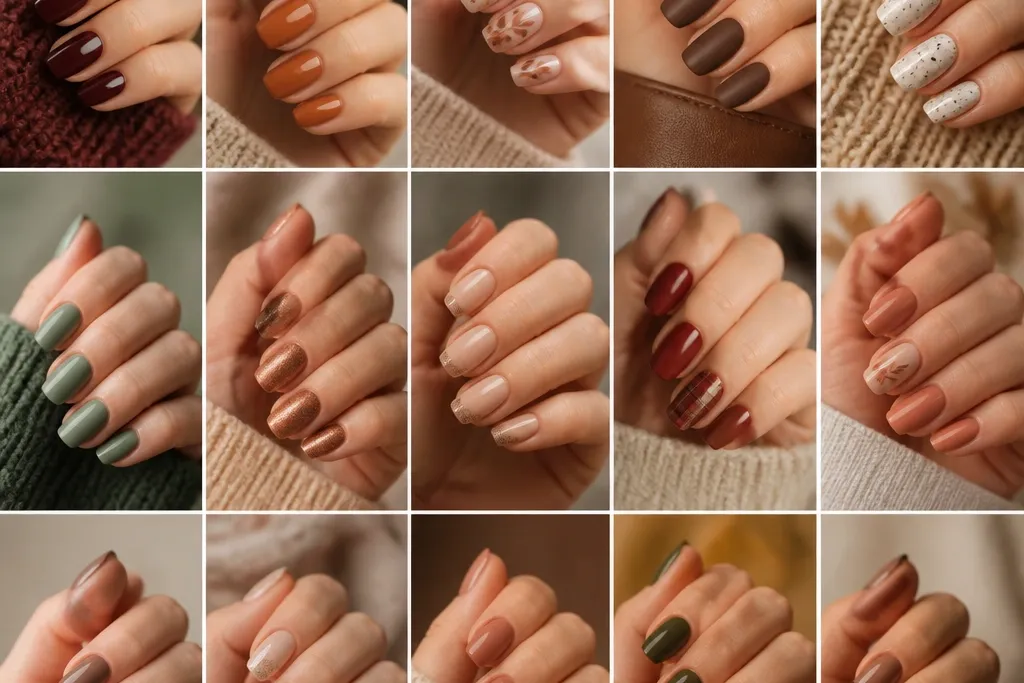

1. Burnt Orange Cream with Espresso Half-Moons
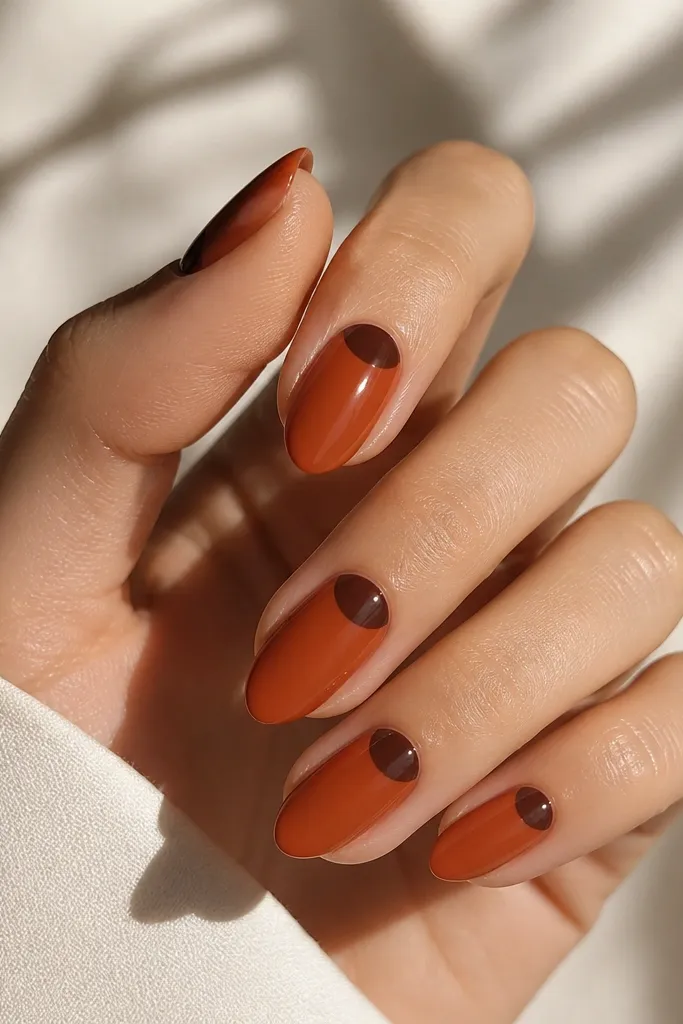
This look is the fastest way to get true autumn color without complicated art. The burnt orange cream reads cozy on every skin tone, especially warm undertones, and it looks flattering on short nails because the base color is solid and even. The espresso half-moon at the cuticle makes the nail look longer and cleaner — it frames your nail bed instead of covering it. I like it for work weeks because it looks intentional even when you’re not wearing heavy makeup.
Start by painting two thin coats of burnt orange cream, letting each coat dry fully. Next, use a small nail art brush or a half-moon stencil to paint the espresso-brown half-moon at the cuticle — aim for a curve that follows your natural cuticle line. If you go a little high, clean the edge with a brush dipped in acetone or polish remover. Finish with one or two coats of glossy top coat to lock in the crisp border.
Use a dotting tool to place the starting points of the half-moon, then connect them with the brush for straighter curves.
Avoid thick polish for the half-moon — it spreads and blurs the curve.
2. Mocha Nude with Micro Gold Lines
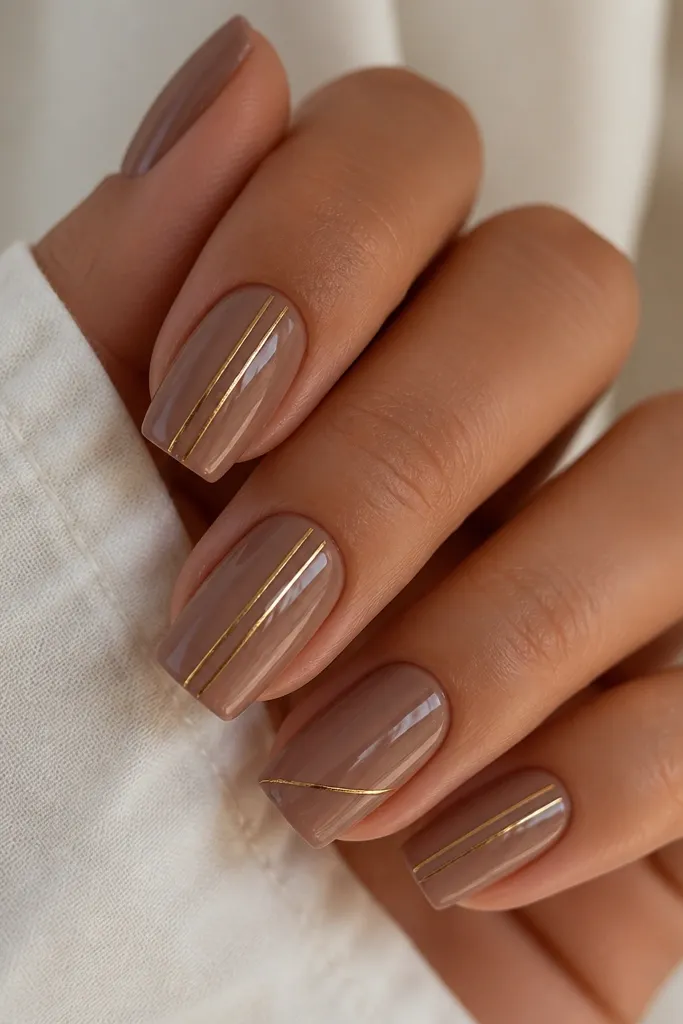
Mocha nude is my go-to fall neutral because it doesn’t go gray or look too pink as the weather changes. The micro gold lines add warmth and make your hands look put-together without feeling “holiday.” This design flatters short and wide nail beds because the lines are narrow and sit in the middle, which visually elongates. It also looks great with gold jewelry and warm-toned outfits like camel coats and rust sweaters.
Apply two coats of the mocha nude, then let it dry completely. Use a striping brush or nail vinyl line guide to paint one thin vertical gold line first, placing it slightly off-center if you want a more natural look. Add a second line parallel to the first, keeping the gap about the width of a thin hair. Finish with a glossy top coat, and if you want more shine, add a second top coat just on the gold lines.
If your gold striping looks patchy, do two light passes instead of one heavy stroke.
Skip chunky gold polish — it looks textured and can catch on fabric.
3. Olive Green Matte with One Glitter Accent
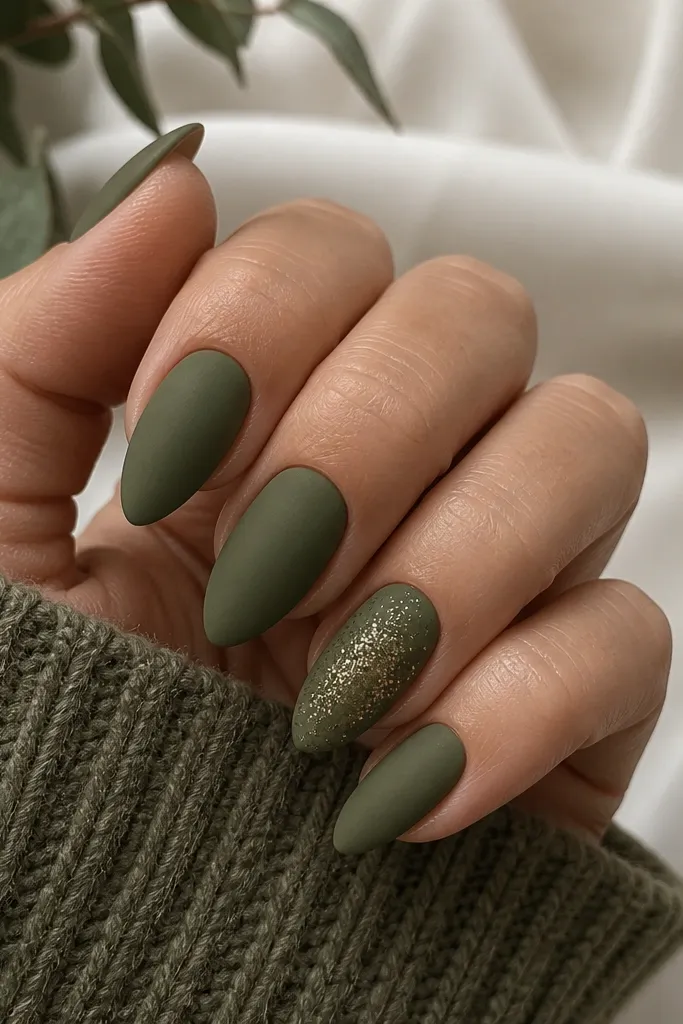
Olive green is the fall color that never feels “basic.” Matte finish makes it look like soft fabric, which is why it feels cozy even with a simple design. I love this for everyday because you get one pop of sparkle without turning your whole manicure into glitter overload. It looks especially good on medium to deep skin tones because the green has depth, but it also flatters fair skin when you keep the base opaque.
Paint all nails two coats of olive green and seal with a matte top coat. Choose one accent nail (I usually pick the ring finger) and apply a glitter polish only to the center area, stopping a few millimeters before the sidewalls. Use a sponge or small brush to blend the glitter lightly into the base so it looks intentional. Top coat the accent nail with glossy top coat if you want extra dimension — matte over glitter can dull the sparkle.
Blend glitter with a gentle tap motion using a makeup sponge, not dragging.
Don’t apply glitter all the way to the cuticle — it makes regrowth obvious fast.
4. Cinnamon Swirl Tips on Nude Base
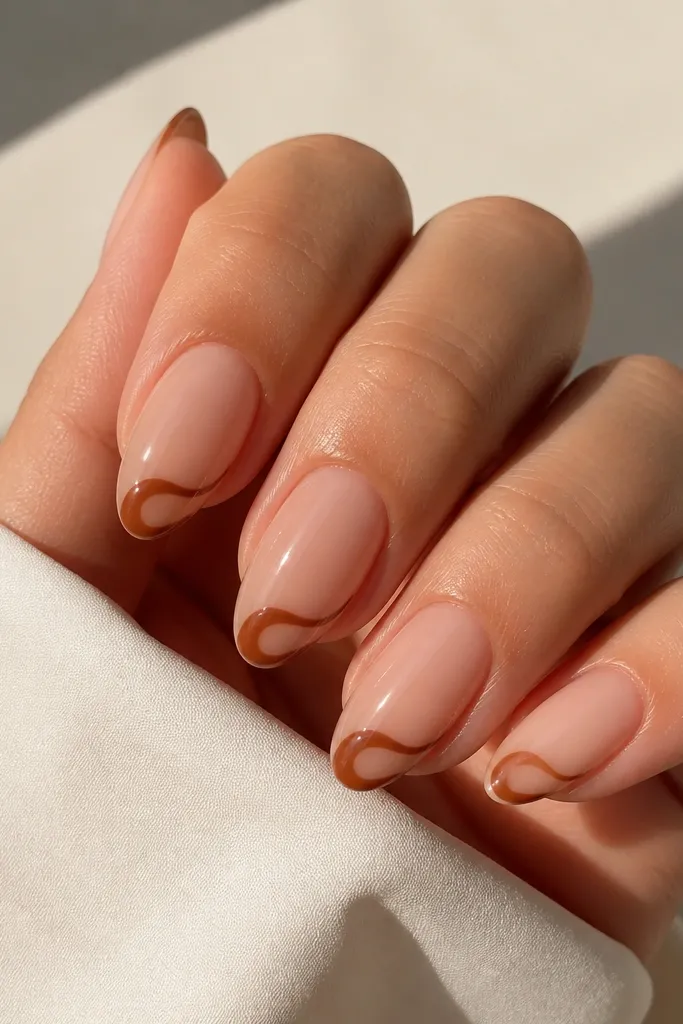
This is the fall manicure I do when I want something artsy but still easy. A nude base keeps it wearable, while cinnamon swirl tips look like baked spice and warm caramel. The swirls are forgiving — you don’t need perfectly identical shapes for it to look cool. It flatters almost everyone because the nude neutral matches your skin tone and the detail stays at the tip where it’s easiest to control.
Start with two coats of nude pink or nude beige, then let it dry. With a thin striping brush, paint a cinnamon-brown swirl that begins near the tip’s center and curves outward toward the sides. Add a second smaller curve so it looks like a continuous ribbon. Keep the swirl about one-third of the nail length. Finish with glossy top coat so the swirls look crisp and smooth.
Editor's notePractice one swirl on a paper towel first — you’ll find your wrist angle fast.
Skip thisAvoid painting swirls too close to the nail bed — they can look crowded and messy.
5. Terracotta Half Nail with Negative Space Line
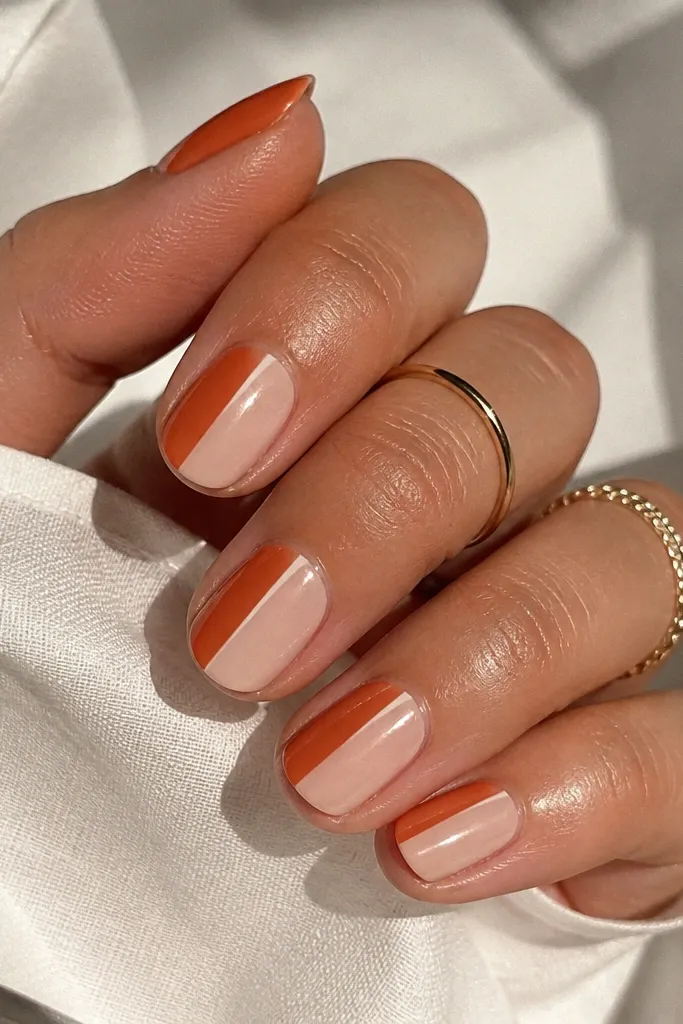
Terracotta is the “September to October” color because it reads warm and earthy. This design uses negative space on purpose, so even if you’re not perfect with nail art, the divider line makes everything look planned. It’s great for short nails because the split creates a clean vertical line that elongates. I also like it on hands with slightly wider nail beds since the nude portion balances the orange.
Paint two coats of nude base first, then place a thin strip of tape down the center where you want the negative space line. Paint terracotta orange on one side only, then remove the tape carefully while the polish is still slightly tacky. If you don’t have tape, use a thin brush and paint a straight vertical guide line first. Clean the edges with a small brush and acetone, then seal with glossy top coat.
For the sharpest line, press the tape down firmly at the edges and pull it off slowly at a low angle.
Avoid smudging the divider line when you remove tape — let the color set a minute first.
6. Plum Jelly Base with Tiny Gold Dots
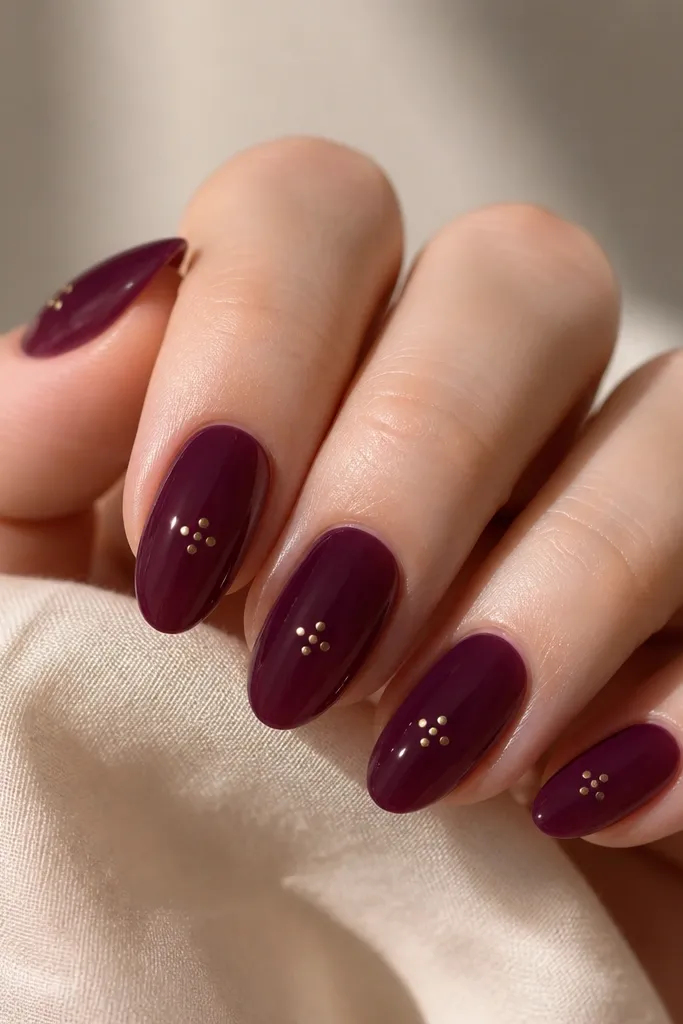
Jelly polish makes fall nails look extra juicy, like candy under glass. A plum jelly base is flattering because it adds depth without going too dark and heavy. The tiny gold dots keep it playful and classy at the same time, and the dot placement is easy to repeat across all nails. This manicure looks great for nights out, but it’s still wearable for daytime because the dots are small.
Apply two to three thin coats of plum jelly polish so it stays translucent and glossy — thin coats prevent ripples. While it’s still a little tacky between coats, place tiny gold dots with a dotting tool: one dot near the center, two dots slightly lower to form a triangle. Keep the dots about the size of a pinhead. Cure or wait fully, then top coat for a smooth glass finish.
If your jelly polish is streaky, layer more thin coats instead of going thicker.
Skip big dots — they look costume-y on a jelly base.
7. Forest Green French with Matte Leaf Accent
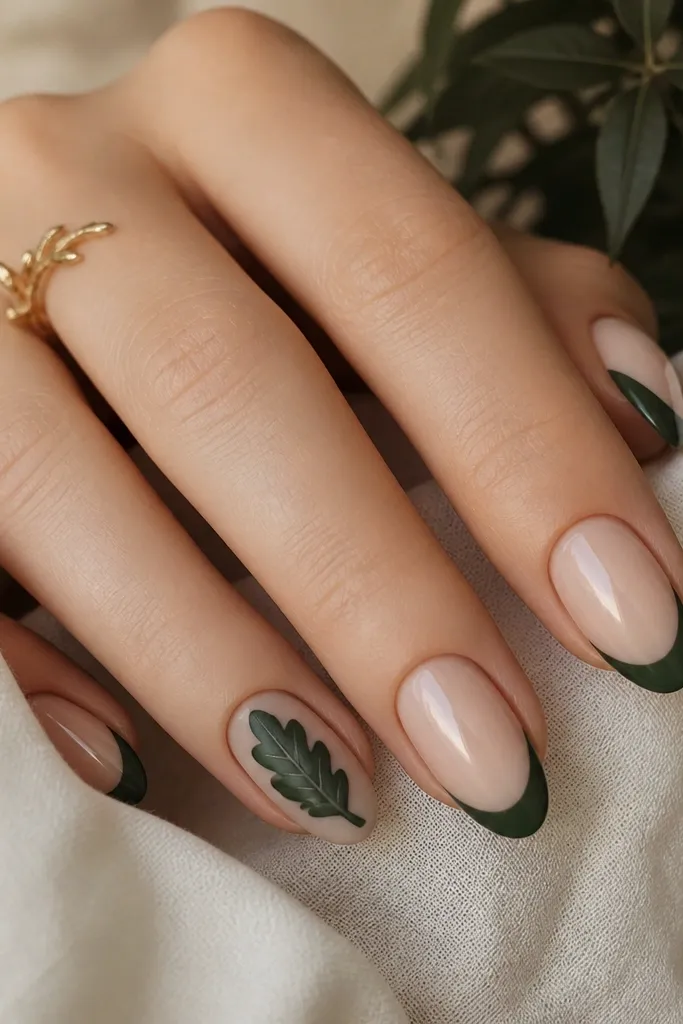
A forest green French tip looks crisp and fall without turning into “Halloween.” The nude base keeps it clean, while the darker tip frames the nail and makes your fingers look tidy. The leaf accent adds a little nature vibe, and matte on the leaf makes it feel softer than regular polish. I like this for fall events because it photographs well and matches coats, scarves, and boots.
Paint two coats of nude base, then line a forest-green French tip using a French tip guide or freehand with a steady striping brush. Keep the tip thickness about 1.5 to 2 mm at the widest point for a modern look. For the leaf accent, paint the leaf shape near the cuticle with dark green, then add a lighter green center vein with a thin brush. Seal the leaf nail with matte top coat and the other nails with glossy top coat.
Editor's noteUse a toothpick for the leaf vein — it gives you a super fine line.
Skip thisDon’t make the French tip too thick — thick tips can look clunky on short nails.
8. Champagne Chrome Fade on Almond Tips
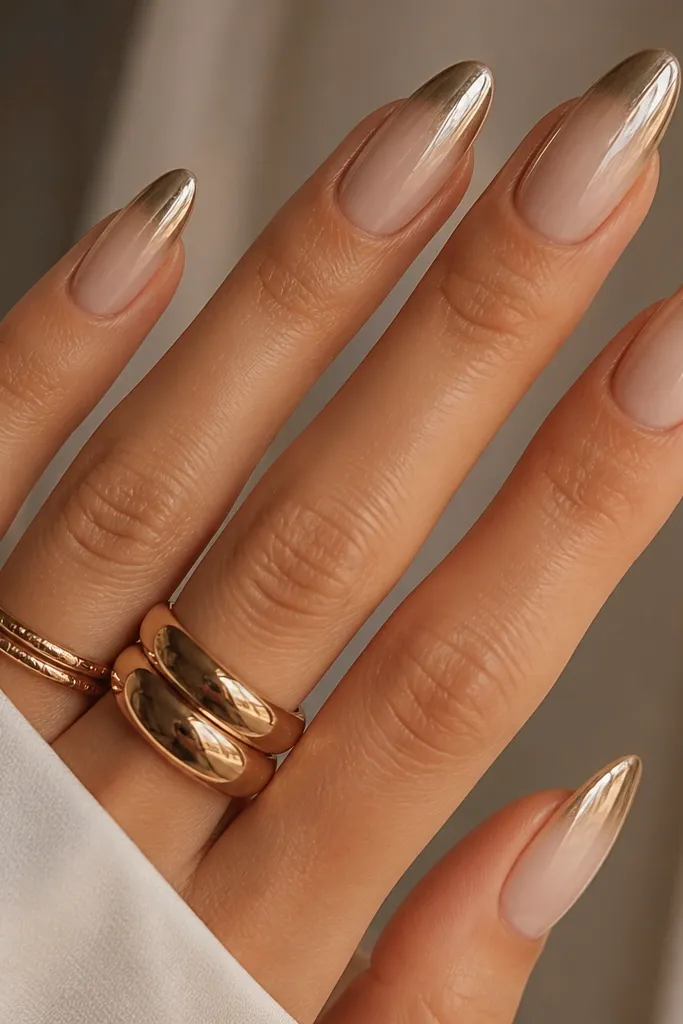
Chrome fade is the quickest way to make fall nails look “special” even when you’re keeping the design simple. Champagne chrome works better than bright gold on fall because it sits between warm and neutral and flatters lots of skin tones. The fade on the tips elongates the nail and looks good with beige, brown, and even black outfits. I’ve worn this to dinners and it still looks polished after a full week.
Start with two coats of nude base and let it dry fully. Apply a thin layer of chrome powder adhesive or gel to the top half of the nail tips only — about the last third of the nail. Rub champagne chrome powder over the adhesive, then use a fluffy brush to blend the edge so it fades. Seal with glossy top coat, focusing on the transition area so it stays smooth.
Editor's noteBlend the chrome edge with a clean makeup sponge for a softer gradient.
Skip thisAvoid thick adhesive — it can create a hard ridge under the chrome.
9. Caramel Swirl French on Nude Short Nails
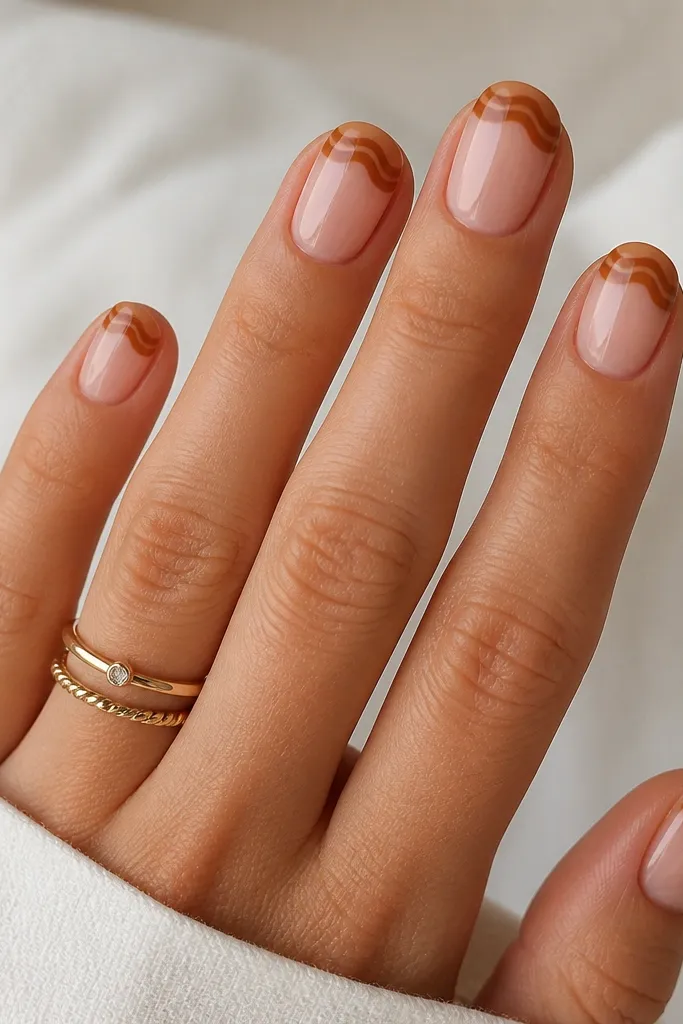
This is like a French manicure’s calmer cousin. The caramel swirl tips read warm and cozy, but because the base is nude, it stays wearable for daily life. It works especially well on short square nails where straight French can look too harsh. The swirls also hide tiny imperfections because your eye follows the curve instead of judging a straight line.
Paint two coats of nude base and let it level. Use a striping brush to draw a curved tip shape on each nail — think of it like placing three small comma shapes along the free edge. Space the swirls so they touch lightly, covering the tip without making a thick blob. Clean the sides with a brush dipped in remover. Finish with glossy top coat for a smooth, shiny surface.
Keep the swirl lines thin — thick swirls look heavy on short nails.
Don’t try to cover the entire nail tip with one thick stroke.
10. Rusty Red with One Matte Stripe
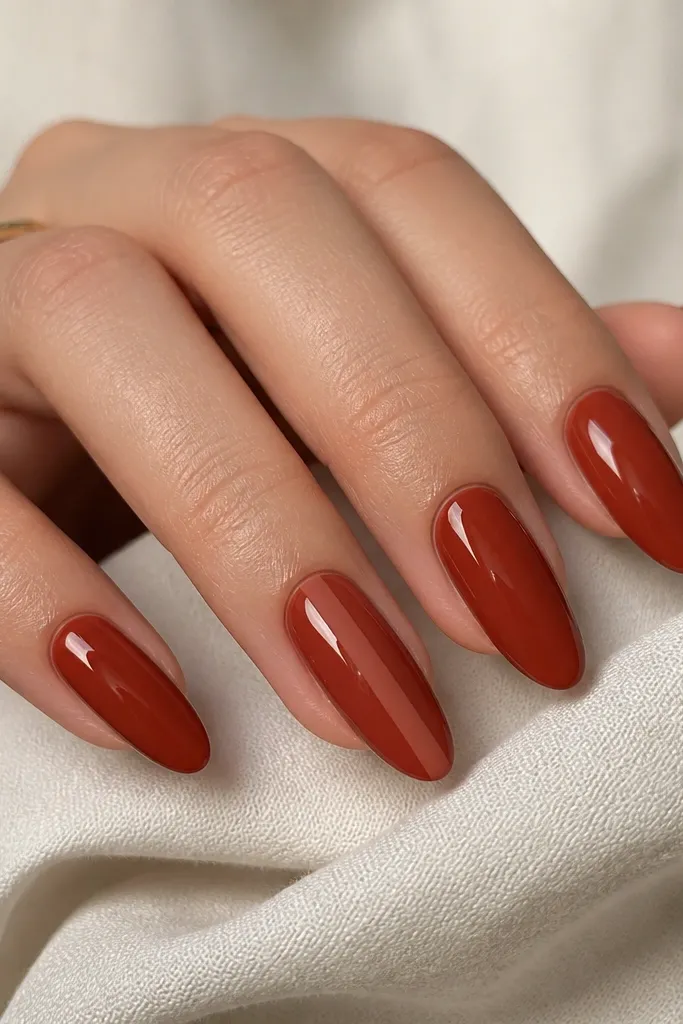
Rusty red is fall’s version of “always works.” It looks great on both fair and deeper skin tones, and it pairs beautifully with gold rings and dark denim. The matte stripe gives you contrast without needing multiple colors or detailed art. I like this design because it’s subtle — you still look polished when you’re not dressed up, but it doesn’t look plain.
Apply two coats of rusty red and seal with glossy top coat. On one or two accent nails, tape a narrow vertical strip down the center where you want matte. Press the tape down firmly and paint matte top coat over that strip only, then remove the tape carefully after it sets for a minute. If you don’t have tape, paint the stripe with a thin brush and matte top coat directly. Finish by checking the edges and adding a tiny amount of glossy top coat on either side to keep the contrast sharp.
Editor's noteUse tape that’s made for nail art so it peels cleanly without pulling polish.
Skip thisAvoid matte over the whole nail — it can make rusty red look flat.
11. Taupe Marble with Burnt Umber Veins
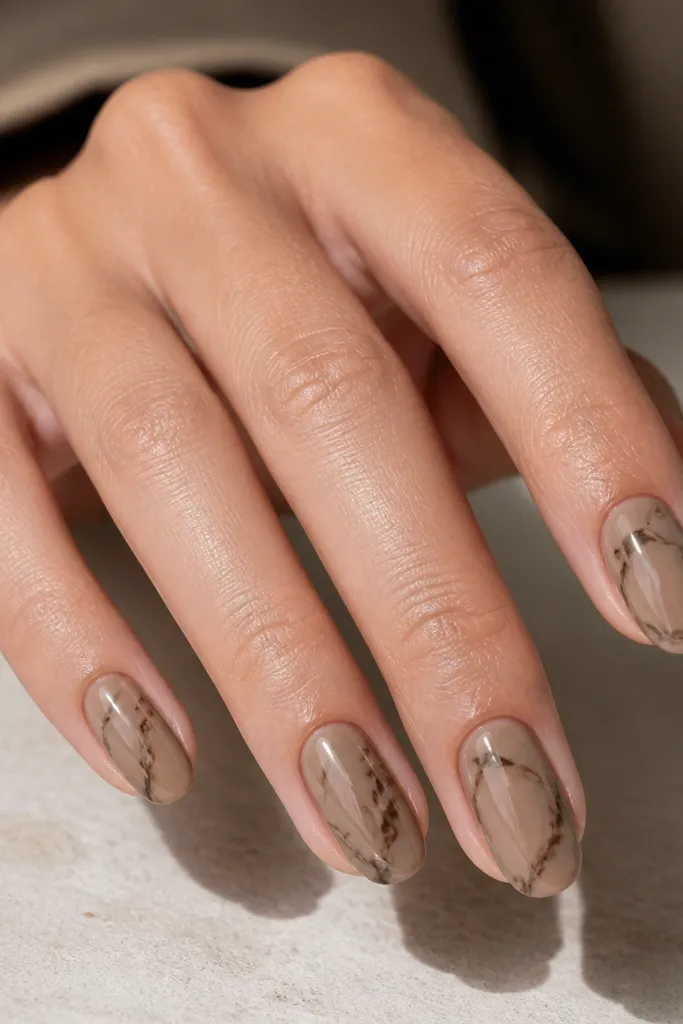
Marble nails look fancy, but you don’t need fancy tools. Taupe is a fall neutral that works with beige sweaters, olive jackets, and even black boots. Burnt umber veins bring the autumn warmth and keep the marble from looking gray. I like this on oval nails because the marble lines naturally follow the curve of the nail bed, making your hands look softer.
Paint a taupe base in two coats and let it dry fully. Add burnt umber veins by dotting small lines with a thin brush, then drag the brush lightly to stretch the lines — you want wispy movement, not thick borders. Work in small sections so the pattern stays organic. Finish with glossy top coat, and if you want more depth, add a second coat after the first dries.
Editor's noteUse a toothpick to break up thick veins so the marble looks more natural.
Skip thisSkip using one continuous vein — repetitive lines look like a stamp.
12. Dark Chocolate Gradient with Sheer Nude Base
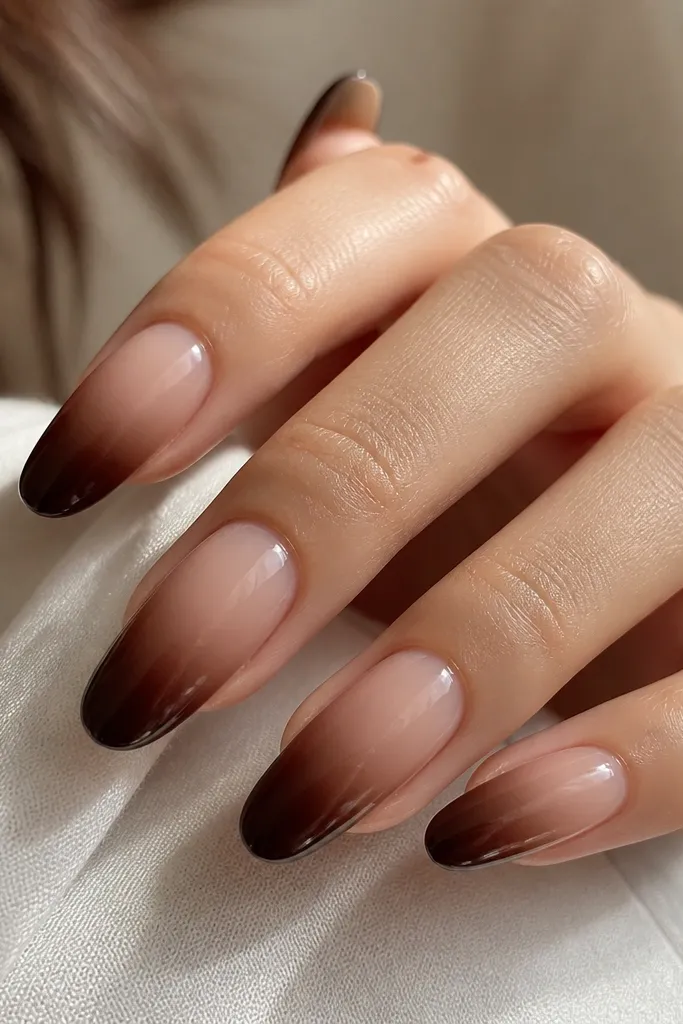
A gradient that goes into dark chocolate looks like warm cocoa and it’s shockingly easy. The sheer nude base keeps the design light, so it doesn’t feel heavy like a full dark coat. This is flattering on hands with shorter nail beds because the gradient creates a gentle lift toward the tip. I like it for fall because it matches every neutral — from cream knits to camel coats.
Paint a sheer nude base and cure or dry it fully. Use a makeup sponge to dab dark chocolate brown at the tips only, then blend upward with lighter dabs — keep it messy at first, then refine. Build the color slowly in two or three layers until the gradient looks smooth. Clean the sides with a small brush and remover. Finish with glossy top coat to smooth the sponge texture.
Editor's noteStart the sponge off the nail and dab inward so the darkest part stays at the tip.
Skip thisAvoid one heavy sponge pass — it creates streaks.
13. Sage Green Micro Flowers on Nude
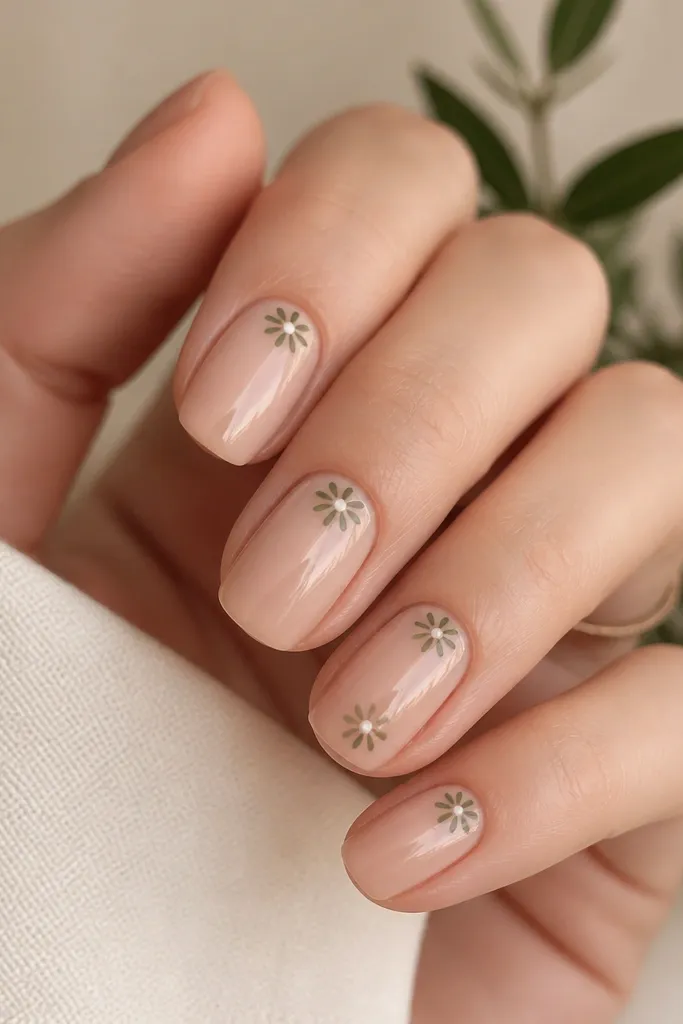
Sage green feels like fall-to-winter transition because it’s muted and calm, not loud. Nude base makes it easy to wear and keeps the flowers from looking busy. Micro flowers are beginner-friendly because they’re small and you only need a few petals to make the shape read as a flower. This works great for fair to medium skin tones, especially with soft makeup and cozy knits.
Start with two coats of nude pink or nude beige. Use a dotting tool to place the flower centers in sage green. Then use a thin brush or dotting tool to add 4 to 5 tiny petal dots around each center, keeping each flower about the size of a grain of rice. Place flowers near the cuticle on two nails and keep the rest plain for balance. Seal with glossy top coat and avoid flooding the tiny details.
Editor's noteTo keep petals from blending, do one nail at a time so the polish stays slightly tacky for crisp edges.
Skip thisAvoid too many flowers on every nail — it turns cute into crowded.
14. Oxblood with Gold Foil Wrap Edge
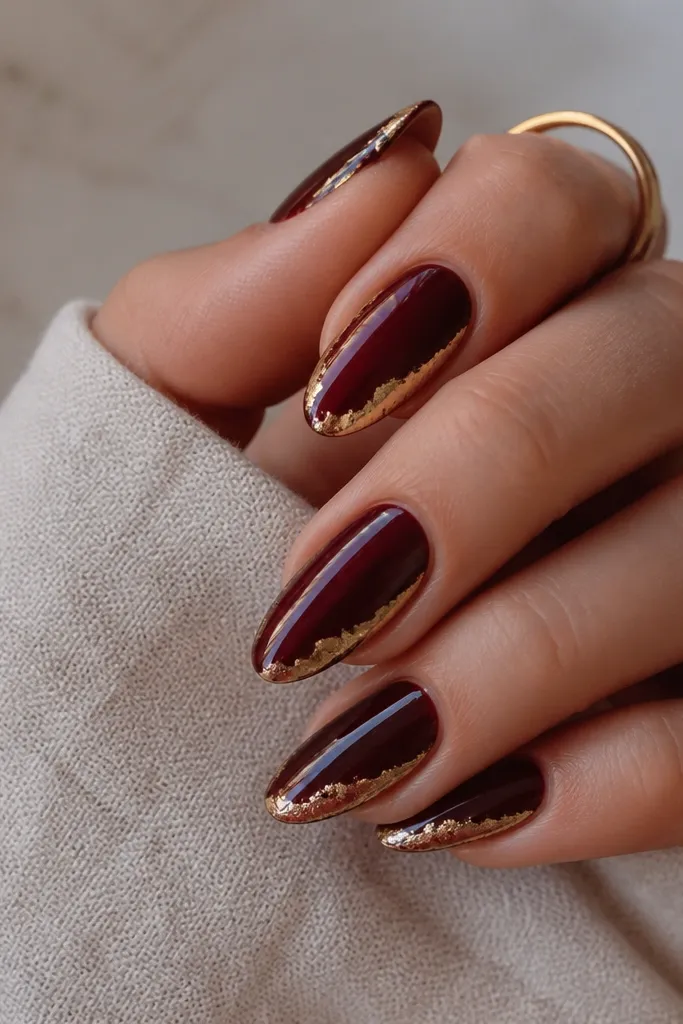
Oxblood is the fall color that always looks “done,” even when your design is simple. The gold foil edge gives you that boutique manicure look without trying to paint perfect lines. Because foil sits along the side and tip, it visually sharpens the nail shape and makes hands look more defined. This one looks especially good with cool-toned outfits like black coats and silver jewelry.
Apply two coats of oxblood and let them fully set, then top coat with gloss. Tear small pieces of gold foil so the edges are irregular, then press the foil gently along the outer edge of each nail — aim for a strip about 1 to 2 mm wide. Use a flat silicone tool or the back of tweezers to burnish so it sticks. Finish with a top coat that’s thick enough to smooth over the foil without smearing it.
Editor's noteLightly press foil only on the edges — pressing the middle too hard can create bulky patches.
Skip thisAvoid foil across the center of the nail — it can look messy on glossy bases.
15. Pumpkin Orange Accent with Brown Dot Grid
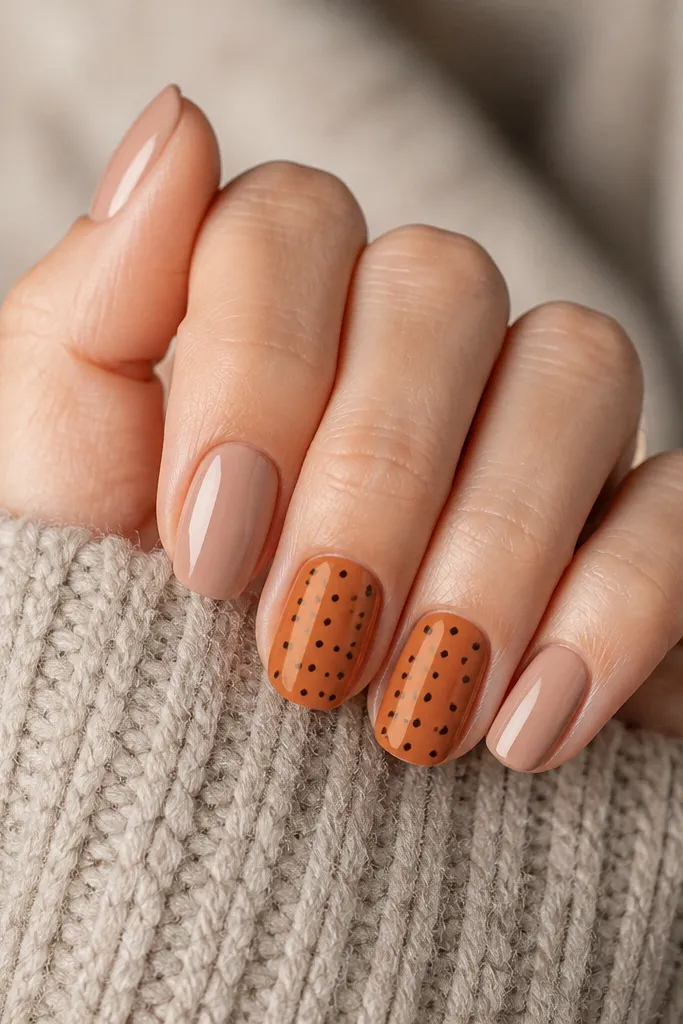
This is the easiest way to get pumpkin vibes without doing a full pumpkin face or leaf cluster. The nude nails keep it wearable, and the pumpkin accent nails give you the fall hit where it counts. A brown dot grid looks graphic and clean, which means it hides small hand wobble better than freehand lines. I like this for casual weekends, especially with orange scarves or plaid shirts.
Paint all nails with warm nude in two coats and seal with glossy top coat. Pick two accent nails and paint them pumpkin orange in two thin coats. Use a dotting tool loaded with brown polish to create a grid pattern: place one row of dots, then repeat a second row underneath, keeping the spacing consistent. Add a third row only if you still have room — stop before the cuticle. Top coat everything and keep the grid nails extra glossy so the dots look raised and crisp.
If your dots get too big, wipe the dotting tool tip on a paper towel before you pick up more polish.
Skip uneven dot spacing across the same nail — it reads sloppy.



