1. Cinnamon Vertical Stripe Set
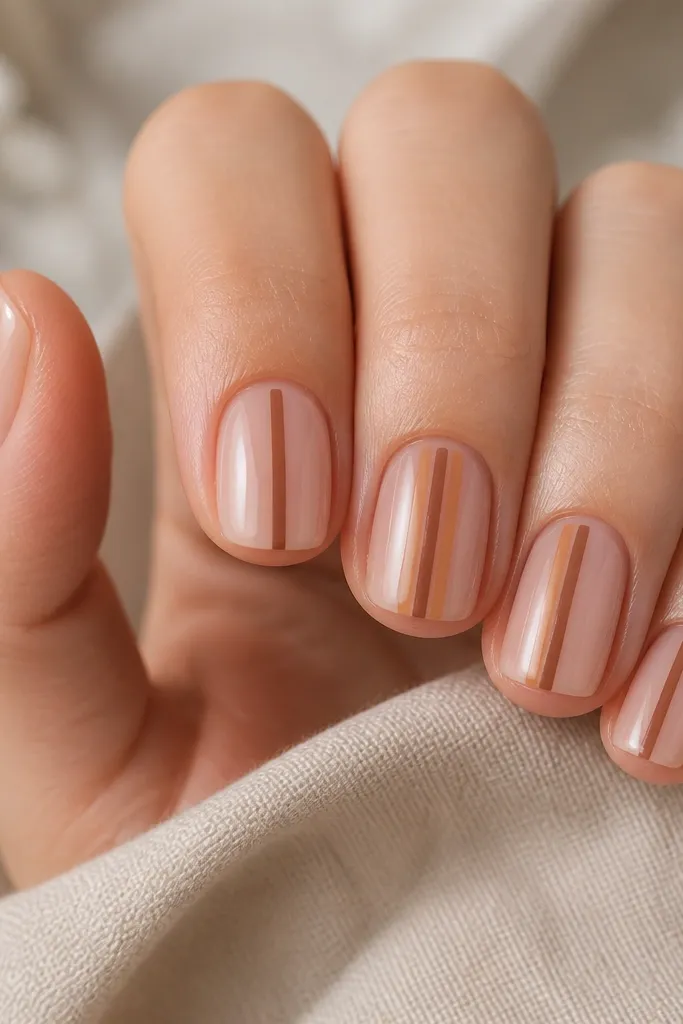
This one is my go-to when the nails are really short, because the stripe pulls the eye straight down. Start with a milky nude base that matches your undertone: peachy nude for warm skin and pink-beige for cooler undertones. Use cinnamon brown as the main stripe so it reads like autumn spice, not plain brown. I add a slightly lighter caramel line beside it on two nails for depth — it looks intentional even when the nails are only a few millimeters long. It flatters hands that look a little “flat” because the vertical line adds length without needing extra art.
Start by filing the tips into a true short square and pushing back cuticles. Apply a nude base color in two thin coats, curing each coat. Use a striping brush to paint one centered vertical line on every nail with cinnamon brown, keeping the stripe width about the thickness of a single stripe on a nail art striping tape. On two accent nails, add a second caramel line next to the cinnamon line, then seal with a high-gloss top coat.
Keep the stripe slightly thicker near the center and taper it just a hair toward the tip for a more natural look.
Avoid painting the stripe all the way onto the corners — it makes short square nails look wider.
2. Caramel Half-Moon Cuticle Glow
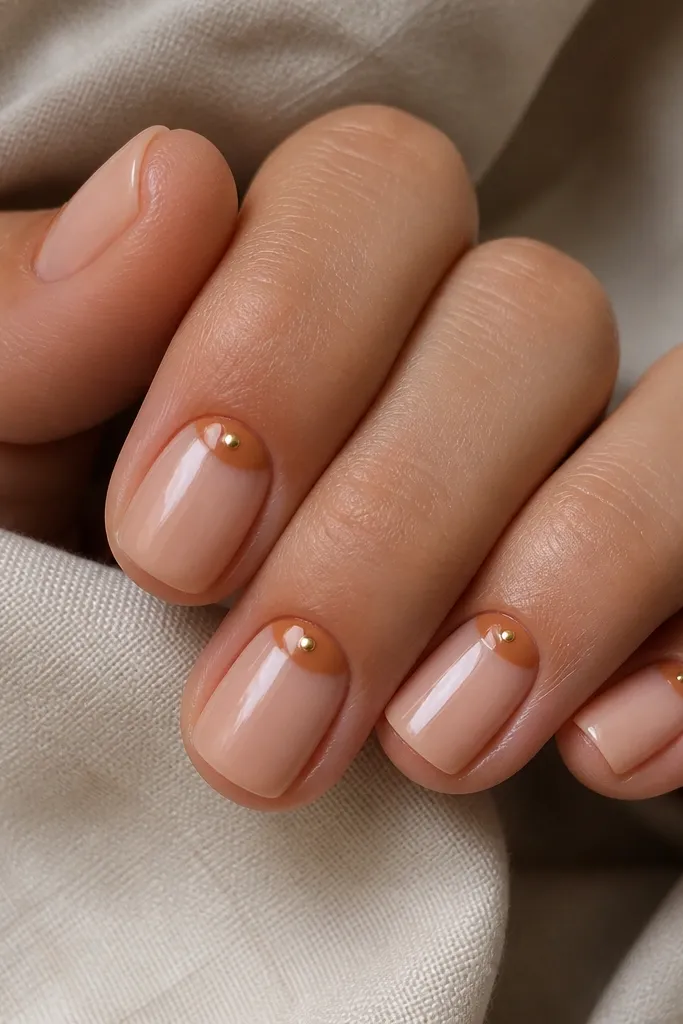
Half-moons are the fastest way to make short square nails look styled without overcrowding. The caramel color sits right where your nail naturally draws attention, so it reads “put together” even when the tip is tiny. I like a sheer warm beige base under it so the half-moon looks like a glow, not a sticker. Add a micro gold dot at the center for autumn warmth — it catches light when you move your hands. This design looks great on most skin tones, especially if you like a clean look that still feels seasonal.
Editor's noteIf your cuticles are dry, apply cuticle oil, wipe off excess, then do the design — it helps the polish edges stay cleaner.
Start with a sheer warm beige or nude jelly polish, two thin coats. Use a small half-moon stencil or a cuticle brush to paint a caramel half-moon that stops about 1 millimeter before the sidewalls. Place a tiny gold dot in the middle of the half-moon and cure. Finish with one or two glossy top coat layers, making sure the top coat covers the half-moon edges so they don’t lift.
Skip thisDon’t make the half-moon too big — if it reaches the sidewalls, it shortens the nail visually.
3. Toffee French Tip with Micro Dots
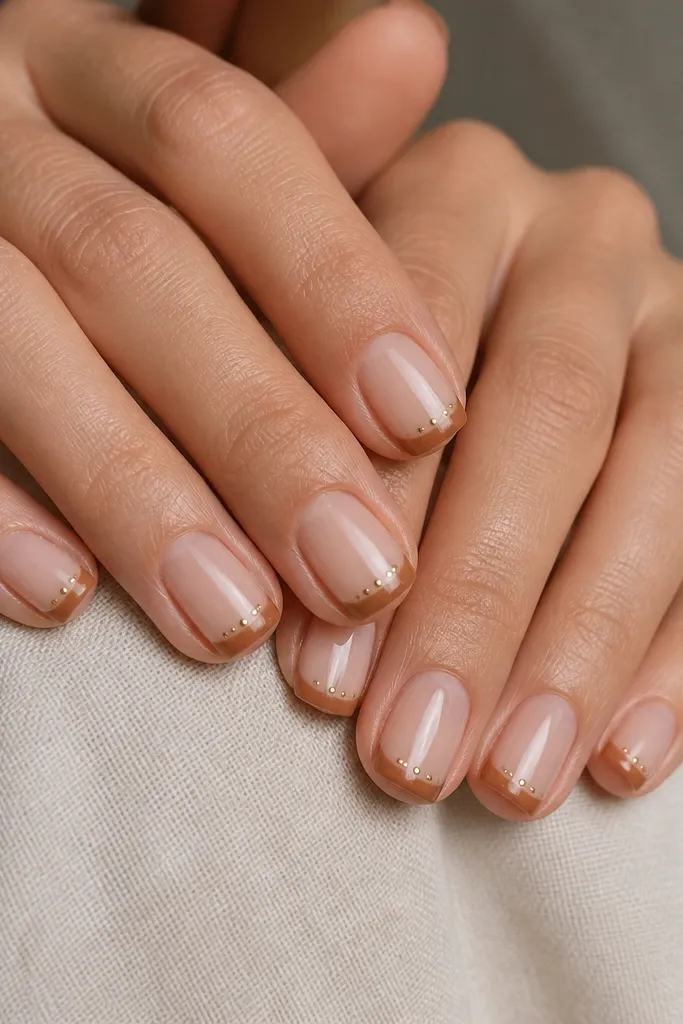
A French tip is classic, but on short square nails, you have to keep it narrow and crisp. Toffee brown feels autumn without going muddy, and the micro dots add a little sparkle that doesn’t need glitter flakes. The nude base keeps your nail bed looking longer. I also like that the dots sit just above the tip line, creating a subtle “frame” effect that makes the nail look taller. This is flattering for hands with short nail beds because the negative space does the work.
Start with a sheer nude base in two thin coats. Paint the French tips in toffee brown using a striping brush, keeping the tip width about 1/6 of the nail length. While the French is still slightly tacky (or after curing if you’re using nail art gel), place three tiny gold dots above the French line in a straight row, about a dot-width apart. Seal everything with a glossy top coat and cure fully.
If your French line wobbles, clean the edges with a flat brush dipped in remover before curing.
Skip a thick French tip — it makes short nails look blunt.
4. Olive Sage Plaid Accent
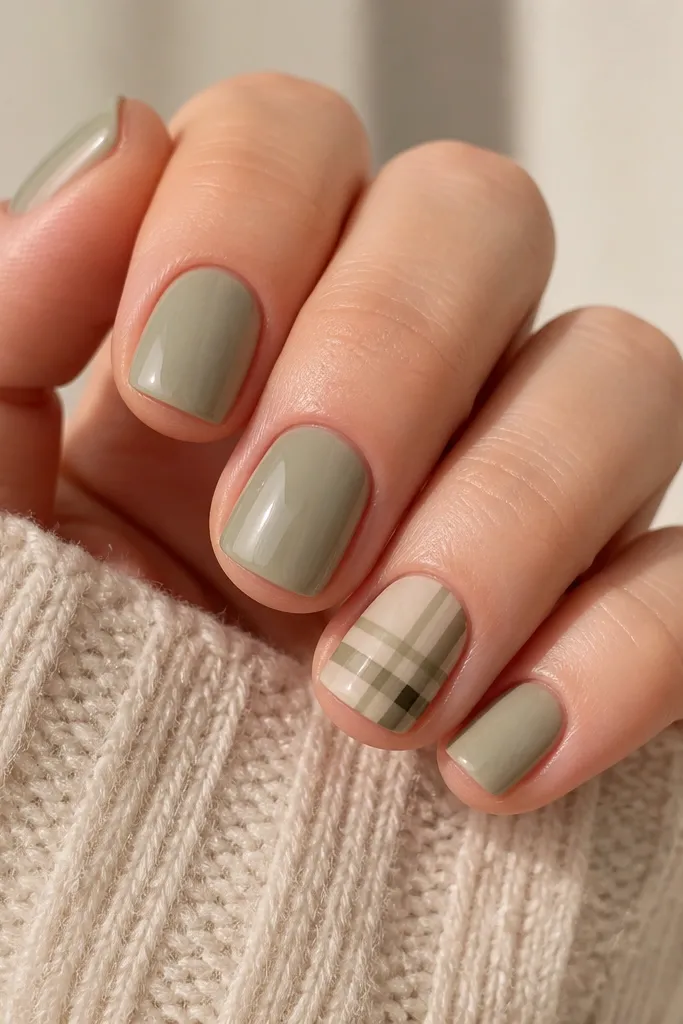
Plaid can look bulky on short nails, so I keep it to one accent nail and use thin lines. Olive sage is the fall shade that flatters almost everyone because it sits between green and neutral. Cream lines soften the look, while a tiny black corner check adds structure. The plaid works because you’re creating a mini grid — the eye reads it as neat geometry instead of “busy art.” Wear this when you want fall style that still looks clean with sweaters and simple rings.
Paint all nails with a glossy sheer sage base in two thin coats. On one accent nail, add a cream grid using a thin liner brush: start with one vertical line down the center, then add two more lines spaced evenly. Next, add horizontal lines across, keeping them light and straight so the plaid stays delicate. Add a tiny black check at the top corner of the accent nail, then finish with glossy top coat over the entire nail.
Use gel liner or an acrylic paint that dries quickly — plaid lines need crisp edges to look expensive.
Don’t put plaid on every nail — it overwhelms short square tips.
5. Rusty Bloom Negative Space
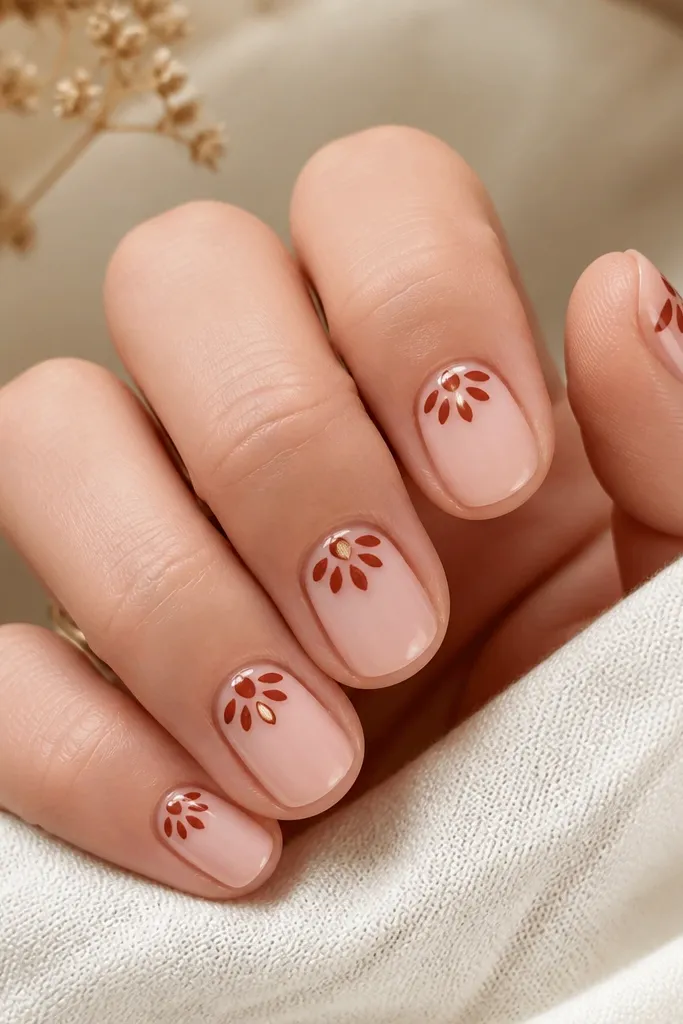
This design looks like a tiny fall bouquet without taking up the whole nail. Rusty bloom colors — terracotta and burnt orange — sit perfectly against nude, and the negative space makes the nail bed look longer. I keep the flower cluster in the middle third, not too far toward the sides, so the square shape still reads clean. The tiny gold leaf on one nail adds warmth and movement when light hits. It’s flattering for hands that like feminine details but still want autumn color.
Editor's noteLet the petals be slightly uneven in size — perfect symmetry makes it look like a sticker.
Start with a nude base jelly polish, two thin coats. Using a dotting tool and a thin detail brush, place a small cluster of 5 petals in rust near the center cuticle area, leaving gaps between petals. Add a darker cinnamon center dot and a couple of tiny leaf strokes with olive-green polish. On one accent nail, paint a single gold leaf shape beside the bloom, then cure and seal with a glossy top coat.
6. Black Licorice Micro Lines
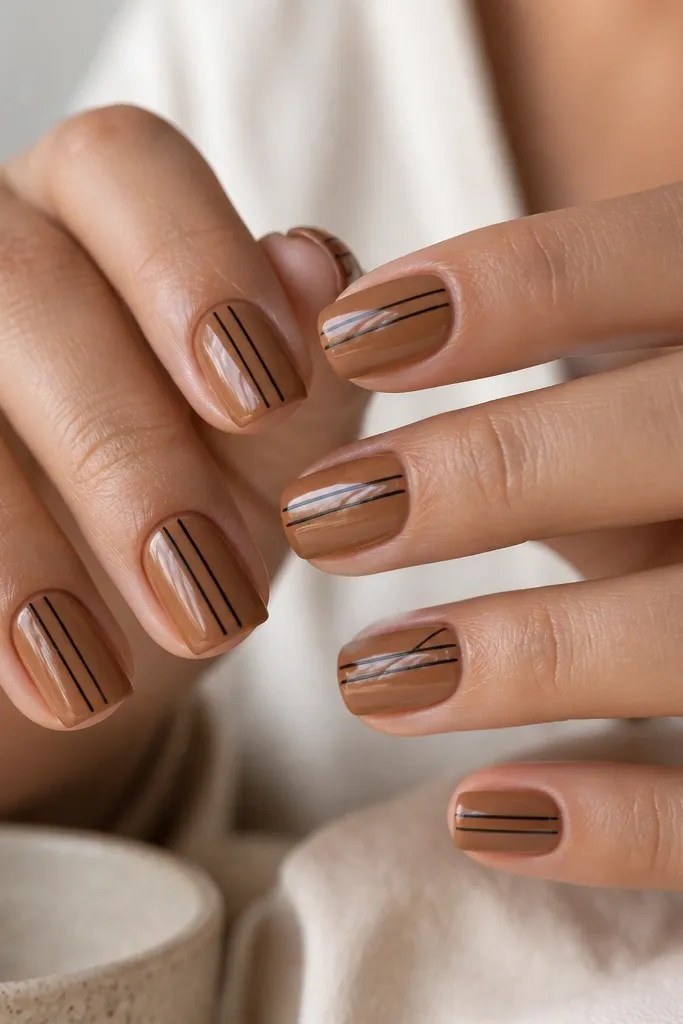
If you like fall but don’t want leaf art, micro lines give you that moody look in seconds. The caramel base keeps it warm, and black licorice lines add definition. This design makes short square nails look longer because the lines are vertical and thin — they don’t add bulk. The diagonal micro line is a small twist that keeps it from feeling too plain. It looks great on medium to deep skin because the caramel base has enough contrast to show clearly.
Apply caramel polish as a base in two thin coats, then cure. Use a nail art striping brush to paint two ultra-thin vertical lines centered on each nail, spacing them about 1 millimeter apart. On two accent nails, add a diagonal micro line crossing near the tip, keeping it short so it doesn’t hit the corners. Finish with one glossy top coat layer, paying attention to the line edges so they don’t catch on fabric.
Wipe your brush on a lint-free pad before painting lines — it keeps the thickness consistent.
Don’t let the lines touch the sidewalls — it makes the nail look wider than it is.
7. Mustard Side French
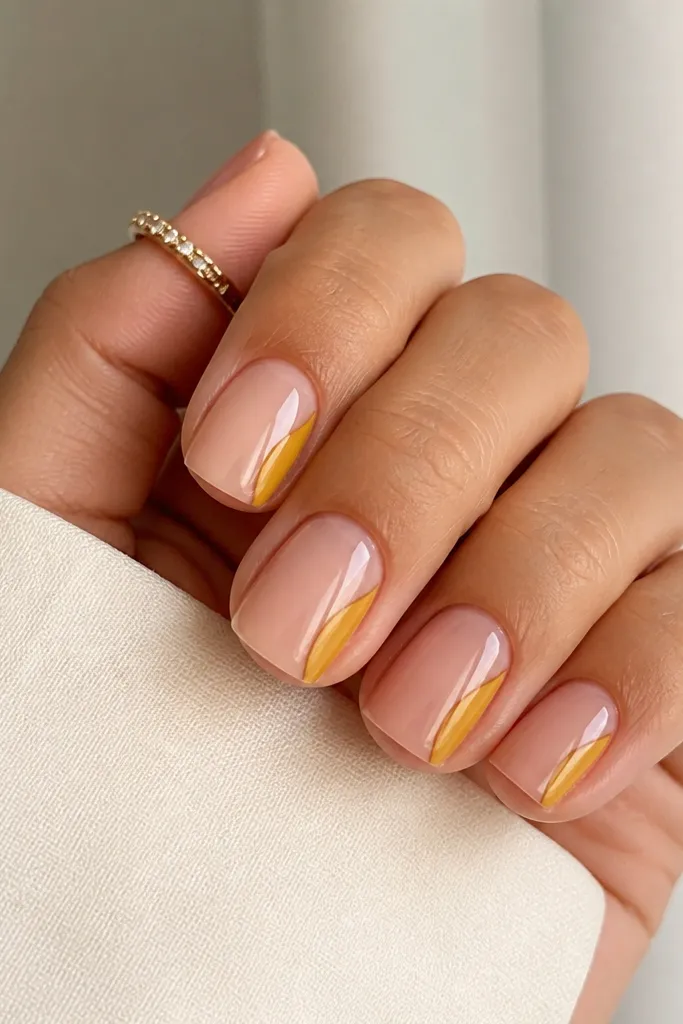
Side French is a cheat code for short square nails because it creates a diagonal visual path. Mustard-gold reads autumn and looks warm against nude, especially when the center stays clear. I choose one side per nail so it looks intentional, not random. The glossy finish makes the mustard feel like lacquer, not chalky paint. This design flatters hands with shorter nail beds because the nail still looks like it has plenty of room in the middle.
Editor's noteUse a thin brush for the curve, then clean the edge with a cotton swab dipped in remover before curing.
Start with a sheer nude base in two thin coats. Pick a side for each nail — right for two nails, left for the others — and paint a curved mustard French that hugs the sidewall without crossing the center. Keep the side French width about the thickness of a pencil line, and stop it just before the tip edge. Cure and add glossy top coat, making sure the side curve is smooth.
Skip thisSkip thick mustard — it can look like a stain on short nails.
8. Emerald Olive Marble Swipe
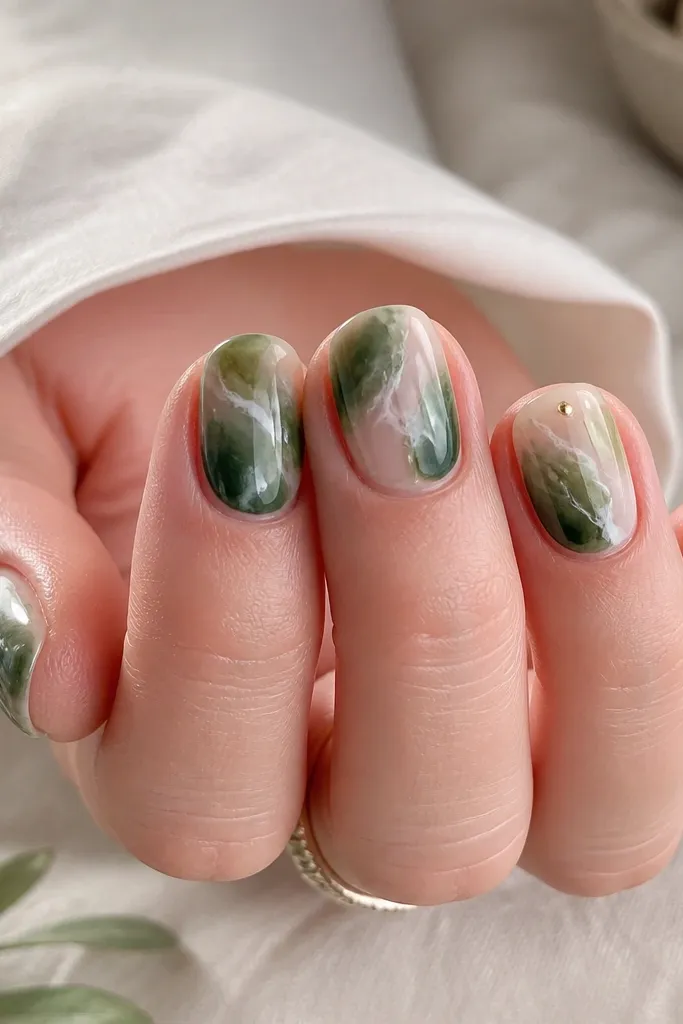
Marble works on short square nails when you keep the veining light and the color movement centered. Emerald olive gives a fall twist that still looks fresh, and the white veining makes the nails look airy instead of heavy. I use a swipe method — less “filled-in” than full marble — so the nail bed stays visible. A small gold dot near the cuticle adds a focal point without adding bulk. This design looks especially good with gold jewelry and darker fall outfits.
Apply a translucent base (milky nude or clear jelly) and cure. Use a makeup sponge or a small brush to swipe emerald green and olive polish in thin streaks from mid-nail downward, leaving gaps. Add thin white lines with a detail brush to mimic veins, then lightly blend the edges by tapping with a clean sponge. Place a tiny gold dot on one accent nail near the cuticle, cure, and seal with glossy top coat.
If your marble turns muddy, use fewer colors and keep the white veining sharper.
9. Cocoa Glaze Over Nude
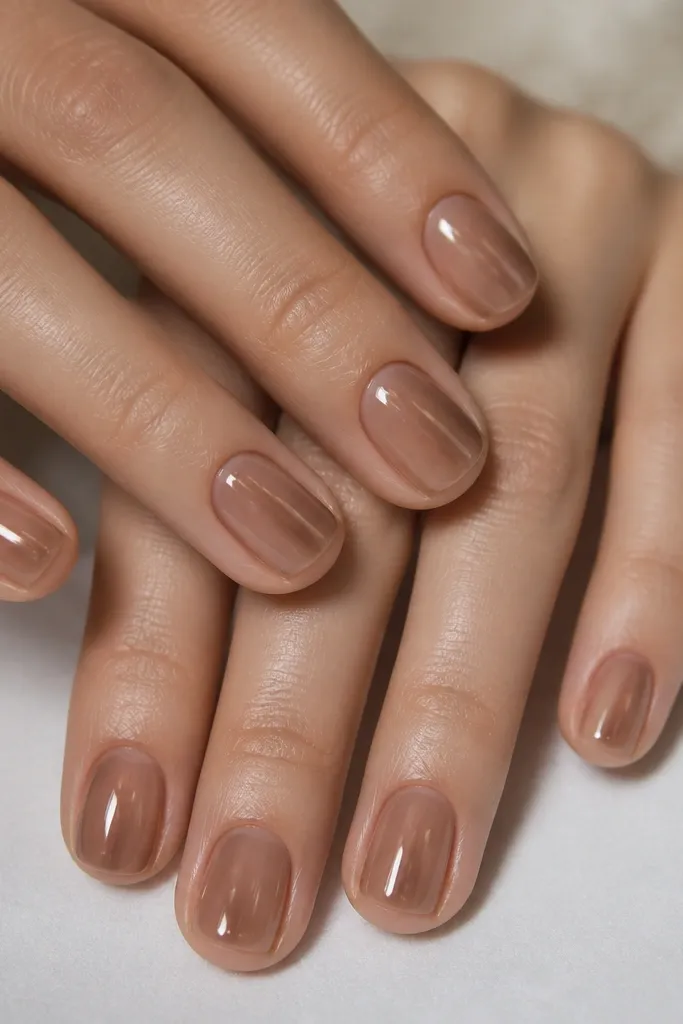
This is the “I want fall nails but I don’t want to draw anything” design. Cocoa glaze gives depth while still letting your natural nail tone show through, so short square nails look smooth and elongated. The semi-transparent layer keeps it from turning into a solid block of brown. I add a faint darker streak on two nails so there’s movement and light reflection. It flatters every skin tone because the brown sits in the neutral zone. Wear it with cozy knits and simple rings — it always looks put together.
Editor's noteIf your cocoa polish is thick, mix it with a clear gel top or use a thinner — even coverage looks expensive.
Start with a nude base in two thin coats and cure completely. Paint a sheer cocoa-brown glaze layer over the whole nail, keeping it thin so the nude still shows at the edges. On two nails, add a single darker cocoa streak down the center using a liner brush, then blend the edges lightly. Finish with a glossy top coat that gives a “gel shine” look and cure fully.
Skip thisDon’t make the cocoa opaque — solid brown on short square nails can look harsh.
10. Burnt Orange Dot Trail
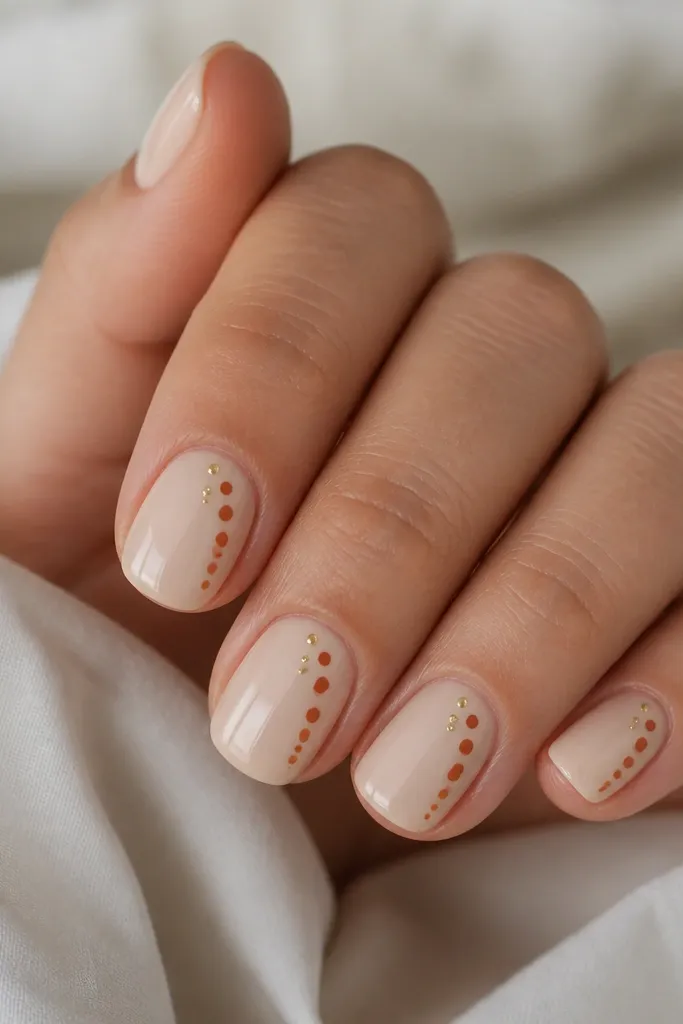
Diagonal dot trails add motion, and motion makes short nails feel longer. Burnt orange is the autumn sweet spot between red and brown, so it reads warm without looking too bright. The creamy nude base keeps contrast soft — the dots look intentional, not like random spots. Gold micro dots near the tip catch light and make the design feel special for fall evenings. This style flatters short nail beds because the diagonal line pulls the eye outward and up.
Editor's noteDot trail looks best when the last dot sits slightly higher than the others — it lifts the whole nail.
Apply a creamy nude base in two thin coats. Use a dotting tool to place 4-5 burnt orange dots starting just below the cuticle at the center, then moving diagonally toward the upper right corner. Keep spacing even — about a dot diameter between dots. Add two tiny gold dots near the final dot, then cure. Seal with glossy top coat and cap the free edge with a thin layer.
Skip thisAvoid random dot sizes — keep them uniform so it reads like a design.
11. Velvet Matte Wine with Micro Star
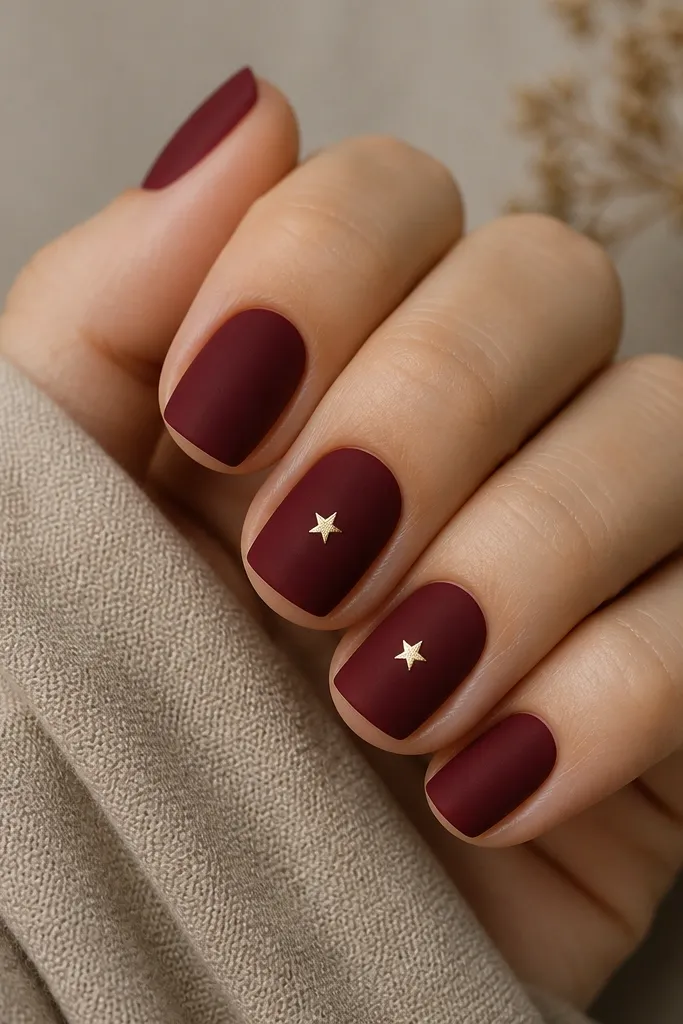
Matte wine is my favorite fall look because it feels like velvet without needing heavy art. The deep wine color flatters cool undertones and looks stunning with silver rings. I keep the design mostly plain so the matte texture is the star, then add a tiny gold star for a little sparkle. Stars work best at a small scale on short nails — one spot is enough. This is a great choice for fall parties, holiday dinners, and nights when you want your nails to look “done” in photos.
Start with a smooth base and paint deep wine polish in two thin coats, curing each. Apply a matte top coat over all nails, curing fully so the finish turns velvety. On two accent nails, use a tiny dot of metallic gold gel and place a micro star shape in the center, about halfway between cuticle and tip. Cure again, then do not add glossy top coat — you want the matte to stay consistent.
If your matte top coat makes the color look patchy, add a second matte coat only after the first is fully cured.
Skip big stars or thick glitter on matte — it can look raised and cheap on short nails.
12. Leaf Line Art Frame
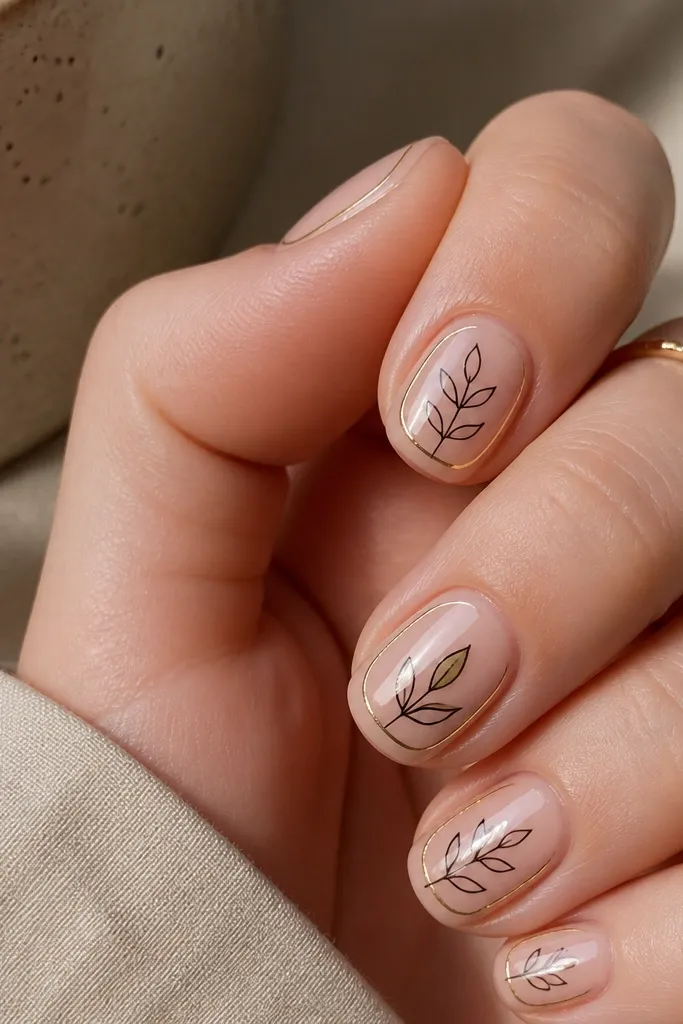
This design looks like a minimalist autumn drawing, and it’s perfect for short square nails because it uses thin lines. The black leaf line art gives crisp contrast, while the gold tip border adds a warm frame that makes the nail look finished. I keep the leaves in the center so the design doesn’t widen the nail. One filled olive leaf gives you color variation without turning the whole set into clutter. It flatters hands that look better with clean, graphic details and works with both casual and office fall outfits.
Apply a nude glossy base in two thin coats. Use a thin detail brush to draw one leaf outline in black at the center of each nail — keep the leaf length about half the nail. Add a thin gold border across the top of the tip area, like a micro French frame, stopping before the corners. On one accent nail, fill the leaf with olive green using a tiny brush, then cure and top coat glossy.
Draw the leaf in one confident pass, then add veins with a second pass for control.
Avoid thick outlines — thick black on short nails makes them feel heavy.
13. Terracotta Crisscross Half Web
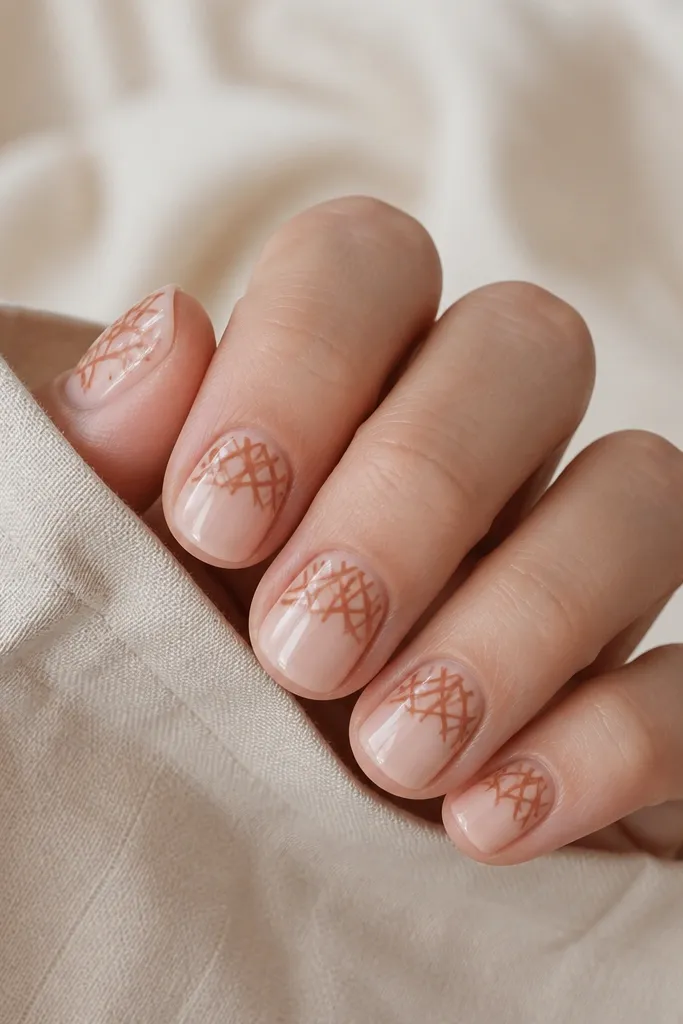
This half-web pattern is a neat trick for making short square nails look longer because the design stops halfway down. Terracotta gives autumn warmth and pairs beautifully with beige nude. The crisscross looks like a woven fabric, but keeping it to the top half prevents the pattern from swallowing the nail. I like it when you want something textured-looking without actual 3D pieces. It flatters almost everyone, especially if you like earthy tones and you wear brown boots or gold hoops.
Editor's noteUse the nail’s natural center line as your alignment guide so the web looks symmetrical.
Start with a sheer beige base and cure in two thin coats. Paint terracotta crisscross lines only on the upper half of the nail, leaving the bottom half nude — use a striping brush for control. Create the web by first drawing vertical lines, then adding diagonal lines that cross them, keeping the pattern tight near the tip. Clean the edges around the square corners with a small brush, cure, and seal with glossy top coat.
Skip thisDon’t extend the web into the cuticle area — it can make the nail look shorter.
14. Gold Leaf Confetti on Nude
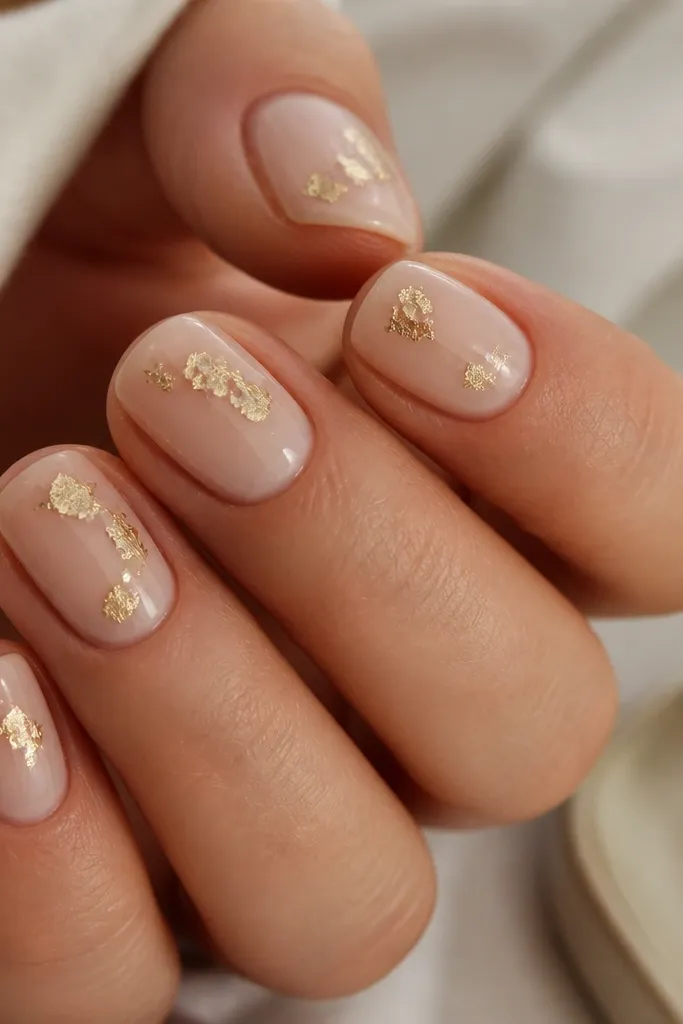
Gold leaf confetti makes short nails look celebratory without the bulk of big glitter. The nude base keeps it wearable, and the foil texture flashes differently than regular polish, which makes it feel more expensive in real life. I place flakes in small clusters rather than covering the whole nail — that keeps the square shape crisp. If you’re fair, the gold reads bright; if you’re deeper, it looks like warm light against your skin. This is my go-to when fall events show up and you want nails that match a cozy dress or a nice coat.
Editor's noteTrim any extra foil at the free edge with a fine file after curing.
Apply a nude glossy base in two thin coats. Use a gel adhesive or a clear tacky layer (depending on your system) on just the areas you want flakes — usually the middle third. Press tiny pieces of gold leaf onto the tacky spots, then lightly smooth with a silicone tool. Cure, then seal with a glossy top coat that covers the foil edges so it doesn’t snag on sweaters.
Skip thisAvoid thick glitter top coats over leaf — it can dull the foil texture.
15. Autumn Ombre Burnt Sienna Tips
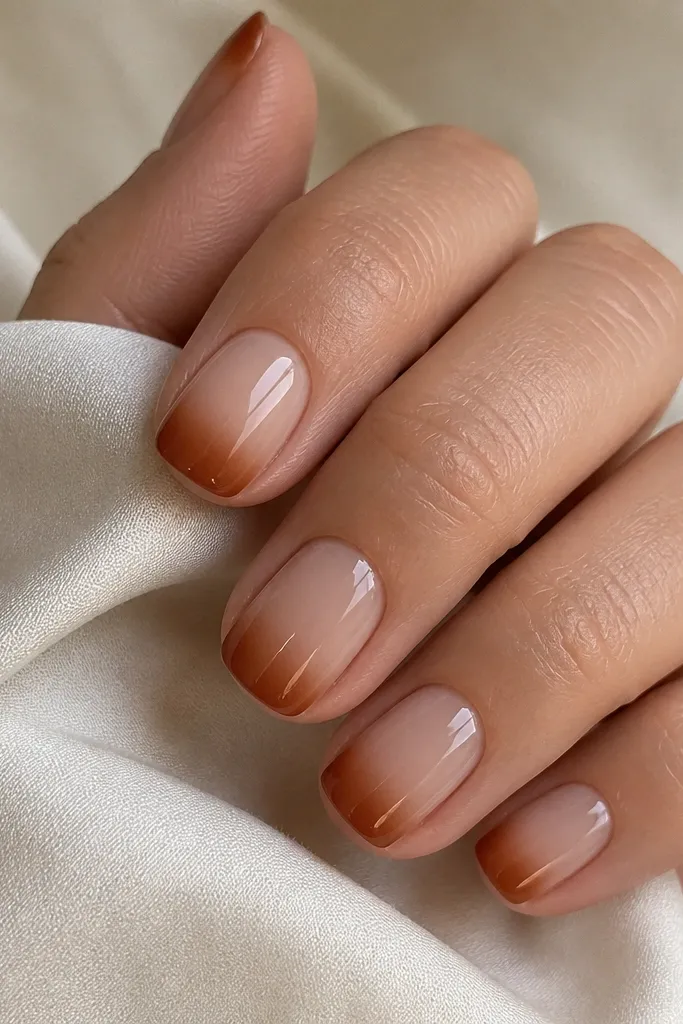
Ombre is a reliable way to add length, and burnt sienna is the fall shade that looks like cinnamon sticks and baked clay. On short square nails, I keep the gradient subtle: most of the color lives at the tip, fading upward into nude. This prevents the nail from looking like a solid block of brown. The smooth blend also looks great with square edges because there’s no hard line to chip. It flatters hands of all skin tones, and it’s especially pretty if you like warm, natural-looking nails.
Start with a nude base and cure in two thin coats. Sponge ombre: lightly dab burnt sienna gel polish onto a makeup sponge and press only on the tip area, then blend upward a tiny amount with gentle taps. Build the color gradually — two thin sessions are better than one heavy press. Clean the edges around the square corners with a brush dipped in cleanser, cure, then apply glossy top coat to even out the finish.
If your ombre looks streaky, add a thin layer of nude over the middle to smooth the transition.
Skip a hard line at the fade point — it makes short nails look chopped.