
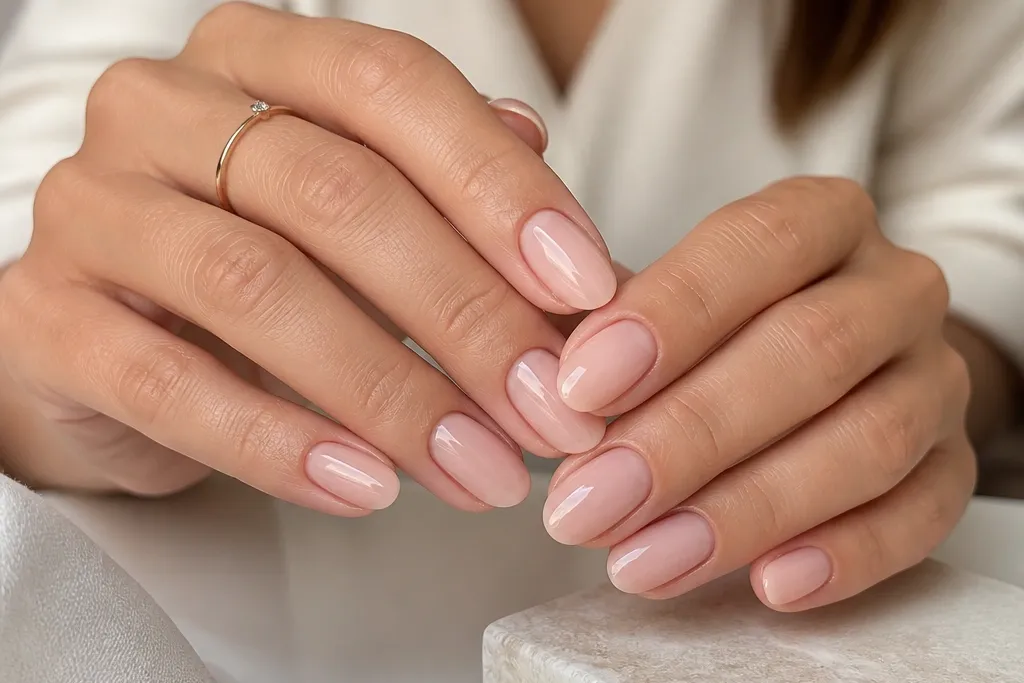

1. Milky Nude BIAB with Micro French Tips
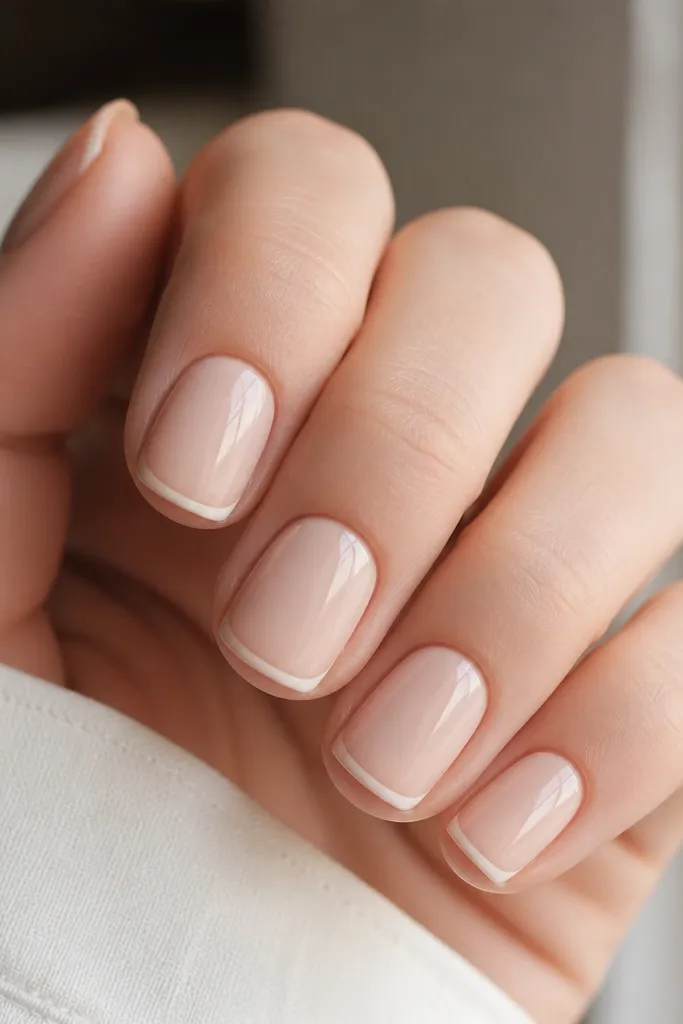
This is the design I hand to beginners when they want “done” nails without big painting. The milky nude base makes your nail look even, while the micro French tip keeps the focus on the outline instead of filling the whole nail with color. It flatters most skin tones because milky shades sit between pink and beige, so they don’t clash with warm or cool undertones. If your nails are slightly uneven, the thin tip line still looks intentional.
Start by building a smooth BIAB layer and curing it fully. Apply a milky nude color in two thin coats, keeping the first coat sheer and the second more even. Using a striping brush, draw a micro French line about 1 mm thick at the tip, then gently pull the line from side to side so it stays straight. Finish with top coat, and run the brush along the free edge to seal.
Use a nail guide card or even a strip of clear tape as a “visual straight edge” for your first few nails.
Don’t make the French line wide — thick tips look bulky on short nails and can lift at the corners.
2. Baby Pink BIAB with One Skinny Accent Stripe
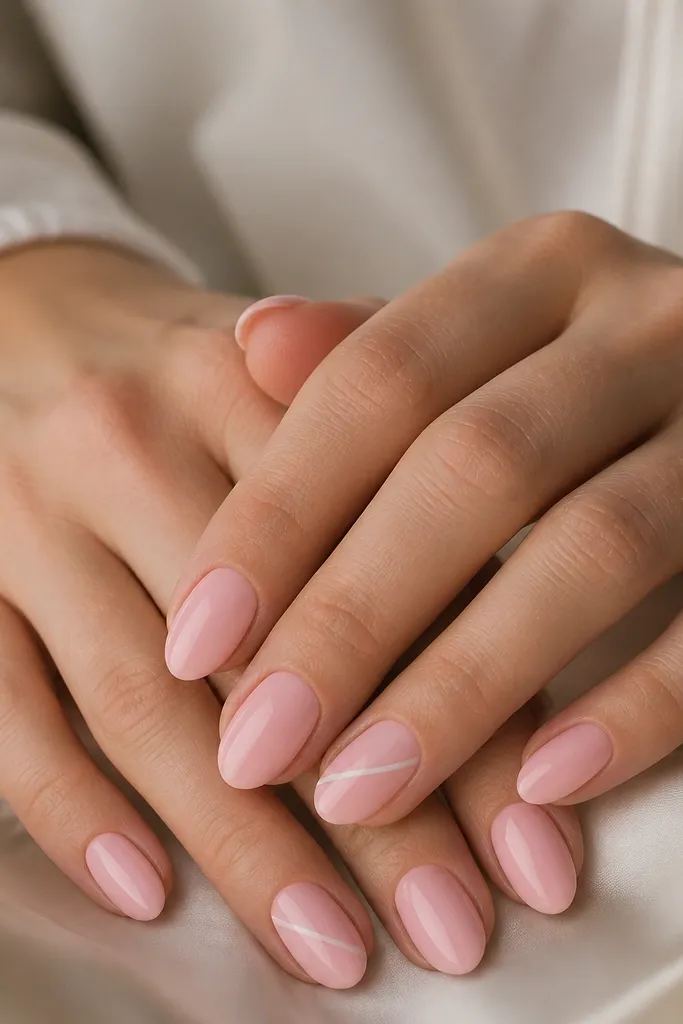
A single skinny stripe makes nails look styled without needing full nail art coverage. Baby pink is forgiving because it smooths the look of ridges and makes your cuticle area look tidy. The diagonal stripe adds movement and length illusion, especially on short nails. It flatters hands with wider nail beds because the stripe pulls the eye toward the center.
Apply BIAB and cure, then paint baby pink in two thin coats. Pick one nail per hand (I usually do ring fingers) and place the stripe with a striping brush, keeping it narrow — about the width of a hairline. Cure, then add top coat on all nails. On the accent nail, cap the stripe edges with top coat so it doesn’t snag on fabric.
If your stripe wobbles, pull it back into shape with a tiny brush dipped in clean gel remover before curing.
Skip thick striping gel — it makes the stripe look raised and catches on sleeves.
3. Nude BIAB with Reverse Half-Moon at the Cuticle
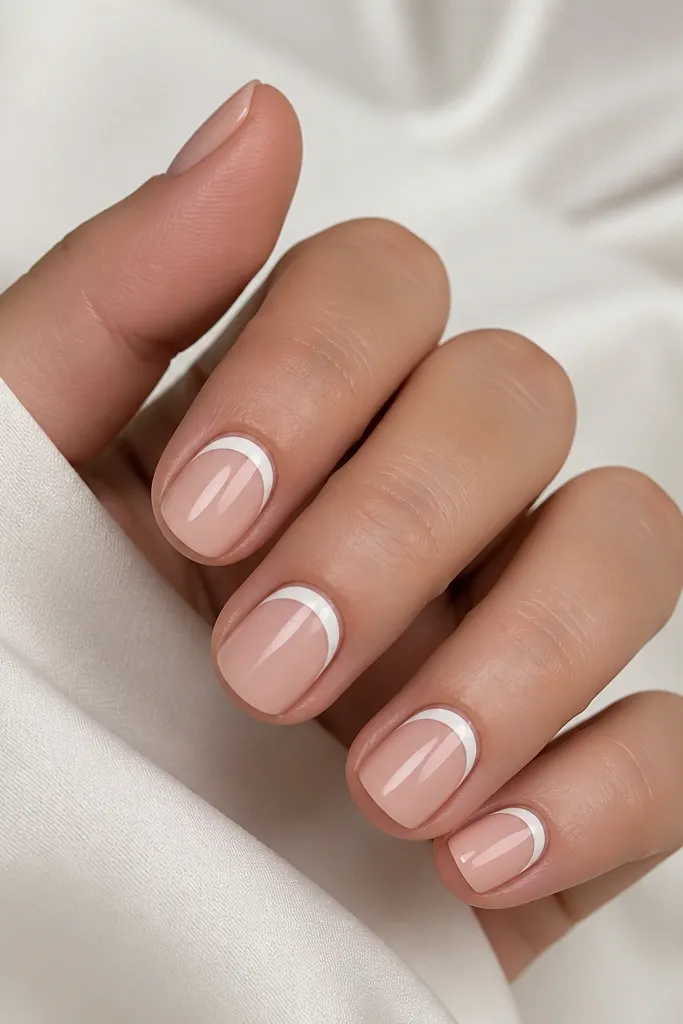
Reverse half-moons look clean because they frame the cuticle instead of covering the whole nail. The nude base keeps your nail looking natural but polished, and the white outline gives definition. This design suits almost every skin tone because nude is your neutral, and white is a simple contrast. If you have slightly irregular cuticles, the half-moon shape helps tidy the visual line.
Start with BIAB and cure, then apply nude polish in two coats. Use a small liner brush to paint a white half-moon that hugs the cuticle curve, leaving a thin nude gap inside. Keep the half-moon centered and symmetrical on each nail, then cure. Finish with top coat and seal the free edge.
Editor's noteUse a dotting tool to place the two “end points” of the half-moon first, then connect them with your liner brush.
Skip thisDon’t fill the entire cuticle area with white — it can look like a messy ring and shrink the nail visually.
4. Clear BIAB Jelly Glaze with Peachy Pink Tinted Tips
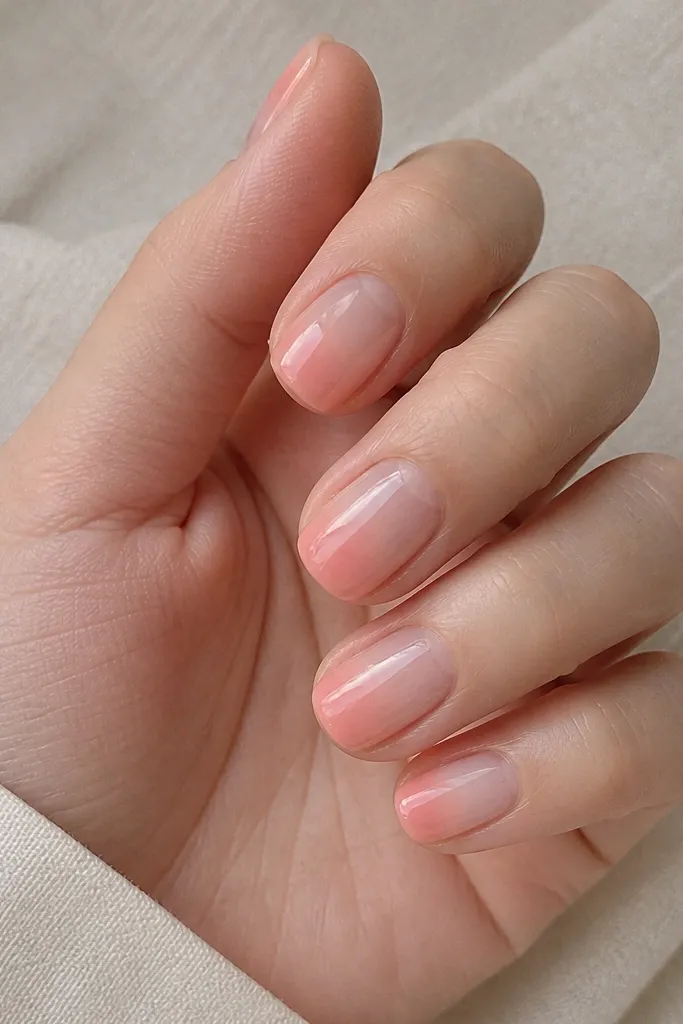
This one looks expensive because it mimics salon jelly finishes. Clear BIAB makes the nail look fresh, and the peachy tint adds warmth without turning into solid color blocks. The ombré fade is flattering on short nails because it doesn’t create a hard line at the tip. It also works great on hands with longer fingers because the gradient keeps things light.
Build clear BIAB and cure. Sponge or airbrush a peachy pink tint at the tips, then blend it down toward the center using a makeup sponge or a soft brush. Keep the pigment light — you want a wash, not a full opaque tip. Cure, wipe the tacky layer if needed, then apply glossy top coat in one even coat.
Editor's noteFor a smoother fade, apply the tint in two light layers instead of one heavy pass.
Skip thisDon’t overbuild the pigment — opaque tips ruin the jelly effect and can look thick on short nails.
5. Chocolate Brown BIAB with Micro Heart on the Ring Finger
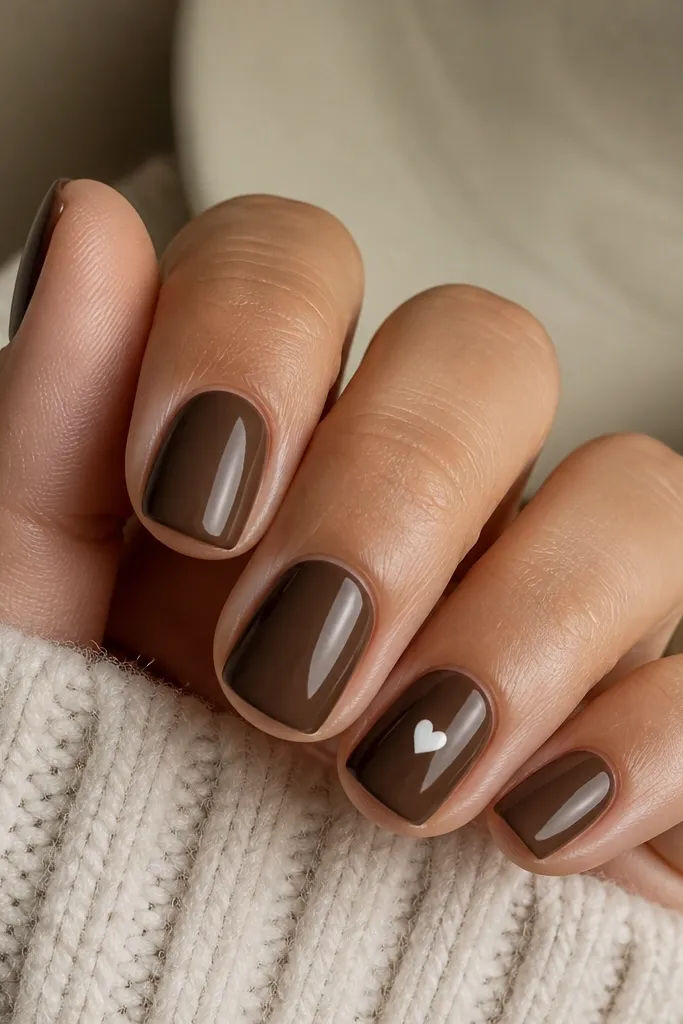
This design is sweet but still grown-up. Chocolate brown is deep enough to look intentional, and the tiny heart gives a focal point without covering the whole nail. I like this on medium to deeper skin tones because the warmth in brown matches undertones and makes the nails look rich. If your nails are short, a micro heart keeps the art readable and not crowded.
Apply BIAB and cure, then paint chocolate brown in two thin coats for full coverage. On the ring finger, use a dotting tool to place two small red dots (or white if you prefer) for the top of the heart, then connect them with a fine liner brush. Make the heart about 2-3 mm wide so it stays crisp at short length. Cure and finish with top coat.
Let your base coat cure hard before drawing the heart so the lines stay sharp.
Avoid making the heart too large — large hearts on short nails start to look like a sticker.
6. Classic Black BIAB with Thin Gold Side Line
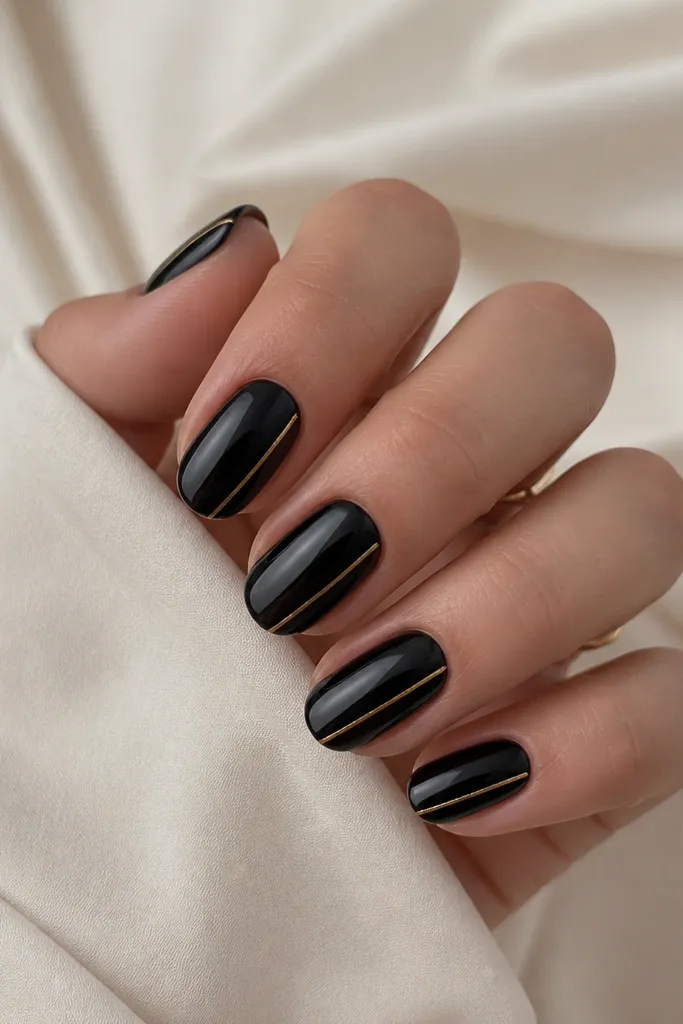
Black nails can look harsh, but a thin gold side line makes them feel intentional and classy. The gold pulls light and makes your nail look longer because it creates a straight vertical reference. This is especially flattering on hands with cool undertones since gold warms the skin around the nail. It also hides minor asymmetry because the line gives your eye a “route.”
Build BIAB and cure, then paint black in two thin coats. Use striping tape or a liner brush to place a gold line along one sidewall — start about 1 mm away from the cuticle and stop about 1 mm before the tip edge. Cure and remove tape carefully if you used it. Apply top coat, and cap over the line so it doesn’t peel at the edges.
If you’re shaky with freehand lines, use striping tape and paint over it like masking.
Don’t run the line into the sidewall cuticle — it can lift and look messy.
7. White BIAB with Gray Cloud Speckle (One Coat Look)
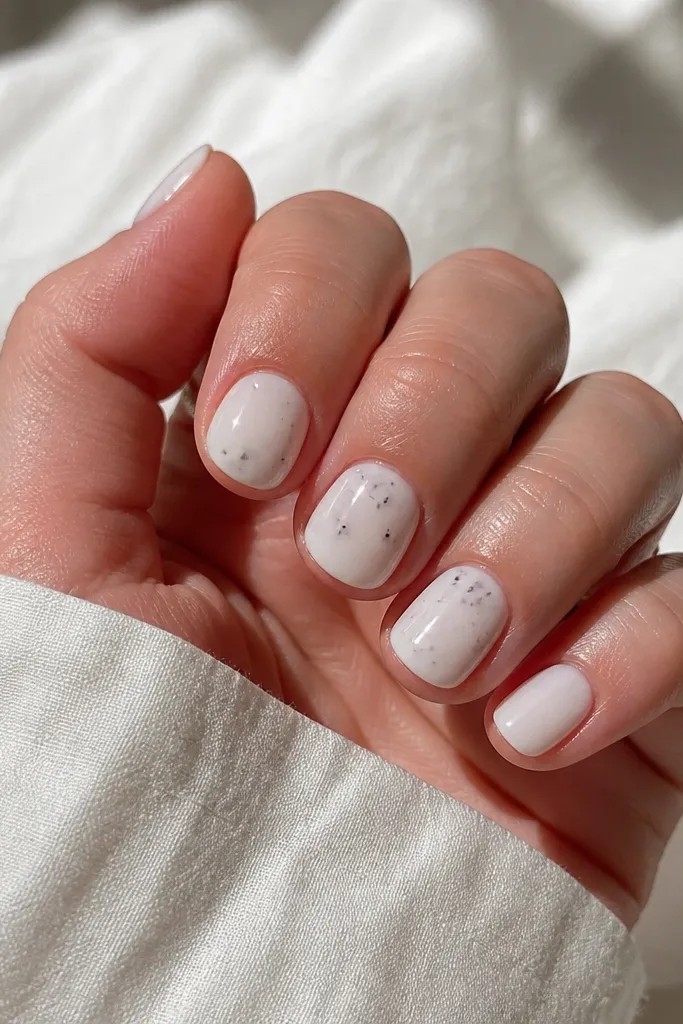
Soft speckle designs look artsy but they’re actually beginner-friendly because you’re not drawing shapes perfectly. Milky white gives a clean base, and gray speckles look like “cloud shadow” instead of random dots. This works great for fair to medium skin tones because the contrast is gentle. It’s also good if you want something wintery without doing full snowflake art.
Apply BIAB and cure, then paint milky white in two thin coats. For the accent nails, use a small brush or broken-down makeup brush to dab gray polish in tiny dots and short smudges. Keep the heaviest speckling in the center third and fade it outward. Cure, then add top coat. Seal the free edge carefully because speckles can catch if the surface is uneven.
Test your dot size on a practice nail or a paper palette first so you don’t overshoot the scale.
Don’t make the speckles too dark — charcoal gray can look muddy on white.
8. Sage Green BIAB with Half-Swirl French
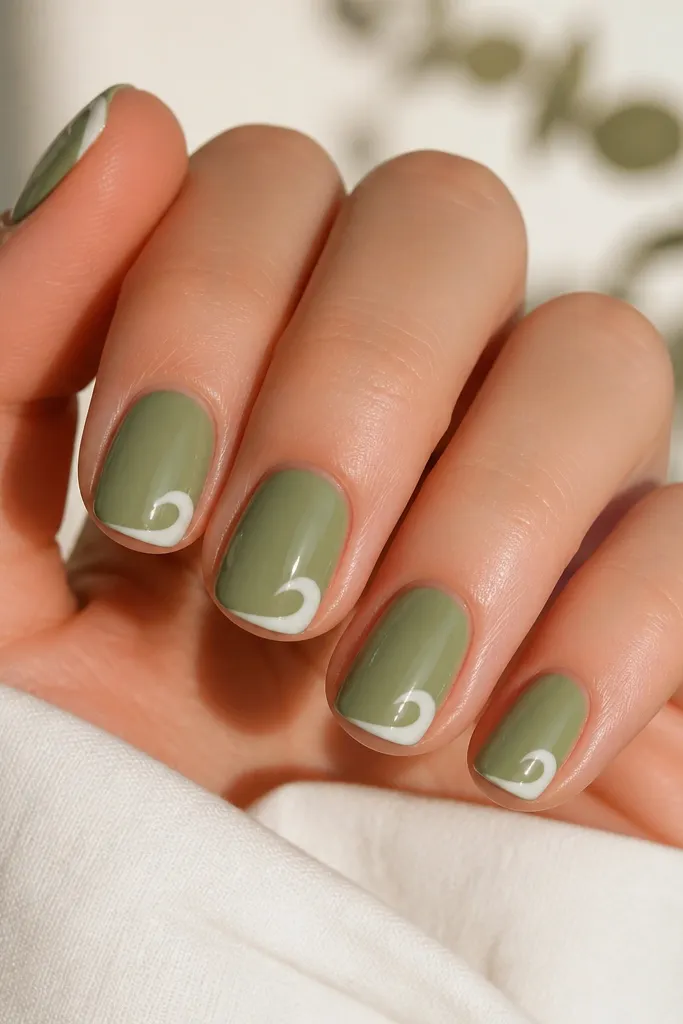
Sage green feels fresh and modern, and the half-swirl French adds a twist without turning into complex nail stamping. The white swirl reads as “clean line art,” so it still looks good even if your nails aren’t perfectly identical. This is flattering on warm and cool skin tones because sage sits in the middle — not too yellow, not too blue. It also looks great for spring and casual weekends.
Build BIAB and cure, then apply sage green in two thin coats. At the tip, paint a white crescent along the outer half of the nail, then add a tiny swirl tail that curves back toward the center. Keep the swirl small — about 2 mm wide — so it stays readable on short nails. Cure and finish with glossy top coat, making sure the swirl edges are fully sealed.
Use a gel liner brush with a fine tip and keep your hand resting on a table so the swirl stays smooth.
Don’t paint the swirl across the entire tip — it turns into a thick blob at short length.
9. Olive Nude BIAB with Tiny Diagonal Rhinestone Dot
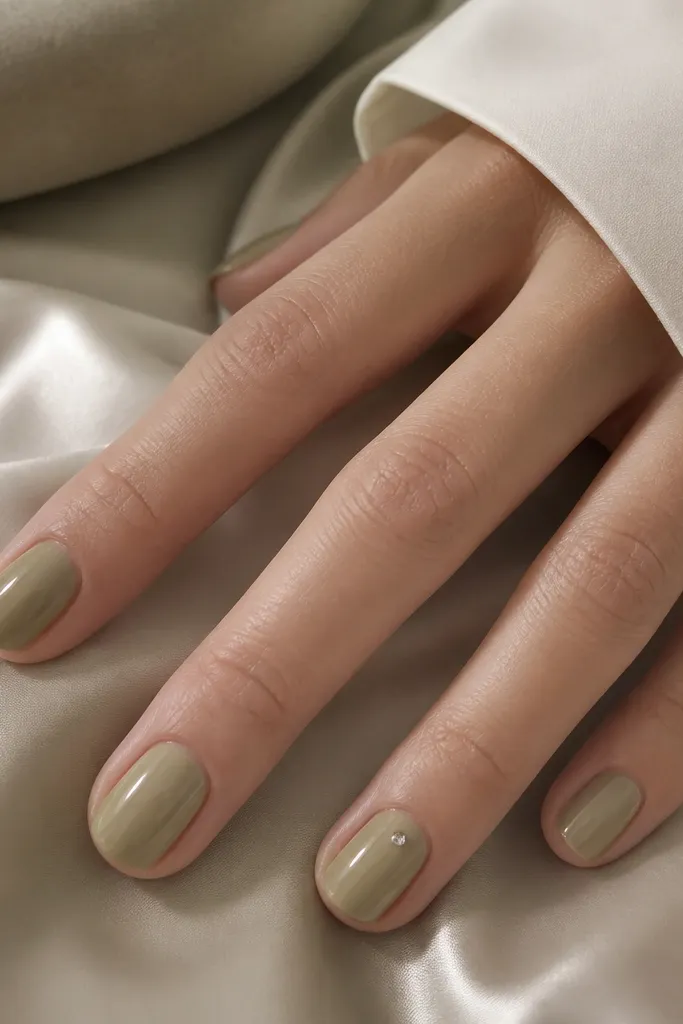
A single rhinestone is the fastest way to make BIAB look “event ready” without adding complicated art. Olive nude is a smart choice because it looks natural but still has personality, especially on medium skin tones. The diagonal placement makes the nail feel longer and more dynamic than a centered dot. Rhinestones also cover small polish imperfections in a way paint can’t.
Apply BIAB and cure, then paint olive nude in two thin coats. On one accent nail, place a small dot of clear builder gel or top coat where you want the stone. Use tweezers to set one tiny rhinestone (SS3 or SS4 size) diagonally, then press lightly. Cure, then apply top coat over everything, leaving no edge for the stone to snag.
Editor's noteAdd the rhinestone only after the color cures fully so it doesn’t slide while you position it.
Skip thisDon’t glue a large rhinestone on short nails — it looks heavy and can lift from the corners.
10. Royal Blue BIAB with White Waterline Detail
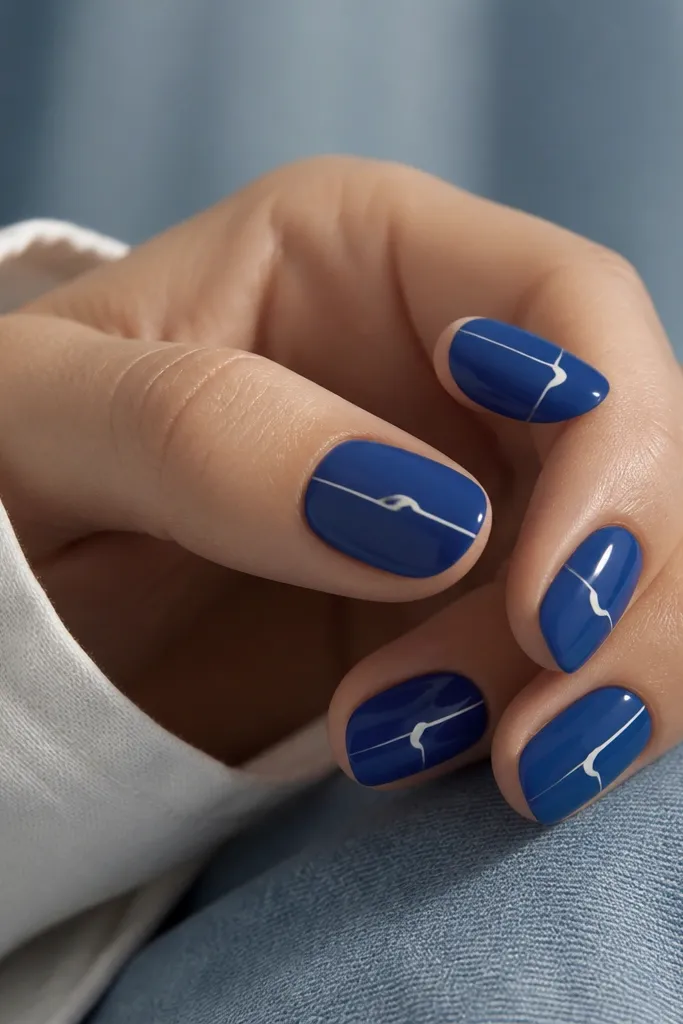
This design looks like clean “nautical” art, but it’s really just one detail line. Royal blue is bold, and the white waterline breaks the color into a graphic shape that looks sharp in photos. It flatters most skin tones because blue gives contrast around the finger. If your nail shape is slightly wider at the base, the horizontal line balances it visually.
Build BIAB and cure, then paint royal blue in two thin coats. Draw a thin white line across the nail at the mid-point, keeping it about 1 mm thick. Add a small wave curve in the center by lifting the liner brush slightly and curving it. Cure and top coat. Seal the line with top coat so it doesn’t feel raised.
If your line is wavy, repaint it before curing — once it’s cured, it’s harder to correct cleanly.
Skip thick white paint — it makes the design look like frosting instead of a crisp graphic.
11. Burgundy BIAB with Single Pearl at the Cuticle Curve
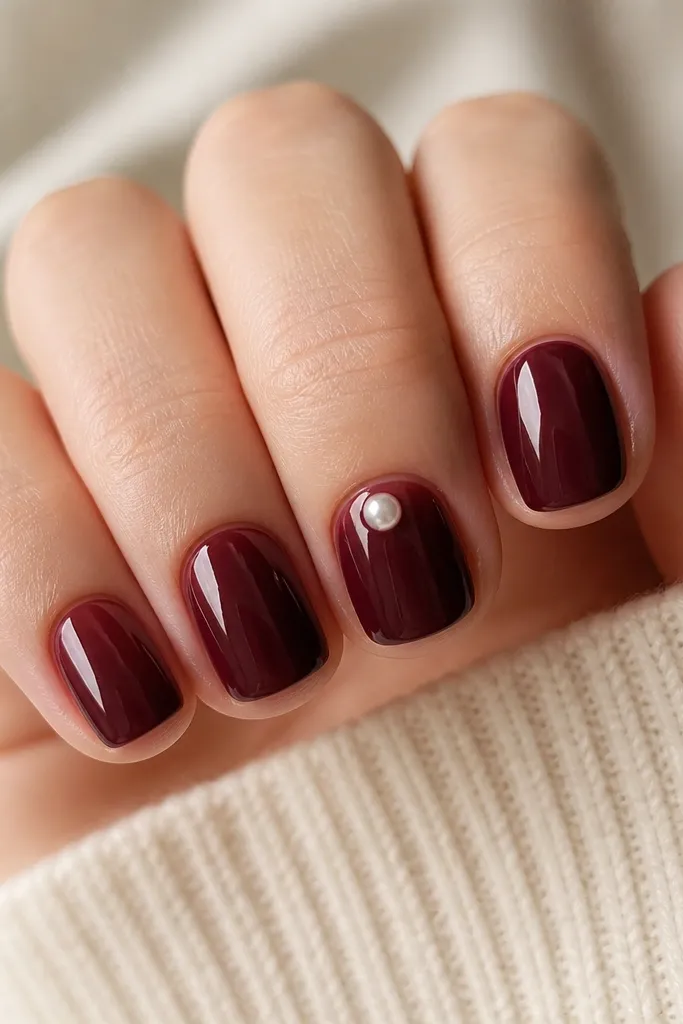
Burgundy looks rich, and the single pearl makes it feel classic instead of trendy. Placing the pearl near the cuticle curve creates a “frame” effect, which makes short nails look more intentional. I like this on fair to medium skin tones because the pearl’s warm white pops without clashing. It also hides tiny cuticle gaps because the pearl sits where your eye already focuses.
Apply BIAB and cure, then paint burgundy in two thin coats. Choose one accent nail and apply a small amount of clear builder gel where the pearl will sit. Place a tiny flat-back pearl under the cuticle line, centered, and press gently. Cure, then apply top coat around the pearl carefully and cap the entire surface.
Use a matte top coat on the burgundy first if you want the pearl to stand out even more, then spot-gloss over the pearl.
Don’t place the pearl too far down the nail — on short length it can look crowded and heavy.
12. Beige Nude BIAB with Brown Dot Fade
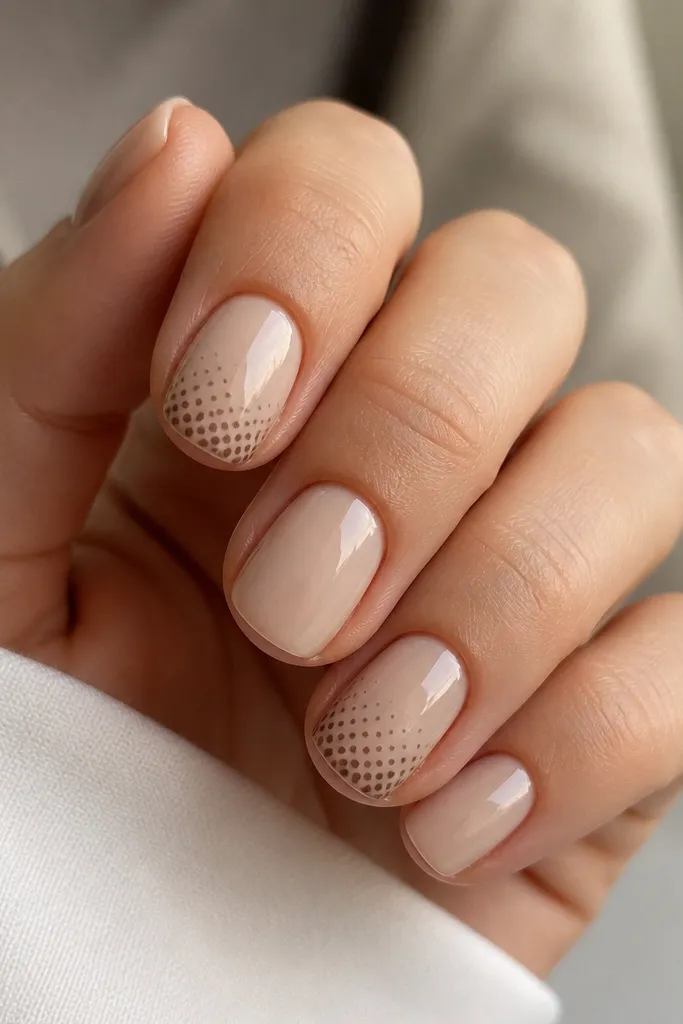
Dot fades look soft and artsy, but they’re easy because you’re repeating one action. Beige nude gives a clean base that doesn’t fight with your skin, and brown dots feel natural instead of neon. This design flatters hands that look better with warm neutrals, especially if you like “cozy” tones. On short nails, a tip-heavy dot fade makes the nail look slightly longer.
Build BIAB and cure, then apply beige nude in two thin coats. For the accent nails, use a dotting tool to place brown dots starting near the tip edge, then space them farther apart as you move toward the middle. Keep the dot sizes consistent — think small pomegranate seed scale. Cure the dots, then top coat in one smooth layer, sealing the edges.
Editor's noteIf dots look too harsh, blend by lightly dragging the dot with a clean brush tip before curing.
Skip thisDon’t cluster dots at the cuticle — the fade should start at the tip to keep it flattering.
13. Powder Pink BIAB with Stacked Thin Lines (Diagonal)
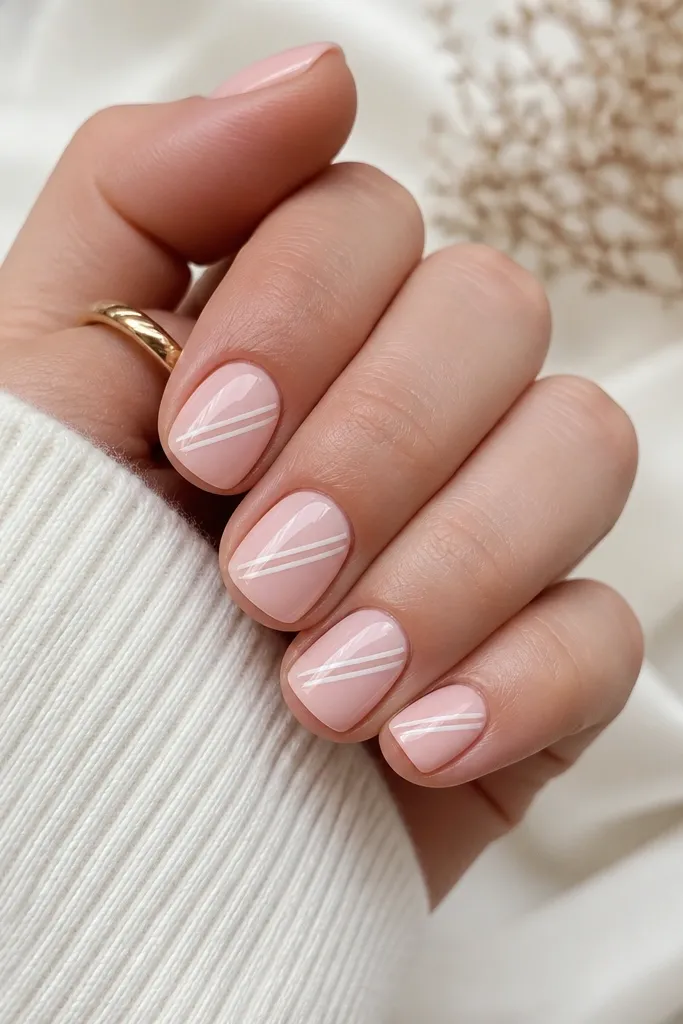
Stacked thin lines look like mini fashion graphics, and they’re surprisingly easy to do with a liner brush. Powder pink is light enough that thin lines show clearly without looking heavy. Diagonal placement makes short nails look slimmer and longer, because it guides the eye upward. This one is flattering on small nail beds because the lines stay narrow and don’t swallow the space.
Apply BIAB and cure, then paint powder pink in two thin coats. Using a liner brush, draw one diagonal line from lower center toward upper right, then add one more line parallel about 1-2 mm away. If you want more contrast, use light gray for the second line and keep white for the first. Cure and top coat. Keep the line thickness consistent so it looks like a design, not accidental marks.
Editor's noteUse the same angle on every nail by marking the angle with your first nail as your template.
Skip thisAvoid uneven line spacing — it makes the manicure look rushed.
14. Clear BIAB with Rose Gold Foil Flakes at the Tips
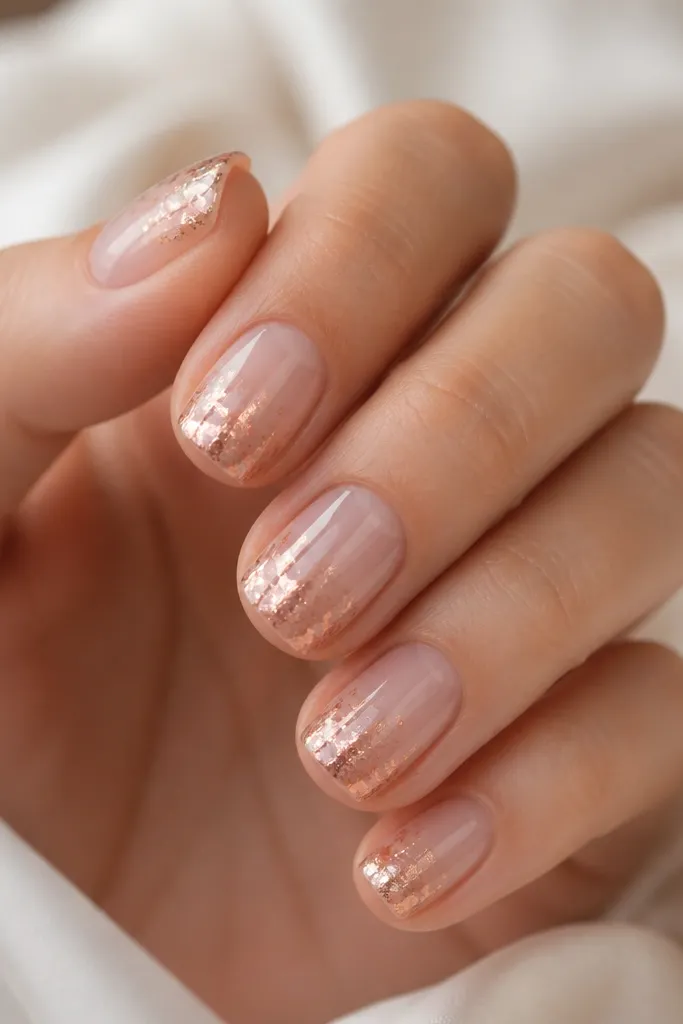
Foil flakes make nails look like jewelry because they catch light from different angles. A clear BIAB base keeps the look airy, so it doesn’t get bulky on short nails. Rose gold is forgiving with different skin tones because it sits between warm gold and soft pink. This design also hides slight unevenness in the tip build because foil draws attention to the sparkle zone.
Build and cure clear BIAB. Apply a thin layer of clear builder gel at the tips only, then press rose gold foil flakes into that sticky zone. Use tweezers to place larger pieces where you want the sparkle focal point, then fill gaps with smaller flakes. Cure, then apply top coat in two passes — first to lock down flakes, second for full gloss.
If foil lifts when you move your finger, add a second top coat layer only on the tip area.
Don’t cover the whole nail in foil — it turns the design into a thick, gritty look.
15. Nude BIAB with Soft Black Micro Polka Dots
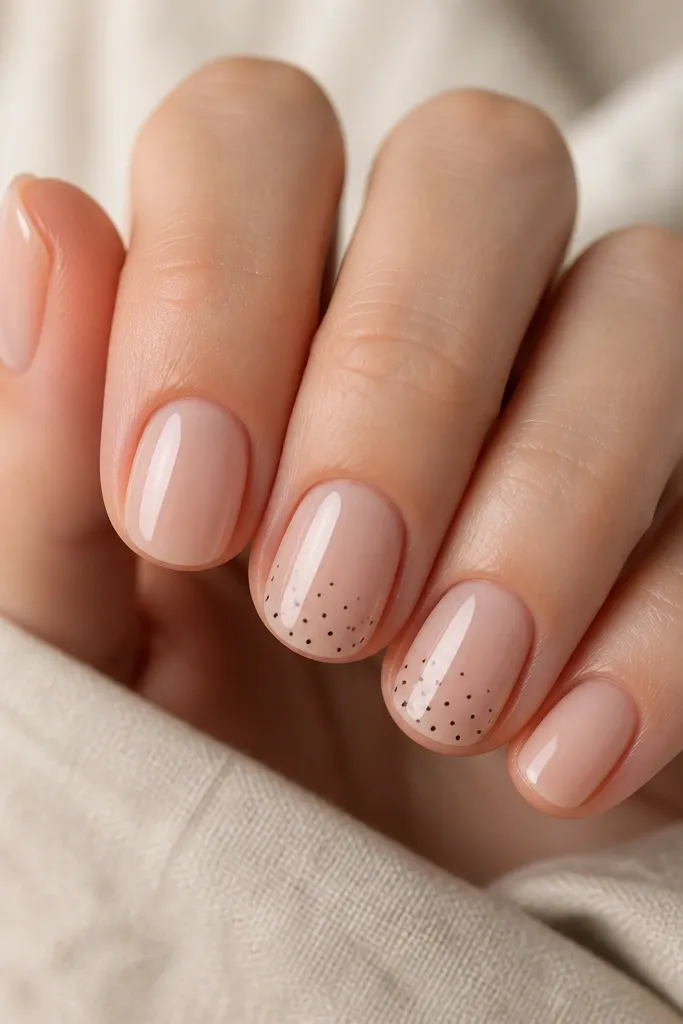
Polka dots are classic because they’re readable even at small sizes. Nude keeps everything clean, and micro black dots feel more modern than big cartoon dots. This works on fair, medium, and deep skin tones because nude is your base and black is a neutral accent. It also flatters shorter nails because you’re not painting big shapes that shrink the nail visually.
Apply BIAB and cure, then paint nude in two coats. Choose one or two accent nails and use a dotting tool to place tiny black dots — about half the size of a grain of rice. Start with a few dots at the tip, then add a lighter scatter toward the center. Cure and top coat, making sure dots are fully sealed so you don’t feel edges.
Editor's noteIf the dots look too sharp, use a slightly softened black by mixing black gel with a drop of clear for a softer opacity.
Skip thisAvoid large dot clusters — they make short nails look crowded and messy.



