
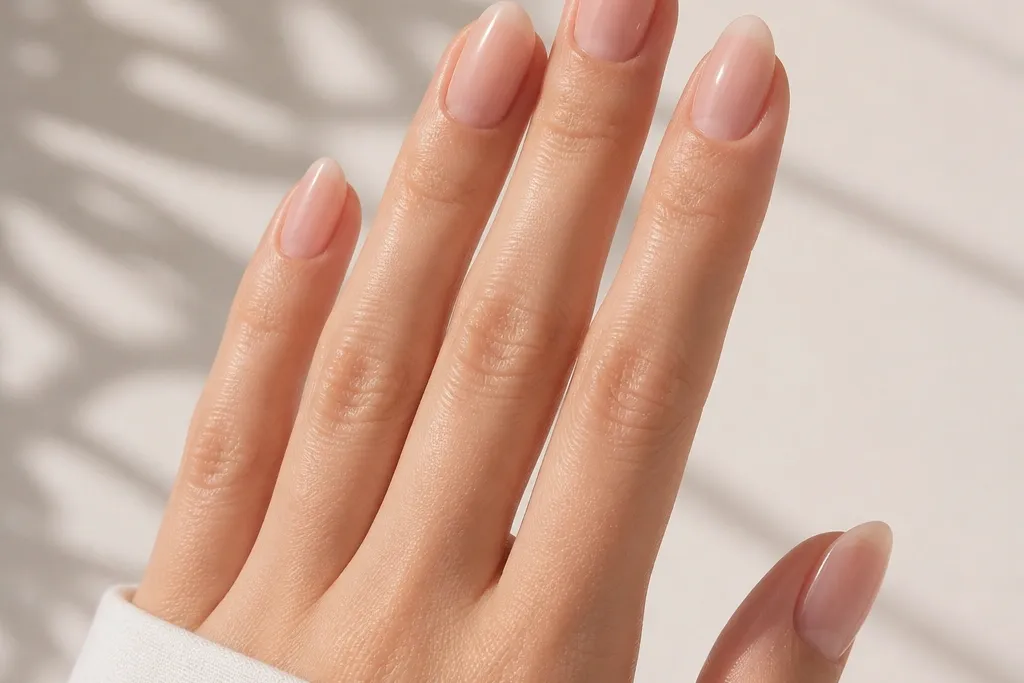
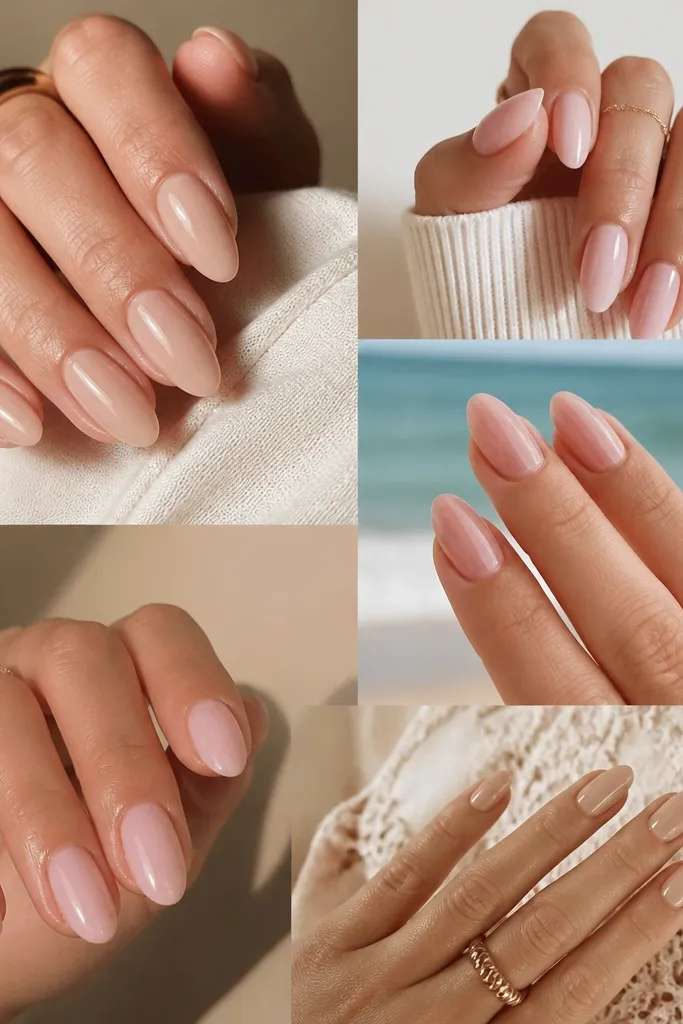
1. Jelly Peach BIAB with Micro-Glitter Cuticle Halo
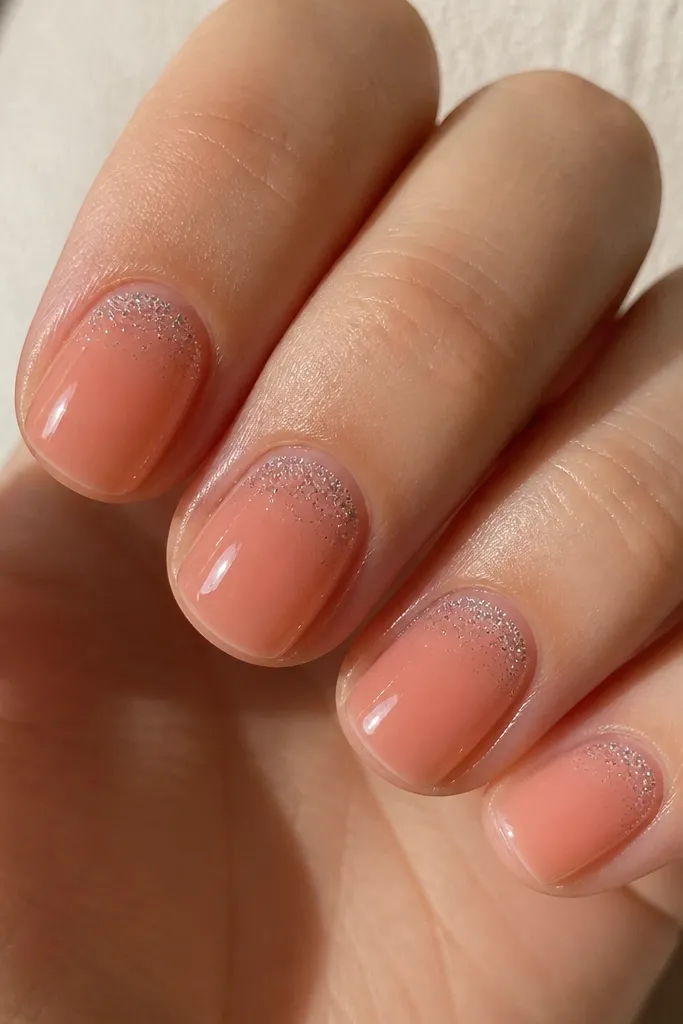
I love jelly peach for summer because it looks like your nail is glowing from under the color, not painted on top. The jelly base is flattering on most skin tones — on fair skin it reads soft and warm, and on medium to deep skin it looks richer without turning orange. The glitter halo is tiny and controlled, so it doesn’t overpower your nail bed or make your hands look busy. This layout also hides small imperfections because the jelly finish smooths the visual line between your nail and the builder.
Start by applying a thin BIAB base layer and cure fully. Then apply a jelly peach builder layer in 2 coats, keeping each coat centered so the sides stay slightly clearer. Add the micro-glitter with a small liner brush right at the cuticle line, then feather it outward so it becomes a fade, not a solid ring. Finish with a glossy top coat, cure, and wipe the tacky layer with a lint-free pad so the glitter stays crisp.
Editor's noteIf you use loose glitter, mix it into a clear gel first so it brushes on smoothly and doesn’t clump.
Skip thisAvoid a thick glitter ring — it creates a step that catches on hair and lifts faster.
2. Sea Glass Mint BIAB with One-Side Negative Space
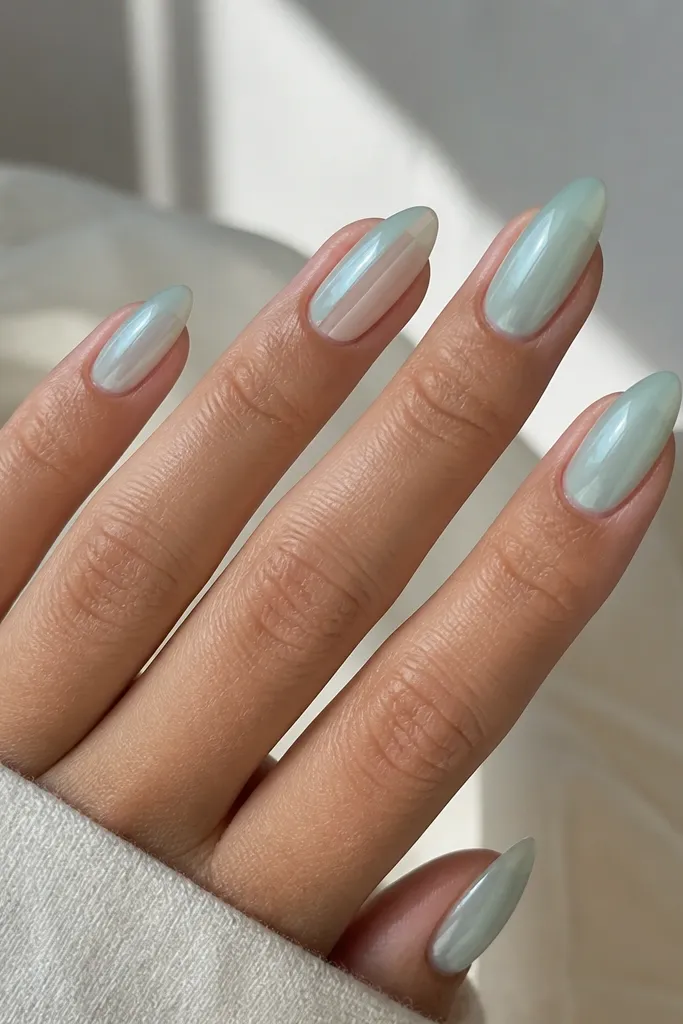
Sea glass mint looks cool and fresh in July because it has that slightly frosted, watery feel. On cool undertones it looks icy and pretty; on warm undertones it balances the warmth and keeps your manicure from turning too yellow. The one-side negative space is the trick that makes it look intentional and modern instead of like random lines. It also makes your nails look longer because the eye follows the clean stripe down the nail.
Apply a thin BIAB base layer and cure, then build with a translucent mint gel in 2 coats. For the accent nails, place striping tape (or a thin silicone barrier) along one side edge and leave a narrow channel of bare nail. Paint mint over the rest of the nail, remove the tape while the gel is still workable, and cure. Seal with a glossy top coat and run a brush along the free edge to lock the design in place.
Use a narrow strip of tape — about 1.5 to 2 mm — so the negative space reads sleek, not chunky.
Don’t paint mint all the way to the sidewalls if you want crisp lines — wipe the edge with a clean brush right after curing.
3. Coconut Milk BIAB with Brown Sugar French Tips
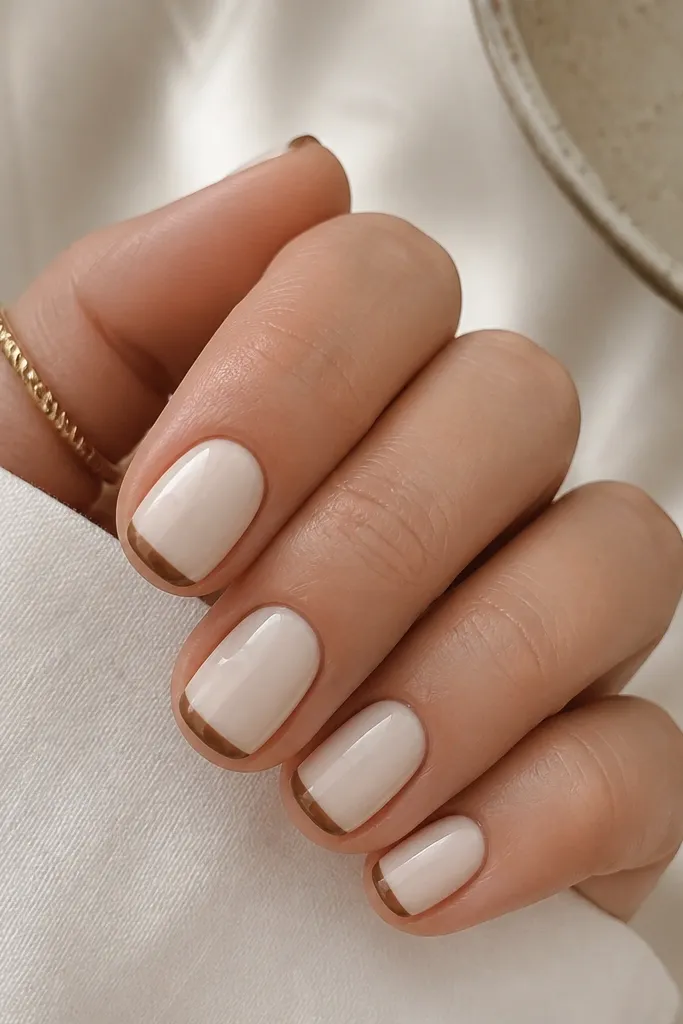
This is the summer French I keep wearing because it doesn’t look stark like classic white tips. Coconut milk is forgiving and flattering — it makes hands look smooth and bright without looking like a full cover repaint. The brown sugar tips add warmth and look especially good with gold jewelry and tan skin. It also pairs perfectly with casual summer outfits because it’s still clean, just warmer.
Start with a thin BIAB base layer and cure, then apply coconut milk in 2 thin coats for an even opacity. Use French tip guides or a steady freehand line — keep the tip width about 1/6 of the nail length for short nails. Blend the brown sugar tip slightly toward the center with a soft edge brush so it looks like sugar dust, not a hard border. Finish with glossy top coat and cap the free edge so the tip line doesn’t peel.
If your brown looks too dark, mix it with a tiny bit of nude gel to keep it warm and milky.
Avoid a super thick tip line — it makes the free edge heavy and chips sooner.
4. Sunset Gradient BIAB with Thin Orange Outline
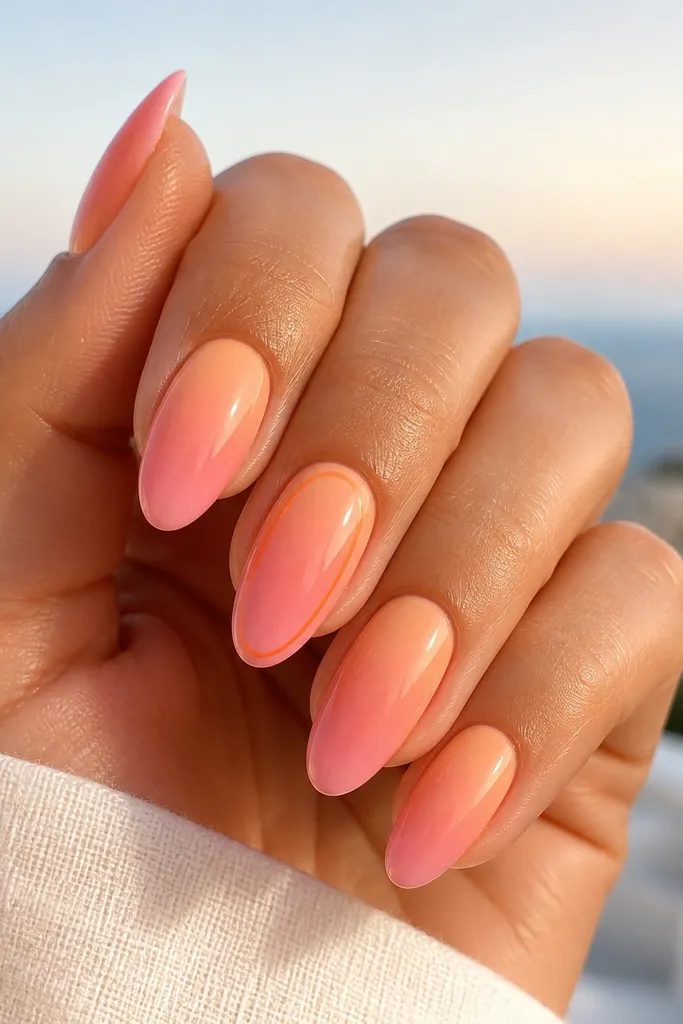
A sunset gradient is pure summer energy, but the thin orange outline is what keeps it from looking messy. The gradient flatters most skin tones because you’re using peach and pink families that blend naturally with your hand. On shorter nails, the gradient makes the nail look longer; on medium lengths it looks like a sunrise over your fingertips. The outline also creates structure, so your color transitions look intentional.
Build a sheer nude BIAB base and cure, then sponge on the gradient in 3 stages: peach near the cuticle, coral in the middle, and pale pink at the tip. Clean up the edges with a gel brush dipped in cleanser so the gradient stays crisp. For the outline, use a fine liner brush to draw a thin orange line along each side curve — keep it about 0.5 mm away from the edge. Cure and finish with glossy top coat, making sure the outline is fully sealed.
Use a makeup sponge with a flat edge and dab, don’t swipe, so the gradient stays smooth.
Don’t overdo the coral — if it gets too opaque, it turns into a block instead of a glow.
5. Lavender Cloud BIAB with Matte Half-Moon Accent
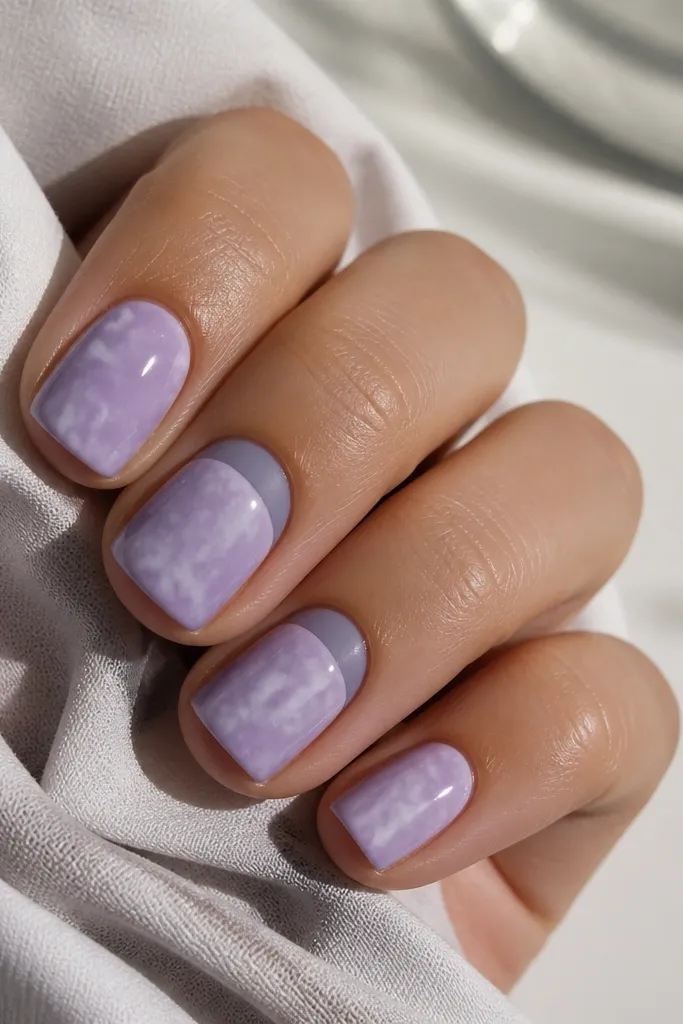
Lavender cloud BIAB looks like a soft filter over your nails, and it’s great when you want something sweet without going neon. The matte half-moon accent makes the set feel styled, not plain, and it draws attention to your cuticle area in a flattering way. On fair skin it reads dreamy and light; on deeper skin it looks more dimensional and not powdery. The mix of matte and gloss also hides minor growth lines because the finishes break up the surface.
Apply a sheer BIAB base and cure, then add a lavender cloud effect using a light, milky lavender gel in 2 coats. For the cloud texture, you can stipple very lightly with a sponge tool before curing so it stays airy. Mask the cuticle area on the accent nails with a small round sponge or tape, then apply matte top coat only on the half-moon zone and cure. Finish the rest of the nails with glossy top coat, then clean edges with a brush.
Editor's noteDo matte last on the accent nails so you don’t accidentally dull the glossy gel.
Skip thisAvoid matte top coat over the entire nail — it can make lavender look dusty and flat.
6. Coral Pop BIAB with Tiny White Dots Like Polka Suns
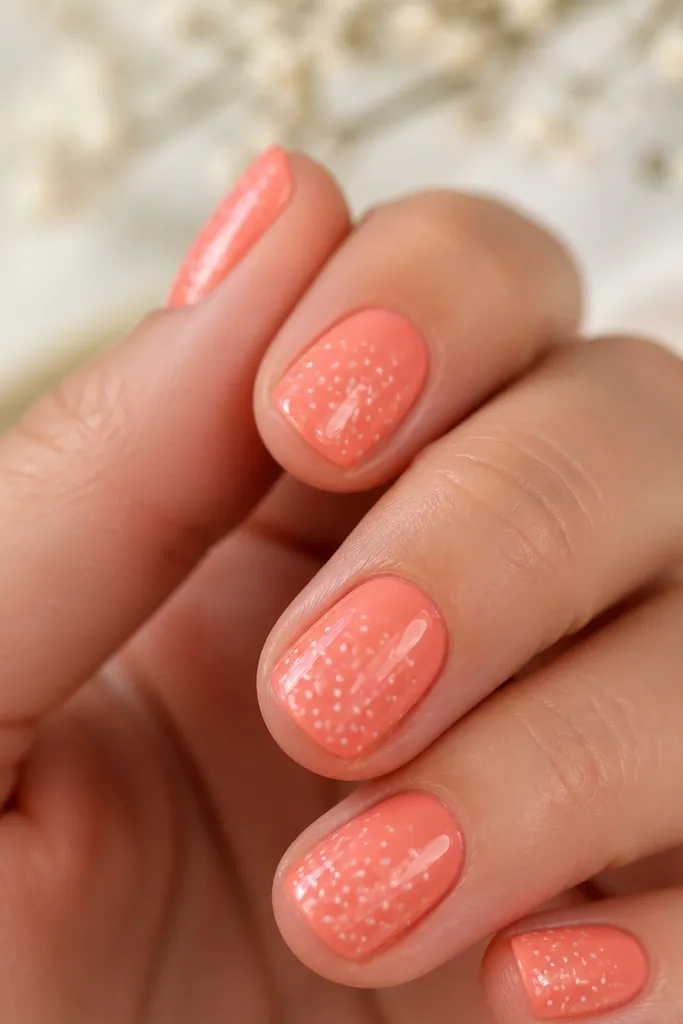
Coral pop is the summer color that makes your hands look awake, especially with warm undertones. Tiny white dots keep it playful but still tidy, and they don’t require full nail art coverage. The pattern is flattering because it pulls the eye to the center of the nail, which makes short nails look intentional. This set also works for everyday because the dots don’t snag like raised 3D art.
Start with a sheer BIAB base and cure, then build coral in 2 thin coats to keep it juicy but not thick. Use a dotting tool with a small tip size to place 6-10 dots total per nail, focusing on the center third. Add a few dots closer to the tip on accent nails only so the set feels varied without getting chaotic. Cure between steps if needed, then apply glossy top coat and cap the free edge.
Editor's noteDip your dotting tool once, then wipe the tip on a paper towel — it helps the dot edges stay sharp.
Skip thisAvoid big dots — they look like stickers and can feel bulky on short nails.
7. Tropical Lime BIAB with Micro Foil Flecks
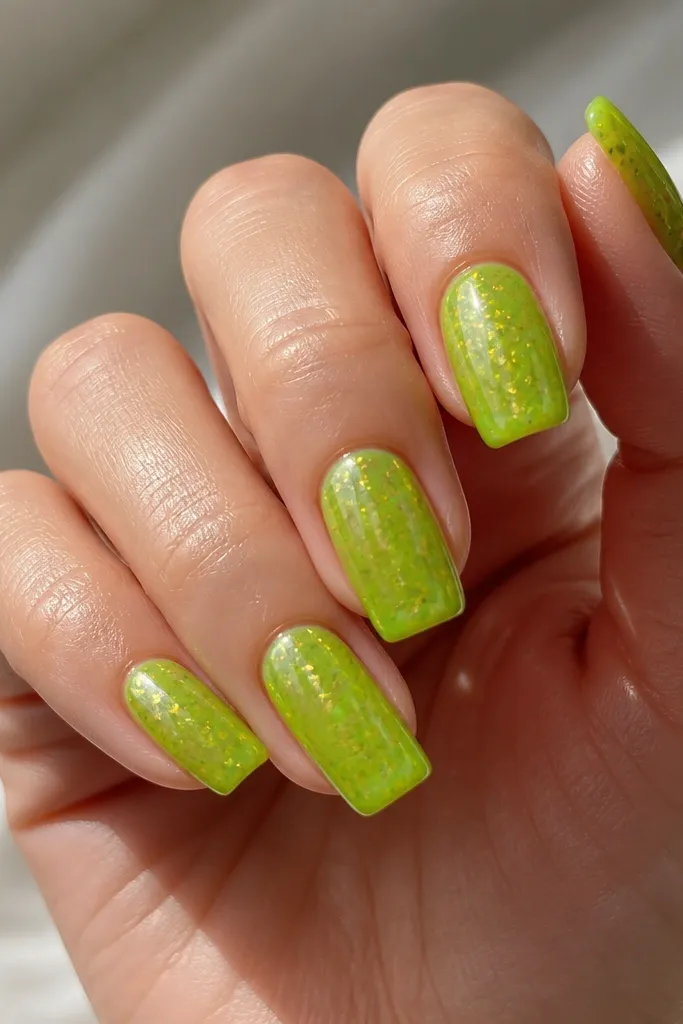
Lime jelly is fearless summer, and it looks amazing against neutral outfits and silver jewelry. The jelly base keeps it from looking like a full opaque neon, so it stays wearable. Gold micro foil flecks add movement without turning it into a heavy festival nail. This combo flatters a wide range of skin tones because the yellow-green reflects warmth, and the gold adds dimension instead of washing out your hand.
Build with a thin BIAB base layer and cure, then apply lime jelly gel in 2 coats, keeping it translucent enough to see the nail underneath. Dab micro foil flecks into the tacky layer after the second coat — use tweezers and place them mostly on the upper half. Seal with a glossy top coat in 2 thin passes so the foil gets fully locked without lifting at the edges. Cure fully and wipe the final tacky layer if your system needs it.
Place foil in clusters of 3-5 flecks rather than random singles; it reads intentional in photos.
Avoid rubbing foil into the gel — it smears and dulls the shine.
8. Pearl White BIAB with Thin Gold Line Smile
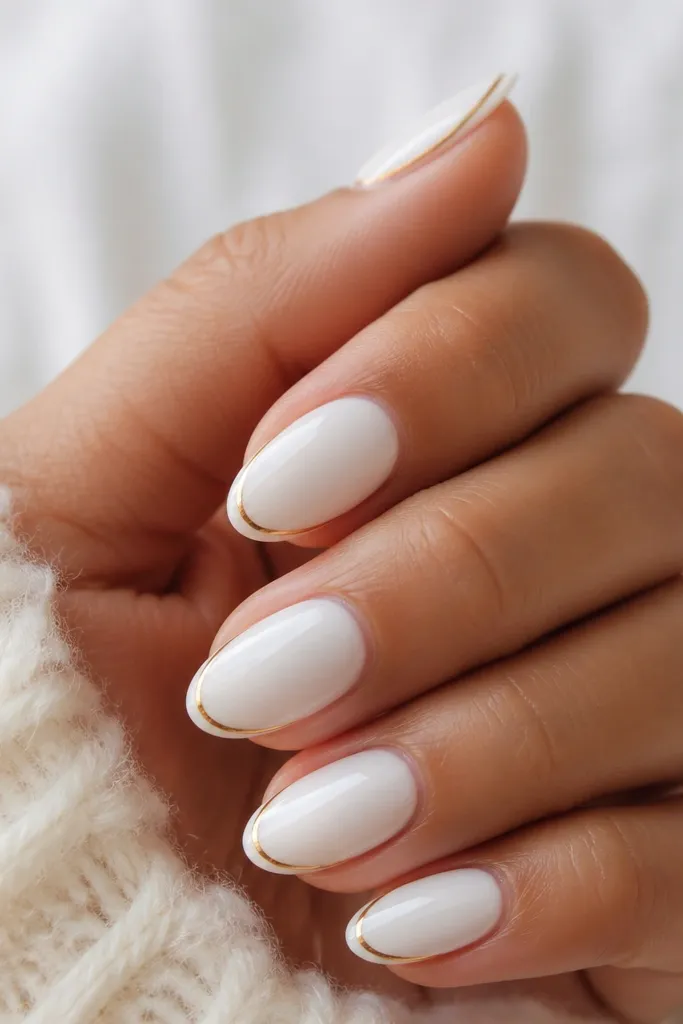
Pearl white looks expensive because it’s not pure white — it has warmth and softness that flatters hands immediately. The thin gold line smile gives you that jewelry vibe without covering the whole nail. This is one of my go-to sets for weddings, dinners, and hot-weather events because it stays clean even when your nails grow out a bit. On fair skin it brightens your hand; on deeper skin it looks crisp and luxe instead of chalky.
Apply a sheer BIAB base and cure, then build with pearl white in 2 coats for smooth coverage. Use a French tip guide or a flexible curve stencil to mark where the smile line sits, about 2-3 mm from the tip edge on short nails. Paint a thin gold line with a liner brush, then add a second gold stroke only if you need extra opacity. Seal with glossy top coat and cap the free edge so the gold line doesn’t chip.
Editor's noteIf your gold gel thickens, warm the bottle between your hands so it flows smoother on the smile curve.
Skip thisAvoid thick gold — it looks like tape and makes the tip line lift faster.
9. Midnight Blue BIAB with Starburst Glitter Tip
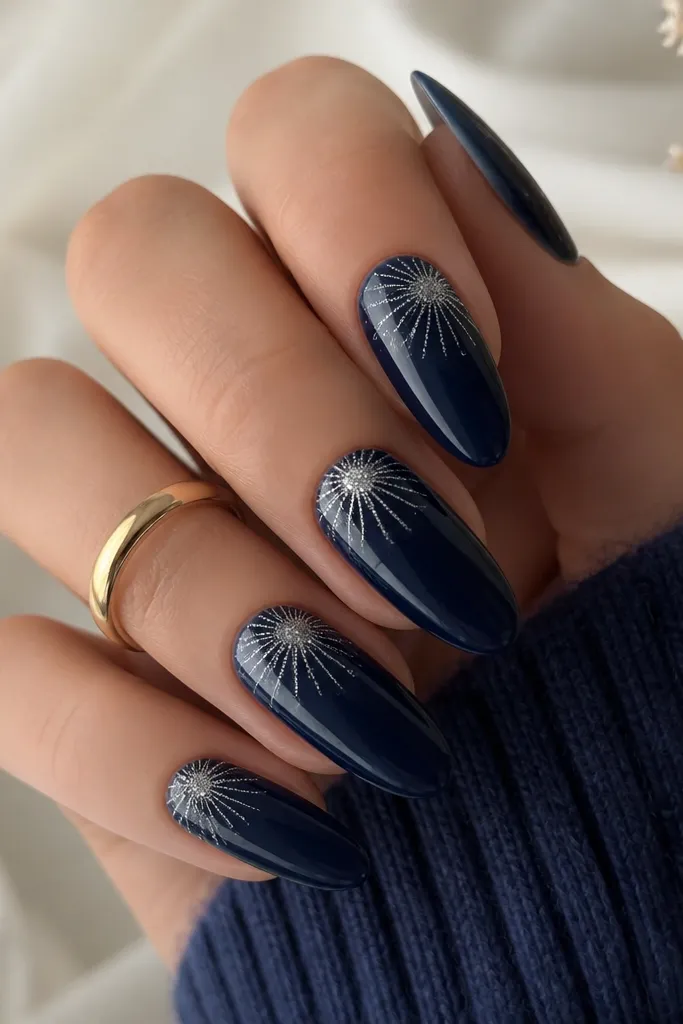
Midnight blue is the summer-night manicure that still looks chic in daylight because it’s deep and reflective. The starburst glitter tip is a controlled way to add sparkle without doing full glitter coverage that feels heavy. This design flatters longer nails by drawing attention to the tip shape, and it looks great on both cool and warm undertones because blue grounds everything. It also hides tiny chips better than lighter colors due to the darker base.
Build a sheer nude base with BIAB, then apply midnight blue in 2 smooth coats and cure. For the starburst, put a small dab of clear gel at the center of the tip, then press fine silver glitter outward with a flat brush to create radiating points. Keep the glitter zone to the last third of the nail so it doesn’t crawl down. Finish with glossy top coat and make sure you cap the glitter completely so it doesn’t feel gritty.
Editor's noteUse a flat eyeshadow brush for the starburst — it spreads glitter in a controlled fan.
Skip thisAvoid glitter all the way to the sidewalls — it looks messy and lifts at the edges.
10. Clear Jelly Base BIAB with Pink Rose Foil Strip
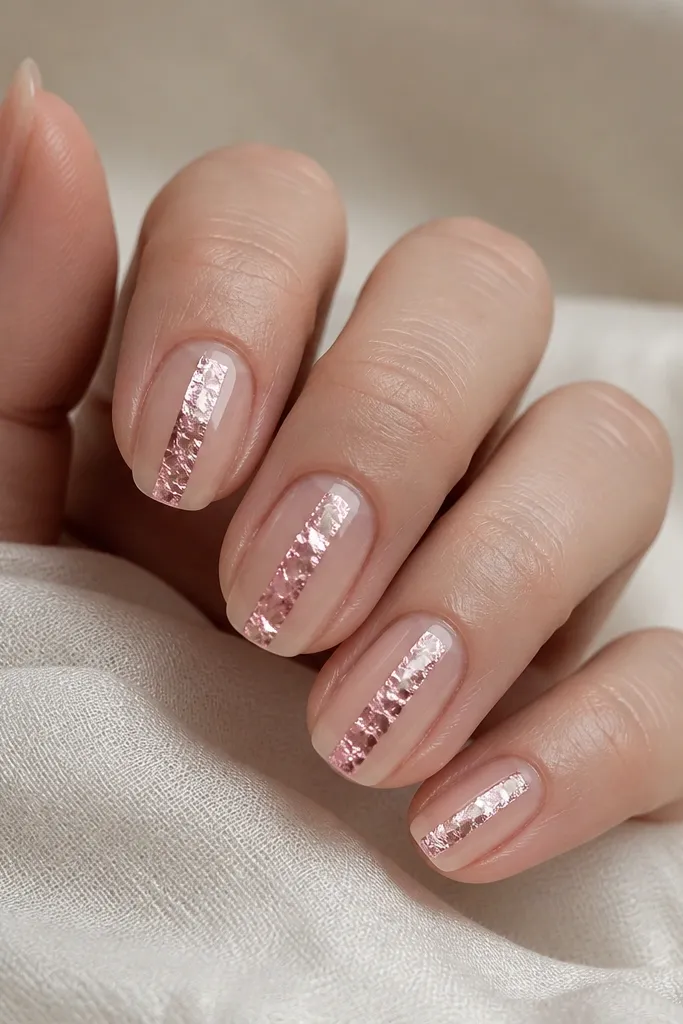
Clear jelly BIAB is my pick when you want nails that look clean even after a week of wear. The pink rose foil strip gives a fashion look without filling the whole nail with pigment, which keeps it light on the nail bed. The vertical placement makes nails look longer and is flattering for hands that prefer minimal coverage. This works across skin tones because the foil color sits on top of your natural pink, creating a soft contrast instead of a hard block.
Apply BIAB in a sheer clear jelly style and cure, keeping it thin but even. Place a strip of pink rose foil down the center using foil gel or a tacky layer — burnish gently with a silicone tool so it sticks without tearing. If you want it less uniform, cut the foil strip with scissors and rotate the piece slightly so the edge looks organic. Seal with glossy top coat in 2 thin coats, focusing on fully covering the foil edges.
Editor's noteTrim the foil strip to reach just past the midpoint, then add a tiny extension with clear gel so it doesn’t look like it ends abruptly.
Skip thisAvoid a foil strip that touches the sidewalls — it looks crowded and can lift there.
11. Hot Pink BIAB with White Marble Swirl Accent
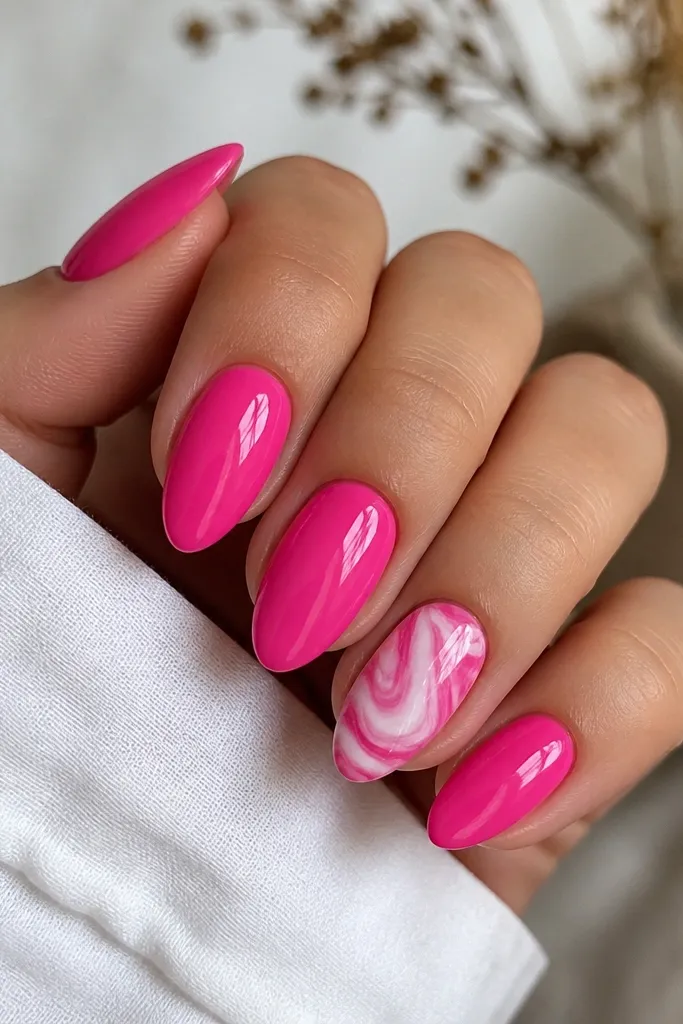
Hot pink is bold, but it’s still summer-friendly when you keep most nails solid and let marble show up only on one or two. The marble swirl looks best when it’s airy — thin white veining over pink — because thick marble can feel heavy and crack at the edges. This set flatters medium to deep skin tones especially well because hot pink pops without washing you out. It also looks great with gold rings and bright summer tops.
Build with BIAB and cure, then apply hot pink gel in 2 thin coats for full opacity. On accent nails, drag a thin white gel line across the nail using a liner brush, then add grey shadow lines by lightly blending a smaller amount near the white. Use a marbling tool or toothpick to swirl the lines together while the gel is still workable, keeping the pattern loose and not symmetrical. Cure and seal with glossy top coat, then cap the free edge.
Editor's noteKeep your marble lines thin — the contrast looks sharper and lasts longer under top coat.
Skip thisAvoid marble on every nail — it turns into a sticker look instead of a design.
12. Sand Beige BIAB with Glossy Jelly Tip
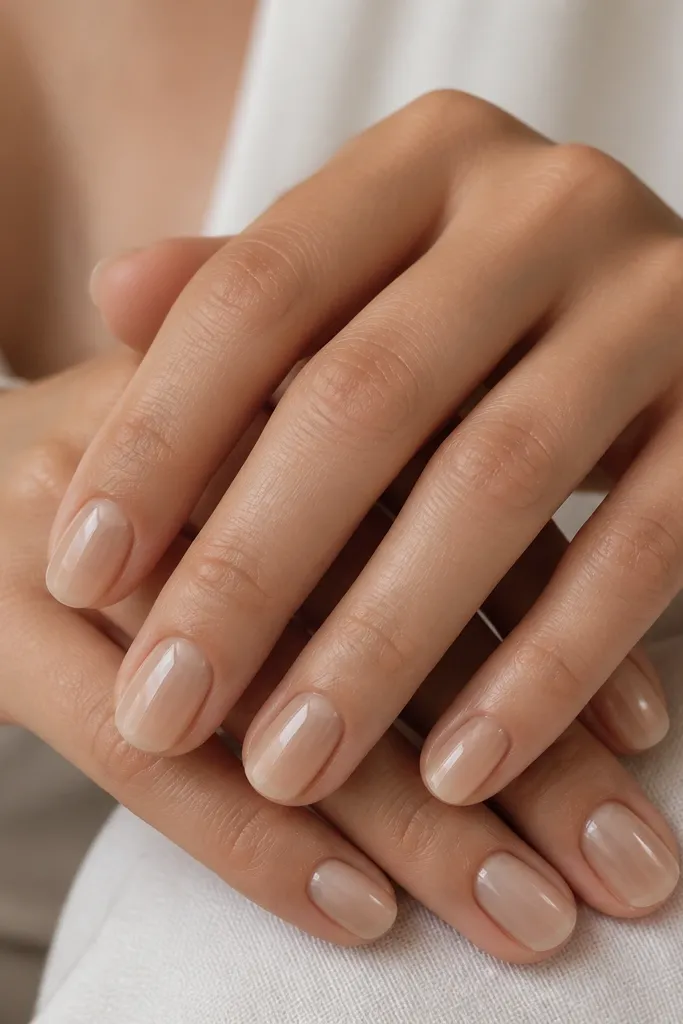
Sand beige is the calm color that still looks summer-ready, especially when you’re wearing linen and neutral outfits. The glossy jelly tip adds dimension because it catches light differently than the matte-looking base gels. This combo is flattering for hands that want a “clean manicure” vibe without the starkness of full nude. It also grows out gracefully because the beige base blends with your natural nail.
Apply a sheer BIAB base layer and cure, then build sand beige in 2 coats, keeping it smooth and close to the nail shape. For the jelly tip, apply a translucent pale nude jelly only on the last third, blending it into the beige with a gentle brush sweep. Cure each layer if your system needs it, then finish with a thick glossy top coat for that wet-look shine. Cap the free edge so the jelly tip doesn’t peel.
Blend the jelly tip with a sponge for 5 seconds on the edge — it removes any hard line.
Avoid opaque jelly on the tip — it stops looking like light and starts looking like a stripe.
13. Mint Chrome BIAB with Micro Star Studs
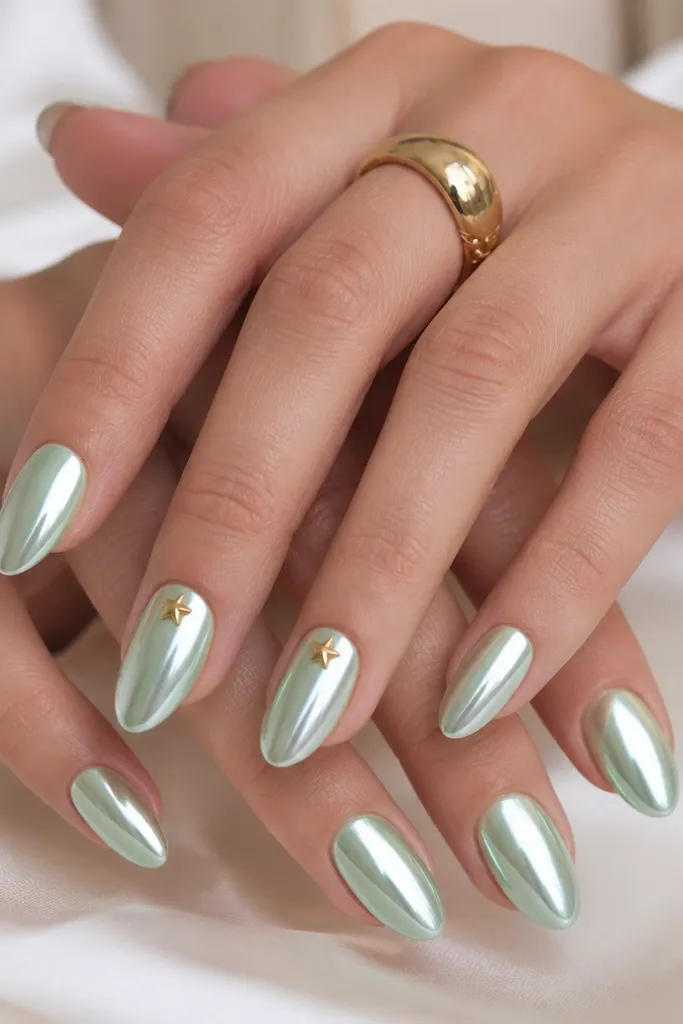
Mint chrome is one of those summer finishes that looks like you dipped your nails in a pool of light. It flatters fair to medium skin tones because the mint hue brightens your hand, and it looks extra cool with silver earrings. The micro star studs keep it playful while staying minimal because they’re small and placed near the cuticle where you notice them. This set works best when your nail shape is clean and your cuticle line is tidy, since chrome shows everything.
Build BIAB with a smooth nude base and cure, then buff lightly for an even surface. Apply a chrome tack coat (or use the specific base your chrome powder needs) and cure or flash-cure per instructions. Press mint chrome powder on with a sponge applicator, then wipe off excess and seal with a glossy top coat that’s compatible with chrome. Place micro star studs on the two accent nails with a tiny dab of clear gel near the cuticle, cure, then top coat over them carefully without flooding the edges.
Clean your cuticle line with a fine brush before chrome — every tiny bump shows up.
Avoid chunky studs — they lift quickly and scrape when you type.
14. Tangerine BIAB with White Lace-Like Striping
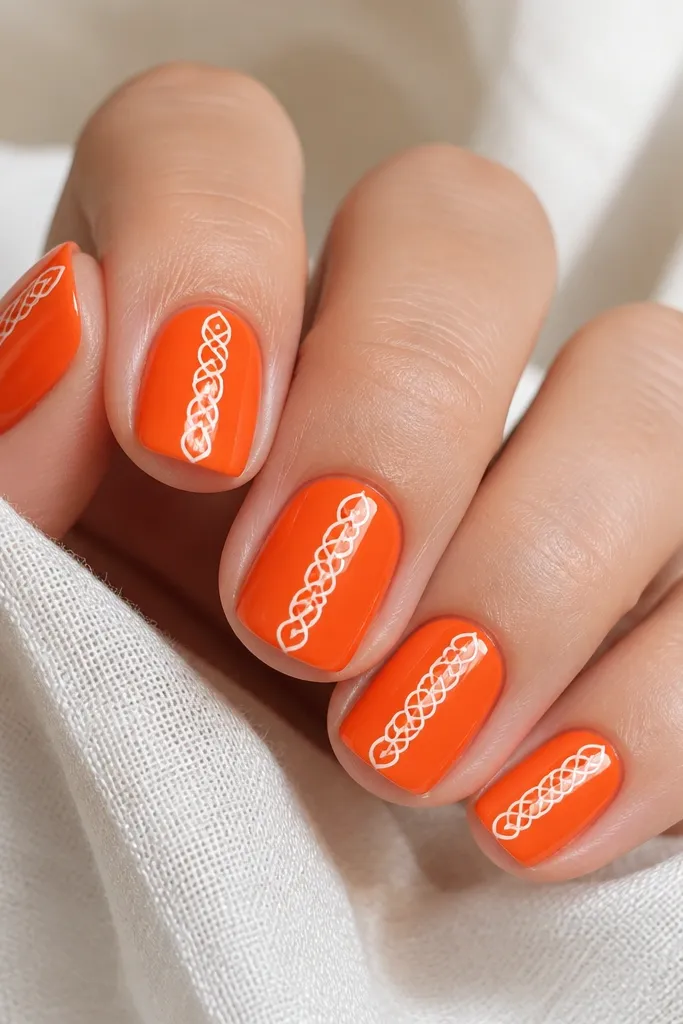
This is summer BIAB that feels dressed up without being heavy. Tangerine is warm and flattering, especially with bronzy makeup and gold jewelry. The white lace-like striping gives texture and detail but stays mostly linework, so it flexes well and doesn’t crack. It also makes nails look longer because the lines guide the eye down the center. If you like nails that look “done” but you hate thick art, this is your lane.
Apply a sheer BIAB base and cure, then build tangerine in 2 thin coats so it stays bright but not bulky. Use a fine liner brush to draw a center path of connected loops, starting near the cuticle and stopping about 1-2 mm before the tip edge. Add two smaller loop lines near the sides on only two nails if you want variation; keep the rest simple. Cure and seal with glossy top coat, then cap the free edge with extra care along the last millimeter.
Practice the loop pattern on a scrap nail tip — you’ll get consistent spacing fast.
Avoid thick white gel for striping — it looks opaque and can smear when you cure.
15. Rose Quartz BIAB with Clear Glass Bead Top Layer
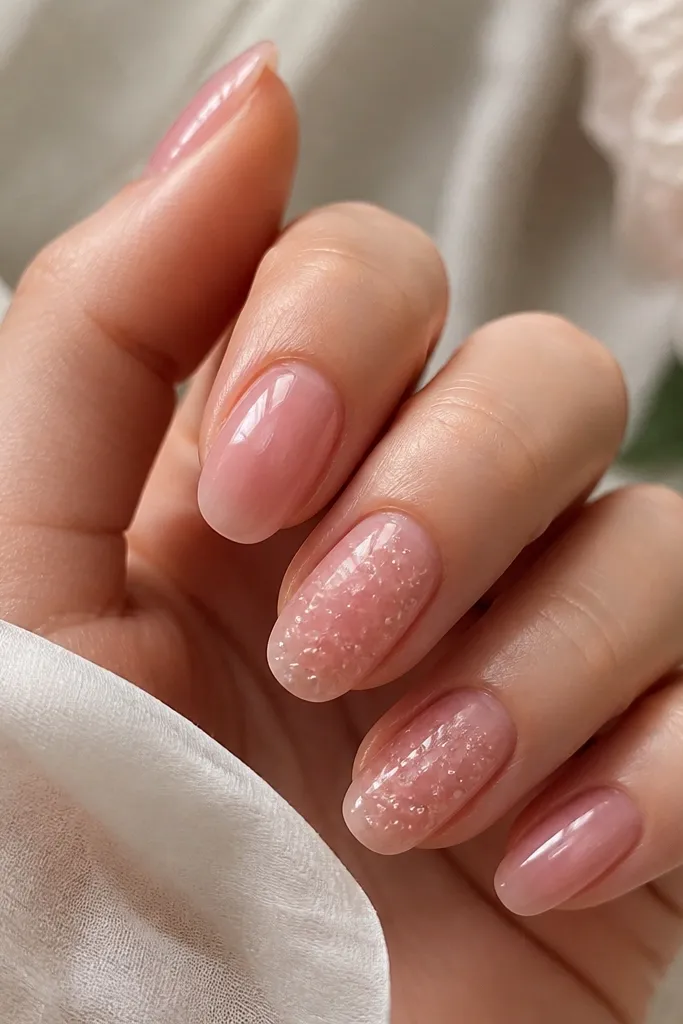
Rose quartz BIAB is flattering because it looks like a soft filter over your nail bed — the pink is translucent and not harsh. The clear glass bead top layer adds a tactile summer look that still reads clean, not messy, because the beads are placed in a small zone. This design works best on medium to longer nails where you can place the bead cluster without hitting the sidewalls. On hands with dry cuticles, the translucent pink helps the area look smoother since it doesn’t emphasize harsh lines.
Build a translucent rose quartz BIAB base in 2 coats, curing each step so it self-levels. Choose one accent nail (or two) and apply clear gel in a small center patch, about the width of a pencil eraser. Drop micro clear beads or create bead bumps using gel dabs, then place them with tweezers so they form a cluster rather than a scattered mess. Cure, then apply glossy top coat carefully around the beads to lock them in without flattening the texture too much.
Editor's noteUse fewer beads than you think — a tight cluster looks luxe and lasts longer.
Skip thisAvoid bead placement near the sidewalls — that’s where they snag and lift.



