1. Milky Pink Mirror Chrome Almonds
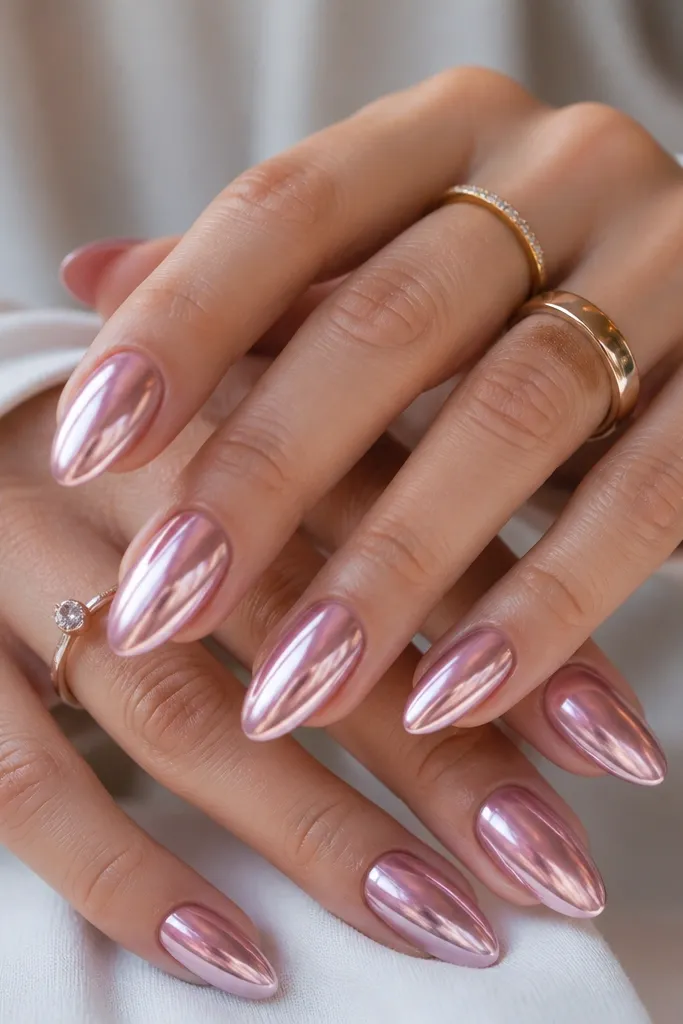
Start by pushing back the cuticle gently and filing the nail surface to remove shine, then wipe with 70% isopropyl alcohol. Apply a milky pink builder gel or thick milky pink gel in a thin layer, cure fully, then do a second thin layer for even opacity. Buff lightly only if you see any texture, then apply pink chrome powder with a firm sponge — press, then lift, no dragging. Seal with two thin coats of high-gloss gel top coat, curing each coat, and cap the free edge on both coats.
This is my go-to when I want low maintenance pink almond nails easy care with the least visual “work.” The base is a milky pink gel — not sheer and not neon — so it looks smooth even if your nail bed has natural texture. The chrome is applied as a full coverage layer, which makes the whole nail read polished from every angle. It flatters most skin tones because the pink is diluted and the mirror finish brightens your hands without looking too loud. For everyday wear, the mirror effect also hides minor nail-line variations better than solid matte pink.
Skip thisSkipping the second top coat makes chrome dull faster and increases the chance of edge lifting.
Editor's noteIf chrome looks patchy, your base might be too tacky or not evenly cured — cure longer, then apply chrome in smaller sections and press firmly.
2. Pink Chrome French Almond Tips
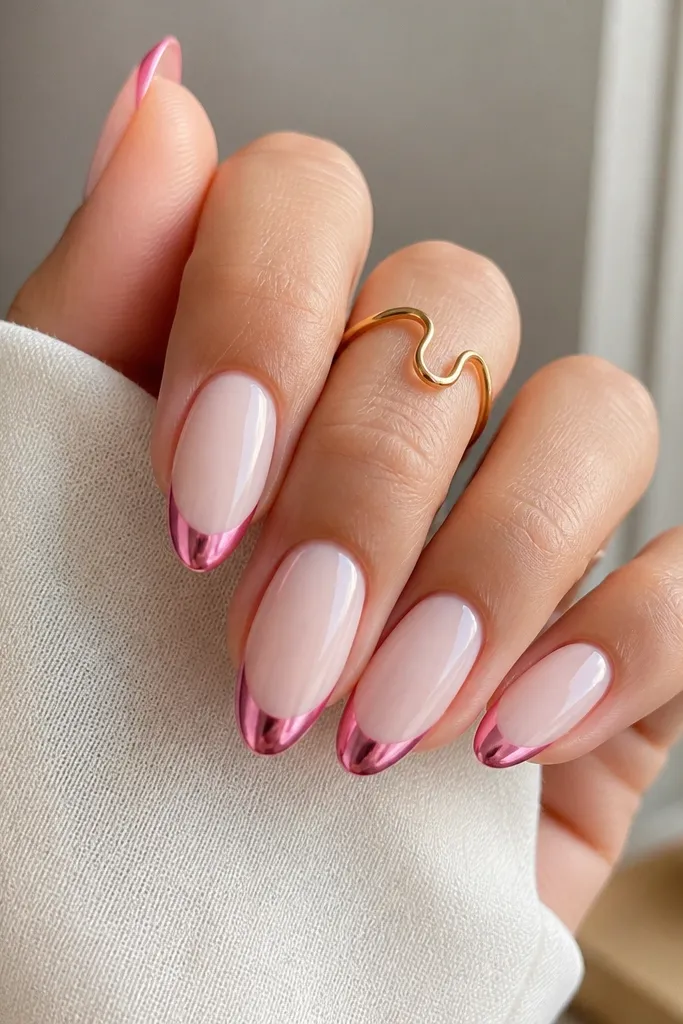
This one grows out better than full chrome because the pink chrome is only on the tip. The base stays soft and natural-looking, and as your nails grow, the line still reads intentional. I like it for hands that get wet a lot because fewer chrome-covered square millimeters means fewer spots to lift. It’s flattering on shorter almond nails too — the chrome band makes your fingers look longer without adding bulk. It also looks great for warm and cool undertones since the base is milky and the tip chrome is bright pink.
Start with a sheer milky pink or nude gel base so the nail bed looks even. Use a French guide strip or a thin brush to paint the smile line with a bright pink gel, keeping the band about 1.5-2 mm from the sidewalls for a clean almond fit. Cure, then add pink chrome powder only on that tip area — press gently and remove excess. Seal with a glossy top coat in two thin layers, and make sure you cap the chrome edge with extra attention at the tip.
To keep the French line sharp, clean your brush often and wipe excess gel off before you touch the smile line.
If you paint the French too close to the sidewalls, the chrome will catch water and lift at the corners.
3. Baby Pink Chrome Aura Fade
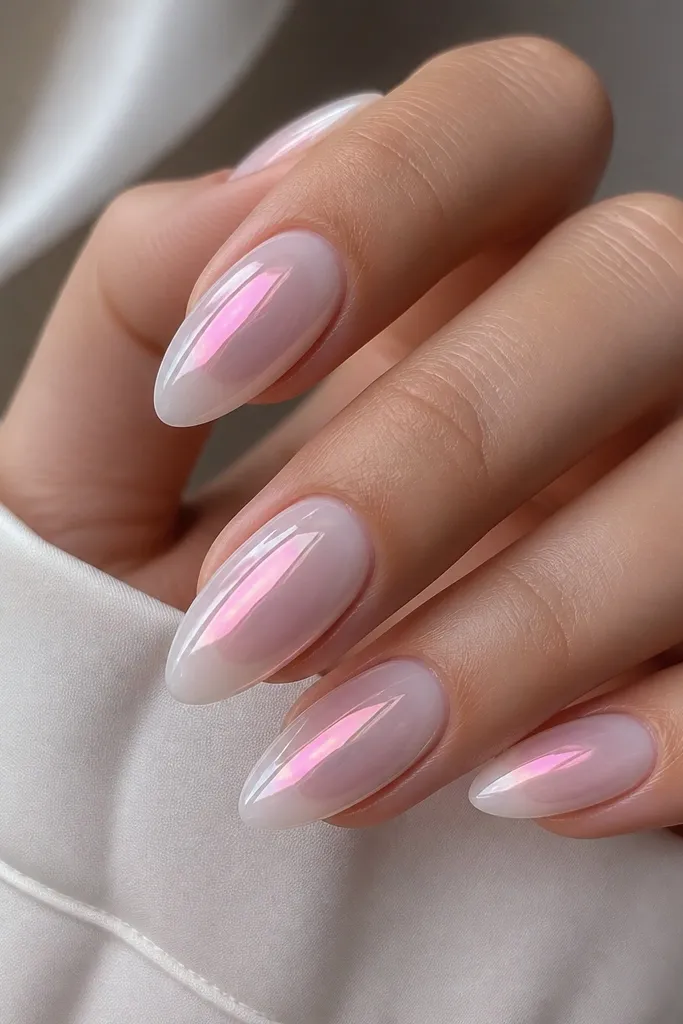
Aura nails look trendy but they’re secretly low maintenance because the fade hides growth lines. The center glow is baby pink, and the chrome is concentrated in the middle so you’re not covering the entire nail surface with powder. This design is forgiving if your application isn’t perfectly even, because the fade is meant to be soft. It’s especially flattering if your nail bed is shorter — the halo draws the eye to the center and makes the nail look longer. For cooler undertones, use a baby pink with a hint of rose-lavender; for warm undertones, use a baby pink that leans peachy.
Start with a sheer milky base and cure fully. Apply a light baby pink gel in a small oval near the cuticle area, leaving a few millimeters of clear space at the edges, then cure. Dab chrome powder onto a sponge and press only into the baby pink center, then lightly feather outward with tiny taps for the aura effect. Finish with two coats of glossy top coat, keeping the first coat thin so the aura remains soft and the second coat gives mirror-level shine.
Use a makeup sponge with very fine pores — it gives a smoother aura blend than a chunky nail sponge.
Putting chrome all the way to the sidewalls makes the aura look harsh and can lift faster.
4. Rose Quartz Pink Chrome Marble
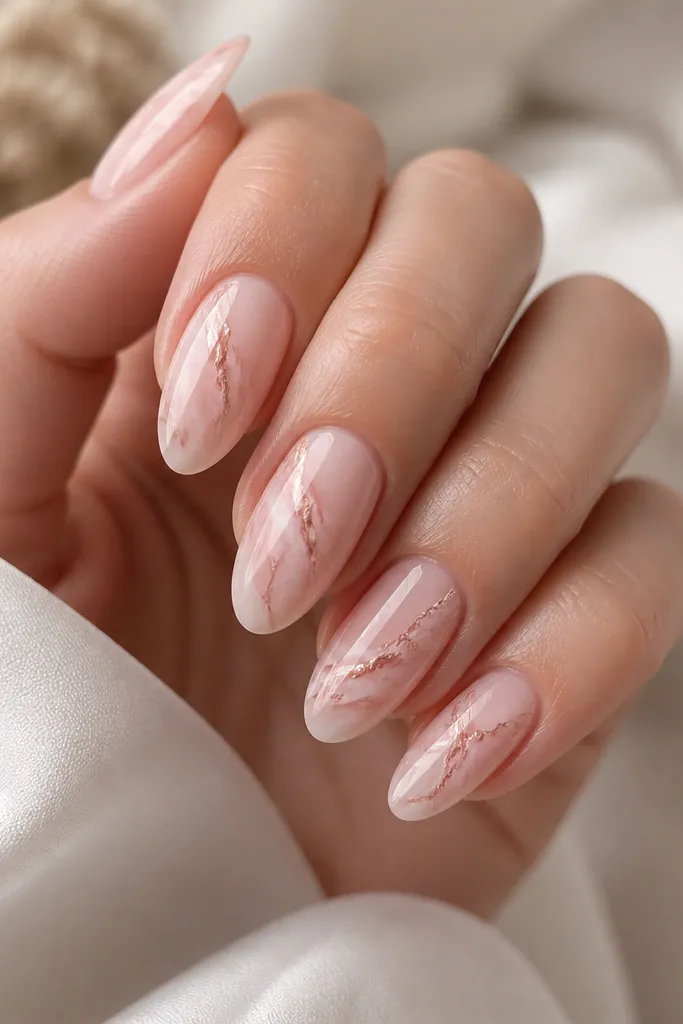
Marble sounds complicated, but this version is built for easy care because the marble lines are thin and the base is milky. The chrome sits inside the swirls, so even if your nail grows out, the pattern still looks cohesive. The look flatters most skin tones because rose quartz pink reads soft and clean, not neon. I like it for events, but it also works for daily wear because it’s not loud — the gloss does the talking. If your nails stain easily, milky pink marble is forgiving since the base is opaque enough to mask discoloration.
Start with a milky pink base and cure. Add thin white-pink lines using a striping brush, then swirl them with a cotton swab dipped in gel cleaner to soften the edges while the gel is still workable. Sprinkle a light touch of pink chrome powder onto the wet marble lines, then cure. Seal with two glossy top coats, and cap the free edge so the chrome streaks stay sealed as your nails grow.
Keep your marble lines small — wide swirls chip more easily because you’re building thickness in motion points.
Overloading the marble with too much gel makes the surface bumpy and chrome won’t lay smooth.
5. Pink Chrome Half-Moon Cuticle Glow
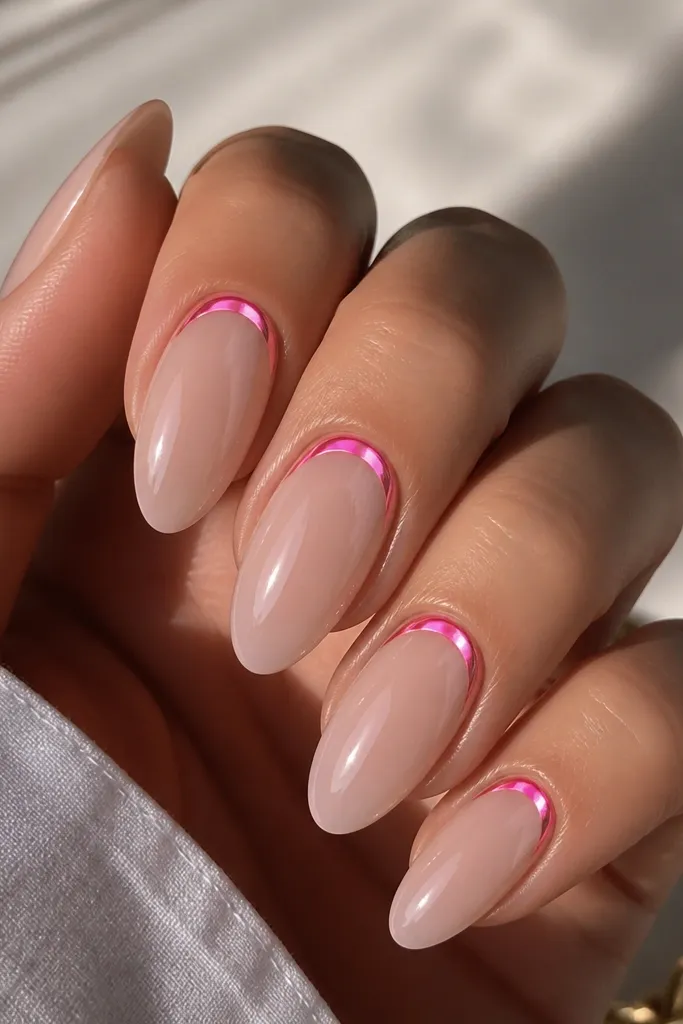
Half-moon chrome is my favorite “I want it pretty but I don’t want to rework it often” design. The chrome is only at the cuticle area, which means less surface area for lifting and fewer touch-up needs. The crescent also makes your nails look longer by visually framing the nail bed. This works beautifully on almond shapes because the crescent matches the curve of the cuticle. It flatters fair, medium, and deep skin tones since the base is sheer and the chrome is a bright pink that pops without turning neon.
Clean and prep the nail, then apply a sheer milky nude base gel and cure. Use a thin liner brush to paint a curved half-moon at the cuticle, leaving a hairline gap from the skin so it doesn’t flood. Cure the half-moon gel, then apply pink chrome powder only within that crescent — press with a small sponge and clean off excess. Top coat in two thin layers, making sure the first coat seals the chrome and the second coat smooths the shine across the whole nail.
Use a silicone cuticle pusher or a small brush handle to check the gap — if chrome touches skin, it lifts sooner.
Painting the crescent too wide makes it look like a thick band instead of a clean cuticle glow.
6. Soft Pink Glossy Ombré with Chrome Edge
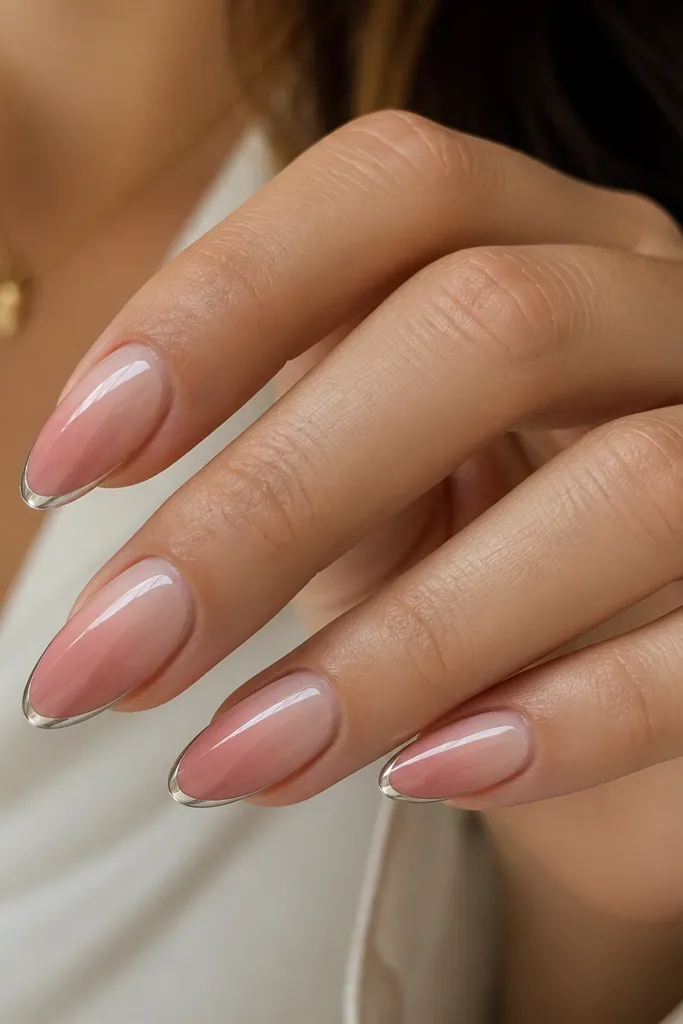
Apply a sheer base and cure. Add a deeper blush pink gel at the tip, then blend upward with a sponge or ombré brush — keep the transition within the last third of the nail. Cure, then wipe off tack if needed and apply pink chrome powder only on the extreme tip edge with a thin sponge. Seal with two coats of glossy top coat and cap the free edge on the second coat so the chrome edge stays locked.
This is “low maintenance” because the ombré hides grow-out and the chrome is only at the very tip where chips usually happen. The blush-to-sheer fade makes the nails look naturally dimensional, and the chrome edge adds that trendy mirror sparkle without covering the entire nail. I wear this when I want a manicure that looks intentional even after a week of dishes and laundry. It flatters short almond nails because the fade elongates the nail bed, and it looks good on all undertones as long as your blush-to-sheer transition is smooth. The gloss finish is what makes it feel fresh every time.
Skip thisSkipping the chrome edge cap makes the tip area dull and prone to roughness.
Editor's noteBlend with a light hand — if you pack too much gel at the tip, the ombré line looks like a stripe after cure.
7. Pink Chrome Confetti Specks on Milky Base
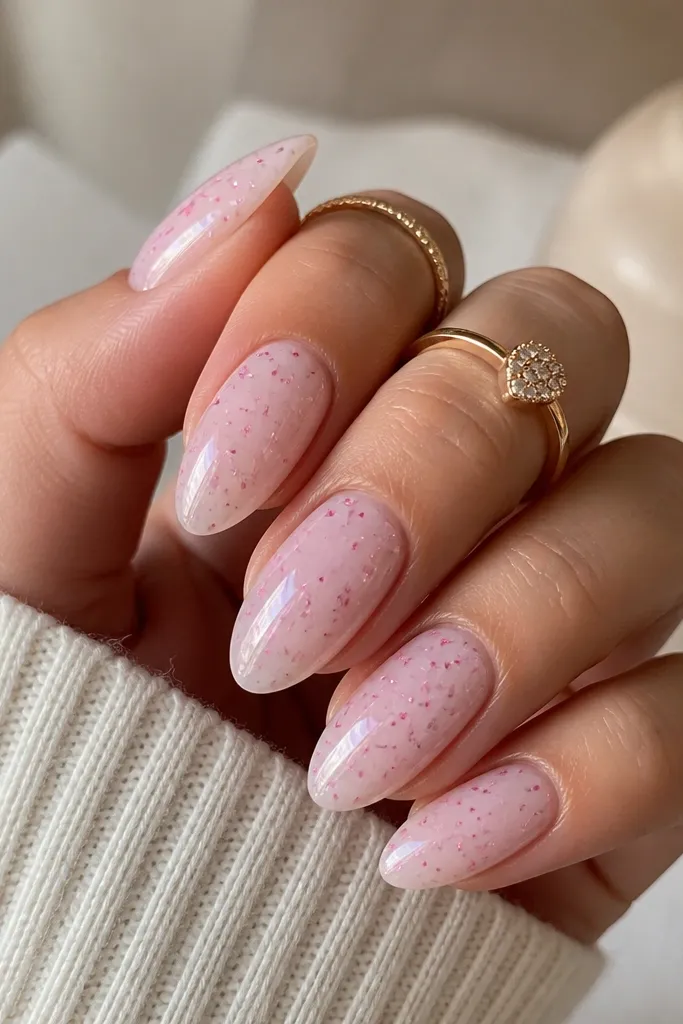
Start with a milky pink gel base and cure. Apply a very thin layer of clear or pink gel on top (tack optional depending on your chrome brand), then tap pink chrome pigment or ultra-fine chrome powder onto the nail with a small sponge — keep it sparse. Cure and remove any loose powder, then seal with a glossy top coat in two thin layers. For extra durability, cap the free edge with the first top coat and smooth any texture before the second coat.
Confetti specks look playful, but they’re easy care because you’re not painting big shapes that show lifting. The milky pink base stays consistent while the chrome specks are small and forgiving if coverage varies. I love this for daily wear because it hides micro-chips — a tiny missing spot still looks like part of the speckle. It flatters hands that need a “soft pop” since the specks brighten without turning your nails into a full mirror. Works across undertones because the base is milky and the specks are bright pink chrome.
Skip thisGoing heavy on confetti makes the nail feel gritty and can lift where the surface stays uneven.
Editor's noteUse a small piece of foam to tap specks — finger tips put down too much product.
8. Blush Pink Chrome Line Nails (Minimal Detail)
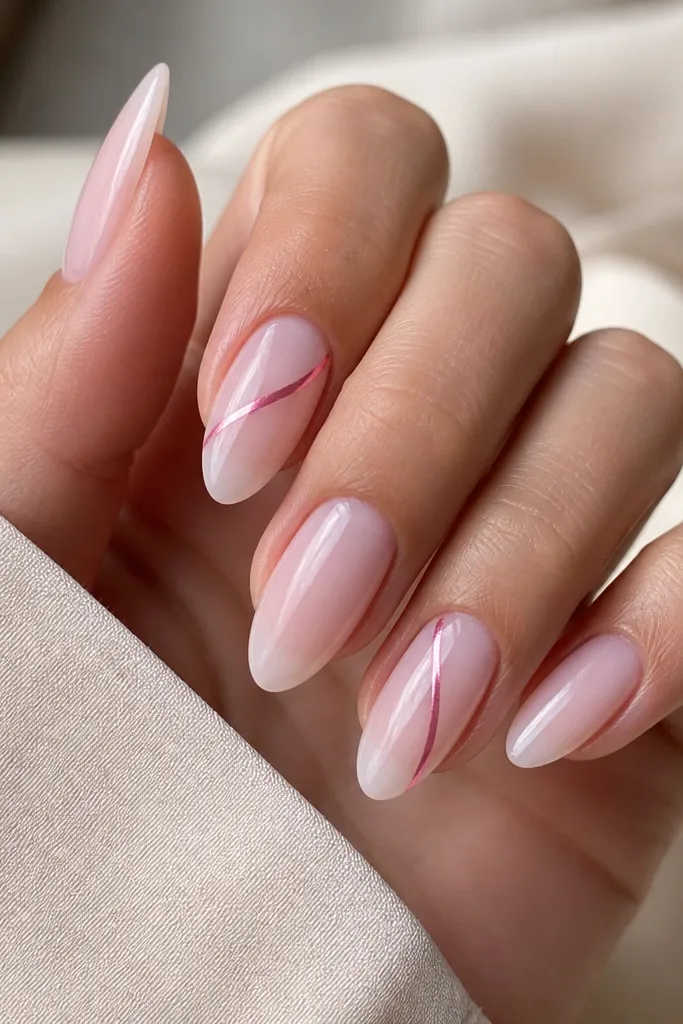
Apply a milky blush base gel and cure, then top coat lightly if your gel needs smoothing. For the accent nails, paint a thin diagonal guide line with pink gel, keeping the line about 1-2 mm wide and centered. Cure, then press pink chrome powder over the line only and clean off excess. Seal with two glossy top coats, and cap the free edge so the chrome line doesn’t snag on fabric or hair.
Minimal line nails are the easiest way to get “trendy” without daily maintenance. One chrome line gives you the shine factor, but the rest of the nail is a solid milky pink that grows out smoothly. I do this set when I want something that looks good in photos but doesn’t require perfect coverage everywhere. The diagonal line makes fingers look longer and slimmer, which is why it flatters short nail beds. It also matches every outfit because the base stays neutral and the chrome line is bright but controlled.
Skip thisPainting a wobbly line without a guide makes it look like a mistake instead of design.
Editor's noteMake the line slightly thicker near the tip — it reads clearer when your nails move and catch light.
9. Pink Chrome Waterfall Glitter Fade
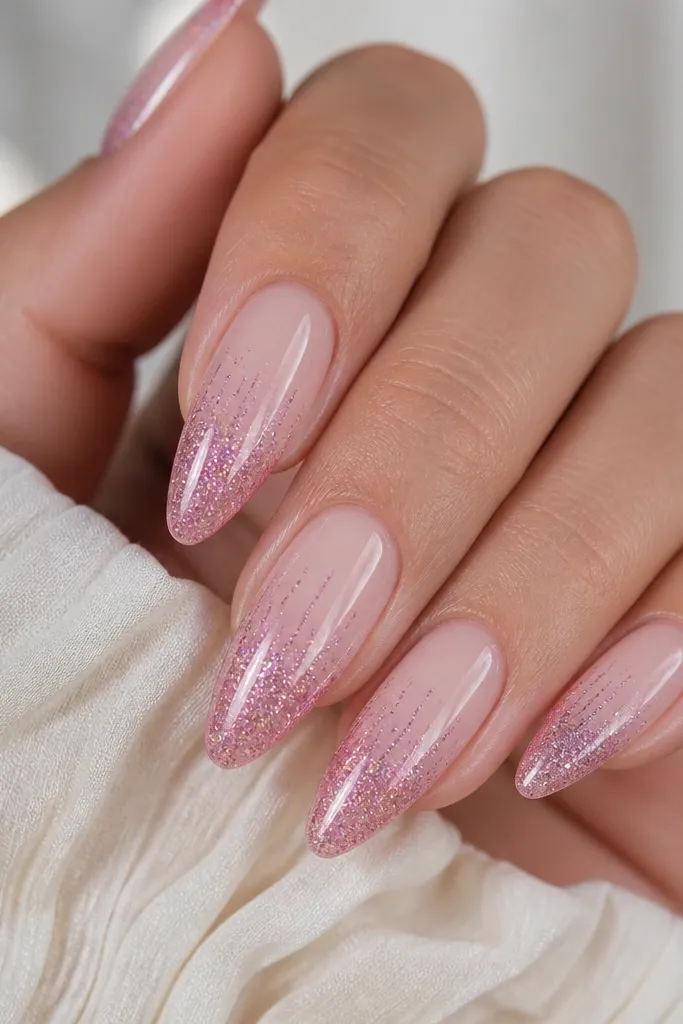
Start with a milky pink base and cure fully. Mix pink chrome powder with a clear gel (thin, not thick) and tap it onto the lower third of the nail, then pull it downward with a detail brush to create narrow drip streaks. Cure and check edges — if the drips look uneven, add a tiny amount of gel only at the drip tips, then cure again. Seal with two glossy top coats, and cap the free edge carefully because glitter can catch and lift if the edge isn’t sealed well.
This design looks high effort, but it’s surprisingly manageable because the glitter pattern is concentrated on the lower half. The milky base stays clean, so if you get a tiny chip up top, it doesn’t wreck the whole look. I like the waterfall effect because it makes the nail look dynamic — like light is moving down the almond. It flatters medium to long almond nails best, but it still works if your almonds are on the shorter side as long as you keep the “drips” narrow. Undertones don’t matter much here because the glitter is pink chrome with holographic lift.
Skip thisSkipping edge sealing on waterfall glitter makes the tips feel sandpapery and chip faster.
Editor's noteUse fine glitter or ultra-fine chrome so the surface stays smooth when you seal — chunky product feels rough after a few days.
10. Soft Pink Chrome Jelly Bloom
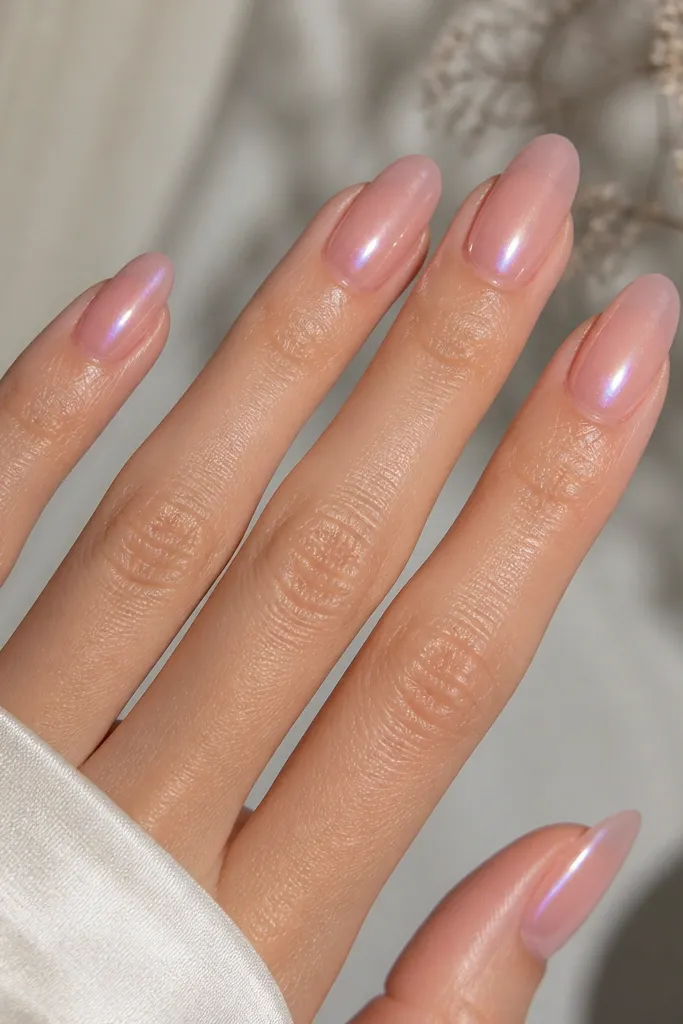
Apply a translucent jelly pink gel base in a thin layer, cure, then add a second thin layer only if you need more opacity — avoid thick jelly. Place a small oval of gel near the cuticle (leave a millimeter gap), cure, then press pink chrome powder into that oval with a sponge. Lightly tap outward with the sponge so the bloom spreads, but keep the edges soft. Finish with two glossy top coats, curing each, and cap the free edge so the jelly surface stays glassy and doesn’t snag.
Jelly bloom nails are glossy, fresh, and they hide imperfections because the base is translucent but evenly toned. The bloom effect uses chrome in the center area, so the nail still looks clean even when it grows. I wear this when my hands look dry — the jelly pink makes the nails look hydrated instead of flat. It flatters fair to deep skin tones because the jelly layer adjusts to your nail bed color and the chrome adds a bright pink highlight. It’s also forgiving if your cuticle line isn’t perfectly smooth, since the bloom draws attention upward.
Skip thisOverbuilding the jelly layer makes the nail bulky and increases lift at the cuticle.
Editor's noteIf jelly looks streaky, apply thinner layers and cure longer rather than adding more gel at once.