
1. Cinnamon-to-Caramel Ombre with Sheer Latte Cuticle
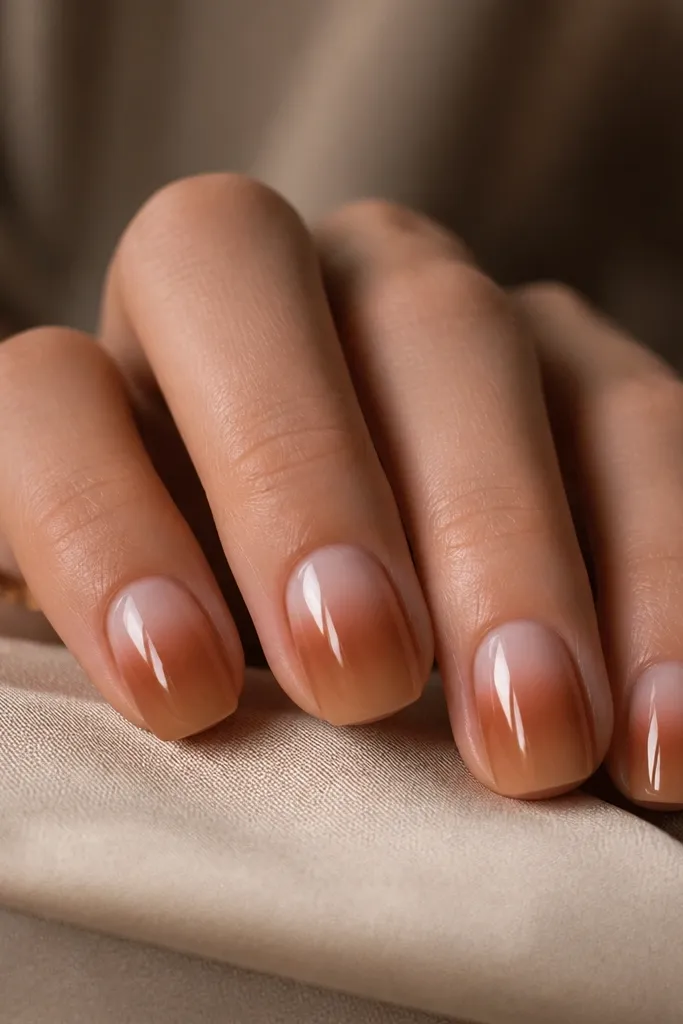
This one is my go-to when you want fall nails that still look clean at work. The sheer latte cuticle makes your nail bed look longer, and the cinnamon-to-caramel fade gives that “cozy coffee” vibe without turning dark. I like it on fair to medium skin tones because the warm beige matches well and doesn’t wash you out. If your hands get dry in autumn, the milky base also hides tiny texture better than a fully opaque nude. The ombre is intentionally soft — you’re aiming for a blur, not a stripe.
Editor's noteUse a makeup sponge that’s barely damp with gel — wet sponge makes bands. If you see a line, add a tiny extra caramel layer and blend again before top coat.
Start by pushing cuticles back and wiping nails with alcohol so the removable base grips. Apply a removable sheer base (thin coat) and cure. Then sponge on cinnamon brown gel from about 1/3 down the nail toward the tip, keeping the top edge of the sponge layer light. Add a second, lighter caramel beige layer on the outer half and blend the meeting point with a clean makeup sponge. Finish with a glossy removable top coat, and cap the free edge lightly so the fade doesn’t chip.
Skip thisSkipping a sheer cuticle makes short nails look top-heavy and stubby.
2. Burnt Orange Ombre with Micro-Glitter Fade Tip
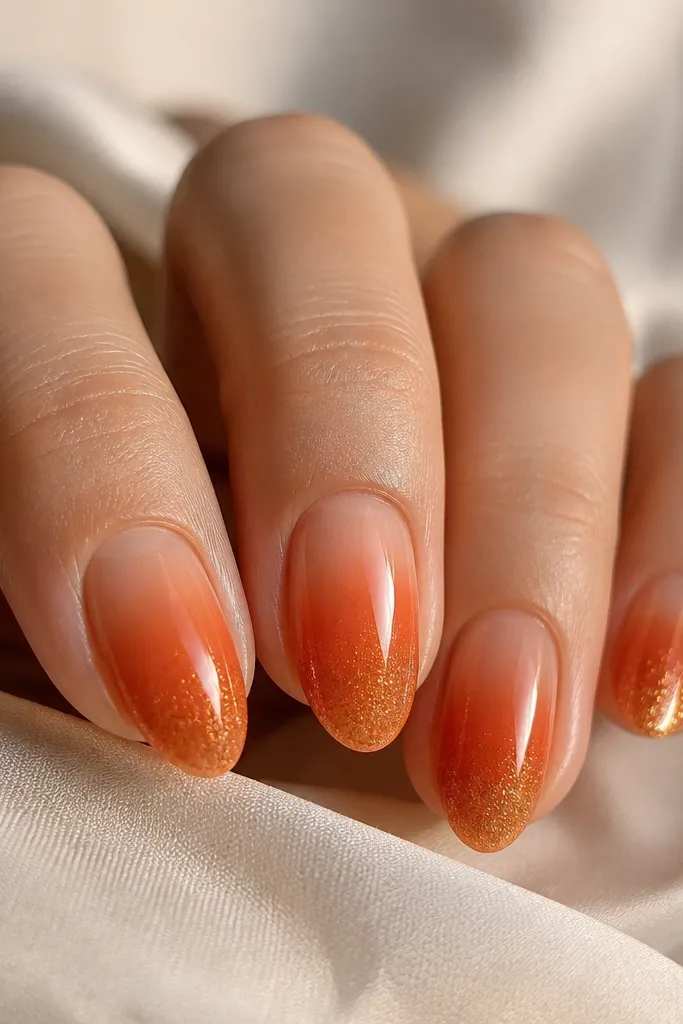
This is the “pumpkin spice lights” look. The burnt orange reads bright in daylight but still feels autumn because it fades into a warm nude rather than stopping at solid orange. I wear it with gold rings and it makes my hands look warmer right away. It flatters short nails because the glitter is only on the far edge, so the center stays smooth. It also works across skin tones, but it looks especially good on medium and olive tones because burnt orange pops without turning neon.
Editor's noteIf your glitter clumps, press it onto the tip with a dry lint-free wipe before curing. That sets the particles in place without thick build-up.
Apply a sheer nude removable base and cure. Sponge burnt orange gel starting at the middle of the nail and dragging it toward the tip, leaving the cuticle area lighter. Then dab a micro-glitter gel (fine, not chunky) only on the last 1-2 millimeters of the free edge and blend it upward just a touch. Cure in thin layers so the glitter doesn’t get gritty. Seal with a glossy top coat and cap the tip edge once.
Skip thisPutting glitter all the way to the cuticle makes the nail look busy and shorter.
3. Mauve-to-Plum Ombre with Smoky Taupe Blend
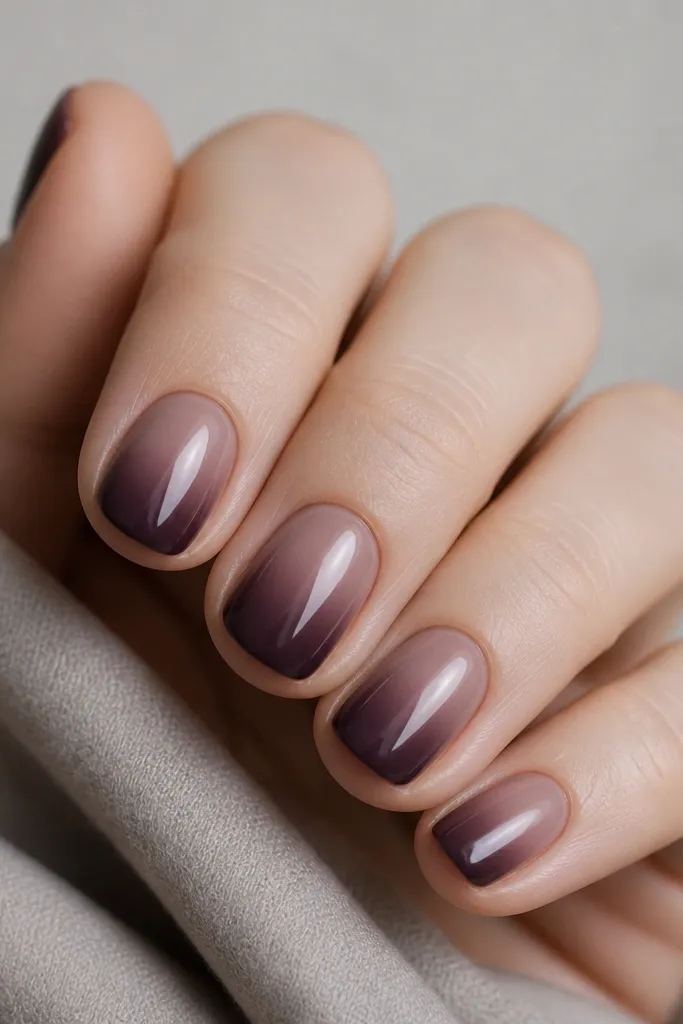
This one looks expensive because it’s built like a smoky makeup look. The mauve base keeps it soft, and the smoky taupe blend stops the plum from looking harsh. I like it when the weather turns gray — it still looks warm but not bright. It flatters cool undertones and fair skin because mauve and taupe don’t fight your complexion. If you’ve got ridges or nail texture, taupe haze visually smooths the gradient.
Editor's noteDo the taupe bridge first, then add plum. If you reverse it, the plum can overpower and make the gradient look muddy.
Start with a pale mauve removable base and cure. Sponge taupe gel as a thin bridge layer where you want the fade to transition, about the center of the nail. Then sponge plum gel on the outer half and lightly drag toward the center, keeping the darkest part on the side and tip. Clean up the edges with a small brush dipped in remover, then cure. Finish with glossy top coat to lock the smoky blend and add shine.
Skip thisOverloading taupe makes it look gray and flat. Keep it thin.
4. Brick Red Ombre on Soft Almond Press-Ons
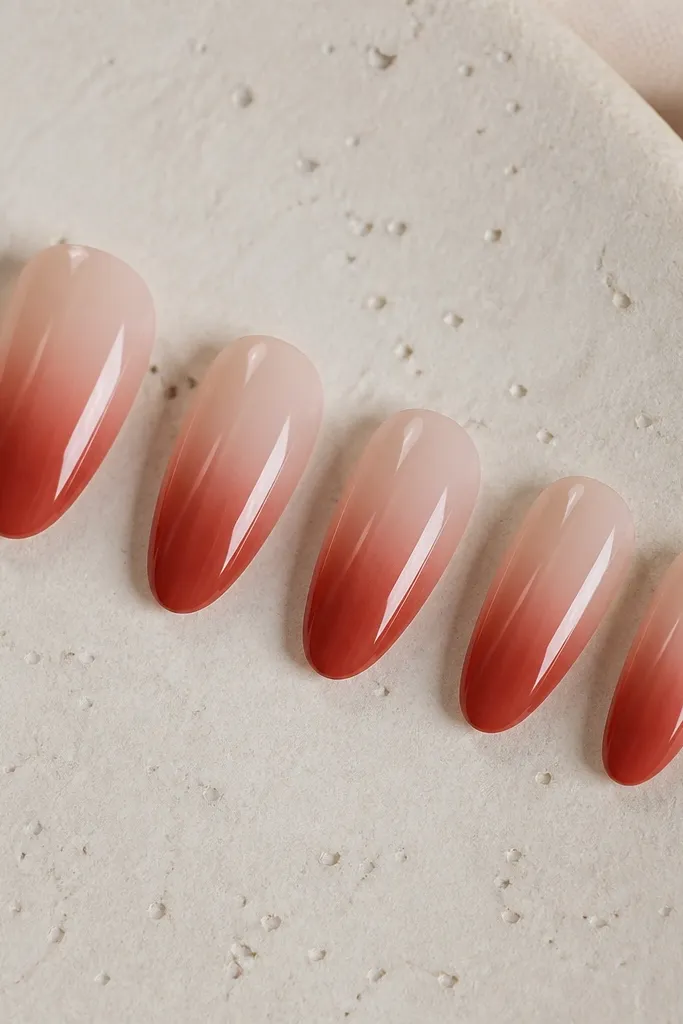
Press-ons are my fastest way to get a real ombre fade when I’m busy. Brick red is the perfect autumn “not too dark” shade — it reads like a sweater even when it’s just nails. The ombre on a soft almond shape makes short nails look more elongated than a flat rounded tip. This works especially well if your nails are uneven in length because press-ons let you match the shape across all fingers. It also looks great with casual outfits and can handle a simple gold chain bracelet.
Editor's noteWarm the press-on adhesive with your fingers for 30 seconds before placement. It spreads thinner and looks more natural at the cuticle.
Pick press-ons labeled short or small almond and try them dry first so the sidewalls sit flush. Clean your nails with alcohol and let them fully dry. Apply adhesive to the press-on, then press from the center outward for 10 seconds. Once set, add a thin removable top coat only over the ombre area so it doesn’t look patchy. If the fade looks too bold, lightly buff the surface with a very fine buffer and re-top coat for a smoother blur.
Skip thisUsing long almond press-ons on short nail beds makes the ombre look like it’s hanging off.
5. Forest Green Ombre with Clear Jelly Top
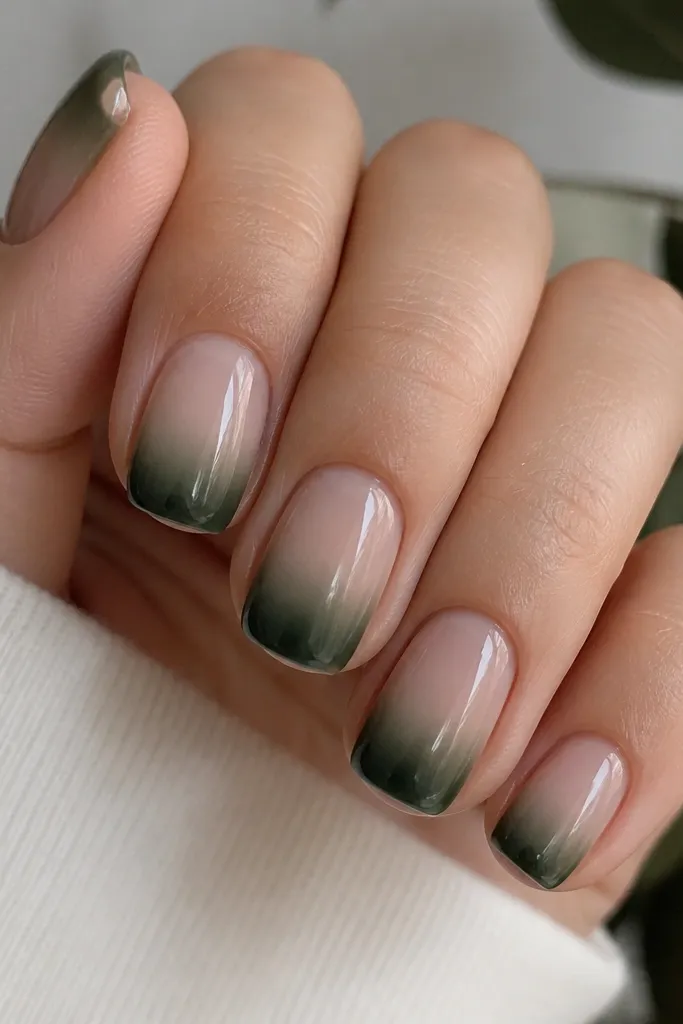
Forest green ombre gives fall without the usual orange-brown route. The jelly nude base keeps it wearable, and the clear jelly top makes the color look deeper and more dimensional. I like this on medium to deep skin tones because forest green shows up rich, not dull. On fair skin it still works, but I keep the base more sheer so it doesn’t overpower your hand. The jelly finish also hides tiny imperfections on short press-ons because it smooths the light reflection.
Apply a sheer jelly nude removable base and cure. Sponge forest green gel from mid-nail to the tip, leaving the cuticle area clear and light. Build the green in two thin passes so you get a soft fade rather than a single stripe. Cure between passes. Finish with a clear jelly top coat, then cap the free edge lightly so the jelly gloss doesn’t peel at the tip.
If your green looks too dark, mix a tiny dab of taupe into your sponge brush before applying the last 1/3 of the nail.
Full coverage green with no jelly shine makes short nails look flat and heavy.
6. Chocolate Brown Ombre with Milky Rose Center
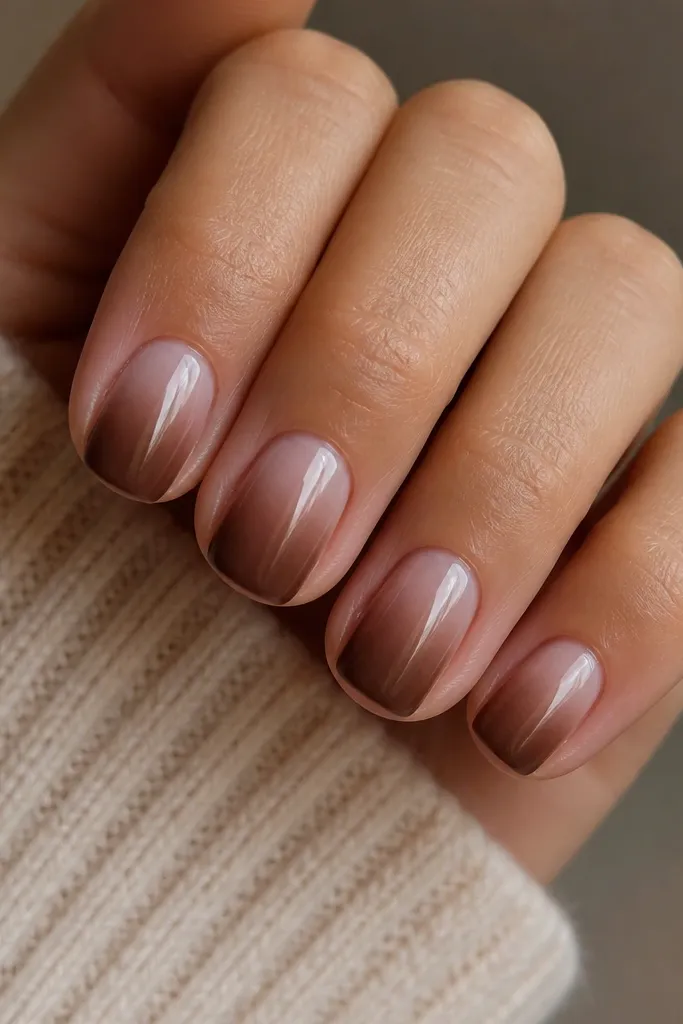
This design is for when you want autumn warmth but still want something feminine. The milky rose center keeps it from looking like plain brown, and the chocolate tip adds that cozy depth. I’ve worn it to fall weddings and it photographs well because the rose catches the light while the brown grounds it. It flatters hands with cooler undertones because rose balances the warmth of chocolate. If your nails are short and wide, the milky center gives a visual centerline that makes the nail look more even.
Start with a milky rose removable base and cure. Sponge chocolate brown gel starting at the last third of the nail and blend upward to the center, keeping the darkest area at the tip. Then go back with a clean sponge and lightly blur the rose-to-brown meeting point so there’s no hard line. Cure again. Seal with a glossy top coat and cap the tip once.
Use a slightly larger sponge for the center blur. That’s what makes it look creamy instead of banded.
Putting the rose only at the cuticle and skipping the center makes the nail look like two separate colors.
7. Sienna Ombre with Burnt Umber Side Fade
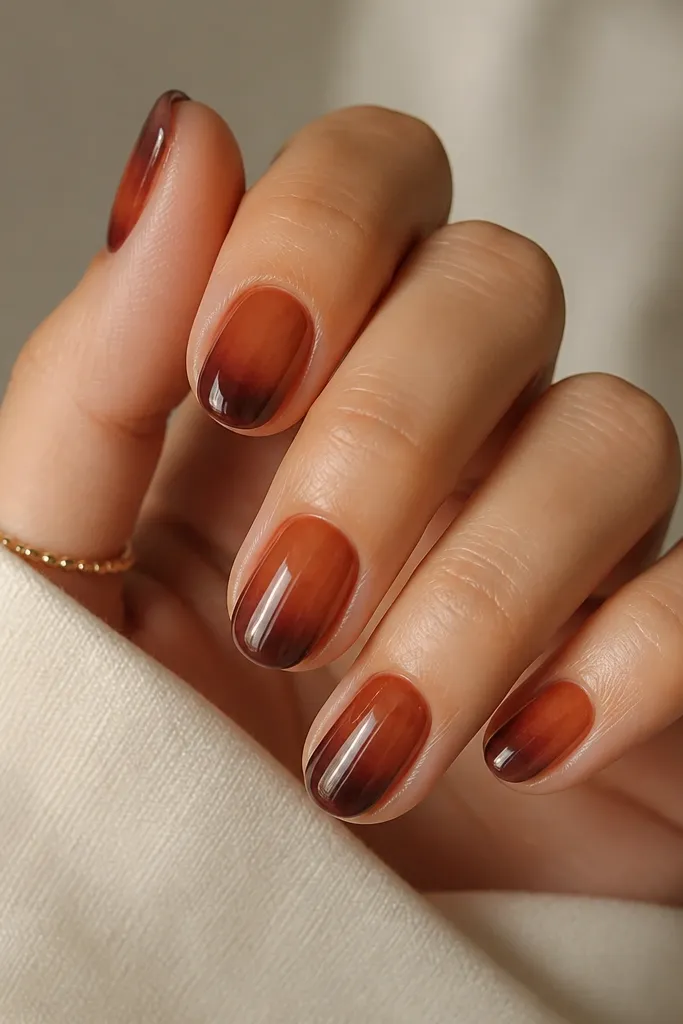
This is the one I do when I want an ombre that looks different from the usual straight fade. The burnt umber side fade creates a subtle diagonal movement that makes short nails look slimmer. It’s flattering if your nail beds are a bit wide because the dark sits off-center instead of filling the whole tip evenly. The sienna base keeps it warm and autumn, not muddy. I’ve worn it with both silver and gold rings — it doesn’t clash either way because the colors are earthy.
Editor's noteRotate your hand while blending. It helps you keep that side fade intentional instead of accidentally centered.
Apply a sheer nude removable base and cure. Sponge sienna gel across the nail in a light layer, focusing on the cuticle area and leaving the tip for later. Then apply burnt umber to the tip but keep it slightly toward one side, and blend it outward with a gentle sponge press. Clean the edges with a brush so the side fade stays crisp. Cure and finish with glossy top coat.
Skip thisDragging the dark shade across the whole tip turns it back into a standard ombre.
8. Olive Sage Ombre with Matte Top and Glossy Cuticle
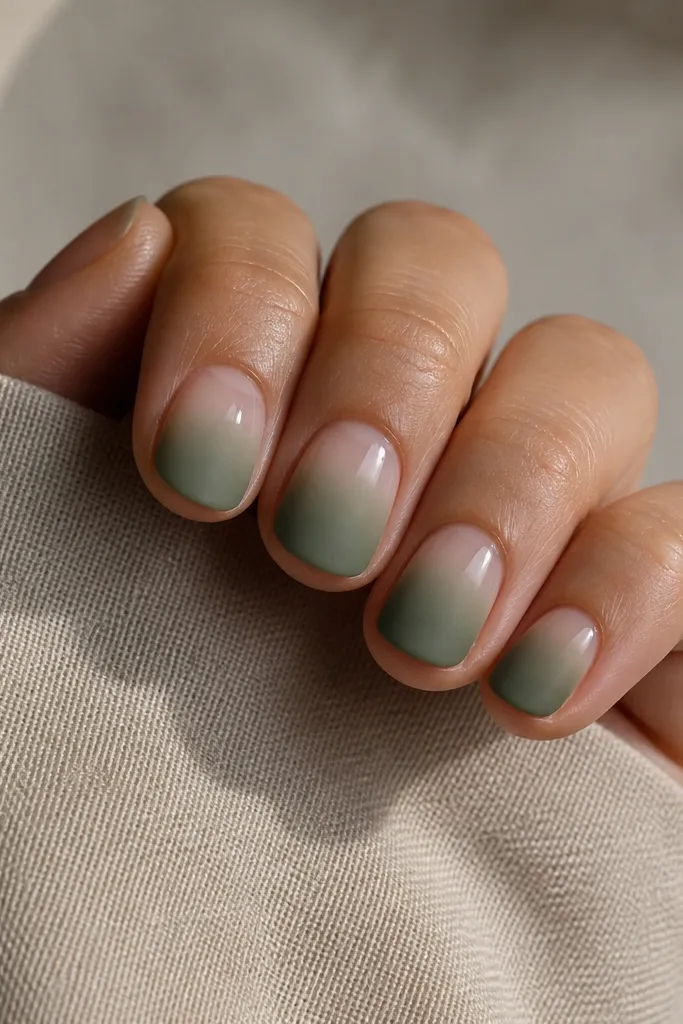
This one looks like nail art from a magazine because it mixes finishes. The glossy cuticle makes your nail bed look fresh, and the matte olive-to-sage fade feels very fall without needing glitter. I love it for evenings and sweater season because matte reads cozy under warm lighting. It flatters almost every skin tone because sage and olive sit in the neutral-to-warm range. If you have ridges, matte actually makes them less obvious because it softens shine reflections.
Start with a sheer nude base and cure. Sponge a light sage tone from about mid-nail toward the tip, then deepen the tip with olive gel in a second thin layer. Cure between layers. Apply matte top coat over the ombre area only, then use a small detail brush to keep the cuticle area glossy with a clear glossy top coat. Cure both finishes and check for any edges where matte meets gloss.
Seal the cuticle boundary with a tiny line of glossy top so it doesn’t look smudged.
Matte top over the whole nail can make short nails look dry. Keep the cuticle glossy.
9. Plum Ombre with Thin Gold Foil Line at the Fade
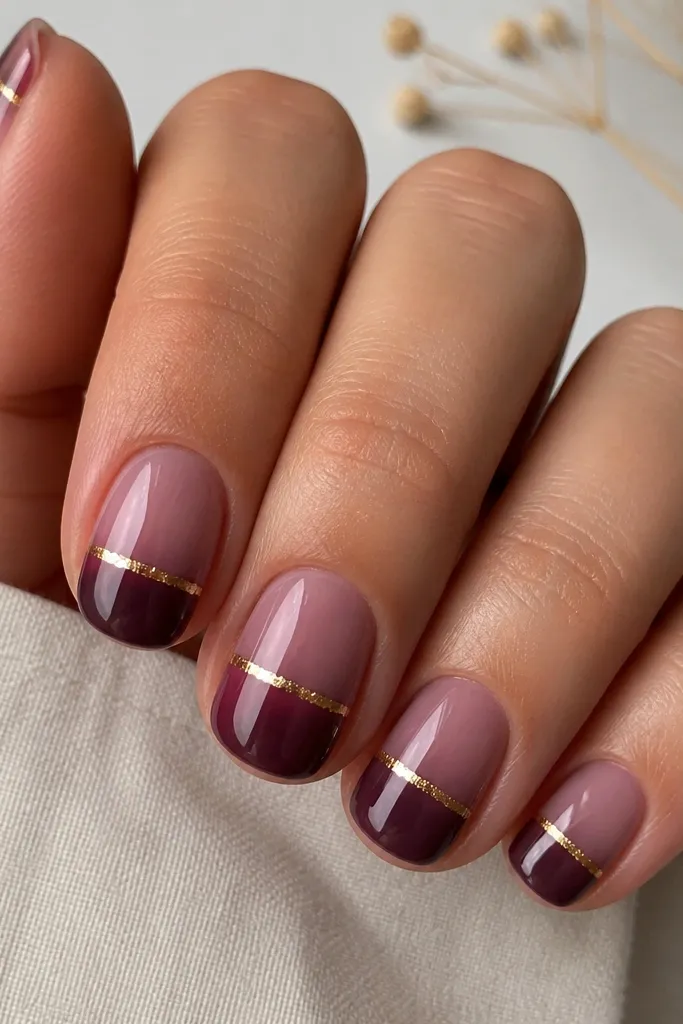
If you want fall ombre but still want it to look like “going out” nails, add one thin gold line. The gold foil sits exactly at the transition point, so it makes the fade look intentional and expensive without covering the nail. I like plum for cooler undertones and for anyone who feels orange shades look too loud on them. It also makes short nails look more designed because the line gives a clean visual anchor. Keep the foil line thin — thick foil makes short nails look crowded.
Editor's noteTrim the foil strip to match your nail width, not your nail bed width. That keeps the line crisp.
Apply a sheer mauve removable base and cure. Sponge plum gel from mid-nail to the tip, leaving the cuticle lighter. Before top coat, place a tiny strip of thin gold foil using foil gel or a tacky layer at the exact fade transition (about 2-3 millimeters below mid-nail on short length). Press the foil down and cure. Finish with glossy top coat, being careful not to flood over the foil edge too heavily.
Skip thisSkipping the cure before you add foil can cause the foil to smear into the plum.
10. Sheer Nude Ombre with Charcoal Smoke Fade
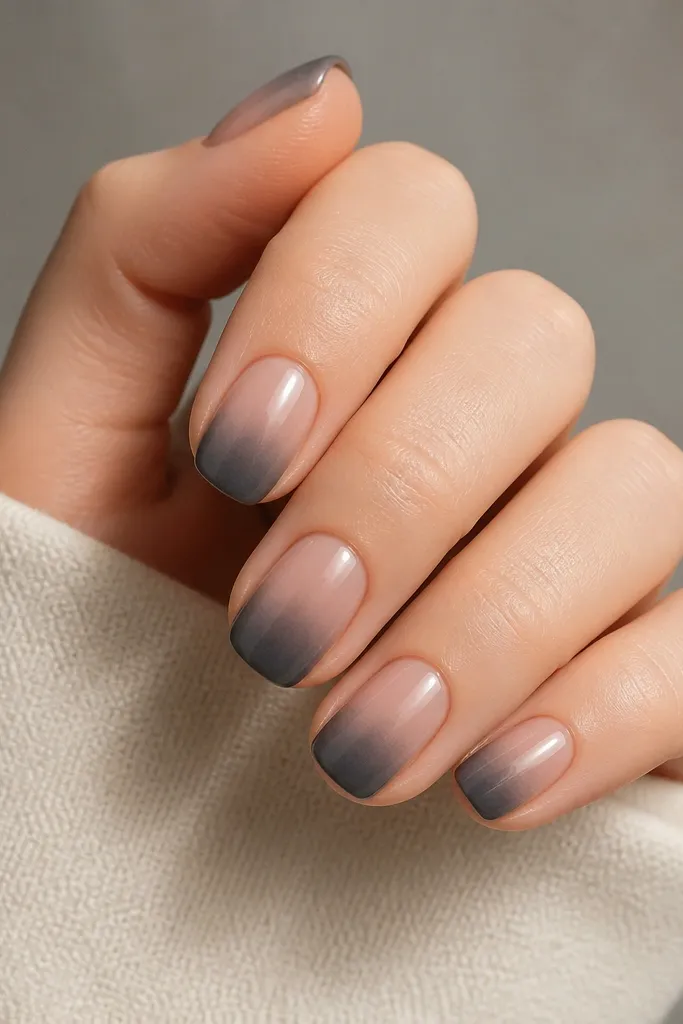
This is the “fall but make it modern” ombre. Charcoal smoke looks like a soft airbrush — it doesn’t scream Halloween, and it works with neutral outfits. I like it when my nail bed looks uneven because the sheer nude base keeps the center looking clean. It flatters fair, medium, and deep skin because charcoal is neutral and the ombre stays soft. If you hate warm colors, this design scratches that itch and still reads autumn.
Start with a sheer nude removable base and cure. Sponge charcoal gray gel starting at the tip and blend upward lightly, keeping the darkest part at the far edge. Add a second charcoal pass only if you need more depth, then blend again with a clean sponge to keep it smoky. Clean the sides with a brush dipped in remover so the fade doesn’t bleed. Finish with a high-gloss top coat so the charcoal looks smooth and not dusty.
Use fewer sponge presses than you think. Charcoal gets intense fast, and that’s where banding happens.
Heavy charcoal coverage makes short nails look bruised.



