
1. Toffee Nude with Burnt Sienna French Tips
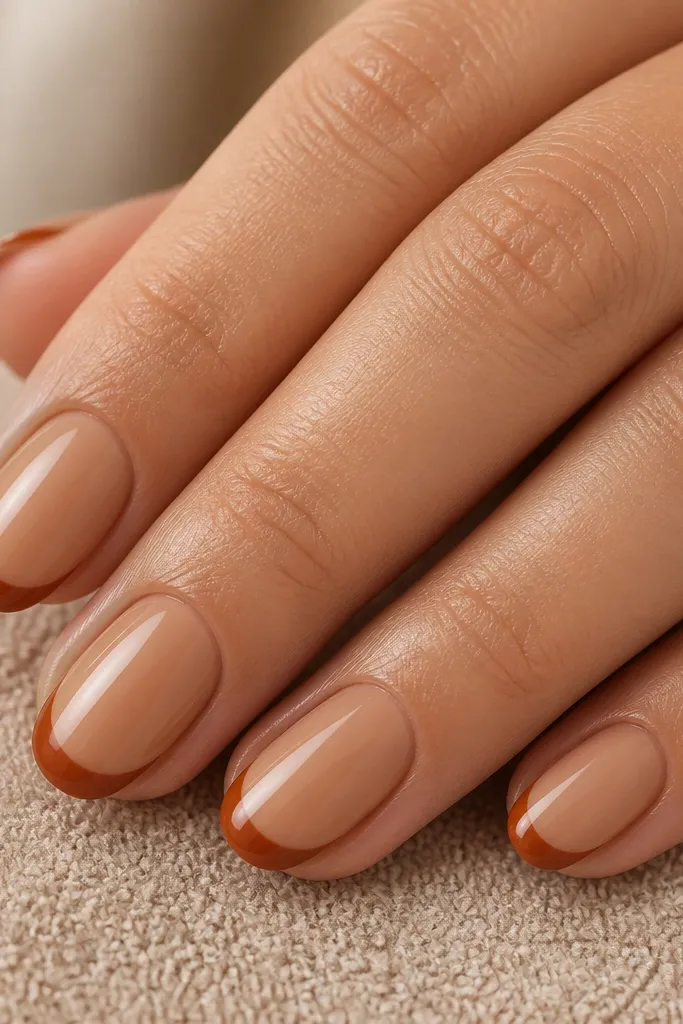
This look flatters most skin tones because the base is a warm nude that matches your undertone instead of turning grey under gel. I use it when I want autumn without heavy art. The burnt sienna French looks sharp and intentional on short nails because the contrast is high but still soft. It also makes your hands look tidy for work — the design reads “clean manicure” even when it’s growing out.
Start by applying BIAB with a toffee nude shade as your base, then cure fully. Next, use striping tape to mark a French line about 1-2mm above the free edge and paint burnt sienna gel over the taped area. Remove the tape while the gel is still movable enough to keep the edges crisp, then cure again. Finish with a thick, level top coat and cap the free edge on every nail.
If your French line ever looks wobbly, clean the edges with a flat brush dipped in gel cleanser before curing.
Don’t flood the tip — thick gel at the smile line makes the French look bulky and chips faster.
2. Chocolate Marble Tips on Clear BIAB
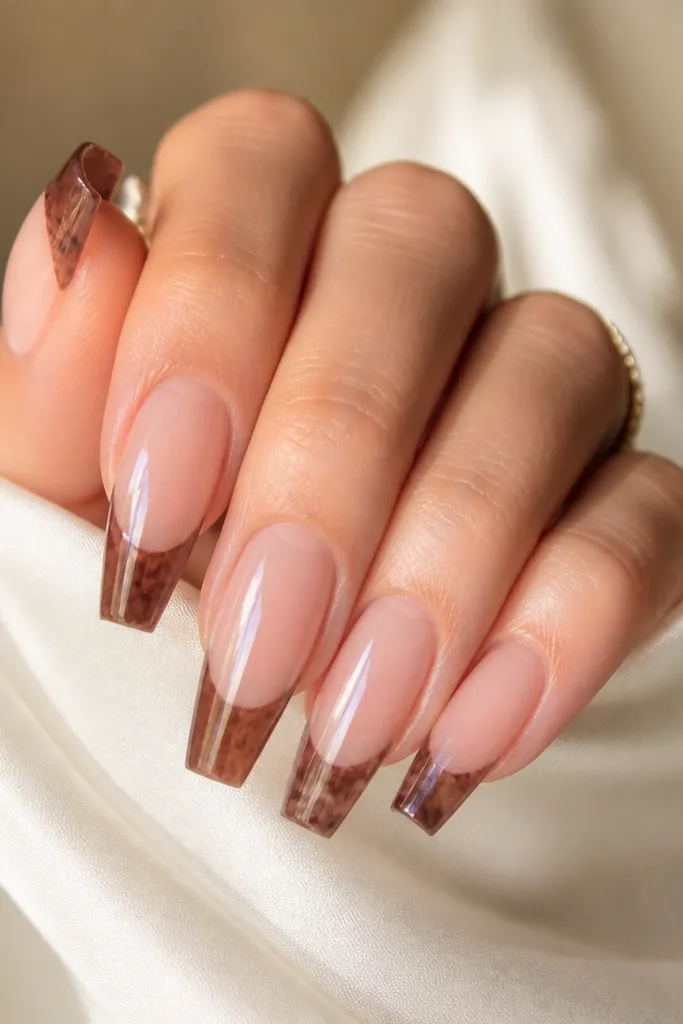
I love this when you want fall drama but you’re not trying to paint full nails. The clear BIAB keeps the nail looking lighter and makes your fingers look longer, which is great if you have wider nail beds. Chocolate marbling hides minor growth because the tip is the focal point. It also photographs well because the glossy clear base catches light while the brown veins stay soft.
Start with a clear BIAB build and cure until it’s fully set and smooth. Then sponge or thin-paint a sheer chocolate wash just on the top third of the nail, leaving a clean gap at the cuticle. Use a marbling tool or toothpick with a darker brown gel to drag small streaks through the wash. Cure, then seal with a glassy top coat and cap the tip edges.
Editor's notePractice the marbling on a spare nail form — the best veins are the ones you barely touch.
Skip thisAvoid making the base wash opaque — opaque tips look heavy and less “marble” after a few days.
3. Olive Sage Half-Moons with Gold Foil
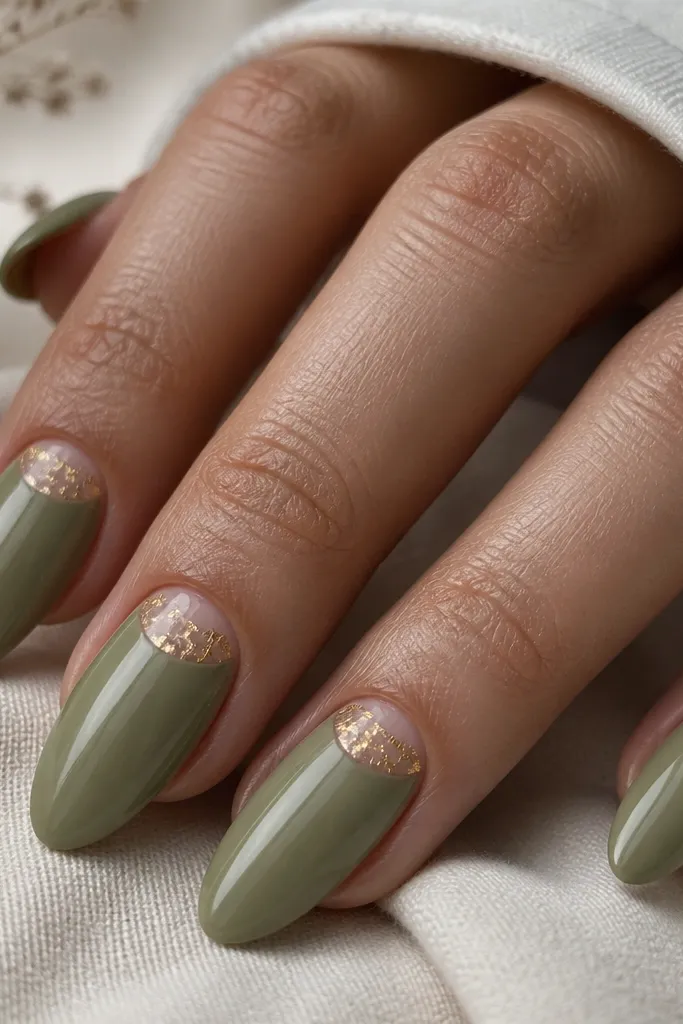
Half-moons are a flattering shape because they visually frame your cuticle area instead of covering it. Olive sage looks great on fair and medium skin, and it also pops on deeper skin tones without going too orange. The gold foil makes it feel autumn-luxe without using expensive gems. I wear this for dinners because it looks styled in daylight and still glows under warm indoor lighting.
Build your nails with BIAB in an olive-sage shade, cure, and smooth the surface. Apply a thin layer of nude-clear gel around the cuticle area, then use a small brush to carve a clean half-moon border leaving negative space. Dab gold foil flakes onto the tacky gel inside the half-moon and press lightly with a foil applicator. Cure and finish with a top coat that keeps the foil sealed and glossy.
Use a cotton-free wipe after curing so foil doesn’t stick to dust and look dull.
Don’t place foil too close to the cuticle — it lifts faster there and can look messy.
4. Pumpkin Spice Gradient with Micro Glitter Edge
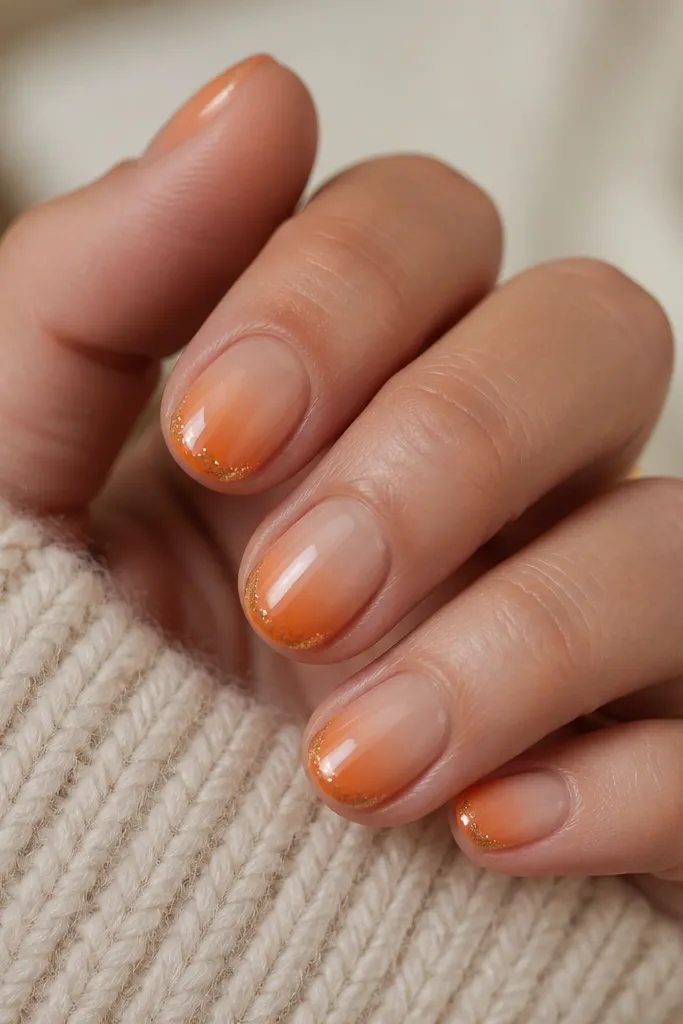
A gradient is the easiest way to get “autumn color” without needing complicated art. Pumpkin orange flatters warm undertones and makes hands look healthy and bright. The micro glitter band at the tip mimics fall sparkle in a way that stays wearable. I like this on short nails because the gradient stretches the nail and the glitter edge makes it look finished.
Start with BIAB in a nude base, cure, then apply a second thin BIAB layer if you need extra strength. Sponge a warm pumpkin gel from the mid-nail to the free edge using a makeup sponge — build it gradually in two coats. Keep the cuticle area clean so the nude shows. Add micro glitter gel only at the very tip band, then cure and seal with top coat, making sure you cap the glitter edge.
Use a sparse sponge dabbing motion instead of swiping so you don’t get streaks.
Avoid using chunky glitter — it catches on hair and makes the manicure feel rough.
5. Burgundy Velvet Nails with Matte Top + Glossy Accent
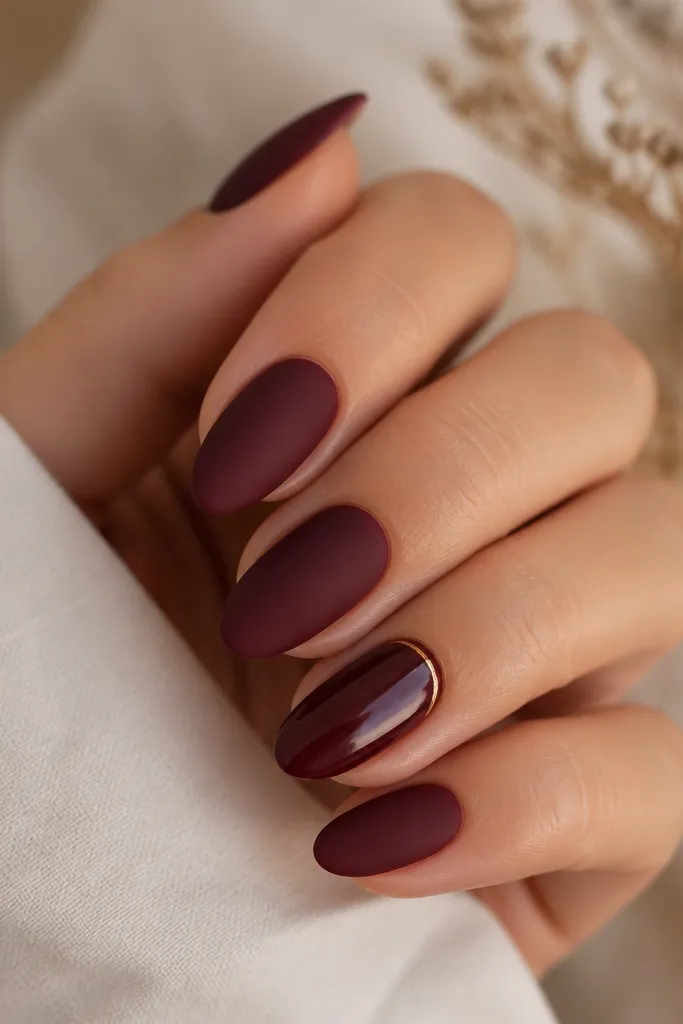
Velvet-style nails look expensive because matte changes how the color reflects light. Burgundy flatters cool undertones and looks gorgeous on short-to-medium nails because it reads bold, not loud. I like mixing matte with one glossy accent nail because it keeps the set from feeling heavy. This is a strong choice for fall nights out and holiday parties.
Apply a deep burgundy BIAB base and cure. File to a smooth surface — matte shows every bump. For the accent nail, add a thin gold stripe with striping tape or a liner brush near the cuticle, cure, then leave that nail for glossy top coat. For the rest, brush on matte top coat and cure fully, then finish the accent nail with a standard glossy top coat to keep the gold line crisp.
If your matte top looks streaky, apply it in two thin passes instead of one thick coat.
Don’t buff the nail too aggressively before matte — it can make the burgundy look patchy.
6. Cinnamon Latte Dots on Nude BIAB
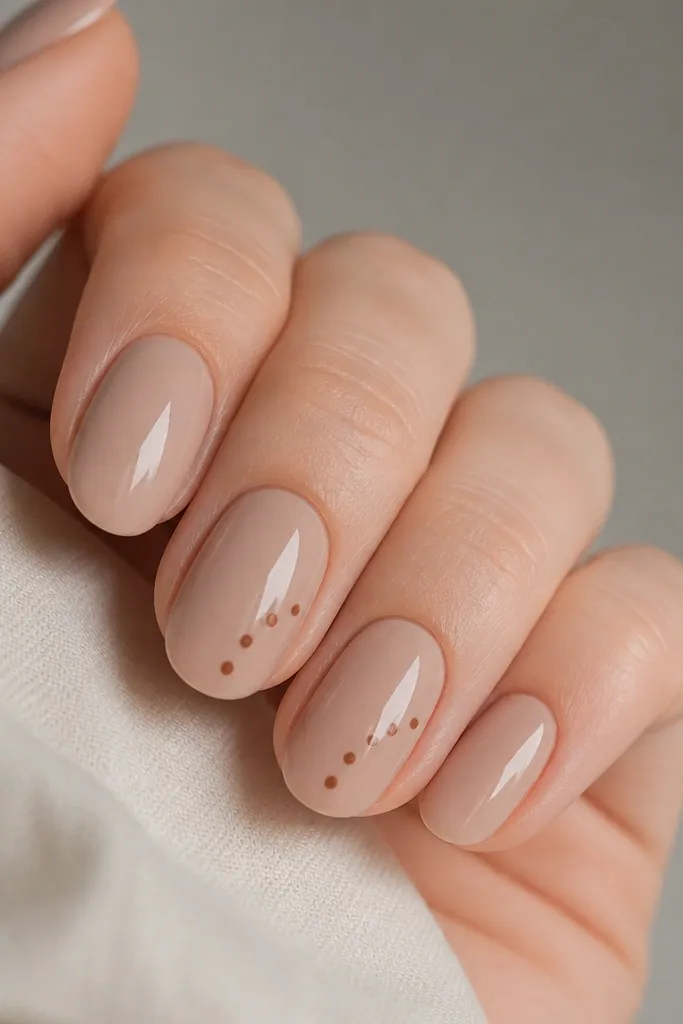
Dots are one of the fastest ways to make fall look cute instead of heavy. Cinnamon latte brown works with almost every skin tone because it sits in the neutral-warm zone. I use this when I want a manicure that looks playful but still grown-up. The diagonal placement makes the nail look slimmer, which is great if your nail beds are wide.
Start with nude BIAB and cure. Use a dotting tool with a cinnamon-brown gel — press lightly for uniform circles. Place dots in a diagonal line on the thumb and ring finger, leaving space between dots so the nude shows through. Add smaller dots near the tip for a “fall sprinkle” effect, then cure and seal with a high-gloss top coat.
Wipe the dotting tool between nails so dots stay perfectly round.
Avoid dragging the dot — press and lift straight up or you’ll get teardrop shapes.
7. Forest Green Micro-Rhinestone Crescent
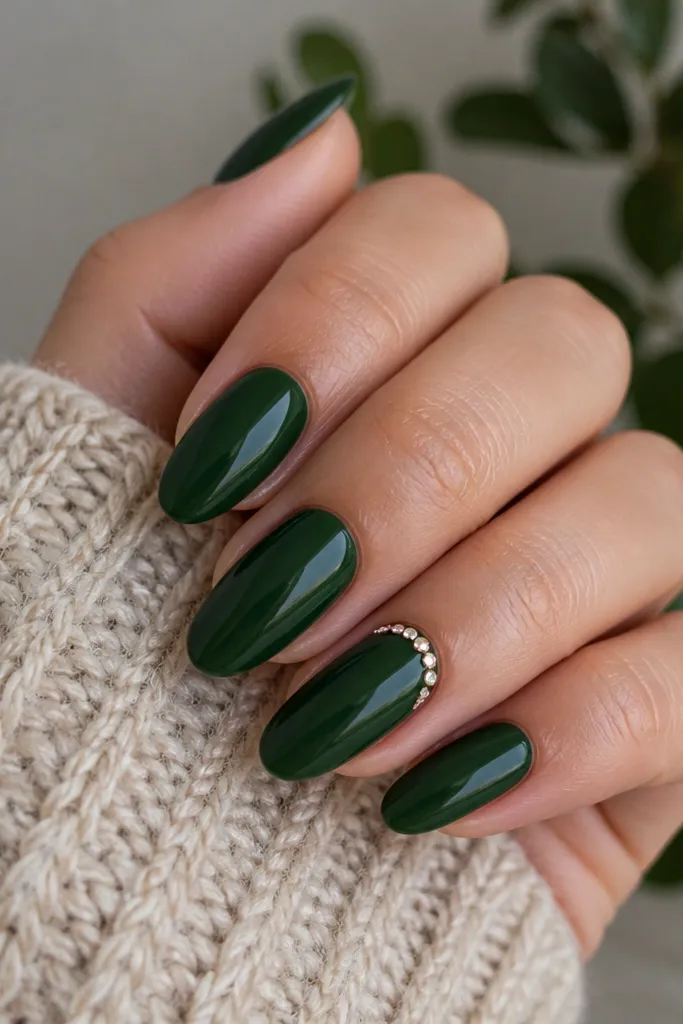
Forest green is the fall color that makes your hands look crisp, especially with olive or warm-brown skin tones. The micro-rhinestone crescent reads fancy but stays budget-friendly because you only need a few stones. I like this design for weddings and holiday office parties because it looks intentional even when you’re not wearing a full glam outfit. Keep the stones near the cuticle so they look like jewelry instead of decoration.
Build your nails with forest green BIAB and cure. For the accent nail, mark a gentle arc 1-2mm below the cuticle using a striping tape guide. Apply a small amount of rhinestone gel or clear tacky gel along the arc, then place 6-10 micro rhinestones in a tight crescent pattern. Press each stone lightly, cure, and finish with top coat — use a thin layer around the stones so they stay sparkly.
Editor's noteUse a rhinestone picker and a light touch — pressing too hard can spread gel and blur the arc.
Skip thisDon’t cover stones with thick gel — it dulls the sparkle and can lift at the edges.
8. Autumn Leaf Silhouette on Sheer Nude
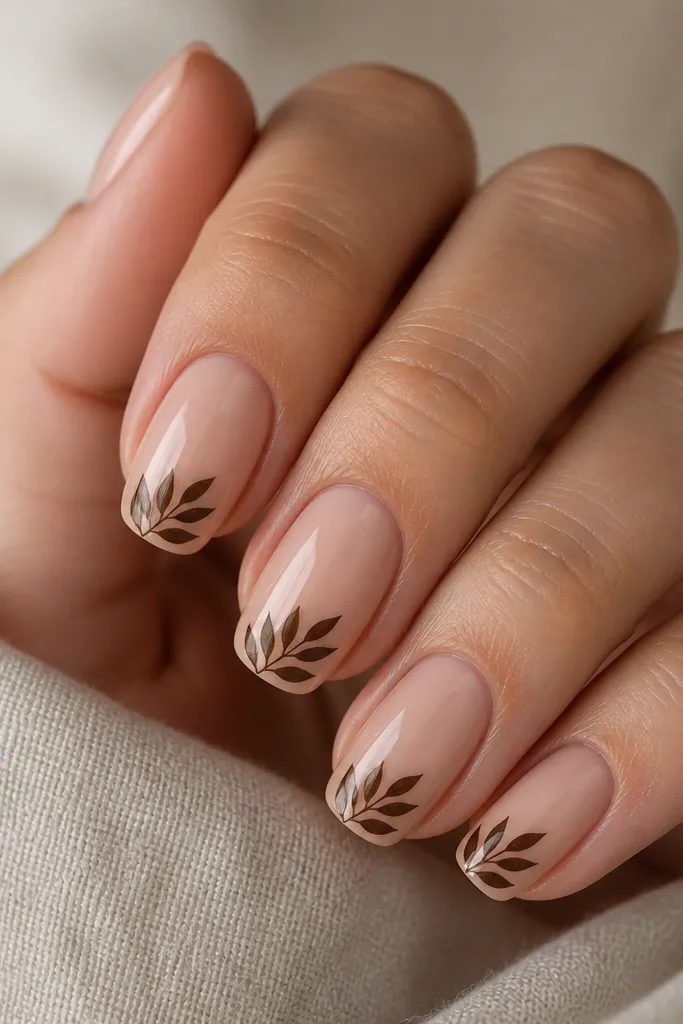
Leaf silhouettes give you real fall character without needing full nail painting. A sheer nude base keeps it light and wearable, which is great if you don’t want dark colors on all ten fingers. I use black-brown for the leaf shape because it stays classy and doesn’t go muddy. This design flatters short nails because the leaf sits where your eye already focuses — the tip.
Start with a sheer nude BIAB build and cure until it’s smooth. Paint or stamp a leaf silhouette near the tip, leaving a small gap from the free edge for clean wear. Use a fine liner brush to tighten the leaf stem and veins, then cure. Seal with top coat, making sure you cap around the leaf edges so it doesn’t catch or lift.
Editor's noteIf you’re freehanding, sketch the leaf in gel cleanser with a thin brush first, then paint over once you like the shape.
Skip thisAvoid filling the leaf with opaque black — a thin, dark-brown silhouette looks more natural under glossy top coat.
9. Rosewood Blush with Gold Foil Flecks
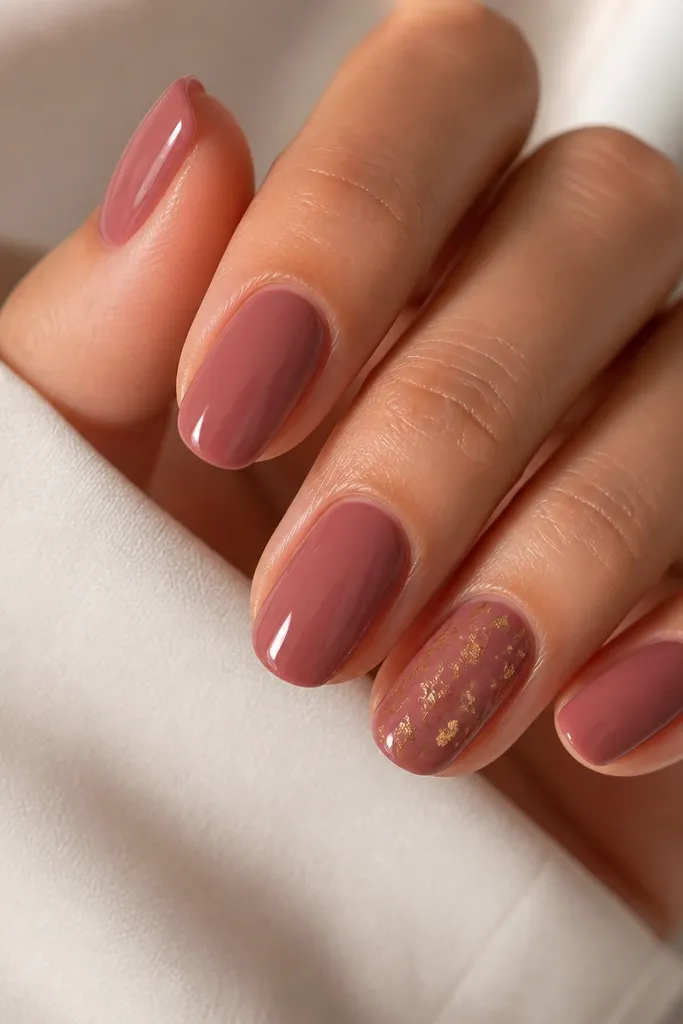
Rosewood blush is my go-to fall pink because it doesn’t lean bright like cherry — it looks more like dried petals. It flatters medium and deep skin tones because the warm undertone keeps it from looking too cool or washed out. Gold foil flecks add a soft glow without taking over the whole nail. This is a great “everyday autumn” set if you want something pretty that still matches sweaters and boots.
Apply rosewood blush BIAB and cure, then file lightly if needed. For the accent nail, add a thin layer of clear gel where you want the foil to sit. Dab tiny gold foil pieces onto the tacky gel using a foil applicator, then cure. Finish all nails with top coat, and cap the accent nail edges so the foil doesn’t lift at week two.
Editor's noteKeep foil flecks smaller than a grain of rice — big pieces look heavy and can snag.
Skip thisDon’t put foil directly on top of thick BIAB texture — it will stick in the wrong spots.
10. Smoky Taupe Fade with Blackened Outline
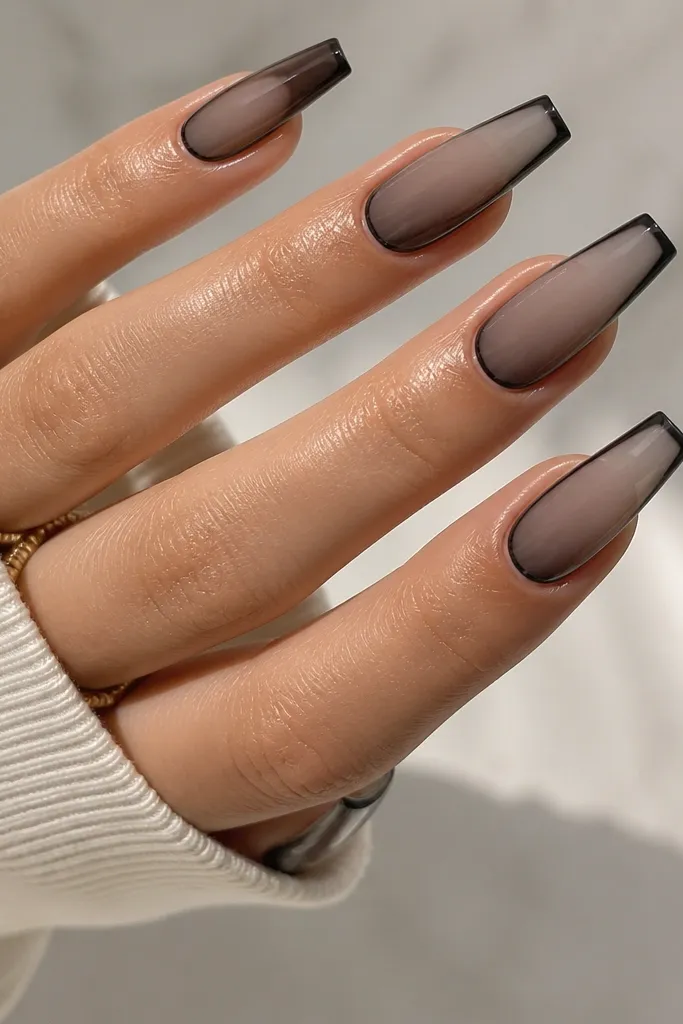
This is fall minimal with teeth. Smoky taupe flatters fair to deep skin because it’s neutral and doesn’t fight your undertone. The blackened outline makes the fade look intentional, like a graphic eyeliner effect. I like it on longer shapes because the frame draws the eye down the nail, but it also works on medium if you keep the outline narrow.
Start with BIAB in a light taupe base and cure. Sponge or airbrush a darker taupe shade from mid-nail to the tip, keeping the fade smooth and blended. Use a liner brush to draw a thin outline along both sides of the nail and lightly at the tip — you want it to look like a frame, not a border sticker. Cure again and seal with a glossy top coat, pulling the top coat to cover the outline edges.
Editor's noteIf your outline feels shaky, use striping tape as a temporary guide and paint over it.
Skip thisAvoid thick black lines — they make the fade look muddy and cheap when the nails grow out.



