
1. Burnt Orange Half-Moons on Nude
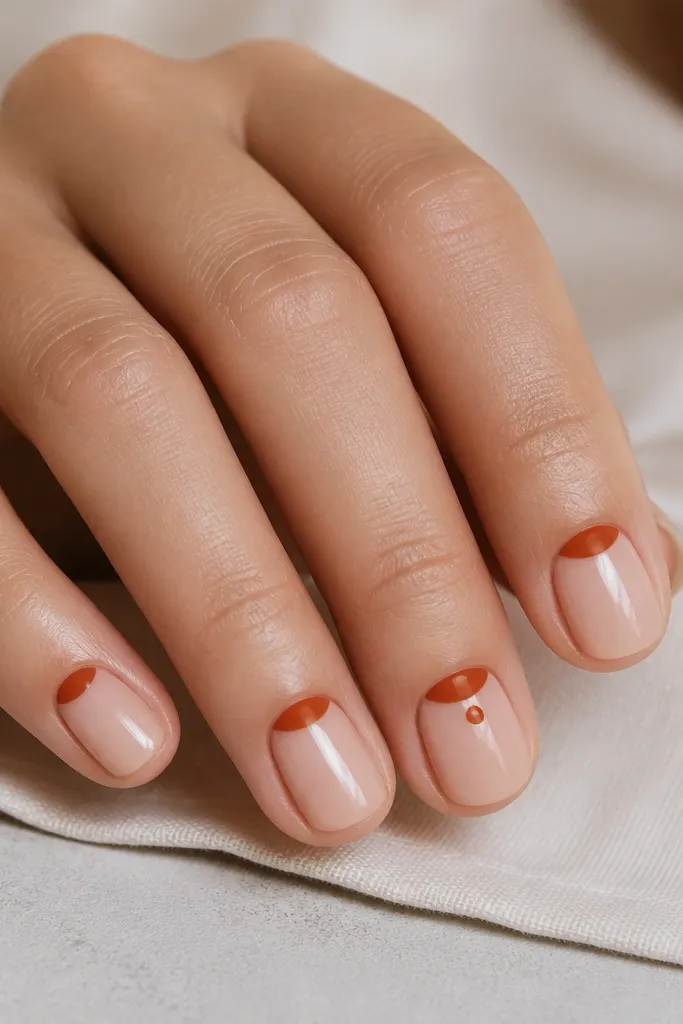
This look is the quickest way to make short nails feel autumn-ready without painting full coverage art. Start with a sheer nude or milky beige base so the half-moon has contrast — burnt orange reads warm and cozy against skin-toned nude. I’ve worn this on fair to medium skin and it always looks clean because the shape stays near the cuticle where your nail bed is naturally fuller. For workdays and casual weekends, it gives you that polished “I did my nails” feeling without needing fancy tools beyond a dotting tool or small brush. The styling principle is simple: one bold shape per nail, kept close to the cuticle so it looks intentional even if your lines aren’t razor-straight.
First, paint a sheer nude base coat and cure it fully if you’re using gel. Then, with a small striping brush or the rounded tip of a dotting tool, place a burnt orange half-moon at the base of the nail — aim for about 1/3 of the nail width, centered. Clean the edge with a brush dipped in remover if you need a sharper curve. Finally, seal with a glossy top coat that covers the half-moon edges so it doesn’t snag. If you want a tiny upgrade, add one small orange dot in the center of the largest half-moon on your ring finger.
Editor's noteUse tape or a half-moon stencil only if you already have it; otherwise freehand with a dotting tool is faster and still looks neat.
Skip thisAvoid thin, watery orange paint — it makes the half-moon look streaky on short nails.
2. Chocolate French Tips with a Soft Caramel Smile
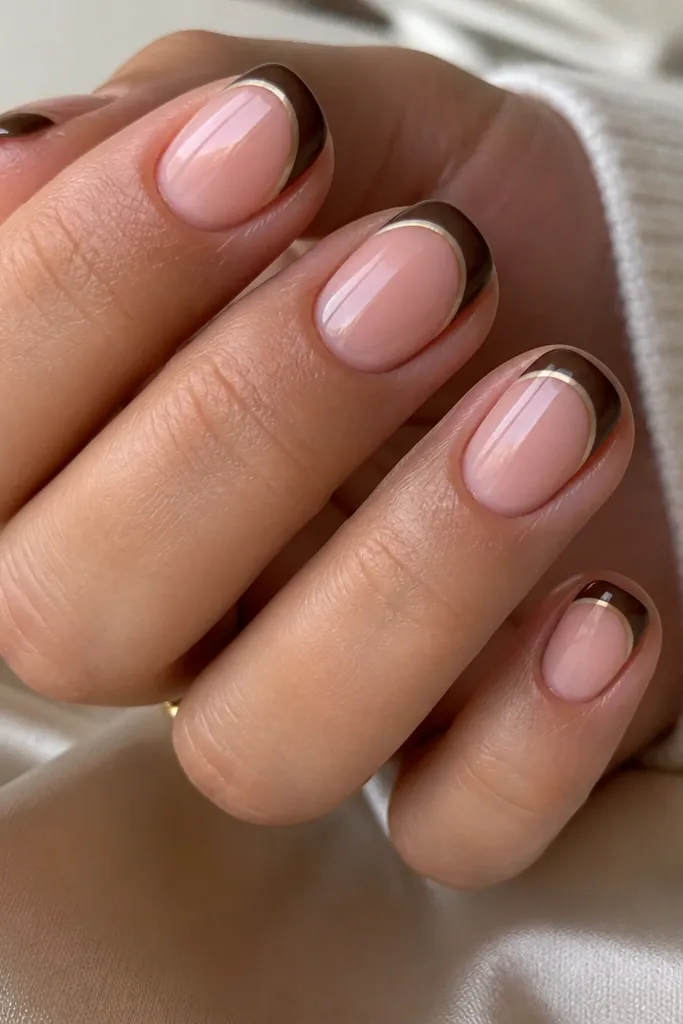
French tips can look fancy on short nails because they elongate visually. I like chocolate brown for fall because it’s darker than taupe but still neutral enough for everyday outfits. The thin caramel smile line inside the tip adds a warm highlight that makes your nails look “finished” instead of flat. This works especially well if your skin is warm or olive — the caramel line echoes your undertones and keeps the look from turning too stark. For events like brunch, family dinners, or holiday shopping, it reads classy without being loud. The principle here is contrast control: keep the tip bold, then add one thin accent line to make it look designed.
Start by applying a sheer pink or nude base coat and let it level. Then paint the French tips in chocolate brown, keeping the curve wide so it doesn’t look too narrow on short nails — aim for about 2 millimeters of tip thickness. While the chocolate is still wet (or right after curing if your gel has a tack layer), add a thin caramel curve inside the tip using a striping brush. Clean up the edges with a flat brush and acetone-free remover on a cotton swab. Seal everything with a glossy top coat, and check the sides - short nails catch on coats if the top coat is uneven.
If you struggle with tip symmetry, line up the brush with the natural smile of your nail bed and keep the width consistent across fingers.
Skip a thick French tip — on short nails it can make the whole nail look stubby.
3. Terracotta Dots Like Falling Leaves
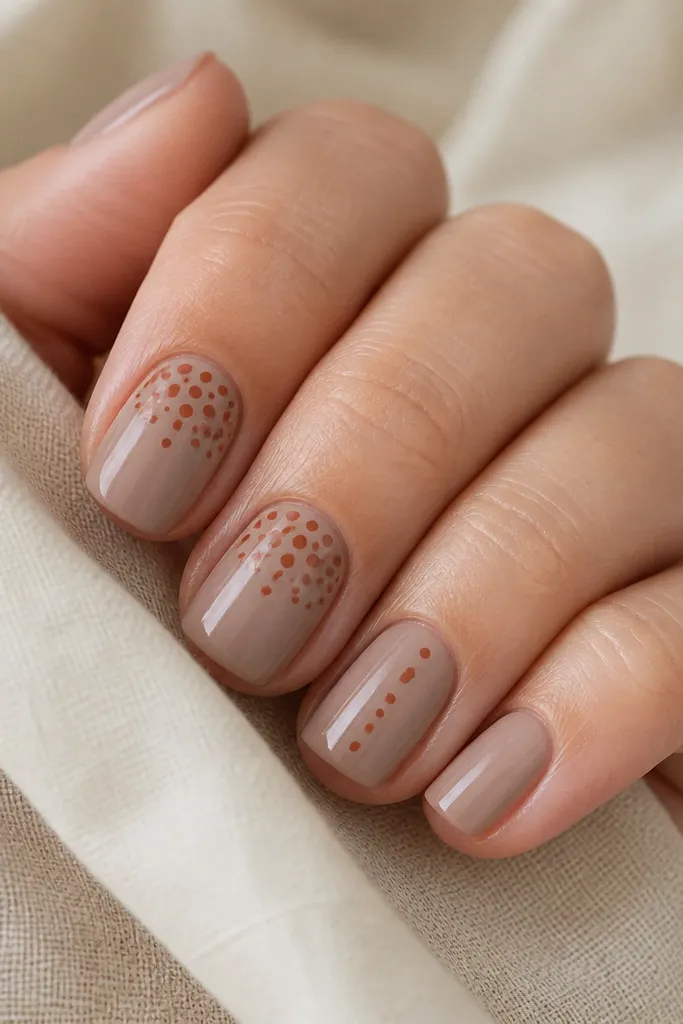
Dots are the fastest way to get an autumn pattern that still looks artsy. I use a warm taupe base because it makes terracotta look like it belongs — it doesn’t clash the way bright orange can on short nails. Place the dots slightly off-center and vary the dot sizes from small to medium so it feels organic, like leaf fall. This flatters most skin tones because the base is neutral and the accent color is warm. It’s great for school, errands, and days when you want something cute but you’re not trying to match every outfit. The principle is spacing: dots that cluster near the cuticle look intentional and don’t require perfect alignment across the nail.
Paint two thin coats of warm taupe and cure or let dry fully. Use a dotting tool to place 4 to 6 terracotta dots on each accent nail, starting near the cuticle — keep the cluster about 1/3 of the nail width. On one nail, switch it up with a vertical trail of 5 dots that starts thicker near the cuticle and gets smaller as it moves toward the tip. Let everything dry, then add a glossy top coat that slightly merges the dots so the pattern looks smooth. If you want extra fall vibes, add one tiny dot in a deeper brown on the ring finger cluster.
Editor's noteRotate the dotting tool angle — a flatter angle makes rounder dots that look cleaner on short nails.
Skip thisDon’t overcrowd — dense dot patterns turn muddy on small nail surfaces.
4. Olive Micro-Stripes on Cream
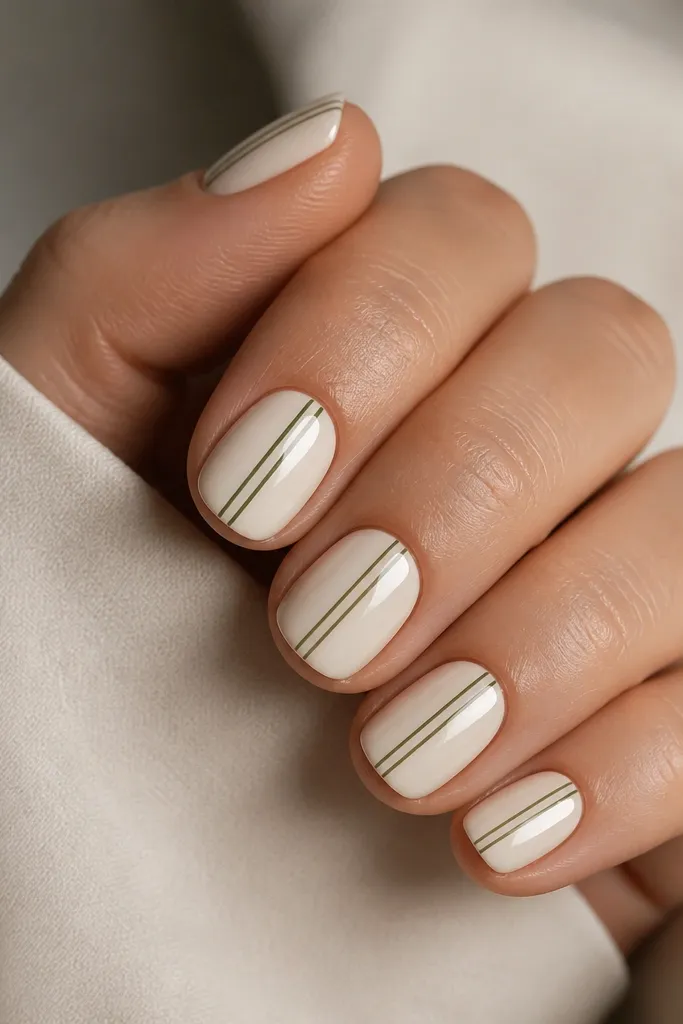
This is the low-effort design I reach for when I want fall nails that still feel neutral. Olive green looks especially good on short nails because it reads earthy and pairs with denim, knits, and boots. The cream base keeps it bright and clean instead of heavy, which matters when your nails are small. I’ve worn this on fair skin and on deeper skin tones — it always looks crisp because the stripes are thin and high-contrast. For office days and winter prep, it feels calm but still seasonal. The principle is restraint: keep the pattern minimal and place stripes vertically so your nails look longer.
Start with a creamy off-white base and do two thin coats so it’s opaque. With a striping brush, paint two vertical micro-stripes in olive green starting about 1 millimeter from the cuticle and ending just before the tip. Keep the stripes narrow — around the width of a hair — so it doesn’t look like a thick band. On your ring finger, offset one stripe slightly toward the side so the set doesn’t look too uniform. Top coat everything with a glossy finish and make sure the brush touches the edges of each stripe so they don’t lift.
If your stripe paint is thick, wipe the brush on the side of the bottle — thin paint makes straighter lines.
Avoid horizontal stripes on short nails — they shorten the nail visually.
5. Burgundy Velvet-Effect Accent (No Sponge Drama)
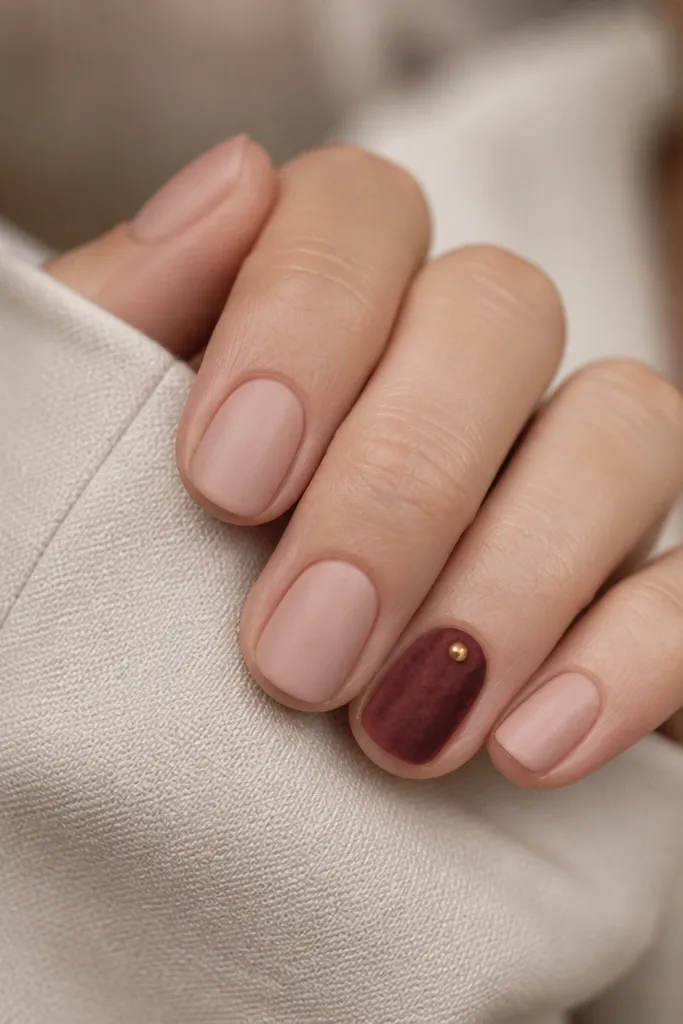
Matte nude plus a burgundy velvet effect looks like you wore a sweater that costs too much money. I like doing this with a velvet powder or velvet gel topcoat on only one or two nails, because short nails need breathing room to look intentional. Burgundy flatters cool undertones and also looks great on warm skin when you keep the base sheer. The tiny gold dot near the cuticle adds warmth and makes the design look more “jewelry” than “plain polish.” This is perfect for dates, holiday parties, and nights when you want your hands to look soft and expensive. The principle is texture contrast: matte base, velvety accent, and one small metallic detail.
Paint all nails with a sheer nude base and apply a matte top coat after curing. On the accent nail, apply the velvet gel/topcoat and then dust the velvet powder according to the product instructions, focusing the powder more heavily in the center so it looks plush. Tap off excess and cap the edges with a thin layer of the velvet topcoat so it doesn’t shed. Add one tiny gold dot near the cuticle on the ring finger using a dotting tool and gold polish or chrome gel. Finish with a matte-friendly top coat only if your velvet product allows it; otherwise, keep it as-is for the soft texture.
Editor's noteDust velvet powder over a piece of paper and funnel it back — it saves product and keeps your counter clean.
Skip thisDon’t put velvet on every nail — on short nails it turns heavy fast.
6. Caramel Swirl on Cocoa Base
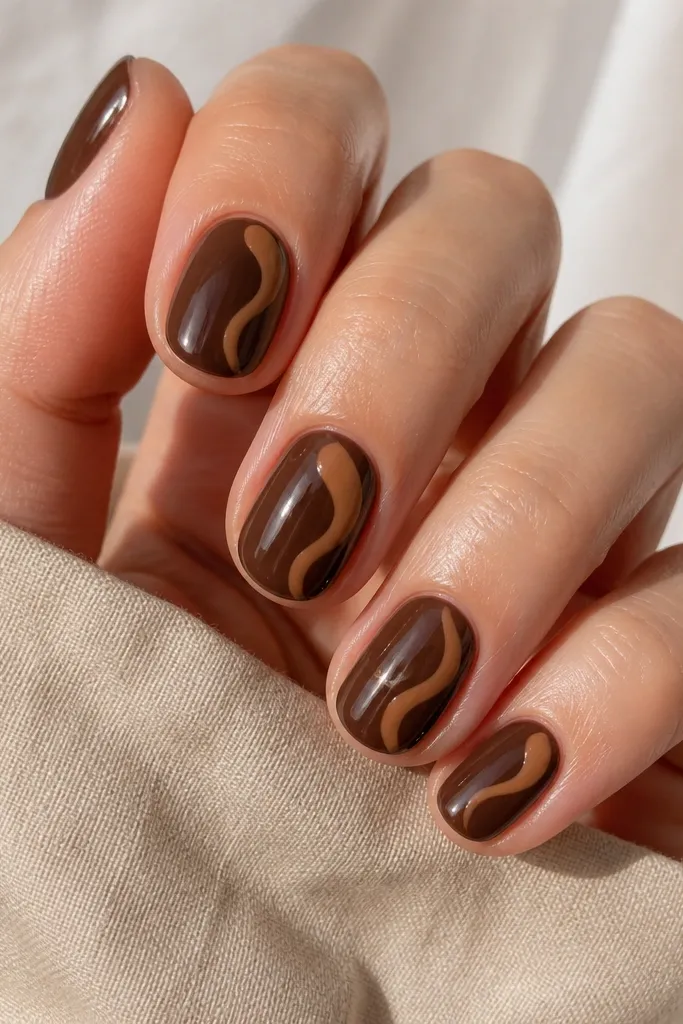
Swirls look complicated, but this one is doable because it’s a single sweeping curve. Cocoa brown is deep fall comfort, and caramel swirl lines make it feel warm and not overly dark. I like this on short nails because the swirl starts near the cuticle, so your eye reads the design from the nail bed out — it doesn’t require full-length coverage. It’s flattering on both light and darker skin tones because the swirl is bright enough to show up but not neon. Wear it with long sleeves and gold jewelry — the caramel color echoes metal tones. The principle is single-stroke design: one curve per nail, with thick-thin variation for a hand-drawn feel.
Paint two coats of glossy cocoa brown and let it level. With a thin detail brush, place a small caramel dot near the cuticle on each nail — about 1 millimeter in diameter. From that dot, pull a single curved line that goes toward the sidewall, then back slightly toward the center, making a loose “S” swirl. Keep the swirl thickness about twice the width of a hair so it stays readable. On the ring finger, thicken the swirl slightly and add one tiny star-shaped accent in dark bronze or gold. Seal with a glossy top coat, and cap the swirl edges so it stays smooth.
Editor's notePractice the swirl on a scrap nail or paper first — your first attempt on real nails is where mistakes happen.
Skip thisAvoid thin caramel lines — they disappear on short nails and look like smudges.
7. Mustard Tip with Chocolate Outline
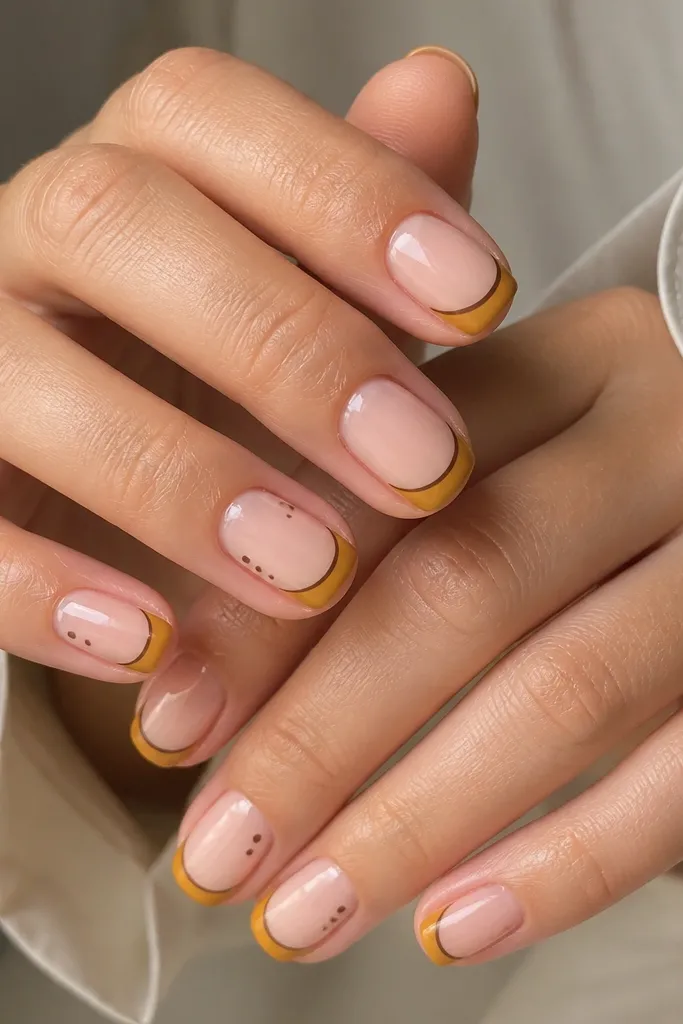
This design is bold in a way that still reads fall. Mustard yellow is one of the fastest ways to say “autumn” without adding leaves or pumpkins, and the chocolate outline makes it look intentional instead of playful. I’ve worn it with sweaters and long coats, and it always gets compliments because the outline creates a crisp border on a small nail surface. It works on most skin tones — fair skin looks bright and sunny, while deeper skin tones look rich and warm. For casual weekends and quick date nights, it’s a fun change from the usual burgundy. The principle is framing: fill the tip with color, then add a thin dark line so the shape stays sharp.
Start with a sheer nude base and cure or dry fully. Paint the tip mustard yellow, keeping the curve similar to your natural nail smile — on short nails, keep the tip fill around 2 millimeters thick. Next, take chocolate-brown polish on a striping brush and trace the outer edge of the mustard tip, starting at one sidewall and ending at the other. On one accent nail, add a single small mustard dot on the side of the nail near mid-length. Finish with a glossy top coat that covers the outline so it doesn’t catch on fabric.
Editor's noteUse a striping brush that’s slightly angled — it makes the outline curve smoother than a flat brush.
Skip thisAvoid painting mustard too close to the cuticle — it can look like a nail stain on short nails.
8. Taupe Base with Burnt Umber Diagonal Accent
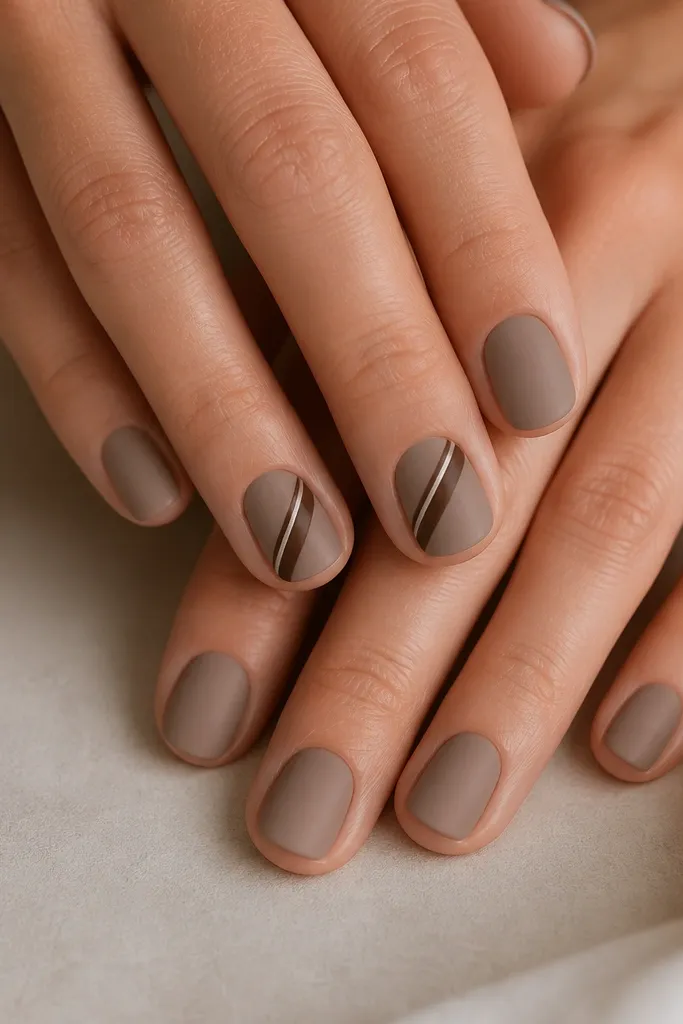
Diagonal accents are my favorite trick for making short nails look longer. A matte taupe base keeps everything soft and wearable, while a burnt umber diagonal band adds fall depth without needing multiple colors. The small lighter highlight line makes the diagonal read like a “cut” rather than a blob. This style flatters different skin tones because taupe sits in that neutral zone, and umber is warm and earthy. It’s great for fall work outfits because it doesn’t scream for attention, but it still looks like you did something. The principle is single diagonal placement: one band, one highlight, and matte base so it looks intentional.
Apply two coats of matte taupe and let it fully dry or cure. On your chosen accent nails, paint a diagonal burnt umber band that starts about 2 millimeters from the lower left sidewall and ends near the upper right edge of the nail. Keep the band thickness about the width of a pencil eraser on the nail — thick enough to see, thin enough to stay neat. Add a thin lighter taupe line along one edge of the band to create a “glint.” Let it dry, then finish with matte top coat if you want the full look matte, or add glossy top coat only on the diagonal band for a mixed finish.
Mark the diagonal with one tiny dot on each end using a dotting tool, then connect the dots with the brush.
Avoid a diagonal band that runs edge-to-edge — on short nails it looks cramped and messy.
9. Glittery Copper Cuticle Frame
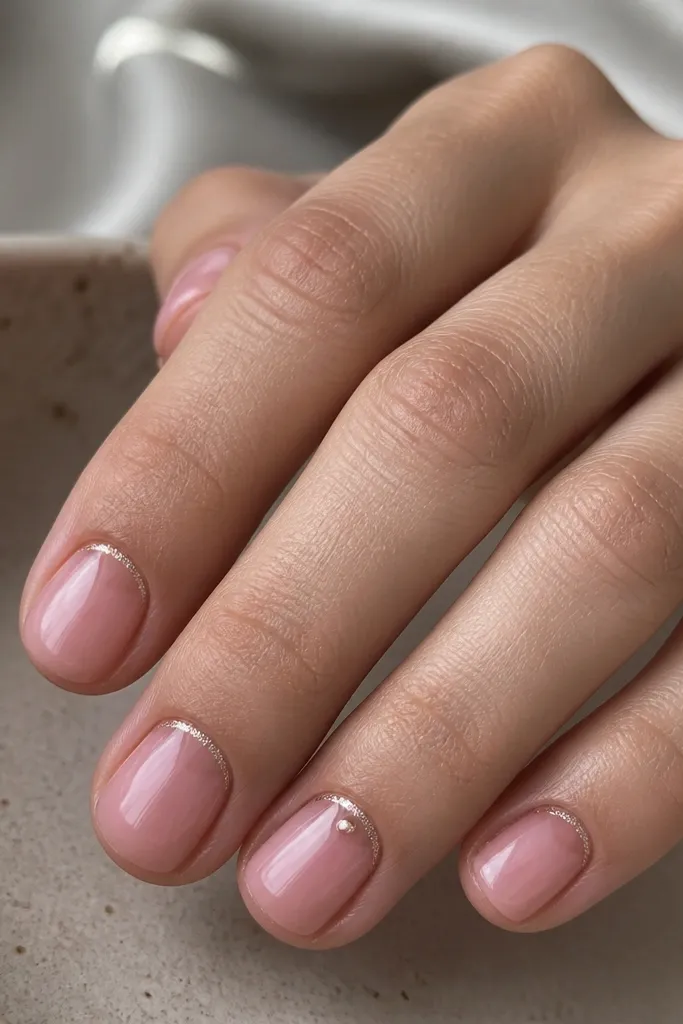
Cuticle framing is the easiest way to make short nails look glam without covering the whole nail. A sheer rose base keeps it flattering and light, and copper glitter gives that fall warmth without going full orange. I love this look because it grows out nicely — even when your nails get longer, the frame stays near the cuticle where it belongs. It looks great on fair, medium, and deep skin tones because copper matches warm metal tones and doesn’t wash out. Wear it to dinners, parties, or any day you want something sparkly but still clean. The principle is thin placement: glitter stays in the frame, so it looks like jewelry not like fallout.
Start with a sheer rose base coat and cure fully. Use a thin brush or the edge of a liner brush to paint a copper glitter arc around the cuticle, leaving a small gap in the center so the frame doesn’t turn into a blob. Keep the arc about 1 millimeter thick — you should still see skin-tone through the sheer base. On one accent nail, add one copper dot centered inside the arc. Seal with a top coat that controls texture; if your glitter topcoat is too thick, use two lighter coats instead of one heavy one.
If glitter polish is chunky, dab it onto a palette first, then pick up tiny amounts with the brush for a cleaner frame.
Avoid thick glitter at the sidewalls — it catches on hair and makes the nail feel rough.
10. Forest Green Leaf Tips with One Accent Nail
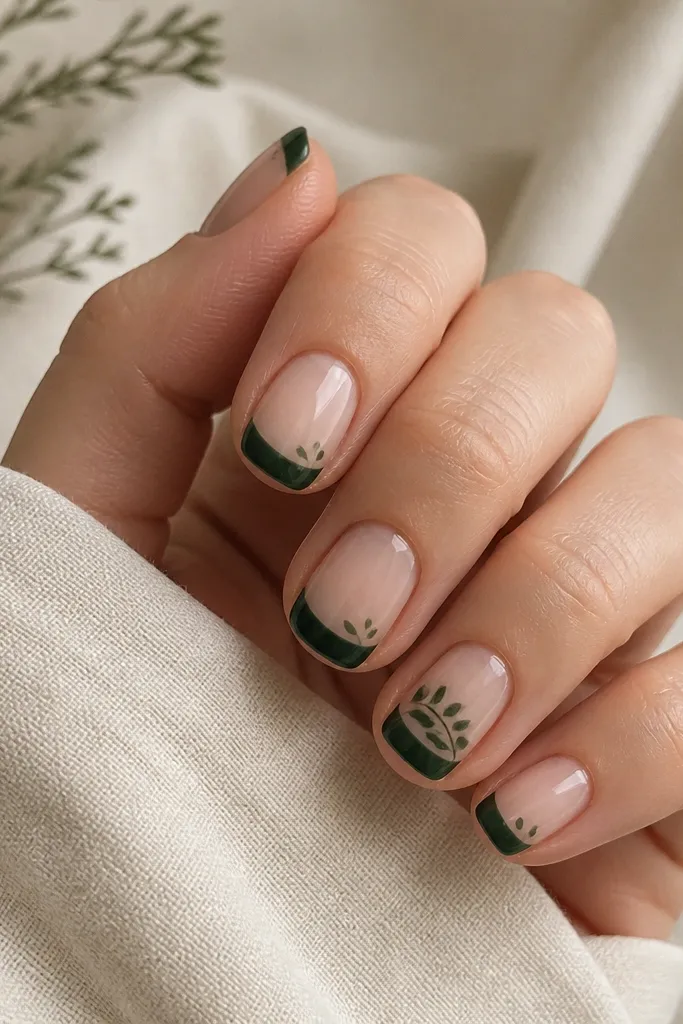
Leaf tips read autumn instantly, but you don’t need full leaf drawings on every nail. I like a forest green tip because it’s grounded and looks great with browns and cream knits. The leaf marks are done as little teardrops or dots so they stay low-effort and still look like foliage. This flatters short nails because the leaves sit at the tip edge, not across the whole nail where details get cramped. If you have fair skin, the green pops; if you have deeper skin, it looks rich and crisp. The principle is concentrated detail: keep leaf shapes small and only on the tip, then do one stronger cluster on the accent nail.
Paint a sheer nude base and let it dry or cure. On most nails, paint a forest green tip, keeping it about 2 millimeters thick and slightly rounded at the outer edge. While the tip is still tacky, place tiny leaf marks along the outer edge using a dotting tool — start with a teardrop shape by touching down and dragging a hair-width. On the ring finger accent, add a small cluster near the cuticle: 6 to 8 tiny leaf marks in a loose fan shape. Top coat everything with a glossy finish, and lightly cap the leaf marks so they don’t snag.
Editor's noteUse a toothpick for leaf marks if you don’t have a dotting tool — drag the tip just a little for a teardrop edge.
Skip thisAvoid big leaf drawings — on short nails they look like stickers instead of nail art.



