
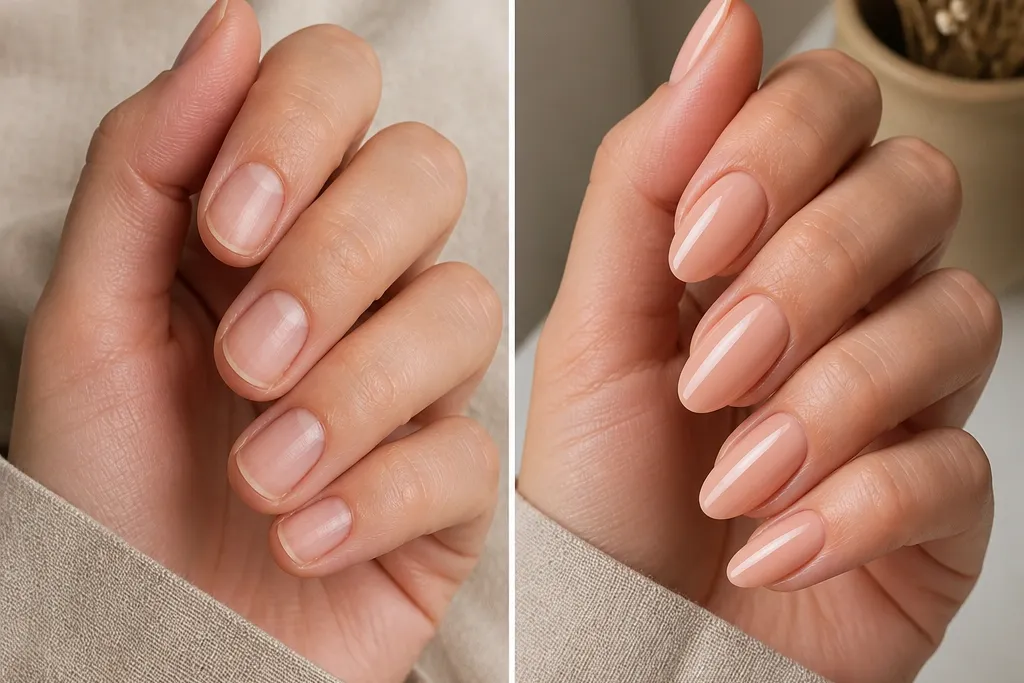
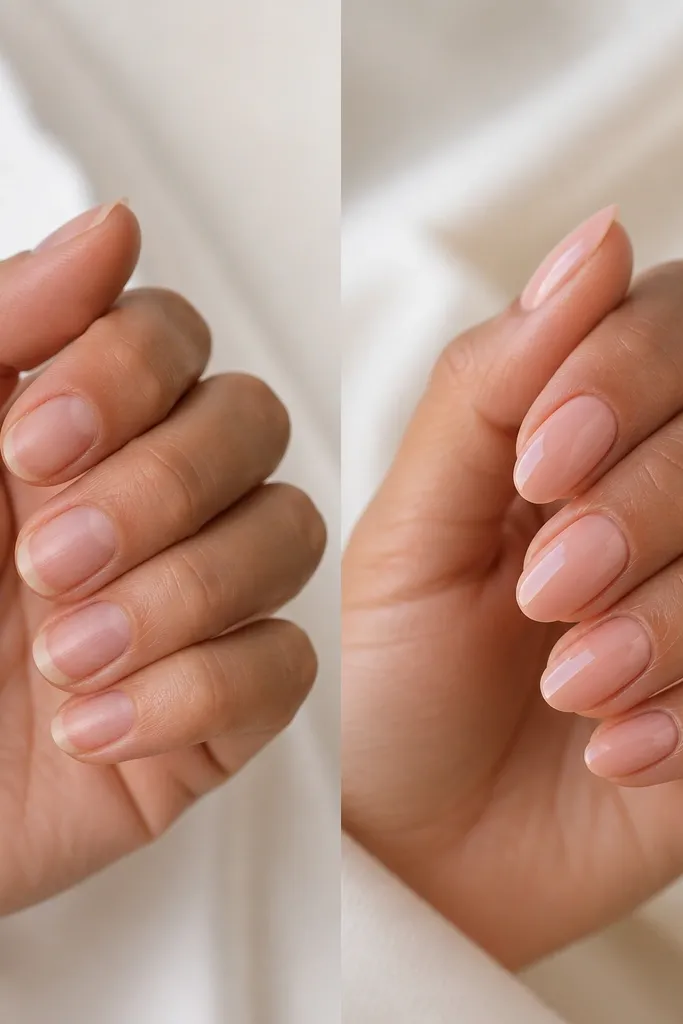
1. Milky Nude + Sharp Micro French (short-to-medium glow-up)
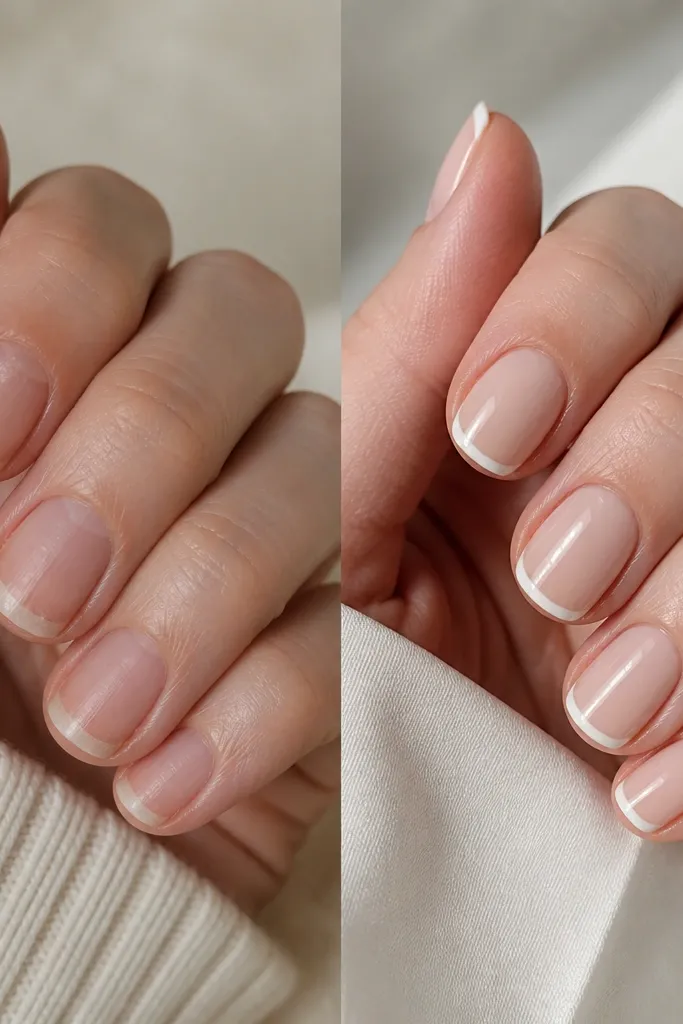
This transformation is for when your nails look “see-through” or ragged at the tips. I start with a milky nude BIAB that matches a cool-to-neutral skin tone, then I keep the French line thin so your nail still looks natural. The squared oval shape makes fingers look longer without feeling too pointy. In photos, the milky base reflects light softly, so the micro French stays sharp instead of looking dusty. It flatters most hands, especially if you wear rings and want the nail to look clean even in low light.
Step 1: After prep, apply a thin BIAB layer, cure, then add a second layer only where you need structure — mostly the center and free edge. Step 2: Build your apex slightly forward (not dead-center) so the nail sits flat and doesn’t flex. Step 3: File into a squared oval, then use a fine liner brush to paint a micro French line about 1-2 mm from the tip edge. Step 4: Clean up any wobbles with a small flat brush dipped in acetone, cure, then finish with a high-gloss topcoat and cap the free edge.
Editor's noteIf your French line gets thick, switch to a liner brush with a shorter bristle length and keep the nail angled under the lamp so the paint doesn’t flood.
Skip thisDon’t paint the French right up to the sidewalls — leave a tiny gap so it doesn’t smear and lift at the corners.
2. Cinnamon Brown BIAB with Clear Jelly Overcoat (warm fall shine)
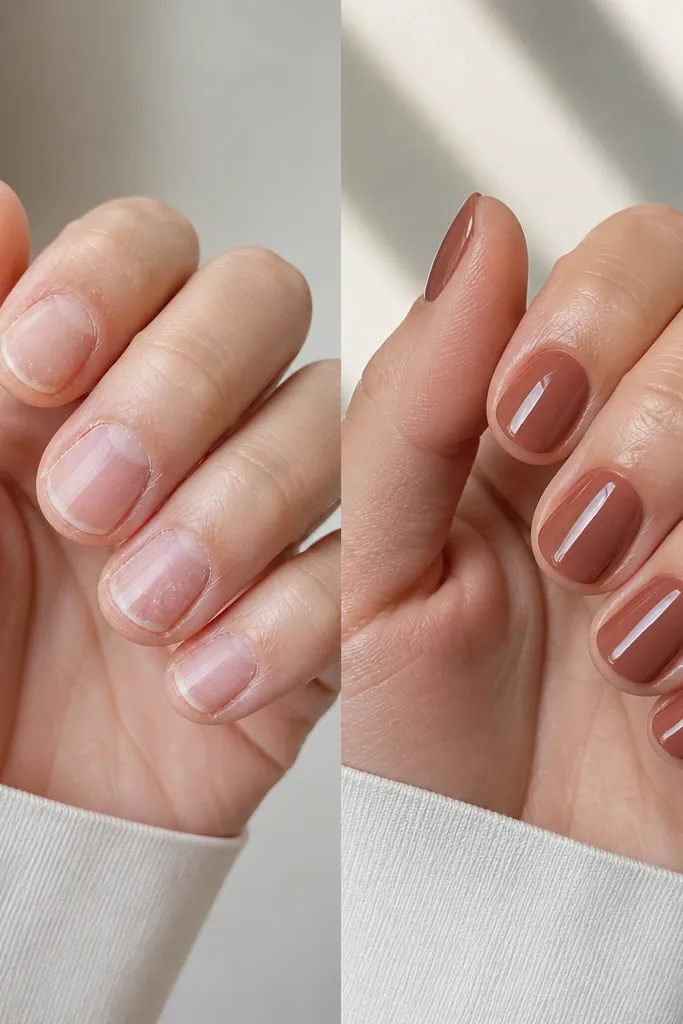
This set makes short nails look richer without going dark and heavy. The cinnamon brown is warm and forgiving, and the clear jelly overcoat adds that “depth” you usually only see in salon photos. I like this on medium to deep skin tones because the warmth makes your hand look healthier, not washed out. The jelly finish also hides tiny filing marks — you’ll see a smoother look even if your surface isn’t perfect. It’s a great choice if you want a transformation that still feels wearable for everyday.
Step 1: Apply BIAB in a warm cinnamon shade, keeping it thicker at the apex and tapering toward the cuticle so it doesn’t bulk up. Step 2: Cure, then file into an almond shape with a gentle taper — aim for an even side profile. Step 3: Wipe dust off, then apply a clear jelly layer over the entire nail, using a lighter touch near the cuticle line. Step 4: Cure again, then topcoat for extra gloss and cap the free edge with a thin seal.
Editor's noteFor a more glassy look, do the jelly layer in two thin coats instead of one thick coat — thick jelly can look cloudy while curing.
Skip thisDon’t skip the dust wipe between filing and jelly — grit under jelly makes the finish look grainy.
3. Classic Red BIAB with Tiny Cuticle Dot (clean and bold)
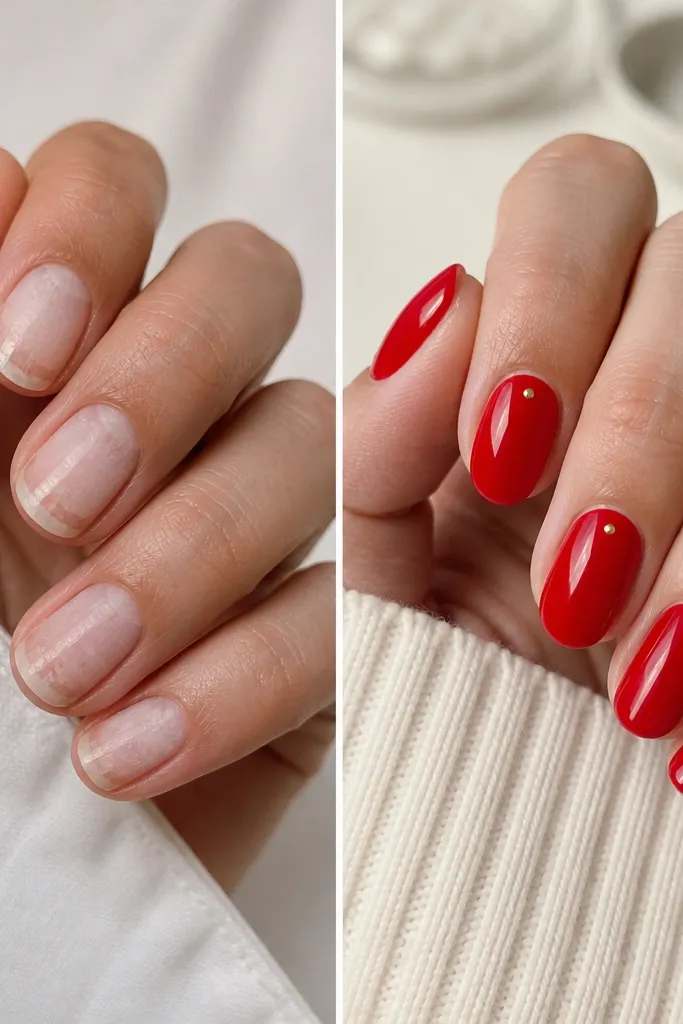
A solid red BIAB transformation is about precision, not complexity. I keep the red opaque but not chalky, and I place a tiny dot near the cuticle — just enough to make the set look intentional. Oval nails flatter hands that are broad at the knuckles because the shape softens the overall look. The glossy finish makes the red look like it’s sealed glass, which distracts from any minor nail line texture. This style looks amazing for dates, holidays, and weeks when you want your hands to look “done” fast.
Step 1: Build with red BIAB in thin layers — I do two coats so it covers evenly without streaks. Step 2: Cure each layer, then file into an oval with a smooth curve at the tip so the red doesn’t look jagged. Step 3: After wiping, place a minuscule dot using a dotting tool and a micro amount of white or nude gel near the cuticle line. Step 4: Cure, then apply one smooth coat of topcoat, making sure to cap the free edge and seal around the dot area.
Editor's noteUse a dotting tool that’s slightly smaller than you think — oversized dots pull focus in a way that looks messy.
Skip thisDon’t let red flood the cuticle — you’ll get a raised ridge that catches on gloves and lifts.
4. Buttercream 3D Gel Swirl + Nude Base (dessert nails without the bulk)
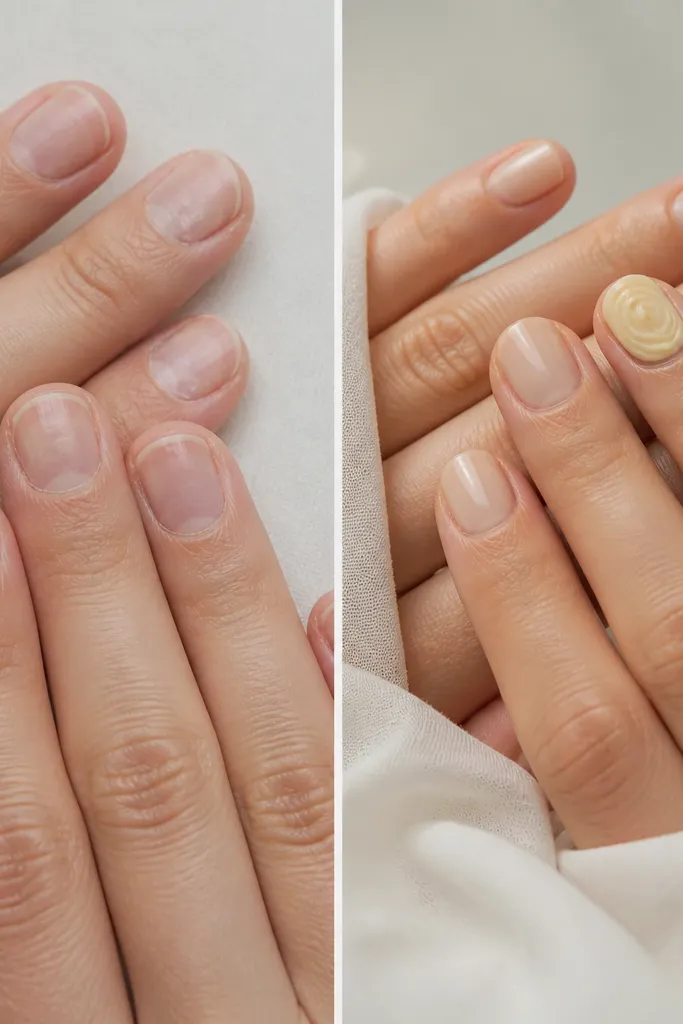
This is the set I do when someone wants “cute” but hates heavy, chunky art. The nude base keeps it clean, and the buttercream 3D gel swirl adds movement without covering the whole nail. I’ve found the color works best on fair to light-medium skin because the yellow reads warm instead of neon. The trick is keeping the swirl narrow so it looks like a ribbon, not a blob. It also photographs well because the gel catches light on the raised edges.
Step 1: Apply nude BIAB and cure, then file into a short almond so the accent has room to sit. Step 2: On the accent nails, apply a thin topcoat or base layer where the swirl will go, cure if your system requires it. Step 3: Build the swirl with 3D gel using a fine spatula or sculpting tool, starting thin at the ends and thicker at the center. Step 4: Cure, then cap the entire nail with a smooth topcoat — two thin coats if you feel any texture.
Editor's noteIf the swirl sinks after curing, it’s usually too thick — make the swirl in two builds and cure between them.
Skip thisDon’t place 3D gel too close to the sidewalls or it will snag and lift first.
5. Grey Taupe Smoke Ombre (grown-up neutral transformation)
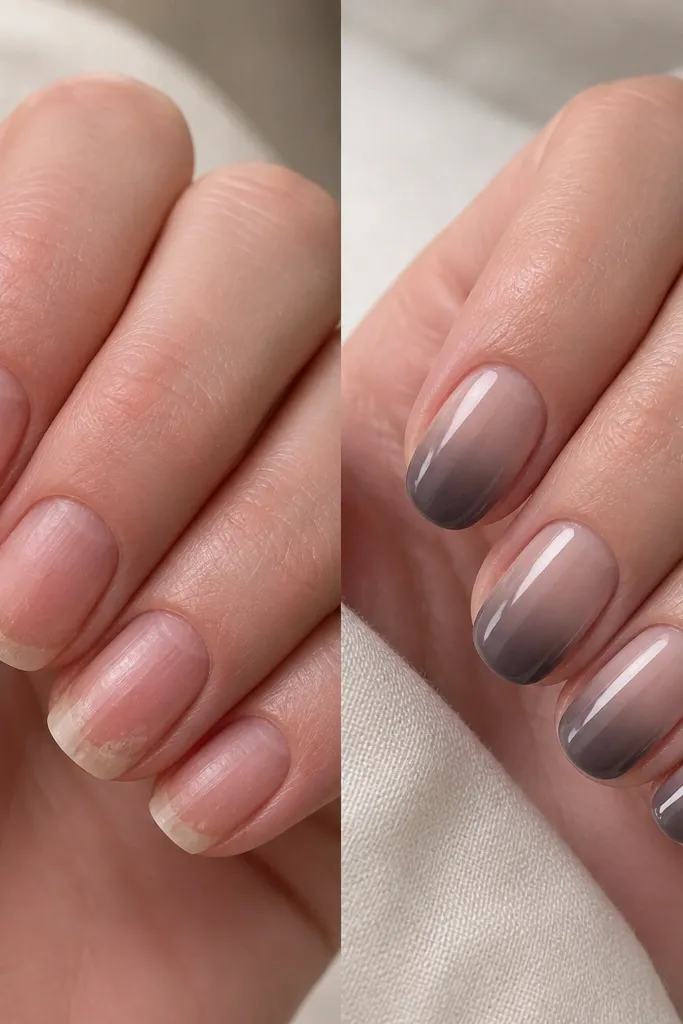
Ombre looks tricky until you see how BIAB changes the blend. This grey taupe smoke ombre gives a “soft filter” effect on your nails — it hides small imperfections and makes the nails look longer. I like it on medium and tan skin tones because grey can look harsh, but taupe keeps it wearable. The fade reads smooth because the BIAB base is even and the ombre is built in layers. It’s a strong choice for people who want a design that still feels office-friendly.
Step 1: Build your BIAB base in a sheer nude or nude pink, cure, then file into a medium oval. Step 2: Sponge a grey taupe gel at the free edge using a makeup sponge cut small — press lightly, then pull upward for the fade. Step 3: Cure, then repeat one more thin sponge layer for density at the tips. Step 4: Clean the edges with a brush and acetone, then topcoat in two smooth coats to lock the blend.
Editor's noteWipe the sponge surface on a paper towel between nails so the fade stays soft instead of patchy.
Skip thisDon’t overwork the blend while it’s wet — it turns chalky and loses that smoky gradient.
6. Clear Builder + Realistic Pink Crystal Tips (glam but tidy)
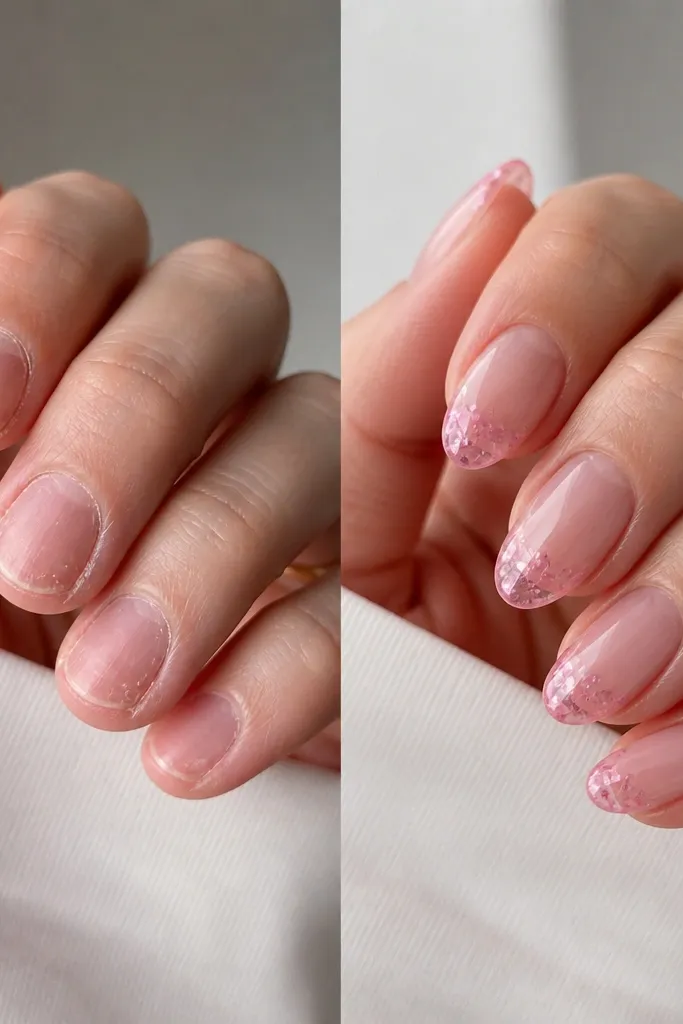
This set works when you want sparkle without covering your whole nail. The clear builder base keeps the nail looking fresh and lengthened, while the pink crystal tips add the “event” factor. I’ve done this on clients who hate thick glitter because it feels gritty — crystals look sharper and cleaner. It’s flattering on shorter nails because the effect stays at the tip, so your hand doesn’t feel weighed down. Pink crystals also pair well with cool skin tones, since they read icy rather than orange.
Step 1: Apply a clear builder BIAB and cure, then file into a short-to-medium oval. Step 2: Place a thin gel layer at the free edge only, keeping it narrow so the crystals don’t spread. Step 3: Press pink crystal pieces onto the gel and adjust placement with tweezers so the tips look like an even line. Step 4: Cure, then seal with a clear gel or topcoat that you apply carefully over the crystals to smooth the surface.
Editor's noteUse the tweezers to build one edge first, then fill the center — you get a cleaner tip line that doesn’t wander.
Skip thisDon’t skip sealing — unsealed crystals catch on hair and clothing and pop off.
7. Olive Green Satin Finish (matte base, glossy highlights)
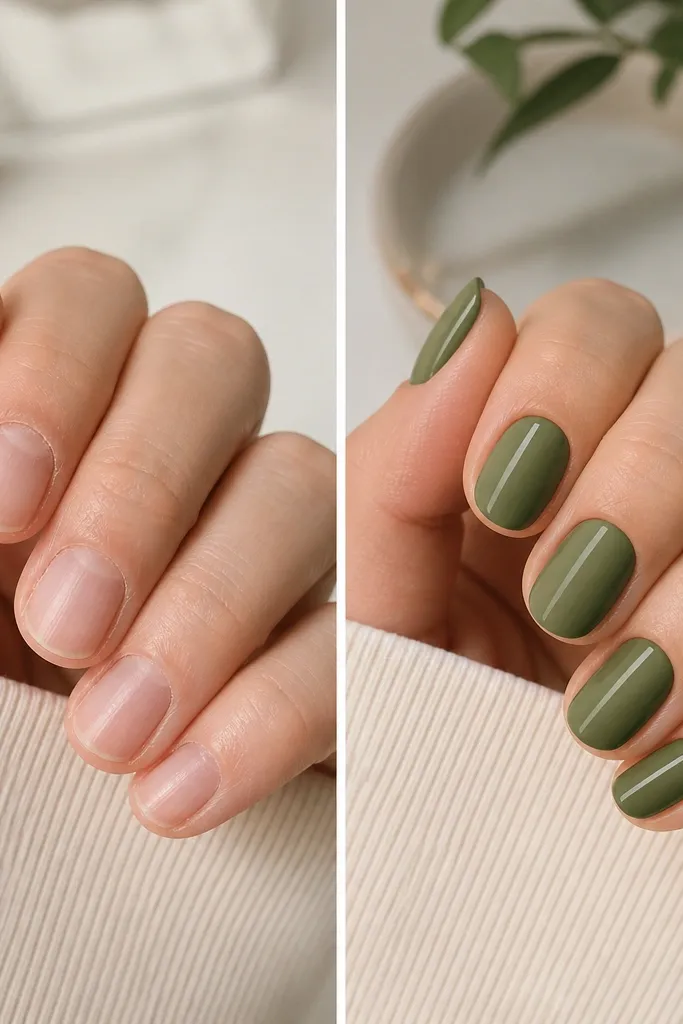
This is the style I do when someone wants color that doesn’t scream. Olive green is flattering on a wide range of skin tones, and the satin finish makes it look soft and expensive. I add a glossy highlight stripe down the center so the nail still catches light in photos. The BIAB base smooths out ridges, so even if your nail plate is uneven, it looks even under the satin. It’s also great for people who hate mirror chrome — it’s more subtle and still interesting.
Step 1: Build with olive green BIAB, cure, then file into a medium almond for a smoother silhouette. Step 2: Apply matte topcoat to the whole nail and cure. Step 3: With a fine brush, paint a narrow glossy stripe using a regular gloss topcoat or gel gloss, then cure. Step 4: Clean edges with a thin brush and wipe-off solution, then do one final gloss coat only on the stripe area.
Editor's noteIf your satin topcoat looks patchy, thin your application and avoid stacking thick product near the cuticle.
Skip thisDon’t apply gloss on top of matte without wiping — dust makes the stripe look hazy.
8. Nude Pink BIAB with Raised Halo Glitter (subtle sparkle)
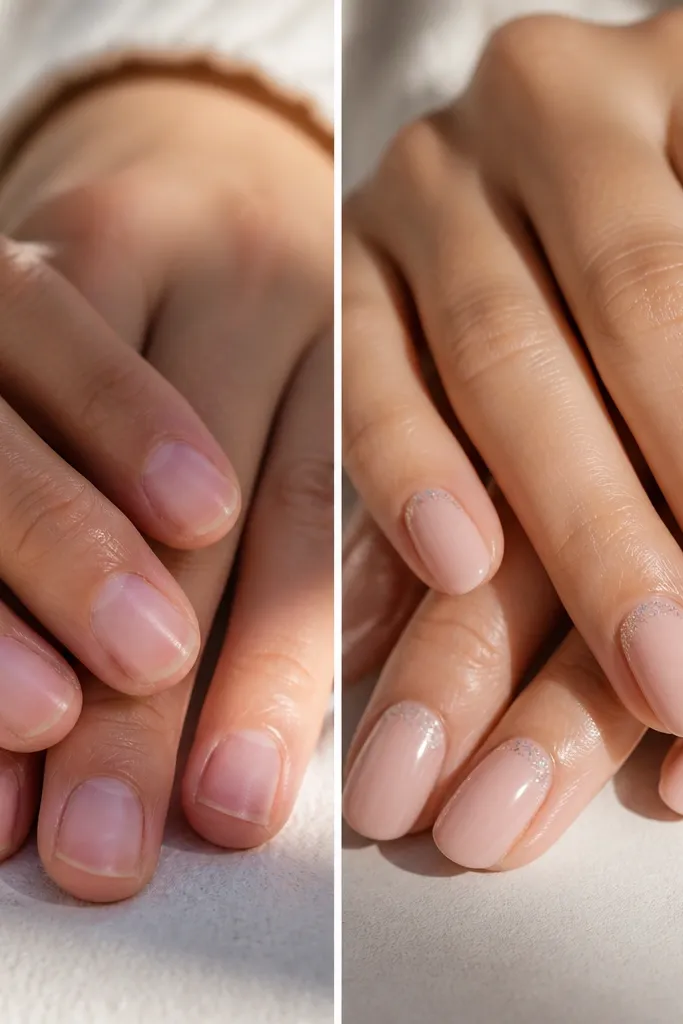
This is a “pretty in real life” design. The nude pink base makes your nails look clean and healthy, and the halo glitter sits near the cuticle where it brightens your whole hand. I like the raised halo because it looks like a gentle frame rather than scattered sparkle. It’s flattering if you have smaller nail beds, since the halo draws attention upward. The raised gel also helps the glitter stay put longer than a flat glitter dusting.
Step 1: Apply nude pink BIAB, cure, and file into a rounded oval. Step 2: Brush a thin gel ring around the cuticle line, leaving a tiny gap so it doesn’t flood. Step 3: Sprinkle fine glitter into the ring, then press lightly and cure. Step 4: Cap the nail with a thin topcoat or clear gel, then do a full topcoat pass for a smooth surface.
Use fine glitter that’s almost powdery — chunky glitter makes the halo look lumpy and uneven.
Don’t pack glitter too thick at the cuticle or it will create a ridge you can feel.
9. Black Line Art on Clear BIAB (graphic, modern edge)
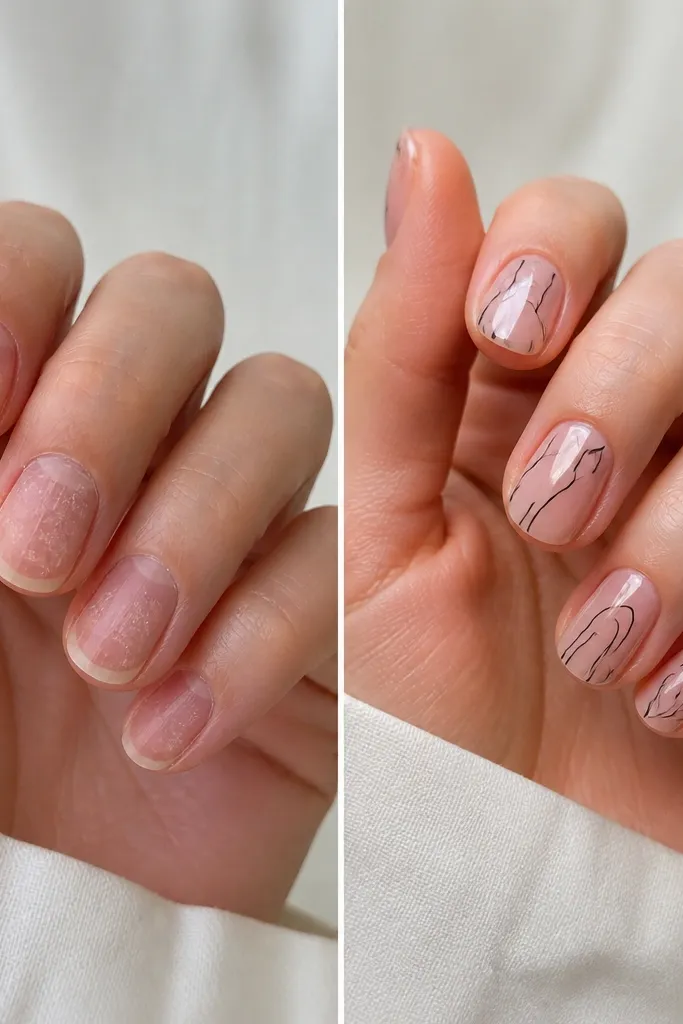
Clear BIAB with black line art looks sharp because the nail bed stays visible and the lines stay clean. I use thin black gel for contour-style lines — it makes the nails look longer without extra color. This flatters people with warm or neutral skin tones because black contrasts cleanly and doesn’t turn the nail gray. The glossy topcoat makes the lines look printed, not painted. It’s also forgiving if your nails aren’t perfectly even, since clear BIAB doesn’t hide texture — it smooths it.
Step 1: Apply clear BIAB, cure, then file into an almond shape with a narrow tip. Step 2: Wipe with slip solution if your system needs it, then paint line art with a striping brush. Step 3: Keep the lines mostly centered and leave space near the sidewalls so the design looks intentional. Step 4: Cure, then apply topcoat in two coats, making sure you seal the line edges so they don’t catch or lift.
Editor's notePractice the line on a clear plastic sheet first, then transfer the motion to the nail — speed makes lines cleaner.
Skip thisDon’t use a thick brush for line art — thick black turns into a blob once topcoat spreads it.
10. Peach Jelly BIAB with Micro Hearts (sweet but controlled)
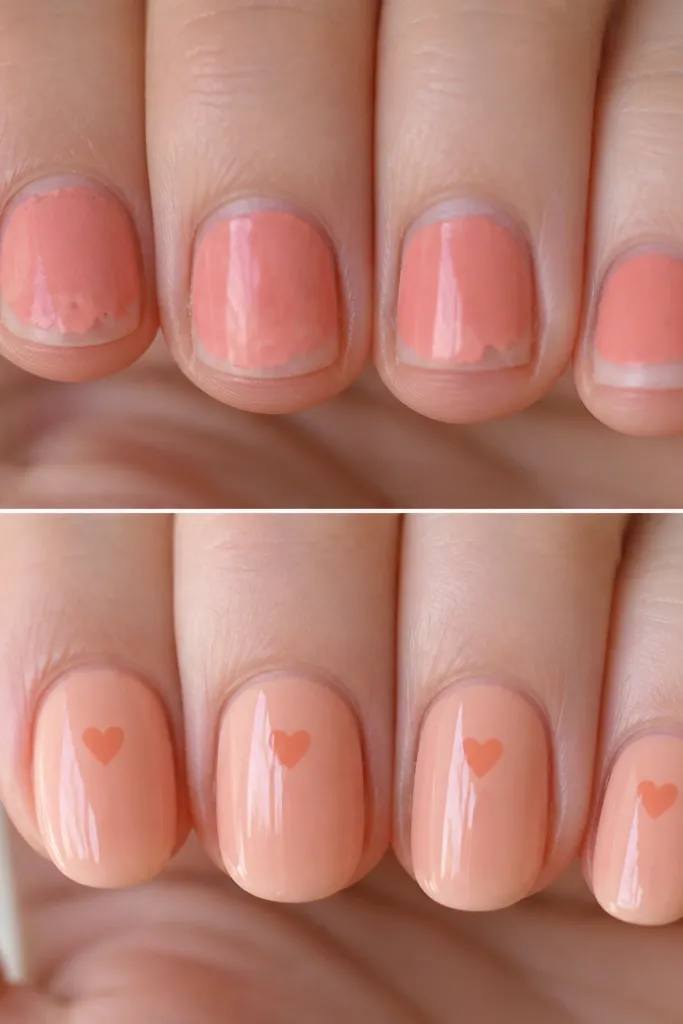
Peach jelly is the easiest way to get that “healthy nail” look with a hint of color. The jelly effect makes the nail look juicy and smooth, and the micro hearts add charm without turning it into a theme. I like it on fair to deep skin because peach shifts in tone — it reads soft on light hands and warmer on deeper skin. The hearts sit near the top half so the nail still looks long. This set is a great choice for spring, birthdays, and weeks you want your hands to look playful.
Step 1: Apply peach jelly BIAB in one thin layer, cure, then add a second layer only if you need more opacity. Step 2: File into a short almond or squoval and keep the surface smooth. Step 3: Place tiny hearts with gel using a dotting tool or set them with a small amount of gel, then cure. Step 4: Topcoat in two coats, and cap the free edge so the jelly doesn’t lift at the tips.
Editor's noteIf the hearts move, use a tacky layer for placement, then cure before adding topcoat.
Skip thisDon’t put hearts too close to the cuticle — they can lift first and look crooked.
11. French Fade Tips in Blush Pink (classic with a twist)
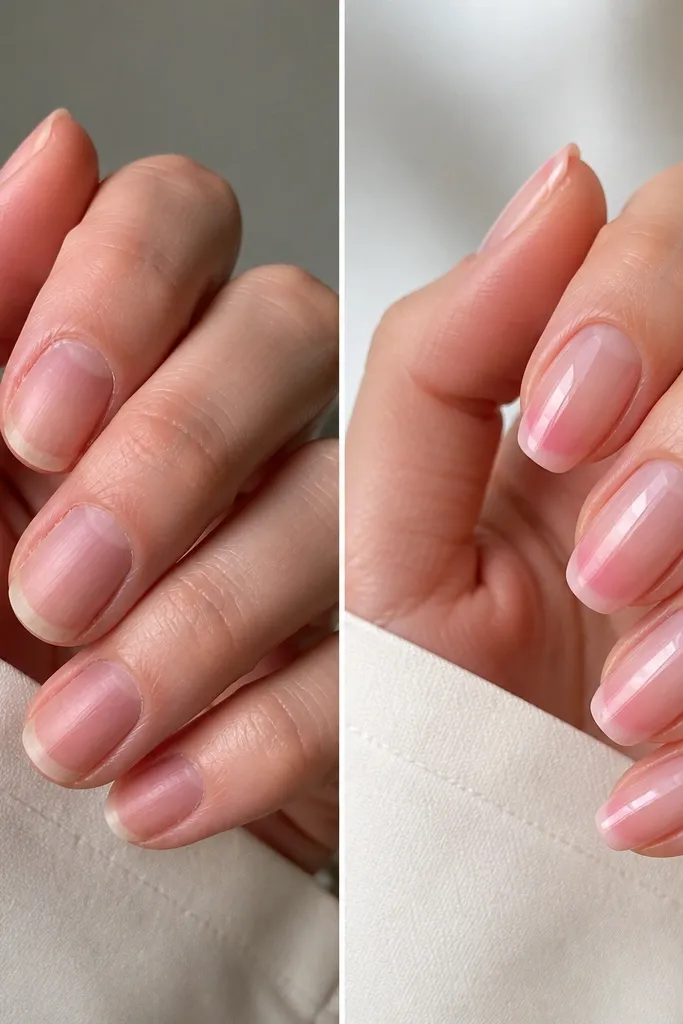
This is my go-to when someone wants French but doesn’t want that hard white line. The blush fade looks natural and hides tip imperfections because the color blends instead of stopping at a sharp edge. It flatters hands with shorter nail beds since the sheer base keeps the nail looking longer. I also love this for people who hate high-contrast designs — it’s gentle but still noticeable. In after photos, the fade looks smooth because the BIAB base is level and the blush is built in thin layers.
Step 1: Apply sheer nude BIAB and cure, then file into a rounded oval. Step 2: With a sponge or airbrush-style brush, apply blush pink gel at the free edge and feather downward. Step 3: Cure, then repeat with a slightly lighter blush for a smoother gradient. Step 4: Clean the sides, cure once more, and seal with glossy topcoat, capping the free edge with a thin bead.
Editor's noteKeep the blush fade narrow at first — you can build width, but you can’t un-broaden once it’s cured.
Skip thisDon’t skip a level filing step before you sponge — uneven base makes the fade look patchy.
12. Champagne Chrome on Nude BIAB (one-step glow)
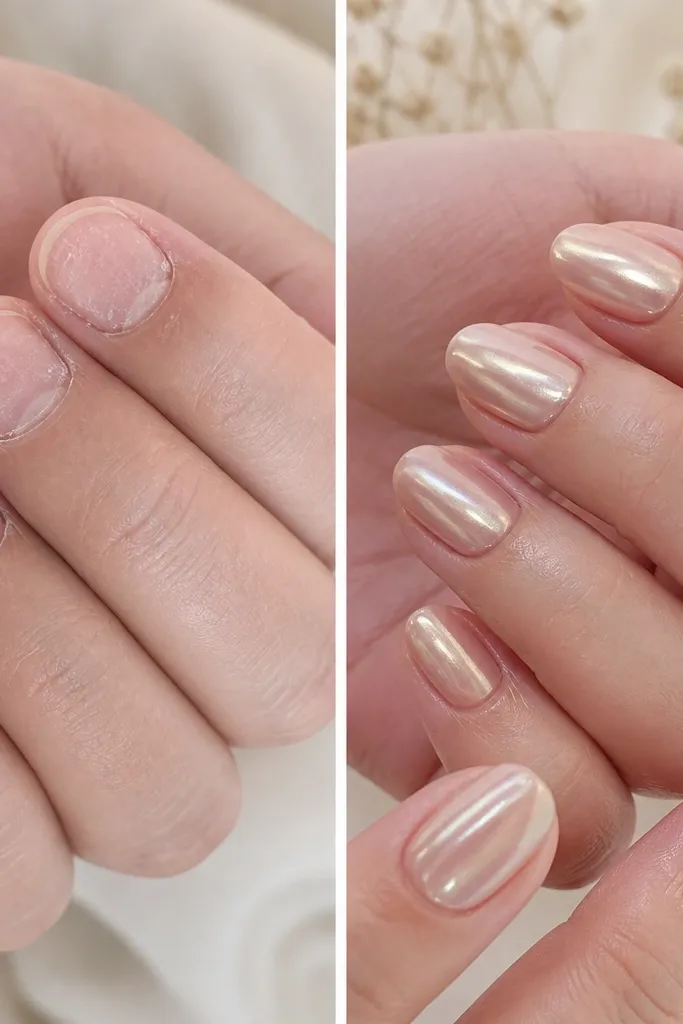
Champagne chrome gives you that “expensive manicure” look fast, and BIAB makes it easier to keep the surface smooth. I use a nude BIAB base so the chrome reads warm instead of icy. On fair skin, champagne looks soft and flattering; on deeper skin, it pops without turning neon. The after nails look extra even because the chrome reflects everything — any bumps show up instantly, so the BIAB leveling matters. This is the set I recommend when you want a transformation that looks dramatic in just a few minutes.
Step 1: Apply nude BIAB, cure, then file into a clean almond or squoval and buff lightly to remove visible lines. Step 2: Wipe dust thoroughly, then apply a chrome base or sticky layer where the chrome will go. Step 3: Press champagne chrome powder with an applicator sponge, then burnish gently until it turns mirror bright. Step 4: Seal with a thin topcoat made for chrome so the shine stays reflective and doesn’t dull.
If the chrome looks patchy, it’s usually a dust problem — wipe longer, not harder.
Don’t use a thick topcoat on chrome — it dulls and can cause a cloudy finish.
13. Teal Marble Veins on Sheer Nude (swirl control)
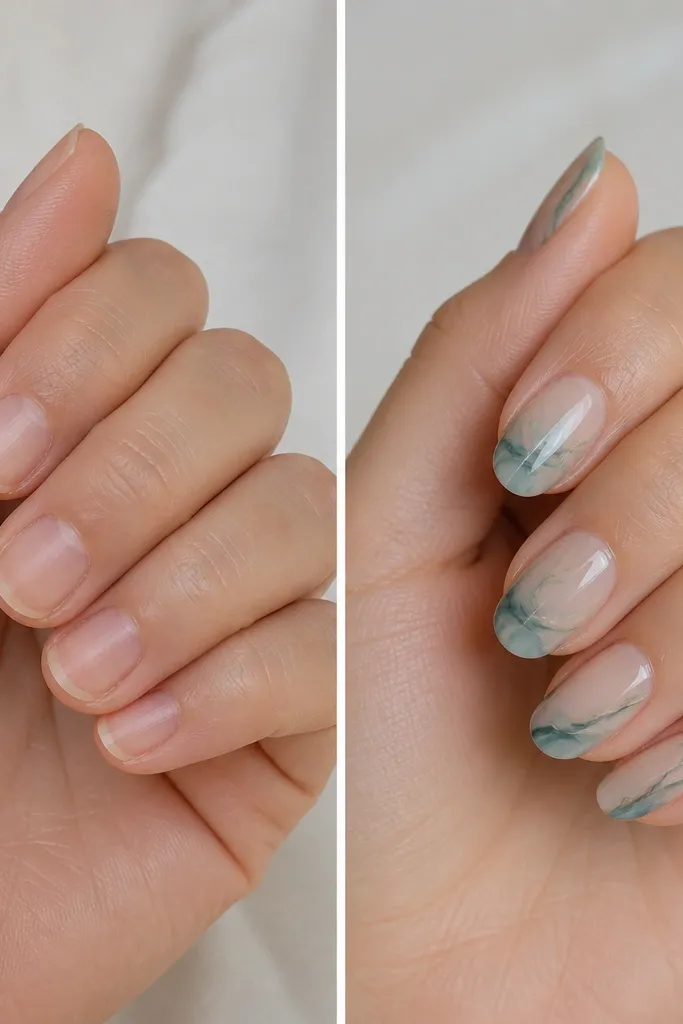
Marble nails look hard until you anchor the design on a sheer base. Teal marble on sheer nude looks clean and modern, and it doesn’t overpower your hand like solid teal can. I like this for medium and deep skin tones because teal has enough contrast to pop without going harsh. The BIAB matters because the veins need a smooth surface to look like stone, not like paint. When it’s done right, the marble veins look layered and dimensional even without heavy 3D work.
Step 1: Apply sheer nude BIAB, cure, then file into an almond shape with a smooth tip. Step 2: Paint thin white or pale gel veins first, cure, then add teal veins over them with a striping brush. Step 3: Use a small dotting tool to soften vein edges so it blends like marble — keep it subtle near the center. Step 4: Cure, then topcoat in two coats, sealing around the cuticle and capping the free edge so the marble doesn’t chip.
Editor's noteLet the first vein layer cure completely before adding teal — wet layers bleed and the marble turns muddy.
Skip thisDon’t outline the entire nail with thick veins — it makes it look like a cartoon instead of stone.
14. Matte Nude with Glossy Side Stripe (grown-up contrast)
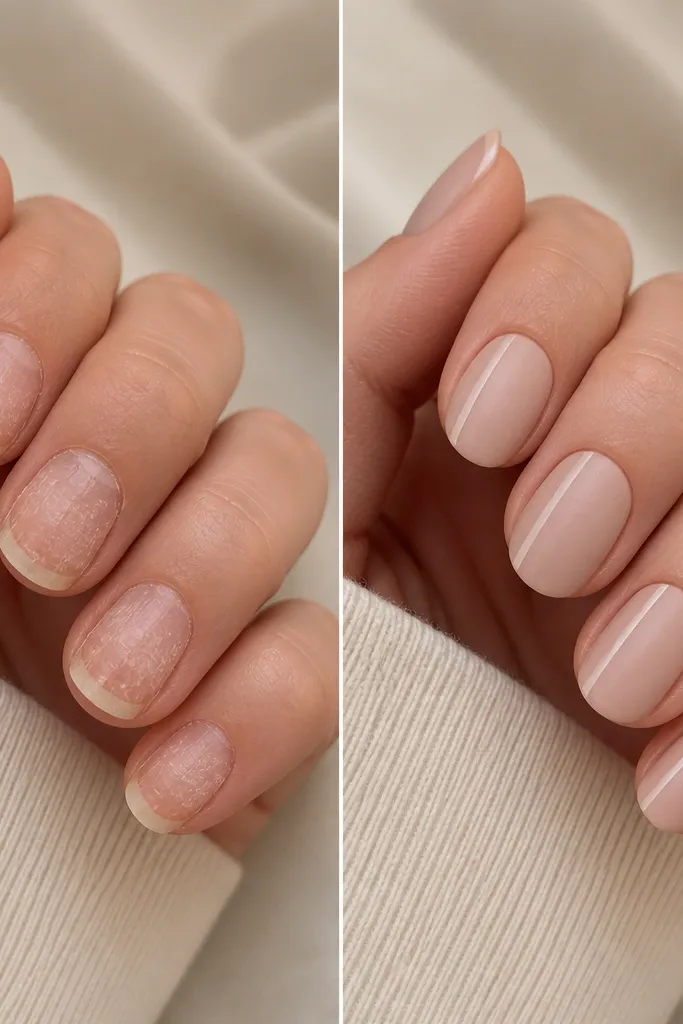
This is the design I use when someone wants something classy that still looks “styled.” Matte nude hides small surface imperfections, and the glossy side stripe adds a clean line that makes the nail look longer. It’s flattering on hands with shorter nails because the stripe creates a vertical focus. I’ve done it on fair and deeper skin tones and it always reads elegant because nude stays close to your natural nail color. The contrast also makes the cuticle area look extra neat, which is where people notice flaws first.
Step 1: Build nude BIAB, cure, then file into a squoval so the nail edges look sharp but not pointy. Step 2: Apply matte topcoat to the whole nail and cure. Step 3: With a fine liner brush, paint a glossy stripe along one sidewall only — keep it about 1 mm wide. Step 4: Cure, then apply a thin gloss topcoat over just the stripe to lock it in and smooth the edges.
Editor's noteGuide your stripe with the sidewall line on the nail — don’t freehand from the center.
Skip thisDon’t drag the matte brush over the stripe area before it’s fully cured — it smears.
15. Clear Pink Ombré + Ultra-Skinny Gold Foil Line (wedding guest energy)
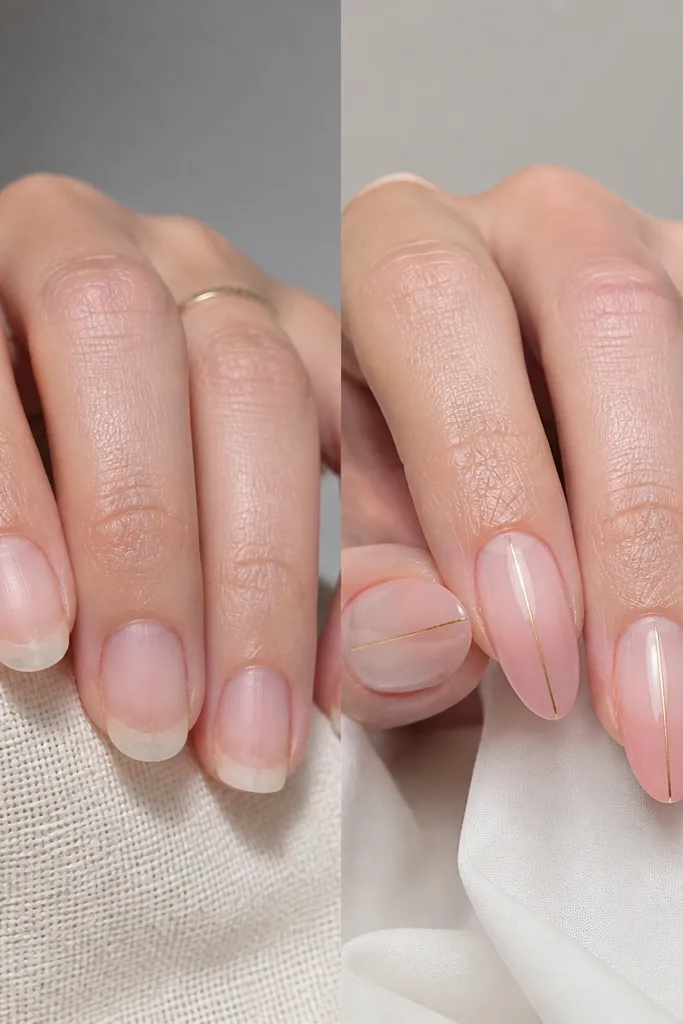
This set gives you the “fresh manicure” look without needing thick color. The clear pink ombré makes the nails look airy, and the ultra-thin gold foil line adds just enough sparkle to feel special. It flatters nearly everyone because the base is transparent and the line is centered, which visually lengthens the nail bed. I’ve worn this look to events and gotten compliments from people who normally don’t notice nails. The BIAB base keeps the ombré smooth and stops that patchy gradient you get when you sponge over uneven nails.
Step 1: Apply clear BIAB, cure, then add a sheer pink ombré at the free edge using a sponge or ombré brush. Step 2: Cure and repeat for smoother coverage, keeping the pink density strongest at the tip. Step 3: Place ultra-thin gold foil strip down the center with a small amount of clear gel, pressing gently so it stays straight. Step 4: Cure, then cap with a clear gel layer and finish with glossy topcoat, making sure the foil edges are sealed.
If the foil won’t stick, apply a tacky layer first — foil hates dry, fully cured surfaces.
Don’t use wide foil strips — they make the nails look heavy and the center line stops looking elegant.
16. Purple Jelly with Black Micro Dots (night mode fun)
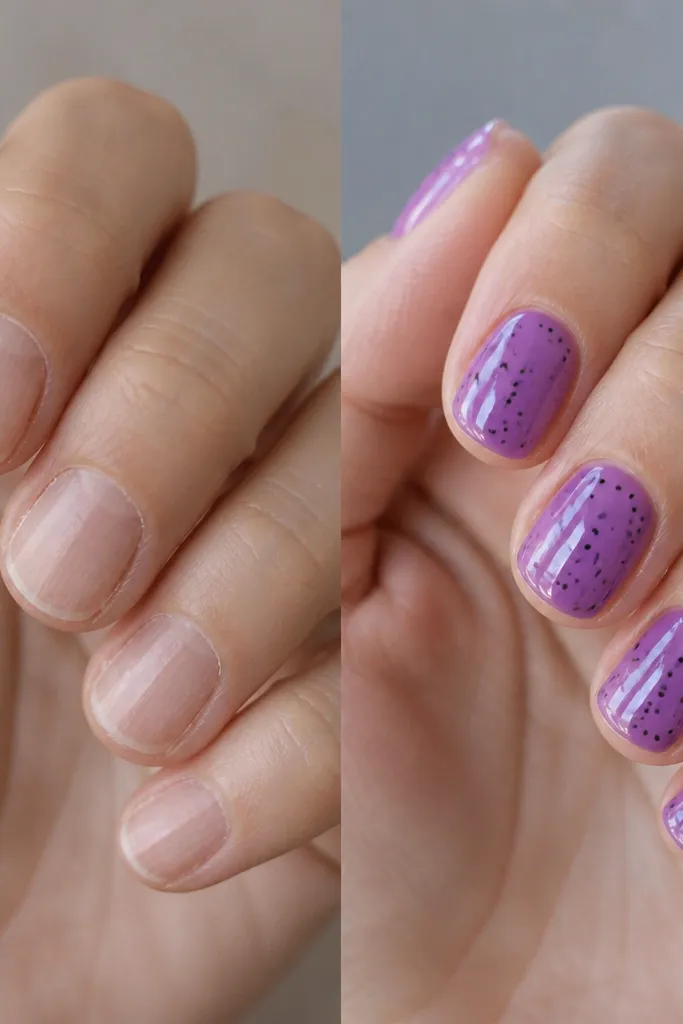
Purple jelly is playful but still flattering because it’s semi-transparent and doesn’t look like a hard block of color. The black micro dots make it feel graphic and “designed,” and the jelly finish keeps it looking smooth instead of gritty. I like this on light-medium skin for a bold contrast, and on deeper skin it still reads rich without turning brown. The BIAB leveling is key because dots highlight texture — a bumpy surface makes dots look uneven. This is a great transformation if you want something that looks fun in photos but still wears well.
Step 1: Apply purple jelly BIAB in two thin layers, cure each time, then file into a short almond. Step 2: Use a dotting tool dipped in black gel to place 3-6 micro dots per nail, spacing them so they don’t cluster at the same spot. Step 3: Cure, then cap the dots with a thin gel layer so they feel smooth. Step 4: Finish with glossy topcoat and seal the free edge with a careful bead.
Editor's noteCount your dots before curing — it’s easier to place 5 perfectly than to fix a crowded nail afterward.
Skip thisDon’t put micro dots too close to the cuticle line — they lift first and look messy quickly.



