
1. Cherry Red BIAB with Micro Gold Foil Tips
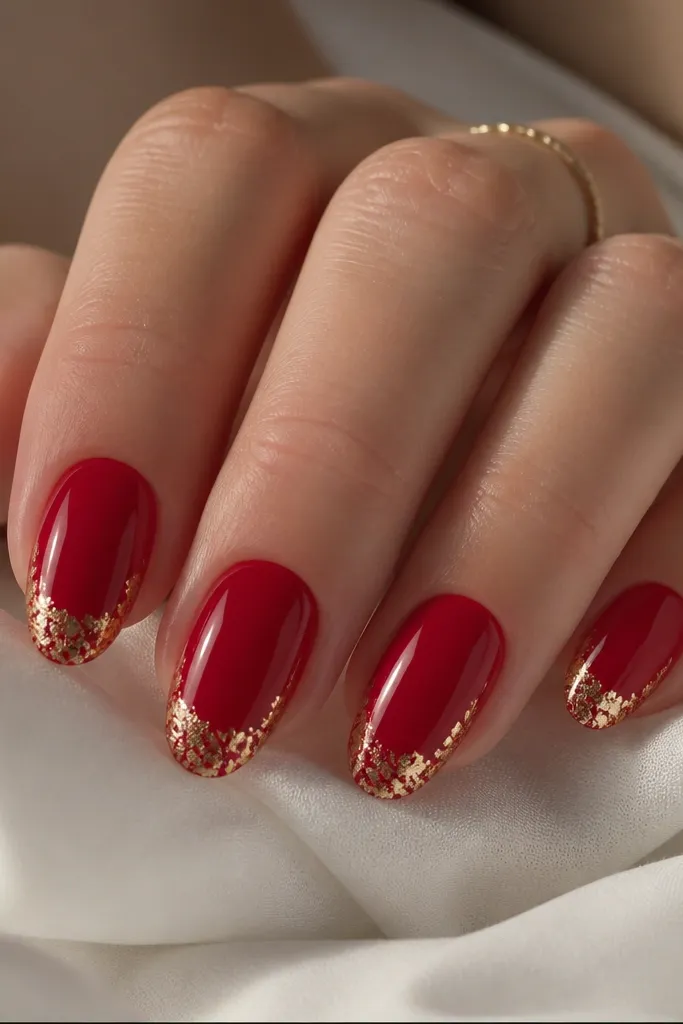
This design is for when you want Christmas without turning your nails into full-on glitter bombs. The cherry red looks clean and modern, especially on light to medium skin tones, and it flatters hands with shorter nail beds because the foil stays concentrated at the tip. I like micro gold foil because it catches light in tiny flashes instead of looking chunky. Keep the foil placement uneven but controlled — it mimics light reflecting off winter glass. The stylish part is the restraint: red coverage stays even, and gold only lives at the tips.
Start by applying a thin, even BIAB layer and curing fully. Shape and buff lightly, then paint cherry red on all nails in two thin coats, curing between coats. For the foil tips, dab a small amount of gel adhesive (or tacky layer from a base gel) only at the last 2-3 mm of the nail, then press micro gold foil with a flat silicone tool. Leave the center untouched so you get a clean negative space line. Seal with a thin topcoat in one smooth pass, then cure and wipe the tacky residue if your topcoat needs it.
Editor's noteIf your foil lifts at the edges, cure the adhesive longer and press each foil piece for 10 seconds before sealing.
Skip thisDon’t spread foil across the whole nail — it turns from “winter sparkle” to “craft glitter” fast.
2. Creamy White BIAB with Red Candy Cane Stripes
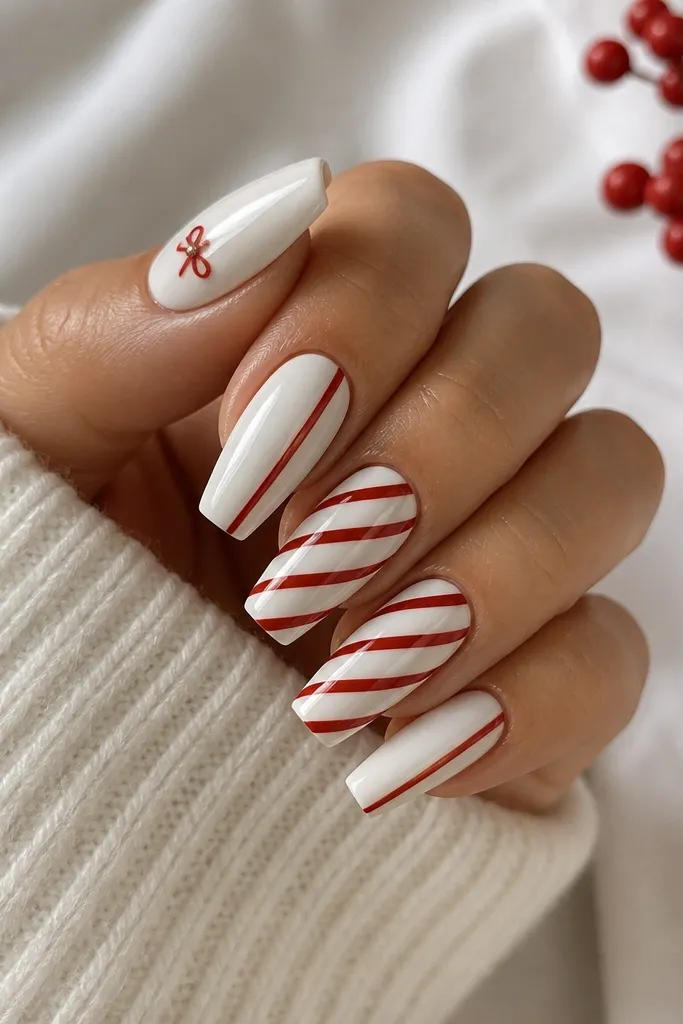
This one looks cute even when your nails are short, because the creamy white makes your skin look brighter and the red stripes read sharp. It flatters cooler undertones especially well, but warm undertones still pop because the white is creamy, not blue-toned. The candy cane stripes are the whole point, so you want them clean and consistent in thickness. I use this set for holiday dinners, because it looks festive without being loud. The principle here is crisp geometry: straight diagonal stripes with tiny placement details that guide the eye.
Apply BIAB and cure, then paint creamy white in two thin coats, curing each time. Use a gel liner brush or striping brush loaded with red gel polish, and draw one diagonal stripe from upper side to lower tip. For the curve, lightly arc the line with your wrist movement — don’t try to force a perfect S curve in one stroke. Add a second parallel stripe spaced about 1 mm away to form the candy cane look, then cure. Finish by sealing with a glossy topcoat and lightly cap the free edge so the stripes don’t catch on sweaters.
Practice the stripe on an old nail tip or a swatch card first — your hand learns the angle in 30 seconds.
Avoid thick gel for striping; it spreads and turns into a red smear.
3. Forest Green BIAB with Gold Star Dotting
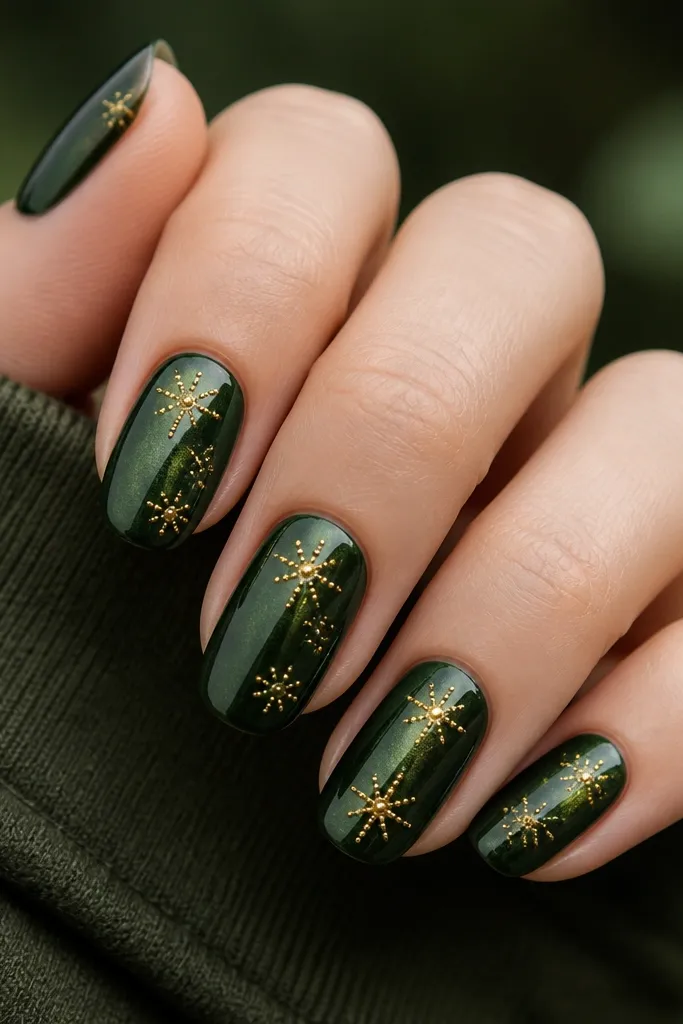
Forest green is the Christmas color that looks expensive when the design is simple. It flatters medium and deep skin tones because gold pops against the darker base, and it also looks great on pale skin when you want something richer than classic red. The star dotting style is forgiving — even if your stars aren’t identical, the overall winter pattern still looks intentional. I like placing stars in clusters so your nails look like they have a “night sky” effect without needing a full background art. The stylish principle is negative-space stars: you keep the center clean and let gold points do the work.
Start with BIAB, cure, then apply forest green gel polish in two thin coats. Cure fully and wipe clean so the gold sticks. For the stars, use a dotting tool and gold chrome gel or gold paint: make a small dot, then add four small dots around it to form a star, finishing with two tiny inner points for definition. Place clusters on two nails and do one single star on a third nail for variety. Seal with a glossy topcoat, but keep the topcoat thin over the stars so the shape stays visible.
Gold chrome gel looks best when you press it lightly with the dotting tool — too much pressure turns it into a blob.
Don’t drown the stars in topcoat; you’ll flatten the texture and lose the sparkle.
4. Red Velvet BIAB with Matte Topcoat and Glossy Bow Accent
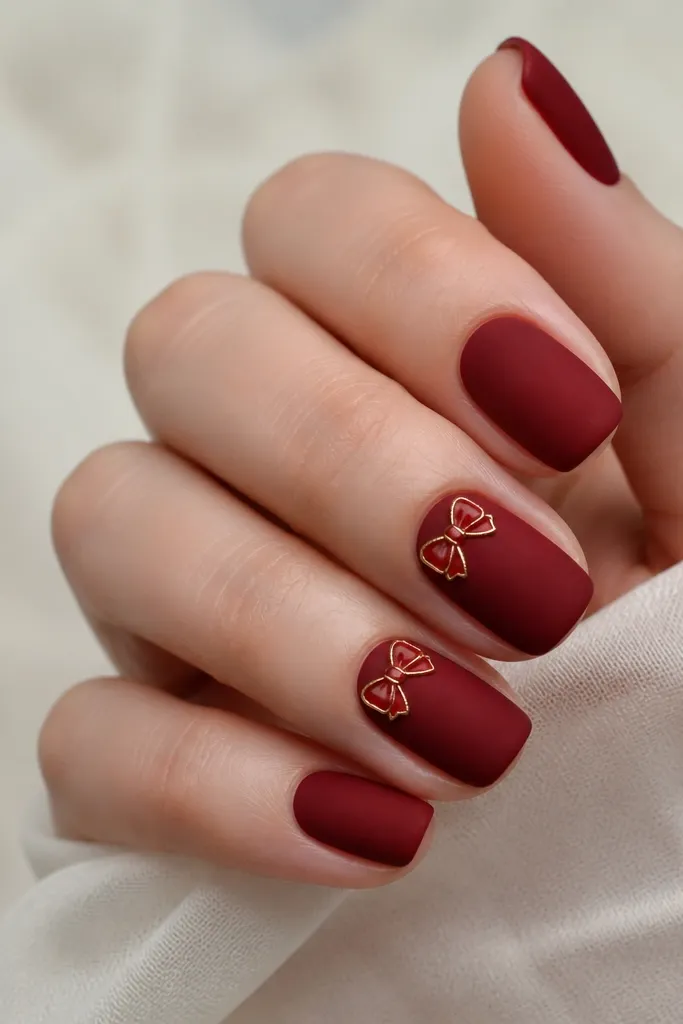
This is the set I reach for when I want Christmas nails to look classy instead of sparkly. The matte red velvet effect hides minor imperfections and makes the design feel soft and expensive. It flatters hands with wider nail beds because the matte finish reduces glare and keeps attention on shape. The glossy bow accent gives you contrast, so the set still reads festive in photos. The principle is texture contrast: matte base, glossy detail, and a thin gold outline to sharpen edges.
Apply BIAB and cure, then paint deep red gel in two thin coats. Cure and wipe, then apply a matte topcoat to every nail and cure again. For the bow accent, use a small striping brush to draw two loops near the cuticle and a tiny center knot, all in glossy red gel. Outline the bow with a thin gold paint line and cure. Finish by applying glossy topcoat only over the bow area, not the whole nail, so the bow stays shiny against the matte red.
If your matte topcoat makes the red look chalky, reduce the number of matte layers and keep them thin.
Don’t put rhinestones on a matte base unless you seal them well — they can catch and lift.
5. Ice Blue BIAB with Silver Snowflake Veins
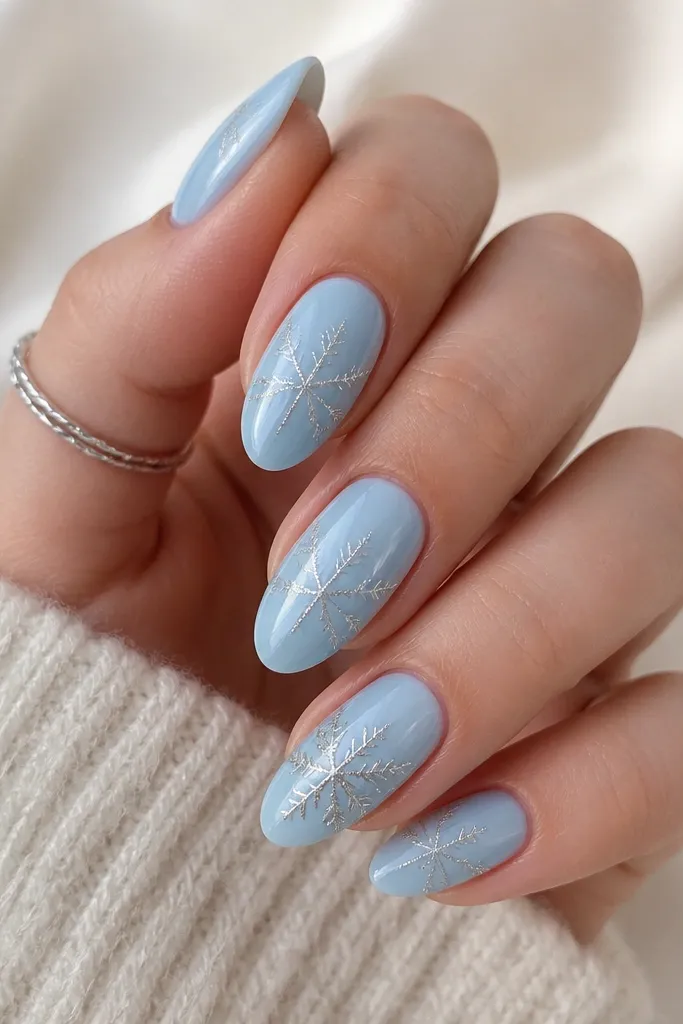
Ice blue makes Christmas feel fresh, and it looks especially good when you wear silver jewelry. It flatters light to medium skin tones by creating a cool contrast that makes fingers look longer. The snowflake vein style is delicate and modern, not cartoony, because the lines stay thin and airy. I like this design for office parties because it reads holiday without screaming “theme.” The principle is line weight: thin branches, consistent spacing, and one slightly larger snowflake to anchor the look.
Start with BIAB and cure, then apply ice blue gel in two thin coats. Cure and wipe, then use a fine liner brush with silver gel paint to draw a main vertical line down the nail center. Add two diagonal branches from the middle and then smaller side branches to create a snowflake outline. On your thumb or ring finger, make the snowflake bigger by adding extra branches, keeping line thickness the same. Seal with a glossy topcoat, using a light brush stroke so the silver lines don’t pool.
Editor's noteUse gel paint, not loose glitter, for silver snowflakes — gel paint stays crisp and doesn’t look gritty.
Skip thisAvoid over-thickening the lines; bulky snowflakes make the set look heavy.
6. Rose Gold BIAB with Red Glazed Swirl Tips
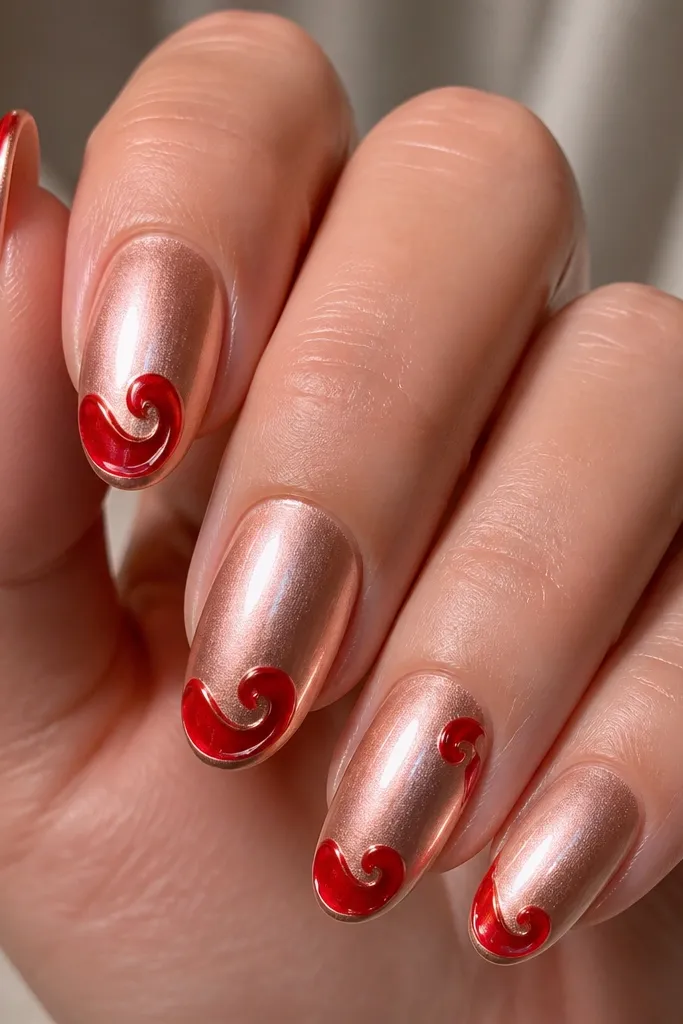
Rose gold + red is my go-to combo when you want Christmas warmth without going full traditional. It flatters warm undertones because the rose base looks like jewelry, and the red swirls add holiday punch. The glazed swirl tips look like candy glass and they photograph really well under indoor lighting. This design also works when your nails are short because the swirl stays at the tip, not across the entire nail. The principle is framing: keep a slim rose border so the swirl looks intentional and clean.
Apply BIAB and cure, then paint rose gold gel polish in two thin coats, curing between. For the glazed tips, use a small detail brush to paint red starting at the very tip and pulling the swirl inward about 2-3 mm. Leave a thin uncovered rose-gold line along one side so it looks framed. Repeat on each nail with slight variation so it feels hand-done, then cure. Seal with a glossy topcoat and cap the free edge so the swirl border doesn’t lift.
Editor's noteIf your swirl looks shaky, anchor the swirl by making one small dot where the curl ends, then pull the line from that point.
Skip thisDon’t cover the whole tip in red; you need the rose-gold border to keep it stylish.
7. Black BIAB with Gold Chain Link Accent
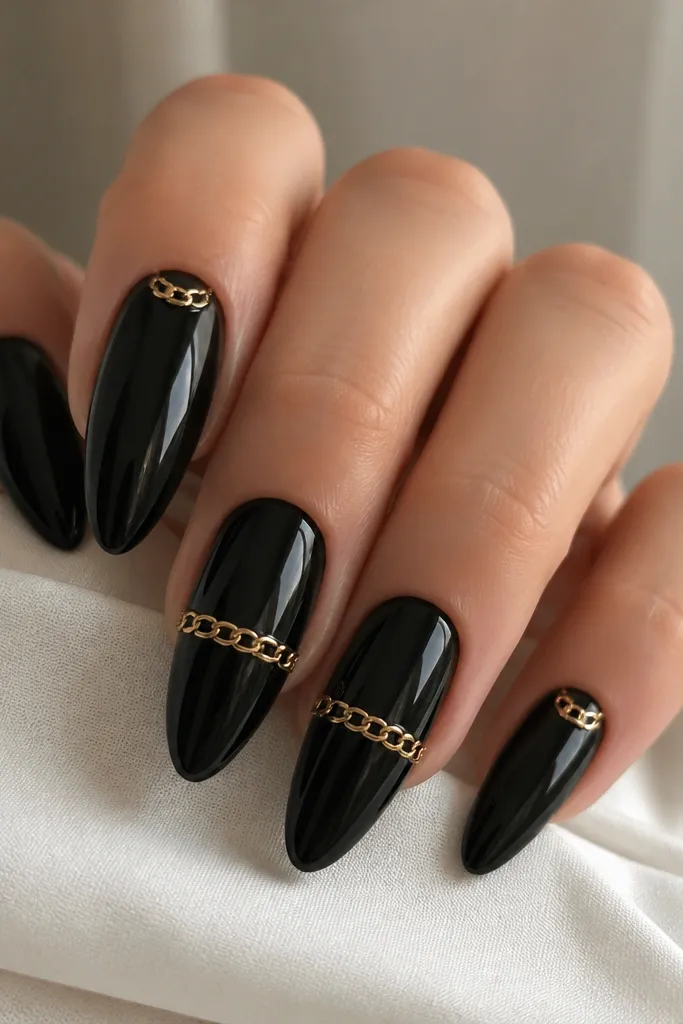
Black Christmas nails sound bold, but this is the kind of bold that looks chic with a holiday outfit. The glossy black makes gold chain details pop, especially if you wear gold hoops or a gold watch. It flatters slender nail shapes and also looks great on medium nail lengths because the chain pattern draws the eye upward. I love this for New Year’s too, because it keeps the holiday vibe without snowflakes everywhere. The principle is one graphic motif: chain links stay crisp and controlled, and the rest of the nails stay clean.
Start by applying BIAB and curing, then paint black gel polish in two thin coats. Cure and wipe. For the chain link accent, use a gold striping gel or gold paint and a liner brush: draw small vertical ovals, then connect them with a tiny line gap so it looks like linked metal. Place the chain on two nails across the center, leaving equal space at the sides. On the other nails, add one small link near the tip or cuticle. Topcoat with a glossy gel and cure, then gently check for any edges on the chain with a soft buffer.
Editor's noteTo keep chain links even, make the first link, then use it as your size template for the rest.
Skip thisAvoid chunky 3D chain stickers on glossy black — they look thick and catch on sleeves.
8. Classic Red BIAB with White Snow Cap Half-Moon
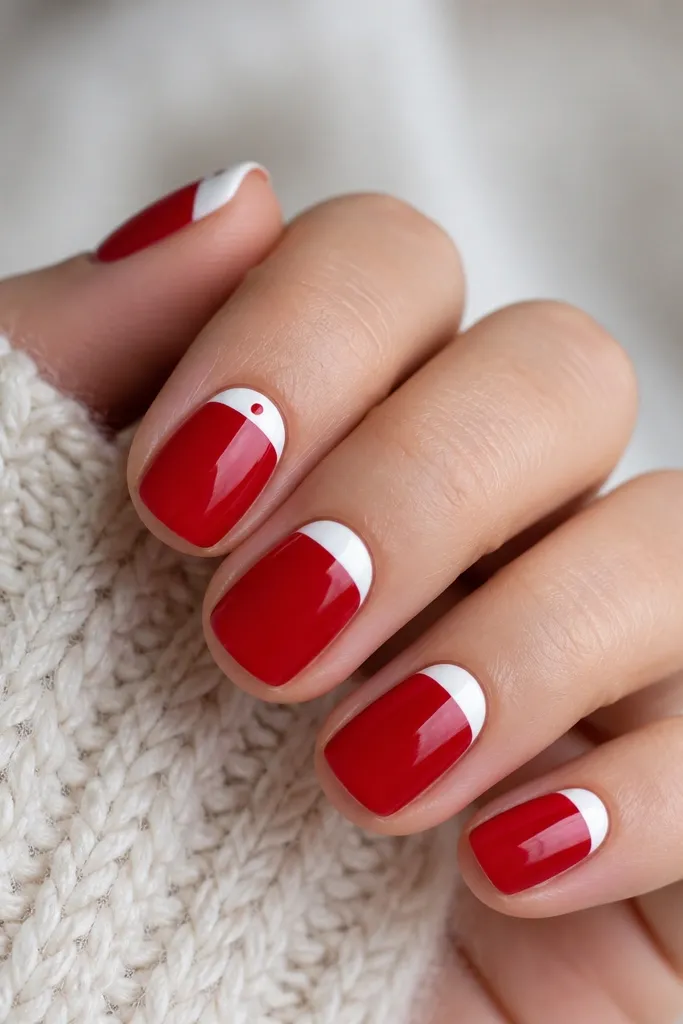
This is traditional Christmas done in a way that looks neat on real hands. The white half-moon makes the red look brighter, and the crisp boundary line keeps the design from looking messy. It flatters shorter nail beds because the design sits at the tip and doesn’t require long space for details. I also like it for people who hate tiny art — you’re painting a simple shape, not drawing snowflakes. The principle is a single geometric shape with a sharp edge.
Apply BIAB and cure, then paint classic red in two thin coats. Cure and wipe, then take a striping brush and paint a white half-moon at the tip, covering the top 2-3 mm. Keep the curve consistent across nails, and use the side of the brush to sharpen the boundary line. Add a tiny red dot in the center of the white on one accent nail, then cure. Finish with a glossy topcoat and cap the free edge where the white meets air so it doesn’t chip.
For a perfect curve, rest your pinky finger on the counter while you paint — it steadies your wrist.
Don’t blur the boundary with too much white gel; it should look like a clean snow line.
9. Green and Gold Marble BIAB with Glitter Vein
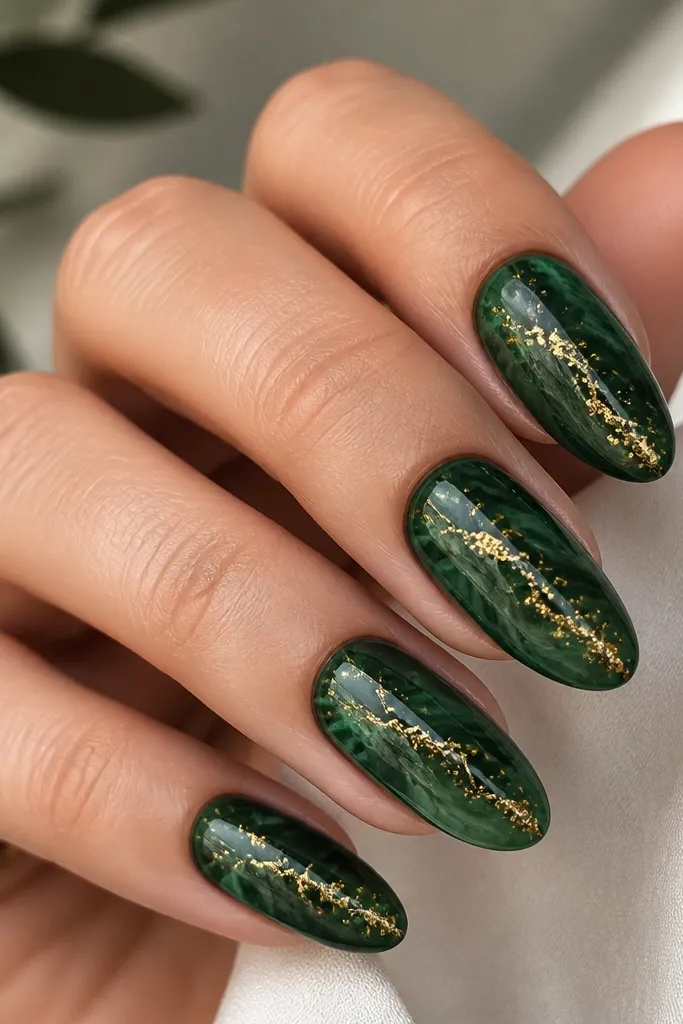
Marble looks fancy, and BIAB makes it easier because you get a smoother surface for thin strokes. Deep green marble with gold flecks reads Christmas without needing Santa hats or snowflake overload. It flatters medium to deep skin tones because the darker base makes the marbling glow. Keep the glitter vein fine and diagonal — that’s what makes it stylish instead of chaotic. The principle is controlled movement: marble streaks are soft, and the glitter vein is the only sharp sparkle line.
Start with BIAB and cure, then paint a deep green base in two thin coats. For marbling, use a thin liner brush with lighter green gel and drag short streaks in random directions, then blend the edges lightly with a clean brush tip while still tacky. Add a diagonal glitter vein: paint a thin clear gel line diagonally from mid-nail to the tip, then sprinkle fine gold glitter over it and press gently. Cure and wipe, then add a few tiny gold foil flecks around the vein. Seal with a glossy topcoat in two thin layers if needed so the glitter feels smooth.
Use fine glitter, not chunky — chunky glitter makes the marble look gritty under indoor light.
Don’t marble over a rough buff — ridges make the streaks look broken.
10. Nude BIAB with Red Rhinestone Bow and Side Garland Line
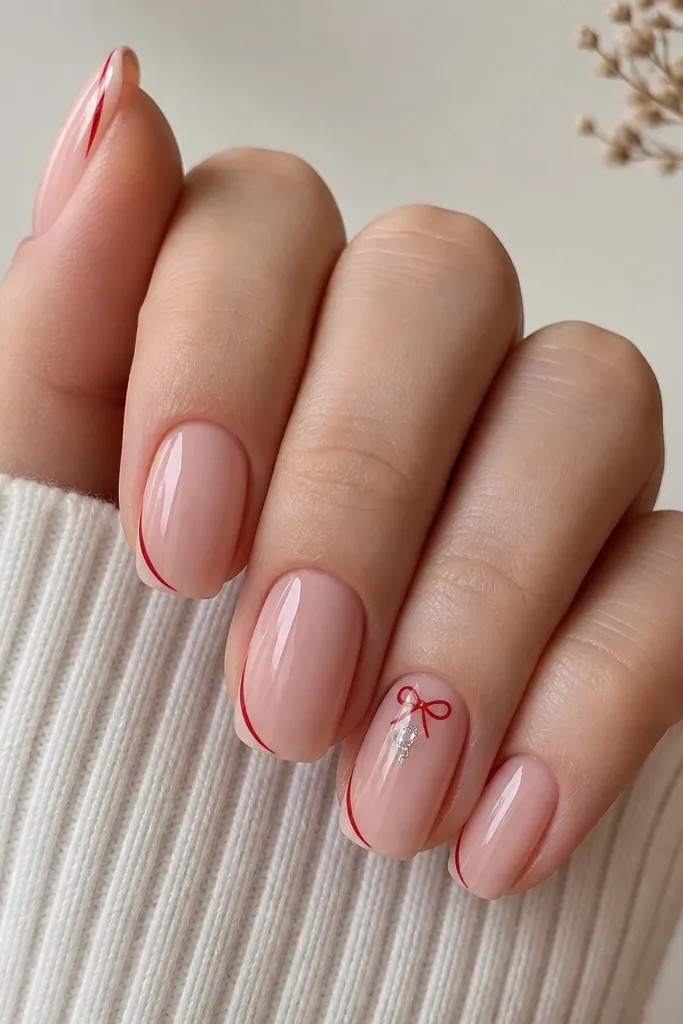
This is the Christmas set for people who want it to look polished even when the rest of the outfit is simple. Nude BIAB flatters almost every skin tone because it matches the natural nail area, and it keeps the focus on the bow and the side garland line. The rhinestone cluster adds real holiday sparkle without covering the whole nail. I like this for short nails because the details live near the cuticle and sidewall, so you don’t need a lot of nail length. The principle is placement: concentrate sparkle near the cuticle and keep the rest clean with one side line.
Apply BIAB and cure, then apply a nude pink gel in two thin coats, curing between. For the side garland line, use red gel and a striping brush to draw a thin line along one sidewall starting about 2 mm from the tip and curving slightly upward. Cure. On one accent nail, draw a small bow at the cuticle using red gel loops and a tiny center knot, then cure. Place clear rhinestones in a tight cluster below the bow using rhinestone gel or a thick topcoat, cure, and then seal everything with a glossy topcoat.
Editor's noteIf your rhinestones lift, add one extra thin coat of topcoat only over the stone edges.
Skip thisAvoid huge rhinestone sizes — they overpower nude and look heavy.



