
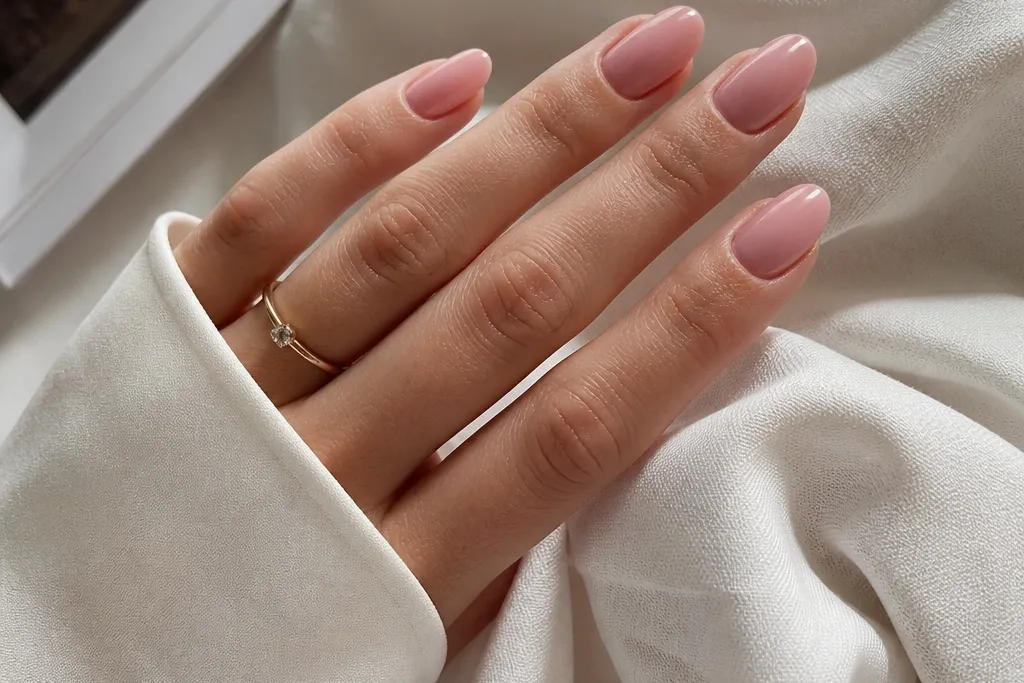
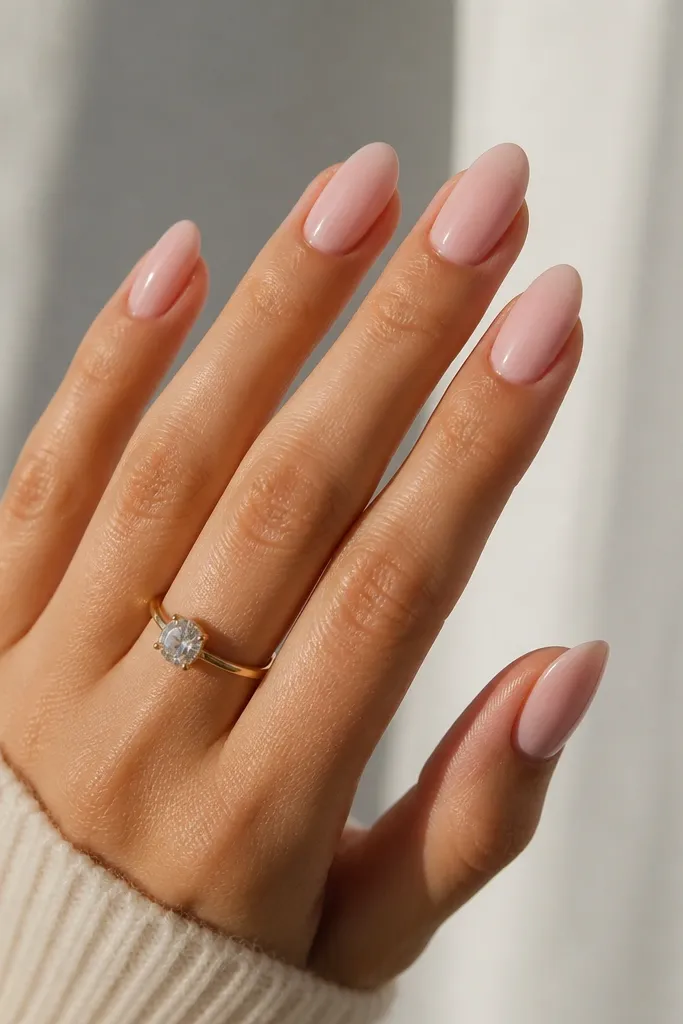
1. Milky Pink Almond with One Cuticle Dot
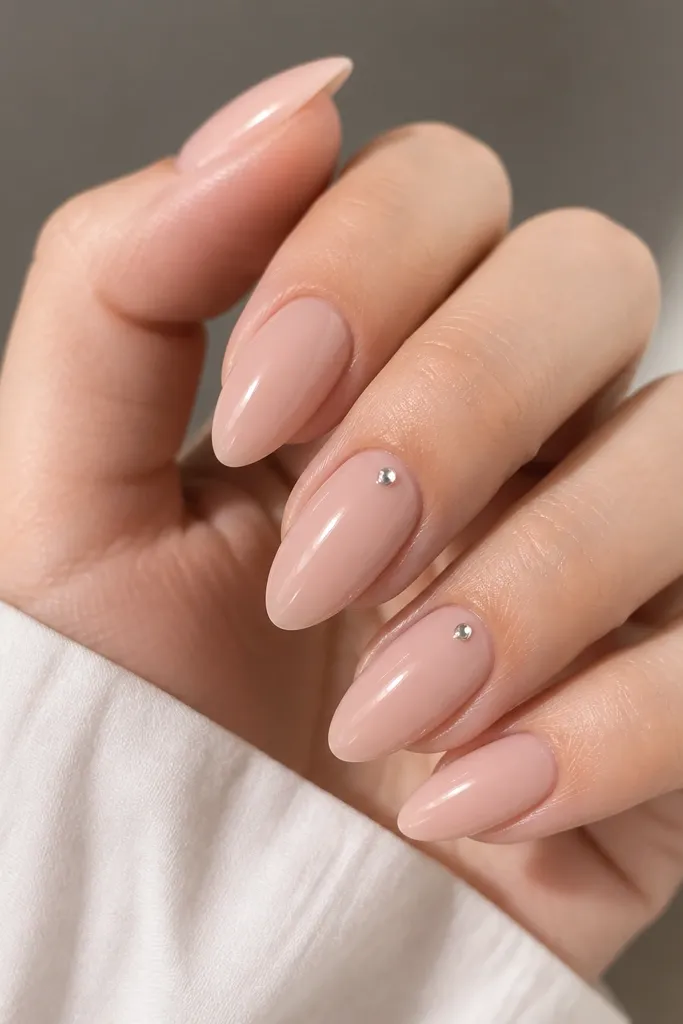
This look is the easiest “classy but modern” set I’ve done for clients who want something polished without committing to lots of art. The base is a milky pink gel that is semi-sheer — you can still see the natural nail tone through it. The tiny dot sits at the cuticle line, which visually lengthens fingers because it keeps the focus high and prevents the design from spreading. It flatters most skin tones, especially light to medium because the pink reads soft against your undertone. Wear it to work, brunch, or anytime you want your nails to look done even with minimal jewelry.
Start by prepping the nails and pushing back cuticles gently, then apply a thin base coat. Paint two even layers of milky pink gel, curing after each layer, until the color is uniform but still translucent at the edges. With a dotting tool, place one small silver dot on the center of the cuticle on two nails only — I keep it about the size of a rice grain. Cure, then seal with a glossy top coat and cap the free edge. Finally, wipe the tacky layer if your top coat requires it, and check the dot is flat so it doesn’t catch on hair.
Editor's noteIf your dot looks too big, switch to a smaller tip on the dotting tool and practice on a spare nail first.
Skip thisAvoid putting the dot in the middle of the nail — it makes the set look like random decoration.
2. Blush Pink Almond with Micro French Half-Moon
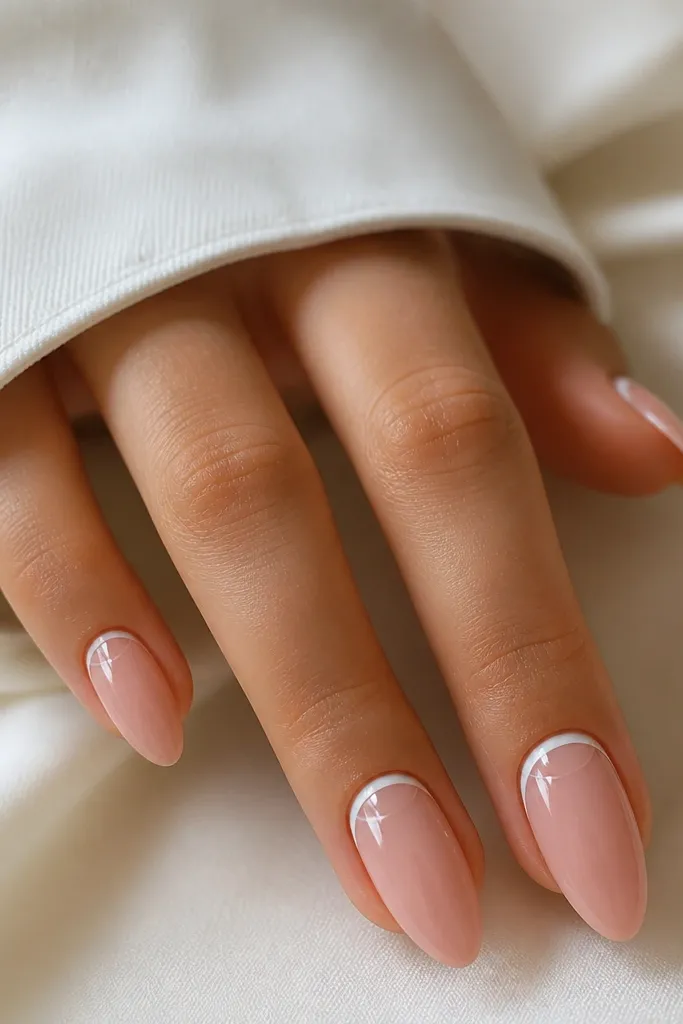
This is reverse French, but tiny. The blush base is sheer enough to look natural, and the half-moon sits right under the cuticle so it frames your nail bed. Thin white lines read crisp and expensive when they’re controlled, and the minimalist placement keeps the look modern. It works great on short-to-medium almond length because the design is small and doesn’t overwhelm the nail surface. I’ve seen it look stunning on warm undertones because the blush doesn’t fight the skin.
Apply a sheer blush pink gel in two thin layers, curing each time. Use a striping brush to paint a micro half-moon just beneath the cuticle — keep it narrow so you’re not painting a thick arc. Fill only the center of the half-moon first, then refine the edges with light brush pressure. Cure the white detail, then add a glossy top coat over everything, making sure it smooths the transition between base and line. Finish by cleaning the line edges with a brush dipped in gel cleanser so the half-moon looks sharp.
Editor's noteFor clean curves, steady your hand by resting your wrist on the table and rotate your finger instead of your wrist.
Skip thisAvoid thick white arcs — they turn this from minimalist into obvious French.
3. Pink Nude Almond with Vertical Nude Stripe
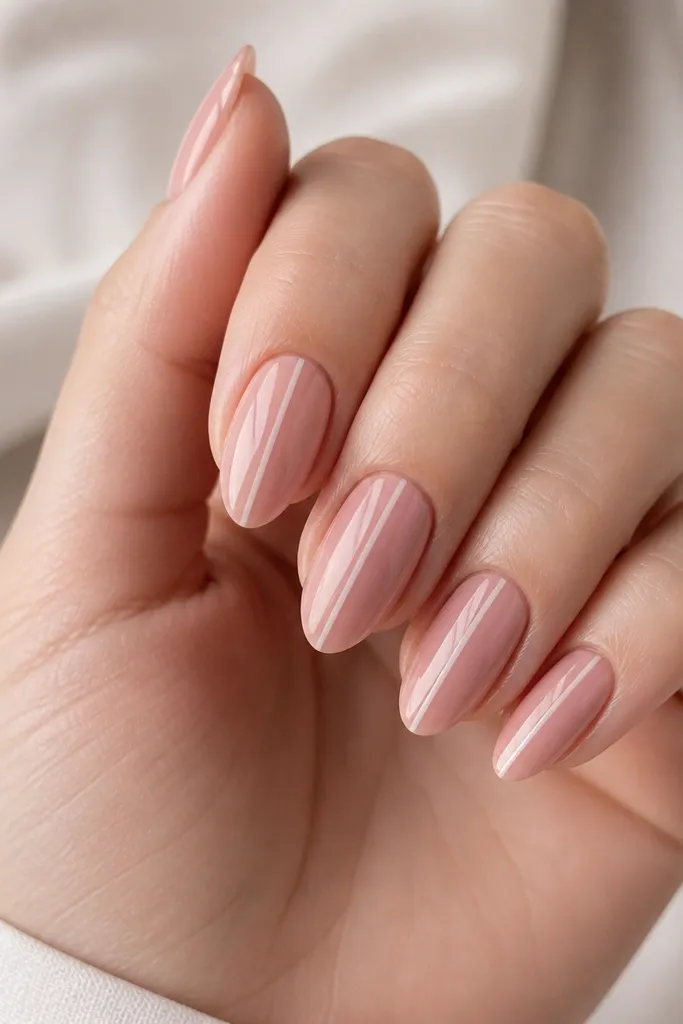
A vertical stripe is my go-to when someone wants a “slimming” nail without glitter or gems. The stripe is only a shade lighter than the base, so it looks like a light reflection rather than an obvious line. Because it runs top to bottom, it makes the nail look longer and more structured. This is flattering on any skin tone, but it’s especially nice on deeper tones because the nude contrast still stays soft. It also works for people who hate “busy” nails but still want a design.
Start with a pink nude gel base in two thin coats, curing each layer, and make sure the surface is smooth. Mix or choose a slightly lighter nude for the stripe — not white, not taupe, just one step lighter. With a striping brush, paint a straight line from near the cuticle (leave a hairline gap) to about 1 mm from the tip. Cure, then top coat with a glossy gel, dragging the brush from cuticle to tip to blend the edges. Wipe and clean around the sidewalls so the stripe looks centered.
Editor's noteIf the stripe looks wobbly, repaint it before curing by wiping with gel cleanser using a small lint-free wipe.
Skip thisAvoid using a high-contrast color like bright white — it stops reading as minimalist.
4. Sheer Pink Almond with Tiny Side Rhinestone
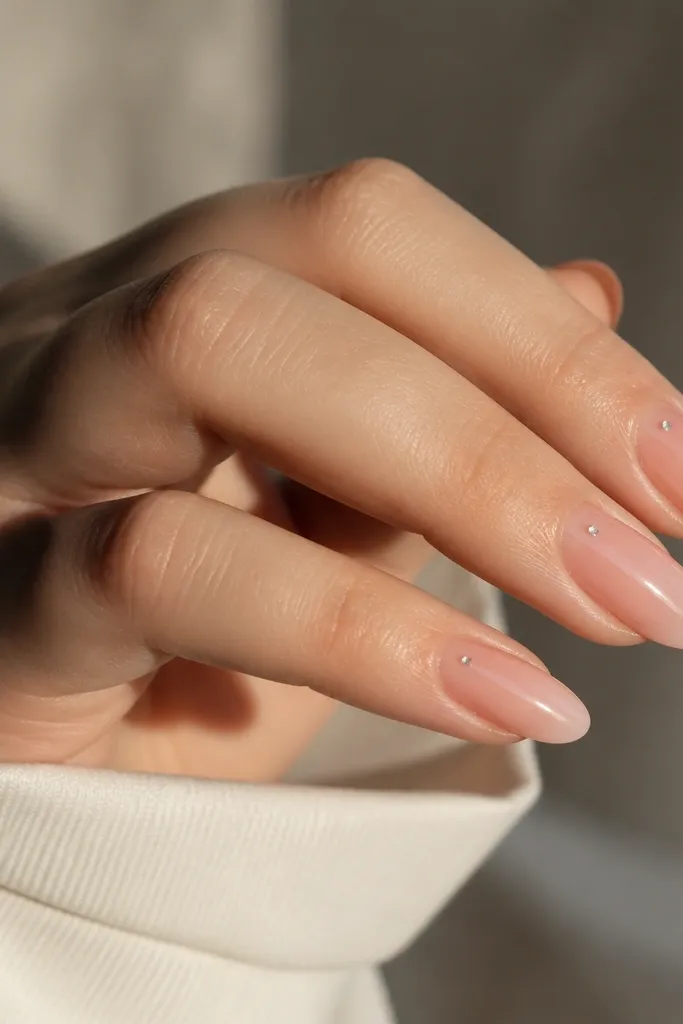
This set adds just enough sparkle without turning into full bling. The base is a sheer glossy pink, so the rhinestone looks like it’s floating on the nail bed rather than sitting on top of a thick color. I place the stone on the outer side near the cuticle because it catches light when you move your hand, but it doesn’t take over the whole nail. It looks great for medium to deep skin tones, because the sheer pink keeps everything light while the stone adds contrast. It’s also a smart choice for date nights when you want “special” without a loud pattern.
Apply a sheer pink gel base in two layers, curing each time, and keep the coat thin so the stone doesn’t lift. Add a small dab of clear builder gel or rhinestone glue right where you want the stone, then place one tiny rhinestone using tweezers. Press gently for 5-10 seconds, cure, and check the stone is flush. Seal over the stone with a thin layer of clear gel so you don’t feel edges, then top coat glossy. Clean the cuticle line with a fine brush and gel cleanser for a crisp finish.
Choose a rhinestone size around 1.5-2 mm for minimalist — anything bigger starts to look like a cluster.
Avoid placing stones in the center of the nail — it looks heavier and less modern.
5. Pink Almond with Micro Glitter Fade at the Tip
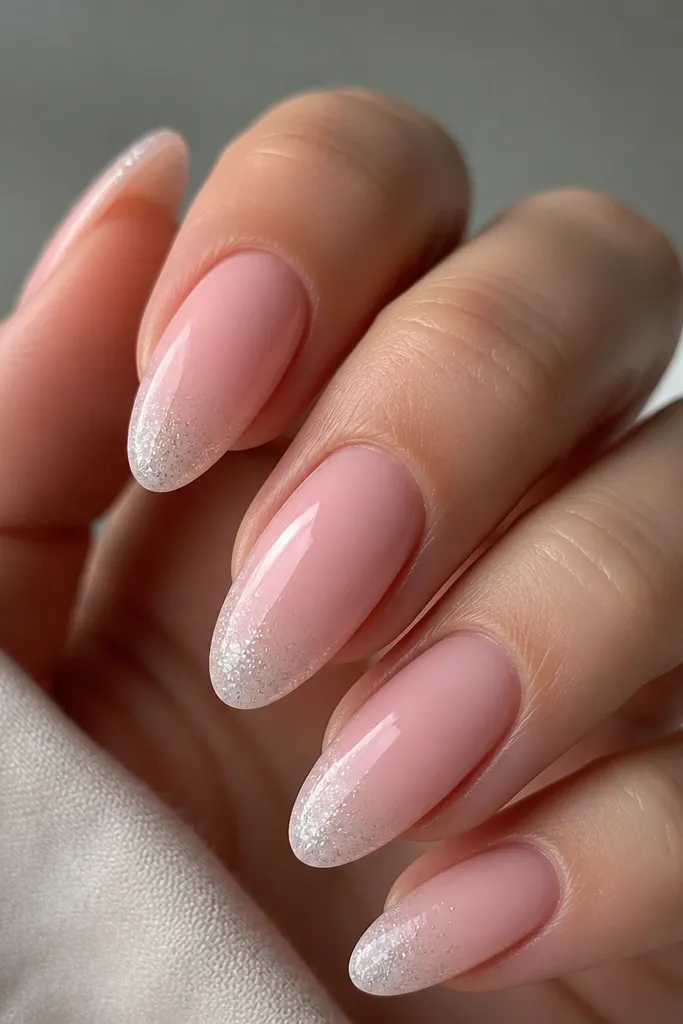
This is a soft sparkle set that reads clean. The base is blush pink, and the glitter is ultra-fine so it looks like a light dusting instead of chunks. I keep the glitter only on the distal tip — about the last 2-3 mm — and feather it downward so there’s no hard line. It flatters every skin tone because the glitter is silver-neutral and doesn’t pull warm or cool too hard. It’s perfect for weddings or holidays when you still want “minimalist,” not full party nails.
Paint two layers of blush pink gel and cure until glossy. On the tip only, apply a small amount of fine silver micro-glitter gel, then use a clean brush to feather it downward 1-2 mm. Cure, then add a second thin glitter layer only if you need more sparkle at the very end. Seal with a glossy top coat, and cap the free edge so the glitter doesn’t snag. Wipe and buff the surface lightly if your top coat makes the glitter texture too raised.
Editor's noteUse a fan brush or a dry gel brush to clean the sides before curing so glitter doesn’t creep.
Skip thisAvoid putting glitter near the cuticle — it makes the look busy fast.
6. Creamy Pink Almond with Barely-There Marble Vein
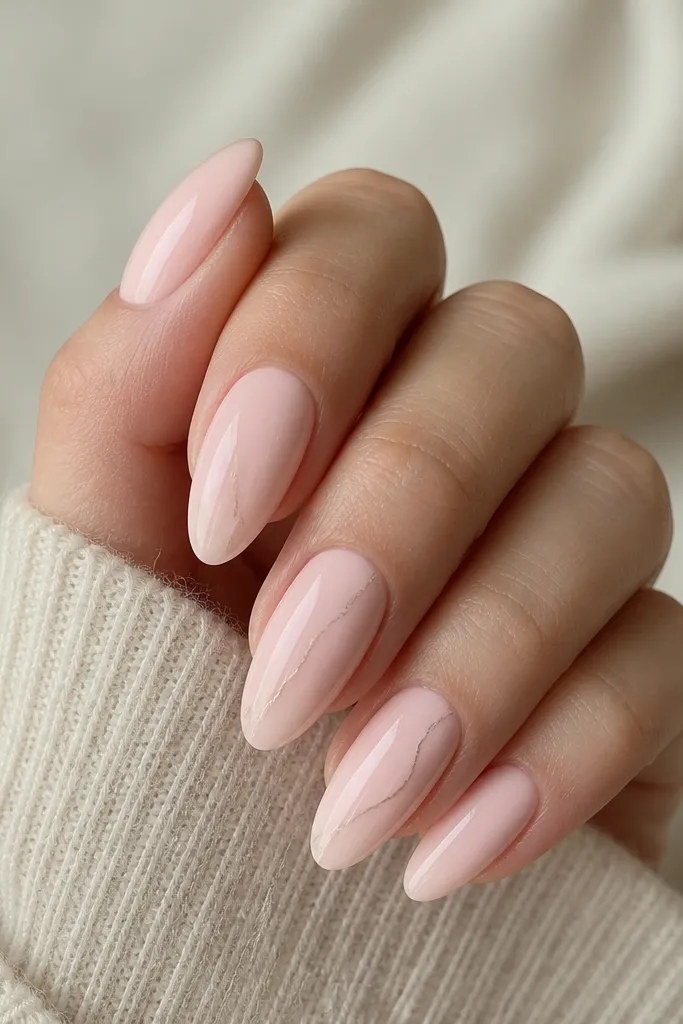
Minimal marble looks classy when it’s barely visible. The base is creamy pink (not milky white), and the vein is a soft gray-beige that mimics natural stone. I keep the marble line thin and place it diagonally from mid-nail toward one side — it gives movement without turning into a full pattern. This works well on fair and medium skin because the marble stays light, and it still looks good on deeper tones because the vein color is muted, not stark. It’s a nice choice when you want something unique but still office-friendly.
Apply two layers of creamy pink gel and cure until smooth. On two accent nails, use a striping brush to draw one thin vein line — start around the center of the nail and taper as you go. Add one or two tiny offshoot lines with very light pressure so it looks like natural veining, not doodles. Cure, then top coat with a glossy gel, dragging the brush slowly to avoid streaks. Clean the sidewalls with a small brush so the marble stays crisp.
Editor's notePractice the vein on a plastic nail tip first; marble lines look best when they’re imperfect and tapered.
Skip thisAvoid gray-black veining — it looks harsh and cheap on a pink base.
7. Rose Pink Almond with One Thin Bow Line
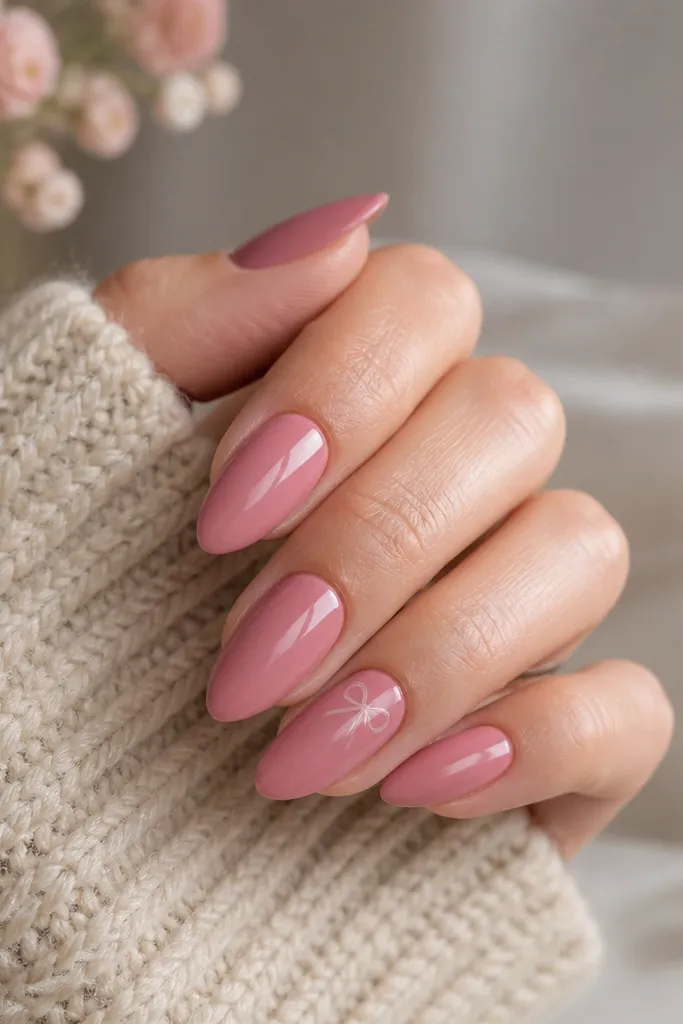
This is for the person who wants a “cute” touch but refuses full nail bows. The bow is not filled in — it’s an outline made from a thin pale line, placed near the cuticle so it stays small and modern. The base is rose pink with a slightly warm tone, which makes the bow line look crisp without needing heavy contrast. It flatters hands with shorter nail beds because the bow placement draws attention upward. It’s also great for spring events or birthdays where you want charm but still classy.
Start with a rose pink gel base in two thin coats, curing each layer. Choose one accent nail and paint a tiny bow outline near the cuticle — the “loops” should be about 2-3 mm wide. Use a detail brush and pale white gel for the outline, and keep the center knot small so it doesn’t turn into a blob. Cure, then apply glossy top coat over the whole nail, taking extra care around the bow edges. Wipe the tacky layer if needed and check the bow sits flat.
Editor's noteUse a gel liner that’s already thin, not a thick cream polish — outlines look cleaner with gel line work.
Skip thisAvoid filling the bow solid — it looks like sticker art instead of nail art.
8. Soft Pink Almond with Negative Space Half Tip
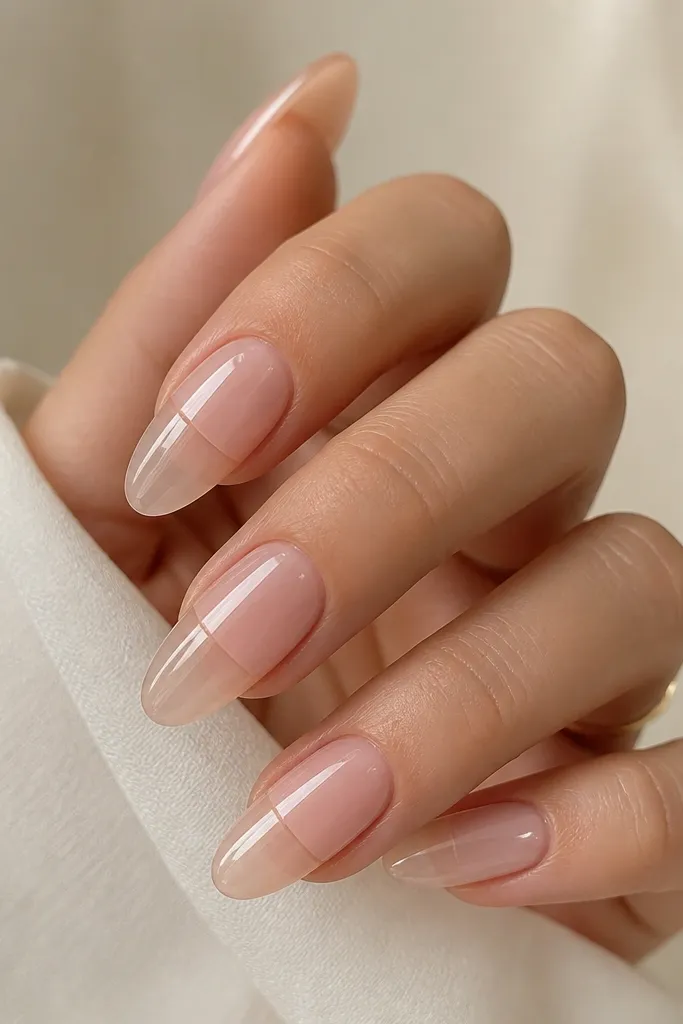
Negative space is the secret weapon for minimalist modern pink nails. Here, the pink covers only the upper portion, leaving the lower half bare so your nails look lighter and more architectural. The horizontal line is kept straight and thin so it reads intentional instead of “grown out.” This is flattering on longer fingers because the negative space adds breathing room, but it also looks good on smaller hands because it avoids heavy coverage. I like it most on people who want something different without using glitter or gems.
Prep and shape your almonds, then apply base coat. Paint a sheer pink gel from the cuticle area down to about halfway, leaving the bottom half clear — keep the edge crisp with a striping brush. Cure, then seal with glossy top coat over both the pink and the clear section, so everything looks smooth. If your clear area looks cloudy, wipe with gel cleanser and add a second thin top coat layer. Finally, check the line under a lamp and touch up any uneven edges before curing.
Make the pink edge slightly higher on the sides, so the line looks naturally curved to the nail shape.
Avoid messy blending at the line — it turns into cloudy ombré instead of clean negative space.
9. Pink Almond with Micro Dot Confetti on One Nail
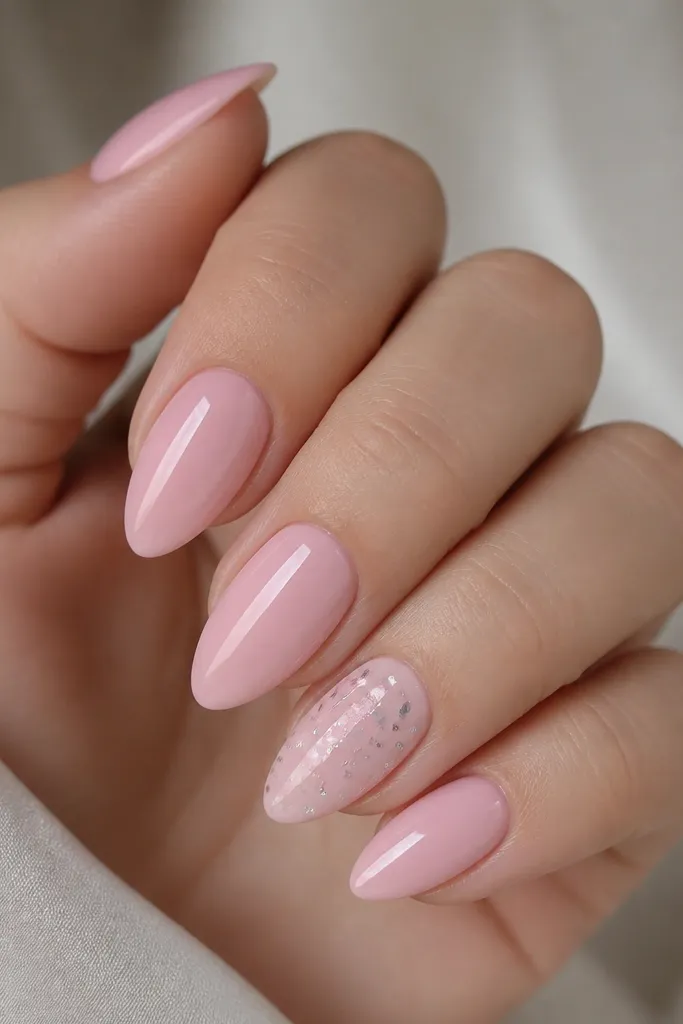
Confetti dots look modern when they’re tiny and placed on just one nail. The base is glossy pink (not matte), so the dots look like they’re sitting on a smooth glass surface. I keep the dot colors limited: silver and a slightly lighter pink so the set stays cohesive. This design flatters all skin tones because the dots are small and reflective, not neon. It’s perfect when you want a little personality but still want your nails to look “put together” in photos.
Apply your glossy pink base in two layers and cure. Pick one accent nail and add a small cluster of micro dots — start with 6-10 dots total, not more, around the center area. Use a dotting tool to place silver first, then add a few pale pink dots between them for depth. Cure, then top coat over the whole nail, making sure the dots don’t feel raised. Clean around the cuticle and sides so the dots stay sharp and don’t smear.
Editor's noteIf you’re unsure on the number of dots, fewer always reads more expensive on minimalist sets.
Skip thisAvoid spreading dots across every nail — it stops being minimalist and starts looking chaotic.
10. Blush Pink Almond with Thin Side Accent Line
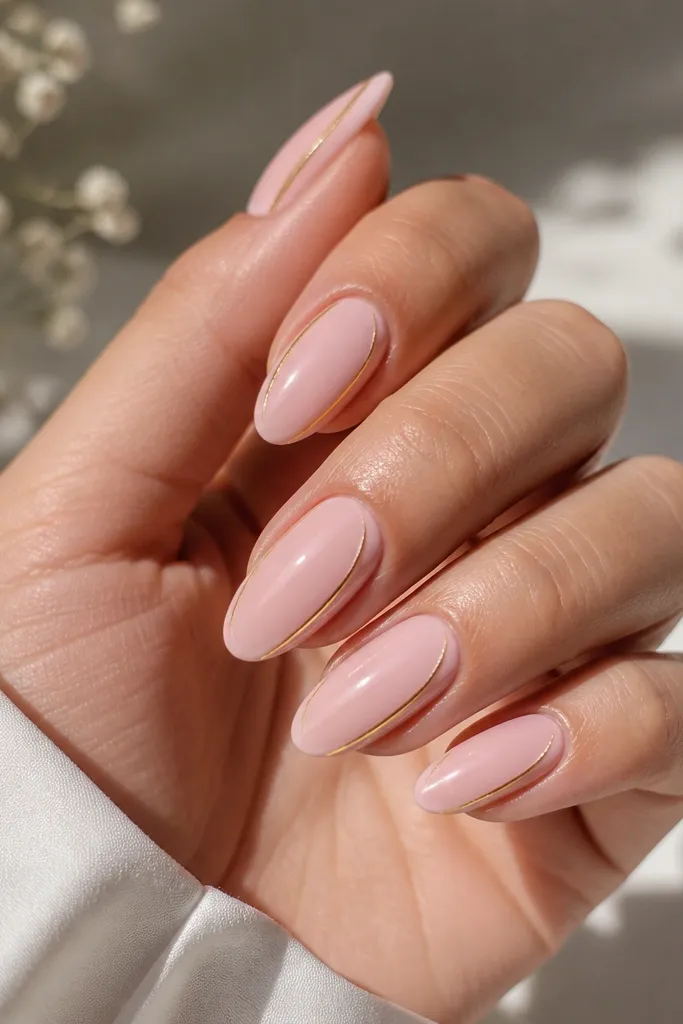
A single side line makes almond nails look sleek and longer. The base is a soft blush pink, and the line is metallic gold or champagne — thin enough that it looks like a highlight. I place it along the outer edge, not the center, because side accents catch light when your hand moves and keep the design from feeling centered and heavy. This looks great on medium to deep skin tones because the gold reads warm and polished. It also works for short workdays when you want a “wow” effect without a lot of art time.
Paint two layers of blush pink gel and cure until you get an even glossy look. With a liner brush, draw one thin line along the outer sidewall — start just under the free edge line and stop about 1 mm from the cuticle. Keep the line parallel to the nail curve so it doesn’t look crooked. Cure, then apply glossy top coat, making sure the top coat doesn’t flood and blur the line. Check the sides from an angle and fix any uneven spots with a tiny brush and gel cleanser.
Editor's noteGold line work looks best when you keep your brush loaded lightly so the stroke is hair-thin.
Skip thisAvoid thick side stripes — they turn into a border and make the nails look wider.
11. Pink Almond with Tiny Negative Space Heart Near Cuticle
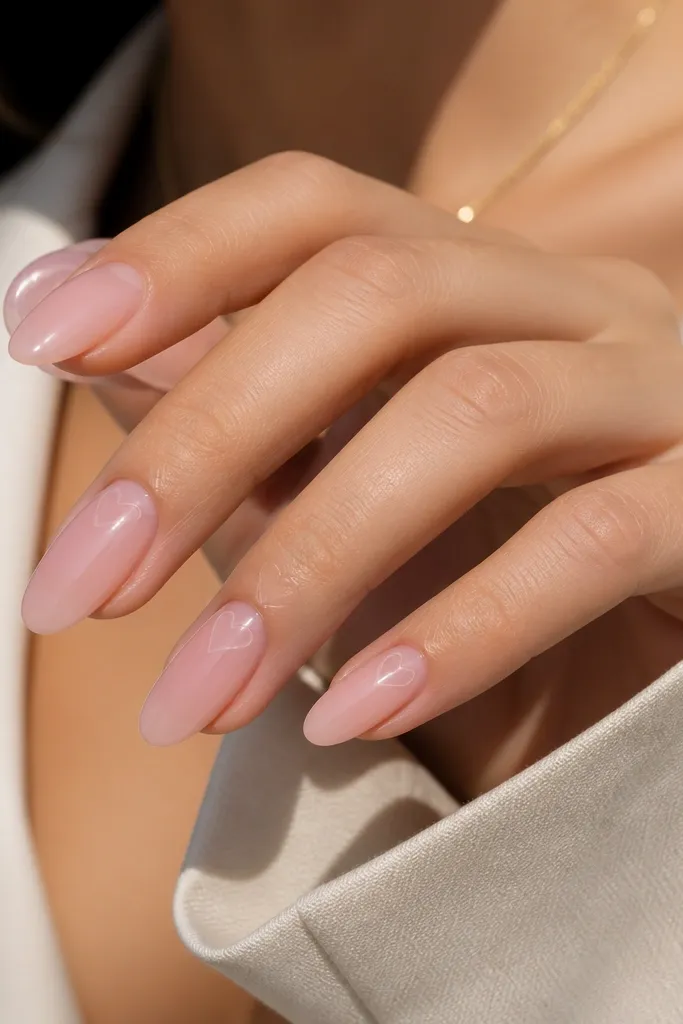
This is minimalist heart nail art without the usual chunky sticker look. The base is sheer pink, and the heart is negative space — you’re leaving the center clear so it reads crisp and clean. I place it right near the cuticle so it looks cute but still grown-up, and it doesn’t take over the nail. It’s flattering on hands with slimmer fingers because the small heart keeps the design delicate. This one is great for Valentine season or anytime you want a subtle romantic detail.
Apply a sheer pink gel in two layers and cure. On two accent nails, use a fine brush to outline a tiny heart shape near the cuticle, then place clear gel only where you want the heart to remain open. If you’re using gel, you can paint around the heart and keep the heart area clear — don’t fill it. Cure, then top coat glossy over the whole nail, including around the heart edges. Clean up any smudges with a brush dipped in cleanser before final curing.
Keep the heart width under 3 mm — any bigger and it looks like a cartoon sticker.
Avoid painting a solid heart — negative space makes it modern.
12. Dusty Rose Almond with Micro Outline French Tip
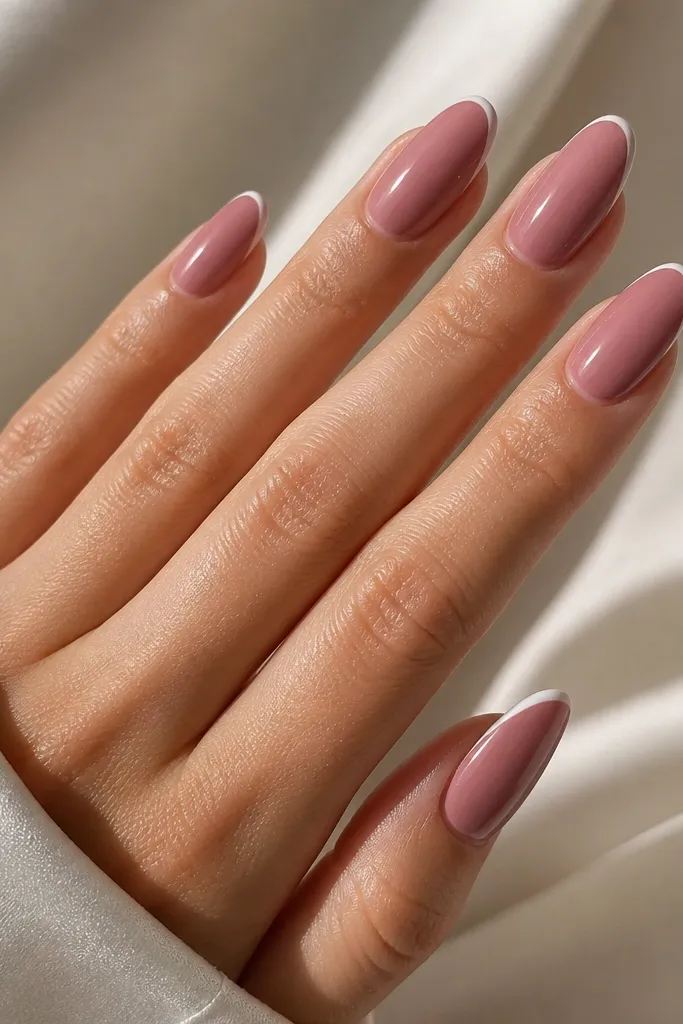
Outline French is the minimalist French that looks expensive because it uses line work instead of coverage. The base is dusty rose, which is muted and flattering against almost every skin tone. The white outline follows the almond curve and gives structure without making the nail look bulky. I like it when clients want a “French but not French” look for work because it stays subtle in daylight. It also photographs well because the lines catch light at the edges.
Apply dusty rose gel in two thin coats and cure until smooth. Use a detail brush to draw a thin white line along the very edge of the almond tip — keep it as an outline, not a full tip fill. Connect the line at the corners so the curve looks symmetrical across nails. Cure, then seal with glossy top coat and cap the free edge carefully so the outline doesn’t lift. Wipe and inspect under side lighting to make sure the outline is even.
If your outline looks uneven, redo it before curing — once cured, it’s much harder to correct cleanly.
Avoid filling the tip white — that turns it into bold French.
13. Pink Almond with Sheer Glaze and Tiny Center Line
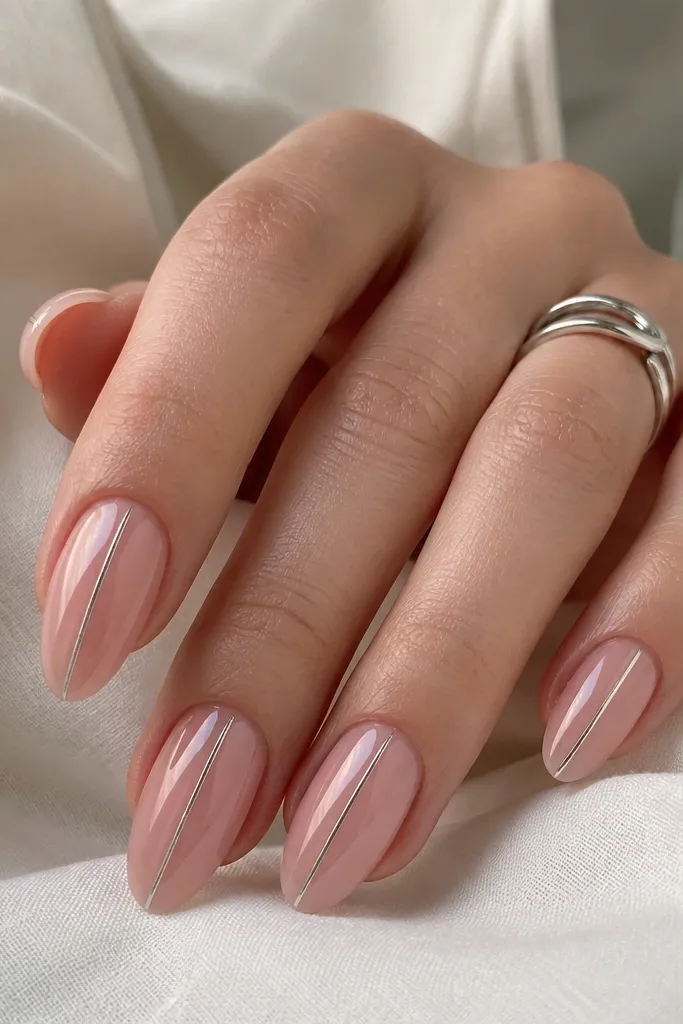
This one looks like jewelry for your nails. The base is a sheer glaze pink that looks like your nails after a fresh wash, and the center line is so thin it reads like a highlight. Because it’s centered and straight, it makes fingers look tidy and more elongated. It also works on both short and medium almond because the line is the only feature. I’ve worn it with simple rings and it still looks “styled,” even when I’m dressed down.
Start with a sheer pink base gel in two layers, curing each time, and keep the surface smooth. Paint a single ultra-thin silver line down the center using a liner brush, leaving a tiny gap at the cuticle so it doesn’t flood. Stop about 1 mm from the tip so the line doesn’t look blunt. Cure, then apply a glossy top coat generously enough to level the line. Cure again and wipe the surface if your top coat has a tacky layer.
Use a liner brush that’s dedicated to metallics — it helps the silver flow without dragging the base color.
Avoid thick metallic lines — they look chunky and make the set feel less modern.
14. Soft Pink Almond with Tiny Bow Sticker-Look Transfer (Hand-Painted)
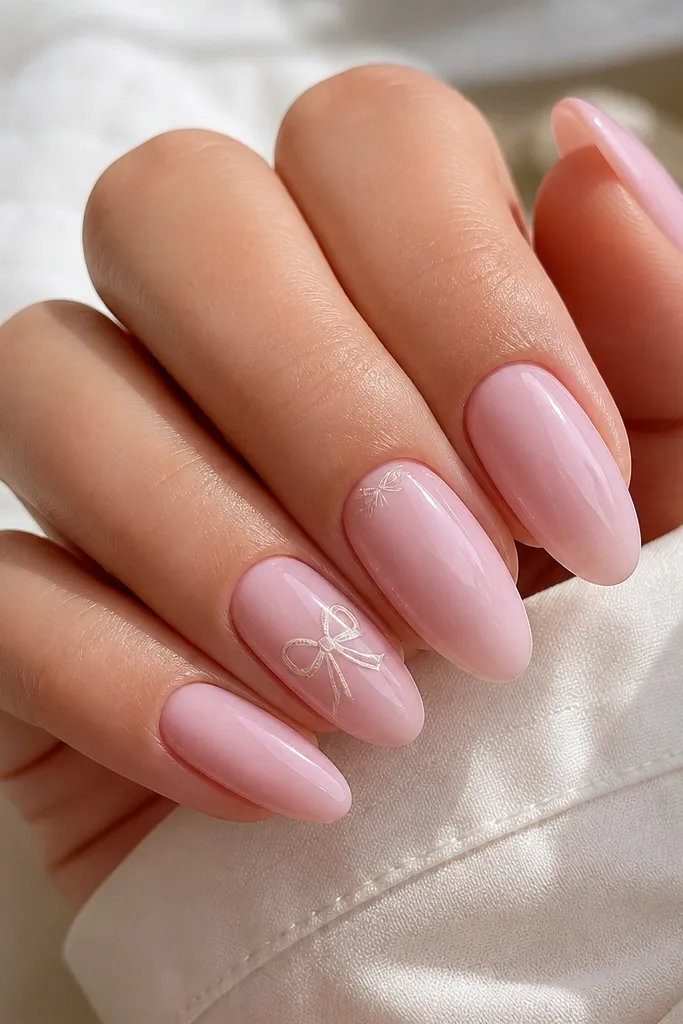
I’m picky about bow nails because most look like kids' crafts. This one stays classy because the bow is painted with line weight control — thin strokes only, no thick fill. The base is soft pink and slightly sheer, so the bow looks like it belongs to the nail rather than sitting on top. I place one bow on one accent nail and a smaller version on another so the set feels balanced. It flatters fair through deep skin because the bow color is pale and neutral, not bright. It’s a fun pick for birthdays, bridal showers, or when you want a cute detail without a full theme.
Apply two thin coats of soft pink gel and cure until glossy. On one accent nail, draw a tiny bow outline near the upper third of the nail, keeping the loop size small and the center knot tiny. On a second accent nail, add a smaller bow outline or a single bow “knot” dot if you want it even more minimal. Cure and top coat glossy over the entire nail, then gently cap the edges around the bow so it doesn’t lift. Clean the bow outline with a small brush dipped in cleanser before final curing.
Editor's noteIf your bow line breaks, repaint with light pressure — thick re-strokes make it look messy.
Skip thisAvoid using thick white polish for bow lines — gel liner reads cleaner and stays sharper.
15. Pink Almond with Micro Pearl at Cuticle Edge
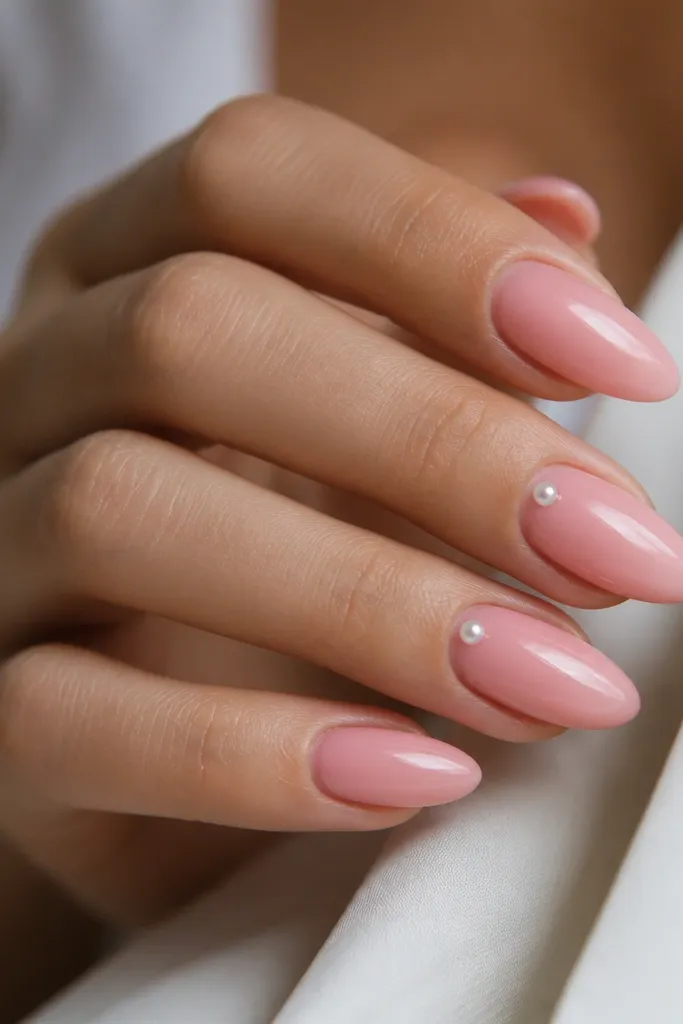
Pearls can look classy fast when they’re small and placed in the right spot. The base is a glossy pink that’s sheer enough to look natural, and the pearl sits on the cuticle edge like a delicate earring. I keep it to one pearl on two nails so the set stays minimalist and not bridal-full. This looks great on cool undertones because the pearl reflects a soft neutral light. It’s also a strong choice for formal events where you want something elegant without doing a full rhinestone manicure.
Paint your glossy pink base in two layers and cure, then wipe the surface if needed. Add a small dot of clear gel at the cuticle edge where you want the pearl, then place a tiny micro pearl using tweezers. Press gently and cure until the pearl is secure. Seal over the pearl with a thin layer of clear gel so it doesn’t snag, then apply glossy top coat across all nails. Finally, clean the cuticle line with a fine brush so the pearl placement looks intentional and tidy.
Editor's noteUse micro pearls around 1.3-1.7 mm; anything bigger will feel bulky on the cuticle.
Skip thisAvoid placing pearls far from the cuticle — it looks like a random decoration.



