
1. Cherry Red Lights Accent with Clear-Top Gel Dome
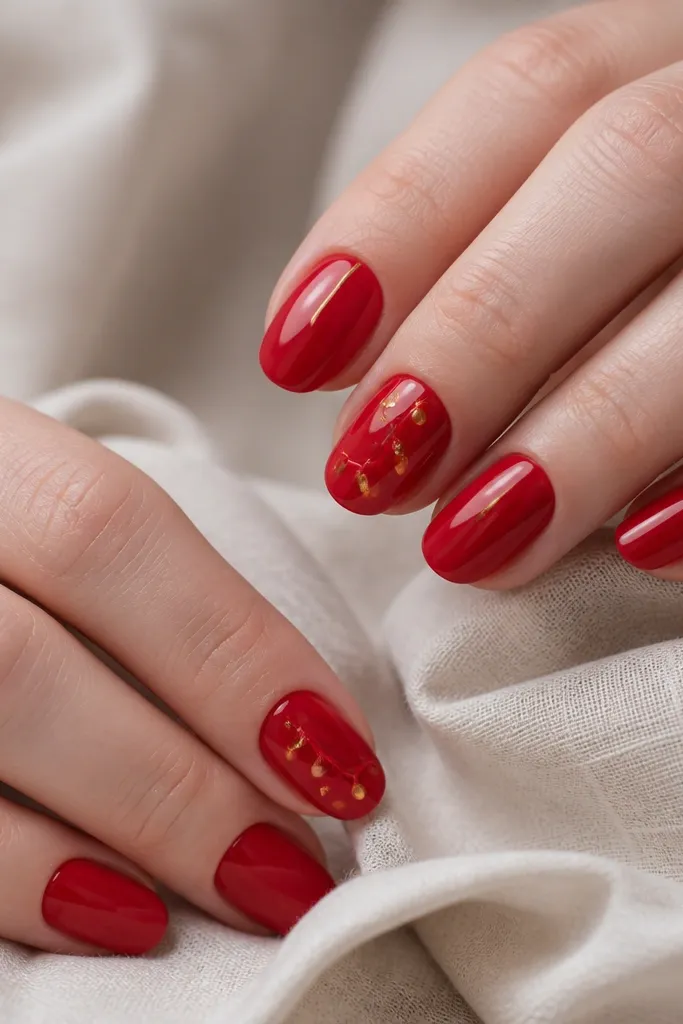
This design is for when you want classic holiday red but also want the “lights” look without messy glitter fallout. I use a true cherry red base — it looks bright under warm indoor bulbs and it stays festive on camera. The raised clear gel dome makes the little gold dots look like miniature bulbs, which reads clean instead of flat. It flatters most hand shapes because the dome sits centered on the nail and the gold stripe near the cuticle elongates the nail bed visually.
Start by painting all nails in two thin coats of cherry red, letting each coat dry fully. On the accent nails, place 5-7 tiny gold dots in a loose line down the center, then add short red “cord” strokes between dots using a striping brush. Cure, then cover just the accent nails with a thick clear gel layer to form a rounded dome; cap the edges so it does not lift. Finish with a high-gloss top coat on every nail and cure again. Store your lights in a foam-lined pouch so the gold studs and thin brushes do not get tangled when you pull this kit back out.
If your clear gel domes look uneven, use a brighter lamp and check from the side — you want a smooth hill, not a puddle.
Avoid putting the dome on top of a textured glitter layer because it traps grit and makes the surface rough.
2. Cranberry Velvet Red with Snow Cap Tips
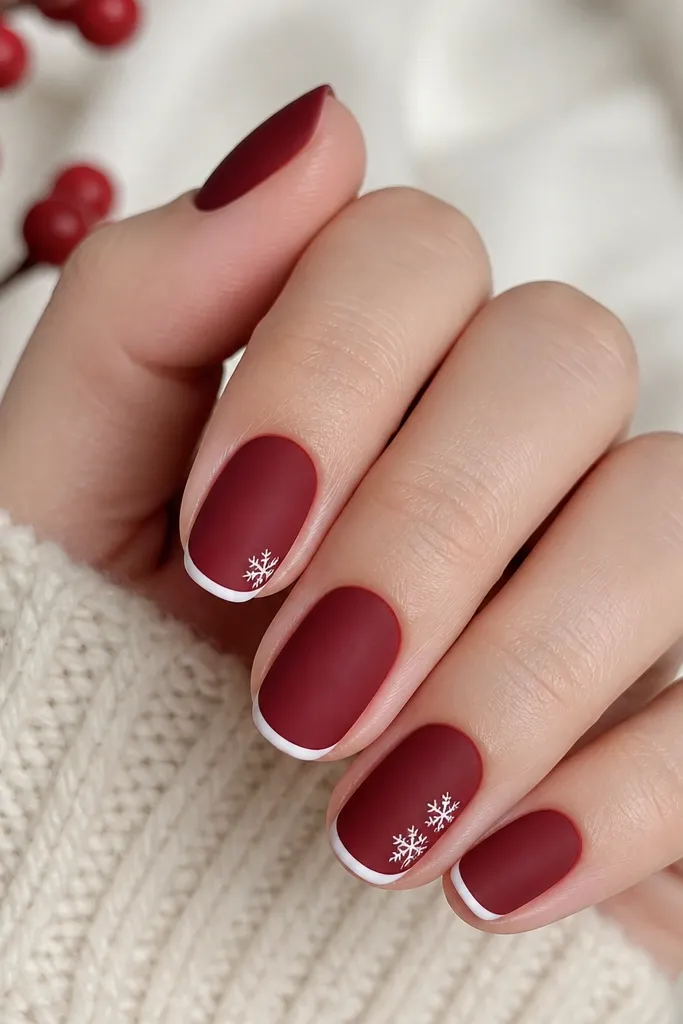
If glossy red feels too loud, this one looks wintery without losing the holiday vibe. I use cranberry for that cold, slightly blue winter tone, then create a velvet effect with a matte top coat over a smooth base. The snow-cap tips are just a thin white arc — it frames the nail and makes your cuticles look tidy. This works especially well on shorter nails because the white sits at the tip and gives a clean “winter” outline instead of turning the whole nail into busy art.
Paint all nails in cranberry gel polish and cure. Apply a velvet matte top coat, then wait until it fully sets so the next layer does not smear. Using a nail art liner brush, paint a thin white curved line at the free edge and slightly blend it into the nail for a snowbank look. Add a tiny snowflake decal only on two nails, placing it about 2-3 mm from the sidewall. Finish with a matte top coat except over the snow caps if you want a subtle contrast shine.
Use a pointed liner brush and pull the white line in one confident stroke — shaky arcs look cheap fast.
Skip thick white paint at the tip; it creates a ridge that catches on sweaters.
3. Red Foil Ribbon Wrap with Micro-Gold Lights
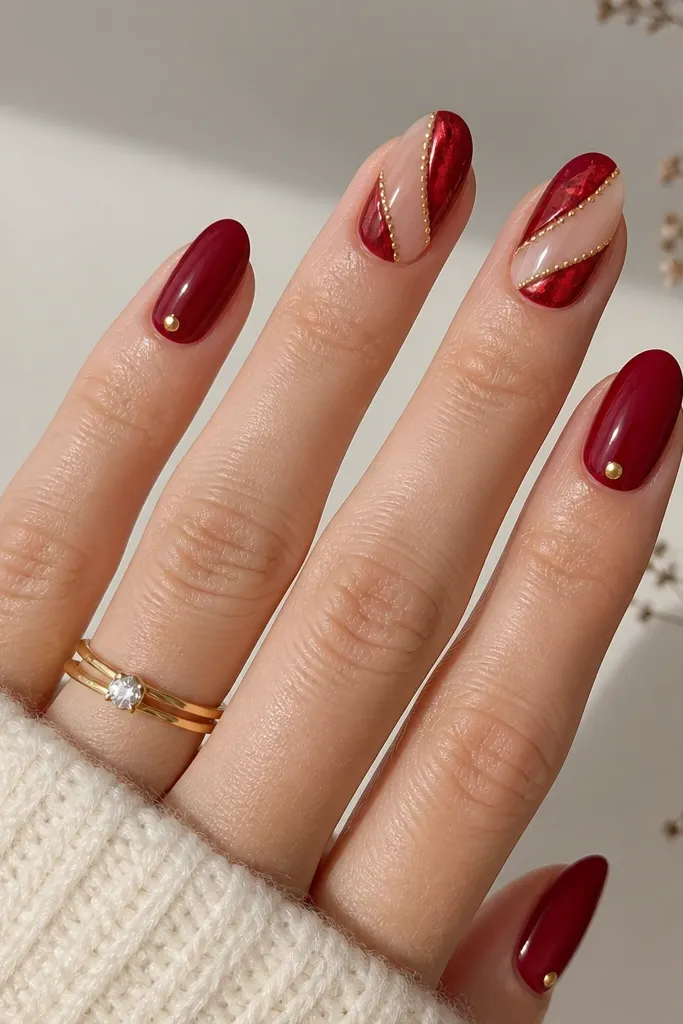
This is my go-to when you want holiday shine but you hate glitter. The foil ribbon gives that ribbon-on-a-present look, and it stays crisp on red because foil reflects light without turning the nail grainy. I pair it with micro gold dots so it looks like lights wrapped around the ribbon. It flatters hands with shorter nail beds because the diagonal ribbon creates length without needing long nail extensions.
Start with a glossy deep red base on all nails, two coats for full coverage. On the accent nails, apply a thin layer of clear gel where you want the ribbon, then press red foil strips diagonally so the edges overlap like wrapped tape. Cure, then use a dotting tool to place 4-6 micro gold dots along one ribbon edge. Seal everything with a glossy top coat, focusing on the sides so the foil does not lift. When storing your kit, keep foil in a small sealed sleeve and keep your dotting tools in the same section as your lights pouch so you do not mix loose bits.
Press foil with a silicone tool, not your fingers — it keeps the pattern sharp and prevents fingerprints.
Do not skip sealing the foil edges; lifting foil ruins the look within days.
4. Classic Red French with Gold Light Bulb Outline
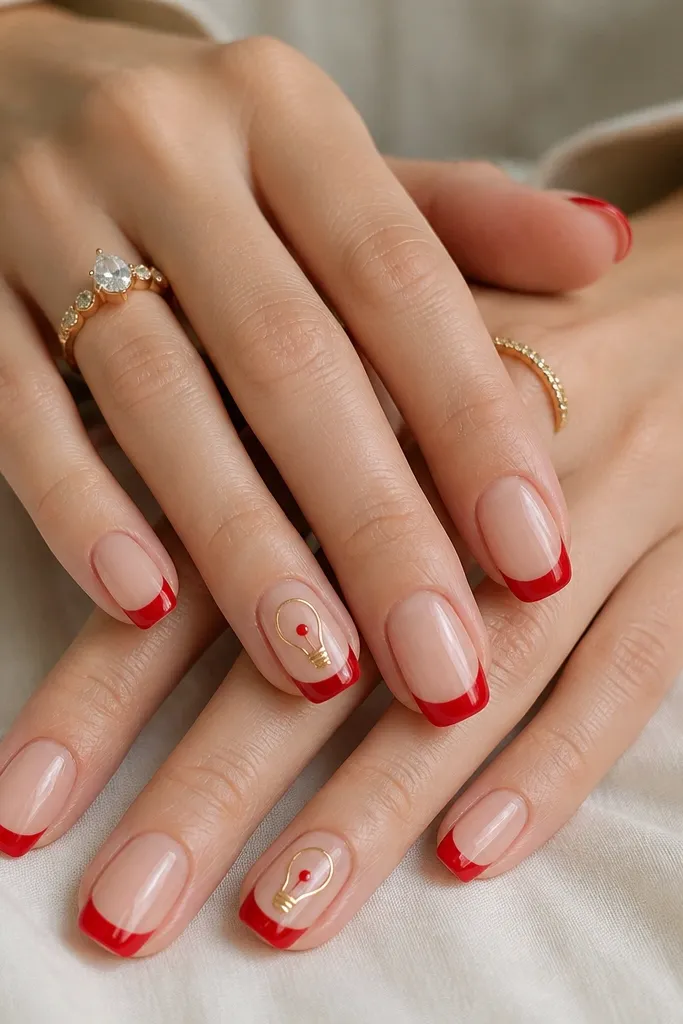
This one reads like a holiday manicure from a salon menu because the contrast is clean: sheer nude plus red tips plus a gold outline. The gold light bulb shape is small, so it stays classy instead of costume-y. I like it on people with dry cuticles because the nude base hides rough edges better than a full red nail. It also looks good on almond and squoval shapes because the French line curves naturally.
Apply a sheer nude base coat and cure. Paint red French tips with a guide sticker if you need help keeping the smile line even; keep the tip thickness around 1/3 of the nail width. On two ring fingers, draw a thin gold outline light bulb near the outer third of the tip, then add a tiny red dot at the center. Cure and top coat with a glossy finish on all nails. Store your gold striping and dotting tools in a small tray compartment so the lines stay sharp and you do not mix them with your lights cord.
Editor's noteIf your French tips look thick, wipe the brush on a paper towel before you paint — it controls flow instantly.
Skip thisAvoid painting the gold outline too wide; bulky gold makes the bulb look like a sticker.
5. Red Gel Marble with White Light-Thread Lines
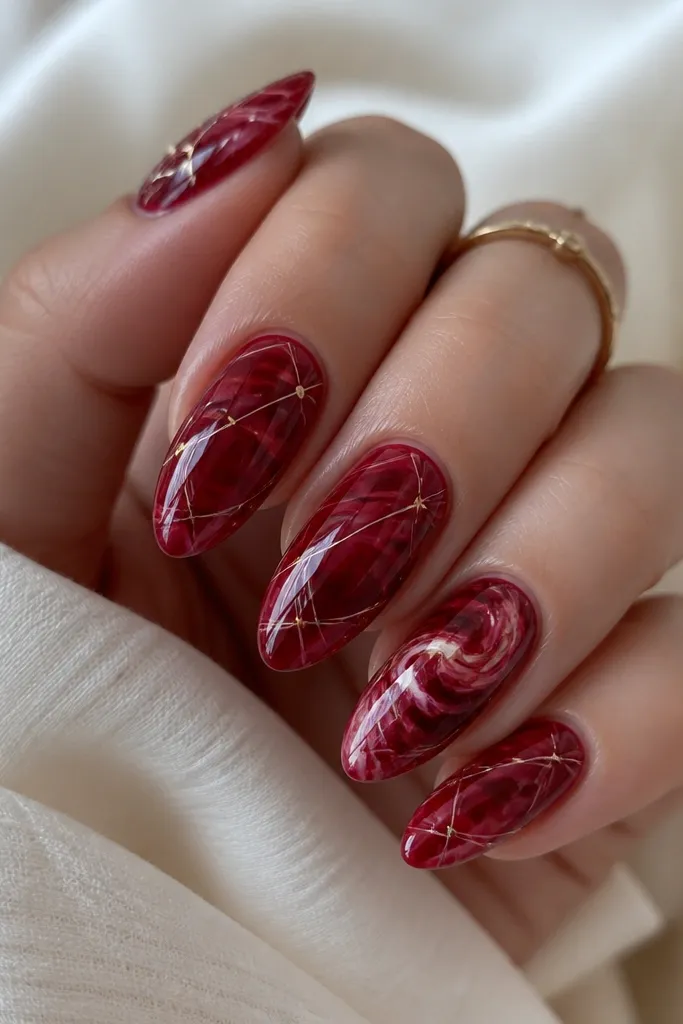
Marble is the fastest way to make red feel expensive without adding a pile of tiny decorations. I use a deep red and blend it with a darker wine shade so the marble looks like winter glass. The white light-thread lines make it feel connected to the lights theme, like strands wrapping around a window. This design flatters longer squoval nails, but you can shrink it to shorter lengths by keeping the marble swirls tight and not too wide.
Paint a base layer of deep red and cure. For marble, dab small amounts of darker wine and a touch of clear gel onto the nail, then swirl gently with a thin brush or a toothpick — do not overwork. Add the white light-thread lines with a liner brush, placing them diagonally and leaving space between lines so the red still shows. Dot gold anchors at two or three intersections, then cure again. Finish with a glossy top coat for a smooth, glassy surface and store your toothpicks/liner brushes in a separate compartment from loose gems.
Keep your white lines thinner than you think; thick lines look like snow plowing instead of light threads.
Do not flood the nail with clear gel while marbling; it makes the pattern cloudy.
6. Velvet Red Swirl with Tiny Bow at the Cuticle
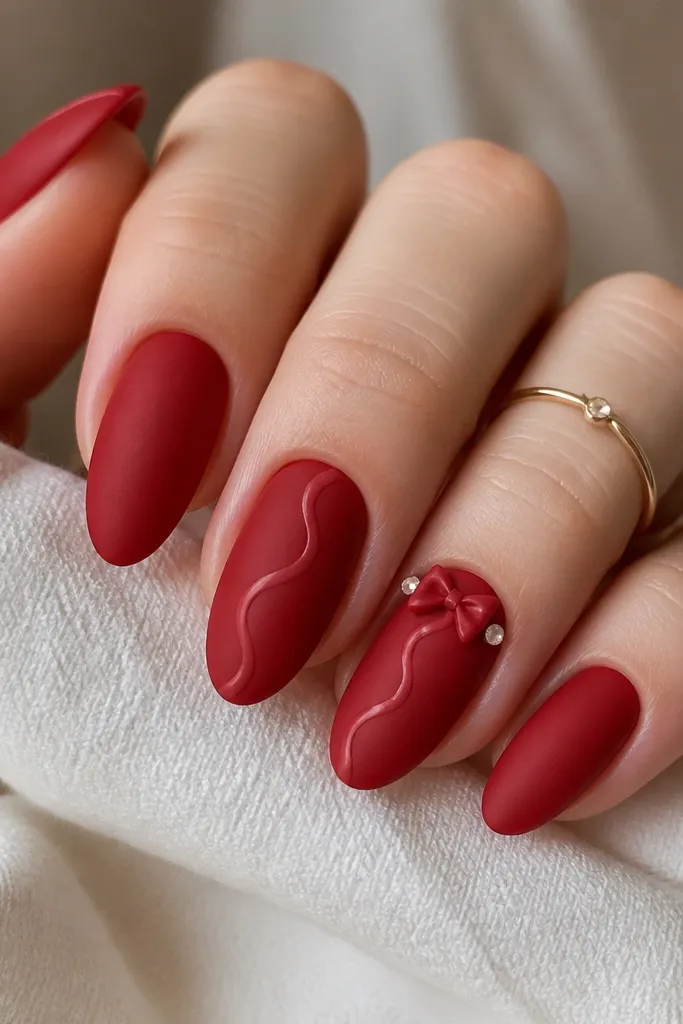
This is a sweet holiday look for when you want cute, not heavy. The velvet matte finish makes the red feel soft and wintery, and the tiny glossy swirl adds a bit of motion. I place a small 3D bow at the cuticle because it draws the eye upward and makes your nail bed look longer. It looks great on medium and short nails, especially if you like minimal art but still want one focal point.
Start with a smooth velvet red base (matte top coat over a cured red). On the accent nails, paint a thin glossy swirl using a lighter red and cure — keep it narrow and centered. Place a tiny bow charm at the cuticle on one nail using gel glue or a dab of thick top coat, then add two micro rhinestones on either side like little light bulbs. Seal the edges around the charm so it does not catch fabric. For storage, keep charm glue and rhinestones in one tray section and keep your lights pouch separate so nothing falls into the wrong compartment.
If the bow sits crooked, nudge it with a dotting tool while the gel is still tacky.
Skip big bow charms on short nails; they look bulky and lift faster.
7. Red Chrome Stars with Light String Dots
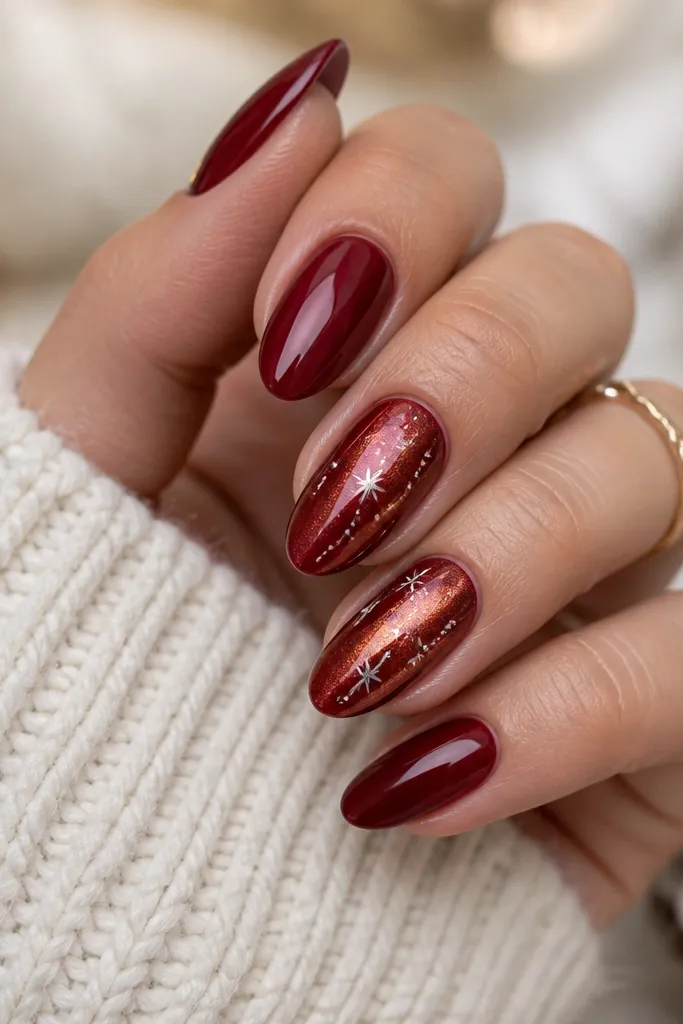
This design looks like holiday decor on your fingertips. Red chrome dust gives that metallic glow without needing a ton of glitter, and it changes with the light so it looks different every time you move your hands. Pale silver stars read like winter night sky, and the dotted light string keeps the theme tied to Christmas lights. It flatters medium-length nails best because chrome looks intentional when there is enough surface for the shine to roll across.
Apply deep red polish to all nails and cure. On two accent nails, apply chrome dust over a tacky layer of gel (or chrome base) and rub gently until you get an even ruby-copper shift. Stamp or hand-paint tiny star shapes in pale silver near the upper half of the nail. Add a dotted light string with a dotting tool in silver or gold, placing dots in an arc from sidewall toward the tip. Seal with a chrome-safe top coat and store chrome dust in a sealed compact so it does not scatter into your lights storage pouch.
Use a makeup sponge to apply chrome dust — it gives smoother coverage than brushing.
Avoid regular top coat over chrome unless it is chrome-safe; it can dull the shine.
8. Red and White Candy Cane Tips with Gold 'Plug' Detail
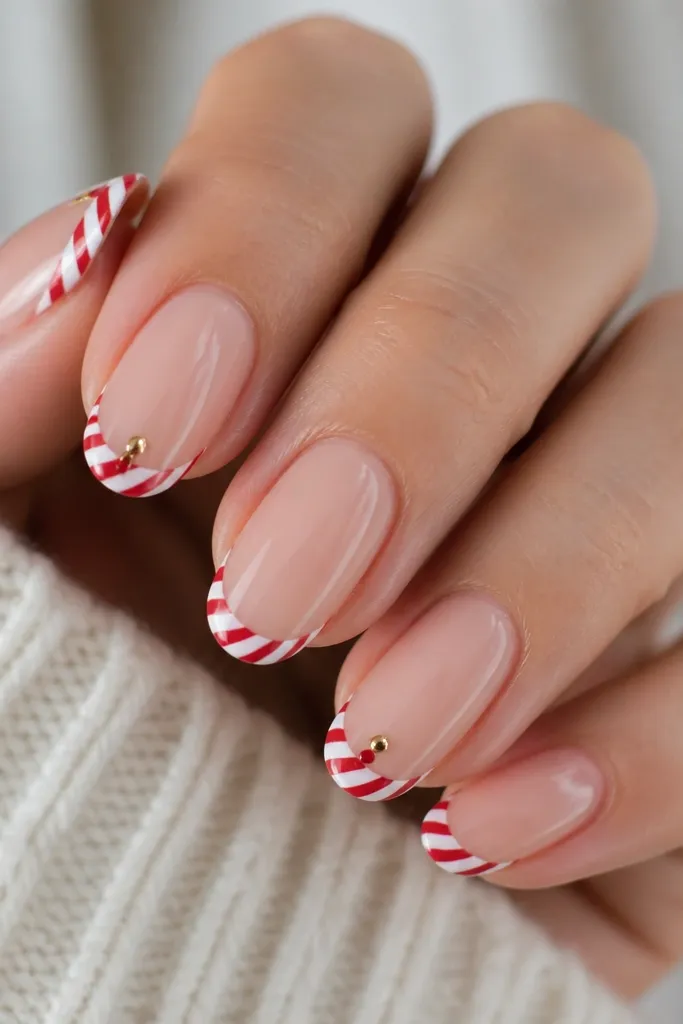
Candy cane tips look festive fast because your eye reads them instantly. I keep the base sheer nude so the stripes stay the star and your manicure still looks clean when the holiday season is over. The tiny gold plug detail at the tip base connects it to the lights theme without adding full-on light art on every nail. This flatters hands with any skin tone because nude base tones blend and the red/white stripes pop cleanly.
Start with a sheer nude base and cure. Create candy cane tips by painting a thin red diagonal stripe first, curing, then painting a white diagonal stripe next, leaving even spacing so it looks like real candy cane wrap. On two nails, add a tiny gold rectangle at the base of the tip and a small red dot just above it to mimic a light bulb. Cure, then top coat with glossy finish. Store the striping brush and gel colors in the same sectioned organizer as your lights pouch so you do not reach across loose bits.
Do stripes in two passes instead of trying to paint both colors at once — it keeps the lines crisp.
Avoid thick stripes; they look heavy and feel snaggy on coats.
9. Deep Wine Ombre with Glowing Light Edge
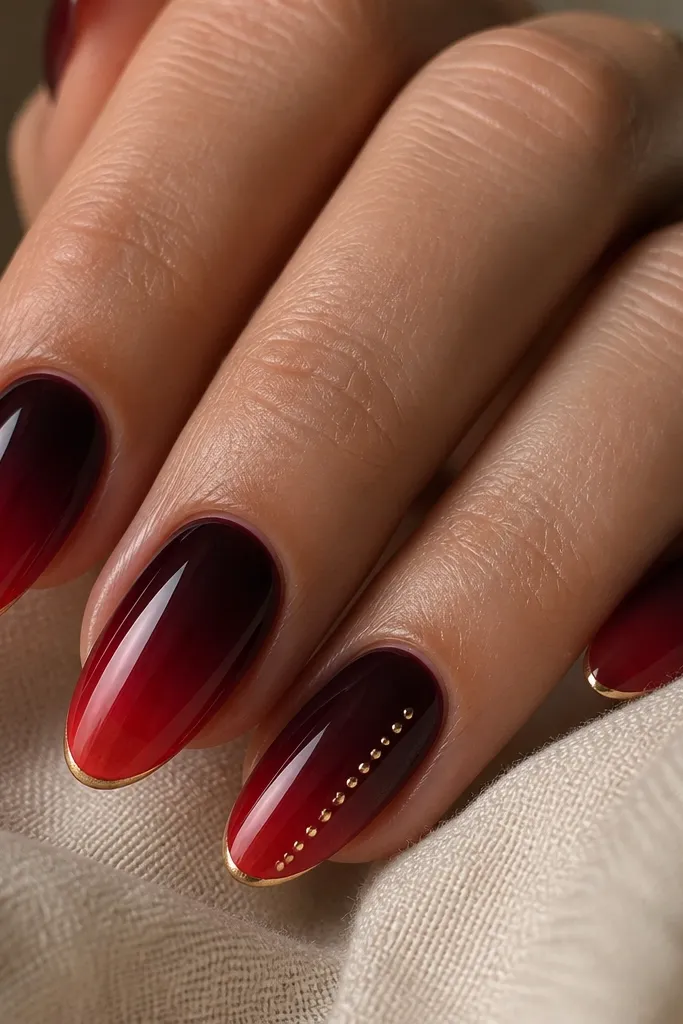
Ombre gives you that “winter evening” look because the red shifts smoothly instead of stopping at a line. I use deep wine at the cuticle so your nail bed looks fuller, then I fade into a sheer red for a softer finish. The pale gold edge line looks like the edge of a string of lights shining on glass. This is flattering on almost everyone because it lengthens visually and does not require heavy decoration.
Apply a sheer base and cure, then sponge deep wine near the cuticle and fade downward with a makeup sponge using a sheer red layer. Blend until the ombre feels smooth — stop early if you see streaks, then build in thin layers. Add a thin pale gold line along the very tip edge with a liner brush, keeping it under 1 mm. On one accent nail, place 4-6 tiny gold dots in a slight curve near the side. Seal with a glossy top coat and cure fully. Store liner brushes flat in a small case so the gold line stays steady next time you do this set.
Editor's noteUse a damp sponge for ombre if your gel is catching — it smooths the transition fast.
Skip thisSkip over-building the ombre; thick layers make the nail look bulky at the cuticle.
10. Red Glitter Half-Moons with Clear 'Light' Beads
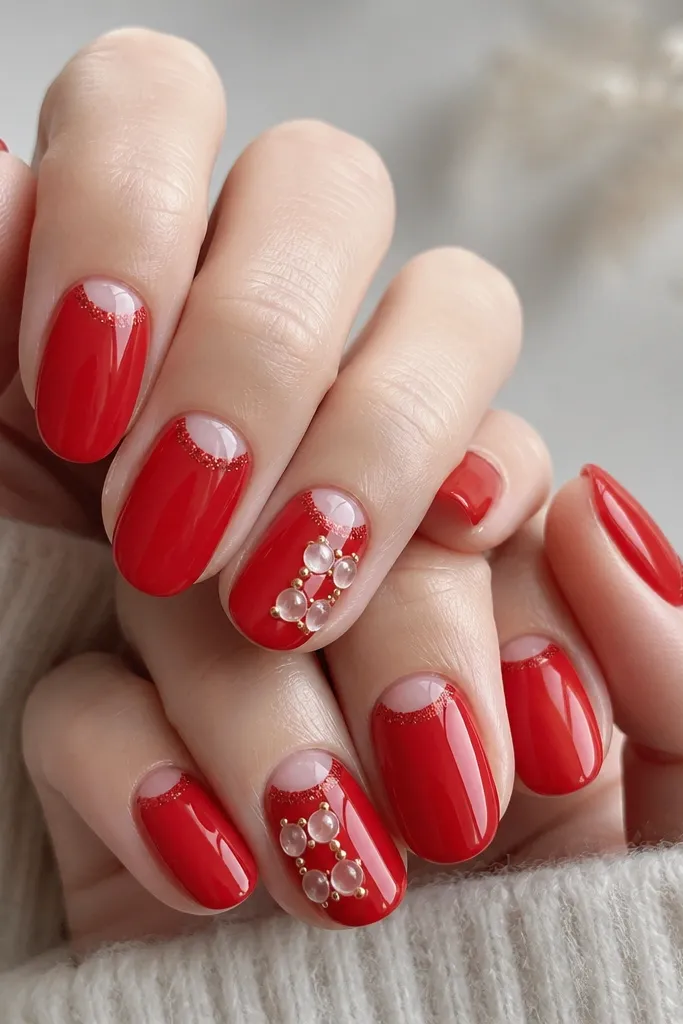
This one is for party nights when you want sparkle but still want the mani to look tidy. The red micro-glitter half-moon sits right at the cuticle, so it frames the nail without covering the whole surface. The clear gel beads mimic light bulbs because they sit raised and catch highlights. It flatters hands with shorter nails since the design starts at the cuticle and draws attention upward.
Paint a nude base and cure, then add glossy red polish over the mid-to-tip area leaving the half-moon area clear. Use a small brush to paint red micro-glitter into the half-moon shape at the cuticle and cure. On two accent nails, place clear gel beads in a vertical line, then top each bead with a tiny gold dot before curing. Finish with a glossy top coat on all nails, capping free edges. For storage, keep glitter in a sealed container and keep your lights pouch separate so stray glitter does not get into the light cords.
Editor's noteUse a small silicone bead tool or the back of a toothpick to place gel beads — it gives smoother domes than a brush.
Skip thisAvoid big chunky glitter at the cuticle; it lifts faster and catches on hair.
11. Minimal Red Nails with White Starry Dotting
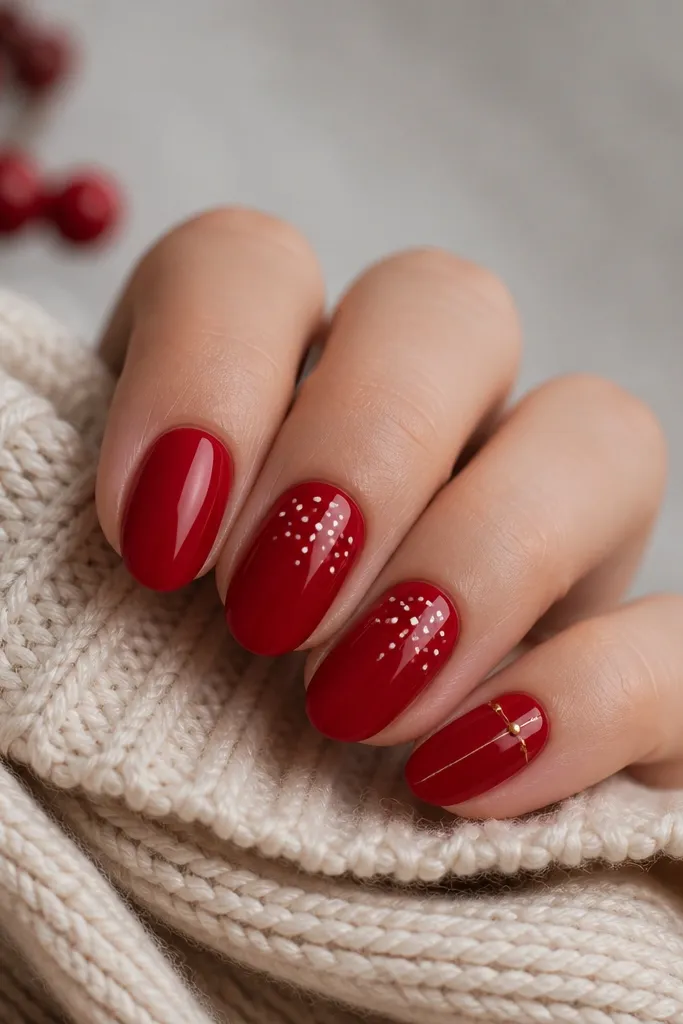
This is the holiday set for people who hate heavy nail art but still want “Christmas” energy. Solid red looks sharp in winter, and the tiny white dot stars are subtle enough for everyday wear. I add two gold dots like light points on one nail to tie it back to the Christmas lights theme without turning the set into a full theme park. It’s flattering on all nail lengths, and it looks especially clean on oval nails where the shine stays even.
Apply a glossy red polish in two thin coats and cure. For the starry nails, use a dotting tool to place 6-10 tiny white dots, varying sizes slightly so it looks natural. Keep the dots clustered near the upper third of the nail and stop before the tip so it does not look like snow smeared down. On one nail, paint a thin white line down the side and add two gold dots near the middle. Top coat everything with high-gloss. Store dotting tools and your lights pouch in the same organizer so you do not lose the dot sizes between sets.
Shake your white polish for 10 seconds and wipe the brush tip — uneven dot size is what usually makes this look messy.
Skip overdoing dots on every nail; it turns minimal into clutter.
12. Red Lace-Look Lines with Gold Light Traces
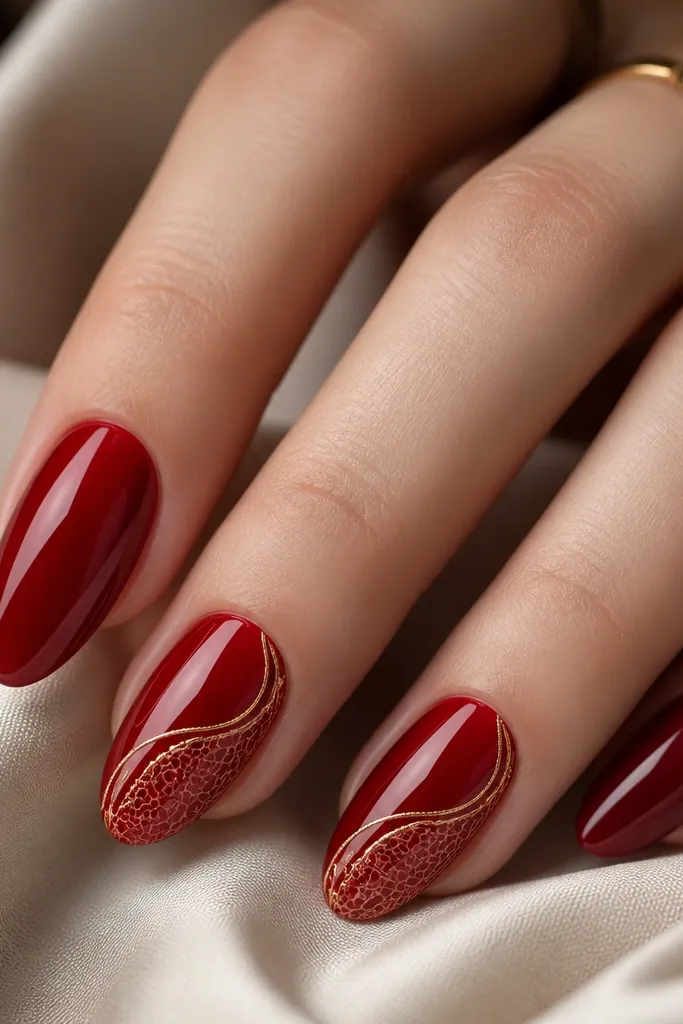
Lace-look nails feel fancy without needing actual lace fabric, and red makes the pattern look romantic instead of gothic. I use thinner lines in a slightly lighter red shade so the lace has depth but stays readable. The gold traces along the lace edge mimic wiring from Christmas lights and keep the winter theme consistent. This works best on medium-length nails because the lace lines need space to look intentional.
Start with deep red polish on all nails, two coats and cure. On the lace accent nails, use a thin liner brush to draw curved vertical lines, then add shorter cross lines to form a net pattern — keep spacing consistent. Add gold traces with the thinnest liner you have, placing them near the cuticle and along one side of the lace so it looks like light wiring. Cure and top coat with glossy finish, focusing on sealing the line edges so they do not lift. When storing your tools, keep liner brushes in a dedicated section so dried gel does not ruin the next manicure.
Editor's noteIf your lace lines keep bleeding, let the base cure longer and use a gel liner with a thinner consistency.
Skip thisAvoid thick lace lines; they look like paint scribbles instead of lace.
13. Red Velvet Base with Tiny Frosted Tree Charms
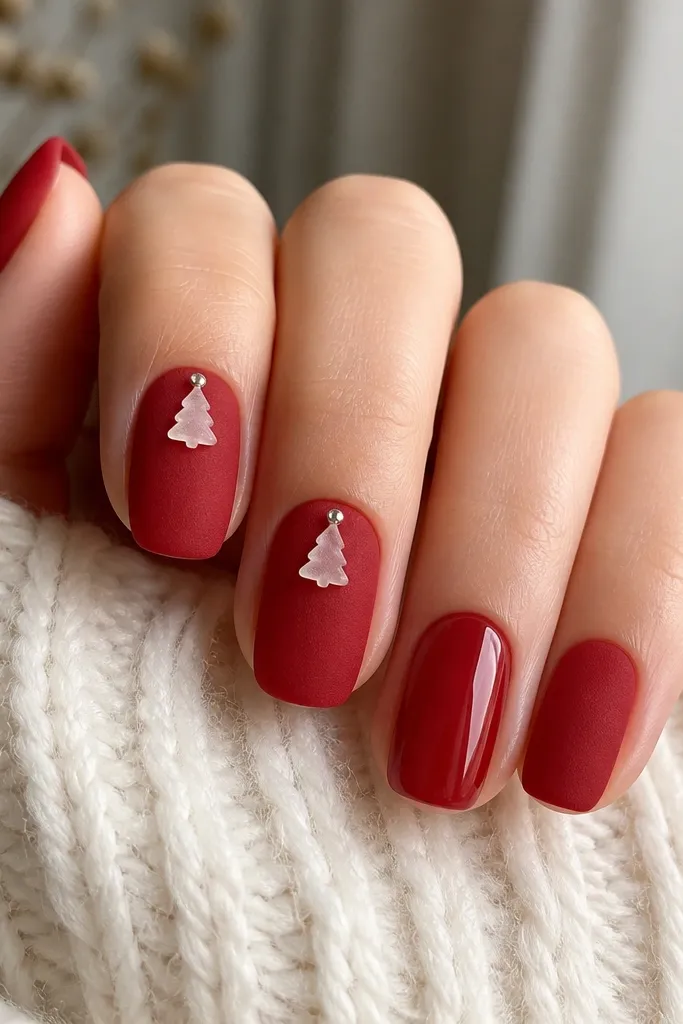
Charms make this set feel like real winter decor, and the matte velvet base keeps it from looking shiny and cheap. I use small frosted tree charms with a light coating so they read “snowy” even when your hands are indoors. The silver rhinestone on each charm acts like a single light point, which is exactly what makes it look festive instead of cluttered. This is best for hands with average nail beds because the charm sits near the cuticle and pulls attention upward.
Paint all nails in a red velvet matte finish and cure. Pick two nails for charms and place the tree charm near the cuticle using gel glue, then cure. Add one small silver rhinestone to the side of each charm, sealing it with a thin layer of gel so it does not snag. On one ring finger, add a glossy top coat just for contrast — it makes the charm nails look sharper. For storage, keep charms in a sealed cup with a lid and keep your lights pouch separate so charm pieces do not scatter when you open the organizer.
Editor's notePress the charm down for 5-8 seconds while the gel is tacky so it bonds flat.
Skip thisSkip large charms; they catch on scarves and chip the edges quickly.
14. Red Window Scene with Minimal Snow and Light Dots
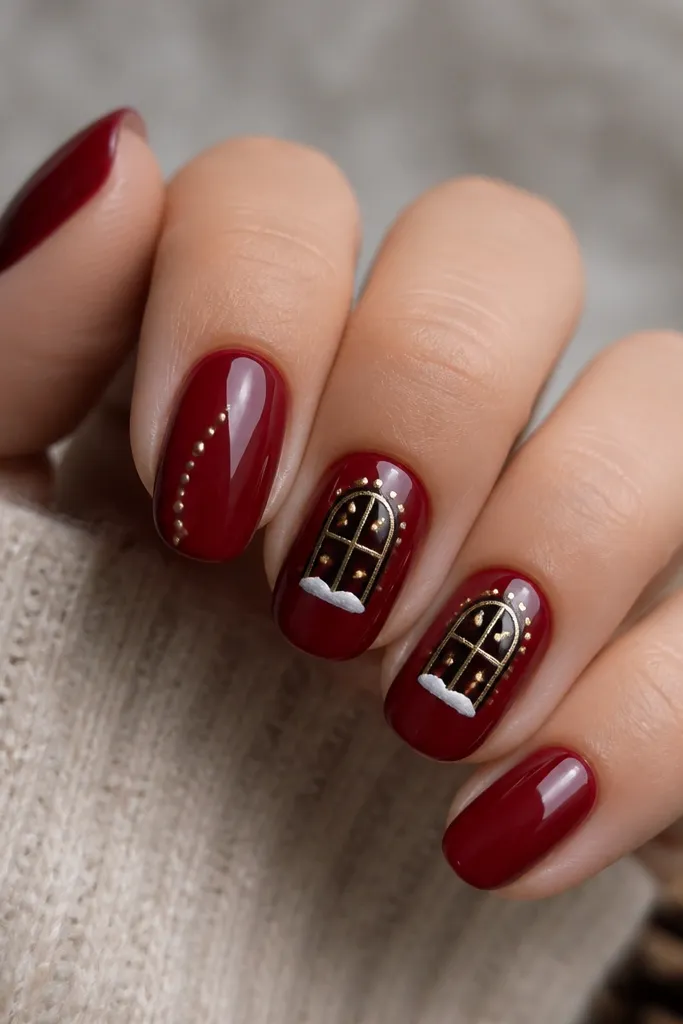
This is the “winter night” look without painting a whole mural. A deep red background makes the window scene feel warm, like you’re looking out at snow from inside. The minimal snow curve keeps it clean, and the gold dots along the window edges read like Christmas lights around the frame. It works on most skin tones because the scene uses neutral black and gold against red — your hand still looks bright and not washed out.
Start with deep red glossy polish on all nails, cure well. On two accent nails, paint a thin window outline using black gel liner, then add a gold border line just inside the black for warmth. Add a small white snow curve at the bottom of the window, keeping it simple and not too wide. Place gold dots along the window edges — about 3-5 dots per side — and cure. Top coat everything with glossy finish and store your gel liner and light accessories in separate compartments so the window lines stay crisp next time.
Editor's noteUse a striping brush you trust and do the outline in one pass per side — patchy lines show fast on dark red.
Skip thisAvoid adding too many details like tiny houses; the red background already carries the holiday mood.
15. Classic Red with Light-Strand Side Accent and Clear Builder Gel
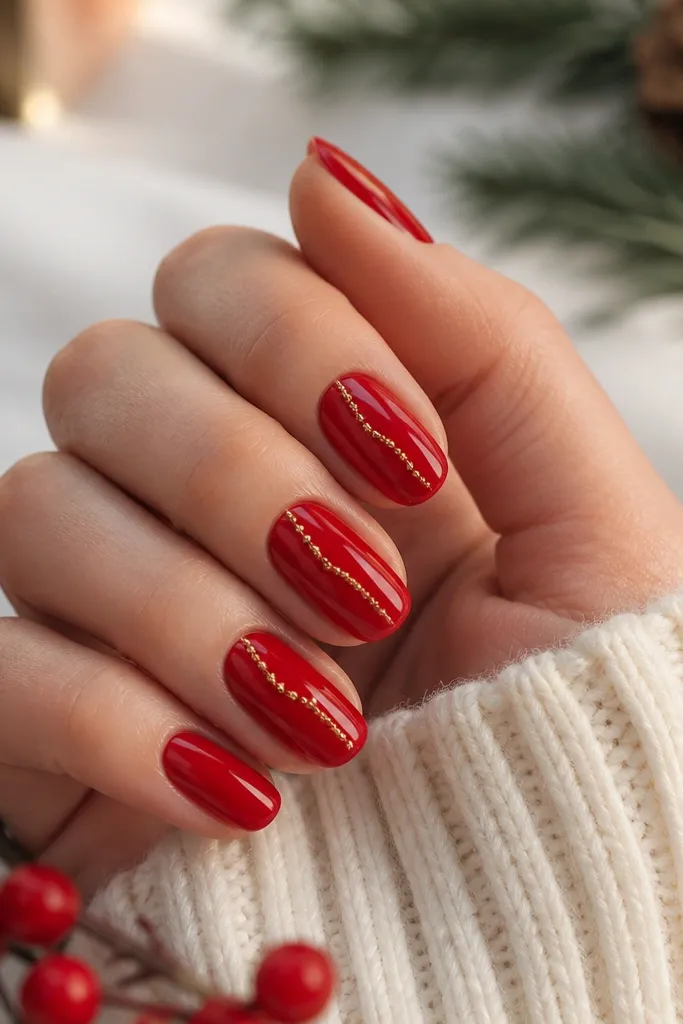
This is the set I wear when I want the classic red look but still want to feel festive every time I move my hands. The side accent keeps the manicure modern and it does not cover the whole nail, so it grows out cleaner. The raised clear builder gel over the strand makes the dots look like they sit on a string of lights. It flatters both short and medium nails because the accent runs vertically and visually lengthens the nail.
Paint all nails with classic red in two thin coats and cure. On two accent nails, apply a thin line of clear builder gel where you want the light strand, then use a dotting tool to place gold dots along it, spacing them evenly. Cure, then add a second thin layer of clear builder gel over the strand so it looks rounded and smooth. Seal with glossy top coat on the whole nail, and cap the free edge. For storage, keep your dotting tool tips clean and store them in a small case next to your lights pouch so you always grab the right size dot.
Editor's noteIf the clear line spreads, cure for 10 seconds first, then place dots on the tacky gel — it stays put.
Skip thisAvoid painting the strand directly over a matte top coat; it makes the clear line look dull and uneven.