
1. Latte Cream with Micro Heart Tips
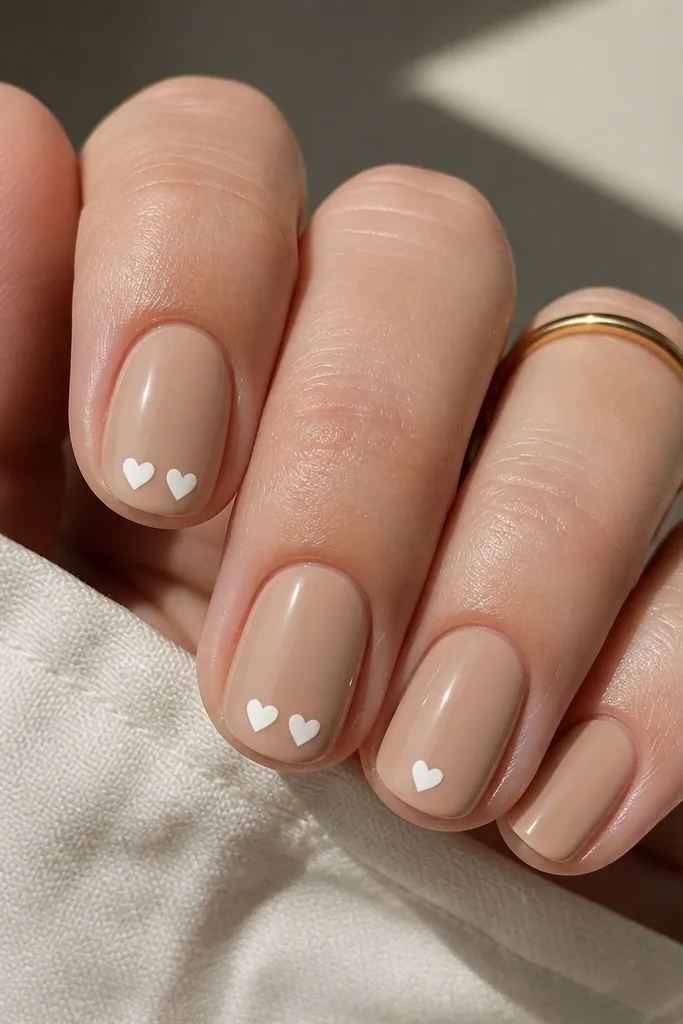
Start with a latte cream base because it gives that “warm mug” look — smooth, creamy, and flattering on most skin tones. I like this when your hands look a little dry; the creamy nude makes the cuticle area blend in instead of drawing attention to texture. Keep the hearts small and tucked into the tip curve so the nail still reads oval, not cartoonish. This design works for everyday office wear and also for date nights because the hearts catch light without being loud. The cozy part is the warm nude, and the polish part is the micro scale.
First, prep and shape to a short oval, then apply a rubber base coat and cure. Paint two thin coats of latte cream, letting each coat level out before curing. Use a dotting tool to place tiny off-white heart halves along the tip curve, then connect the bottoms with a quick second dot. Put the hearts mostly on the index, middle, and ring fingers, leaving the thumb and pinky plain for balance. Finish with a glossy topcoat and cap the free edge on every nail.
Editor's noteIf your hearts get lopsided, make them slightly asymmetrical on purpose — they look cuter and more natural.
Skip thisAvoid oversized hearts on short ovals; they make the nails look wider and shorter.
2. Dusty Rose Velvet Matte with One Shimmer Cuticle Stripe
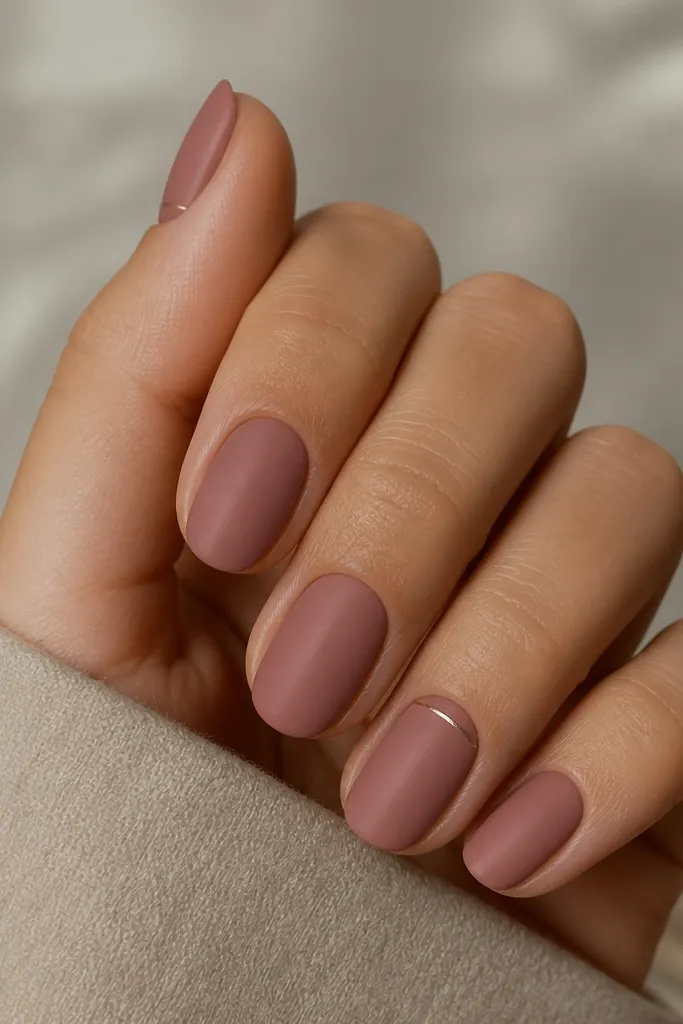
Dusty rose matte is cozy because it looks like fabric — soft, slightly muted, and not too bright. On fair to medium skin, it flatters by adding warmth without washing you out. On deeper skin tones, it looks creamy and romantic when the rose is dusty rather than neon. The shimmer cuticle stripe gives you that “done” look without needing full nail art. The stripe also visually lifts the nail by anchoring near the cuticle line and making the center look longer.
Start with a smooth base coat and cure fully so the matte finish doesn’t highlight bumps. Apply two coats of dusty rose polish, then top with a matte topcoat. For the accent, use a fine striping brush to paint a thin band of champagne shimmer right under the cuticle, staying parallel to it. Keep the stripe about one-third the nail width so it looks delicate on short ovals. Seal around the stripe with matte topcoat, but don’t flood it — you want the shimmer to stay crisp.
Editor's noteMatte topcoat can dull shimmer too much, so apply matte only over the surrounding areas and keep the stripe slightly protected.
Skip thisAvoid thick matte layers; they dry uneven and can look chalky on short nails.
3. Caramel Nude with Stippled Sugar Speckles
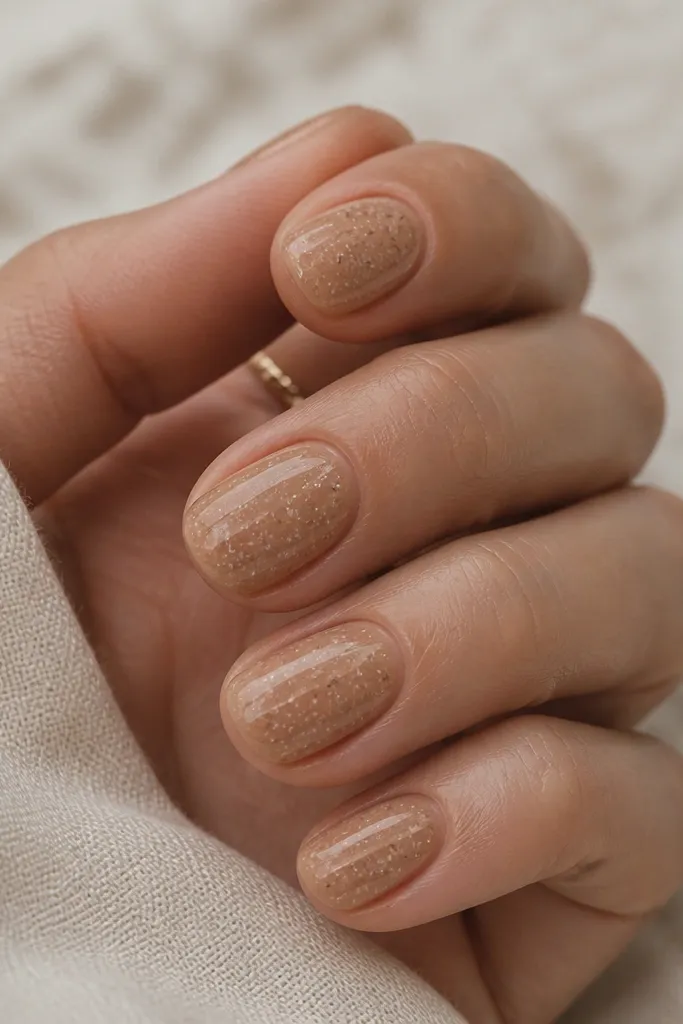
Caramel nude with stippled speckles feels cozy because it looks warm and edible, like cinnamon on toast. The lighter beige dots add dimension without harsh contrast, which is perfect for short ovals. If your nails stain easily, this design hides it because the base is warm and the speckles break up any unevenness. It flatters a wide range of skin tones — it gives fair skin more warmth and adds glow on deeper tones. The speckles also make the nails look textured in a way that feels intentional, not messy.
Begin with a caramel nude base in two thin coats, curing each coat. Take a dotting tool or the end of a bobby pin and pick up a lighter beige polish. Tap lightly across the nail from mid-nail toward the tip, leaving some areas clean so it doesn’t look like glitter bomb. Add a few micro gold dots near the tips only for extra warmth. Finish with a glossy topcoat to make the speckles look like they sit under glass.
Practice on a paper swatch first — the right amount of tapping makes it look airy, not crowded.
Avoid dense speckling that covers the whole nail; it makes short ovals look bulky.
4. Creamy White with Toasted Cinnamon Half-Moons
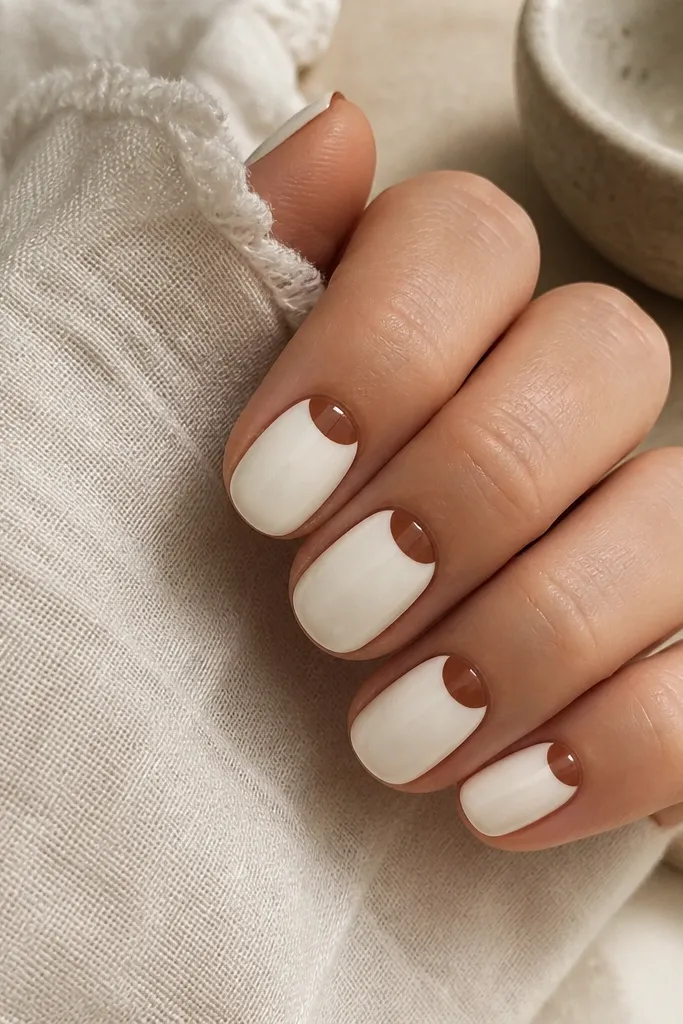
Creamy white makes hands look fresh, but it can get cold fast. Toasted cinnamon half-moons keep it cozy by adding warmth right at the base. The half-moon placement elongates the nail because it frames the cuticle without taking over the tip. This works especially well if your cuticles are a little uneven — the brown shape visually covers the transition line. I’ve worn this to brunch, and it photographs warm even in shade. The key is keeping the half-moon size consistent across nails.
Apply a rubber base coat, then paint two coats of creamy white, curing and letting it level. Use a thin liner brush and toasted cinnamon brown to draw a half-moon under the cuticle, centered on each nail. Keep the half-moon height about one-third of the nail’s visible area on short ovals. Make one smooth curve, then fill carefully without getting polish into the sidewalls. Add glossy topcoat and cap the free edge so the white stays crisp.
If your half-moons wobble, wipe the brush edge on a paper towel and re-stroke one line — crisp edges matter most.
Avoid painting right up to the skin; leave a tiny gap so it looks intentional, not messy.
5. Mocha Swirl Lines on Nude Pink
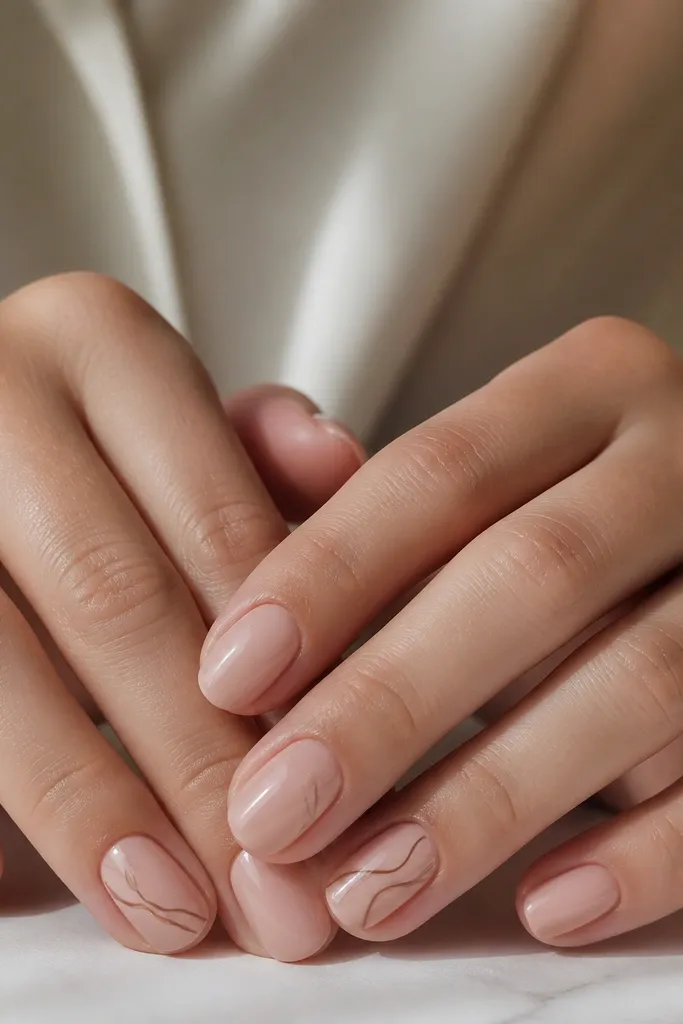
Nude pink is the cozy base because it looks like your nails but warmer, and it goes with everything. The mocha swirl lines add personality without filling the whole nail. I like thin swirls because short ovals already have a strong shape; thick lines make them look heavy. This design flatters most skin tones because the nude pink sits close to the cuticle and the mocha color reads warm instead of stark. It’s a great choice for work because it’s neat and still pretty in close-up.
Start with nude pink in two thin coats and cure well. Choose a mocha brown polish and a striping brush with a fine tip. Paint one thin swirl line on the index and ring fingers, starting around the center of the nail and curving toward the outer edge. For the second line, mirror it lightly but don’t make it identical — slight variation looks more handmade. Finish with glossy topcoat so the lines look smooth and not raised.
If you’re nervous, draw the swirl in two parts: first the curve, then the tail toward the tip.
Avoid filling the swirls with solid color; thin lines are what keep it airy on short nails.
6. Olive Sage with Knit-Stripe Accent
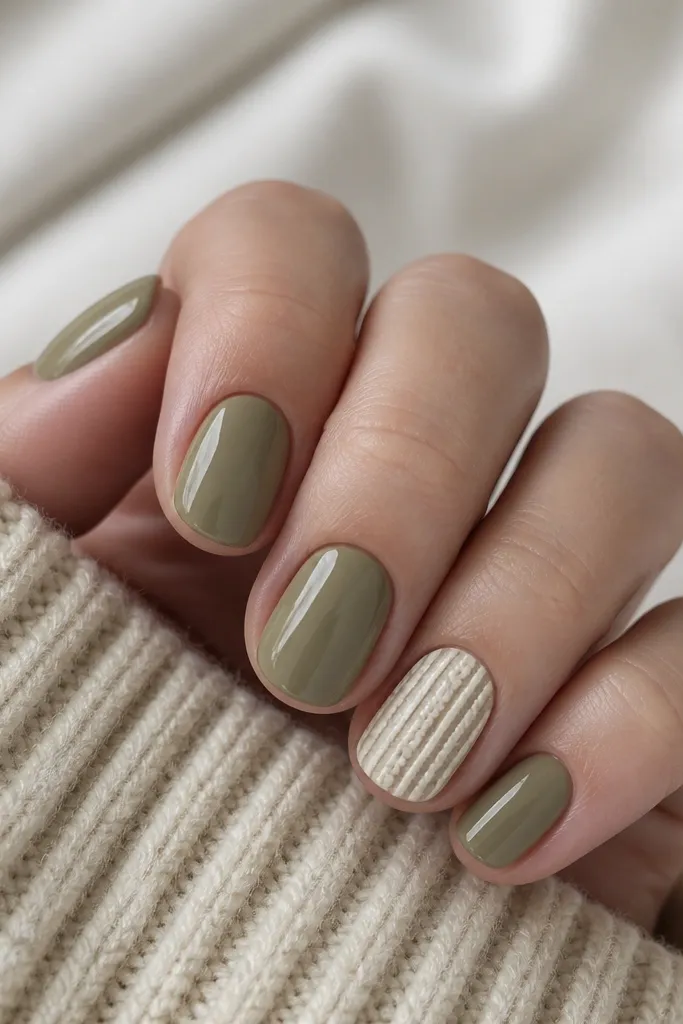
Olive sage nails feel cozy because the color reads like sweater wool — muted, earthy, and calm. It’s flattering on cool and warm skin tones because the undertone is neutral enough to play nice. The knit-stripe accent makes it feel seasonal without adding length or fake drama. I like using cream and light beige for the knit panel because it keeps the contrast soft. This set is also forgiving — if your knit lines aren’t perfect, the knit texture still reads as cozy.
Paint all nails two coats of olive sage, then cure. Pick one accent nail per hand (ring finger works best) and add a vertical panel using cream polish, about half the nail width centered. With a dotting tool, tap light beige dots between the vertical stripes so it looks like knit stitches. Next, use a thin striping brush to add faint horizontal “stitch” lines across the panel every few millimeters. Finish with glossy topcoat on the plain nails and a slightly thicker topcoat on the knit panel so it looks smooth.
Editor's noteMake the knit panel narrower on short ovals; a wide panel can make the nail look squat.
Skip thisAvoid using bright neon greens — they kill the cozy sweater look.
7. Berry Jam Jelly with Tiny Gold Dots
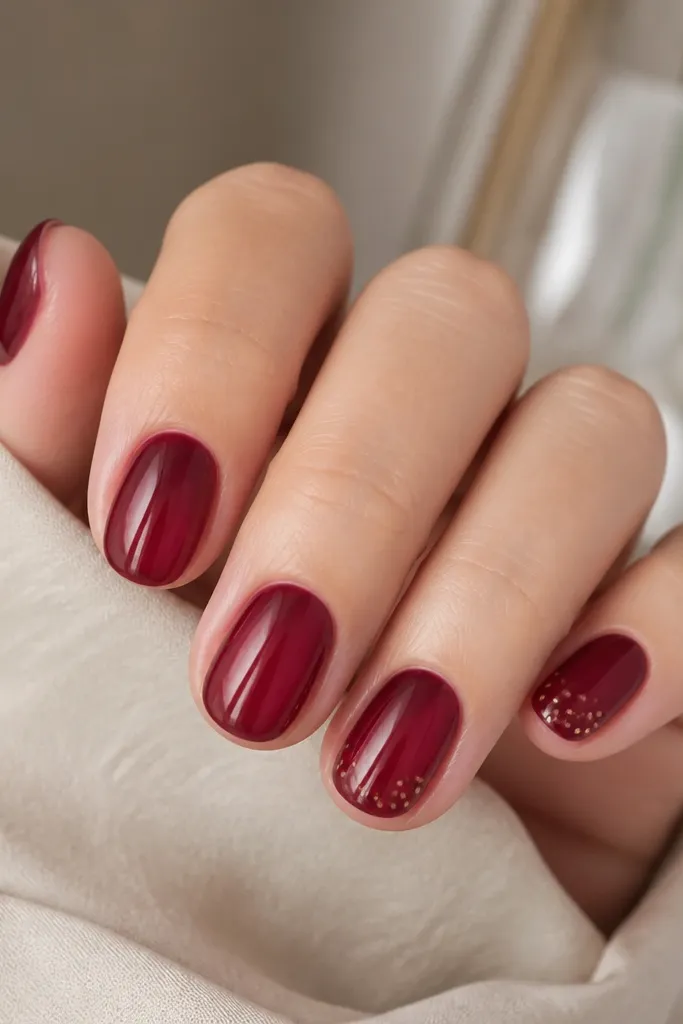
Jelly polish is my secret weapon for cozy short nails because it looks glossy and forgiving. Berry jam gives you that warm, cozy berry vibe without the harshness of full-coverage darks. The jelly finish also helps cover minor ridges since the color has depth. Gold dots near the tip add a little “warm light” effect, which looks great in indoor lighting and in photos. This design flatters hands that have slight unevenness because the translucency makes the nail look smoother. It’s also perfect when you want something more fun than nude but still not loud.
Apply a clear or nude base under the jelly polish so the color has a nice even glow. Paint two to three thin coats of berry jam jelly, curing each coat, until it looks juicy but not thick. For the accent, use a dotting tool with gold polish and place 4-6 tiny dots near the tip on the ring finger and pinky. Keep dots closer together at the outer corners so the nail looks lifted. Finish with a high-gloss topcoat and cap the free edge.
Editor's noteThin jelly coats last longer than one thick coat — they stay flexible and chip less.
Skip thisAvoid flooding the cuticle area with jelly; it can pool and look messy on short ovals.
8. Butterscotch French with Soft Rounded Edges
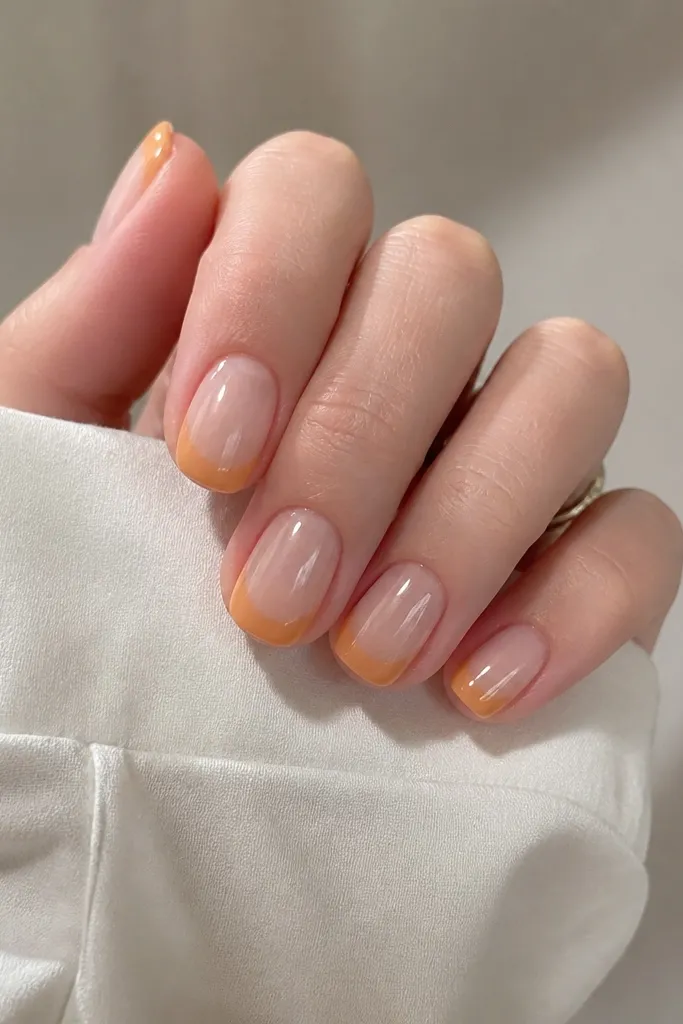
French tips are cozy when the tip color is warm and the line is soft. Butterscotch yellow-orange warms up your whole hand and looks especially good with cozy knits and denim. On short oval nails, the rounded French edge keeps the tip from making nails look too wide. Use a sheer nude base so your nail bed still shows through and the oval looks longer. This is a great everyday design because it grows out without looking messy. The warmth is the whole point here — it reads like fall without being dark.
Start with a sheer nude base in two coats, curing each. For the French, use a thin brush and butterscotch polish, and paint a curved tip that covers about 20-25% of the nail length. Instead of drawing a sharp line, lightly blend the butterscotch inward with the same brush, so the edge looks rounded. Clean up the sides with a brush dipped in acetone-free remover. Add glossy topcoat and seal the tip edge so the butterscotch stays smooth.
If you mess up the curve, wipe only the edge and re-draw the curve — don’t repaint the whole tip.
Avoid super-thin sheer bases with dark French; it can look streaky on short ovals.
9. Powder Blue + Cloud Matte with One Glossy Accent Nail
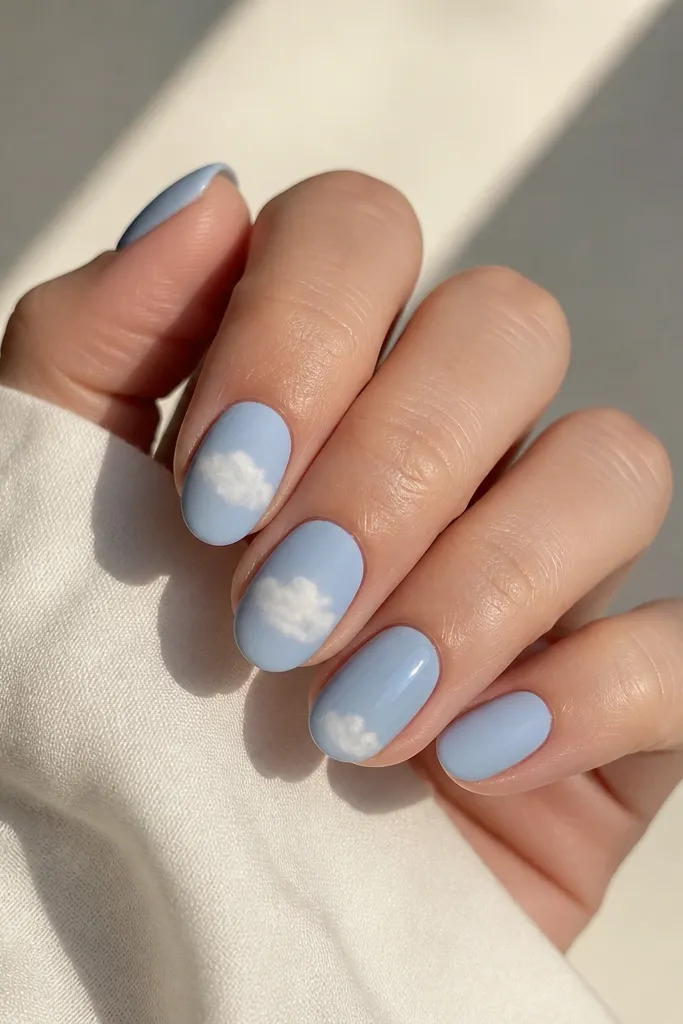
Powder blue can feel chilly, but matte and cloud shapes make it cozy. The matte finish diffuses the color so it looks like a soft sky sweater, not a nail salon chrome. White cloud shapes add whimsy while staying light and clean on short ovals. I like making one nail glossy to create contrast — it makes the set look intentional instead of flat. This works well for fair to medium skin because the cool tone brightens your hands, and it looks surprisingly wearable on deeper skin when you keep the blue pastel, not icy. The cloud placement also keeps attention on the center, which elongates.
Paint all nails powder blue and cure, then apply a matte topcoat over everything. For the cloud design, use a sponge or a small makeup brush to dab white polish into a soft cloud shape near the center of the index and ring fingers. Keep the edges feathered — no hard outlines. On the accent nail (usually thumb), skip the matte topcoat and leave it glossy powder blue, then add one small white cloud near the tip. Finish with matte topcoat on the matte nails and glossy topcoat on the accent nail only.
For feathered clouds, dab with a sponge rather than drawing — it looks natural on short nails.
Avoid crisp outlined clouds; outlines make it look like sticker art.
10. Cream Puff Gradient Fade with Brown Sugar Outline
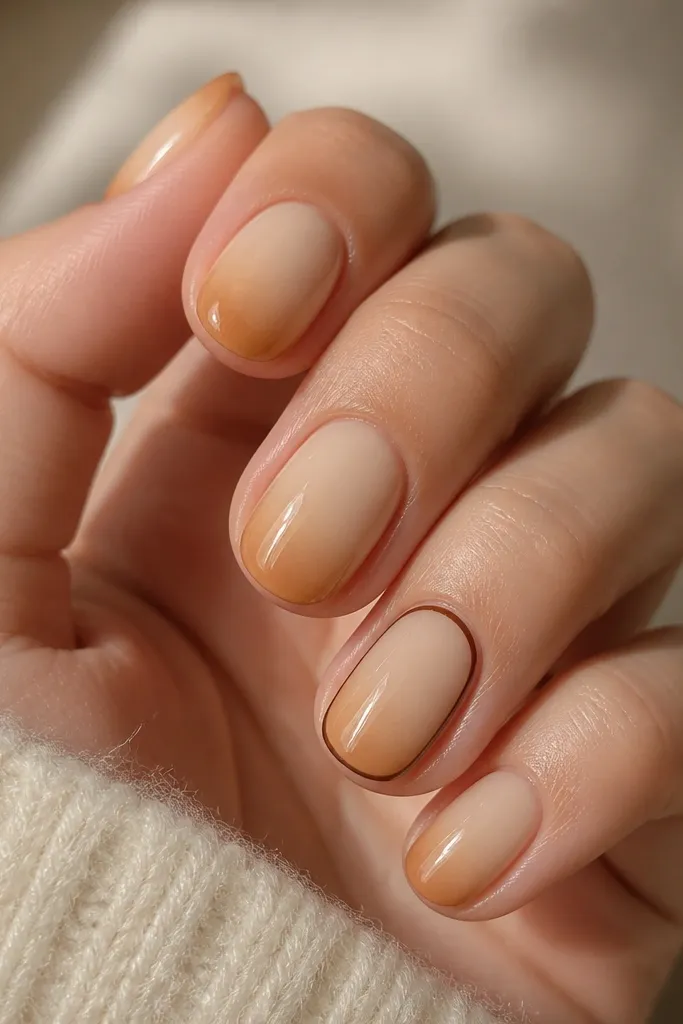
A cream puff gradient feels cozy because it looks like dessert — soft and smooth. The warm nude-to-caramel fade flatters short ovals by blending from cuticle to tip, making the nail look longer than it is. The brown sugar outline on one nail gives a neat focal point without needing lots of tiny art. I like this for people who want something “pretty” but don’t want hearts, bows, or glitter. It also works on any skin tone because the gradient stays in warm neutrals. The key is smooth blending and a thin outline — both make it look salon-clean.
Apply a nude cream base, then sponge a caramel shade starting about one-third down the nail and blending toward the tip. Use a makeup sponge with very light pressure so the gradient stays soft. Clean up the edges with a small brush dipped in remover, then cure. On the accent nail, paint a thin brown outline following the oval tip edge — just one line, slightly rounded, not a full frame. Seal everything with glossy topcoat and cap the free edge.
Editor's noteIf the gradient looks patchy, add a third ultra-thin nude layer over it to smooth the fade.
Skip thisAvoid heavy sponge strokes; they make short ovals look streaky.



