
1. Creamy French with a thin mocha smile line
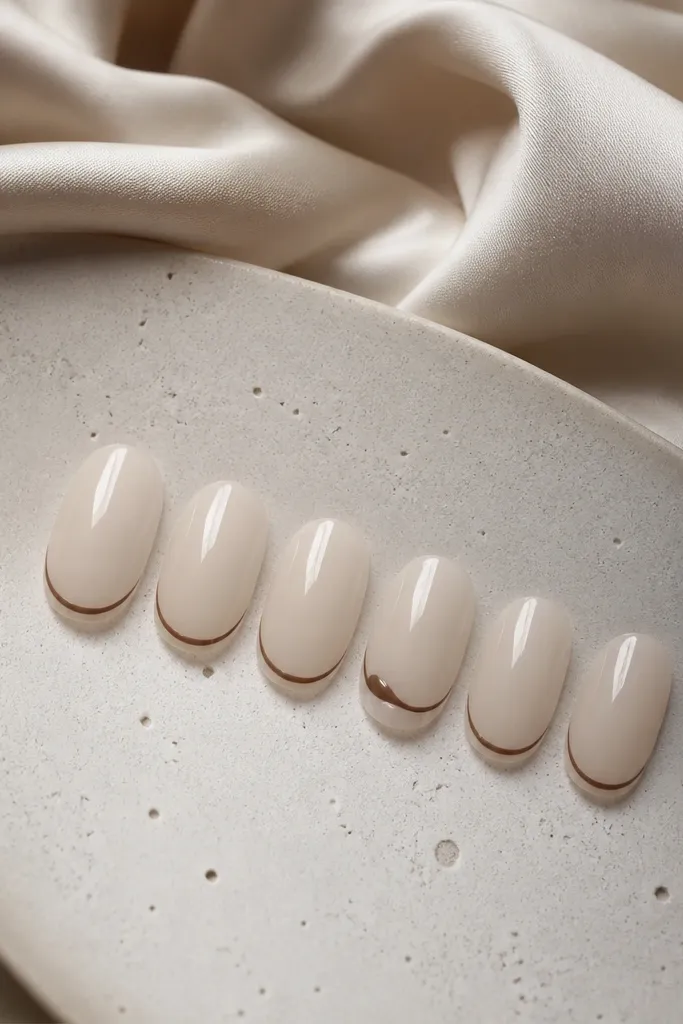
Start by applying two thin coats of the creamy nude, letting each coat dry fully. Then use a fine French striping brush to paint a thin mocha smile line — aim for about one-third of the nail’s width, leaving a small gap near the sidewalls. Cure or dry, then add a glossy top coat so the smile line stays crisp. If you’re using press-ons, pick nails already pre-shaped oval, then apply the mocha line with nail polish before sealing with top coat.
I love this one because it makes short oval nails look longer without turning into a thick, chunky French. The base is a creamy nude that matches most skin undertones, and the mocha line adds warmth so it doesn’t look harsh like pure black. On fair skin, the cream reads bright and clean; on medium and deep skin, it gives a smooth, polished contrast. Keep the line thin and centered — short oval needs negative space to look sharp, not bold.
Skip thisDon’t paint the French line too wide — on short oval it makes the nail look stubby and cheap.
Editor's noteUse a striping brush with a tiny amount of polish — if the brush is overloaded, the line will bleed at the sides on short oval.
2. Rose latte swirl on two accent nails
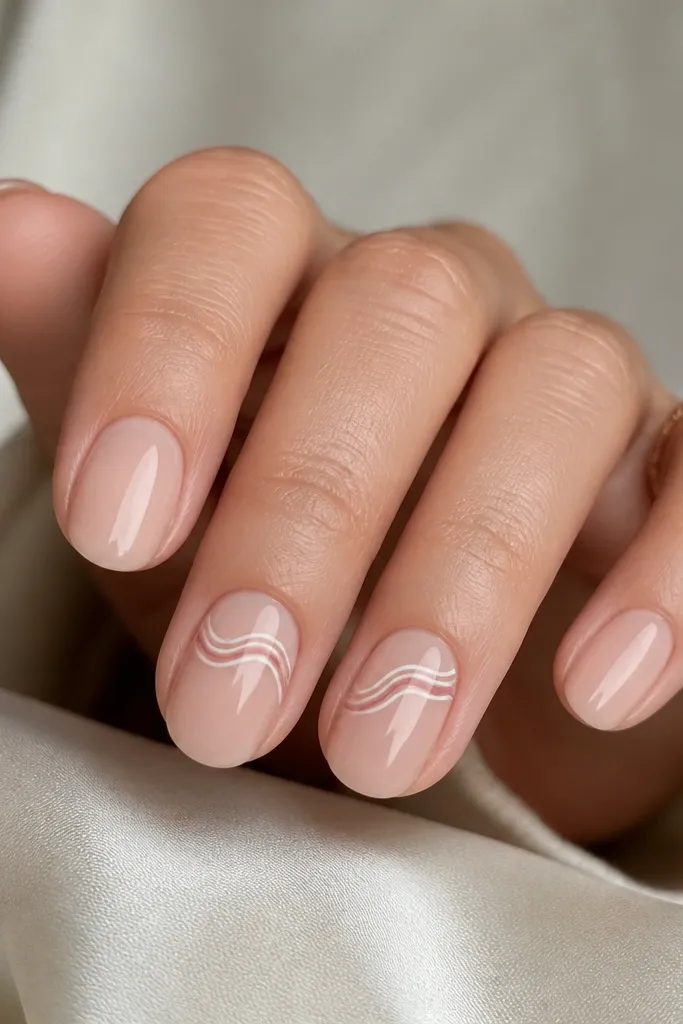
This design is my go-to when I want something pretty but not loud. The sheer nude base makes your nails look tidy, and the rose latte swirl adds movement without needing heavy decoration. It flatters all skin tones because the colors sit in that warm pink-beige family. The swirl also looks best on short oval when it stays near the cuticle area — the eye reads it as intentional, not crowded.
Start with a sheer nude base — two thin coats, then seal with a glossy top coat so the swirl lines don’t drag. Choose two accent nails (I pick index and ring), then lightly mark the swirl center with a dot using a toothpick. Paint a thin cream-white swirl first, then outline it with rose pink so it pops. Finally, add one more glossy top coat and keep it extra careful around the sidewalls for smooth edges.
If the swirl looks messy, wipe the brush on a paper towel and redo just the top loop — the top third is where it matters most.
Don’t cover the whole nail with swirls — on short oval it turns busy fast.
3. Olive matte base with gold foil half-moons
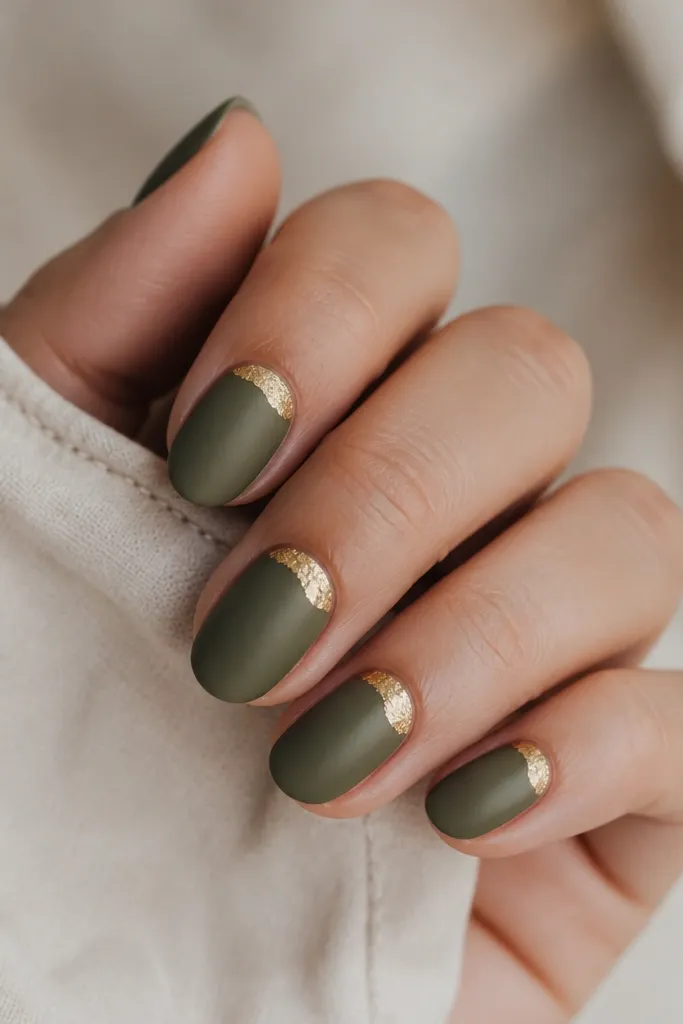
Matte olive is a little moodier than typical nudes, and short oval makes it look modern instead of heavy. The gold foil half-moon at the cuticle gives a luxe glow right where your nail bed is strongest. I’ve worn this on both cool-toned and warm-toned skin — olive balances either, while gold warms everything up. Keep the foil crescent small; big crescents swallow the short nail shape.
Start by applying two coats of olive matte polish or matte gel, letting it dry without touching it. Then apply a thin layer of cuticle-area foil adhesive or a tacky base near the cuticle — not down the middle. Press gold foil so it forms a neat half-moon crescent, then gently tap off excess. Finish with a matte top coat everywhere except the foil — seal the foil with a glossy top coat only on the crescent so it doesn’t dull.
Use a small foam applicator to press foil — fingers leave smudges on matte bases.
Don’t seal the entire nail in glossy top coat — it ruins the matte contrast that makes this look expensive.
4. Black micro-dot grid on sheer pink
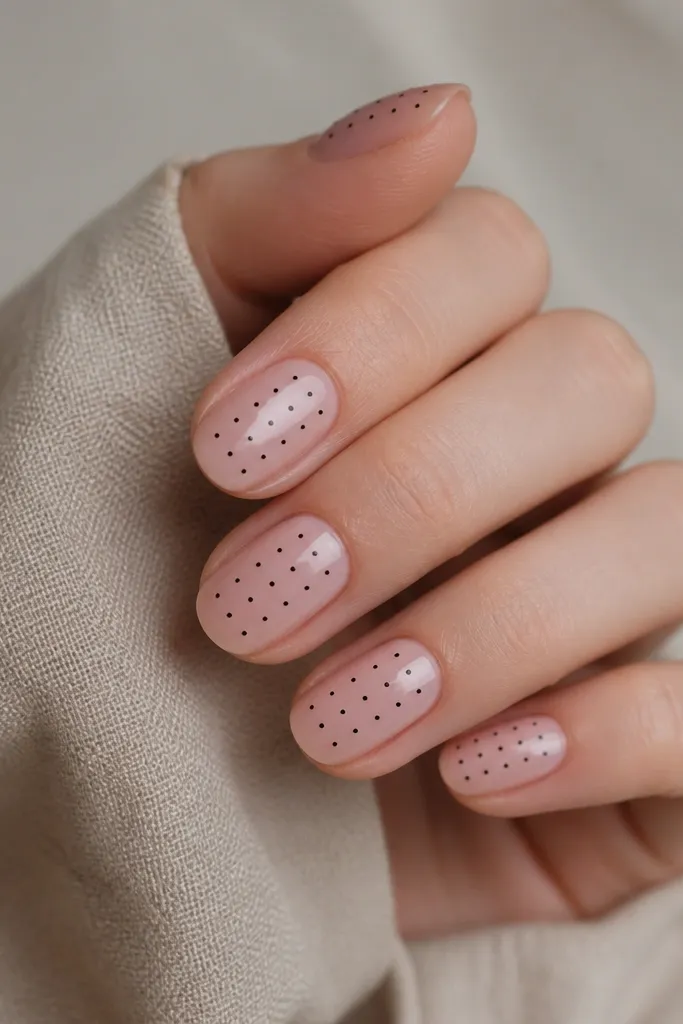
Start with a sheer pink base, then add a glossy top coat before dots. Use a dotting tool and black polish (or a striping gel) and place dots in rows — I keep about 5-6 dots per nail across the center. Leave the first row slightly closer to the cuticle so the grid doesn’t look like it’s floating. After the dots dry, add one more glossy top coat, dragging the brush gently from cuticle to tip to lock everything down.
Micro-dot grid looks clean on short oval because the dots are small enough to stay readable at a glance. The sheer pink base keeps it feminine, and black dots add graphic contrast without needing thick lines. This one flatters hands that need a little visual structure — it makes the nail bed look even. If your nails have ridges, the sheer base plus glossy top smooths the look.
Skip thisDon’t use chunky dots — larger dots on short oval make the design feel like a sticker.
Editor's noteIf your dot spacing drifts, use the nail’s width as your guide: keep the dot columns evenly spaced by counting the dots per row.
5. Glazed donut chrome tip
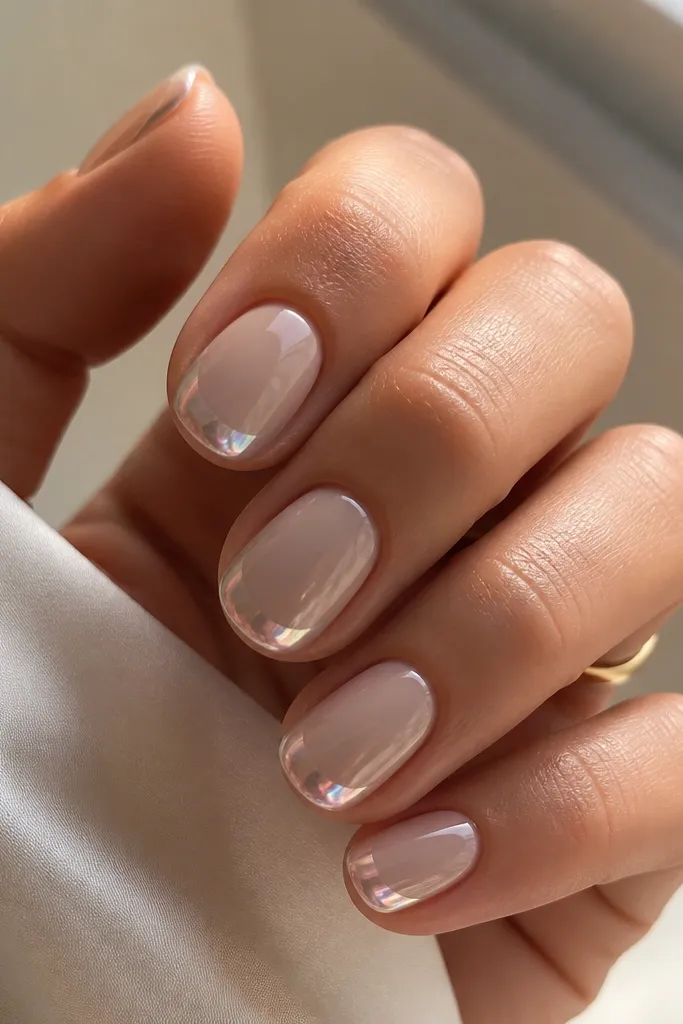
Start with a beige nude base — two thin coats, then buff lightly only if your base is textured. Apply a thin line of chrome gel or chrome adhesive exactly where you want the tip arc. Press chrome powder or use a chrome pen to build the arc from the center outward, then fade it slightly near the sidewalls. Seal with a high-shine top coat so the mirror effect stays smooth.
Glazed donut chrome is one of those looks that reads expensive even when the nail is short. The beige base keeps it wearable for day, and the chrome tip creates a bright highlight that makes your fingers look fresh. I’ve worn this with gold jewelry and silver jewelry — chrome sits in the middle, so it doesn’t clash. On short oval, keep the chrome only on the tip and slightly off the corners so the nail still looks tapered.
Skip thisDon’t bring the chrome too far down the nail — it makes short oval look wide and squat.
Editor's noteUse a makeup sponge to dab chrome in tiny taps — it prevents harsh streaks on short oval curves.
6. Nude-to-salmon ombre with micro-glitter fade
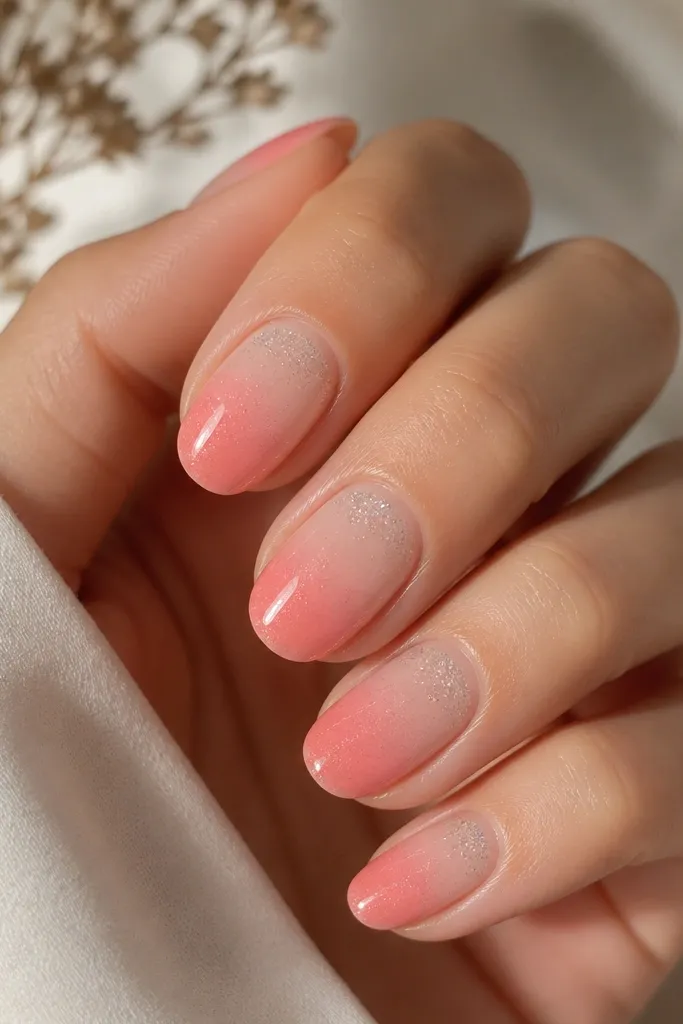
This ombre is flattering because it follows the natural shape of short oval — you get length from the gradient, not from extra decoration. The nude-to-salmon shift looks like a healthy nail tint, and the micro-glitter fade adds just enough light for photos. It works especially well on medium to deep skin because salmon pops without looking neon. Keep the glitter fine and concentrated near the tips so it doesn’t make the nail look busy.
Start with a nude base, then sponge on salmon pink starting around the middle and blending upward toward the cuticle with a light touch. For the glitter, dab a sheer glitter gel only on the top third, then feather it down with the sponge edge. Cure or let it set fully, then apply a smooth top coat that covers the gradient so it feels even. If you’re using press-ons, paint the ombre on the nail surface first, then seal once.
Blend using the edge of a makeup sponge, not the flat side — it keeps the ombre from getting stripey.
Don’t add chunky glitter — it catches on sleeves and lifts faster on short nails.
7. Tiny cherry decals with glossy red accent
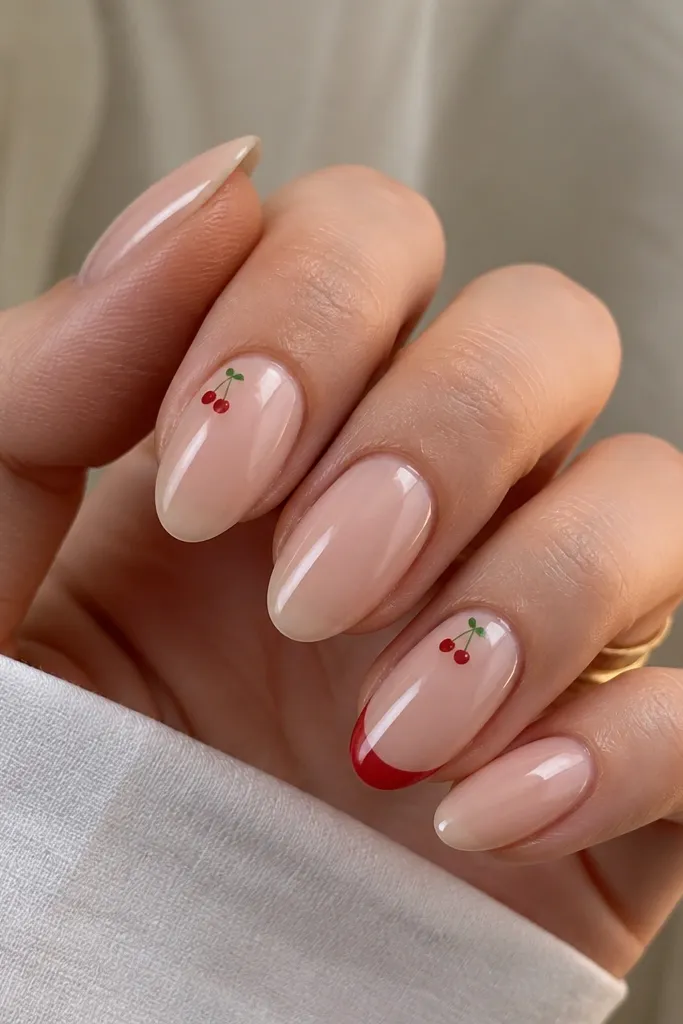
Cherry decals look adorable on short oval because the art is small and sits where your nail bed is widest. The glossy red accent gives you the punch without covering the whole nail. I like this for spring, but it also works for casual weekends because it feels playful instead of formal. This design flatters hands that look dry — the sheer nude base makes the nail feel clean, while the glossy top coat makes it look hydrated.
Begin with a sheer nude base in two thin coats and seal with glossy top coat. Apply cherry decals on two nails — place them about 1-2 mm below the cuticle line so the stem doesn’t crowd the skin. Press each decal down gently, then add a thin top coat over it, making sure the edges are sealed. Finish by painting a glossy red half-panel on just the tip of one accent nail, keeping it narrow for short oval.
If decals lift at the edges, add a tiny dot of top coat only along the border with a toothpick.
Don’t place cherries in the center of the nail — short oval needs the art higher up to look balanced.
8. Lavender satin base with diagonal white stripe
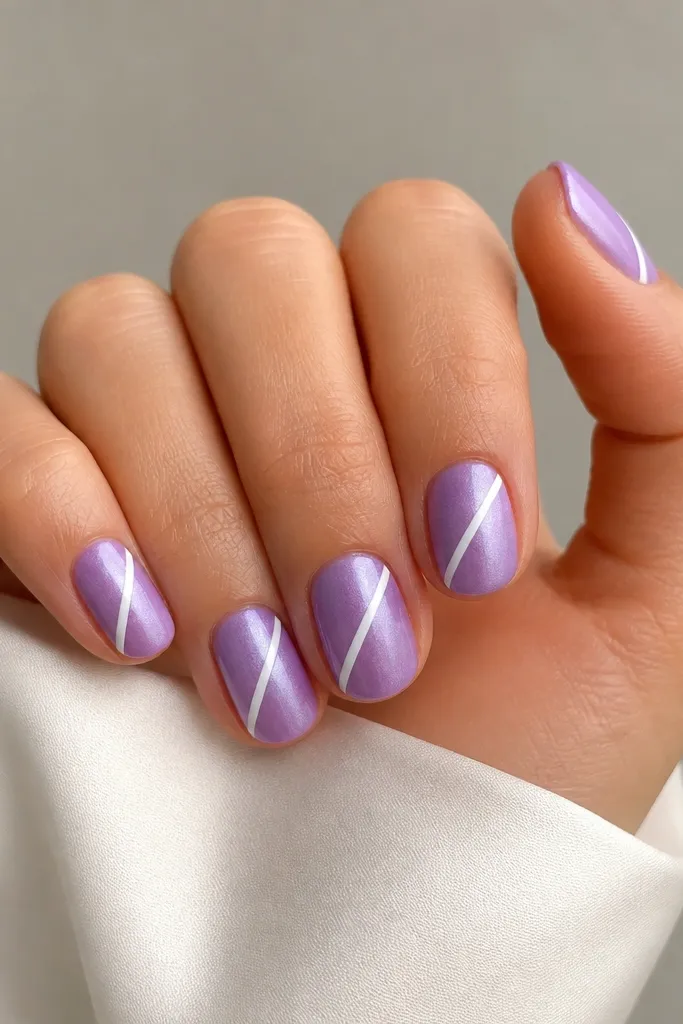
A diagonal stripe is the fastest way to make short oval look longer because it pulls the eye across the nail. Lavender satin keeps it soft, and the white stripe adds contrast without getting harsh. This one looks especially good on cool-toned skin and on hands with visible veins because the lavender cancels the red undertone. Keep the stripe narrow and straight — the polish line should look like it was measured.
Start with lavender satin polish and apply two coats, letting the surface set until it looks smooth and velvety. Use striping tape or a thin nail art brush to create the diagonal stripe — place it starting near the cuticle on one side and ending about 2 mm from the tip. Paint white over the guide, remove tape carefully while the paint is still slightly tacky, then seal with a satin or glossy top coat depending on how shiny you want it. For press-ons, paint the stripe before sealing so the edges stay crisp.
If you freehand the stripe, practice on a paper strip first — your wrist learns the angle in 30 seconds.
Don’t use thick tape lines — wide stripes on short oval look heavy.
9. Chocolate swirl line art with nude base
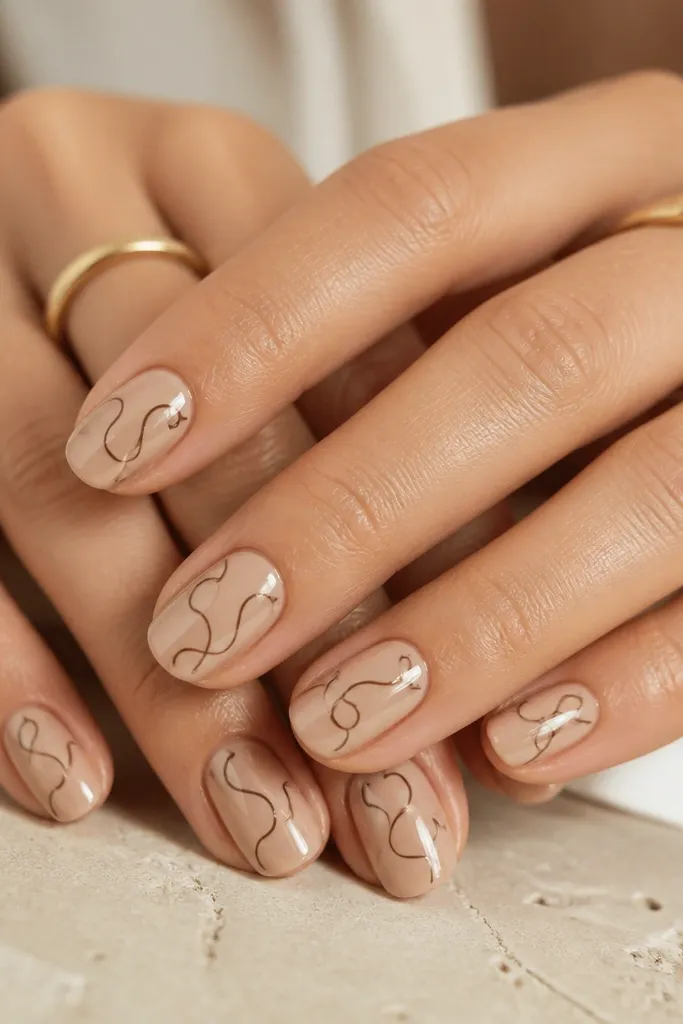
Apply nude beige in two coats and top with a glossy layer to give the line art a smooth surface. With a fine liner brush, paint a thin chocolate swirl on each nail — keep it within the middle third and avoid touching the cuticle. Let it dry fully, then add one more glossy top coat over the lines. If you’re using nail stickers, use only line-art stickers and press them down with a flat tool, then seal.
Line art is perfect for short oval because it adds interest without shrinking the nail visually. The nude beige base is warm and makes the chocolate line feel intentional, not muddy. This design flatters almost everyone because it’s a neutral palette with a little movement. I also like it for hands with shorter nail beds — the thin lines keep the eye moving instead of stopping.
Skip thisDon’t thicken the lines to make them “show” — short oval already shows — thick lines look messy.
Editor's noteThin liner brushes are everything here — if the brush is too wide, the swirl looks like a smudge on short nails.
10. Black velvet-look base with silver dot corners
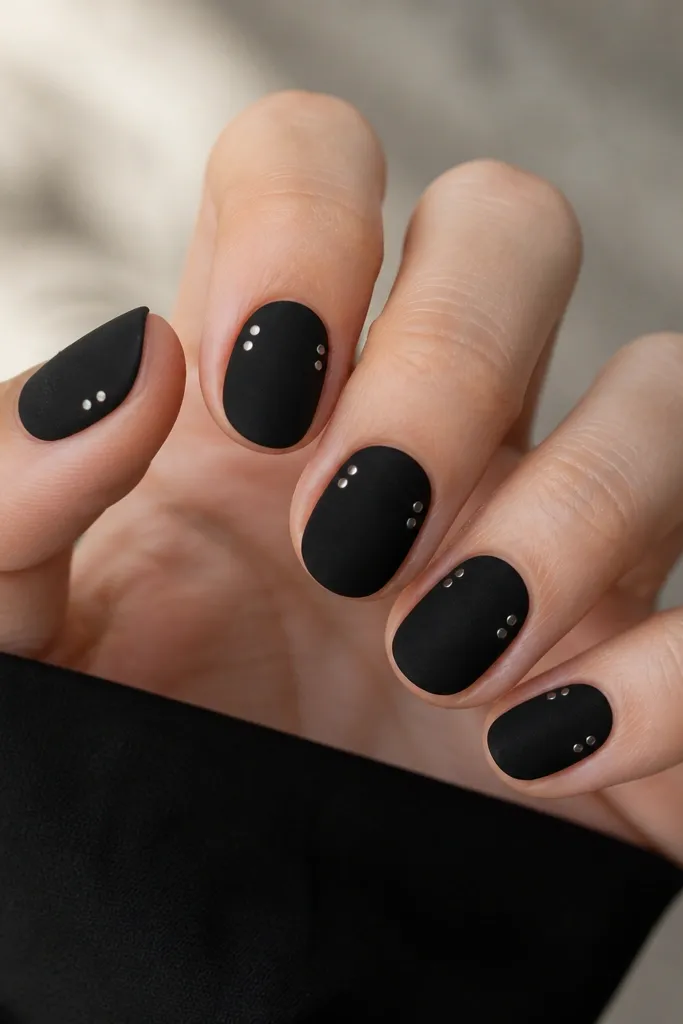
Start with a deep black velvet-matte polish or matte powder top coat effect, and apply two coats for full coverage. Then use a dotting tool with silver polish to place two dots per nail — one near the left sidewall and one near the right sidewall, both around the top half. Keep the dots the same size so the corners look intentional. Seal with a matte top coat if you want everything velvet, or use glossy top coat only on the dot area for a “tiny jewelry” effect.
Velvet-look black makes short oval feel edgy without needing long nails or complicated art. The silver dot corners act like little light reflections, which keeps the design from feeling flat. This is a great choice for evenings, but I’ve worn it to work too because the base is matte and the dots stay small. It looks best when your nail shape is already tidy — the matte finish highlights uneven edges less than glossy, but it still shows sloppy cuticles.
Skip thisDon’t add rhinestones on short oval — the stones catch and pop sooner than you expect.
Editor's noteLet the black fully dry before adding dots — wet matte polish will grab the silver and make it look uneven.



