
1. Milky Nude Micro French with Ultra-Thin Silver Edge
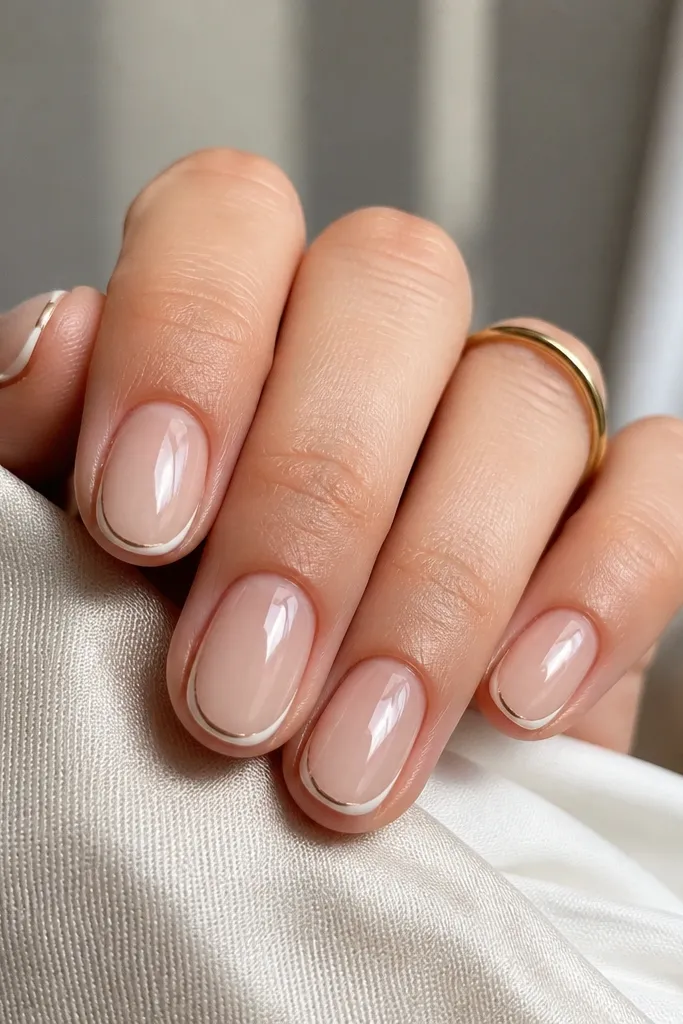
This one is my go-to when you want “expensive hands” without loud color. The milky nude base is semi-sheer, so your natural nail tone shows through just enough to make the oval look smooth and healthy. The French is tiny and tight to the tip, then topped with an ultra-thin silver line that catches light every time you move your fingers. I love it on fair to medium skin tones because the nude doesn’t wash you out, and on deeper skin tones it looks extra clean because the micro French stays crisp instead of chalky. It also works for workdays because it reads polished, not flashy.
Start by pushing back cuticles and buffing the surface lightly so gel or polish grips. Apply a milky nude base in two thin coats, curing each coat fully if you use gel. Paint the micro French with a fine liner brush, keeping the curve narrow and centered so the sides of the oval stay rounded. Add the silver edge as a single hairline stroke just above the French line, then finish with glossy top coat. Cure or dry until fully set, then wipe with cleanser if your system leaves a tacky layer.
Editor's noteUse a striping brush with a light hand — if you have to go over the silver twice, it usually turns thick and loses the luxe look.
Skip thisDon’t make the French wider than 1 mm — anything thicker on short ovals looks blunt and cheap.
2. Cocoa Velvet Base with One Gold Cuticle Dot
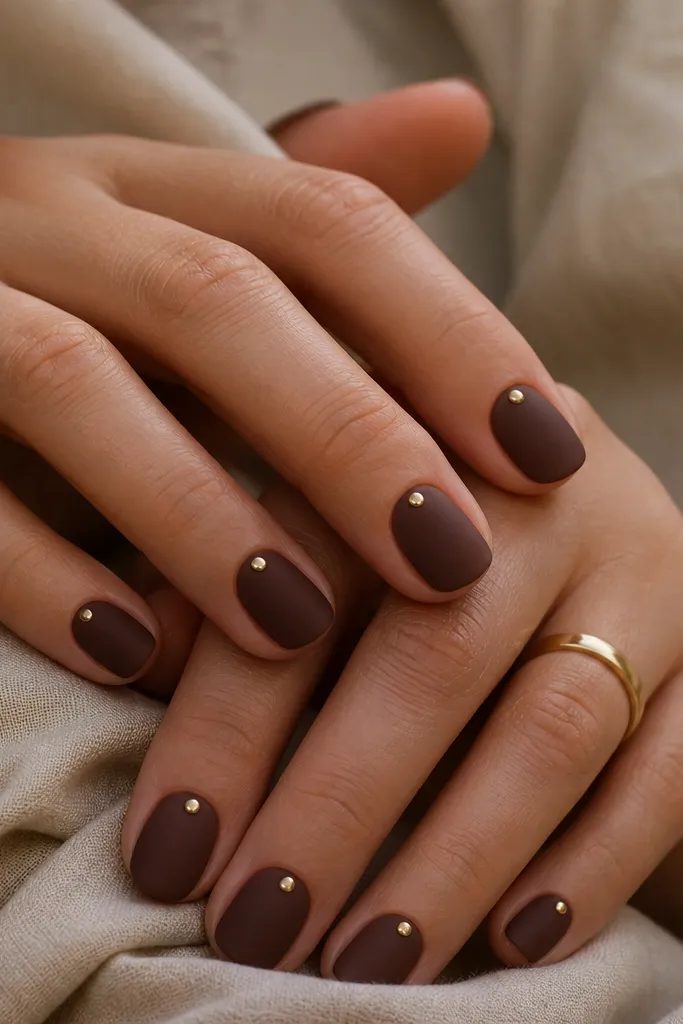
Cocoa velvet is the easiest way to get high-end warmth for fall and winter. The matte finish hides small imperfections in the nail plate and makes the brown look plush instead of flat. A single gold dot at the cuticle center creates a focal point without clutter, and it makes your nail bed look longer because the eye is pulled upward. I’ve worn this on medium skin with golden undertones and it looks like jewelry — warm and clean. For fair skin, the cocoa can be a touch too intense, so keep the base slightly sheer by using a thinner coat or adding a tiny bit of nude-brown mixing gel.
Apply a thin cocoa-brown base, then build to full opacity in two coats. Keep the color even to the sidewalls, because matte shows streaking more than gloss. Cure or dry fully, then switch to matte top coat or use a matte gel top if you’re in gel land. Use a dotting tool to place one gold dot at the center of the cuticle line, leaving a tiny gap from the skin so it looks intentional. Seal with a matte top coat only if your gold is compatible with matte — otherwise, use a small glossy spot over the gold to make it pop.
Editor's noteIf your dot looks smeared, let the matte base fully set and then place the dot carefully — matte can grab pigment fast.
Skip thisDon’t add more than one accent per nail — two or three dots makes it look like craft art.
3. Sheer Rose Base with Diagonal Champagne Foil Strip
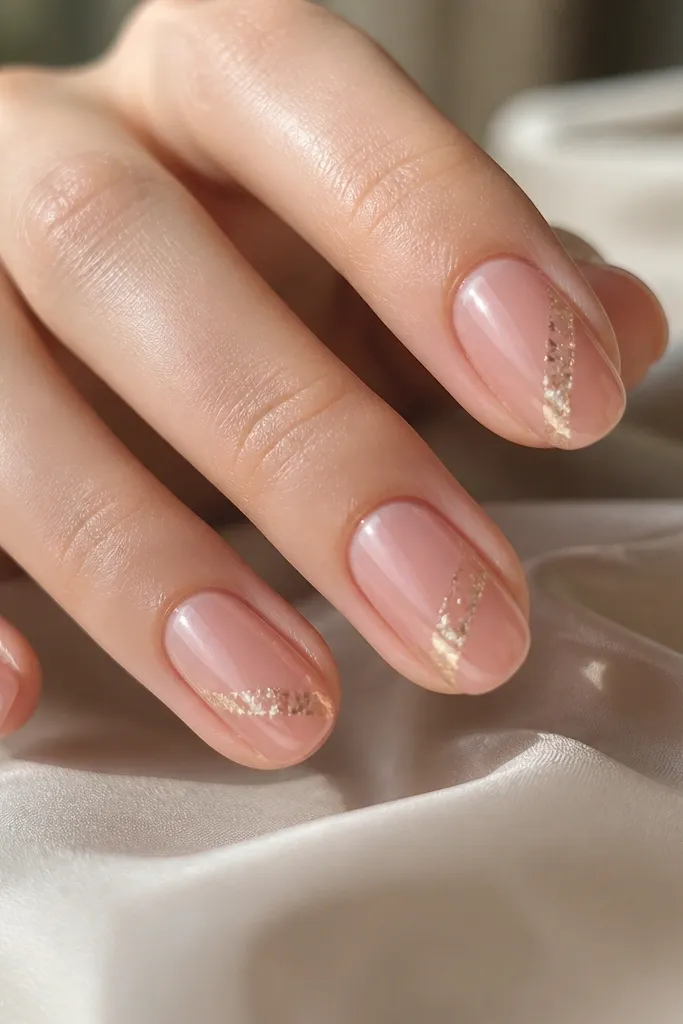
This design looks expensive because it uses negative space and one controlled metallic highlight. The sheer rose base keeps everything airy and flattering, while the diagonal champagne foil makes the nail look longer by drawing the eye across the surface. Champagne foil is softer than bright yellow gold, so it pairs well with cool and warm skin tones. I love it for weddings, birthdays, and date nights because it photographs beautifully without needing rhinestones. On short ovals, the diagonal placement prevents the nail from looking “blocked” and keeps the oval tip looking rounded and smooth.
Start with a sheer rose base in two thin coats, curing each one. Place a small piece of champagne foil so it lands diagonally, starting around the middle of the nail and ending near the outer tip area. Press the foil down gently with a silicone tool, then seal with a layer of gel or clear builder to lock it in. If you’re using regular polish, apply foil adhesive first, then seal with a thick top coat once the adhesive sets. Finish with a glossy top coat to intensify the metallic flare.
Trim the foil with small scissors before applying — pre-cut pieces look cleaner on short nails.
Don’t let the foil touch the cuticle — it makes the design look messy and grows out fast.
4. Blackened Navy Gloss with Micro Halo at the Cuticle
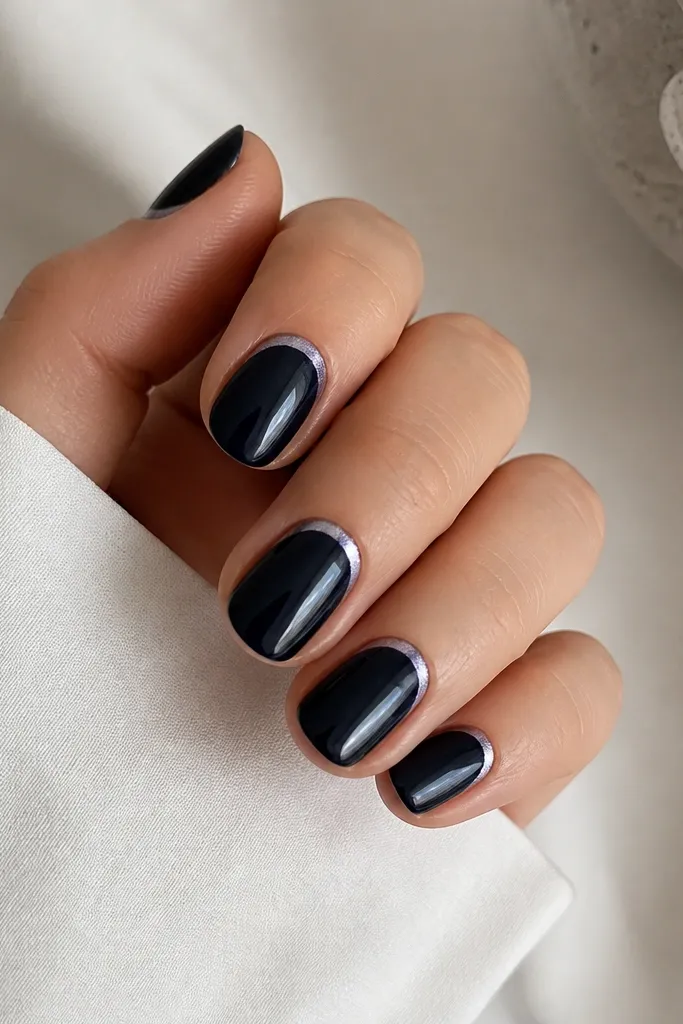
Blackened navy is my favorite deep color for clean, luxe nails because it looks black in some light and blue in others. The glossy finish makes it feel like glass, and the micro halo at the cuticle adds a jewelry effect without turning into a full glitter nail. The shimmer line should be subtle — think a pale silver-blue that matches the navy undertone. This is flattering on all skin tones, but it especially pops on medium and deep complexions because the navy reads rich, not dull. It also looks great year-round and doesn’t fight with gold or silver rings.
Paint a blackened navy base in two coats, keeping the first coat slightly thin so it doesn’t flood the cuticle. Cure fully, then use a fine liner brush to draw a tiny crescent halo around the cuticle, leaving the center clean. Apply a shimmer gel or pigment that’s pale and cool-toned, then lightly feather the edges so it looks like a glow rather than a sticker line. Seal with a glossy top coat in one or two thin layers. After curing, wipe the surface and check the sides — the halo should stay centered and not drag to the corners.
Editor's noteUse a liner brush with less paint than you think — a micro halo should look airy, not painted on thick.
Skip thisDon’t extend the halo down the nail — on short ovals it makes the nail look shorter.
5. Ivory Nude with Reverse French in Warm Taupe
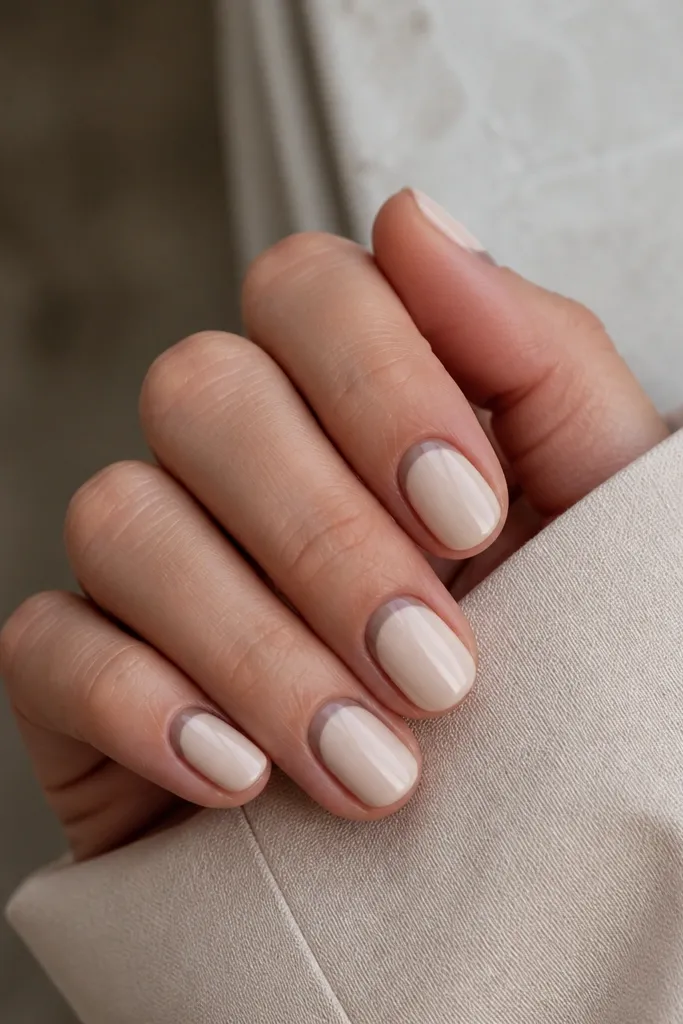
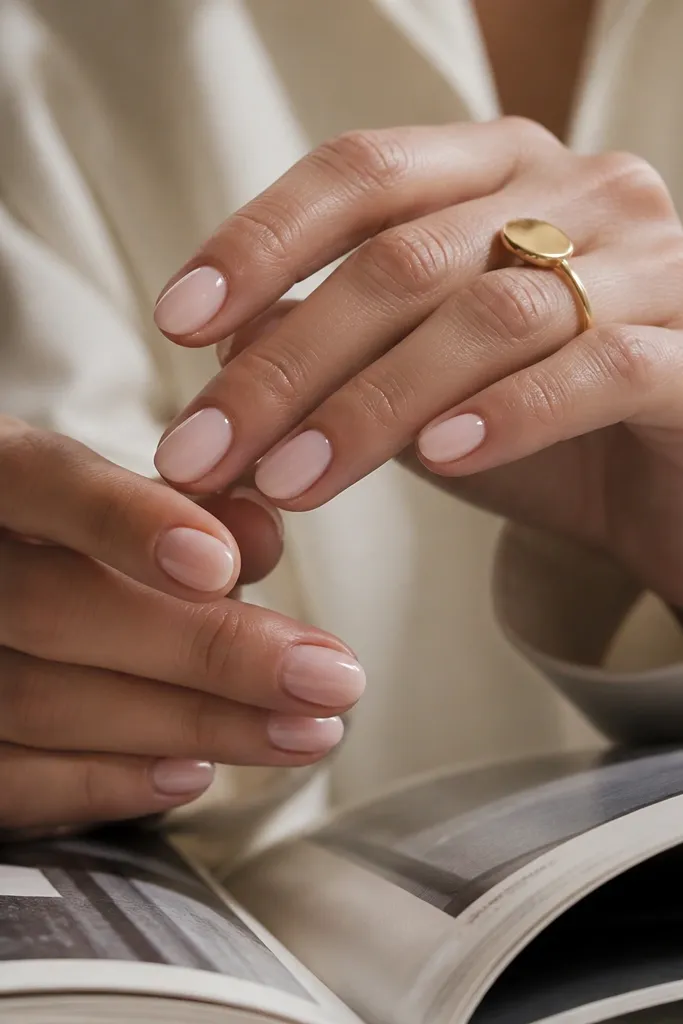
Reverse French is luxe because it frames the nail bed instead of the tip. The ivory nude base brightens your hands and keeps the design fresh, while the warm taupe arch adds depth without looking harsh. Taupe flatters a wide range of skin tones because it’s not too gray and not too beige. This is a great option if you hate the look of bright white French lines or if you want something that grows out more gracefully. On short oval nails, the reverse arch also makes the nail look more elongated because the eye is drawn up the sides of the oval.
Apply ivory nude in two coats, curing each layer. Use a thin brush to paint the reverse French arch right at the cuticle line, keeping it narrow and symmetrical from sidewall to sidewall. Fill only the arch area — don’t drag taupe over the whole nail. Once the arch is even, cure fully, then seal with glossy top coat. If you see any uneven edges, clean them with a small flat brush dipped in acetone-free remover before top coat.
Editor's noteIf your cuticle line is uneven, use the nail’s natural curve as your guide and skip perfect symmetry — it still reads high-end.
Skip thisDon’t make the reverse French too thick — thick taupe near the cuticle looks heavy on short nails.
6. Pearl Chrome Half-Moon on a Sheer Nude Base
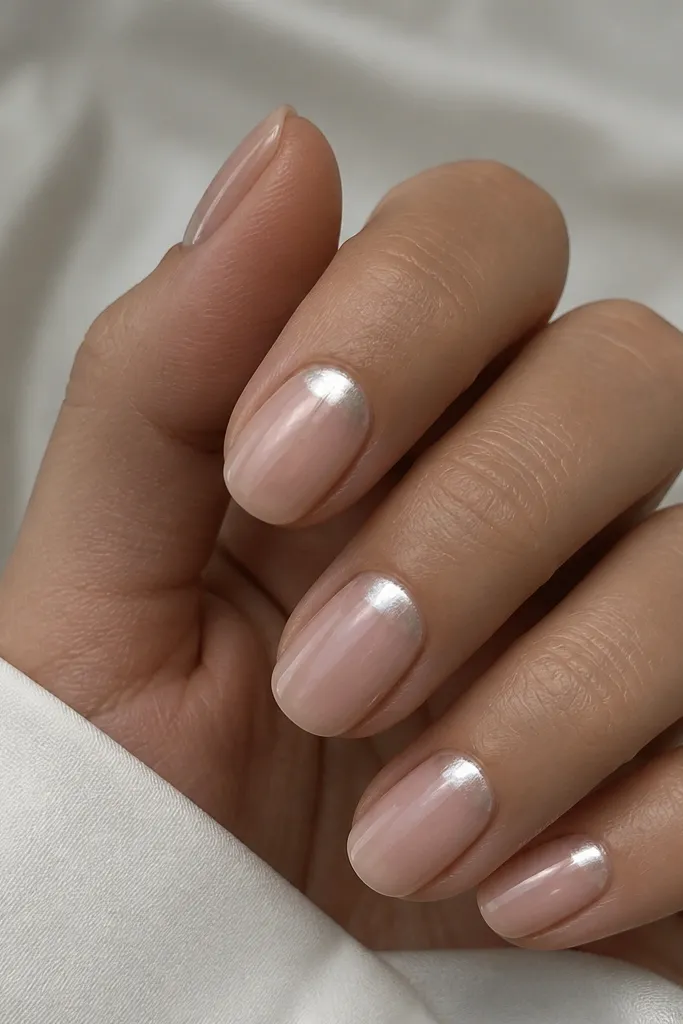
A pearl chrome half-moon is the fastest way I’ve found to make short nails look like salon jewelry. The sheer nude base keeps it clean and wearable, while the half-moon sits exactly where your eye naturally lands — at the cuticle. Pearl chrome is softer than full chrome and it doesn’t scream “party” like glitter can. This works beautifully on fair, neutral, and warm skin tones because pearl reflects undertones without clashing. On short ovals, the fade from the half-moon prevents the design from looking like a sticker and keeps the nail looking smooth.
Start with a sheer nude base in two coats so it looks like your natural nail but better. Apply a small amount of chrome gel or sticky base at the cuticle area only, then use a sponge or applicator to press pearl chrome powder into the half-moon. Blend the edges lightly toward the center so you get a fade, not a sharp block. Seal with a gel top coat designed for chrome or a careful clear layer, curing fully. After curing, wipe any residue and check the half-moon curve from different angles.
Editor's notePractice the half-moon curve on one nail first — once you get the arc, the rest takes minutes.
Skip thisDon’t cover the entire nail with chrome — full coverage makes short ovals look flat.
7. Berry Jelly Nails with Tiny Clear Crystal Cluster
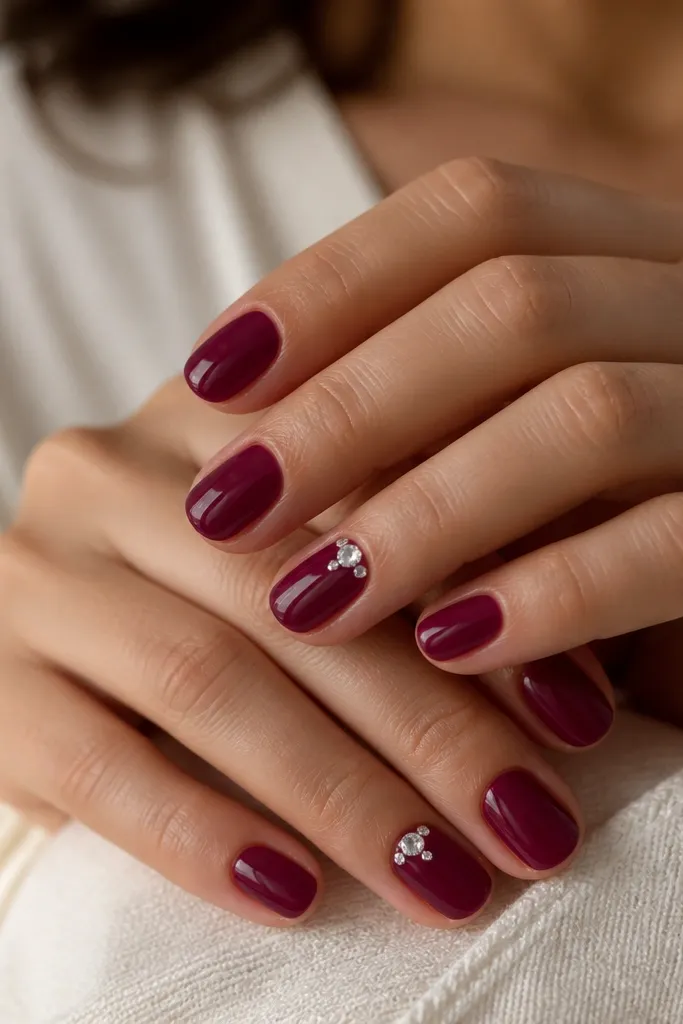
Jelly polish looks expensive because it layers like candy and lets the nail underneath glow through. A berry jelly base gives you that rich color without the heaviness of opaque lacquer. The tiny clear crystal cluster adds sparkle that reads refined when it’s small and placed near the cuticle, not scattered across the tip. I like this for date nights because it catches light when you move your hands, but it doesn’t look costume-y. It flatters most skin tones; on deeper skin it looks jewel-toned, and on fair skin it looks romantic and clean.
Apply berry jelly polish in two to three thin coats, curing each coat so it stays glossy and smooth. Keep the color slightly lighter in the center so it looks like a jelly layer, not paint. Choose two accent nails and add a small crystal cluster near the cuticle — three tiny stones max, with one slightly larger in the middle. Use a gel adhesive or top coat tack to place each crystal, then cure. Finish with a glossy top coat around the crystals, avoiding flooding the stone edges.
Place crystals with tweezers and press gently for 2-3 seconds — rushed placement makes them sit uneven.
Don’t put crystals on every nail — short ovals look busy fast.
8. Satin Sage with Thin White Side Stripes
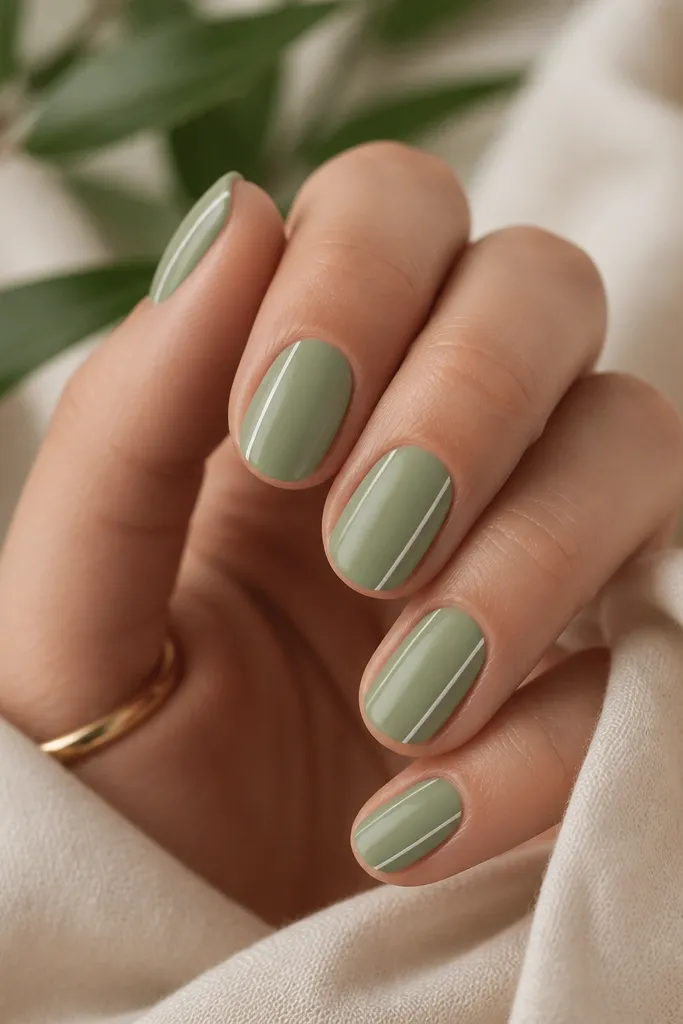
Satin sage is calm, but it still looks high-end because the finish diffuses light. The thin white side stripes create a lengthening effect on short ovals by drawing attention to the vertical edges. This combo looks great on cool undertones and also works for warm skin if you pick a sage that leans slightly gray. I wore this for a spring event and it looked clean in daylight photos — no sparkles needed. The key is that the stripes are narrow and aligned, so your nail stays elegant instead of looking like it has stripes from a craft project.
Apply a satin sage base in two coats, using thin layers so the satin finish stays even. Cure fully or let regular polish dry until it feels firm. Use a striping brush to paint two vertical white lines on each nail, leaving about a third of the nail center untouched. Keep the stripes starting just above the center of the nail bed and taper them slightly as they reach the tip. Seal with a matte or satin top coat that matches the base finish.
Editor's noteIf your white lines look thick, clean the brush with acetone-free remover and re-straighten while the stripe is still workable.
Skip thisDon’t do wide stripes — they shorten short ovals visually.
9. Caramel Marble Lines over Nude Beige
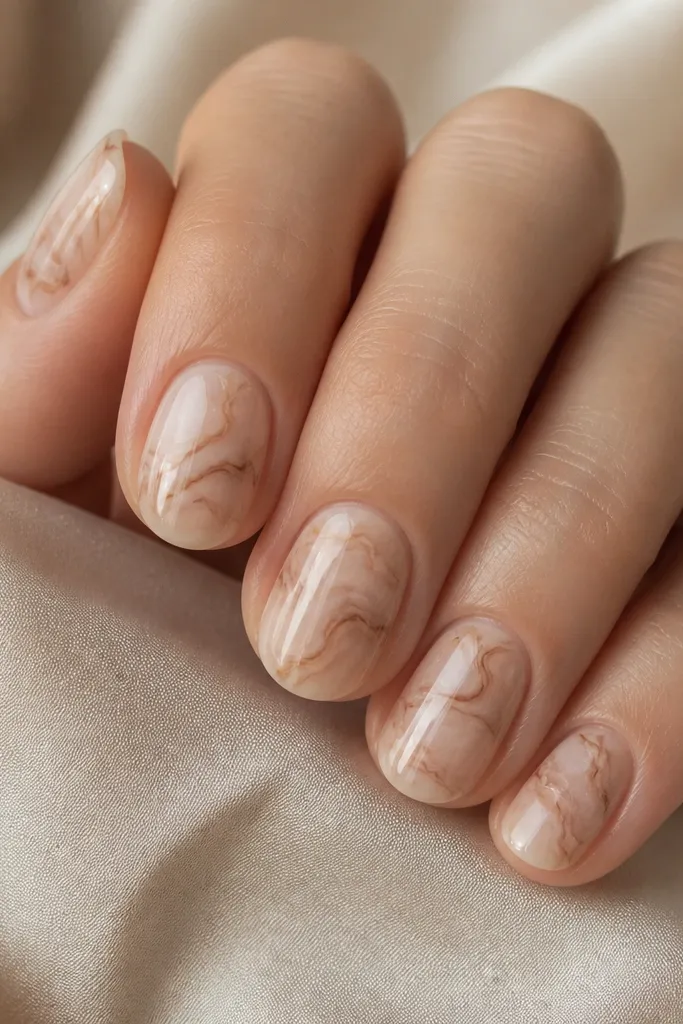
Marble works on short ovals when you keep it line-based, not chunky. Nude beige makes the caramel marble look like designer stone, and the glossy top coat makes the lines look suspended under glass. I like caramel marble because it flatters both warm and neutral undertones and matches everyday jewelry — gold, silver, and rose gold all look fine next to it. This design looks especially good on medium and deep skin tones because the caramel lines show up clearly without needing bright colors. It’s a great “I did my nails but I kept it wearable” look.
Start with nude beige base in two coats, curing each. For marble, use a thin brush and caramel-brown gel or polish to draw 2-3 curved lines per nail, keeping them light and not too dense. Add tiny breaks in the lines so it looks like veining instead of doodles. Blend the edges with a clear gel layer if your product allows, then cure. Finish with a glossy top coat in two thin layers for that domed “marble under glass” look.
Editor's noteLess marble looks more luxe — stop after you’ve placed three strong lines you actually like.
Skip thisDon’t smear marble into a full background — it turns into muddy blobs on short nails.
10. Champagne Glitter Fade from Tip to Center
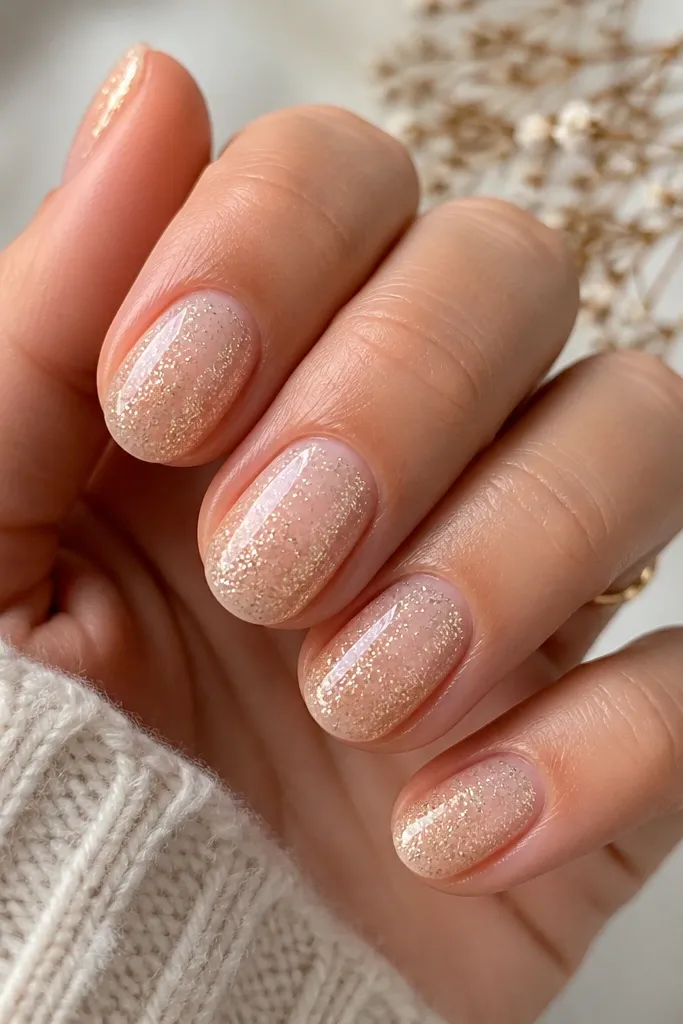
A glitter fade is luxe because it looks intentional and controlled. Champagne glitter at the tips gives a party-ready effect, but the fade keeps it wearable for daily life. The sheer nude base matters — it makes the glitter look like it’s embedded in the nail rather than sitting on top. This is flattering on all skin tones because champagne is universally forgiving and doesn’t fight your undertone. On short ovals, the tip fade elongates visually and keeps the cuticle area clean, so it grows out better.
Paint a sheer nude base in two coats and cure fully. Then apply glitter only at the tip, about 2-3 mm from the end, using a small brush or sponge. Blend downward toward the center with a lighter amount of glitter, using a second brush to soften the edges. Cure, then seal with a glossy top coat that smooths any texture. If you’re using regular polish glitter, you’ll need a thicker top coat layer to avoid snagging at the fade line.
Editor's noteUse a makeup sponge dab for the blend — it creates a softer gradient than dragging with a brush.
Skip thisDon’t pack glitter all the way to the cuticle — it looks heavy on short oval nails.
11. Soft Black Smoky Gradient with Clear Top Glow
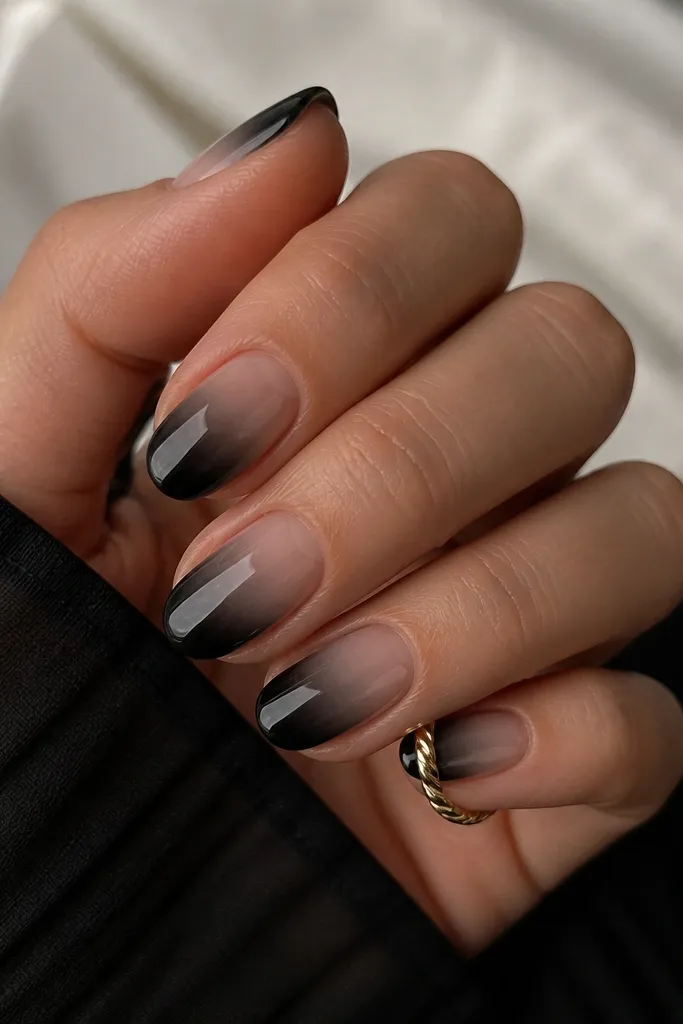
A smoky gradient looks high-end because it mimics salon airbrushing and makes the nail look longer. The trick is using black as a haze, not a solid block, so the oval tip stays rounded and smooth. The nude base should be slightly sheer so the black fade looks like it’s floating. This design looks incredible on fair skin because the nude base brightens and the smoke adds drama, and it looks sleek on deeper skin because the black reads rich. It’s also great for nights out when you want dark nails that still look refined.
Start with a sheer nude base and cure fully. Sponge on black gel at the very tip only, then blend upward with a clean sponge so you get a smoky fade instead of a hard line. Keep the sides clean by wiping the brush or sponge edge on a lint-free pad before touching the nail corners. Cure, then apply a clear glossy top coat to smooth and intensify the gradient. Check under bright light — the fade should be darkest at the tip and almost nude near the cuticle.
Editor's noteDo the gradient in two light passes instead of one heavy pass — it keeps the smoke soft.
Skip thisDon’t let the gradient reach the cuticle — it makes short nails look smaller.
12. Nude Base with One Skinny Rose-Gold Line Down the Center
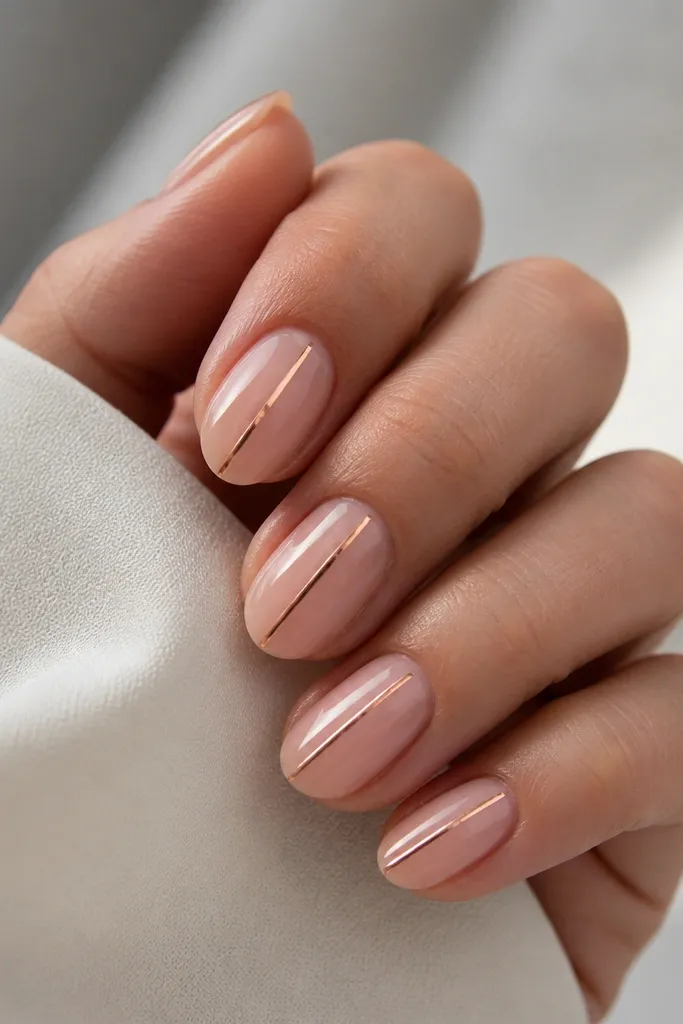
This is the cleanest “luxury minimal” nail design I’ve worn when I’m busy but still want the manicure to look intentional. A sheer nude base makes your nail bed look neat, and a single skinny rose-gold line adds a jewelry effect without crowding. Rose gold is forgiving with skin tones because it sits between warm and pink undertones. On short ovals, one center line is lengthening — it pulls the eye from cuticle to tip. It also works with any outfit because it’s subtle, but it still catches light when you type or hold a drink.
Apply sheer nude in two coats, curing fully. Use a striping brush to draw one straight line down the center of the nail, keeping it about the width of a thin hair. Place the line starting at the middle of the cuticle area and stopping just before the very tip curve. If the line looks shaky, clean the edges with a small brush and remover before curing. Seal with a high-gloss top coat so the line looks like it’s under glass.
Editor's noteIf your line keeps wandering, rest your pinky on the table and keep your wrist anchored for steadier strokes.
Skip thisDon’t add side lines — two lines make short ovals look boxed in.
13. Olive Green Glass Nails with Micro Gold Specks
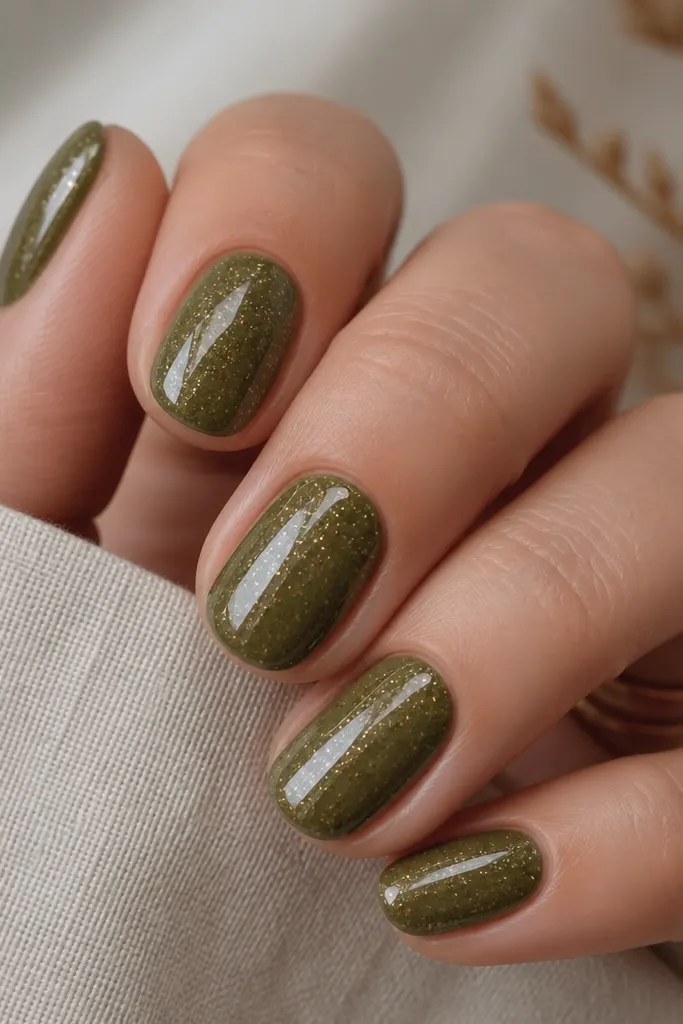
Olive green glass nails look rich because the color is muted and the shine is intense. The micro gold specks read like dusted metallic particles, and when they’re small they look like high-end nail art rather than glitter. I like this on olive, neutral, and warm skin tones because the olive base makes gold look natural. It also looks great with earth-toned clothing and gold jewelry, but it still works with silver because the specks are tiny. Short oval nails benefit from this design because the specks don’t crowd the cuticle and the glossy finish keeps the oval tip looking smooth.
Apply olive green gel polish in two thin coats, curing fully and keeping the edges clean. While the surface is slightly tacky (or use a clear tack layer), sprinkle micro gold pigment or very fine gold glitter using a small brush. Tap off extra specks so you don’t get chunky clusters. Cure, then seal with a clear glossy top coat in two coats to lock the specks in place and smooth the surface. Wipe residue if needed and check the shine in daylight.
Use a small eyeshadow brush for specks — it deposits tiny dots instead of streaks.
Don’t use chunky glitter — it catches on fabric and makes the manicure feel cheap.
14. Plum Velvet with a Single White "Smile" at the Tip
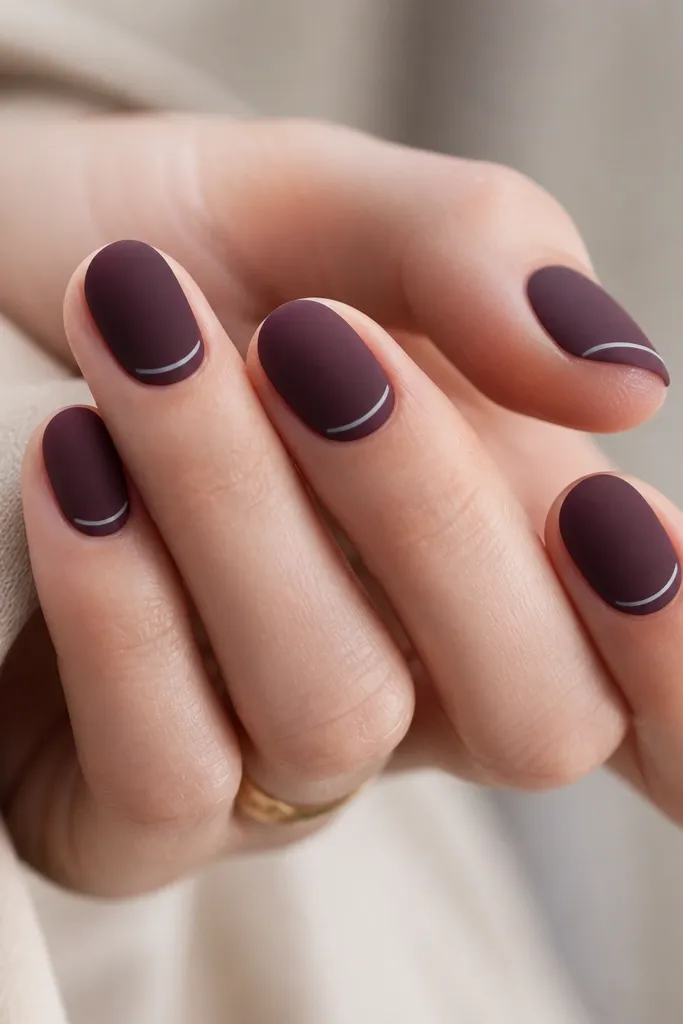
This is a modern twist on French, and it looks luxe because the contrast is controlled. Plum velvet matte gives you depth, while the tiny white smile at the tip adds a clean, graphic accent. The smile shape should be thin and centered so it doesn’t overpower the short oval. I’ve worn it with both gold and silver jewelry and it still looks cohesive because plum sits in the same family as many metals. This design flatters hands that have a little width at the nail bed because the centered smile keeps the eye on the tip curve.
Paint plum in two coats and cure fully, then apply a matte top coat for the velvet look. Use a fine liner brush to draw the white smile: a short curved line centered on the tip, about 1 mm tall. Keep the line slightly inside the outermost edges so it follows the oval shape. Let it dry or cure, then add a matte finish only if you want the white matte too. If your white paint looks too flat, spot-gloss the white line with a tiny brush and top coat.
If your white line looks shaky, wipe the brush edge and re-do it on a spare nail first to steady your hand.
Don’t make the white smile too wide across the tip — on short ovals it turns into a thick patch.
15. Clear Jelly Top with Rose Quartz Pink Streaks
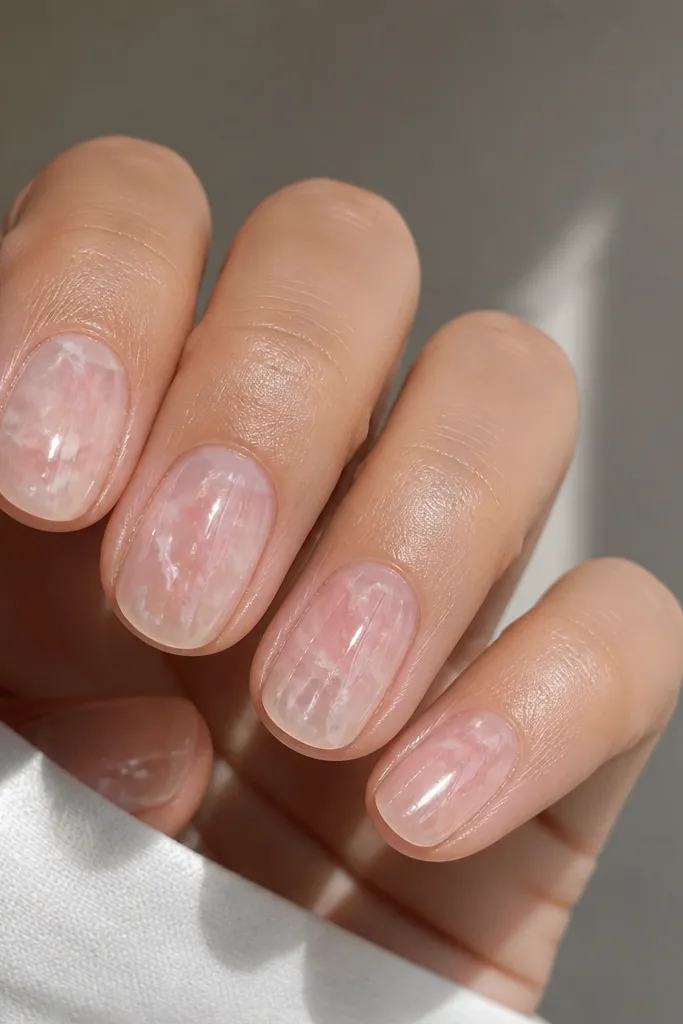
Rose quartz streaks look high-end because they mimic stone — soft, cloudy, and never perfectly uniform. The clear jelly top makes the pink feel like it’s under glass, which is exactly the effect you want on short oval nails. This design is flattering because the clear base keeps your nail bed looking clean and lets your own skin tone blend in. I like it for spring, but I’ve worn it in winter too because the glassy finish still reads polished. It’s also a good option if you want something “nail art” without adding thickness.
Start with a sheer nude or builder gel base so the nail has a stable foundation. Add rose quartz pink streaks using a thin brush or marbling tool — keep them cloudy with breaks and soft edges rather than crisp lines. Layer a clear jelly gel over the top, smoothing it so you don’t trap bubbles. Cure fully, then finish with a glossy top coat for maximum glass effect. Check the surface under different angles — the streaks should look suspended, not sitting on top.
Editor's noteUse a slightly diluted pink for the cloudy parts so the streaks fade naturally instead of looking painted on.
Skip thisDon’t pile on extra jelly until it’s thick — short ovals look clunky fast.



