
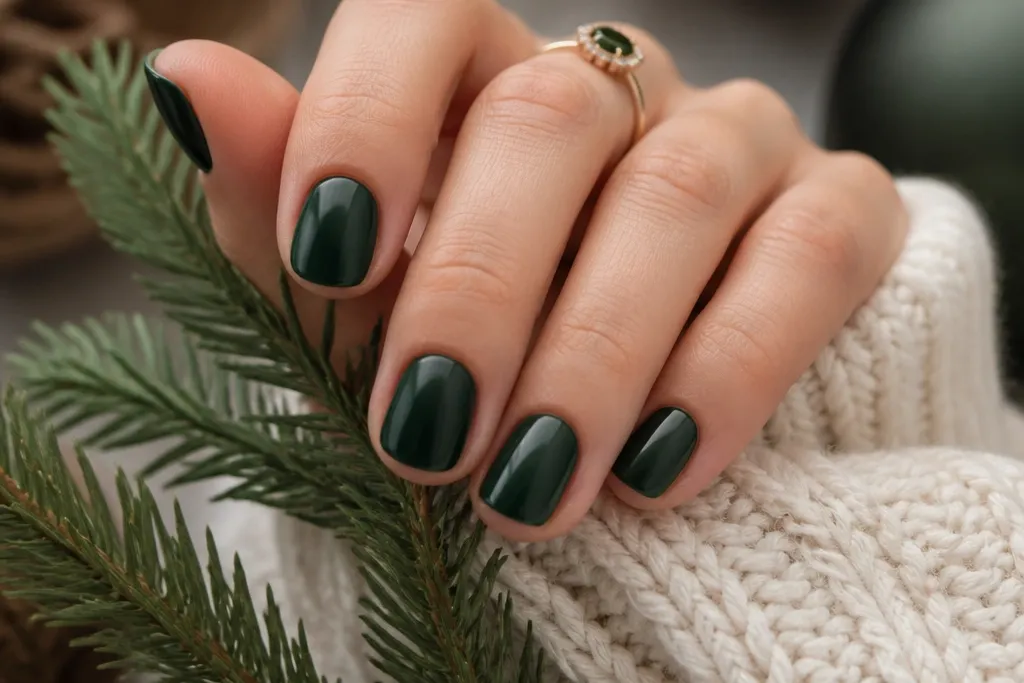
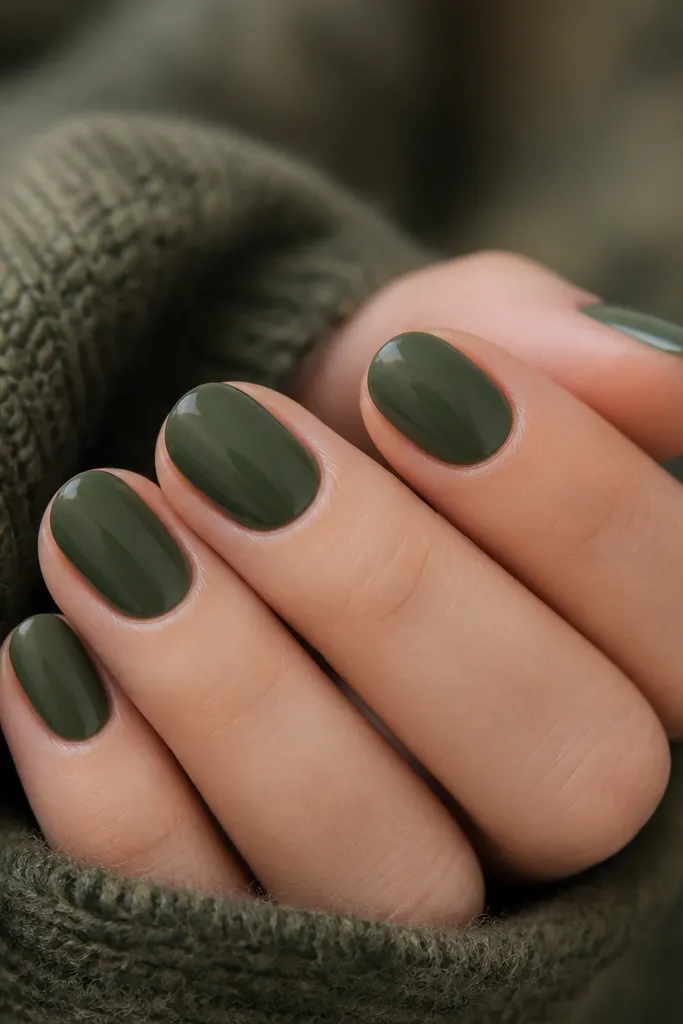
1. Pine Forest Micro-French with Gold Pinstripe
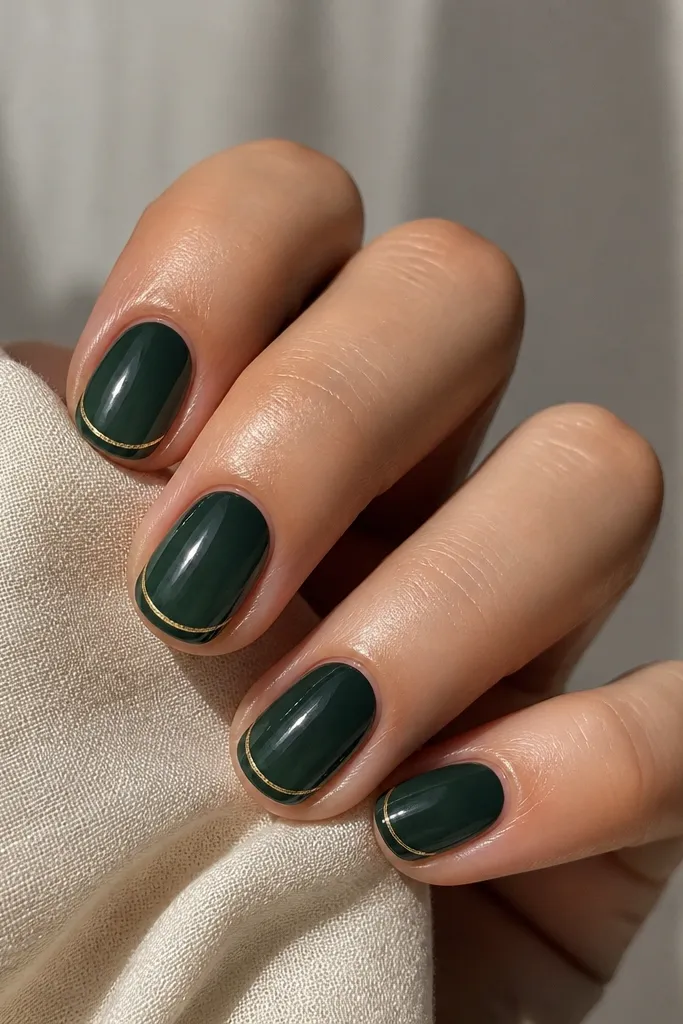
This one flatters almost every hand because the micro-French keeps the nail visually longer without adding length. I use a deep pine green base that looks almost black in indoor light, then I brighten it with a thin gold line so your nails catch light when you move. It’s especially flattering on warm skin tones because the gold makes the green look richer instead of muddy. For cooler undertones, the pine still reads crisp, and the gold pinstripe stops it from looking flat. It works for workdays, holiday parties, and “I need something tidy” weeks.
Start by painting two thin coats of pine green on all nails, letting each coat dry fully. Then place the micro-French: use a striping brush and paint a hairline curve at the very tip, keeping it under 1 mm from the free edge. After that, drag a tiny gold pinstripe along the same curve — I load the brush lightly and pull in one steady stroke. Finish by sealing with a glossy topcoat, and cap the free edge with extra topcoat so the tip line stays sharp.
If your gold bleeds, let the pine cure longer and wipe the brush on a paper towel before you touch the nail.
Don’t make the French too wide or it turns short oval nails into chunky rectangles.
2. Smoked Espresso Nude with Clear Jelly Snow Cap
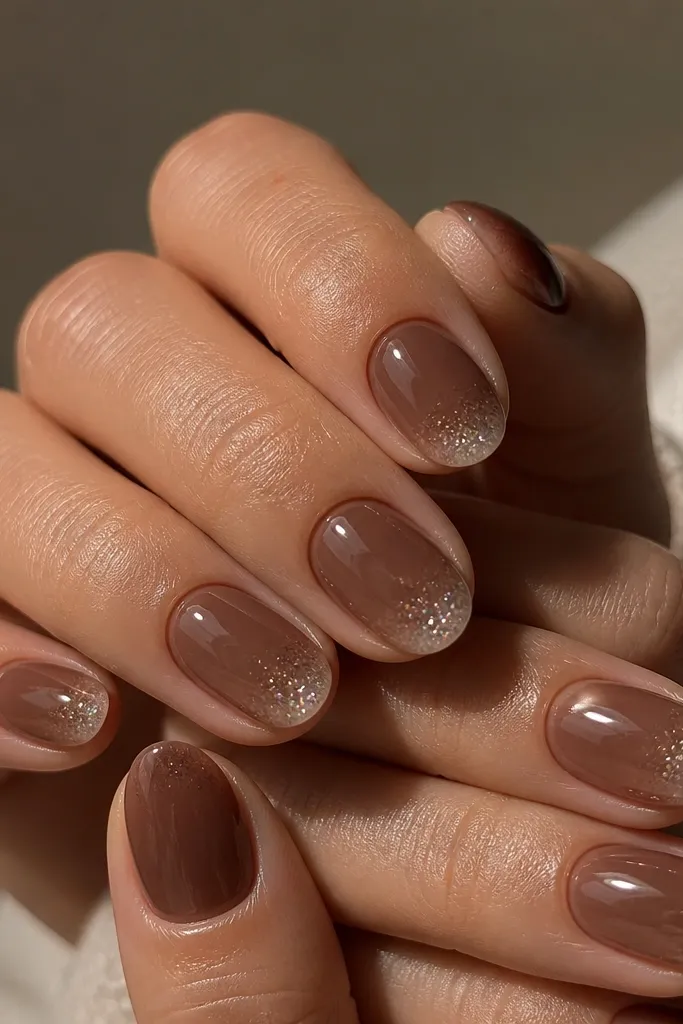
This design gives you winter sparkle without glitter fallout. The smoked espresso nude flatters medium to deep skin tones because it echoes warm browns and doesn’t wash the fingers out. On fair skin it looks classy and slightly rosy-brown, especially when the jelly catches light. The clear jelly tip also makes short oval nails look smoother, since there’s no harsh color block. I wear this when I want something evergreen but not obviously holiday.
Apply a sheer smoked espresso nude in two thin coats, keeping it slightly more opaque in the center and lighter near the cuticle. Then sponge or brush a clear jelly layer at the free edge — I keep it to about 2-3 mm from the tip so the oval stays defined. Add micro-sparkle into the jelly while it’s still wet, then lightly blend the top of the jelly so it fades toward the center. Seal with a thick glossy topcoat and cap the tip so the jelly stays glassy.
Editor's noteUse a “clear” jelly with fine shimmer, not chunky glitter, so the sparkle stays suspended and smooth.
Skip thisSkip heavy glitter direct-to-nail; it creates texture that chips faster on short nails.
3. Evergreen Sage Half-Moons with Nude Negative Space
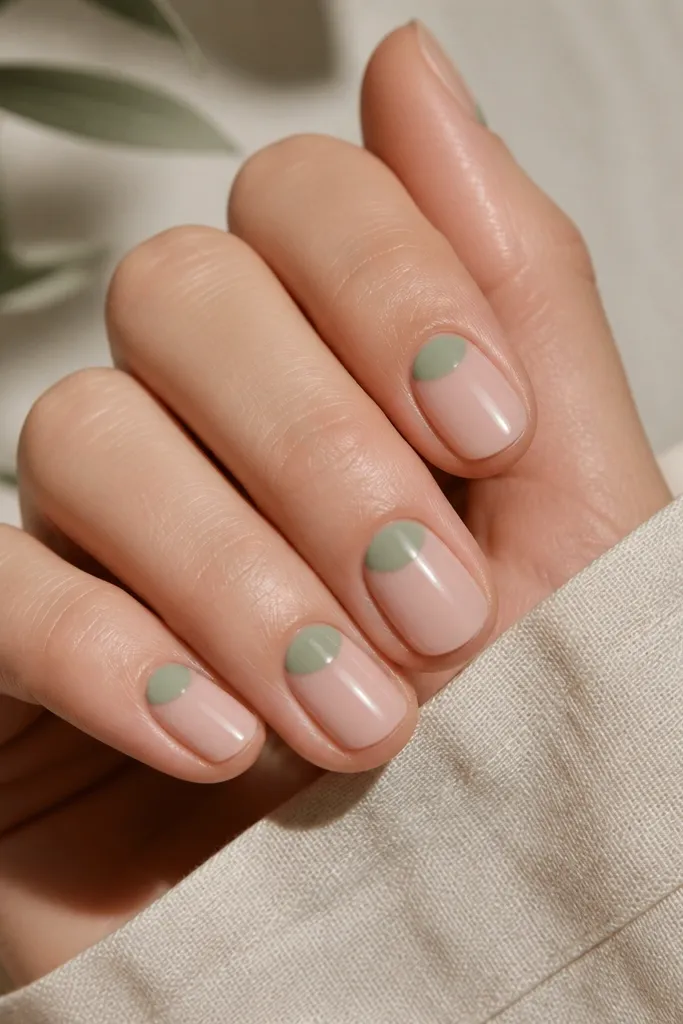
Half-moons are one of the fastest ways I know to make short oval nails look intentional. This version uses evergreen sage that reads soft and fresh while still feeling seasonal all year. The nude negative space makes fingers look longer, especially if you have shorter nail beds or you hate bold full-color manis. It’s also friendly on skin tones because sage sits in a flattering middle ground — it doesn’t turn fingers yellow like some bright greens. Wear it for spring, summer, and office-friendly fall.
Paint a sheer nude base in two thin coats. For the half-moons, use a small detail brush and paint a curved arc at the cuticle — aim for about 1/4 of the nail width on each side. Keep the arc slightly rounded, not sharp, so it matches the oval shape. Clean up edges with a brush dipped in acetone or gel cleanser, then topcoat with a glossy layer.
Editor's noteIf your cuticle line is uneven, do the half-moon slightly smaller and let it sit centered — it looks cleaner than trying to cover flaws.
Skip thisDon’t paint the half-moon too close to the sidewalls or it will look like a thick stripe.
4. Charcoal Velvet Matte with Micro-Star Accent
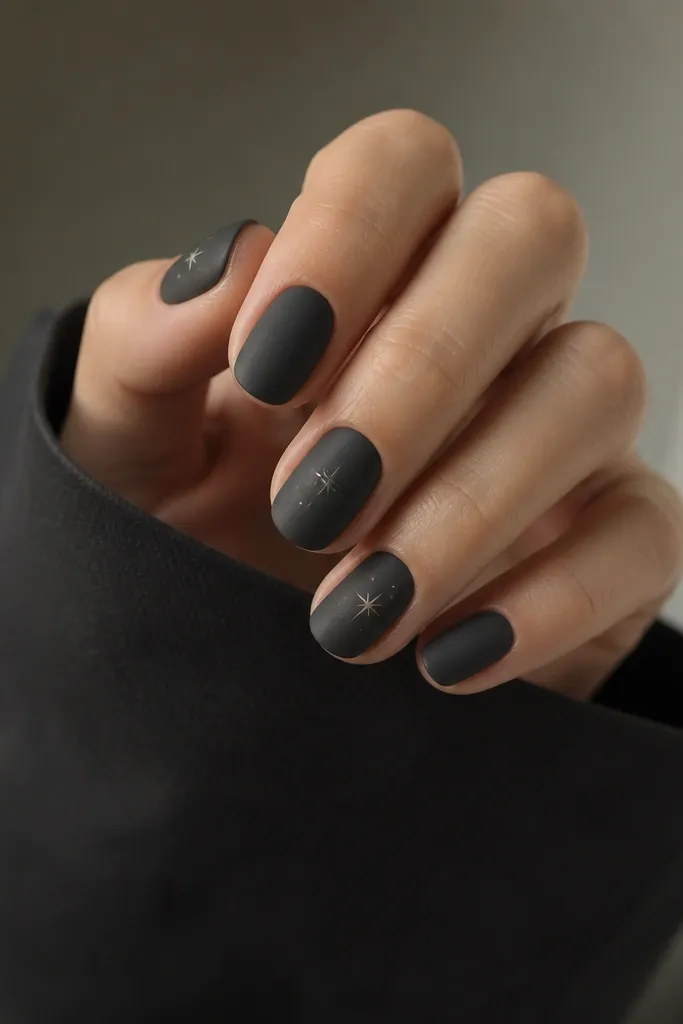
Matte charcoal looks sharp on short oval nails because it hides tiny ridges and keeps the shape looking crisp. I love this when the season shifts cooler because the dark tone feels grounded, not heavy. On fair skin it gives a strong contrast that makes fingers look longer; on medium and deep skin it reads sleek and modern. The micro-star accent adds a little twinkle without turning it into full glitter overload. This is also great for people who hate glossy chips showing at the edges.
Start with two coats of charcoal gel (or polish) and let it level. Cure fully, then apply matte topcoat across all nails — I use a matte that still looks smooth, not chalky. For the accent, place 3-5 tiny silver star dots on one or two nails using a dotting tool, spacing them so the stars sit around the midline. Seal the stars with a thin glossy topcoat only on the accent nails if you want extra contrast, or keep them matte for a subtler look.
Editor's noteIf matte makes your cuticle area look dry, wipe the cuticle with a little slip solution before topcoat so edges look clean.
Skip thisDon’t apply matte topcoat over thick gel art; it makes bumps stand out.
5. Redwood Ombré Tips with Creamy Nude Base
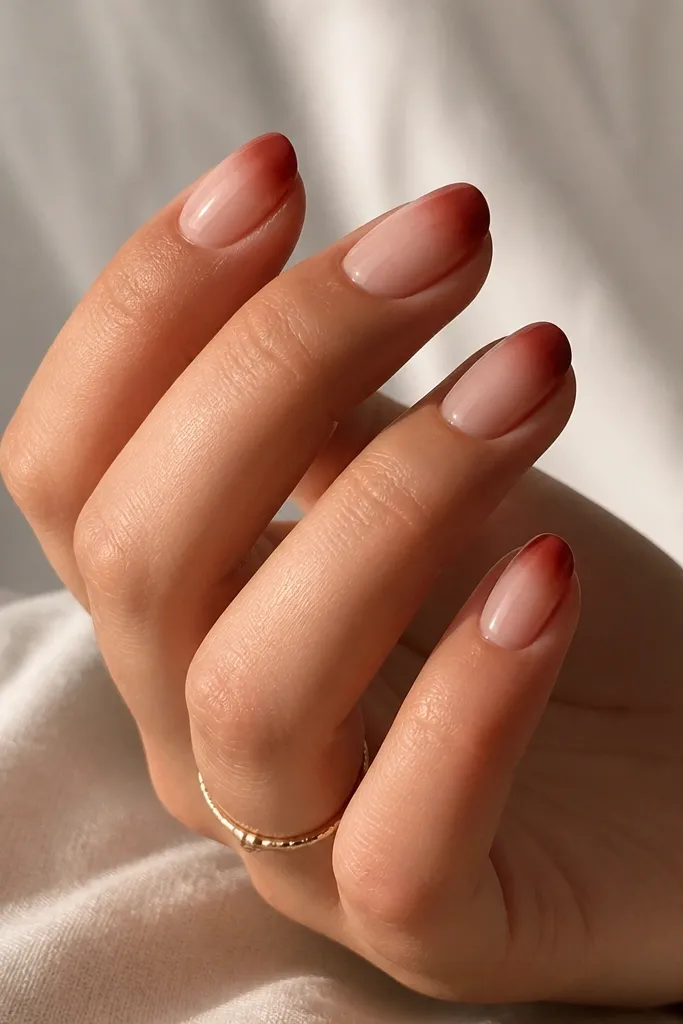
Warm red-brown ombré looks flattering because it mimics the natural warmth of skin and makes the nail look longer. This is the design I reach for in fall because it feels like leaves without needing orange neon. The creamy nude base keeps your nails from looking too dark near the cuticle, which is where short nails show wear first. On cool undertones, the redwood still reads flattering because it leans earthy, not blue-red. It’s also forgiving if your nail bed is a little uneven.
Paint a creamy nude base in two thin coats, keeping it slightly sheer at the cuticle. Next, sponge the redwood color onto the tip area only, using a makeup sponge cut small — dab, don’t swipe. Build the pigment gradually until you get a soft fade that covers the last 2-3 mm of the nail. Clean the edges with a brush and nail polish remover, then topcoat glossy to smooth the gradient.
Editor's noteUse a lighter nude than you think — it makes the ombré look airy instead of heavy on short nails.
Skip thisDon’t sponge too close to the cuticle or you’ll lose the flattering length effect.
6. Forest Green Marble Swipe with Clear Gloss
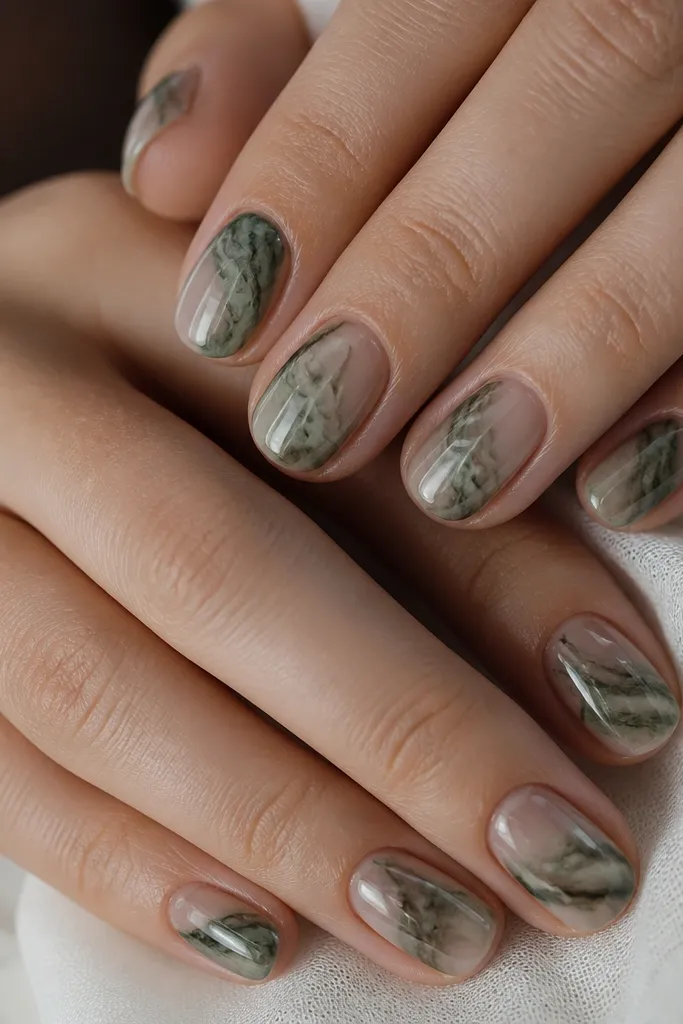
Marble looks best on short oval because the swirls can stay small and still look high-end. I use a sheer nude base so the nail doesn’t look flat, then I add forest green marble streaks that are slightly irregular — real marble never repeats perfectly. This design flatters olive and warm skin tones because green makes the hand look fresh. For very fair skin, the sheer base prevents the pattern from overpowering. It also hides minor growth lines because the marbling breaks up the uniform color.
Apply a sheer nude base and cure fully or let it dry completely. Then paint thin forest green streaks using a striping brush, and add a darker green or near-black streak over a few of the lines. Use a small brush to drag some streaks together — keep it light so you don’t muddy the pattern. Finish with a clear gloss topcoat in two thin layers so the marble looks smooth and dimensional.
If the marble looks too solid, add one extra thin streak of near-black and stop — that’s when it starts looking like stone.
Don’t cover the whole nail with chunky marble blobs; it gets busy fast on short oval.
7. Winter Berry Glaze with Tiny Gold Leaf Specks
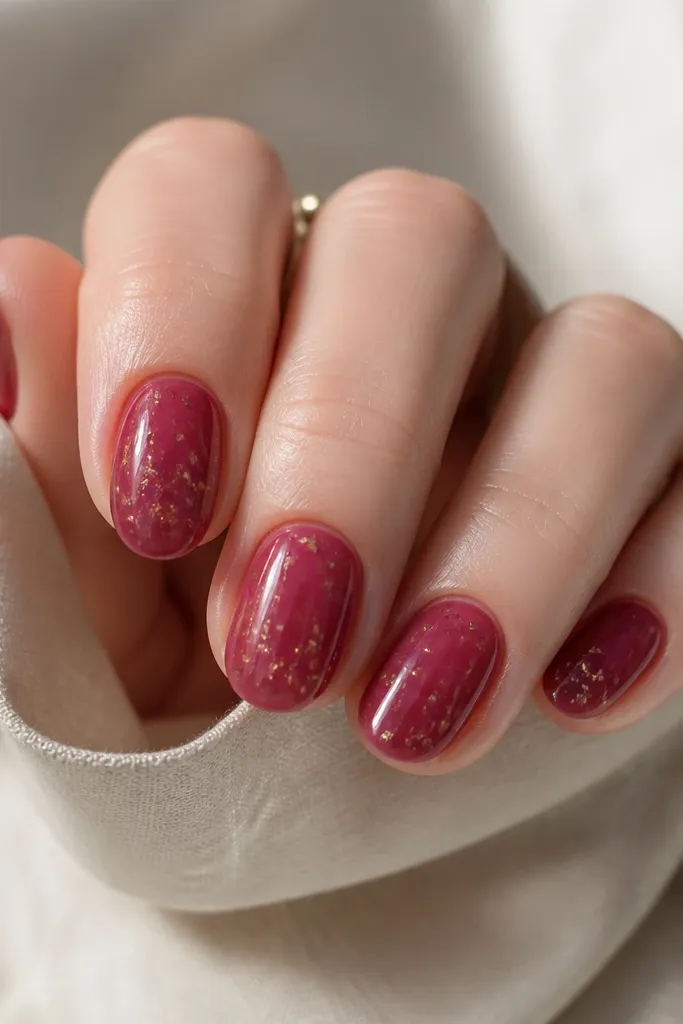
Berry glaze is my go-to for evergreen nails that still feel seasonal in winter. The key is that it’s translucent, not opaque — you want that juicy glass look that flatters the nail bed. This works well for almost every skin tone because berry has both red warmth and cool depth. If you have darker skin, the glaze stays rich without turning black; if you have fair skin, it adds color without looking harsh. The tiny gold leaf specks make it feel festive without turning it into glitter.
Start with a sheer nude or nude-rose base so the berry has something to glow from underneath. Then apply 2-3 thin coats of berry glaze, keeping it translucent — stop when it looks like a smooth drink-colored layer. Add tiny gold leaf specks using tweezers or a leaf applicator, placing more near the center of the nail and less near the cuticle. Seal with a thick glossy topcoat so the leaf is trapped and the surface stays smooth.
Editor's noteGold leaf sticks better when the berry layer is slightly tacky, not fully cured.
Skip thisAvoid big chunks of foil; they catch on fabric and chip faster on short nails.
8. Soft Cloud Blue with Clear Outline at the Tip
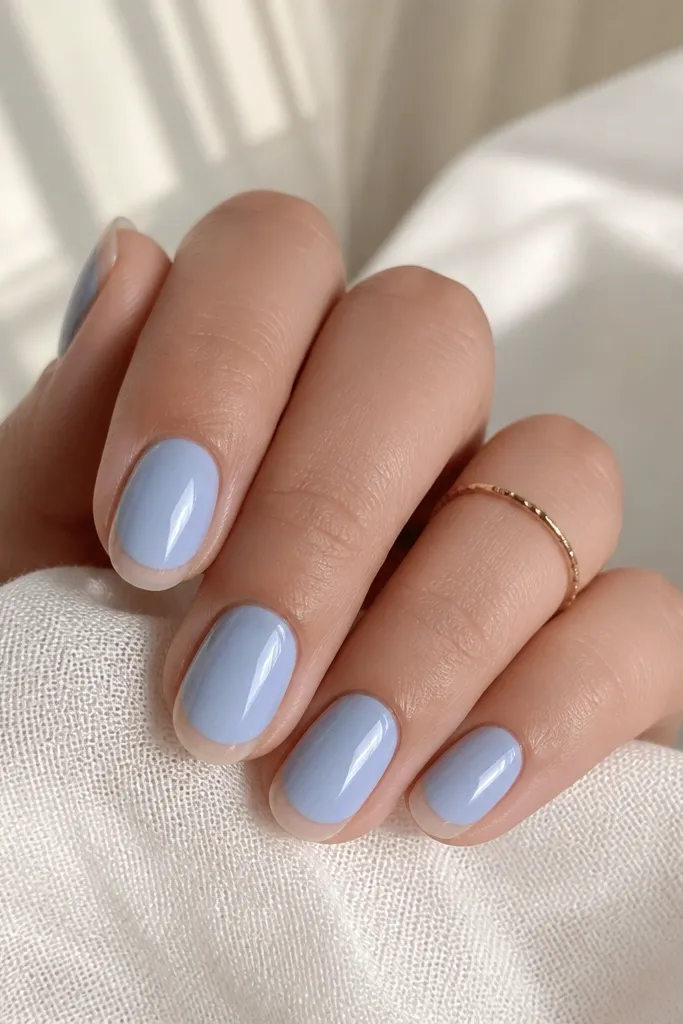
This design gives you a clean winter-spring bridge color without going full pastel overload. The cloud blue looks fresh on cool and neutral undertones, and it still works on warm undertones when it’s kept pale, not icy. The clear outline at the tip makes the nail look more defined and slightly longer, which is what you want with short oval. It’s also beginner-friendly because the shape is consistent across nails — a single line does most of the work. I wear it when I want my hands to look “done” even if I’m not in the mood for heavy art.
Paint two coats of soft cloud blue, leaving the cuticle area clean. Then use a fine liner brush and clear or slightly sheer gel topcoat to trace a thin line right at the tip boundary — it should look like a border, not a filled shape. Let the outline settle for a second, then cure. Add a final glossy topcoat across the whole nail so the outline blends into the shine.
If your line looks wobbly, place a tiny dot at the center tip first, then connect to the sides slowly.
Don’t make the outline too thick or it turns into a ridge you’ll feel when you type.
9. Nude Base with Evergreen Geometric Triangle Accent
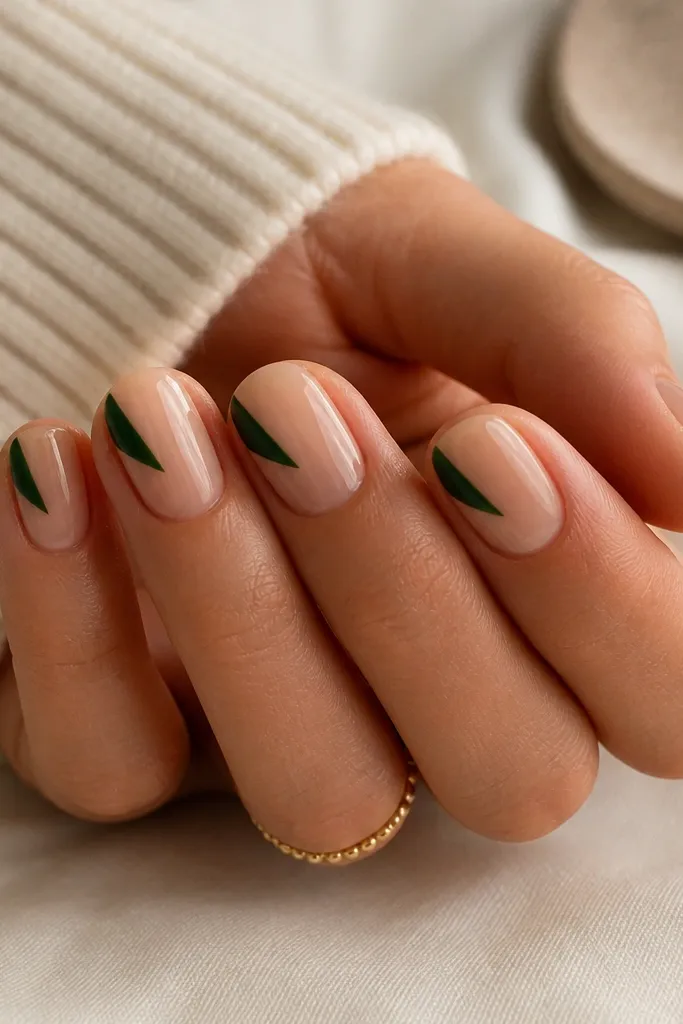
A single geometric triangle makes short oval nails look modern and clean, even with minimal time. I use evergreen green because it reads classic and doesn’t clash with fall neutrals or winter coats. The nude base is what flatters — it keeps the nail bed looking natural and makes your fingers look longer. This design works especially well if your nails have ridges, because the geometry draws the eye away from texture. It’s also a safe choice for hands that need to look polished but not overly decorated.
Paint a nude base in two thin coats and keep it sheer enough that your nail bed still shows. For the triangle, place it near one side of the tip so it angles inward toward the center — keep it about 2 mm from the sidewall. Use a striping brush to fill the triangle with evergreen green, then clean the edges with a small brush. Topcoat glossy, making sure to cap the triangle edges so they don’t lift.
Editor's noteMake the triangle smaller than you think; big triangles make short nails look chopped.
Skip thisAvoid triangles centered too high; they can make the nail look shorter.
10. Olive Green Skittle Nails with One Neutral Marble
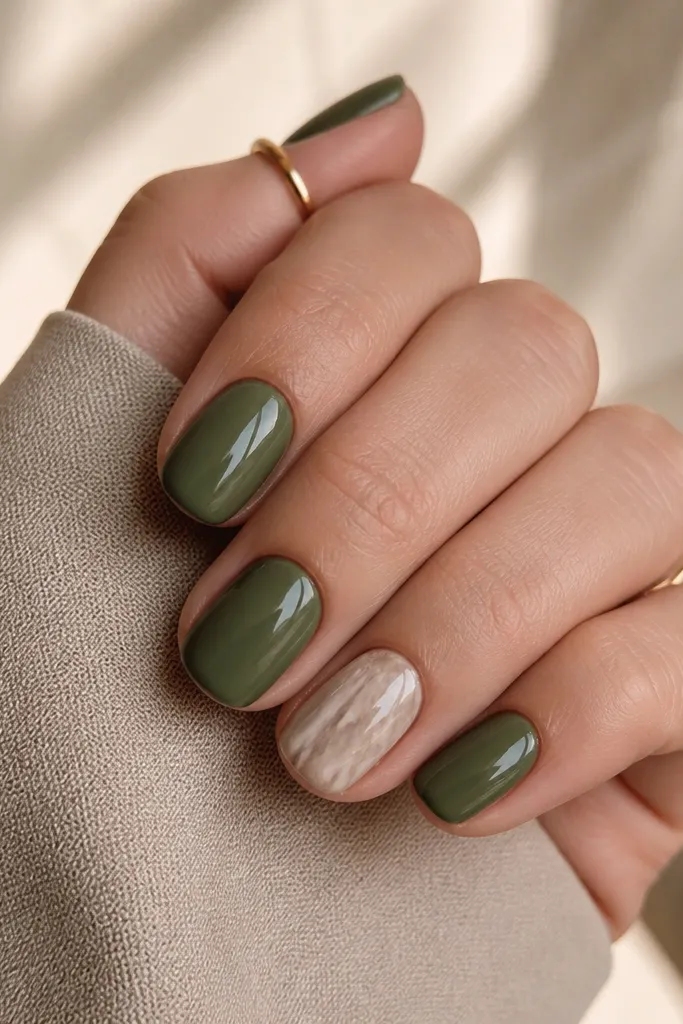
Skittle nails look fun on short oval when you keep the palette tight. I like olive green as the evergreen anchor because it works with gold jewelry and it doesn’t look like “holiday green” only. Then I break the pattern with one neutral marble nail using taupe and cream so the set still feels wearable. This flatters medium and deep skin tones because olive adds depth without turning the hands gray. On fair skin, the neutral marble keeps it from looking too dark. It’s a good choice when you want variety but still want a neat, cohesive look.
Paint olive green on four nails with two thin coats, keeping the application smooth and centered. On the accent nail, paint a sheer nude base, then add taupe and cream marble swipes using a liner brush. Keep the marble streaks thin and let the nude show through between them. Finish with glossy topcoat on all nails, and add one extra thin layer on the accent nail to smooth the marble texture.
Editor's noteIf you hate over-decoration, do the accent nail only — the rest stays one color and looks intentional.
Skip thisDon’t mix too many different greens; it makes short nails look messy.
11. Creamy White Snow Drifts with Espresso Lines
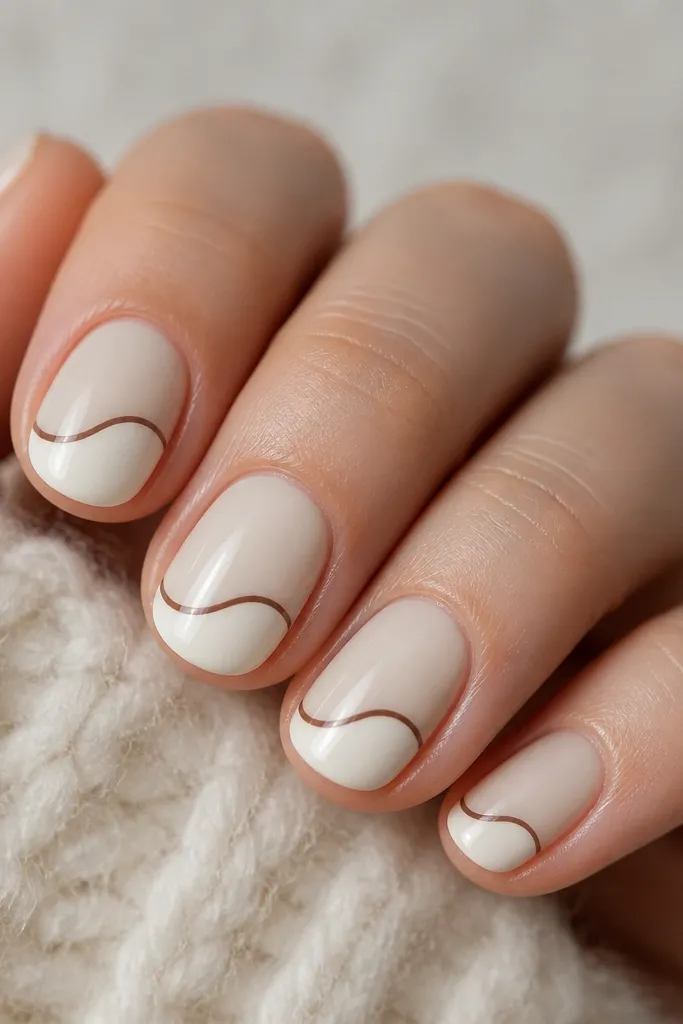
This is a winter design that still reads clean because it uses creamy white instead of stark opaque white. The espresso lines add structure, so the drifts look intentional rather than like random smudges. It flatters hands because the contrast between creamy white and espresso is crisp without being harsh. On warm skin tones, the espresso keeps it grounded; on cool skin tones, the creamy base avoids that icy, washed-out look. I like this when I want something seasonal but not covered in glitter.
Apply two coats of creamy white, letting it build smoothly in thin layers so it doesn’t streak. With a thin striping brush, draw curved espresso-brown lines along the upper edge of the tip area to define the drift shape. Then lightly fill the drift curves with a second espresso line or tiny shadow line — keep it narrow so it doesn’t cover the white. Topcoat glossy and cap the tip so the lines stay crisp.
Use a striping brush you already know is steady; snow drifts look best when the curves are consistent across nails.
Avoid thick lines — they make short oval nails look heavy and uneven.
12. Rosewood Gloss with Dark Green Cuticle Halo
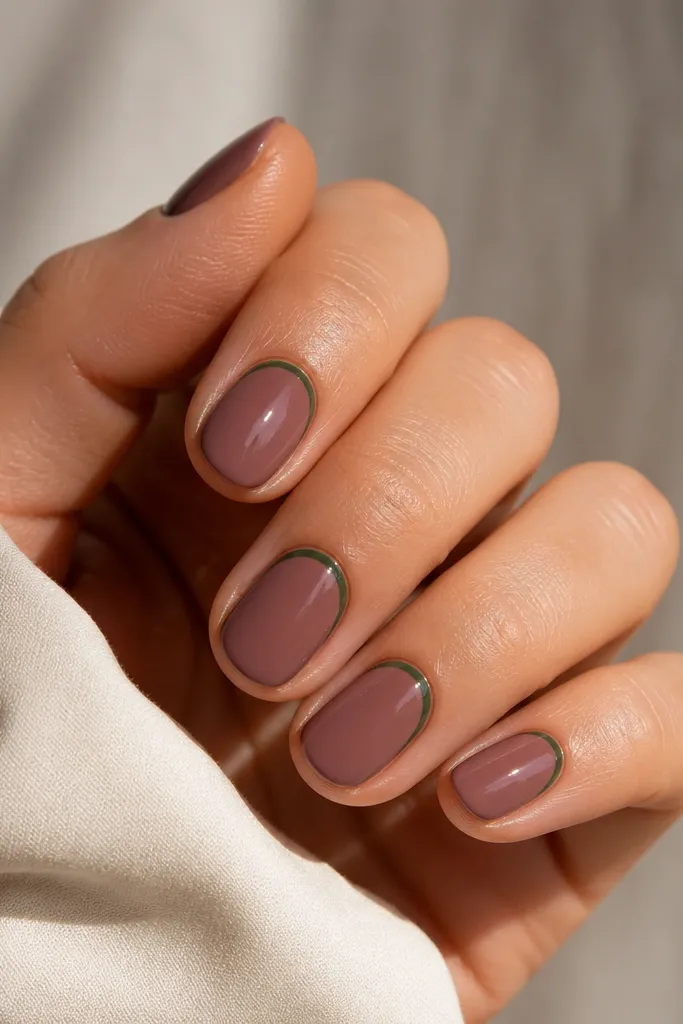
A cuticle halo makes short oval nails look freshly done even when your nails start to grow out. The rosewood gloss is flattering because it sits between nude and berry — it warms up the hand without looking too bright. The dark green halo adds an evergreen twist and frames the nail bed, which is where short nails can otherwise look plain. This is great for people who love color but want a simple design. It also looks good with rings because the halo draws attention upward toward jewelry.
Paint rosewood gloss in two thin coats and cure or dry fully. Then take a fine liner brush and paint a thin dark green arc around the cuticle, leaving a small nude gap so it looks like a halo not a block. Keep the arc about 1/2 the width of the nail bed and stop before it hits the sidewalls. Clean up the edges, then topcoat glossy, paying attention to the cuticle line so it stays smooth.
Editor's noteIf your halo bleeds, use gel cleanser on a small brush and clean while the line is still slightly tacky.
Skip thisDon’t fill the whole cuticle area; a halo line should feel thin and precise.
13. Champagne Nude with Espresso Polka Dot Tips
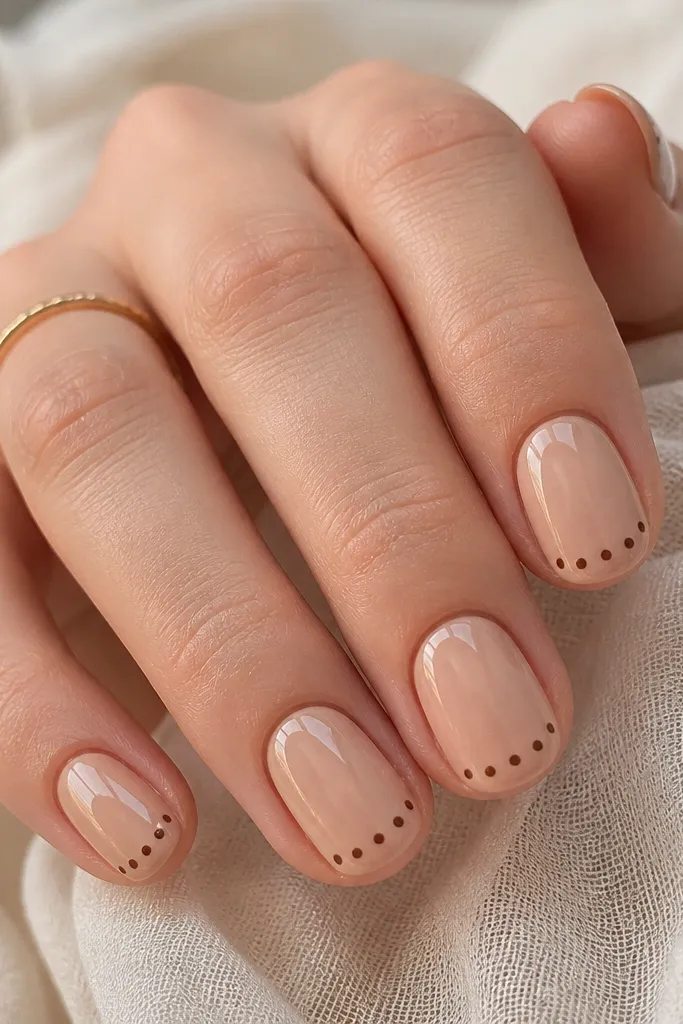
Polka dots look adorable on short oval when the dots are tiny and placed right at the tip. Champagne nude flatters because it brightens the nail bed while staying close to your natural color, which makes grown-out nails still look decent. The espresso dots add contrast and an evergreen feel without going dark-green heavy. This design works on all skin tones because the base is neutral and the dots are small, so it never overwhelms. I wear it for everyday events where I want something cute but not “party nails.”
Apply champagne nude in two thin coats, then let it dry or cure fully for a smooth surface. Use a dotting tool to place 3-5 tiny espresso dots along the tip line — start in the center and then place dots evenly toward the sides. If your dots spread, load less polish on the tool and press once, then lift straight up. Seal with a glossy topcoat and cap the very tip so dots don’t catch on fabric.
Editor's notePractice dot spacing on a spare nail tip or paper first — the pattern looks best when the dots match across nails.
Skip thisSkip large dots; they make short oval nails look like they have spots instead of a design.
14. Sea Glass Green with Clear Negative Center
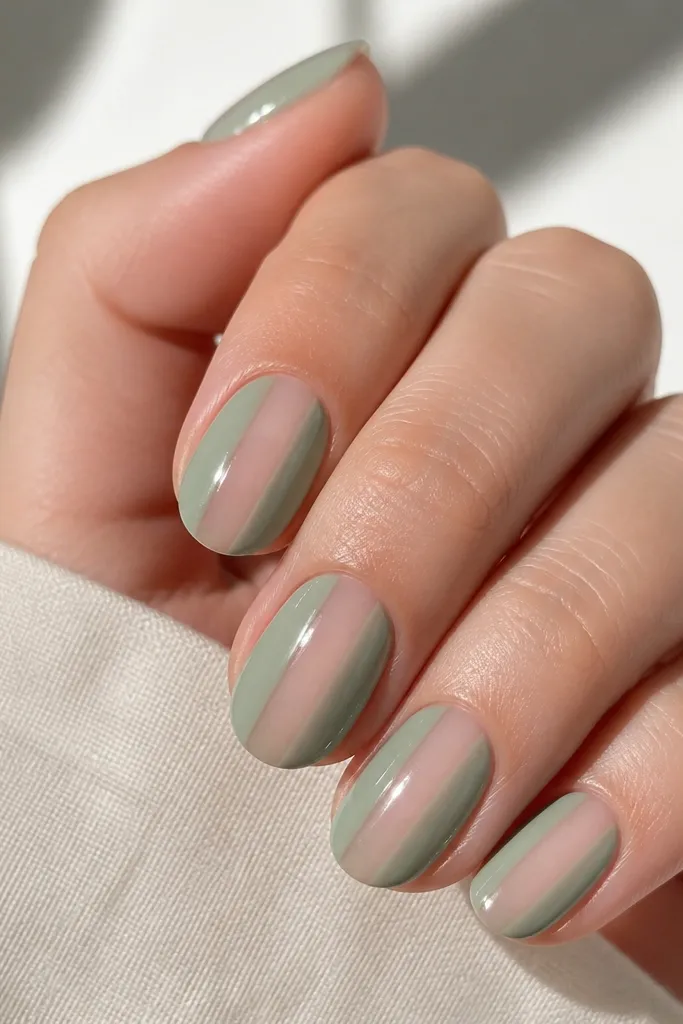
This is a flattering optical design because the clear center makes the nail look slimmer and longer. Sea glass green is evergreen without being harsh, and it looks soft against silver or gold jewelry. On fair skin it reads fresh and airy; on deeper skin tones it still looks clean because the green is light enough to show. The negative space also hides small application mistakes — your eye goes to the center shape instead of the base coverage. It’s my pick when I want something seasonal but not obviously holiday.
Paint sea glass green over the entire nail except you’ll leave a vertical clear oval in the center. The easiest way is to apply green in two thin coats, then use a striping brush to clean around the clear center while it’s still slightly tacky or freshly dry. After you get the shape, seal with topcoat and make sure the clear center stays see-through — don’t flood it with green. Finish with a glossy topcoat across the whole nail so the green looks glassy and smooth.
Editor's noteUse a thin striping brush and keep the clear oval narrower than you think — it creates the slimming effect.
Skip thisDon’t make the clear oval too wide or the nail will look cut in half.
15. Evergreen Tips with Nude Center Line (Reverse French)
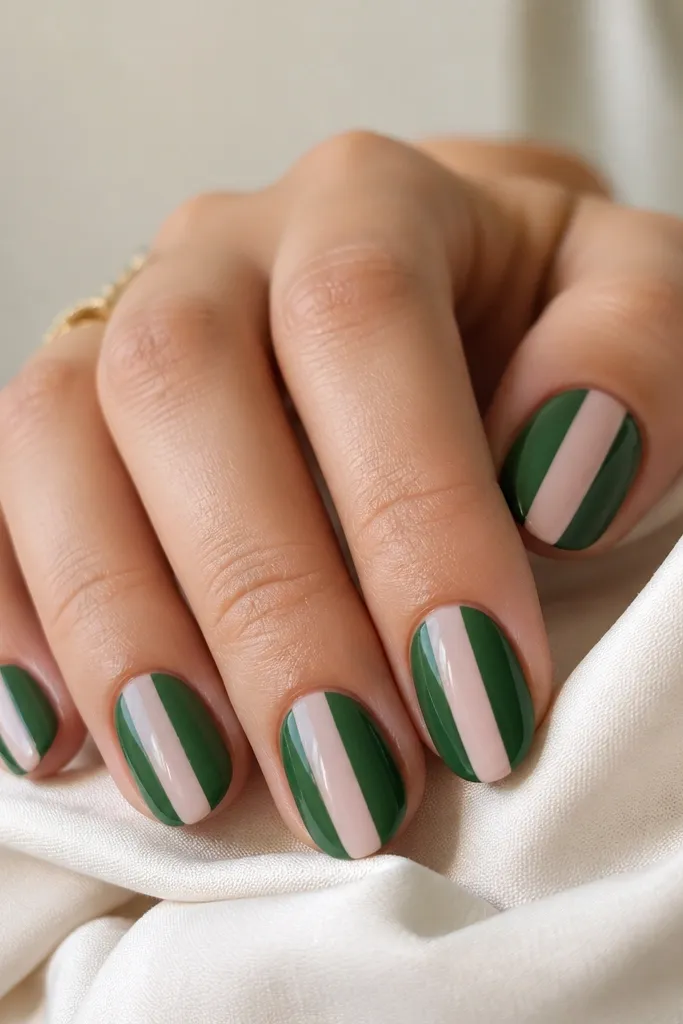
Reverse French-style placement makes short oval nails look sharp without adding length. The evergreen green outer placement gives you that fall-winter feel, and the nude center line keeps it airy so your nails don’t look heavy. I like this for medium and deep skin because the nude line keeps the nail bed bright; on fair skin it prevents the green from washing out near the cuticle. It also looks great with both gold and silver rings because the center line gives a clean focal point. This is the manicure I wear when I want “neat and flattering” more than “cute and loud.”
Start with a nude base in two thin coats. Then paint evergreen green on the sides and tip, leaving the center nude line about 2 mm wide — use a striping brush and follow the oval shape. Connect the side color around the free edge so it looks like a U-shape framing the tip. Clean the edges, then topcoat glossy and cap the free edge for a smooth finish.
If your center line looks uneven, fix it by wiping the brush edge along the line before curing or drying fully.
Don’t cover the center line — the nude line is what makes the shape flattering on short nails.



