
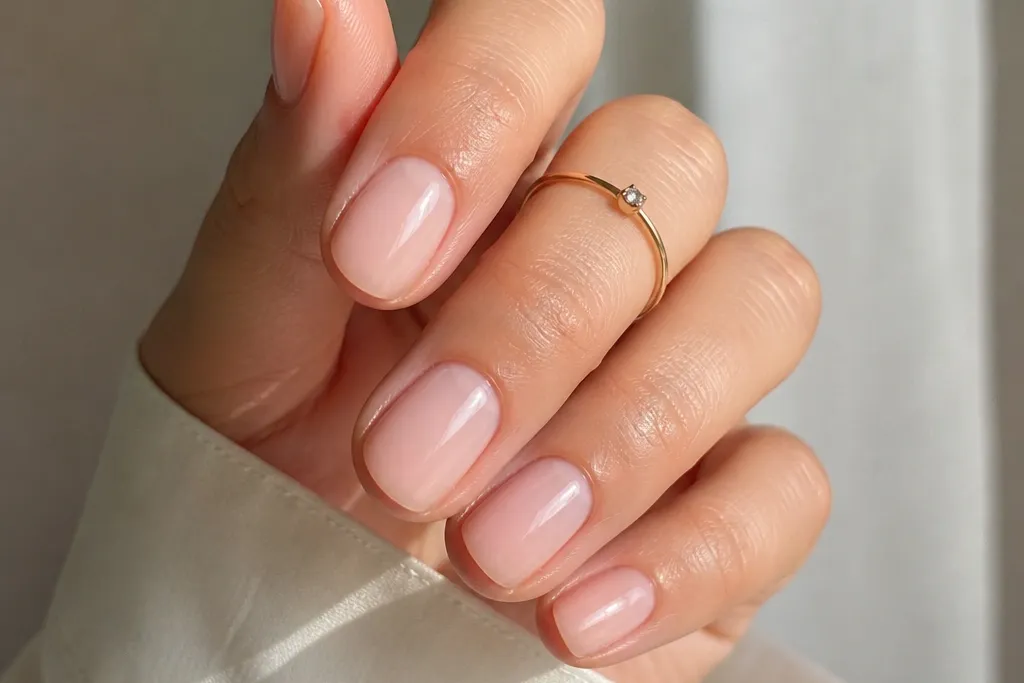
1. Classic Short Oval French in Milky Nude + Bright White
This is the French I reach for when I want my hands to look freshly done without looking “try-hard.” The base is a milky nude that sits close to your natural nail tone, then the tip is bright white with a thin, even edge. On light to medium skin tones, the contrast looks clean and bright; on deeper skin tones, the white pops without turning chalky if you keep the base sheer. Short oval nails make the tip curve feel intentional instead of blunt, especially when you keep the free edge short. The styling principle is contrast with control: one crisp line and no extra patterns.
Start by pushing back cuticles and lightly buffing the shine off your nail plate, then wipe with alcohol prep. Apply 1 thin coat of milky nude gel or press-on adhesive base, cure/let set, and repeat with a second thin coat for an even look. For the French, place the white gel/paint at the tip using a striping brush and follow your smile line — don’t drag it all the way into the corners. Cure, then add a tiny second pass only where the line looks uneven. Finish with glossy top coat, cap the free edge, and cure fully or let it dry until it’s no longer tacky.
Editor's noteIf your white looks streaky, do two thin coats instead of one thick coat — thick white bleeds into the nude and ruins the line.
Skip thisSkipping a top coat that seals the tip is the fastest way to get chips on short French nails.
2. Reverse French with Nude Base + White Cuticle Half-Moons
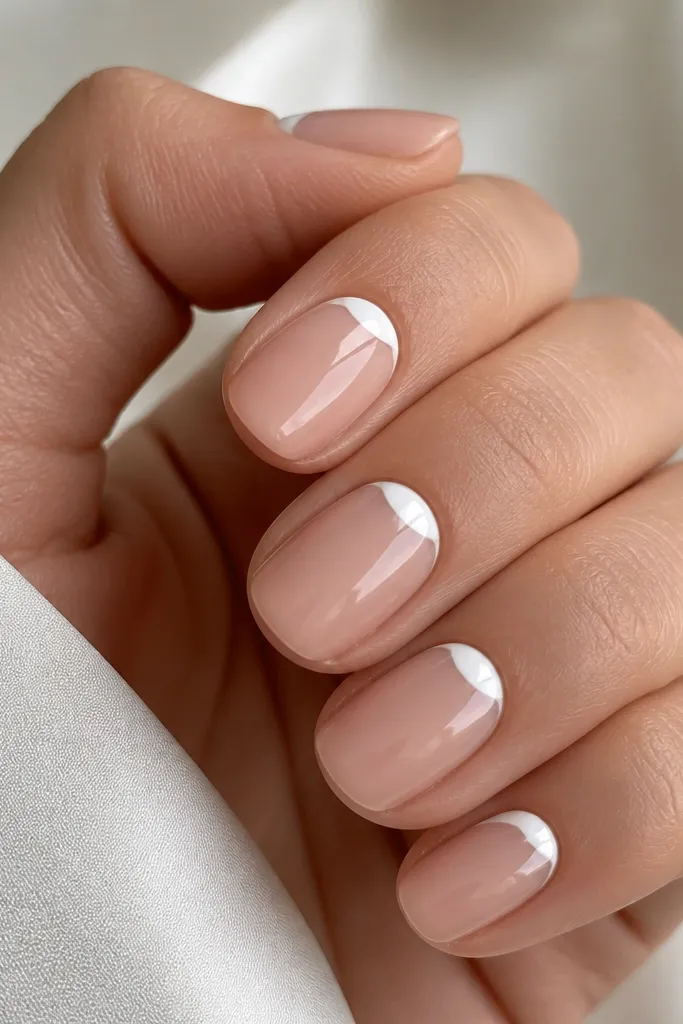
Reverse French is my go-to when you want the French vibe but your tips keep getting worn down. You leave the tip natural and place the white at the cuticle half-moon, which makes short oval nails look longer and neater. This design flatters hands with bitten or uneven tips because the focus is up near the cuticle where the nail is usually strongest. For warm undertones, pair nude with a creamy white; for cool undertones, pair nude with a brighter, colder white. The principle here is “focus shift” — you move the bold part upward so the shape looks intentional.
Start with a sheer nude base over clean, dry nails, then cure/let set. Use a small detail brush and paint a thin white arc starting at one sidewall, stopping short of the side corners by about 0.5 mm. Repeat on the other side, then connect the arc in the center so it looks like a smooth half-moon. Let it cure/dry, then check symmetry by looking straight down from above. Seal with a glossy top coat and cap the tips lightly so the half-moon doesn’t snag.
Editor's noteUse a dotting tool to place two guide dots at each side of the arc, then draw the curve between them — it keeps the shape even.
Skip thisGoing too wide with the half-moon can make the cuticle area look messy instead of crisp.
3. French Fade Tip in Sheer Pink + Soft White Ombré
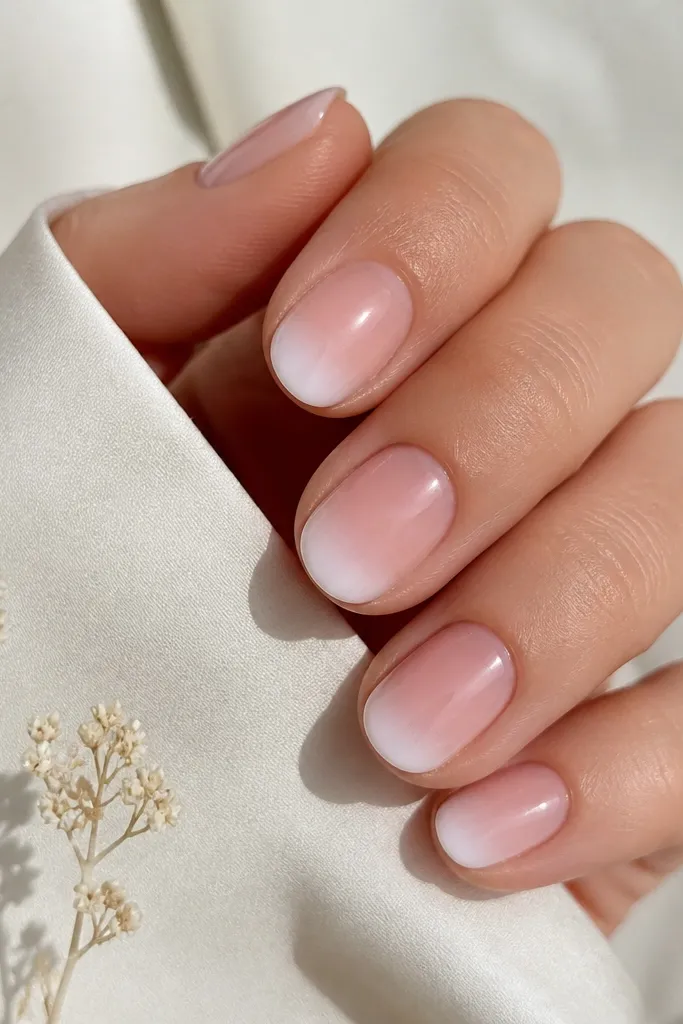
If classic French feels too sharp for your everyday life, do a fade tip. The base is a sheer pink (not opaque), and the white is blended so it looks like a soft cloud at the edge. This flatters almost everyone because it’s gentler on the nail and doesn’t create a hard block of color. On short oval nails, ombré makes the nail look smoother and slightly longer without adding length. The principle is a gradient that hides tiny imperfections in your smile line.
Apply a sheer pink base coat in two thin layers, keeping it translucent so the fade has room to blend. For the tip, sponge a small amount of white gel or paint onto a makeup sponge, then tap onto the free edge — start light and build. Blend downward with 2-3 quick taps, not swipes, so you keep the oval shape. Cure/let dry, then add a second white layer only at the very tip edge for definition. Finish with glossy top coat to smooth out the sponge texture.
Use a sponge that’s slightly worn-in (not brand new) so the texture comes out soft instead of patchy.
Overloading the sponge with white — it creates hard spots that show up on short nails.
4. Gold-Trim Micro French with Nude Base + Thin White Line
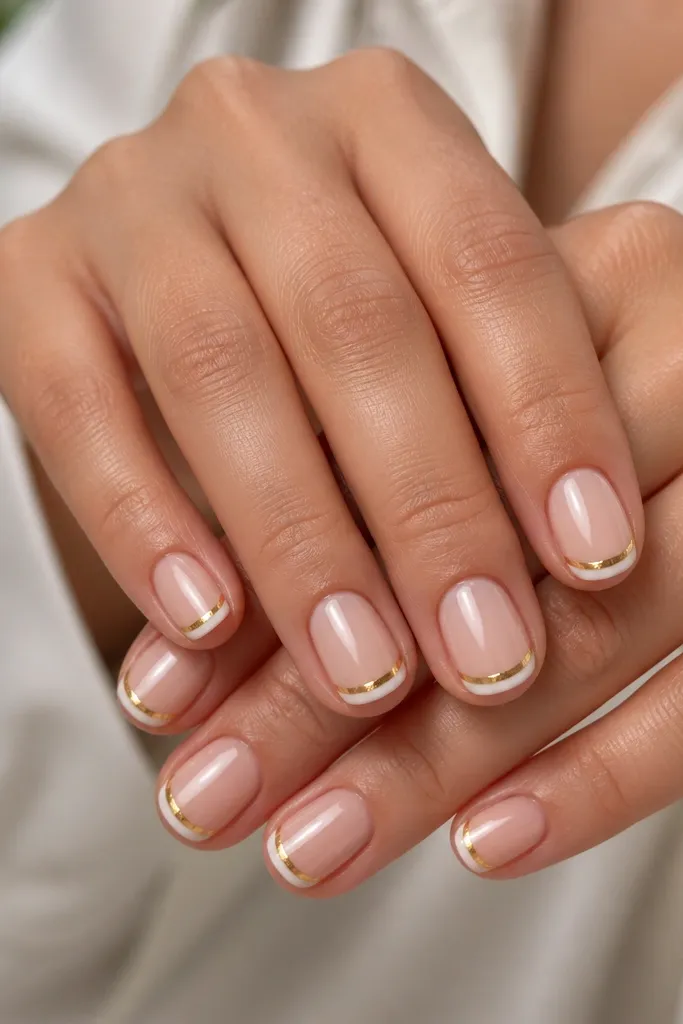
This one looks expensive because it’s basically micro French with a gold accent. The nude base keeps it clean, the white line is thin enough to look like a design detail, and the gold foil adds sparkle without clutter. I love it for medium to deep skin tones because the gold reads warm and flattering against nude. On light skin tones it still works, but keep the gold fine and not chunky so it doesn’t overpower. The principle is restraint: narrow lines and one accent, not full glitter everywhere.
Start with a nude gel base that’s slightly pink or beige, then cure. Paint a micro French line in bright white using a striping brush, keeping it about half the width of a regular French tip line. While the white is still workable (or use a thin clear tacky layer), press a thin gold foil strip along the same curve — you want it to mirror the smile line. Seal with a thin top coat, then add a second top coat for smoothness since foil can feel textured. Cure/let dry fully.
Editor's noteIf the gold foil lifts on the edges, press it with the flat back of a bobby pin for 5 seconds per nail.
Skip thisUsing wide gold tape or chunky foil — it makes micro French look bulky on short oval nails.
5. Blue French Tip with Milky Base and Navy Smile Line
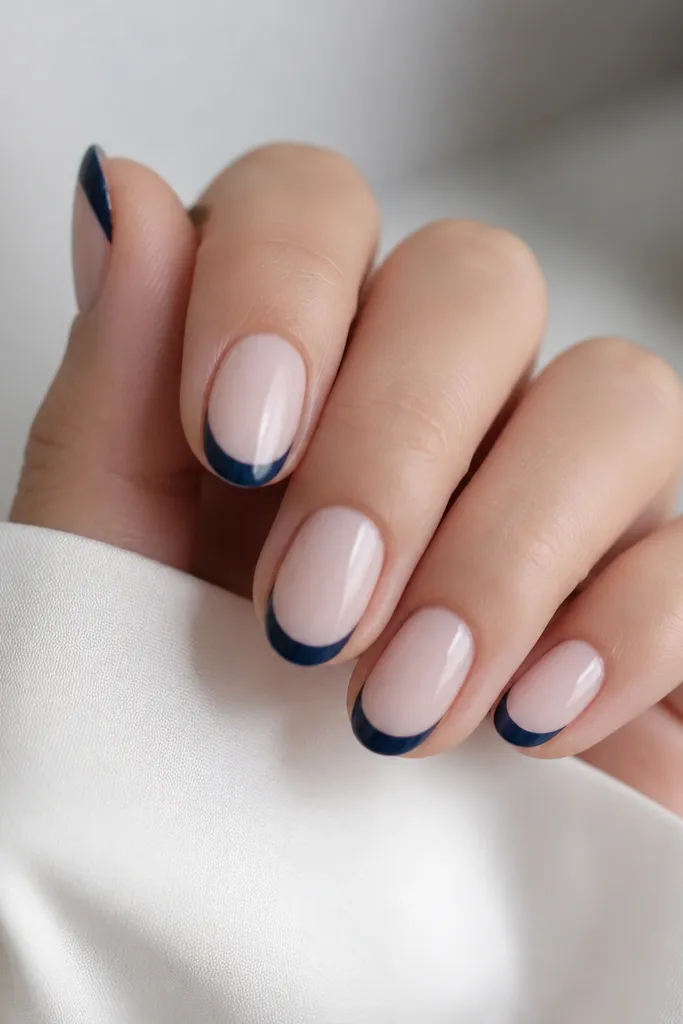
White French is classic, but a navy French tip looks crisp and more “grown” without trying. The base is milky nude, and the tip is a deep navy that reads clean and sharp on short oval nails. Navy flatters cool undertones and also looks stunning on warm undertones because it gives a strong contrast without the harshness of black. This is the style I wear when I need nails that match jeans and a plain tee. The principle is choosing a tip color that’s dark enough to define the shape but not so dark it looks like a solid cap.
Prep your nails, then apply milky nude base in two thin coats. For the French, use a small angled brush to place navy at the tip edge only, following your smile line. Keep the navy slightly thinner at the center and a touch fuller near the corners so the oval shape looks balanced. Cure/let dry, then add a second thin coat if the navy is patchy. Top coat and cap the free edge so the navy line stays crisp through wear.
Editor's noteIf navy looks streaky, mix a drop of clear gel into the navy — it smooths the brush without changing the color much.
Skip thisPainting navy all the way down the sides — it makes short oval nails look wider than they are.
6. Blush French with Rose-Tinted Tip and Sheer Nude Base
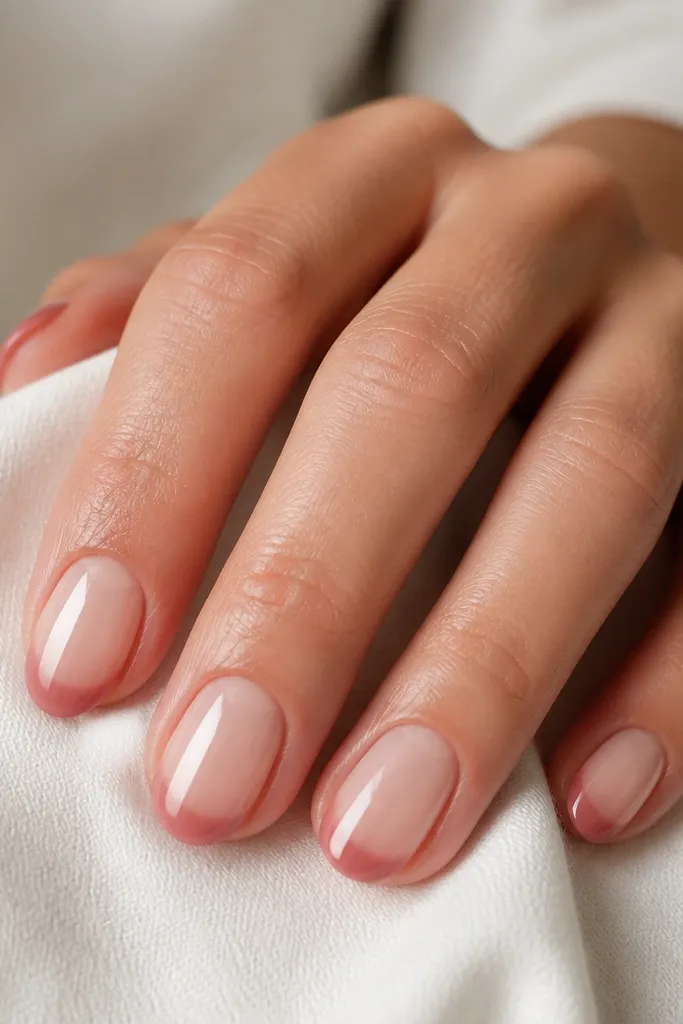
This is French for people who don’t want “white tips” showing up like a costume. You use a sheer nude base, then a rose-blush tip color that’s slightly translucent at the edge. On fair to light skin, it looks romantic and subtle; on deeper skin tones, it adds a soft pop that still looks classy. Short oval nails make blush French feel delicate instead of heavy. The principle is tonal contrast — you get definition from a color shift, not from stark white.
Apply a sheer nude base, cure, then repeat once more for an even glow. Paint the blush tip using a thin brush — start at the center of the smile line, then pull the color outward to both sides. Keep the blush opacity lighter than you think you need; you can always add a second coat after curing. After the first coat, check the edges and touch up only where the curve looks thin. Finish with glossy top coat so the blush looks smooth and not chalky.
Editor's noteMix blush with a tiny bit of clear to keep the tip from going opaque — this keeps the soft French look.
Skip thisUsing a fully opaque pink tip — it turns into a blocky “colored tip” on short oval nails.
7. Half-White Half-Clear French with Milky Base
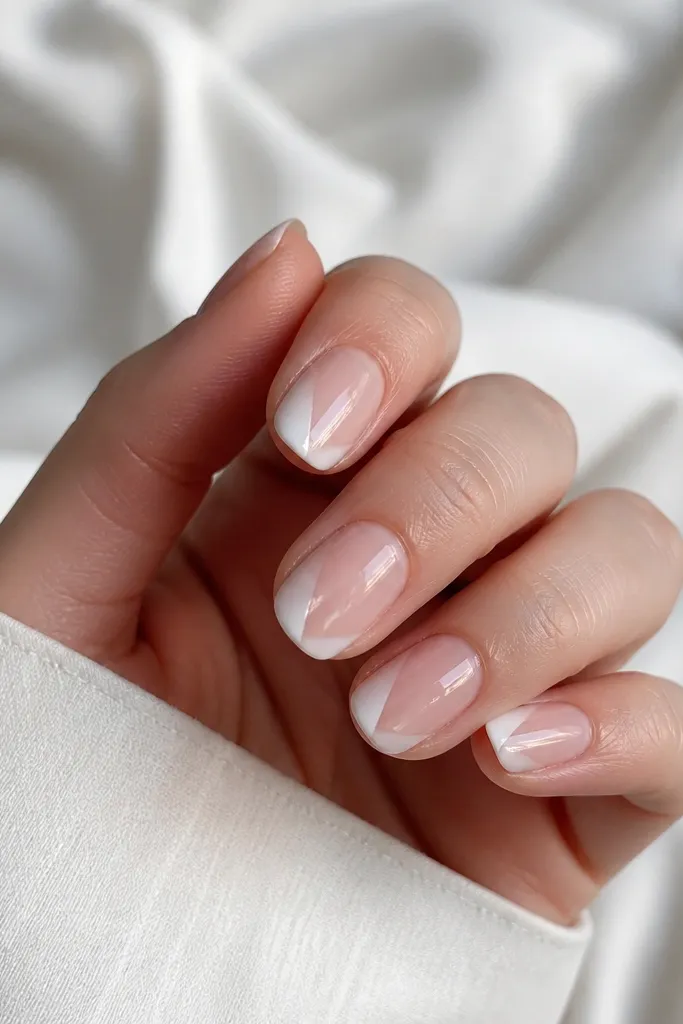
This design is the fastest way I’ve found to make short oval French look artsy without adding extra steps. The base is milky nude, then the tip is split — one side in bright white, the other stays sheer and glossy. Because the white is only on part of the tip, it looks lighter and keeps your nail from looking too “busy.” It flatters all skin tones because the milky nude base keeps the look neutral while the white adds definition. The principle is negative space — you leave part of the tip clear so the shape stays breathable.
Start with a milky nude base and cure/let set. Use a striping brush to paint a clean white section on one side of the tip following your smile curve, stopping before the opposite edge. On the other side, leave the nail bare and keep it glossy with a clear gel layer. Cure, then apply top coat over both sections so the separation line stays crisp. If the line smudges, clean it with a brush dipped in alcohol before curing and redo the edge once.
Editor's noteUse painter’s tape as a temporary divider for the first nail — peel it off right after you paint so you don’t smudge the line.
Skip thisTrying to freehand the split line on all ten nails at once — do two nails, then adjust your angle.
8. Matte Mini French with Glossy Accent Stripe
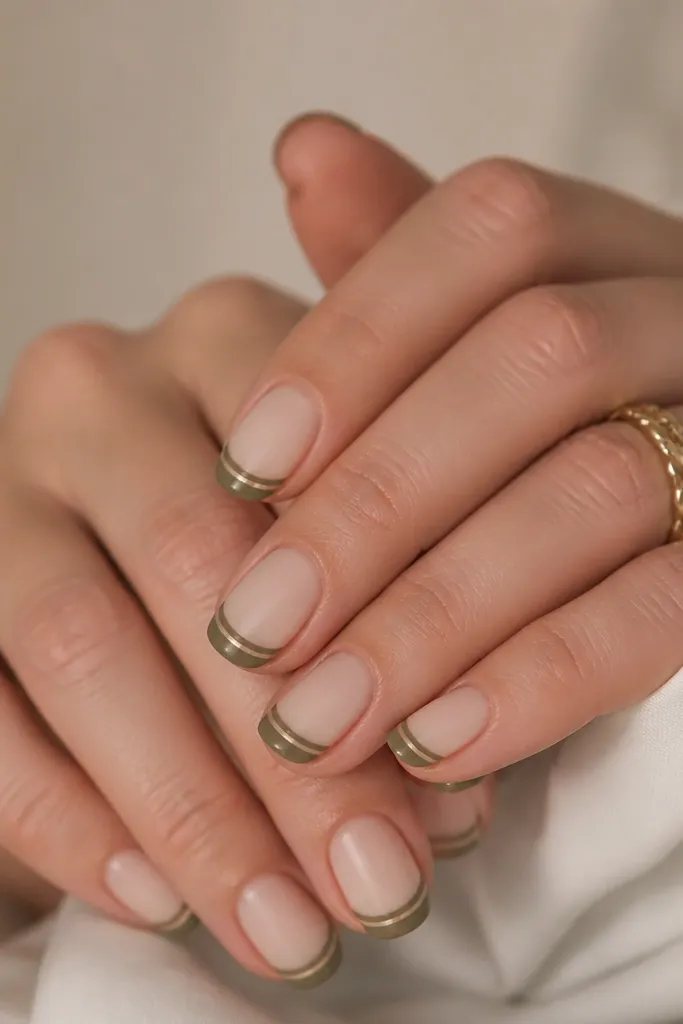
Matte French is a different kind of classy. You keep the base nude, then make the French tip matte so it looks soft and velvety, and add one thin glossy stripe for a highlight. This is flattering because matte hides tiny surface bumps and makes short nails look smoother. It looks especially good on nails that have slight ridges since the matte finish makes the surface even. The principle is texture contrast — matte for the shape, glossy line for the definition.
Apply a nude base and cure, then paint a mini French tip in white. Cure again, then apply a matte top coat over everything except the thin stripe area. For the glossy stripe, paint a super-thin line (white or clear) right through the center of the matte tip and seal it with glossy top coat only over that stripe. Clean the edges with a flat brush and alcohol. Cure fully so the matte stays matte and the stripe stays shiny.
Editor's noteIf your matte top coat dries patchy, stir it gently instead of shaking and wipe the brush on the bottle rim before applying.
Skip thisPutting matte top coat over the whole nail after you paint a glossy stripe — it turns the stripe dull.
9. French with Tiny Rhinestone at the Corner on Short Oval
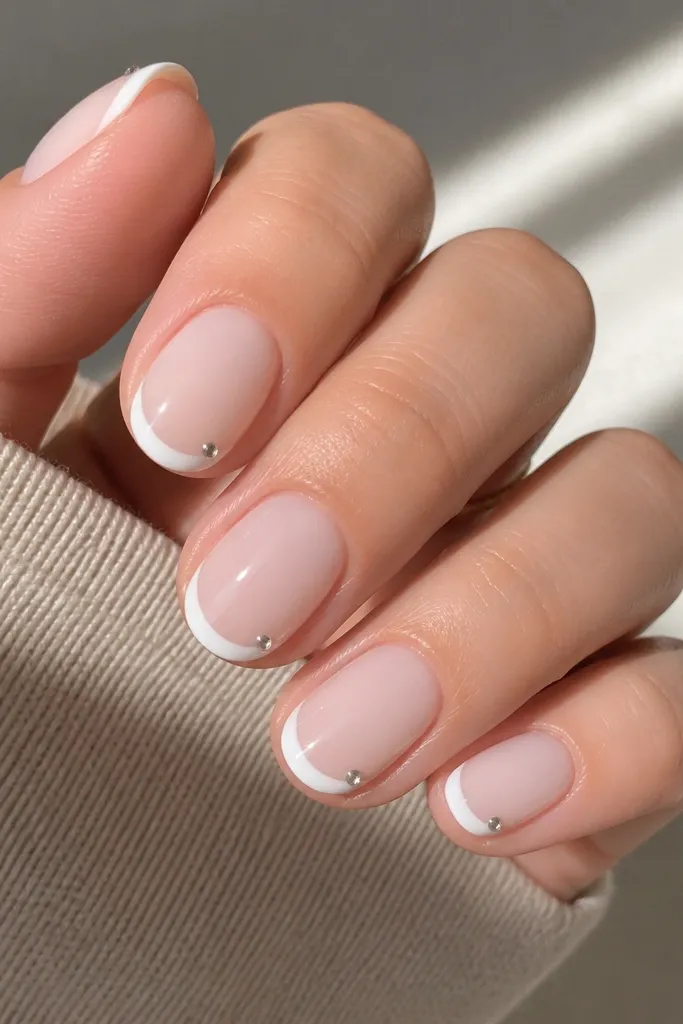
This is the “one detail, done” version of bling. You keep a classic nude + white French, then place one tiny rhinestone at the outer corner of the tip — not centered, and not on every nail if you want it to feel wearable. On short oval nails, corner placement makes the nail look slightly longer because the sparkle sits where the eye naturally lands. It flatters hands of any skin tone, but it looks especially good with warm nudes because the stone reads clear and bright. The principle is micro-focus: one element that guides the eye to the shape.
Paint your milky nude base and cure. Apply the white French tips using a striping brush, keeping the line crisp and narrow. While the top coat is tacky (or use a dot of gel), place one small rhinestone at the outer corner of each nail, about 1 mm in from the sidewall and 1 mm down from the tip edge. Press lightly with tweezers and cure so it doesn’t pop loose. Finish with a top coat that covers the rhinestone fully, then check for a smooth surface by running a fingertip over it.
Use a rhinestone that’s 1.0-1.5 mm wide — anything bigger on short nails grabs attention in a messy way.
Skipping a full seal over the stone — it catches on fabric and lifts.
10. Toasted Nude French with Brown-Taupe Tip
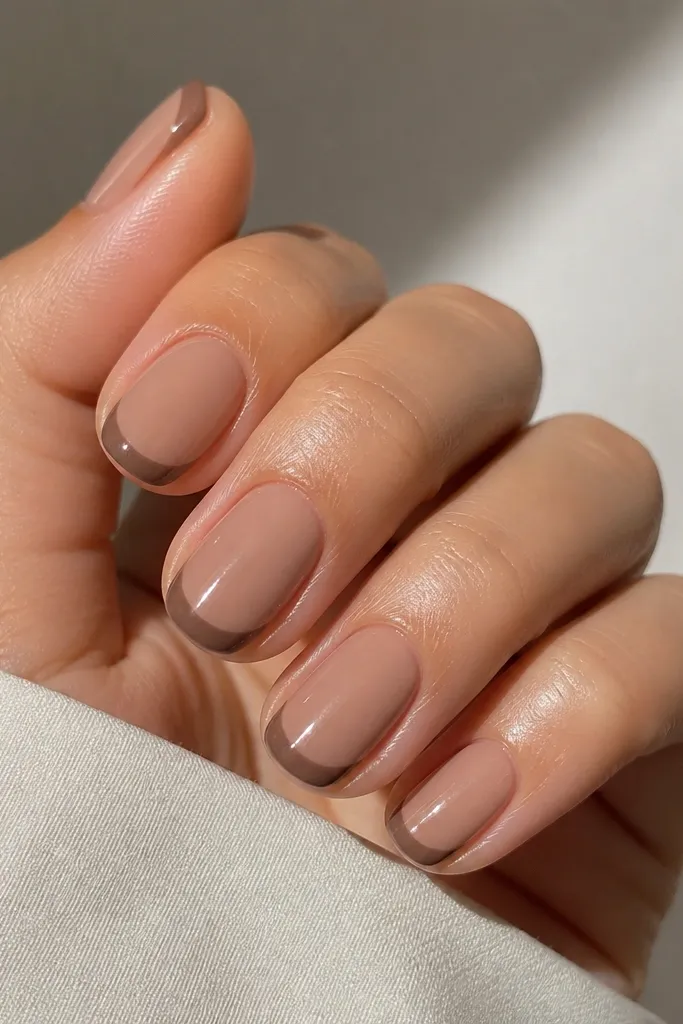
This French looks classy because it’s warm and modern, not stark. The base is a toasted nude (slightly caramel-beige), and the tip is a brown-taupe that looks like a latte foam edge. It flatters medium to deep skin tones like crazy because the warm browns match undertones and don’t wash out. On lighter skin, it still works — it reads chic and “neutral” instead of harsh. Short oval nails help because the warmer tones look smoother when the shape is rounded. The principle is using tone-on-tone warmth for definition.
Prep and apply a toasted nude base in two thin coats, cure/let set. Mix or choose a brown-taupe tip color that’s slightly darker than the base, then paint the French line at the tip with a thin brush. Keep the tip color concentrated at the free edge and taper it slightly toward the center so it doesn’t look like a thick cap. Cure and check symmetry under daylight. Seal with a glossy top coat and cap the tip edge so the warm color stays crisp.
Editor's noteTest the brown-taupe on one nail first — the difference between “taupe” and “mud” shows up fast on short French.
Skip thisUsing a tip color that’s too close to your base — if it’s only 1 shade darker, the French line disappears.



