
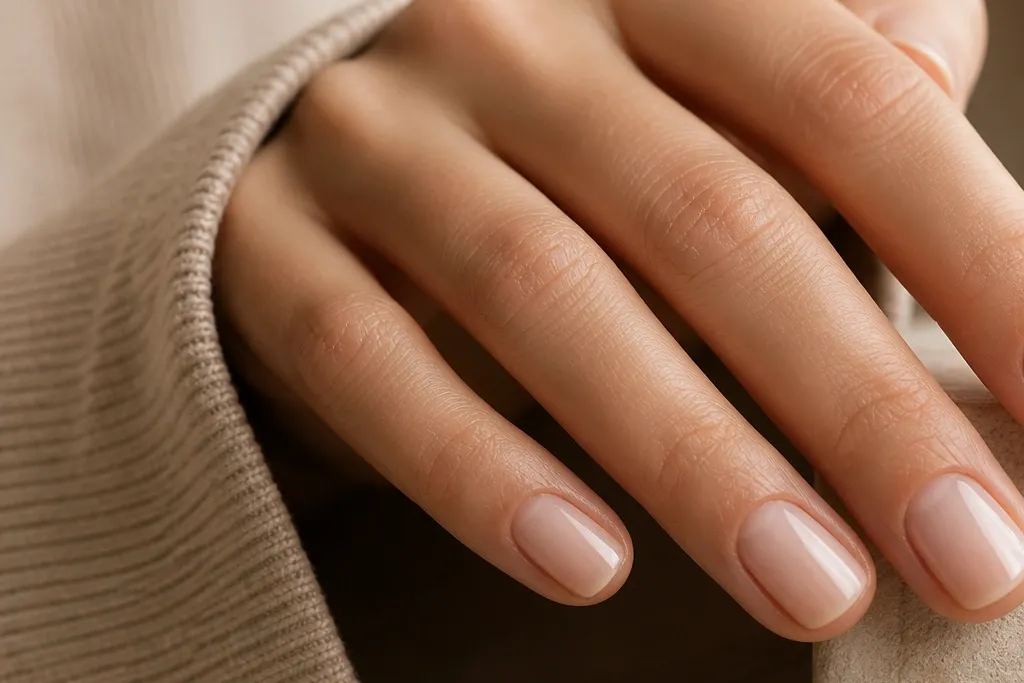
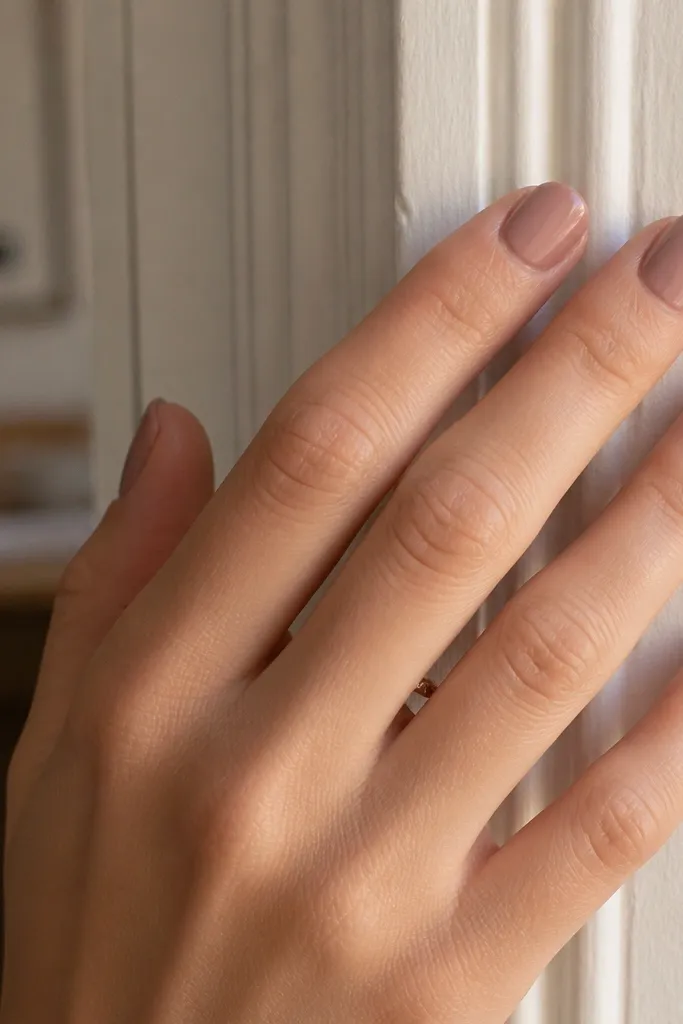
1. Milky nude oval with a single micro French curve
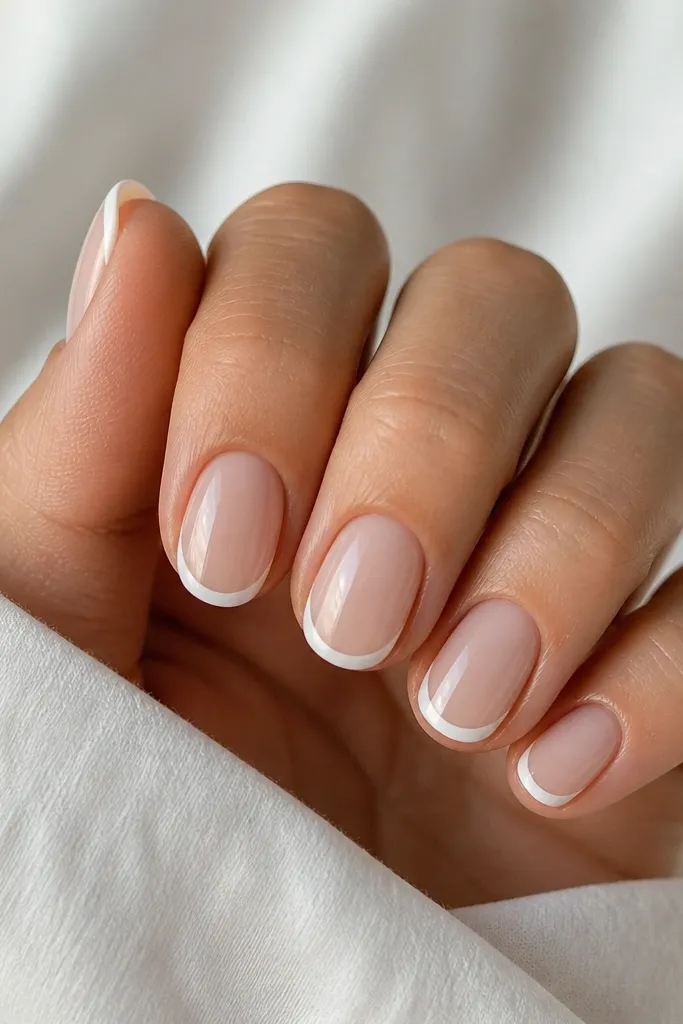
This is the design I reach for when my nails feel too short for anything “cute.” The milky nude base makes your nail bed look smoother and brighter, and the micro French curve stays narrow so it doesn’t steal length. I like glossy sheer white because it looks like softened porcelain instead of harsh sticker lines. This flatters light to medium skin tones especially well because the base is close to your natural color but a touch brighter. It’s also the safest option for work since the art sits only on the tip.
Start by applying a rubber base, then cure. Paint two thin coats of milky nude, curing each coat fully, and keep the sidewalls clean. With a size 10-12 striping brush, draw one thin arc across the very edge of the nail — about 1/6 of the nail length — then cap the brush stroke with a quick topcoat swipe. Finally, add a glossy top coat and do a careful swipe under the free edge so the line stays sealed.
Editor's noteIf your French line keeps bleeding, pull the brush almost dry and draw slower — the milky base grips better when it’s not flooded.
Skip thisAvoid a thick French tip on short ovals; it eats the nail space and makes the shape look stubby.
2. Sheer pink gradient with a cuticle dot halo
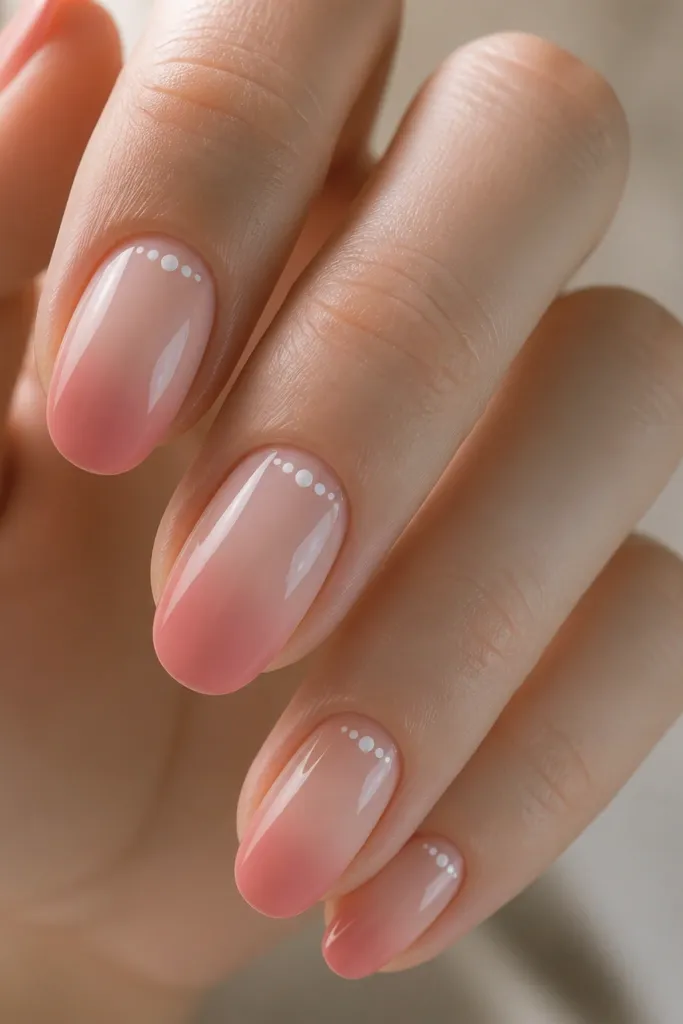
A gradient that starts at the cuticle gives short ovals the illusion of height. The sheer pink lets your nail bed show through, so the whole nail looks airy instead of heavy. The cuticle dot halo is small enough to fit tiny space, but it creates a focal point near your hand’s natural highlight line. This looks flattering on cool and neutral undertones because soft white dots brighten without turning orange. It’s also great for people who want nail art but don’t want long lines.
Start with a sheer nude-pink base and cure. Sponge or brush on a gradient: keep the cuticle area the lightest, then build toward the tip with a slightly deeper rose. Use a dotting tool with a 1 mm tip to place micro dots in a half-circle around the cuticle, leaving a small gap at the sidewalls. Clean up the edges with a fine brush dipped in acetone, then seal with two coats of glossy top coat.
To keep dots even, press the dotting tool straight down for one count, then lift — don’t drag.
Skip chunky dot sizes; big dots on short ovals look like paint blobs.
3. Nude base with a thin vertical gem line
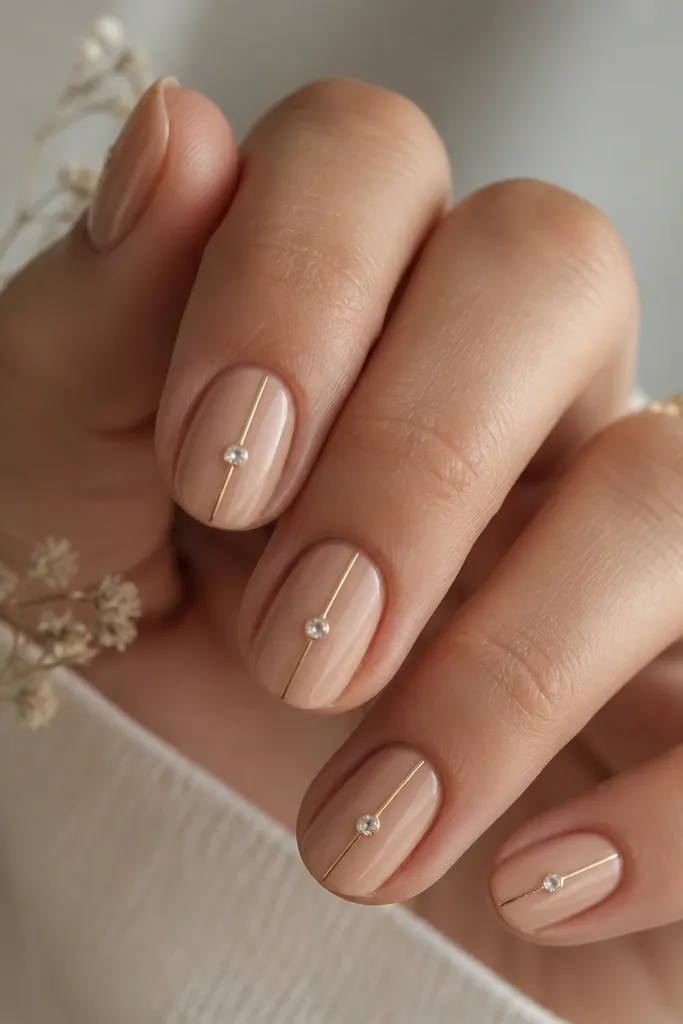
Vertical lines trick your eye into reading the nail as longer, and on short ovals that matters. The warm nude base keeps it soft and feminine, while the gold foil line adds a “jewelry” feel without taking over the nail. I place the crystal at the midpoint because that’s where the nail looks widest, so it looks balanced. This flatters most skin tones, especially if you wear gold jewelry often. It also works for events because it photographs well without being loud.
Apply a nude base in two thin coats, then cure. Use a striping brush to paint a vertical line down the center — start about 1 mm below the cuticle and stop about 1 mm above the tip. Press a tiny clear gem onto sticky gel at the center, then cure. If the gem looks raised, add a micro layer of top coat gel around it and cure again, so it stays smooth.
Use a gel that stays tacky only briefly; gems stick better when the surface isn’t fully cured yet.
Don’t center the gem too low; if it sits near the tip on short nails, it makes the nail look bottom-heavy.
4. Soft sage half-moon with nude sides
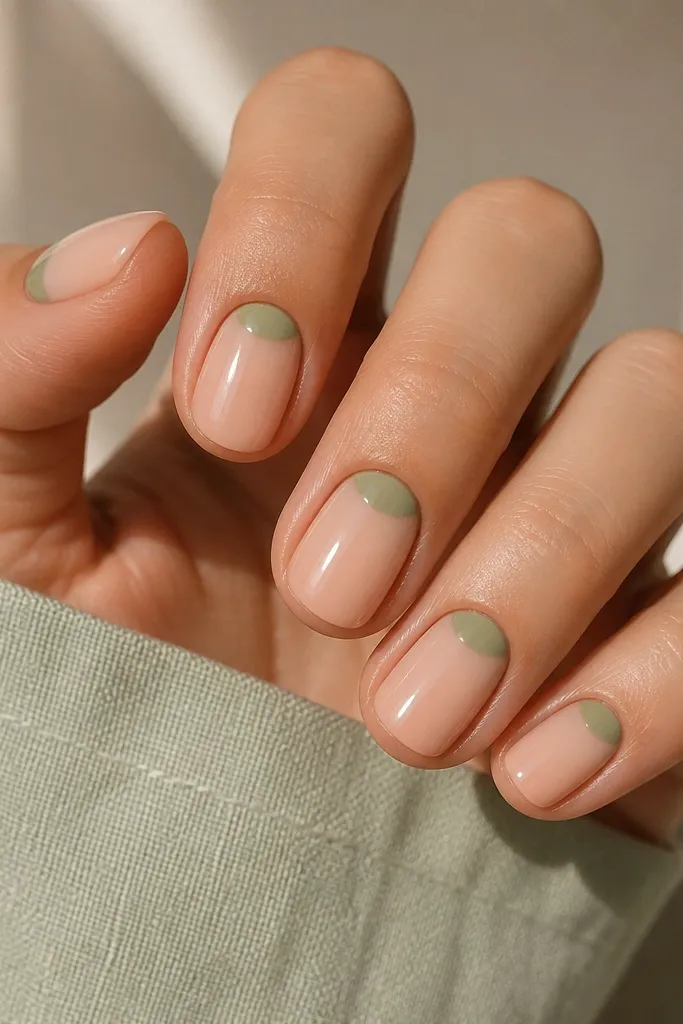
Half-moons are perfect for small space because they take up only the top third of the nail. Soft sage feels feminine and calm, and the nude sides keep everything looking clean. The shape also frames your cuticle area so the nail bed looks fuller. I like this on hands with a slightly pink undertone because sage makes the skin look fresh instead of washed out. It’s a great spring option that still feels wearable in fall.
Start with a nude base and cure. Use a half-moon stencil or freehand with a thin brush to paint the sage arc at the cuticle, keeping it narrow so it doesn’t touch the sidewalls. Fill the arc in two thin layers for even coverage. Clean the edges with a small brush and acetone, then seal with glossy top coat, paying extra attention to the half-moon border so it doesn’t chip.
If you freehand, anchor your brush at the center first, then pull one side at a time to keep symmetry.
Avoid a wide half-moon; on short ovals it looks like your nail is capped.
5. Micro floral vine on one accent nail
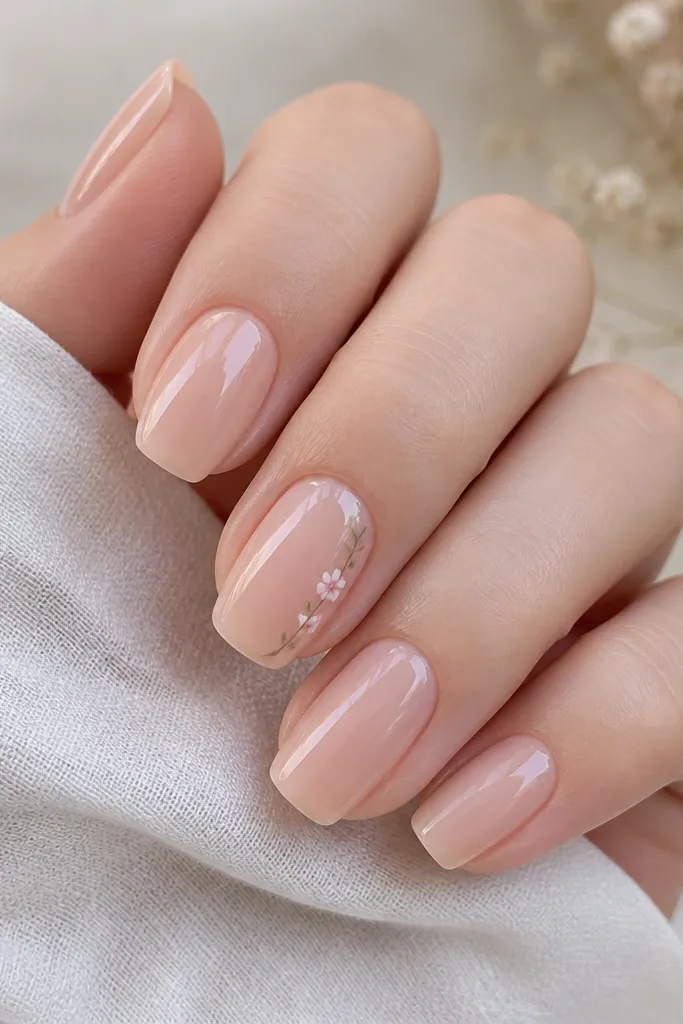
One accent nail keeps the design airy, which is what short oval nails need. A micro floral vine reads soft because the shapes are small and spaced, and the diagonal angle adds length. I use white and blush flowers with tiny green leaves so the palette stays gentle and not overly themed. This works on any skin tone because the nude base blends and the florals are light. It’s also beginner-friendly if you’re steady with a striping brush.
Paint all nails sheer nude in two thin coats and cure. On the accent nail only, draw a thin vine line diagonally, starting 1 mm below the cuticle and ending around the outer edge of the tip. Add three to four tiny blossoms using a dotting tool for petals, then add two mini leaves with the striping brush. Finish with a glossy top coat and cap the edges of each petal so they don’t lift.
Use a lighter hand with the green; two leaves look prettier than filling the whole nail with foliage.
Skip full-hand florals on short ovals; the spacing collapses and looks like a sticker.
6. Rose chrome tips over sheer pink
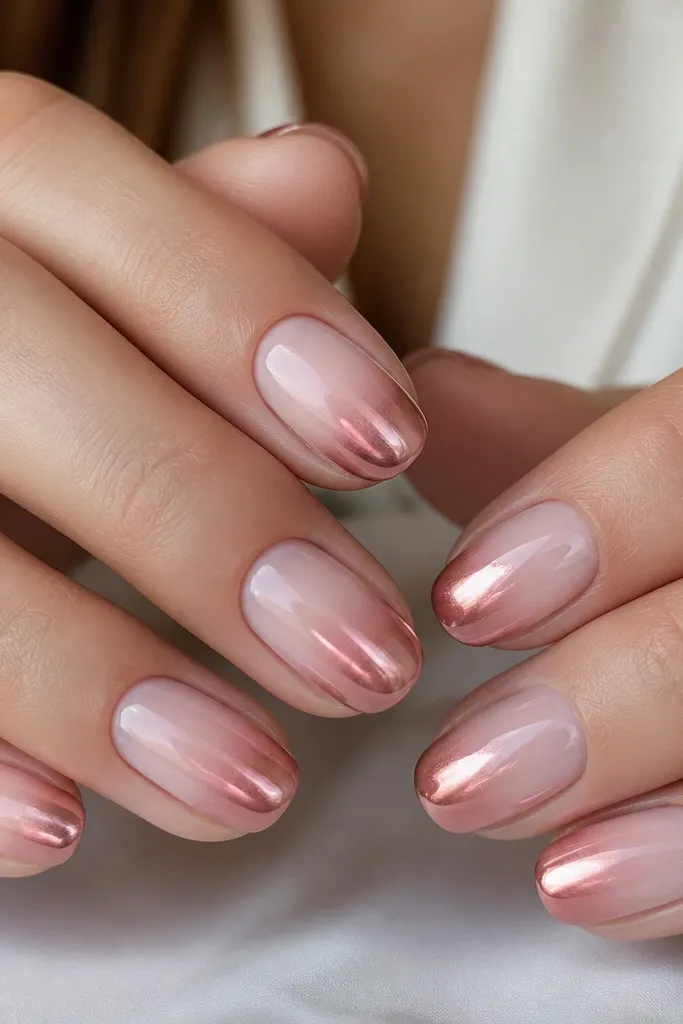
Chrome tips give you that “done at a salon” look, and the ombré fade prevents the tips from looking heavy. A sheer pink base keeps the overall effect feminine, not metallic-cold. I like rose chrome because it flatters warm and neutral undertones, and it looks good with both gold and silver jewelry. On short ovals, a fade matters — you want the strongest chrome near the tip and lighter as it moves inward. The result reads sleek from across the room.
Apply a sheer pink base and cure. For the chrome placement, paint a thin layer of gel only on the tips — about 1/4 of the nail length — then cure until tacky. Press rose chrome powder onto the gel, then gently buff off excess with a soft brush. Use a second layer of gel lightly toward the middle if you want a smoother fade, then top coat with a chrome-safe glossy sealer.
Editor's noteWork one hand at a time so the tacky gel doesn’t dry out before you buff in the powder.
Skip thisAvoid putting chrome all the way to the sidewalls on short ovals; it widens the nail visually.
7. Tiny checkerboard accent with micro dots
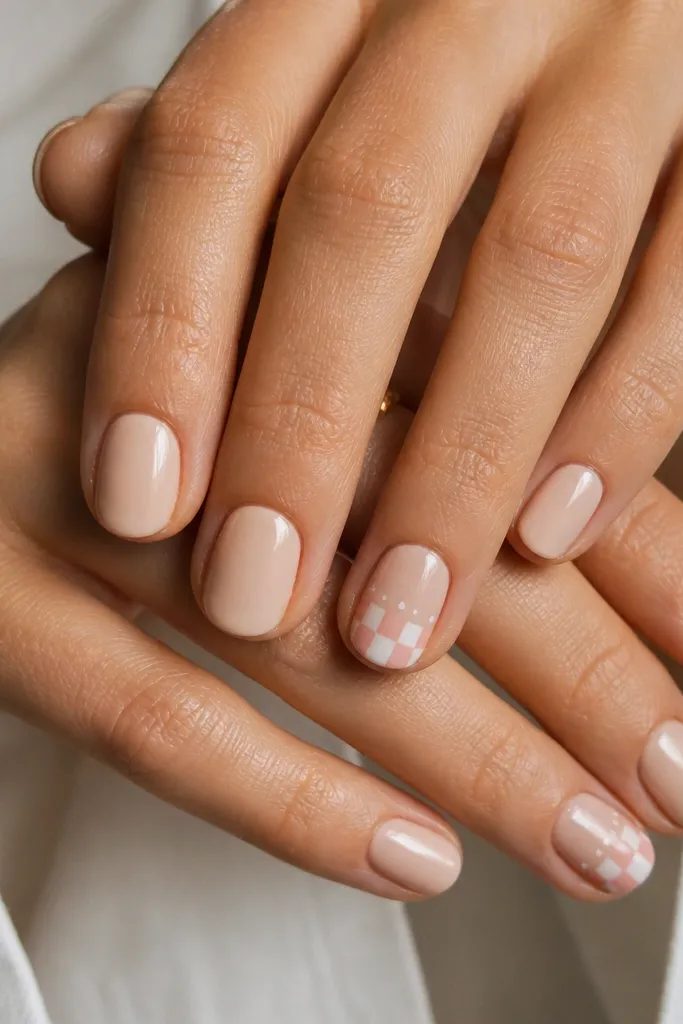
Checkerboard can look playful without looking childish when the squares are tiny and limited to the tip area. The creamy nude base makes the pattern look intentional, and the micro dots keep it from reading like a heavy grid. I stick to two accent nails because short ovals need breathing room. This design flatters hands that look better with more contrast near the tip. It’s also a good option if you like nail art but hate large shapes.
Start with a creamy nude base in two coats and cure. On the accent nails, use a striping brush to outline a small checker area near the tip, about 1/5 of the nail length. Fill alternating squares with pale pink and sheer white, leaving thin gaps so squares stay crisp. Add three to five micro dots with white gel above the checker area, then cure and finish with glossy top coat.
Editor's noteIf your squares smear, let each color cure separately and assemble the pattern after — it keeps edges sharp.
Skip thisDon’t draw a full nail checkerboard; it overwhelms short oval space and looks messy.
8. Barely-there shimmer French with a clear smile line
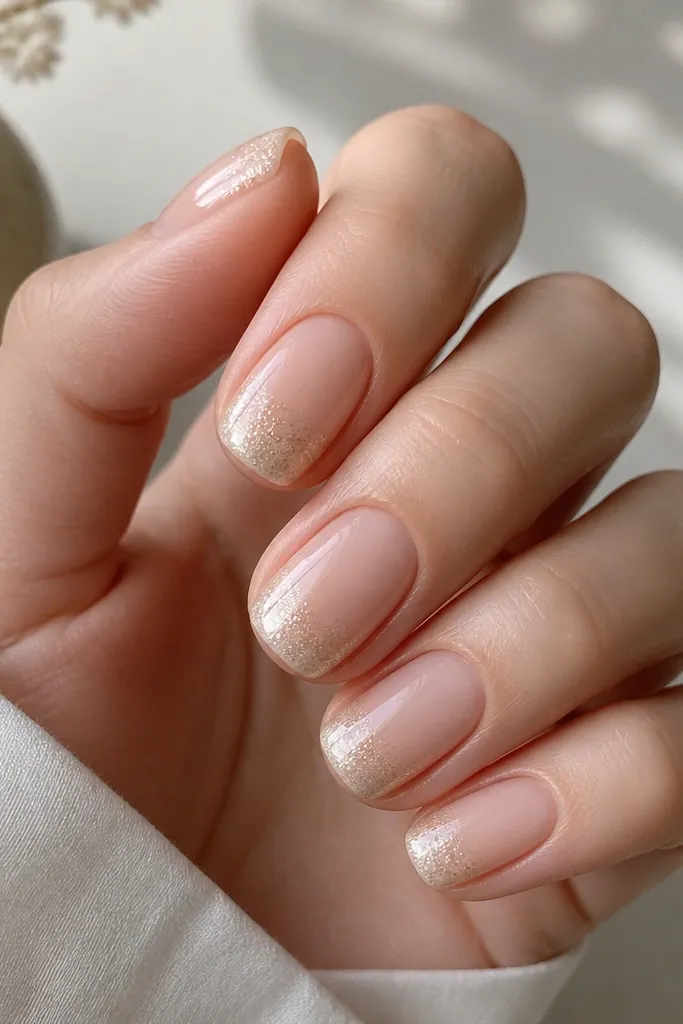
This is the French look for people who hate obvious lines. The clear smile line gives structure, while champagne shimmer inside the tip adds glow without a thick block of color. Because shimmer is translucent, it doesn’t shorten the nail the way opaque tips can. I like it on medium skin tones because champagne reflects warmth and looks flattering under warm lighting. It also works for bridesmaids and everyday wear since it reads subtle.
Apply sheer nude and cure, then wait until it’s fully smooth. Draw a thin clear border at the tip using a gel topcoat-thin layer — keep it like a curve, not a straight stripe. Fill inside the curve with champagne shimmer gel, then feather it inward with a clean brush. Cure fully, then add one more glossy top coat to seal the curve so it feels smooth to the touch.
Editor's noteUse a lint-free wipe after gel layers so shimmer doesn’t grab fuzz and dull the finish.
Skip thisAvoid opaque glitter tips; they look chunky on short ovals and catch on hair.
9. Mocha nude with diagonal stripe and tiny heart
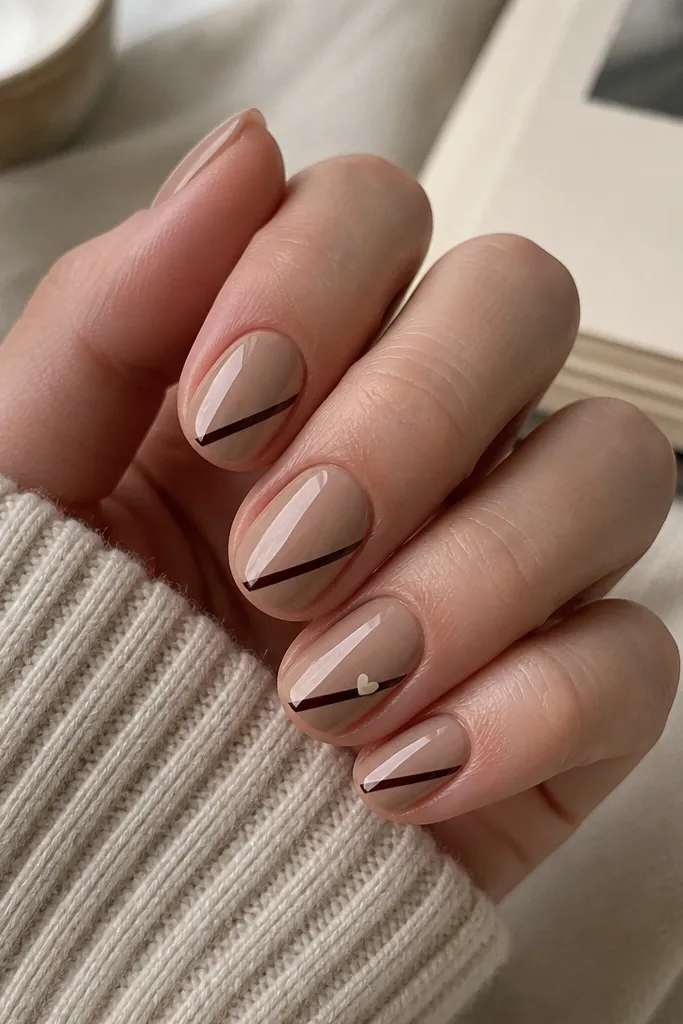
Diagonal stripes make short nails look more dynamic because the line travels across the nail. Mocha nude keeps it soft and wearable, and the black-brown stripe gives contrast without going full goth. The tiny heart adds sweetness without crowding the nail bed area. I like this for people with deeper skin tones because mocha and black-brown create a clean, flattering contrast. It’s also great for fall and winter because the palette feels cozy.
Start with mocha nude in two coats and cure. Use a thin striping brush to draw one diagonal stripe on each nail, keeping it narrow — about the width of a small hair. Place the stripe starting around the center of the nail and ending near the outer tip edge. On one accent nail, paint a tiny cream heart at the stripe endpoint, then cure and seal with glossy top coat.
Editor's noteMake the stripe slightly thinner at the top — it looks sleeker on short oval curves.
Skip thisDon’t add hearts on every nail; one tiny heart is enough for the whole set.
10. Peachy nude with cuticle shimmer fade
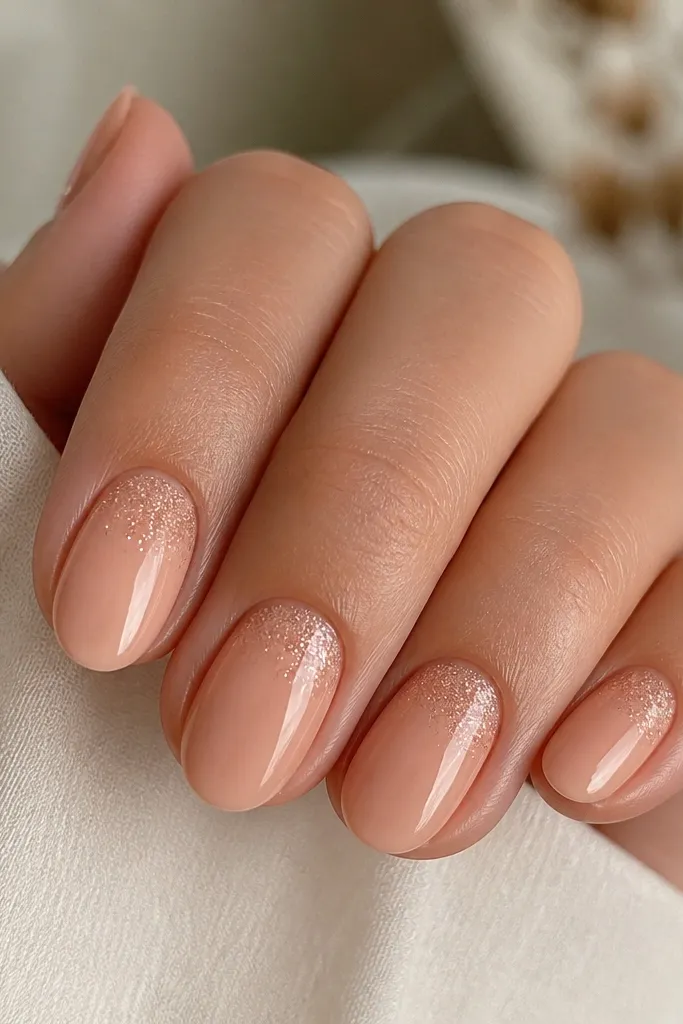
A shimmer fade at the cuticle gives the eye a bright starting point, and your nail looks more illuminated. Peachy nude is flattering on warm undertones, and it looks extra pretty when paired with gold rings. I keep the shimmer concentrated at the cuticle area so it doesn’t widen the nail. This design suits everyday wear and photos because the shimmer catches light without looking busy. It also hides small imperfections in short nail beds.
Apply a peachy nude base and cure. Add a thin layer of gel only at the upper third of the nail, then dab fine shimmer powder onto that tacky gel. With a clean sponge, lightly blend the shimmer downward so it fades instead of stopping abruptly. Cure, then top coat glossy — you want the gradient to look smooth, not gritty.
Editor's noteUse very fine shimmer powder; chunky glitter will make the cuticle area look uneven on short nails.
Skip thisSkip a full-coverage shimmer top; it turns short ovals into flat glitter blocks.
11. Tiny gold line art bow at the sidewall
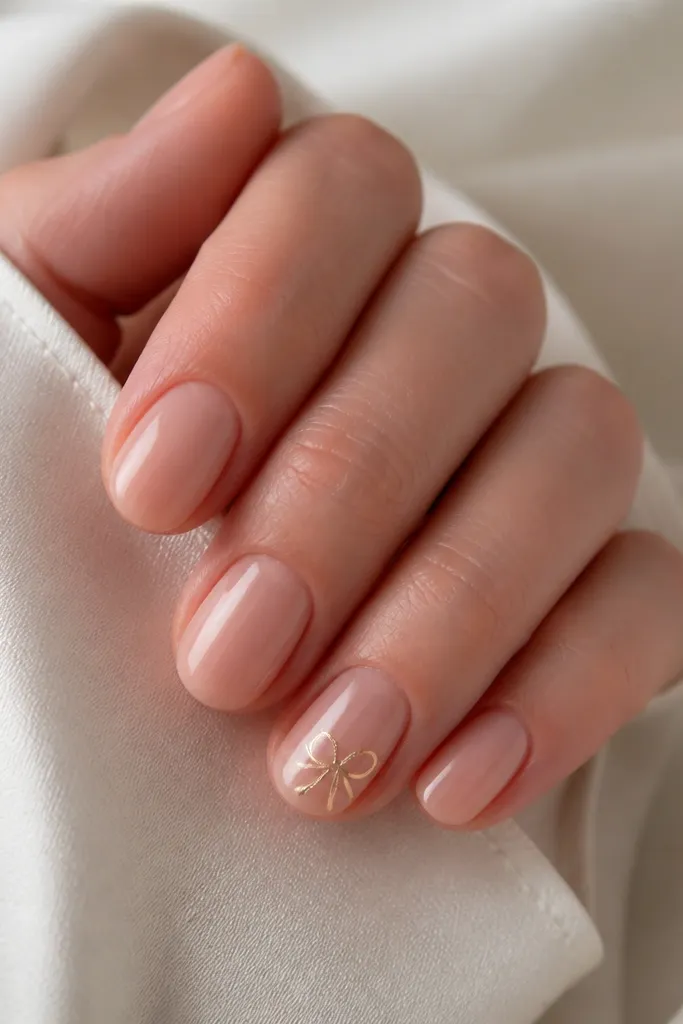
Sidewall placement is how you keep line art from shrinking your nail. The bow sits near the outer edge so the center stays clean, which makes the nail bed look longer. A gold line art bow is also forgiving because the “drawing” style hides tiny hand tremors better than filled shapes. This looks especially good on fair to light-medium skin tones because gold pops without overpowering. It’s a sweet, soft look for birthdays, anniversaries, and date nights.
Paint sheer nude on all nails and cure. On the accent nail, draw two thin curved loops near the sidewall about 1 mm below the cuticle — keep them small, like 1/8 of the nail length. Add a tiny center knot with a dot of gold gel. Cure, then run a thin top coat around the bow so it stays smooth and doesn’t snag on fabric.
Editor's noteIf your bow looks uneven, fix it with a micro striping brush and a little more gold gel on the smaller side, then cure.
Skip thisDon’t place the bow dead center; on short ovals it can make the nail look “short and wide.”
12. Black micro-dot ombré over nude
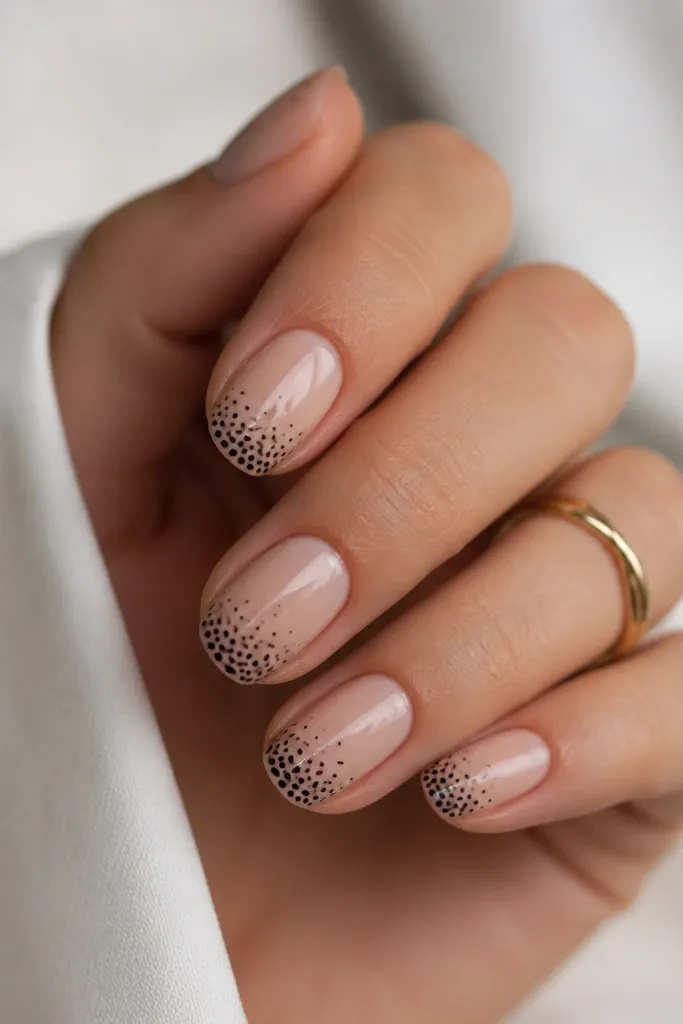
Stippling gives you a gradient without needing a big brush stroke, which is perfect for short oval nails. The nude base keeps it elegant, and the black dots create a crisp focal point at the tip. I like black over dark gray because it reads sharp and stays visible through glossy top coat. This design flatters cooler undertones and looks great with silver jewelry. It’s also a fun way to wear dark color without committing to full black tips.
Start with a nude base and cure. On the nail tip, load a dotting tool with black gel and press down to create the densest cluster at the very edge. Work upward in rows, using fewer dots as you move toward the center, leaving more nude space between dots. Cure and seal with glossy top coat, brushing carefully over the dot pattern to smooth the surface.
Editor's notePractice on a nail form first; dot density control is the whole look.
Skip thisDon’t overfill the tip; too many dots turn into a solid patch and lose the ombré effect.
13. Pastel rainbow stripe tip (ultra thin)
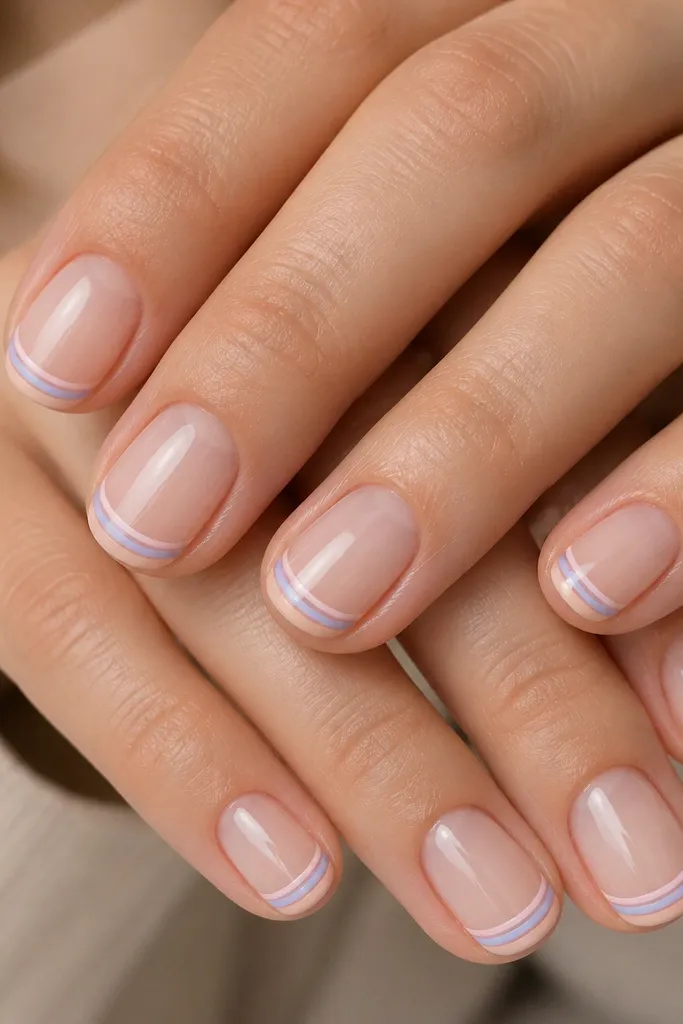
Pastel rainbow stripes look sweet on short ovals when they’re ultra thin and confined to the tip. The tiny gaps between colors prevent the rainbow from turning into one pastel smear. Sheer nude keeps the set soft and feminine, and the tip-only placement keeps the nail looking longer. This works beautifully on light to medium skin tones because the pastels blend with your natural warmth. It’s also a good choice for spring events or office days when you want color but not chaos.
Apply sheer nude and cure. Paint the tip area with a thin clear gel layer to help the stripes adhere, then cure. Use a striping brush to add three lines across the tip — keep each line about half the width of your hair strand and leave 1 mm gaps. Cure again, then top coat glossy and cap the free edge so the stripes don’t chip at the corners.
Use gel colors that are slightly sheer for pastels; opaque pastels make short tips look thicker.
Avoid thick rainbow tips; they visually widen the nail and shorten the look.
14. Creamy nude with tiny side flower and green dot center
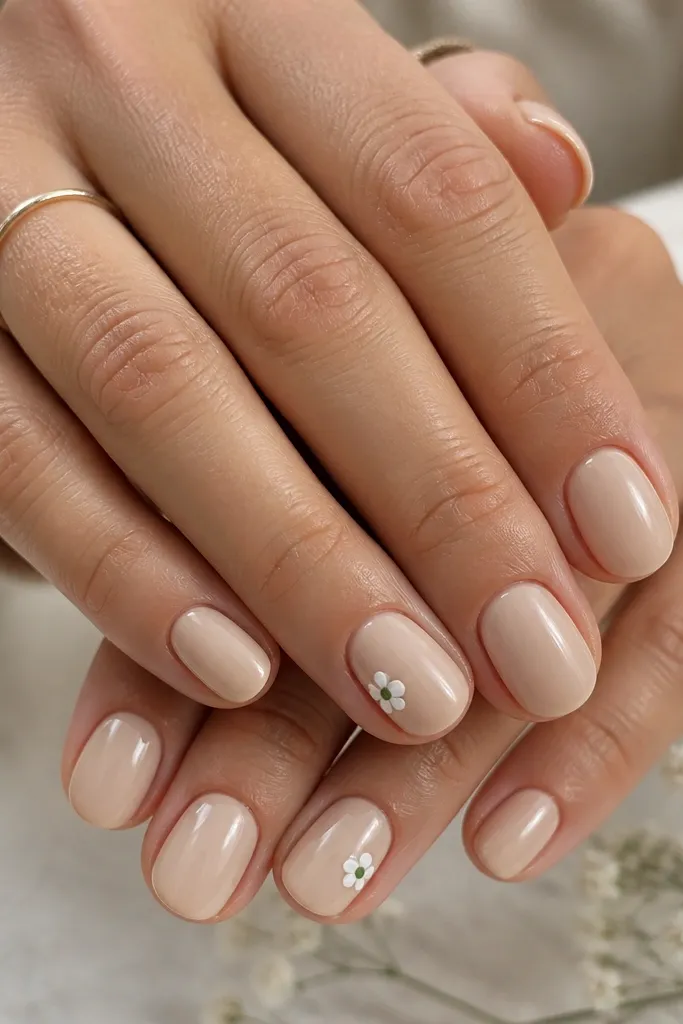
This is my go-to when I want florals but I hate the “garden on every nail” vibe. A single tiny side flower adds softness without shrinking the nail space, and the green dot center gives it life. Creamy nude makes the petals look clean and almost raised, especially under glossy top coat. This design flatters hands with short nail beds because the flower is placed near the sidewall rather than across the center. It also looks cute with short oval rings because the motif doesn’t compete.
Start with creamy nude in two coats and cure. On two accent nails, place a tiny flower near the outer sidewall at about the middle height of the nail. Use a dotting tool to create five petals in white gel, then add one small green dot in the center. Cure, then add top coat and gently drag it over the flower so it feels smooth.
Keep the flower smaller than you think — a 2 mm flower looks right on short ovals.
Skip full nail floral clusters; they crowd the nail bed and look uneven.
15. Powder Blue Short Oval with Clear Jelly Cuticle Swipe
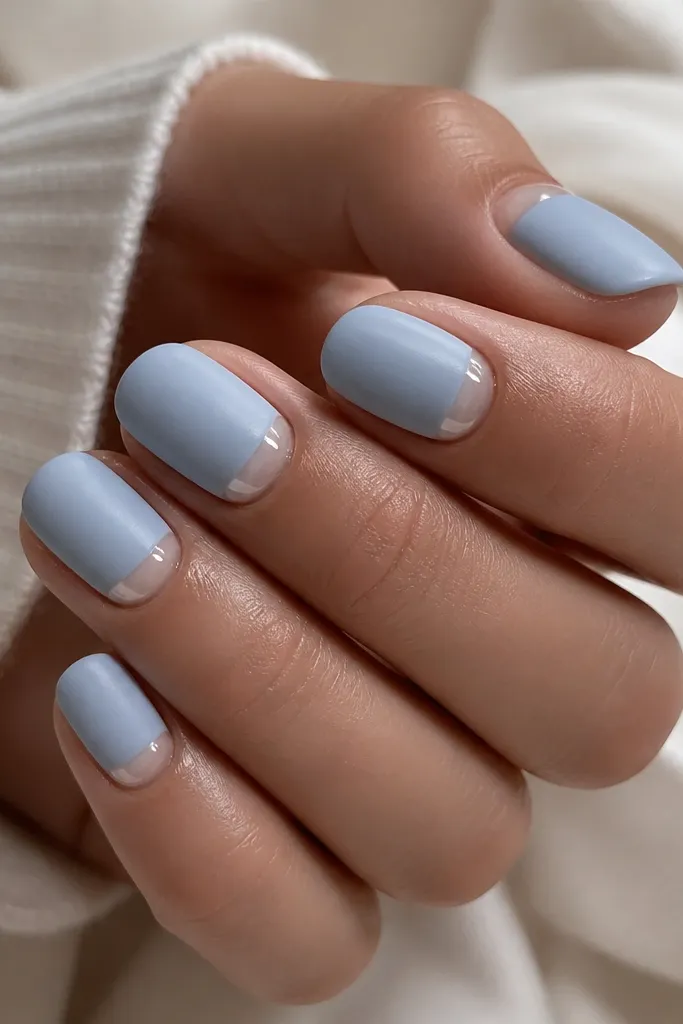
This look works because it keeps the color soft and feminine while the clear jelly swipe adds a shiny focal point right where the nail starts. On small space short oval nails, the cuticle area is your best real estate, so the swipe makes the nail look longer without adding length. I like powder blue paired with a slightly milky opacity, because it reads gentle instead of icy. The glossy swipe also makes your manicure look freshly done even after a few days, since the shine catches light when your hands move.
Start by prepping the nails and shaping them into a short oval. Paint two thin coats of powder blue milky polish, letting each coat level out before curing. For the jelly swipe, use a clear builder gel or clear jelly top coat and paint a curved band that follows the cuticle line, leaving a hairline gap from the sidewalls. Build it up in one or two passes so it looks glass-thick, then cure fully. Finish with a normal top coat over the rest of the nail, but keep the jelly swipe glossy — do not over-thin it or it will turn milky. Clean the edges with a brush dipped in alcohol so the swipe has crisp borders.
Use a small detail brush and pull the jelly swipe from center outward. If you flood near the sidewalls, the swipe will look messy on short oval nails.
Do not paint the jelly swipe too wide — if it crosses too much of the nail plate, the manicure looks bulky on 8 small space short oval nails.



