
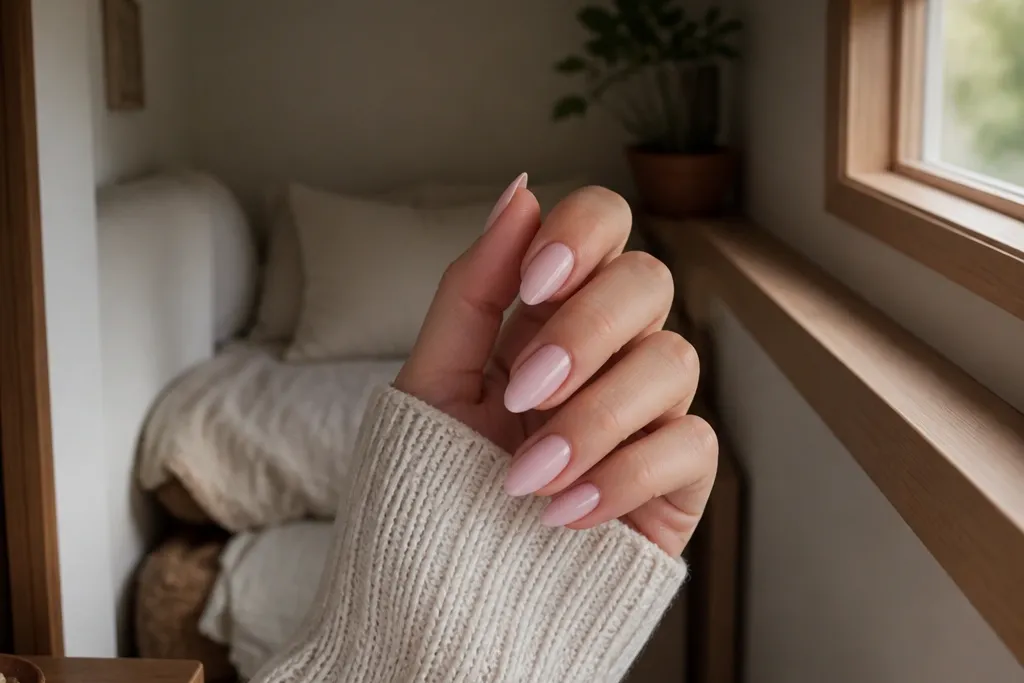
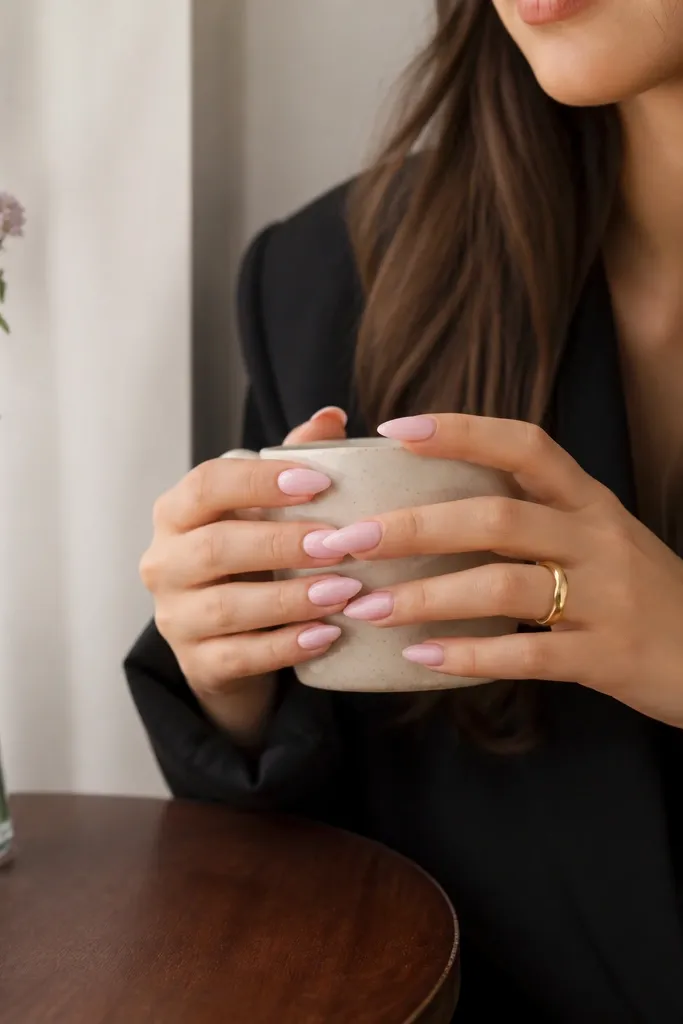
1. Sheer Blush Center Fade with Micro Dot Halo
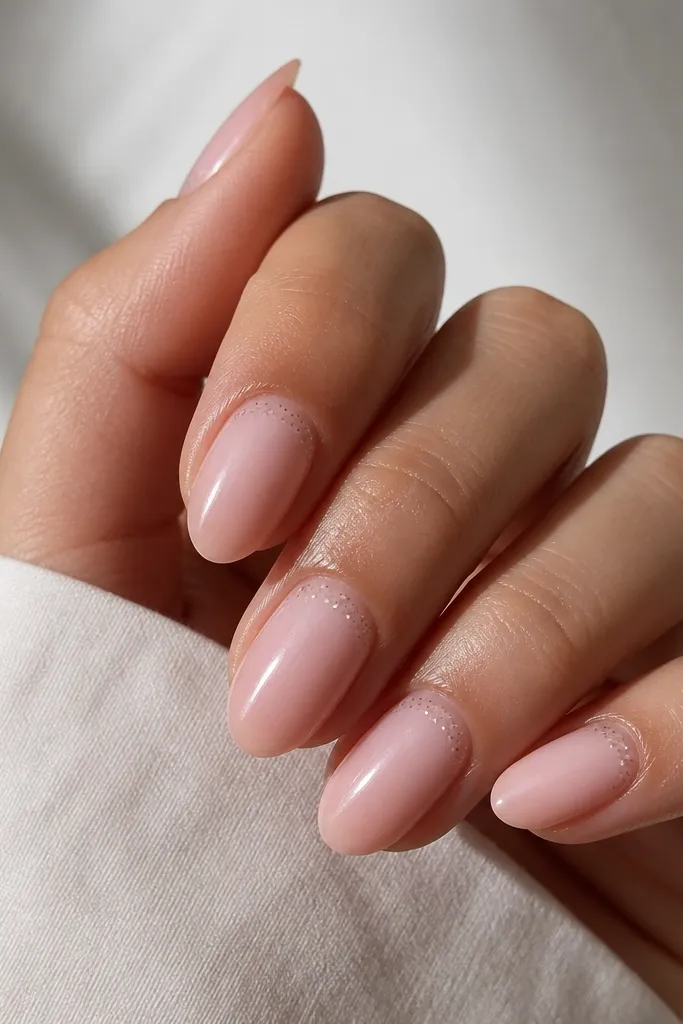
This design works because the fade creates a vertical highlight that tricks your eye into reading the nail as longer. I use a sheer blush base first, then I place a thicker wash of pale pink only in the middle, pulling it out with a soft brush so the sides stay airy. The micro dot halo at the cuticle adds polish without stealing space from the tip. It flatters most skin tones because the colors are low-contrast — fair skin looks clean and airy, medium skin looks rosy, and deeper skin looks soft instead of dusty. For everyday wear, this one is my go-to when nails are short and you want “done” without feeling busy.
Start by prepping the nail and applying a sheer blush builder gel or polish base, keeping it thin near the sidewalls. Then take a pale pink gel and apply it as a teardrop shape in the center — not full width — and blend outward until the edges look faint. Cure, then use a dotting tool to place 6-10 tiny dots in a loose arc near the cuticle, leaving a small gap from the skin. Finish with a glossy topcoat, and wipe the tacky layer if your gel system requires it. The key proportion is that the halo should sit in the bottom third of the nail, not halfway up.
If your nail bed is extra short, shrink the halo so it sits only 1-2 mm from the cuticle line.
Avoid a solid pink fill across the whole nail — it makes short almond shapes look wider.
2. Double-Tiny French in Blush and Milky Pink
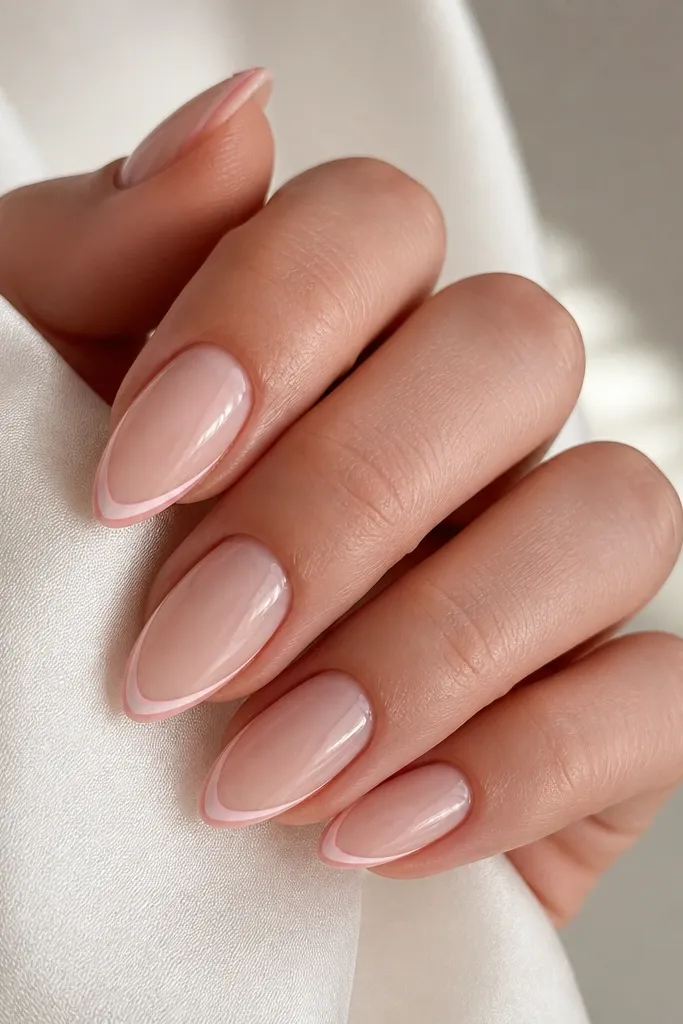
A double-tiny French gives you that length illusion without needing much nail space. The trick is to keep the French lines narrow and slightly separated so your eye reads two clean “rails” that point upward. I paint the base as sheer nude-pink first, then I place the milky inner line slightly closer to the tip than the blush outer line. This flatters hands because it frames the almond shape and makes the tip look crisp instead of blunt. It’s especially good for small nail beds because the design lives at the very top, where you already have the most visual space. For formal events, it also looks expensive even with minimal color.
Start with a sheer nude-pink base and cure it fully so the surface is smooth. Then place the milky pink French line first using a striping brush, keeping it about 0.5-0.7 mm thick and centered. After curing, add the blush pink line just outside it, leaving a thin gap between the two lines. Clean up the edges with a brush dipped in gel cleanser, then cap the tip lightly with topcoat. Keep both lines thin — if you thicken them, the nail looks shorter because the tip band takes over the whole nail.
Use a guide strip of tape on your finger for 10 seconds to steady your hand, then remove it before curing.
Don’t paint a wide French — it turns short almond nails into “caps” instead of tapered tips.
3. Milky Pink Reverse French with Clear Center
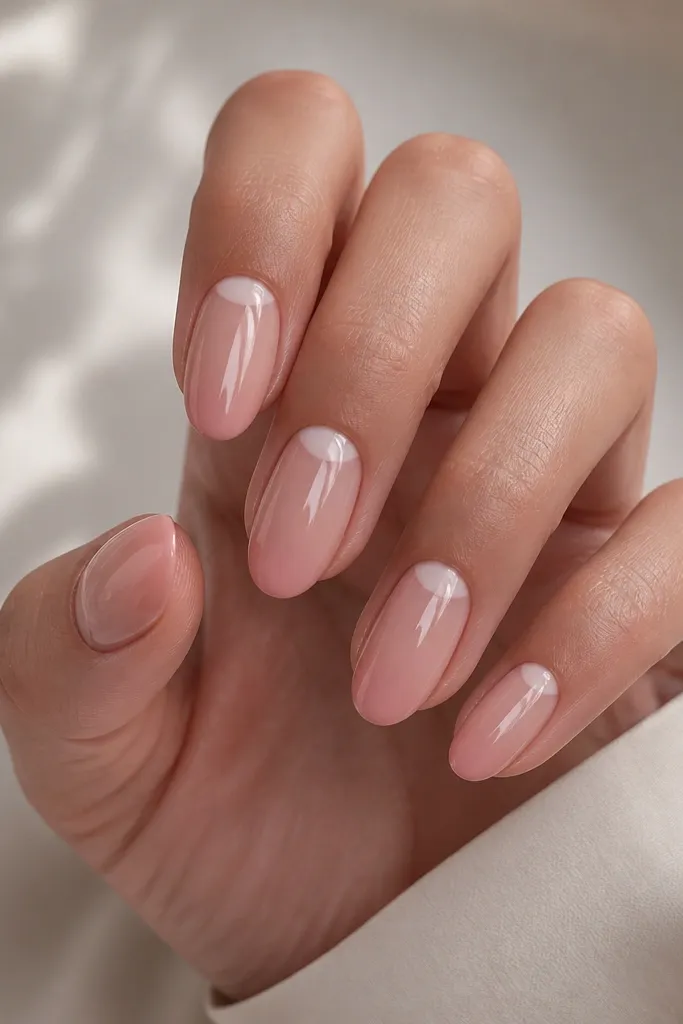
Reverse French is sneaky good for small space because it pulls attention toward the cuticle while keeping the center light. I do this with a milky pink arc near the cuticle line, then I leave the center sheer so the nail doesn’t look packed. The milky arc gives structure — it makes the almond shape read clearly even when the nail is short. This design flatters different skin tones because milky pink sits in that middle zone where it looks soft on everyone. It’s also a great choice if you like pink but you hate the feeling of heavy color on the whole nail.
Apply a sheer pink base first and cure. Then use a fine brush to paint a milky pink arc just above the cuticle line, following the almond shape but staying about 1 mm away from the skin. Fill the arc lightly so it looks like a crescent, not a block. Leave the center clear-sheer — don’t drag the milky color down the sides. Finish with glossy topcoat and cap the free edge so it stays smooth.
Editor's noteIf your cuticles grow fast, make the arc slightly thinner so regrowth doesn’t look like a harsh line.
Skip thisAvoid letting the milky arc touch the side cuticle — that makes nails look wider and messy.
4. Blush Gradient Ombré with a Razor-Thin Pink Line Down the Center
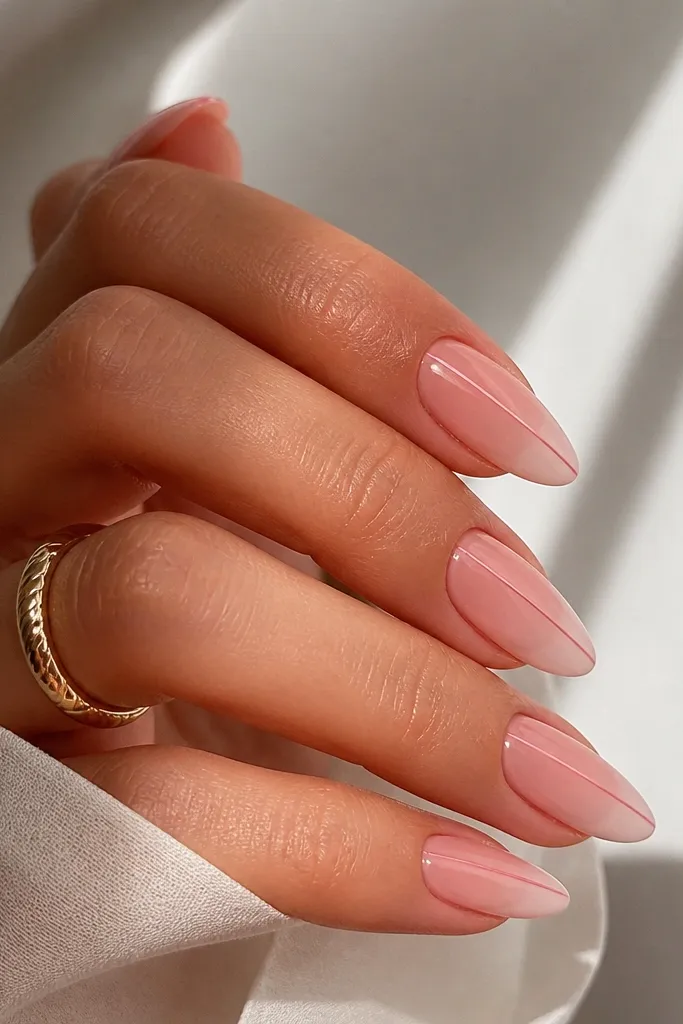
This is the “small space length hack” I use when someone wants a bold look but doesn’t have nail length to spend. The ombré creates depth, and the razor-thin center line acts like a visual spine. I keep the center line darker than the base but still in the same family of pinks so it doesn’t look harsh. On fair skin it reads delicate and clean, on medium skin it looks rosy and smooth, and on deeper skin it looks defined without turning neon. The almond shape matters here — the line should align with the natural center ridge so it looks intentional.
Start with a blush-to-pale gradient: apply a deeper blush near the cuticle and blend it downward toward a lighter pink at the tip. Cure, then take a liner brush and draw a single vertical stripe in a slightly deeper pink — keep it thinner than a hairline. Place it exactly down the center, stopping about 1-2 mm short of the tip so it doesn’t thicken at the edge. Cure again and add a glossy topcoat in a thin layer. If your nails are very short, keep the stripe shorter — only the middle third needs to be visible.
Editor's noteWhen you cure, check the stripe from the side under a lamp; adjust if it looks slightly off-center before it hardens.
Skip thisDon’t draw a thick stripe — on short nails it makes the nail look like a label sticker.
5. Pink Almond Nails with Tiny Bow Tie at the Cuticle
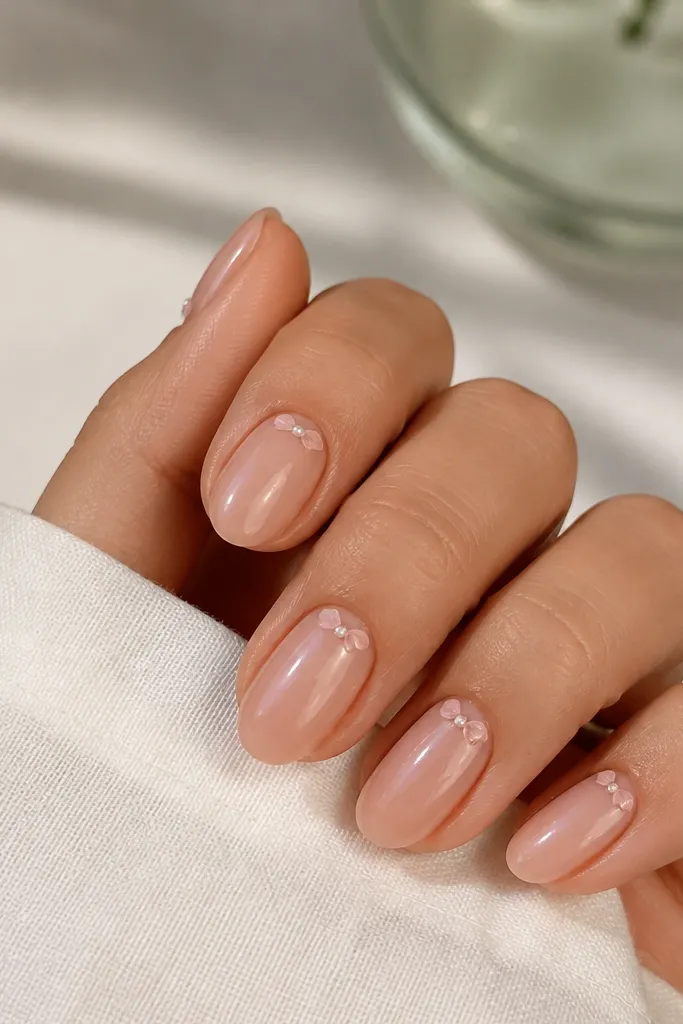
A tiny bow tie is cute without swallowing the nail space. I place it at the cuticle so it feels like a detail, not a big graphic. The base stays sheer nude-pink so the bow has contrast but doesn’t look heavy. This works best when the bow is small enough that you can still see your natural almond taper above it. Fair skin gets a clean, sweet look, while medium and deeper skin tones look polished because the sheer base keeps everything soft. It’s great for birthdays, date nights, or any time you want “playful” but still classy.
Apply a sheer nude-pink base and cure. Use a striping brush to paint two tiny curved bow loops, then add a micro dot in the center with a dotting tool. Cure and check height — the bow should sit flat, not like a raised sticker. If you’re using gel, keep the bow gel thin and cap it with topcoat so it doesn’t catch on fabric. Keep the bow centered and within the bottom quarter of the nail, leaving space above for the almond shape to show.
Editor's noteIf your bow keeps lifting, roughen the nail surface lightly with a very fine buffer before base gel and wipe with cleanser.
Skip thisAvoid making the bow wider than the nail’s natural center width — it ruins the taper.
6. Soft Pink Marble Vein in the Upper Third
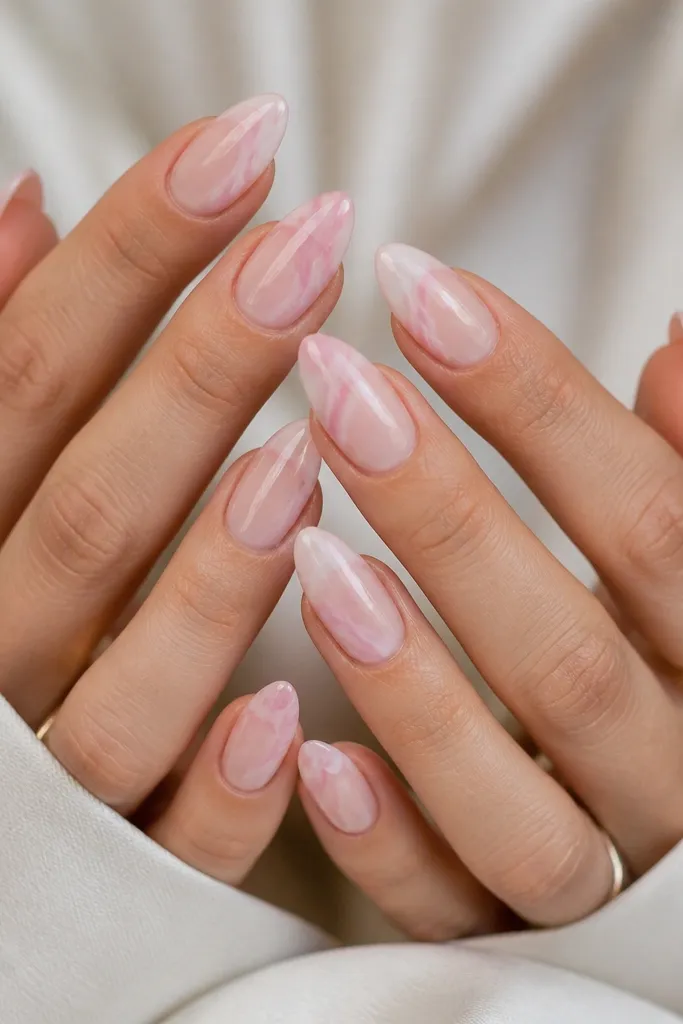
Marble looks fancy, but on short nails it can get thick fast. This version keeps the marble only in the upper third, so you get the movement without losing length. I use a milky sheer base and then add thin veins with a liner brush, letting some areas stay almost translucent. The color difference is subtle — darker blush veins with a tiny white highlight line. It flatters everyone because it’s low-contrast and doesn’t pull attention sideways. For everyday wear, it looks artsy but still wearable.
Start with a milky sheer pink base and cure thoroughly. With a fine liner brush, paint 2-3 thin veins in darker blush, keeping them mostly vertical and placing them closer to the center. Add a whisper of white along one edge of a vein for that marble depth, then gently blur the ends with a clean brush if your gel is still workable. Cure, then seal with glossy topcoat in thin coats. Keep the marble confined to the top third — if you drag it down, your nail looks crowded.
Use gel that’s slightly runnier than your base so the veins look feathered instead of painted on thick.
Don’t do full nail marble — it makes small space nails look busy and shorter.
7. Glazed Pink Chrome on the Tip Only
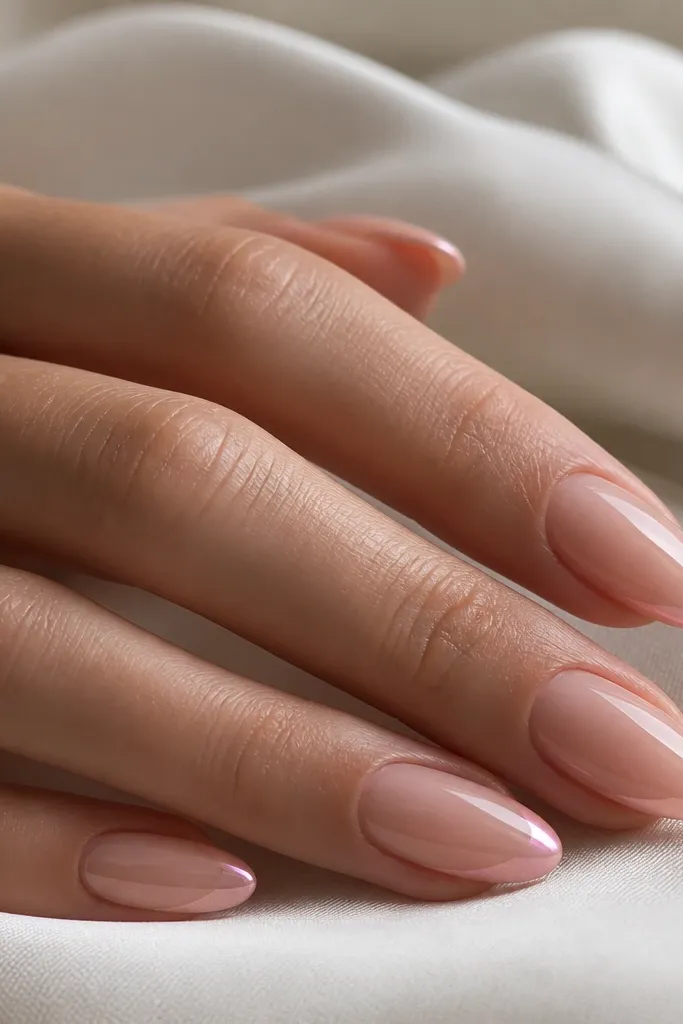
Chrome can look expensive even when your nail length is short, but only if you stop it at the tip. I apply glazed pale pink chrome powder or rub-on chrome so the reflection concentrates at the end of the nail and makes it look longer. The sheer base keeps the overall look light, and the chrome edge gives a crisp finish that catches light when you move your hands. Fair skin looks icy and clean, medium skin looks rosy and dimensional, and deeper skin looks luxe without turning too bright. This is my pick for nights out because it photographs better than glitter on short nails.
Apply a sheer blush base gel and cure. Paint a thin layer of tacky top or chrome-ready base gel only on the top 1/3 of the nail, then cure according to your product instructions. Rub or press pale pink chrome powder into the tacky area, then buff off the excess gently with a soft brush. Seal with a glossy topcoat, careful not to wipe off the chrome edge. The clean stop line should be around the middle of the upper third, not halfway down the nail.
Editor's noteIf your chrome looks patchy, add a second ultra-thin chrome layer only on the bare spots instead of redoing the whole nail.
Skip thisAvoid chrome across the entire nail — it flattens the gradient and makes short nails look heavy.
8. Pink Almond Nails with Tiny Heart in the Negative Space
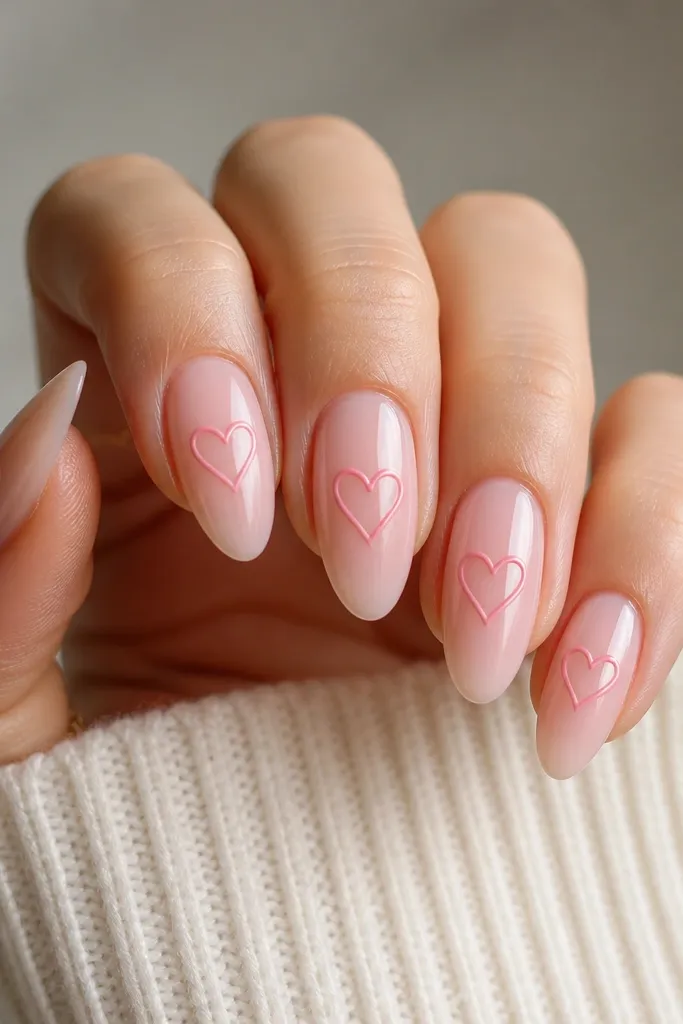
Negative space hearts look delicate and keep the design from crowding short nail beds. I outline a tiny heart in a deeper pink, then leave the heart interior sheer so it feels light. The heart sits in the center to keep the almond shape reading long. This design flatters hands with shorter nail beds because the “drawing” is compact and doesn’t fill the sides. Fair skin looks sweet and clean, while medium and deeper skin tones get a stylish pop without needing bright reds. It’s also beginner-friendly if you use a stencil or a steady dotting and liner combo.
Start with a sheer nude-pink base and cure. Use a dotting tool to place two small dots where the top of the heart will start, then connect them with a fine liner brush to form the heart V shape. Leave the inside clear — do not fill it in — and keep the outline thickness thin. Cure, then add glossy topcoat. Place the heart around the nail’s center, and keep it smaller than the width of your almond tip.
To keep the heart symmetrical, paint one half first, cure for 10 seconds, then mirror the other half before full cure.
Avoid filling the heart solid — it turns into a blob on short nails.
9. Blush Confetti Specks with Clear Topcoat Layers
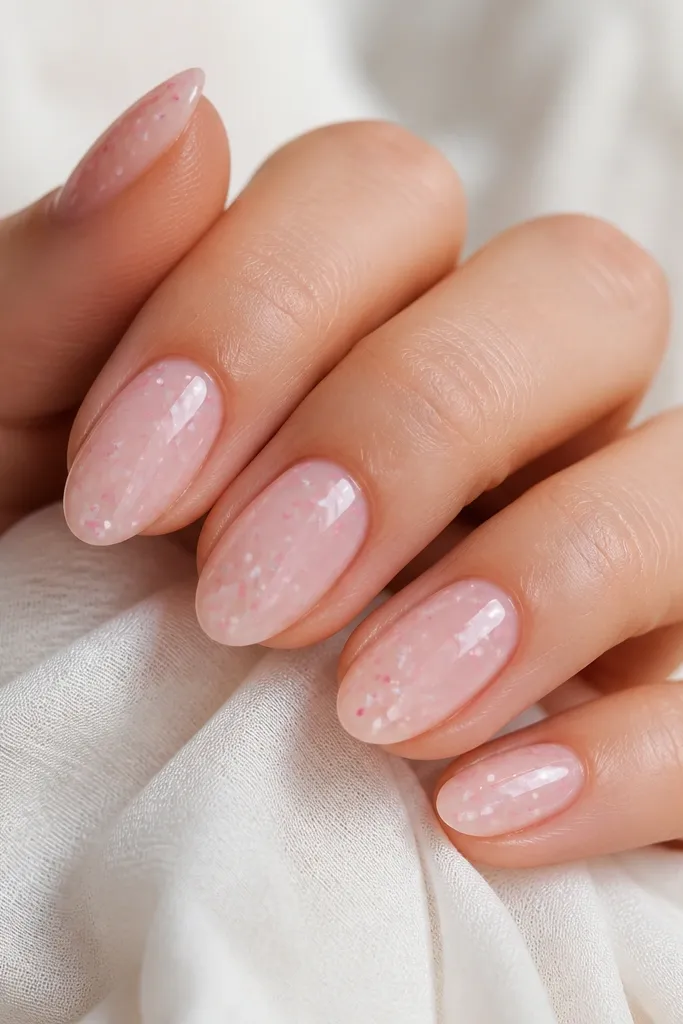
Confetti specks look fun, but they can get messy fast on small space. This version uses tiny specks and keeps them sparse, so your nail still has breathing room. I mix micro-glitter in pale pink and white and place it mostly in the upper half, then I seal it under clear layers so it looks suspended, not gritty. The effect is soft sparkle that doesn’t make nails look shorter. It flatters fair, medium, and deeper skin tones because the glitter is light and close to your base shade. Great for spring, but honestly I wear it year-round because it’s subtle in person.
Apply a sheer pink base and cure. Use a small brush to tap micro-glitter specks onto the upper half only, keeping the density light around the sides. Add a thin layer of clear gel on top and cure, then repeat one more clear layer if you want extra glass. Finish with a final glossy topcoat. The spacing matters: leave at least 1 mm of clear area near the sidewalls so the nail stays narrow.
Use the back of a clean brush to remove extra specks before curing so you don’t get a glitter ridge.
Don’t pile glitter at the tip — it makes the nail look like it’s wearing frosting.
10. Matte Pink Almond Nails with Glossy Center Stripe
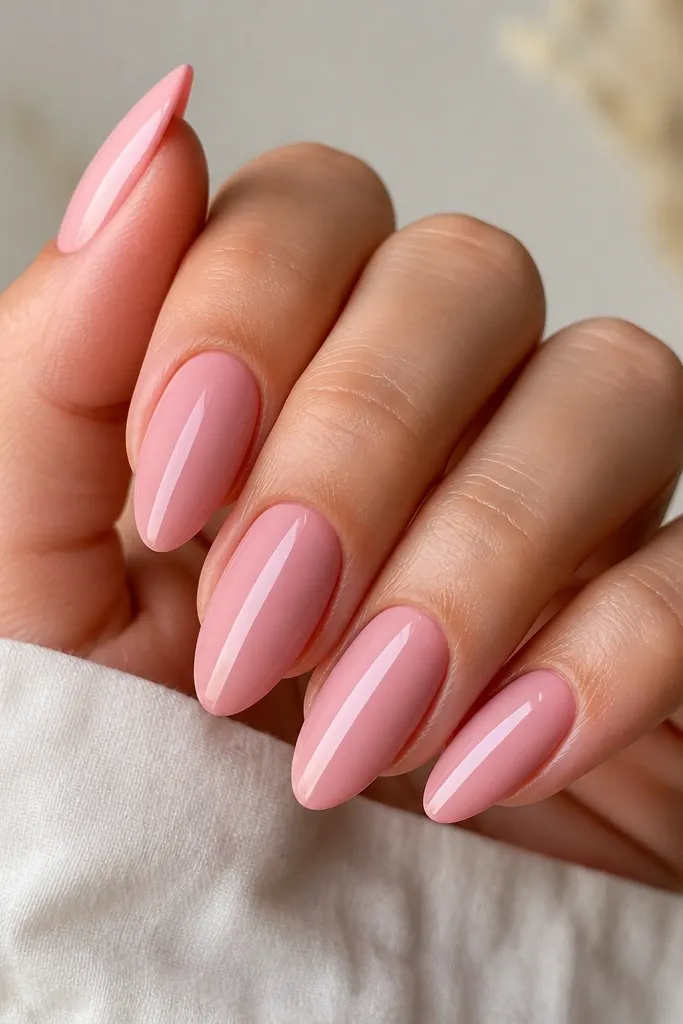
This combo is a cheat code for small space because matte hides uneven texture and the glossy stripe adds a lengthwise highlight. I paint the base in a mid-tone pink, cure, then topcoat with matte for the full nail. After that, I add a glossy center stripe in a lighter pink so it stands out like a beam of light. It flatters short almond nails because the stripe draws the eye up while matte keeps the rest calm. Fair skin looks soft and modern, medium skin looks creamy, and deeper skin looks velvety. It’s also a great option if your nails have slight ridges — matte makes them look smoother.
Start with a pink builder gel or polish base in your preferred mid-tone and cure. Apply a matte topcoat across all nails and cure it fully so it sets down. With a liner brush, paint a thin glossy stripe using a lighter pink gel and cure. Seal around the stripe with a glossy topcoat only on the stripe area, keeping the matte effect elsewhere. Keep the stripe narrow so it doesn’t turn into a thick “channel” on short nails.
Editor's noteLet the matte topcoat cure fully before you paint the glossy stripe — if it’s tacky, the lines smear.
Skip thisAvoid a wide stripe — matte plus thick gloss makes short nails look blunt.
11. Pink Almond Nails with Thin Side Ombre Fade
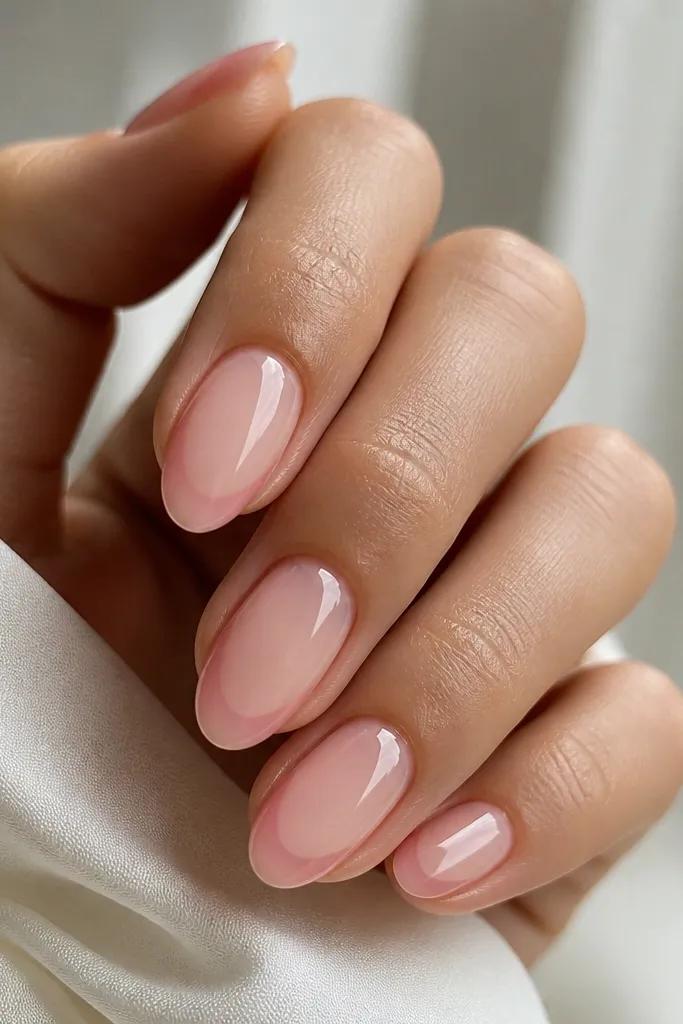
Side ombré is one of the best tricks for small space because it visually narrows the nail. I keep the center lighter and slightly sheer, then I deepen the color along the sides so the almond shape reads sharp. This design flatters wide nail plates because the darker sides pull the edges in. Fair skin looks airy, medium skin looks rosy and smooth, and deeper skin looks structured without feeling heavy. It’s also a good choice if you want pink but you don’t want nail art. The effect is clean and intentional.
Apply a sheer base pink and cure. Then take a slightly deeper blush and apply it only to the side edges, starting around the lower half of the nail and feathering toward the tip. Blend so the center stays lighter — you should be able to see more pale pink down the middle than on the sides. Cure and add a glossy topcoat. Keep the side color within the nail edges — if it touches the center, the nail looks flat instead of tapered.
Editor's noteUse a flat brush to press the side pigment outward first, then blend back toward the center with a clean brush.
Skip thisAvoid full nail ombré — it removes the narrowing effect.
12. Blush Pink Micro Rhinestones in a Single Vertical Row
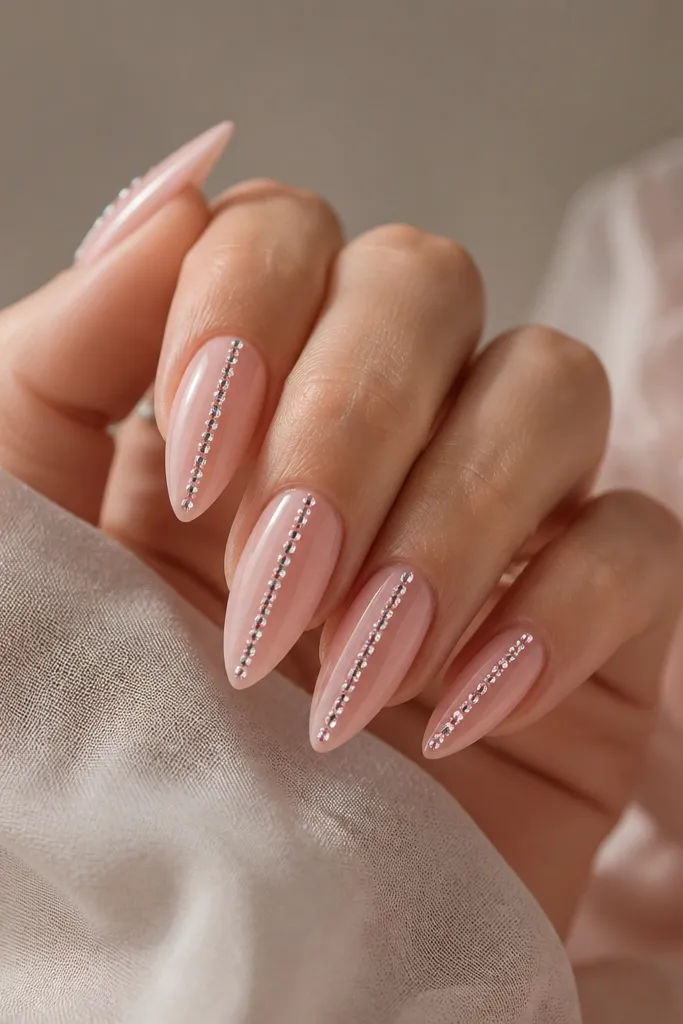
Micro rhinestones look best on short almond nails when they’re controlled — one row, centered, and kept tiny. This design adds sparkle without filling the whole nail, and the vertical placement makes the finger look longer. I like pale pink and clear stones because they match the base and don’t create harsh contrast. It flatters all skin tones because the stones reflect light instead of adding a loud color block. For special days, this feels glam but still wearable because the sparkle is concentrated where your eye already focuses — the center line.
Start with a sheer blush base and cure. Apply a thin strip of gel adhesive in a narrow line down the center, about 1/3 the width of the nail. Place micro rhinestones one by one with tweezers, leaving a small gap between stones so the row looks airy. Cure, then seal with glossy topcoat in two thin layers to lock the stones down. Keep the row from the middle third toward the tip, not all the way to the cuticle, so it doesn’t look crowded.
If your stones catch on sleeves, add a thicker topcoat layer over the row but keep it smooth so it doesn’t look bumpy.
Avoid placing rhinestones in clusters — clusters widen short nails fast.
13. Ombre Pink Tips with a Clear 'Air Gap' Under the Smile Line
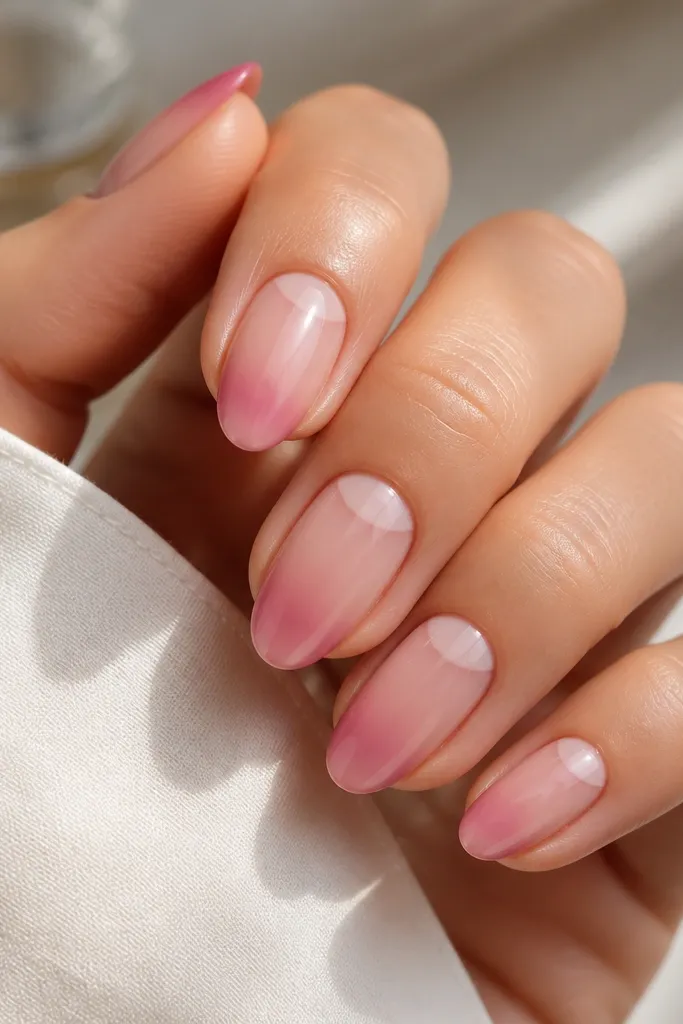
The clear air gap is the secret that makes this look longer instead of thicker. The tip ombré gives you the color payoff, and the gap below it keeps the design from turning into a wide band. I use a sheer base so the air gap reads as intentional negative space, not a mistake. This is flattering on short almond nails because it preserves the natural taper — the nail still looks narrow at the sides. Fair skin looks fresh, medium skin looks soft and rosy, and deeper skin looks clean and modern. It’s also great if your almond shape is a little uneven because the separation line hides tiny inconsistencies.
Apply a sheer nude-pink base and cure. Paint the tip ombré using a darker pink at the very edge, blending downward only about 1-2 mm. Before curing, add a thin line of clear gel or leave a visible negative-space gap right below where the smile line would be — about 0.5-1 mm thick. Cure, then clean the sides with a liner brush dipped in cleanser. Finish with glossy topcoat, making sure the tip is fully sealed so the ombré doesn’t lift at the edges.
Mark the gap position with a tiny dot on the side of your nail first — it keeps the separation consistent across fingers.
Avoid a continuous tip without the gap — it makes short nails look like they have a thick cap.
14. Blush Pink Pixel Confetti on One Accent Nail
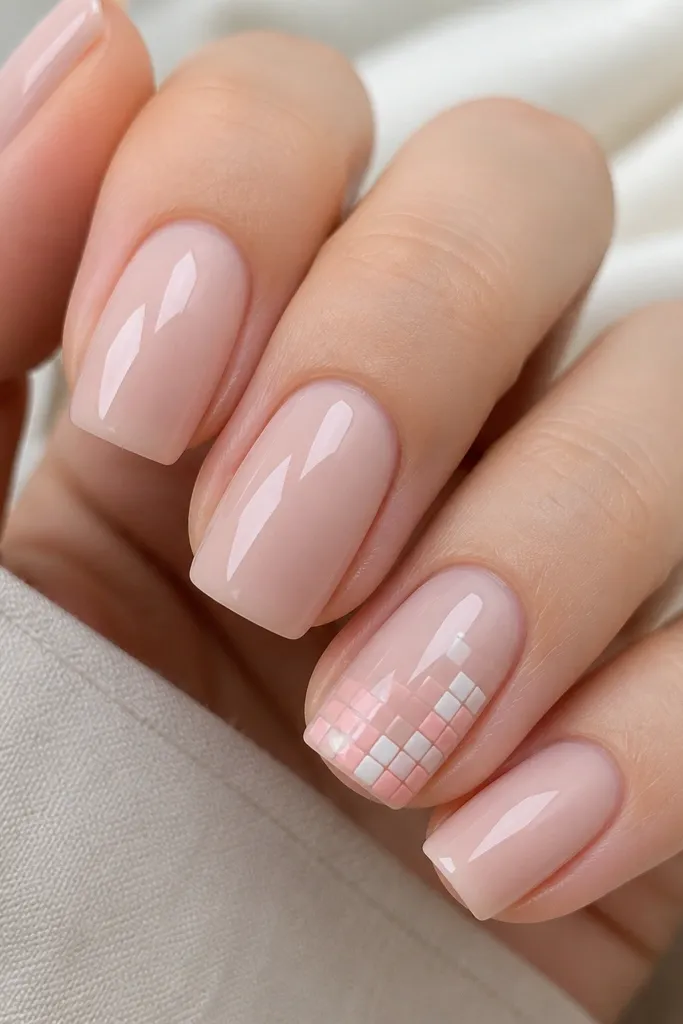
This design is playful but still structured, which matters for small space. I keep pixel blocks tiny and use only one accent nail so the rest of your hand stays clean and long-looking. The diagonal placement makes the nail feel like it stretches, and the milky white squares keep the look bright without needing length. It flatters most skin tones because the colors are close to nude and don’t clash. If you have short almond nails and want something that looks “trend” but not childish, this is the one.
Do a sheer nude-pink base on all nails and cure. Choose one accent nail and apply a slightly lighter blush overlay so the pixels stand out. Use a thin brush or dotting tool to place 8-12 tiny squares, mixing milky white and blush pink, arranged diagonally across the center. Keep the block size under 1 mm and leave gaps so the nail still shows through. Cure and seal with glossy topcoat in a thin layer, then add a second thin clear layer if you want extra smoothness.
If your squares look rounded, use a sculpting brush to clean the edges before curing.
Avoid doing pixel art on every nail — multiple accents crowd short nails and ruin the almond effect.
15. Pink Almond Nails with Gold Line 'C' Curve at the Tip
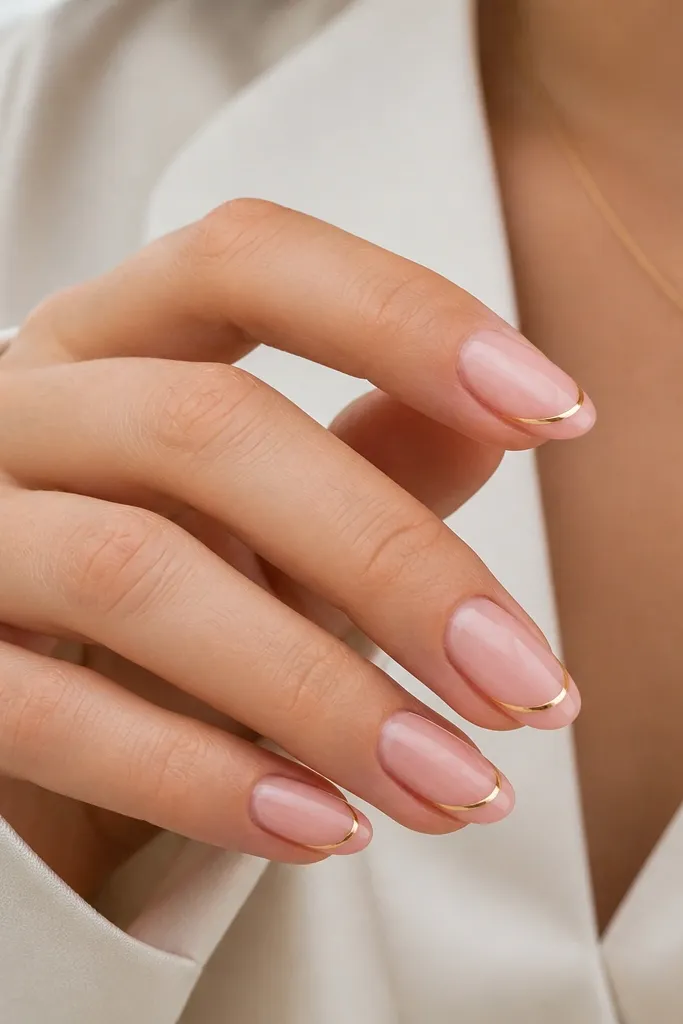
A single gold 'C' curve is classy and length-friendly because it traces the almond tip without filling it. I use a sheer blush base so the gold looks like jewelry, not like a thick paint job. The curve sits near the very edge and stays thin, which helps short nails look intentional and sharp. This flatters fair skin with a clean golden contrast, and on medium to deeper skin tones it adds warmth that makes pink look richer. It’s also a good option when you want something special but you don’t want full nail art.
Apply a sheer blush base and cure, then wipe if needed to remove tackiness. Using a fine liner brush, draw a thin gold arc following the smile line at the tip, leaving about 1 mm of space from the side edges. Make it look like a 'C' that wraps around the tip but doesn’t connect to the center. Cure and add a glossy topcoat, sealing the gold line so it doesn’t snag. Keep the gold line thickness around 0.3-0.5 mm so the nail still reads delicate.
Let the gold liner dry 30-60 seconds before topcoat if your system is air-dry or hybrid, so it doesn’t smear.
Avoid thick gold paint — it makes the tip look heavy on short almond nails.



