1. Milky Pink Almond with Micro French Edge
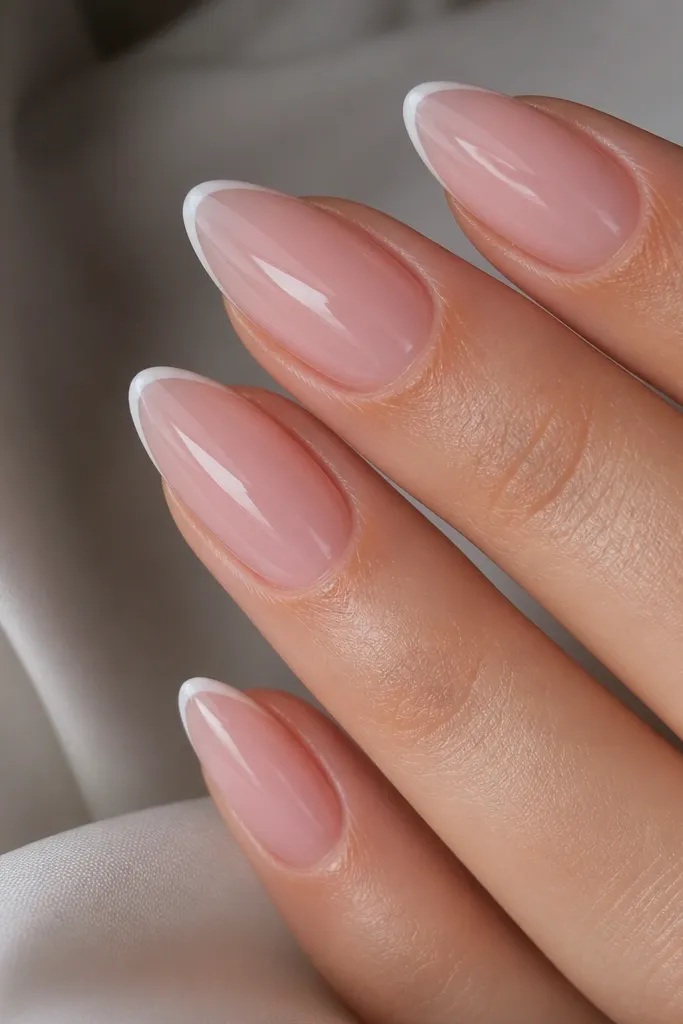
This is the pink almond design I reach for when I want hands to look polished without looking “overdecorated.” The base is milky blush — not opaque — so your nail bed shows through just enough to look natural. The micro French edge is where the expensive effect happens: a thin white line gives structure, and the narrow width keeps it from looking like a craft project. It flatters most skin tones because the pink is neutral and the white stays clean, especially if you pair it with gold rings or a beige sweater. For a medium-length almond, it looks extra long and tidy, like you just left a salon chair.
Start by applying a sheer milky pink builder gel as your first layer, keeping it thin and centered so it doesn’t flood the cuticle. Cure, then add a second thin layer until you get a soft opacity that still looks translucent near the edges. Use a striping brush to draw a micro French line at the tip — keep it under 1 mm wide and follow the natural curve of your almond. Fill the very tip with a whisper of milky white gel only where the line needs support, then seal everything with a glossy top coat. Cure fully, wipe tacky residue if your top coat requires it, and check the edges under a desk lamp for any uneven thickness.
If your French line looks shaky, rest your pinky on the table and pull the brush in one smooth motion from center outward.
Avoid a thick French band — wide white tips read costume-y fast.
2. Sheer Pink Almond with One Side Pink-Rose Stripe
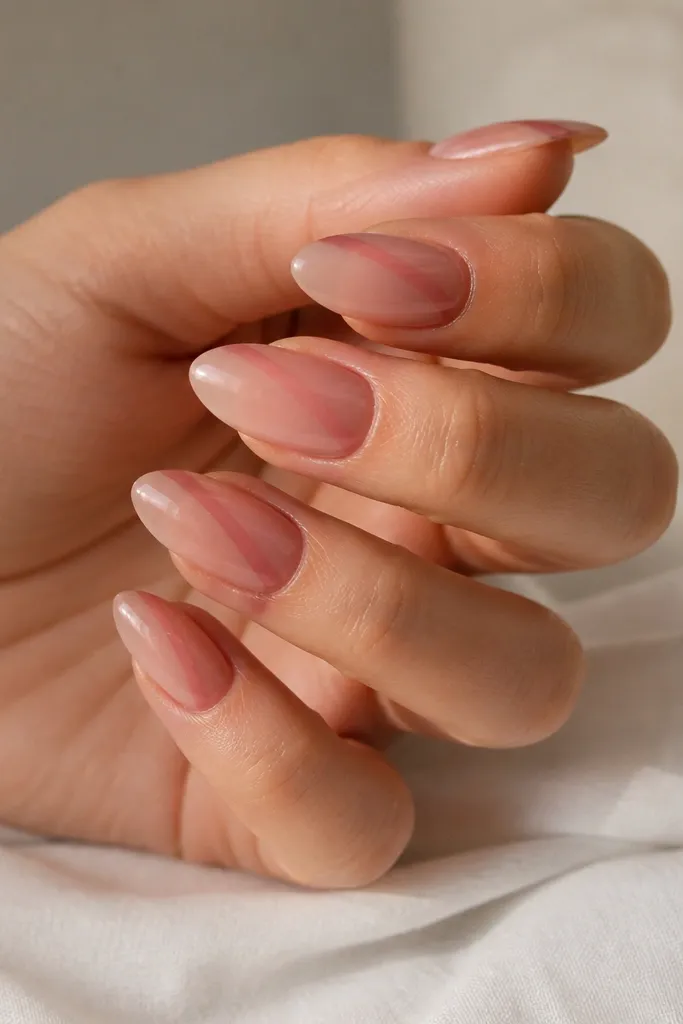
Start with a sheer pink-rose base layer, then build only enough coverage to erase visible nail lines. Cure and then place the stripe: use a fine liner brush to draw one clean diagonal stroke starting just above the midpoint and tapering toward the tip. Keep the stripe width thin, around 0.5 to 0.8 mm, and leave a small gap between the stripe and the sidewall so it doesn’t flood. Cure again, then top coat with two thin passes — one over the stripe and one over the whole nail — for a smooth, sealed finish. Cure fully and wipe if needed.
This design looks expensive because it’s controlled and asymmetrical in a good way. The base is sheer pink-rose — it looks like your nails but smoother — and the stripe is a deeper rose that gives dimension without adding bulk. I like it on almond shapes because the diagonal line visually lengthens the nail and makes the point look sharper. It also flatters hands with longer fingers because the stripe balances the shape; on shorter fingers, it still works since the stripe creates a vertical pull. Wear it with soft makeup and simple jewelry and it still looks intentional.
Skip thisAvoid placing the stripe too close to the cuticle — it can look like a stain.
Editor's noteMake the stripe slightly off-center on two nails and centered on the rest — it looks more “designer” than perfectly identical sets.
3. Pink Almond with Blush Marble Vein (Soft Edition)
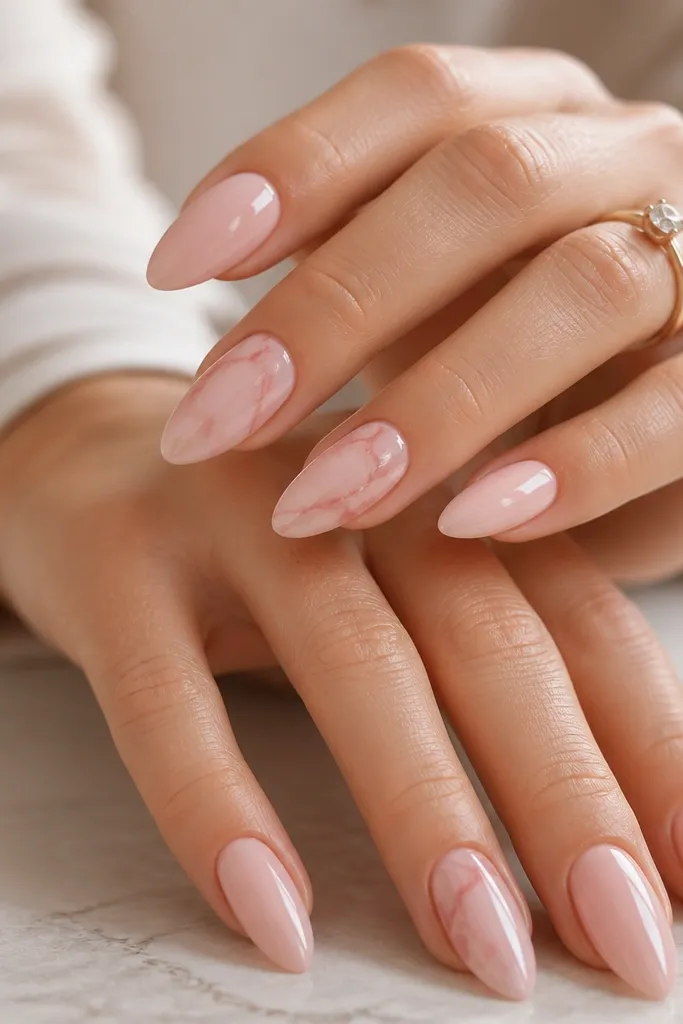
Apply a sheer blush pink base and build to a medium opacity, leaving the nail slightly translucent near the edges. On two accent nails, use a dotting tool or the tip of a liner brush to drag thin white gel veins across the nail — keep them irregular but spaced. Add one tiny darker rose vein line on top of the white veins so it looks layered, not flat. Cure, then use a clear builder gel overlay to smooth the surface if your veins sit a bit raised. Finish with glossy top coat, cure, and check the pattern from the side to confirm the gel is sealed smoothly.
Marble nails can look cheap when the pattern is heavy or messy. This soft marble version works because the base stays sheer and the veins are thin, airy, and mostly white with a small amount of deeper blush. The effect looks like natural stone — light, feminine, and expensive — because the contrast is low and the lines are fine. It flatters cool and neutral skin tones especially well, since the blush base doesn’t fight your undertone. I wear this when I want something romantic that still looks grown-up for dinner or casual office days.
Skip thisAvoid thick swirls — bulky marble lines catch light like stickers.
Editor's noteIf your marble looks too bold, add less darker rose and let the white do the work.
4. Pink Almond with Champagne Chrome Cuticle Glow
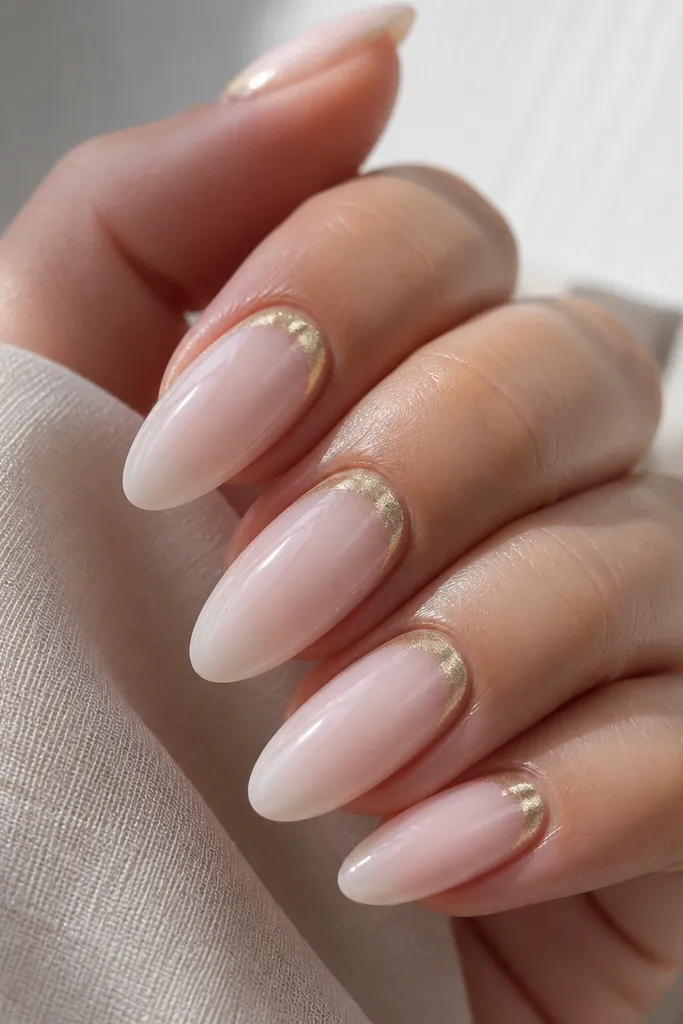
Chrome looks expensive when it’s placed like jewelry, not when it covers the whole nail like a mirror ball. This cuticle glow uses champagne chrome — warm and flattering — on a sheer milky pink base so it looks like a subtle highlight. The crescent near the cuticle elongates the nail bed and makes your hands look brighter, especially with gold rings. It’s beautiful for skin tones from light to deep because the chrome reflects warm tones back at you. I love it for weddings and nights out since the chrome catches light without turning your nails into a distraction.
Start with a sheer milky pink base and cure. Apply a small amount of cuticle-area chrome gel or tacky adhesive gel in a half-moon shape, leaving the center of the nail bare. Press champagne chrome powder or rub-on chrome into that crescent, then gently brush off the excess so it fades naturally. Seal with a glossy top coat — if you use a thick top coat, it can dull the glow, so use thin coats and cap the edges. Cure fully and wipe residue if your system requires it.
Use a flat eyeshadow brush to blend the chrome fade — you get a cleaner gradient than with fingertips.
Avoid chrome across the entire nail — it looks flat and can look cheap in daylight.
5. Blush Pink Almond with Tiny Clear Gem Cluster
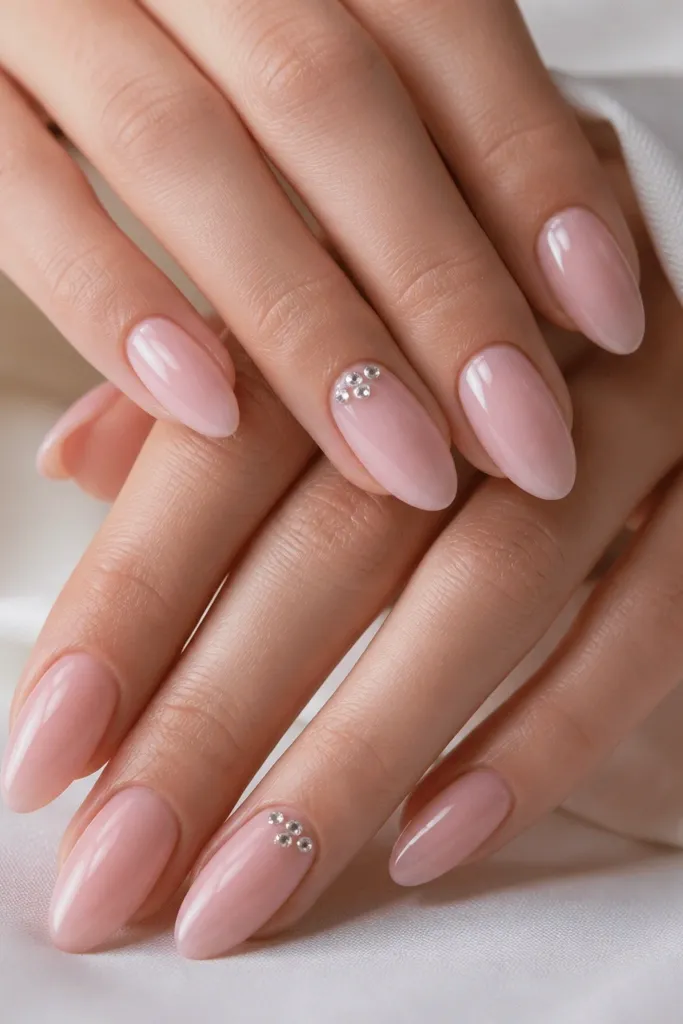
Apply a blush pink builder gel base and cure. On the accent nails, place a small dot of clear gel near the cuticle and pick up micro clear gems with tweezers or a gem applicator. Arrange 3 to 5 stones with the smallest at the center and slightly larger around it, keeping the cluster centered and about 2 to 3 mm wide. Cure, then add a thin layer of clear builder gel over the gems to level the surface. Finish with glossy top coat, cure, and lightly buff only if the surface feels uneven.
This is the “expensive but not loud” design I’ve gotten the most compliments on. The blush pink base is smooth and slightly sheer so the gems look like they’re suspended, not glued on top of a thick layer. I keep the gem cluster tiny — a few micro stones placed near the cuticle — because larger clusters can look like costume jewelry. It flatters nearly every skin tone because the stones are clear and let the pink do the work. Wear it with a simple ring stack and it looks like you planned it.
Skip thisAvoid hot-gluing chunky stones — they lift and snag.
Editor's noteIf the gems catch on fabric, file the surrounding gel smoother before top coat.
6. Pink Almond with Soft Rose Lining and Negative Space
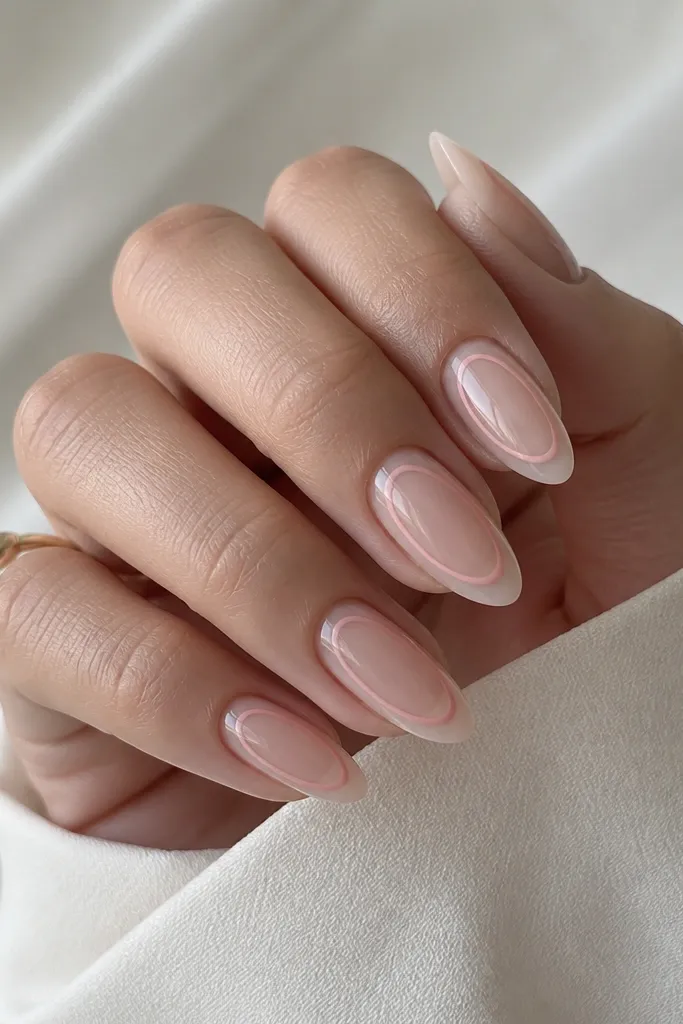
Apply a sheer nude-pink base and cure, keeping thickness even so the negative space looks clean. Use a gel liner to draw a thin curved line starting from one sidewall near the midline, arcing gently toward the other sidewall. Leave the inside area clear — do not fill it. Cure, then top coat with careful brushing along the line edges so the gel levels without smearing. For best results, do two thin top coats and cure between them.
Negative space is what makes this look designer. The base is a sheer nude-pink, then a single thin rose-pink line outlines a curved “frame” so part of the nail stays see-through. This design looks expensive because it’s light and the lines are crisp — the eye reads it as intentional, not random. It flatters hands that already have a nice nail shape because it doesn’t cover everything; it also looks clean on short almonds since the design stays centered. I wear this when I want my nails to look neat with minimal effort, but still special.
Skip thisAvoid thick outlines — they block the negative space and kill the expensive feel.
Editor's noteUse a light hand and let the gel self-level — heavy pressure makes the line widen and look messy.
7. Pink Almond with Ombre Blush Fade (No Glitter)
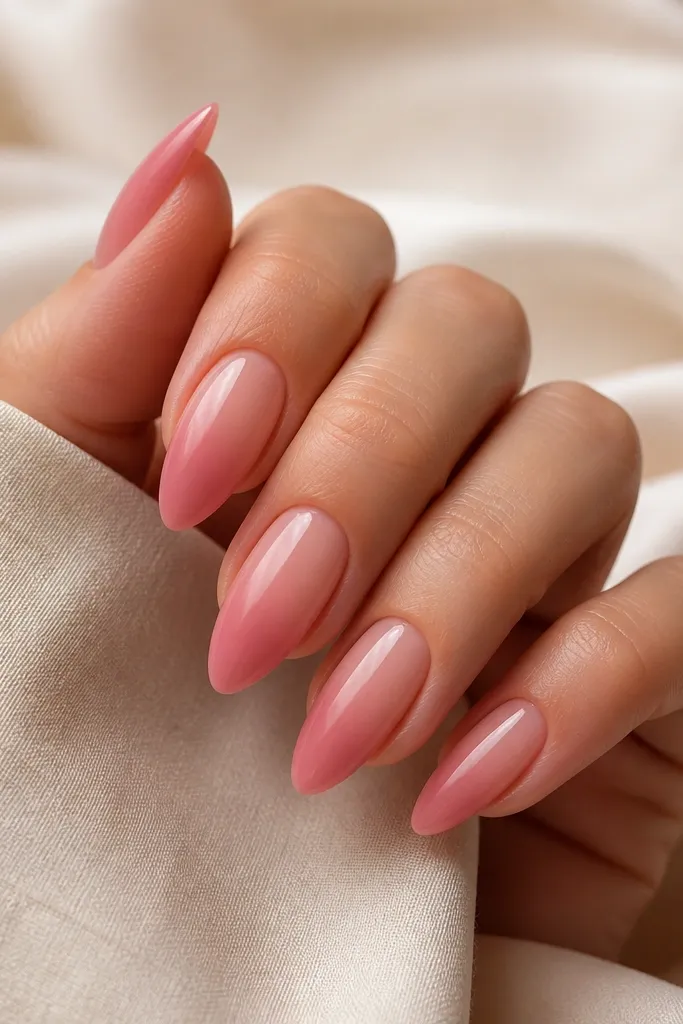
Start with a sheer pink base layer and cure. Sponge a deeper blush gel at the tip using a small makeup sponge — press lightly and pull the sponge upward in short passes to blend. Keep the gradient within the top half of the nail so the cuticle stays airy. Cure, then apply a clear builder gel overlay to smooth the blend and seal any sponge texture. Finish with glossy top coat and cap the free edge for long wear.
This ombre is expensive because it looks like it was airbrushed, not painted. The deeper blush at the tip gives shape and length, while the lighter cuticle area keeps it soft and feminine. I like doing this on almond nails because the taper makes the gradient feel natural and smooth. It flatters all skin tones, but it’s especially flattering if you wear warm neutrals — the blush harmonizes with creams and camel. This is also a great choice if you want something clean for work that still looks styled.
Skip thisAvoid harsh lines where the sponge stops — blend upward in tiny steps.
Editor's notePractice on one nail first — the trick is light pressure, not more product.
8. Pink Almond with Faux Pearl Tips (Half-Pearl Look)
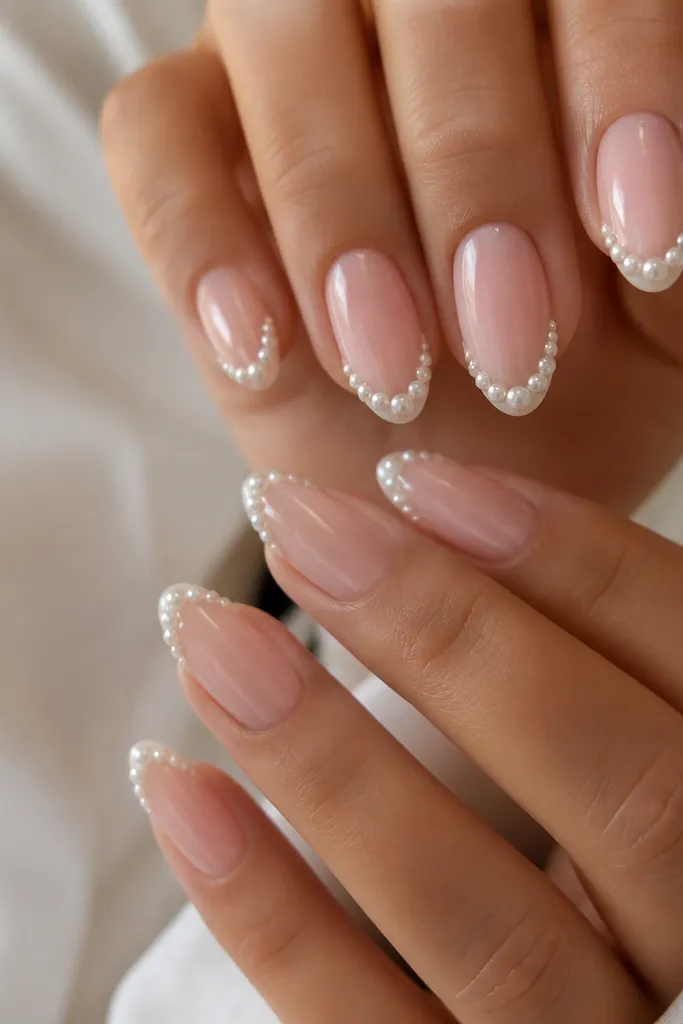
Pearl tips read expensive when they’re placed like a detail, not when they cover the whole nail. This half-pearl look keeps the base pale pink and lets the pearls sit only on the outer half of the tip, so the nail still feels light. The faux pearls are a little iridescent, which makes your hands look soft and romantic in photos. It flatters people who love jewelry — pearls match rings and earrings easily. I do this for bridal events and holiday dinners because it looks dressed up without screaming “costume.”
Apply a pale pink sheer base and cure. Place tiny faux pearls on the outer half of each tip — start with one at the outer corner, then add 2 to 3 more inward, keeping spacing even. Use clear gel to anchor them and cure. Add a thin clear builder gel layer over the pearls to level the surface, then top coat with glossy finish. Cap the free edge carefully so the pearls don’t lift at the tips.
If pearls pop out when you file, stop filing around them and instead add an extra thin clear gel top coat to smooth.
Avoid full pearl coverage — it looks heavy and can snag on sleeves.
9. Soft Pink Almond with Tiny Star Confetti (Matte Base, Gloss Top)
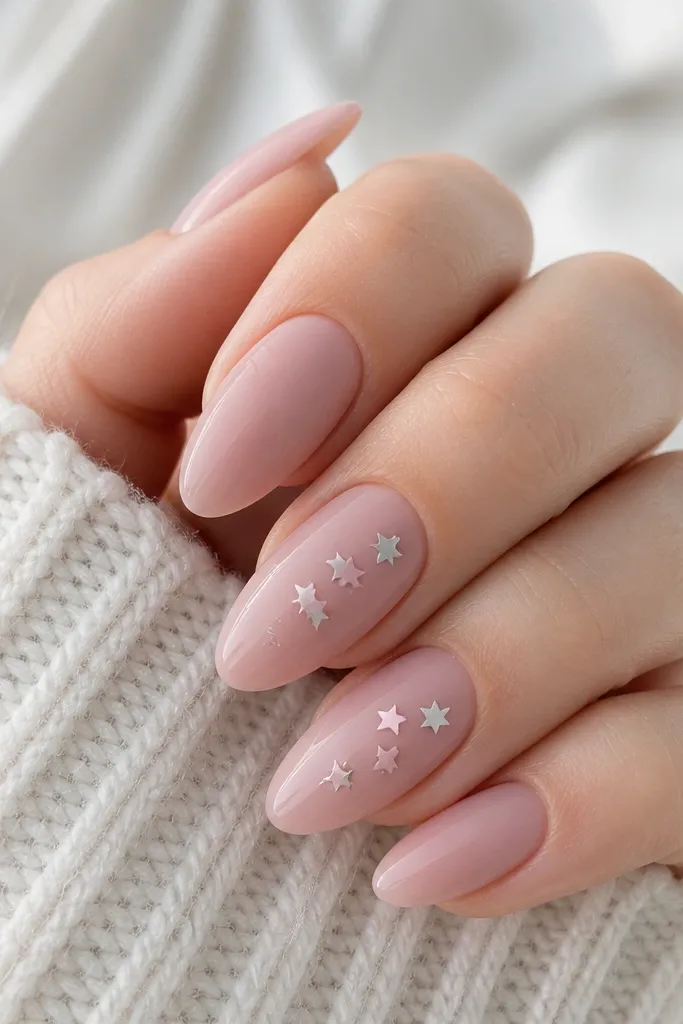
Apply a dusty soft pink base and cure, then top coat with a matte top coat and cure. Place tiny star confetti on two accent nails using clear gel as glue — keep the stars clustered in the center and leave the cuticle and sides clean. Cure, then brush on a glossy top coat only over the star area and extend it slightly around the cluster so it blends. Cure fully and check for any rough edges by rubbing a fingertip across the surface.
This design is for when you want “expensive” with a little magic. The dusty pink matte base hides imperfections and makes the stars look like they’re floating. Then the glossy top coat seals the confetti so it doesn’t catch fabric and it looks clean in close-up. I like it on almond nails because the matte base makes the taper look smooth, and the stars stay concentrated so the nail doesn’t get busy. It flatters fair to medium skin tones beautifully, and it also looks great with silver-toned rings.
Skip thisAvoid glitter dust as a substitute — it looks grainy against matte.
Editor's noteUse a small dot of gel for each star — too much gel spreads and turns the confetti into a patch.
10. Pink Almond with Thin Rose-Gold Foil Vein
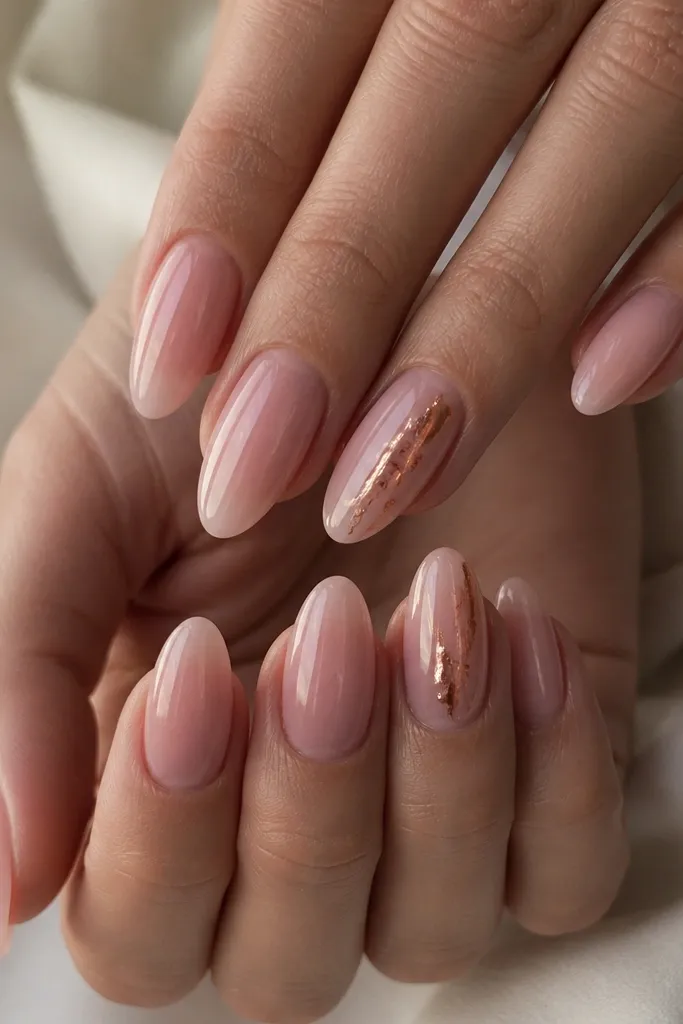
Rose-gold foil on a sheer pink almond looks expensive because the foil adds warm metallic sparkle without needing heavy paint. The key is the vein placement and thickness — keep it narrow and let the foil look broken and natural, like a mineral crack. This suits a feminine look with an edge, and it flatters warm undertones especially well. If you wear rose-gold jewelry, it matches instantly; if you wear silver, it still works because the pink base keeps it soft. I use this design when I want something that stands out in photos but still feels wearable.
Start with a sheer pink base and cure, keeping it smooth and not too thick. Apply a thin layer of foil adhesive gel along a diagonal path — about 1 to 2 mm wide. Press rose-gold foil onto the adhesive, then gently lift and brush off excess so it stays like a vein, not a patch. Seal with glossy top coat in two thin layers to prevent lifting and to lock the foil edges down. Cure fully and inspect under light from the side to confirm the foil is sealed everywhere it touches.
Work with small pieces of foil so you get a realistic vein break instead of a solid strip.
Avoid covering the entire nail with foil — it loses the “jewelry detail” effect.