
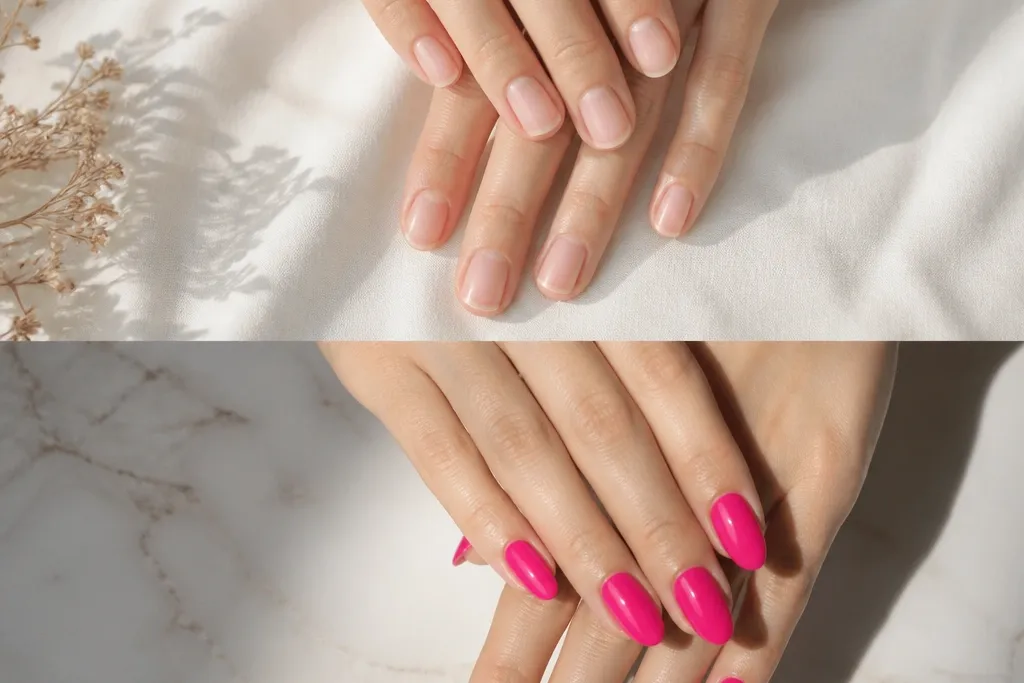
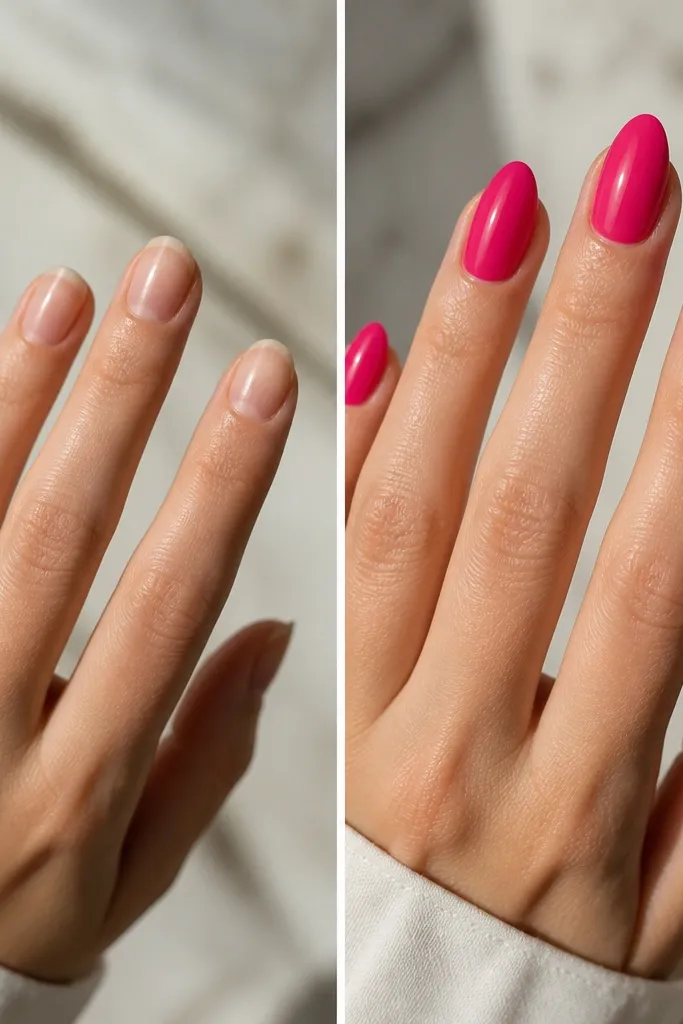
1. Mirror Hot Pink Almond with Micro-Glitter Top Coat
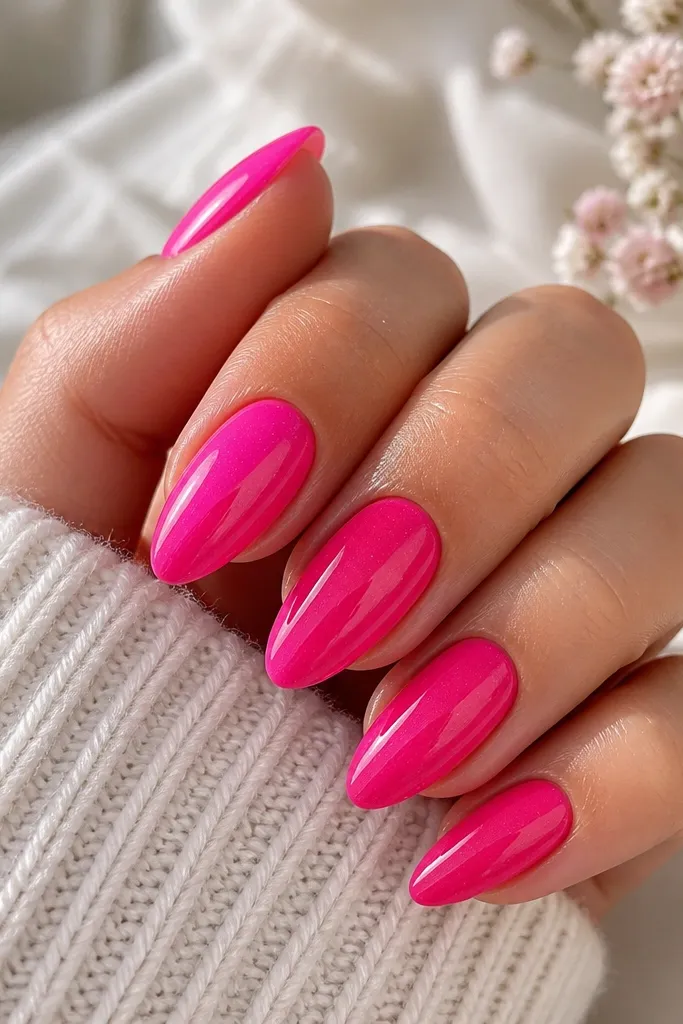
This is the “I did my nails at home and they look salon” set. The base is a true hot pink with a mirror finish, and the sparkle is so fine it reads like brightness, not bling. I love it on medium to deep skin tones because the pink pops without looking neon, and on fair skin because it doesn’t wash out when the top coat is glassy. The almond shape matters here — the tapered tip makes the reflective surface look longer, especially if your nail beds are short. For everyday wear, this one wins because it looks bold even with plain outfits.
First, prep and shape to a clear almond: file the sides to meet at the tip and keep the free edge thin, about 1-2 mm. Apply a rubber base gel, cure, then paint hot pink in two thin coats, keeping each coat close to the cuticle but not touching it. For the micro-glitter, use a sheer, high-shine top coat with ultra-fine glitter — paint only on the top half of the nail first, then sweep through the tip so it stays smooth. Cure fully, then wipe with cleanser if your system needs it, and cap the free edge with the final top coat. When you’re done, the color should look like one continuous gloss layer, not glitter specks sitting on top.
After curing, check under a bright lamp. If you see any dull spots, add a second thin top coat and cure again.
Don’t do thick glitter coats — they make almond tips look bumpy and cheap.
2. Hot Pink Ombre Almond with White Center Fade
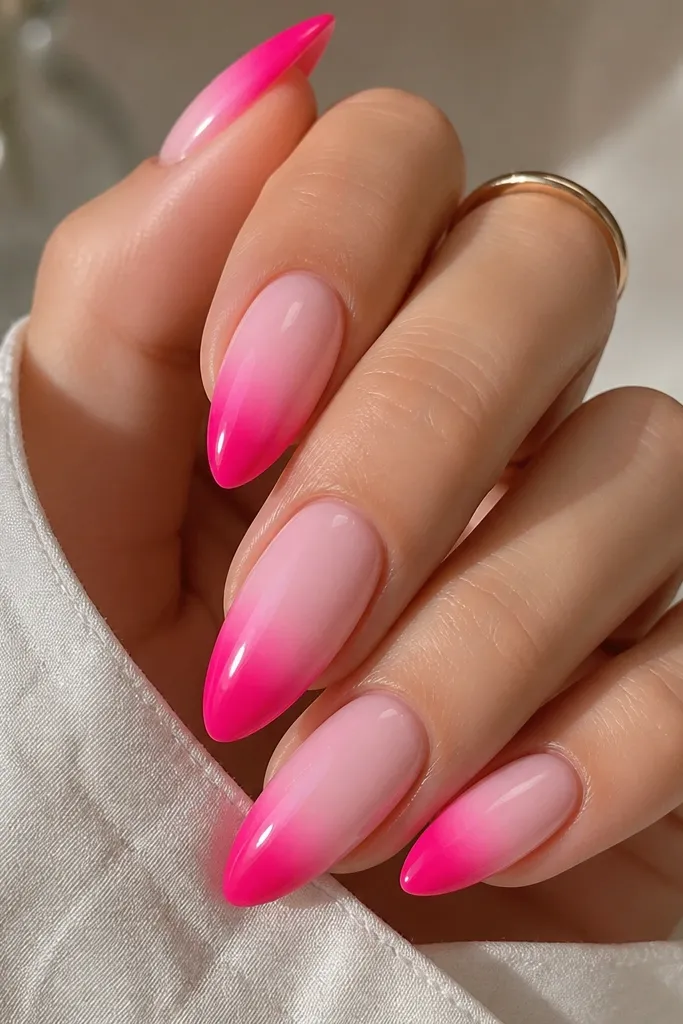
This design is how you get the before after hot pink almond nails transformation without the color looking harsh. The white center fade softens the hot pink and creates depth, so your nails look longer and more dimensional. I use it when someone says hot pink always looks too loud on them — the white glow calms it down while still keeping the statement. It flatters short nail beds because the fade visually lengthens the middle of the nail. It also looks great on cool and neutral undertones because the white-pink transition keeps everything clean.
Editor's noteDo a test blend on one nail first. If the sponge leaves dots, switch to an ombre brush and thin your gel slightly.
Start with your base coat and a thin hot pink coat, cured. Then, sponge on hot pink at the tip only, leaving a gap in the center for blending. Use a small makeup sponge or ombre brush to tap the color upward until it meets the center glow — keep the transition feathered, not streaky. Mix a tiny amount of white or white-pink gel and dab it in the center, then blend outward lightly with the sponge edge. Seal with a thick, glossy top coat and cap the tip so the ombre stays smooth.
Skip thisDon’t blend all the way to the cuticle — it makes the ombre shrink instead of stretch.
3. Hot Pink French Almond with Clear Smile Line
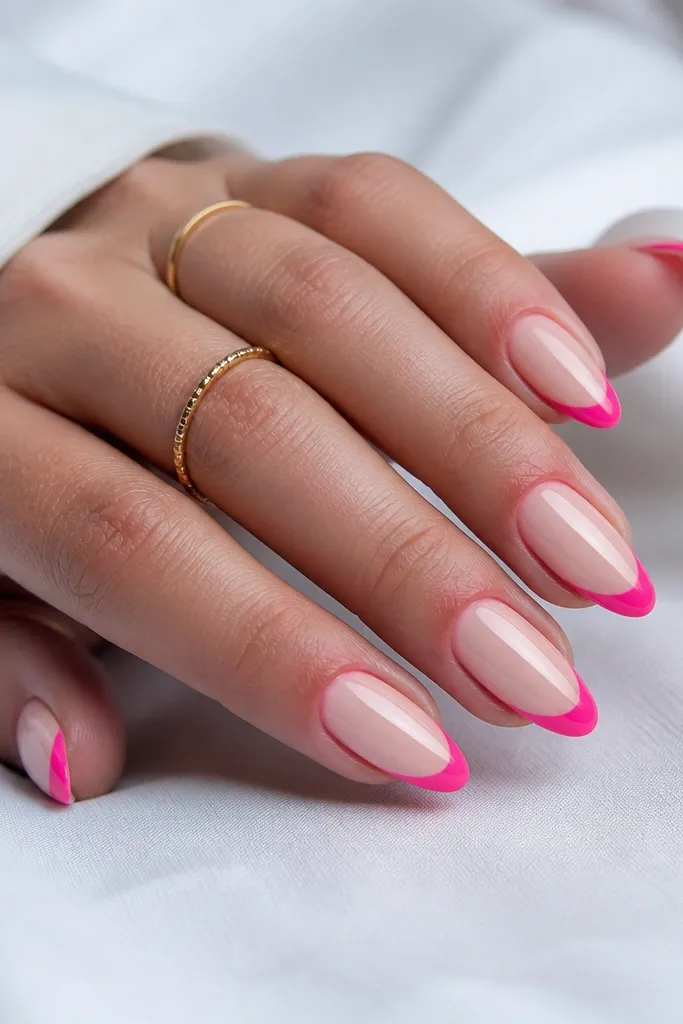
If you want hot pink that still looks classy on real hands, do this French. The sheer nude base makes your nail bed look healthy, while the hot pink tip gives the drama. The clear smile line is the secret — it keeps the design airy and prevents the pink from swallowing the nail. I’ve worn this with short sleeves and long sleeves, and it always looks sharp because the color placement is controlled. It flatters almost everyone because the nude base matches your natural tone and the almond tip lengthens your fingers.
Editor's noteFor a crisp smile line, drag a thin liner brush along where you want the clear area, then fill the tip after it sets tacky.
Prep and shape first, then apply a sheer nude gel in one thin layer, cure. For the French, use a striping brush and mark your smile line lightly with a straight edge tool so the curve is even. Paint hot pink only on the tip, keeping the line thin at the sides and slightly thicker at the center. Clean up the edges with a brush dipped in gel cleanser, then cure. Finish with a glossy top coat and cap the sidewalls lightly so the French edge doesn’t lift.
Skip thisDon’t make the French too wide. Wide tips shorten almond nails visually.
4. Hot Pink Almond with Black Micro-Line Detail
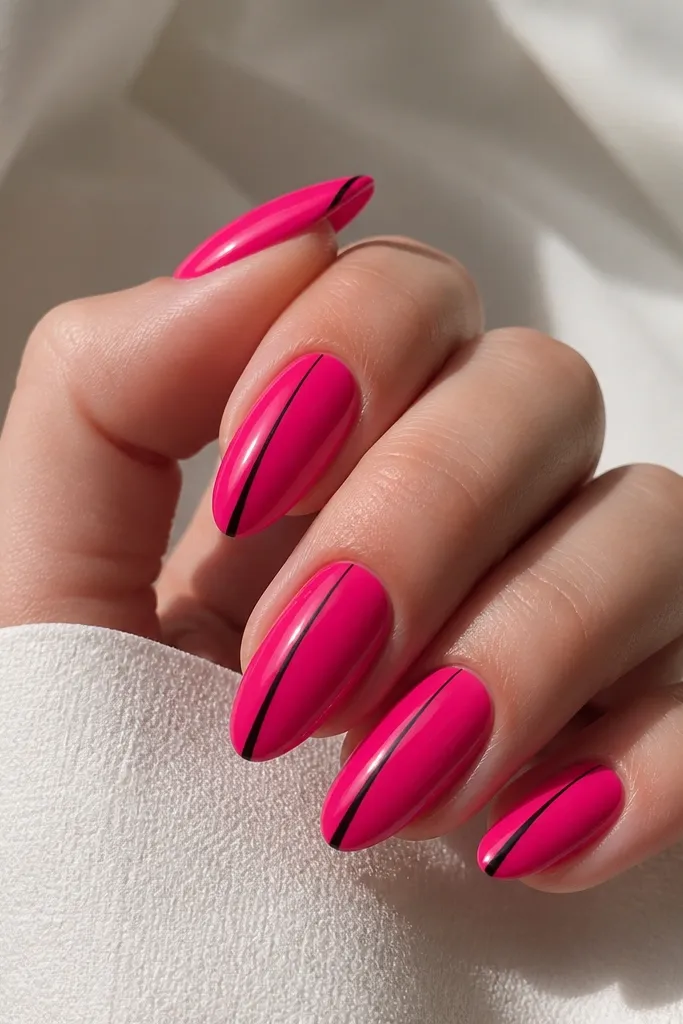
This is my go-to when someone wants hot pink but doesn’t want it to feel like “one big color.” The black micro-line adds structure and makes the hot pink look more intentional, like it belongs to a design set rather than a color choice. I like it on medium and olive skin tones because black makes the pink look richer, not washed. It also flatters hands with shorter nails because the diagonal line creates a visual pull toward the tip. Keep it minimal — the line is thin enough to look chic even at work.
Start with a solid hot pink base — two thin coats for full coverage, cured between coats. Use a fine striping gel or a nail art pen with black pigment and draw one diagonal line, starting a few millimeters below the cuticle and ending near the outer tip edge. Clean the line with a small flat brush and gel cleanser so it stays crisp. Add a second tiny black dot or short dash near the center if you want a little extra dimension, then cure again. Seal with a glossy top coat, but apply it carefully over the line to avoid smearing.
If your line looks shaky, draw it in two passes: place the start point first, then connect to the end point.
Don’t thicken the line. Thick black over hot pink looks heavy and can make the nails look shorter.
5. Hot Pink Almond with Clear Jelly Base and Pink Tips
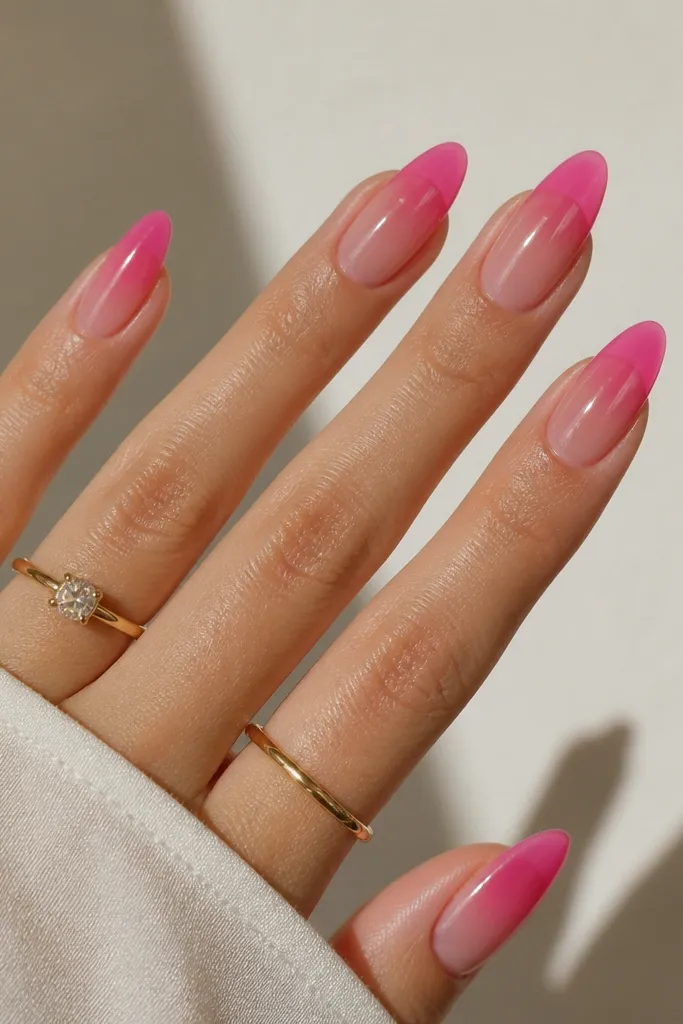
This one looks like a fresh gel manicure that’s still “wet,” and that’s why it photographs so well. The clear jelly base makes your natural nail visible, so the pink feels lighter and more modern. I do this when my clients want hot pink but their nails are already short or they don’t like opaque color. It flatters fair to deep skin because the jelly tone sits between your skin and the pink, so everything blends smoothly. The almond tip keeps the color concentrated where it counts.
Editor's noteUse a gel that levels well. If it’s watery, it will flood the cuticle and ruin the jelly look.
Apply a base coat, then build a clear jelly layer and cure. For the hot pink tips, use a slightly thicker hot pink gel and paint only the outer third to half of the nail tip, then drag a small amount into the jelly so it fades. Cure, then add a second hot pink layer for opacity at the tip if needed. Wipe, then top coat with a super glossy jelly top coat so it stays glassy rather than rubbery. Cap the free edge with a thin layer to prevent lifting.
Skip thisDon’t overbuild the jelly base. Too much thickness makes the nails look bulky.
6. Hot Pink Almond with White Marble Swirl Accents
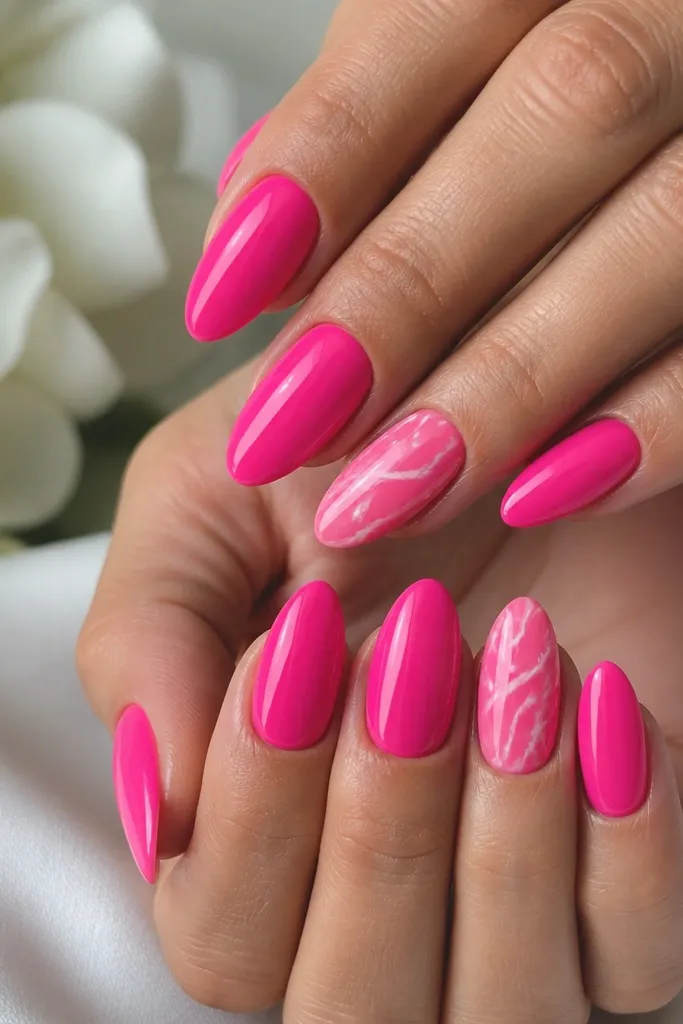
Marble swirls make hot pink look high-end because the white lines break up the solid color. I use this combo when someone wants a statement for events but still wants it to look neat up close. The marble lines look best when they’re thin and slightly imperfect — like real stone, not a printed sticker. It flatters all nail lengths, but especially looks great on almond because the swirls follow the nail’s taper. If you’re worried about hot pink being too much, the white veining gives your eye a place to rest.
Start with two coats of hot pink gel and cure. Pick two accent nails and add a white gel in thin streaks, then drag a dotting tool or liner brush through the streaks to form swirls. Keep the swirls away from the cuticle by about 2-3 mm so the lines don’t look messy. Add a tiny highlight dot of white near the tip if you want extra dimension, then cure. Finish with a glossy top coat and cap the marble area so it stays smooth.
Draw fewer lines than you think. Two or three good swirls per nail look cleaner than five messy ones.
Don’t cover the whole nail in marble. That turns it into a sticker look fast.
7. Hot Pink Almond with Silver Chrome Half-Moon
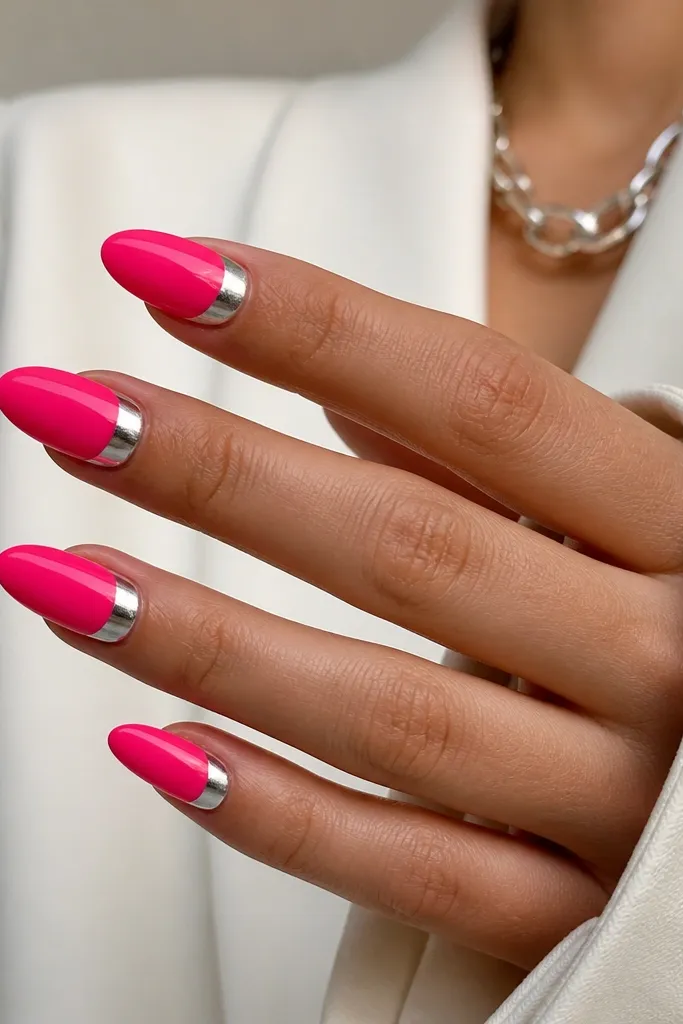
A chrome half-moon gives you that “fresh set” shine without needing full chrome coverage. The hot pink base keeps it playful, while the silver reflection makes your nails look like jewelry. This is especially flattering if your nail beds are slightly uneven, because the half-moon focuses attention near the cuticle and hides small imperfections. It also looks great on both warm and cool undertones because chrome sits neutral between skin and pink. For nights out, it’s loud in a clean way.
Apply base coat and two coats of hot pink, cure fully. For the half-moon, use a small stencil or cut a curved guide from thin tape so you get a crisp arc. Paint a thin patch of tacky gel where the half-moon will sit, cure until tacky (not fully hard), then apply silver chrome powder and buff gently. Remove excess with a dry brush, then seal with a glossy top coat that covers chrome without dulling it. Clean the edges with a small brush and cleanser for sharp lines.
Use a foam applicator for chrome. It presses the powder evenly and reduces patchiness.
Don’t seal chrome with a thick matte top coat. It kills the mirror reflect.
8. Hot Pink Almond with Polka Dot Accent (Micro Dots)
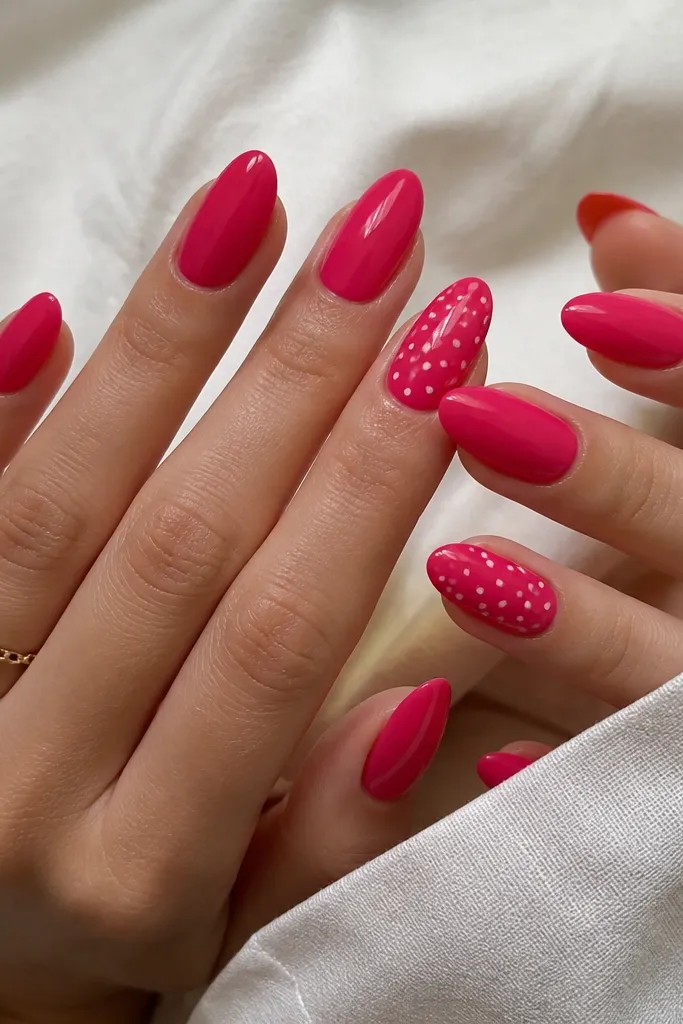
Micro polka dots make hot pink feel playful instead of aggressive. I like this version because the dots are small enough to look intentional, not like a child’s craft. It flatters hands that look better with “busy but controlled” designs — the dots give texture without adding bulk. White dots also brighten skin tones, especially if you’re wearing warm makeup. On almond nails, the dots look like they’re floating, which helps the overall shape stay sleek.
Paint all nails hot pink in two thin coats and cure. Choose one or two accent nails and add a base layer of clear gel on top of the hot pink if you want the dots to look slightly raised — I usually keep them flat for a smoother feel. Use a dotting tool with white gel or white acrylic paint and place dots starting about 3 mm from the cuticle, then work toward the tip. Keep the dot spacing consistent, with fewer dots on the sides so the design doesn’t crowd the almond taper. Cure and seal with a high-gloss top coat.
If dots smear, let your white gel sit tacky for 30 seconds before dotting.
Don’t use big dots. Large circles on almond tips look cartoonish and uneven.
9. Hot Pink Almond with Negative Space Triangle at Side
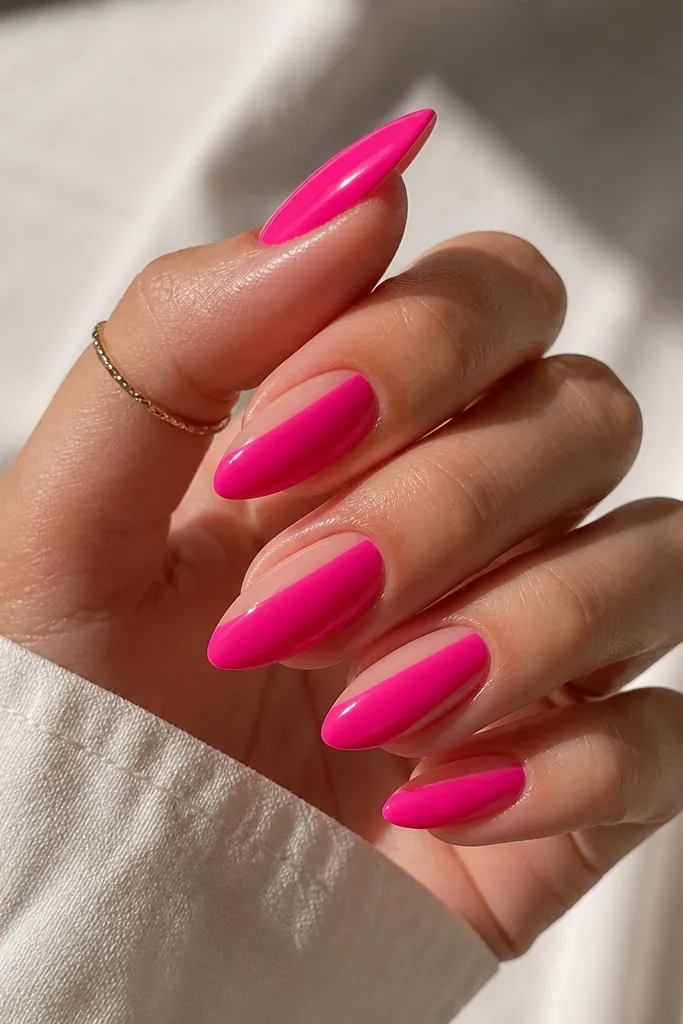
Negative space keeps hot pink from feeling like it’s covering everything. The side triangle is a design trick I use when I want the nails to look more angular and flattering on fingers that look wide at the knuckle. The clear triangle draws the eye inward, so the hand looks more narrow. I’ve done this on fair and deep skin with the same result — the contrast makes the pink look brighter. It also looks good for short-to-medium almond lengths because the shape already creates a longer line.
Editor's noteCut your triangle guide from thin vinyl tape. It gives cleaner edges than regular masking tape.
Prep and shape as usual, then apply a clear base gel and cure. Paint hot pink over most of the nail, leaving a triangle-shaped area unpainted on one side. Use tape or a stencil strip to block the triangle while you fill in the pink — press the edge flat so you get a crisp line. Remove the tape carefully before curing if your gel system allows it, or cure after you fully fill the pink without moving the guide. Finish with a glossy top coat, and cap the sides where the pink meets the triangle edge.
Skip thisDon’t freehand the triangle if you want it to look expensive. Cheap-looking edges ruin the whole effect.
10. Hot Pink Almond with Black Glossy Outline on Two Nails
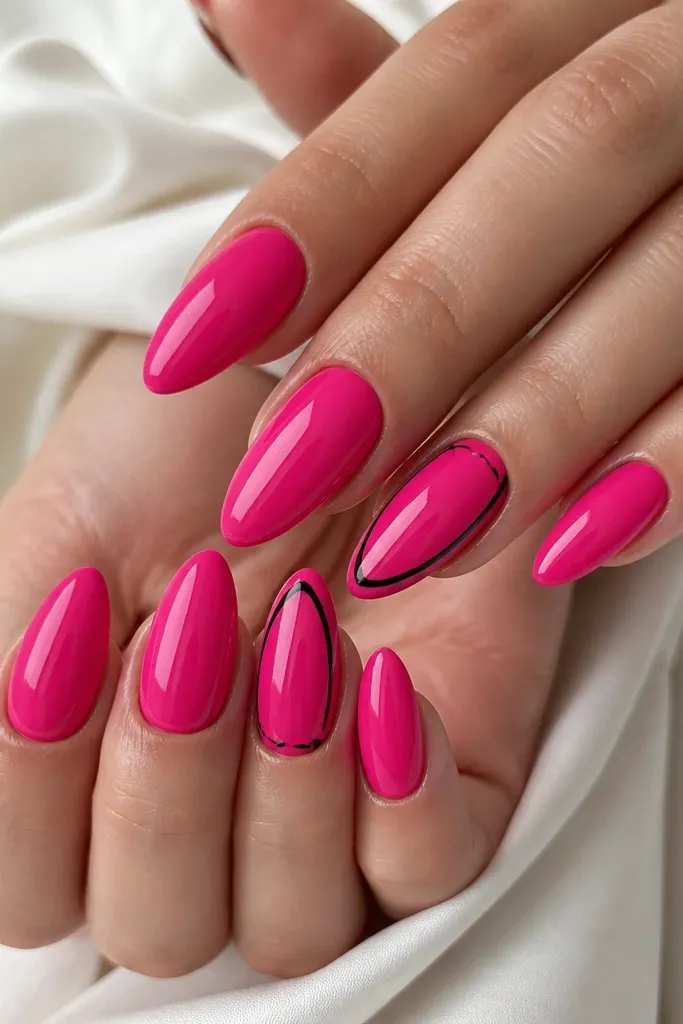
Outlines look graphic and modern, and the black makes hot pink feel like it belongs to a designed set. I use this when someone wants a statement but hates tiny art details that chip quickly. The outline is also forgiving because minor imperfections in the black line don’t ruin the design — the overall structure stays clear. It flatters everyone because the line work pulls attention toward the nail tip, making fingers look longer. This is a great choice for nights out or even a bold office day.
Start with two coats of hot pink on all nails and cure. Choose two accent nails and paint a thin black gel outline tracing the inner edge of the almond curve, starting near the middle of the nail and curving toward the tip. Add a short black line at the tip edge to close the outline shape. Cure, then apply top coat carefully over the black lines so they stay glossy and don’t smear. If you’re using gel, keep the outline thin so the top coat doesn’t flood and blur the edges.
Use a gel liner brush with a sharp tip and clean it between nails. One messy stroke ruins the symmetry.
Don’t outline the entire nail with thick black. It overwhelms the pink and makes it look heavy.
11. Hot Pink Almond with White Aura Glow Around Cuticle
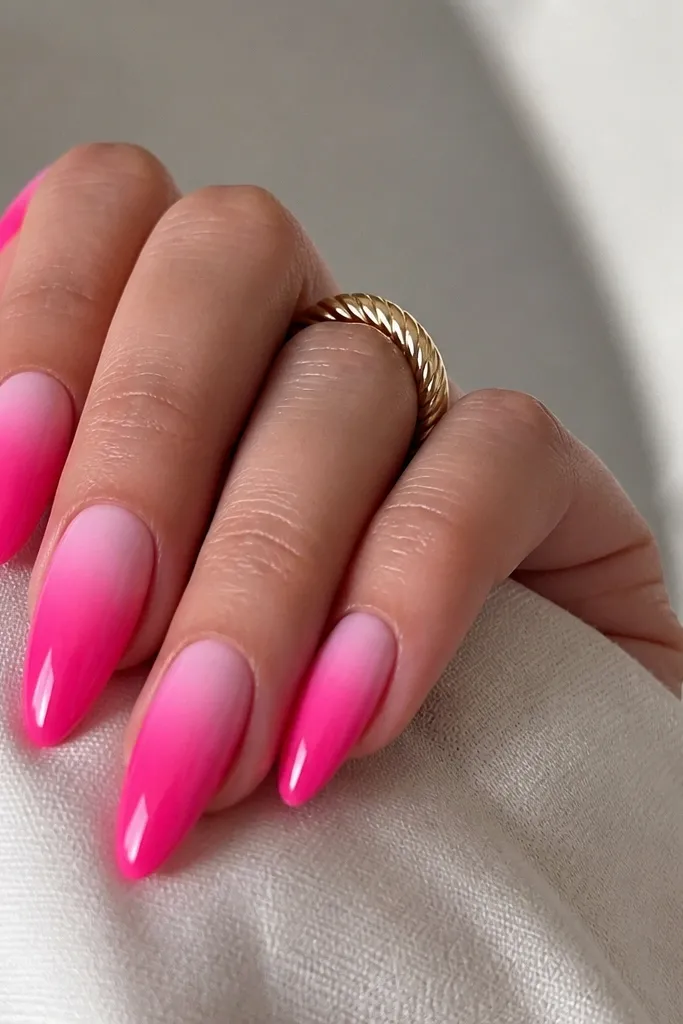
Aura nails are one of the easiest ways to make hot pink look soft and flattering. The white glow around the cuticle lifts the nail visually and makes your nail bed look wider and healthier. I use this when a client wants hot pink but doesn’t want it to look harsh on camera or in indoor lighting. The aura also helps hide slight unevenness near the cuticle because the glow draws the eye to the center. It flatters almost every skin tone because white adds brightness without changing the hot pink hue.
Apply a base coat and two thin coats of hot pink gel, curing each coat. For the aura, take a small makeup sponge and dab white gel right around the cuticle area, staying about 1-2 mm below the cuticle line so it looks intentional. Tap the sponge lightly to create a soft halo, then blend outward with one gentle pass — don’t drag. Cure, wipe, then apply a glossy top coat. Cap the tip last so the nails stay smooth and the aura doesn’t lift.
Keep the aura small. A tight halo looks expensive; a wide halo can look messy fast.
Don’t paint the aura with a brush. It leaves hard edges that kill the glow effect.
12. Hot Pink Almond with Gold Foil Shards on Accent Nail
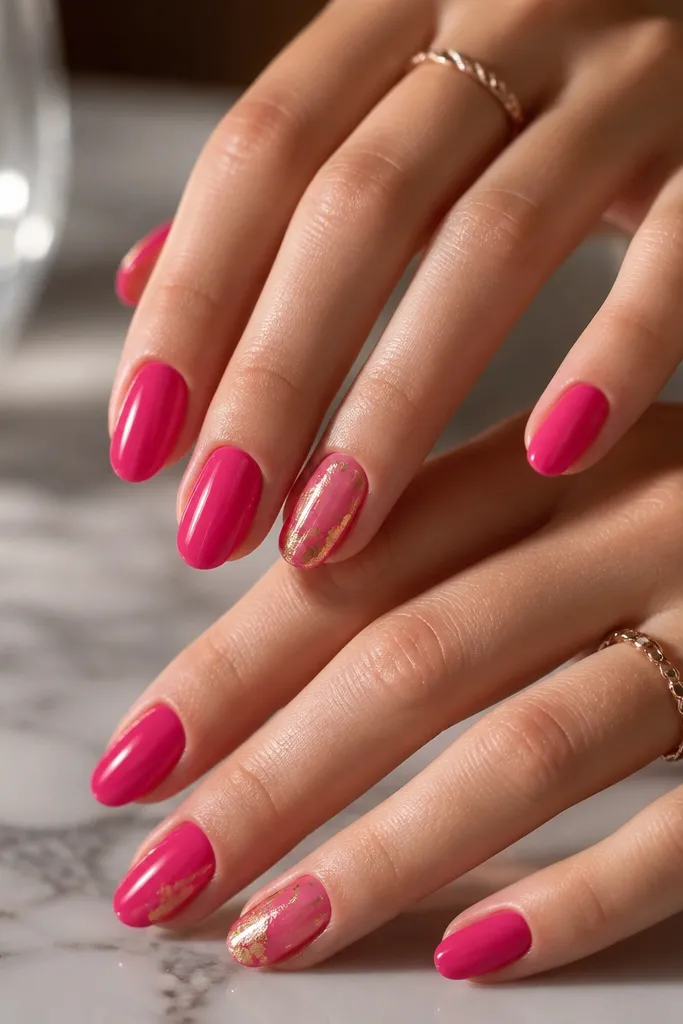
Gold foil shards make hot pink look like a party manicure without needing a full gem set. The foil adds texture and movement, and because it’s irregular, it looks more natural than painted gold stripes. I love it on warm skin tones because gold and hot pink look like they belong together. It also flatters hands with short nail beds because the foil placement near the center pulls focus upward. Use this when you want something bright but still wearable in photos.
Paint hot pink on all nails with two coats and cure. On your accent nail, apply a tacky gel patch in the area you want foil, usually the top half. Press gold foil shards into the tacky gel, then tap lightly to seat them — overlap pieces for a denser look near the tip. Cure, then apply a thin top coat over the foil without smearing it. If you feel texture, add a second thin top coat after the first levels out.
Press foil with clean tweezers or a foam pad, not your fingers. Finger oils can cause gaps and dull spots.
Don’t cover the entire nail in foil. Full coverage looks cluttered and less flattering.
13. Hot Pink Almond with Matte Hot Pink + Glossy Tip Combo
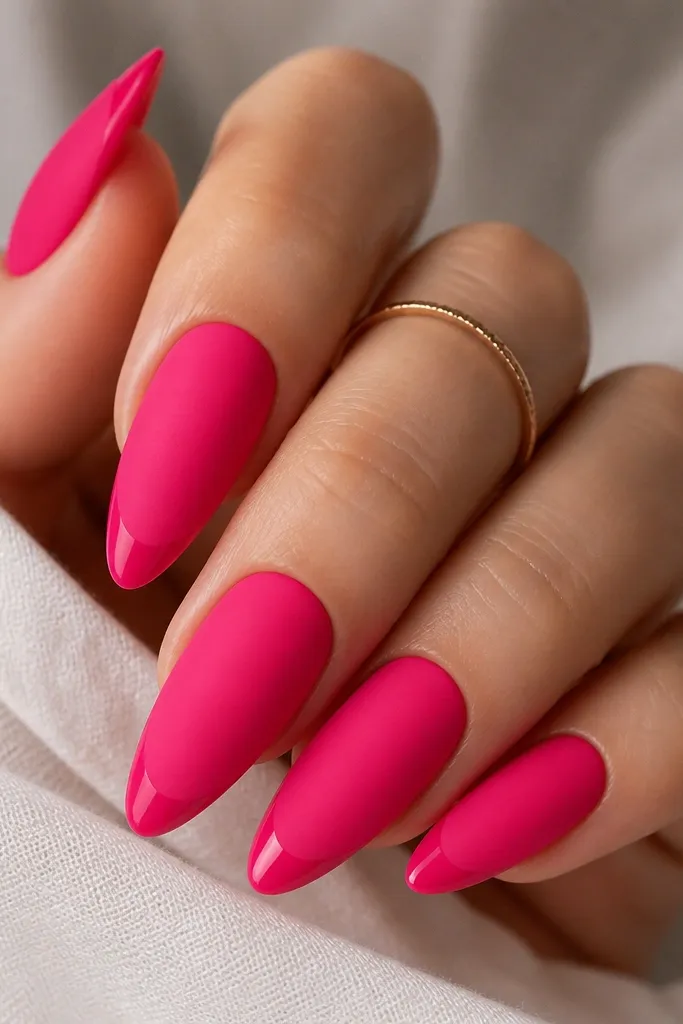
Finish contrast is the secret sauce when you want hot pink to look styled instead of plain. Matte on the base softens the color and makes the hot pink look velvety, while the glossy tip brings back that “fresh manicure” shine. I like this for day-to-night outfits because it looks calm in daylight and catches light when you move. It flatters fingers by making the nail surface look wider at first glance, then the gloss tip draws your eye to the end. If you get bored with glossy-only sets, this one fixes that fast.
Editor's noteDo the matte top coat evenly. Patchy matte makes the gloss boundary look uneven.
Start with two coats of hot pink gel and cure. After your final cure, apply matte top coat on the whole nail surface first, then cure. Use a striping brush to paint glossy top coat only on the tip zone — I keep it to the last third of the nail, about 3-4 mm. Cure again so the gloss sets crisp. Clean the edges with a small brush and cleanser so the matte-to-gloss line stays sharp.
Skip thisDon’t mix matte and gloss on the same brush. You’ll drag gloss into the matte area and blur the boundary.
14. Hot Pink Almond with White Daisy Outline (One Accent Nail)
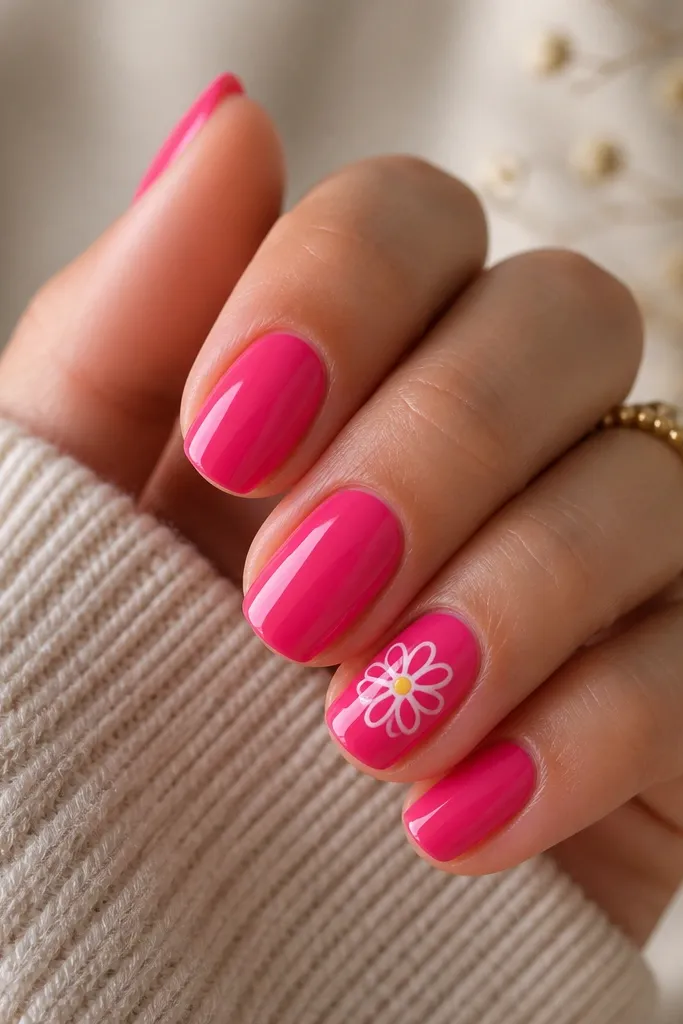
This is the cute-but-grown-up version of nail art. One daisy outline on an almond tip looks sweet without turning into cartoon nails, because the outline stays thin and the hot pink background stays solid. I recommend this if you wear floral dresses, simple tops, or if you want a “spring” vibe that still feels bold. The daisy also flatters shorter almond nails because the flower sits centrally and makes the nail look balanced. It’s a great design to try when you’re nervous about freehand — the outline technique is forgiving.
Paint all nails hot pink with two coats and cure. On the accent nail, draw a small circle in the center with a dotting tool for the daisy center and add a tiny yellow dot. Then use a fine liner brush or nail art pen to draw 6-8 white petals around the circle, keeping them narrow and slightly curved. Outline only the petals — don’t flood them — so the daisy stays crisp. Cure and seal with a glossy top coat, brushing over the flower lightly so it doesn’t smear.
Use a nail art pen for the petals if your brush tends to splay. The pen keeps the petal edges clean.
Don’t add too many flowers. One accent nail looks intentional; multiple looks messy.
15. Hot Pink Almond with Clear Rhinestone Cluster at Sidewall
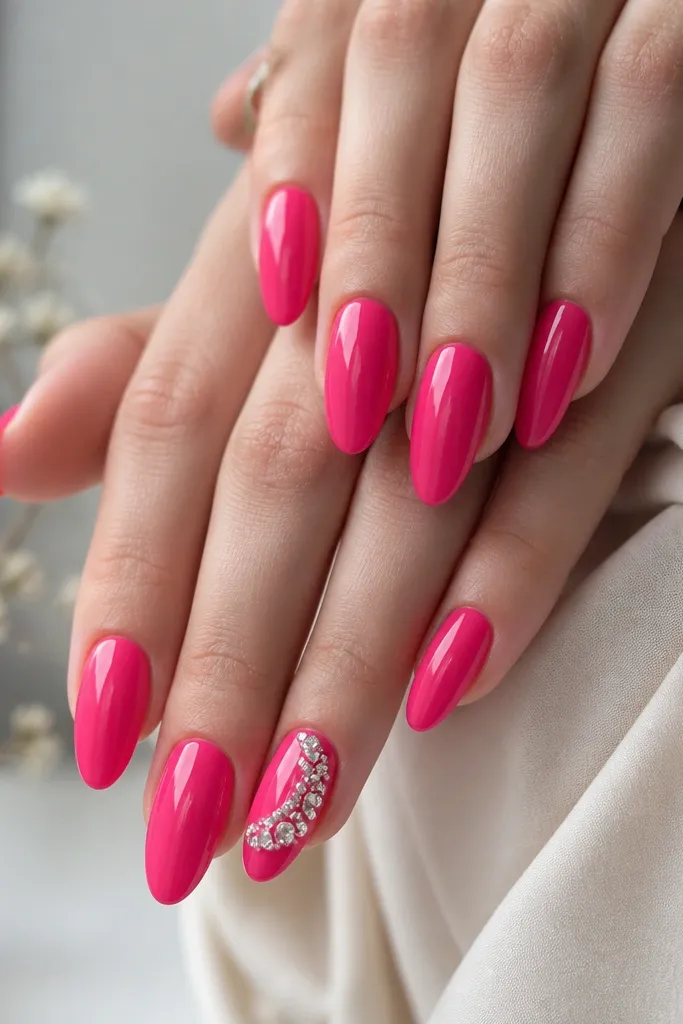
A rhinestone cluster on the sidewall makes hot pink feel like jewelry. The clear stones don’t compete with the hot pink; they scatter light and make your hands look brighter. I like placing the cluster slightly off-center, because it draws attention to the almond taper and avoids a bulky look at the center. This is flattering for most nail shapes, especially if your cuticle area is a little uneven — the stones sit where your eye naturally goes. Wear it for birthdays, weddings, or when you want your nails to look expensive without going full glam everywhere.
Editor's notePick rhinestones with flat backs and store them in a tray. Flat backs grab gel better and sit tighter.
Start with a clean hot pink set — two coats and cure. On the accent nail, apply a small dot of strong gel or rhinestone glue on the sidewall where you want the cluster, then place 3-6 clear rhinestones of mixed sizes. Press each stone with tweezers, then add a tiny top coat gel around the base to lock them in. Cure fully, then apply top coat over the rest of the nail, avoiding pooling around the stones. If you feel texture, add a second thin top coat after curing so the surface stays smooth.
Skip thisDon’t use big stones in a straight line. Side clusters look more flattering and natural on almond.



