
1. Jelly Candy Cane Tips with Micro-Glitter Seal
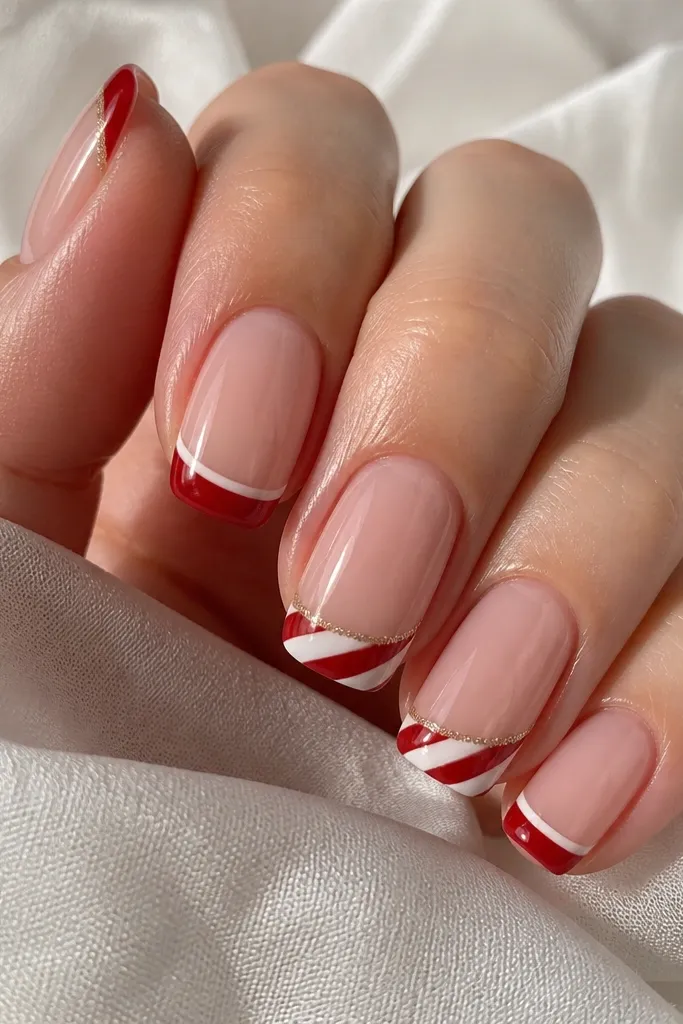
This set works because it keeps the candy-cane motif small and sharp instead of painting full stripes across the whole nail. The jelly pink base flatters most skin tones since it mimics a natural nail color, and the red looks crisp without turning neon. I like it on short almond because the tip width is enough for two clean stripes but not so wide that it turns into a cartoon. The micro-glitter is placed like a frame — it catches light in photos but doesn’t feel gritty in real life.
Start by building your BIAB base with a sheer jelly pink shade. Cure fully, then apply a thin top coat and cure again if your system needs extra tack-free smoothness. For the accent nails, paint a white diagonal stripe on the tip, then a red stripe beside it, keeping both stripes about 1.5 mm wide at the widest point. Add micro-glitter only along the stripe border using a tiny brush, then cap the design with a thin top coat layer — cure carefully so the glitter doesn’t flood into the center.
Use striping tape as a guide for the first stripe. Remove it right after painting while the gel is still slightly wet so the edges stay razor clean.
Avoid dragging glitter across the whole tip — it turns sandy and catches on sweaters.
2. Emerald Forest Matte Base with Gold Foil Pine Lines
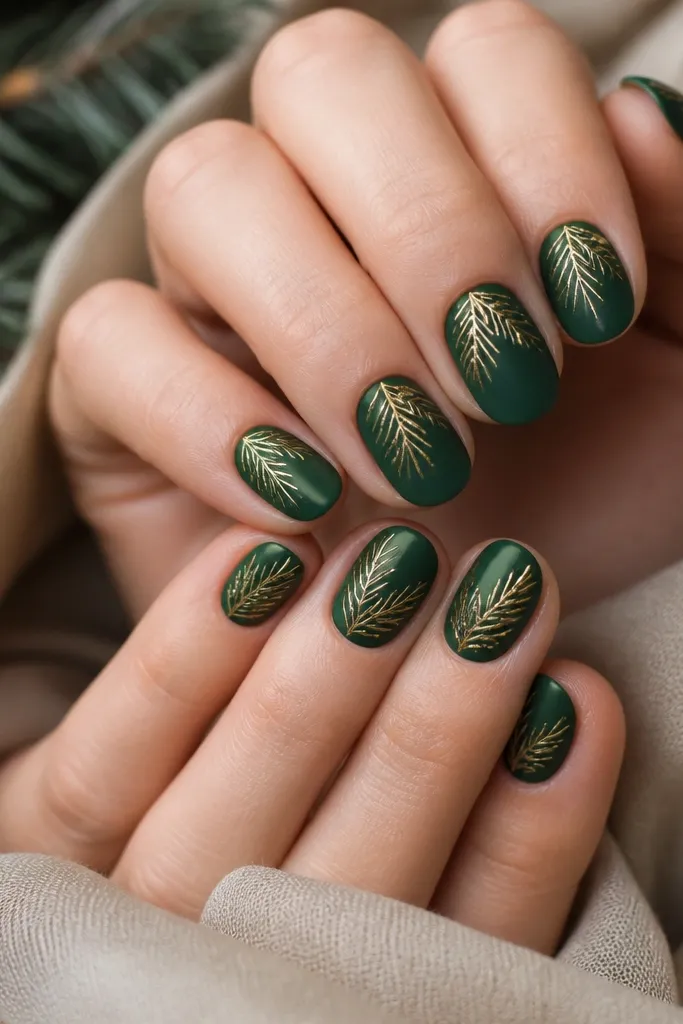
I love this look when you want Christmas without red everywhere. Emerald matte reads classy on camera, and matte makes gold foil look sharper instead of blurry. It flatters cooler undertones and also looks great on warm skin because the gold brings warmth back. The pine-line placement is narrow and vertical, which makes fingers look longer. Keep the foil thin — too much foil makes it look like a craft project.
Prep and apply BIAB in a forest green. Cure, then matte it with a matte top coat (or a matte gel) over the entire nail, curing per your product instructions. Using a fine liner brush, place small gold foil pieces along the nail in short, tapered strokes — start near the center and keep them about 2-3 mm long each stroke. Seal with a glossy top coat only over the foil lines if you want the contrast, or use matte all over if you prefer a uniform look.
If you hate foil mess, press foil onto a thin tack layer with a silicone tool, then remove excess with gentle tapping.
Don’t cover matte nails with a fully glossy top coat — the emerald will look flat and less “forest.”
3. Red Chrome Half-Moons with Black Velvet Bow Accent
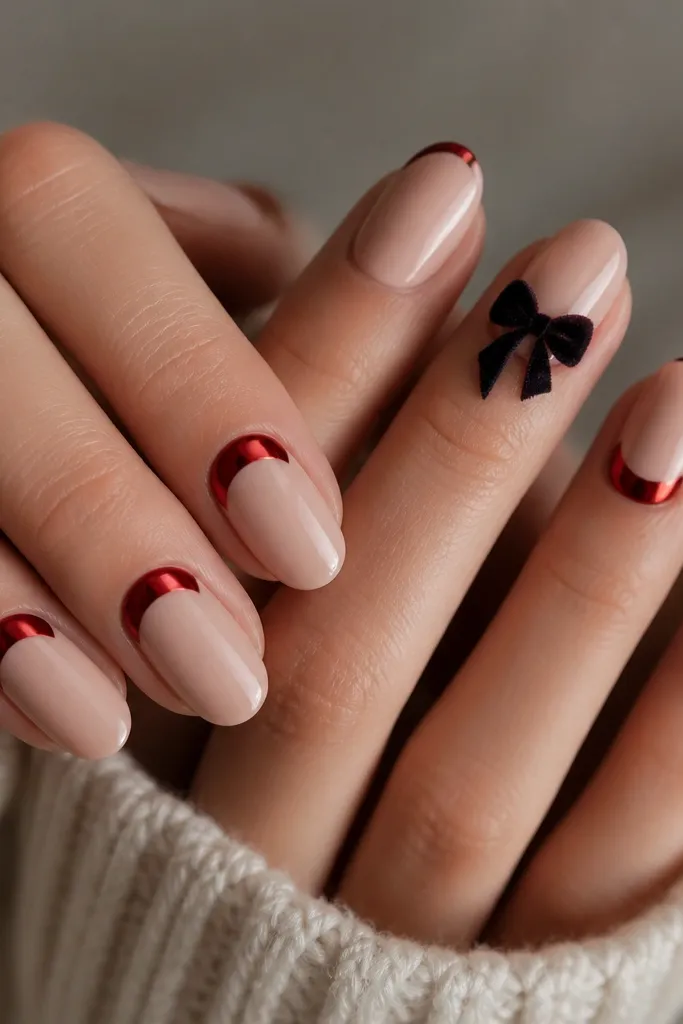
Apply BIAB in a sheer nude with a pink tint, cure, then clean up the cuticle line. For the half-moons, tape a curved guide or use a small half-moon stencil at the cuticle and apply red chrome gel/paint inside the shape, cure, then remove the guide. On the accent nails, build a black velvet gel bow: swipe a thin base layer, then sculpt the bow loops with a small dotting tool, and add a tiny center knot. Finish by sealing everything with a glossy top coat, but keep the velvet bow capped lightly so it doesn’t lose its fuzzy look.
This is the set I do when I want “holiday glam” but still wearable after the parties. Red chrome half-moons make your nail bed look longer because the shine starts at the cuticle and pulls the eye upward. Black velvet bow details add that cozy winter vibe without needing a full snowflake pattern. This flatters medium to deep skin tones especially well, but it also looks great on fair skin if you keep the nude base slightly rosy.
Skip thisAvoid thick chrome at the cuticle — it can peel when your nails flex.
Editor's noteWipe chrome gel with a lint-free pad before curing if it looks streaky. It smooths the finish fast.
4. Snow Globe Clear BIAB with Floating Silver Stars
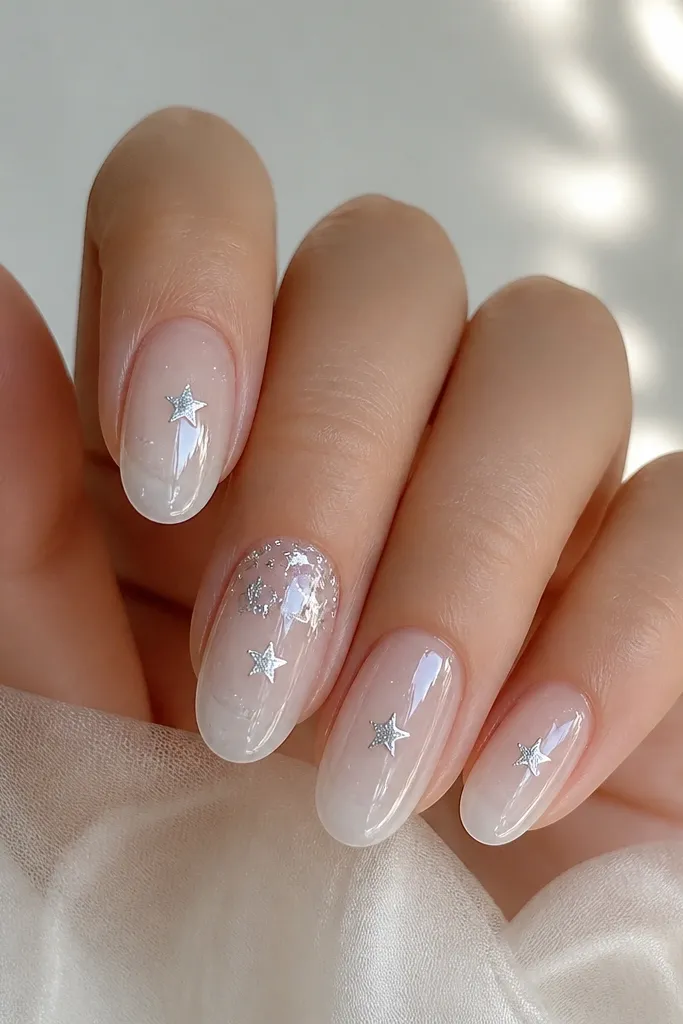
Start with a clear BIAB base and cure. Add a soft cool white gel in the center of each nail using a sponge or a flat brush, then cure so it stays suspended. Place tiny silver star charms on the center area while the gel is still tacky, then cover with an additional clear BIAB layer to bury them — cure again. Finish with a high-gloss top coat and cap the free edge so the stars don’t snag.
This design looks like you trapped winter in a jar, and it’s surprisingly flattering. Clear BIAB with a cool white center makes nails look longer and cleaner, especially if you keep the stars sparse. Silver stars work on every skin tone because they reflect cool light instead of relying on warm pigment. I like this for people who hate heavy glitter because the sparkle is concentrated inside the clear layer, not on top.
Skip thisDon’t overfill the clear layer — too thick can feel bulky and takes longer to cure.
Editor's noteUse a pair of tweezers and press each star down for 2-3 seconds so it doesn’t float sideways.
5. Green Tartan Plaid with Red Micro-Rhinestone "Baubles"
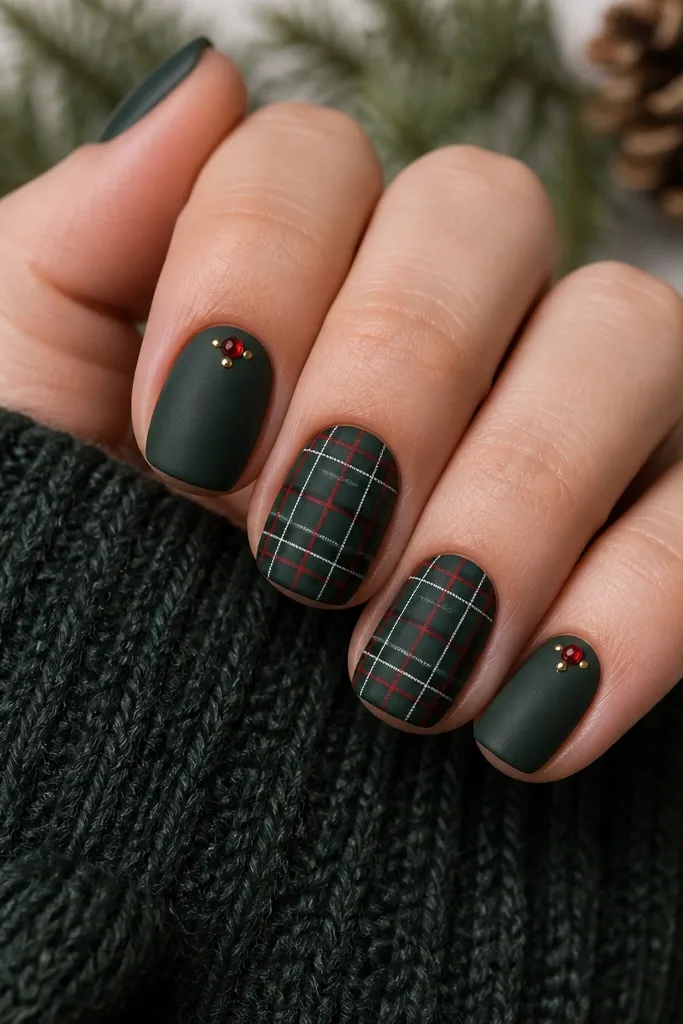
Apply BIAB in a deep green satin gel (or matte then lightly satin with a satin top coat). Cure, then on the plaid nails paint thin intersecting lines: start with black vertical lines, then add white lines, then add red lines, spacing each band about 1 mm. Let each color cure briefly if your gel system needs it, then add a final horizontal pass to complete the tartan. For the bauble nails, place 3-5 red micro-rhinestones in a cluster near the cuticle and add one small gold dot next to the cluster. Seal with top coat, keeping the rhinestone edges fully capped.
Tartan plaid looks festive because it reads like fabric, and satin base makes the lines look stitched. The red micro-rhinestones are tiny on purpose — they add holiday sparkle without looking like a cheap sticker sheet. This set looks best on short squoval because the plaid grid stays proportional. It also flatters hands with wider nail beds because the lines frame the sides instead of stretching across.
Skip thisDon’t flood the plaid with top coat while it’s still wet — it blurs the grid.
Editor's noteUse a 00 liner brush and wipe it on a paper towel so the lines stay hair-thin.
6. Rose Quartz BIAB with Gold Candy Dots and One Red Line
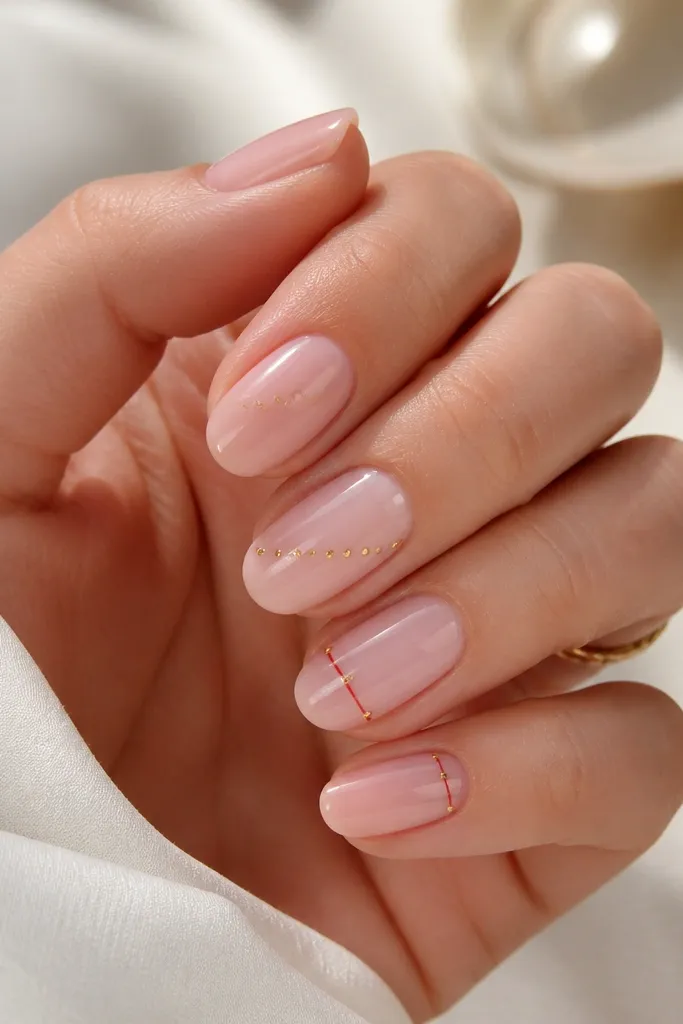
Build BIAB in a rose quartz pink (sheer enough to keep the nail looking natural). Cure and apply a glossy top coat to lock the surface smooth. For the dot nails, use a dotting tool to place gold gel dots in a diagonal — keep them 2-3 dots per nail so it doesn’t look busy. For the line nails, paint one thin red stripe across the center, about 1 mm wide, then add a gold dot at each side of the stripe. Cure, then cap the line with a top coat so it stays crisp.
If you want “Christmas festive” but you don’t want full-on holiday art, this is your lane. The rose quartz base makes the set look wearable even for work, and the gold dots bring that gift-wrap vibe. The thin red line gives you the holiday signal without turning the nails into a sticker collage. This works on short and medium lengths, and it flatters both fair and deep skin because the pink is balanced, not orange.
Skip thisSkip big rhinestones here — the whole point is delicate holiday sparkle.
Editor's noteIf your gold gel looks too thick, thin it slightly with a gel medium so the dots stay rounded.
7. Black Licorice Nails with Red Glossy Bow Strips
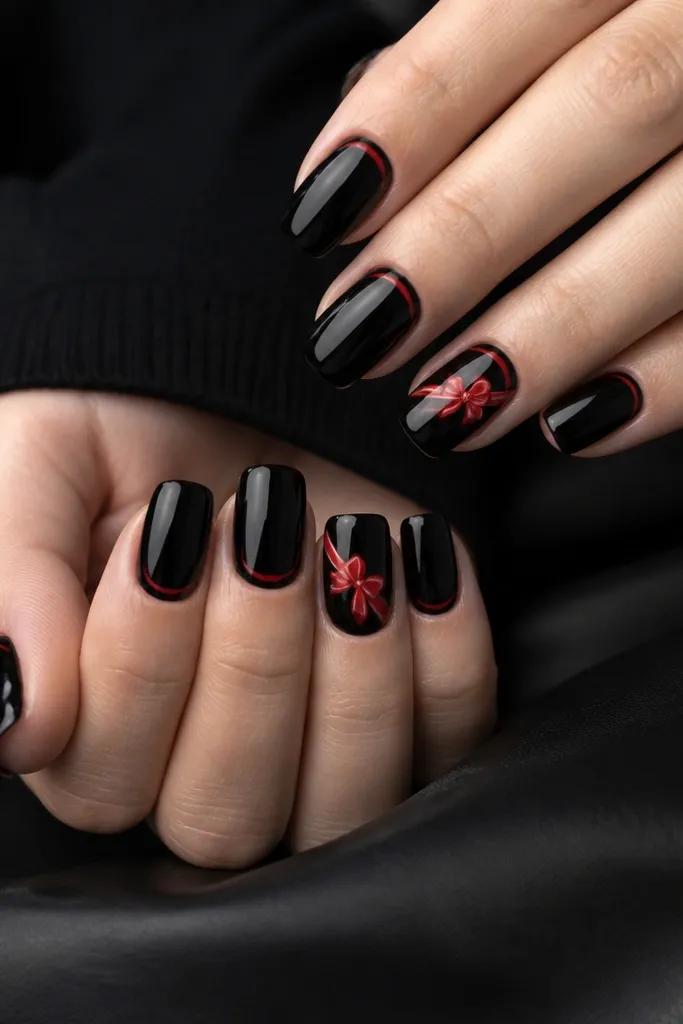
Black nails make Christmas look edgy fast, and the red bow strips add that gift-ribbon energy. The high-gloss black is important — it makes your red look richer instead of muddy. This flatters hands with cool undertones and also looks great with gold jewelry. Keep the bow strips narrow and glossy so the set looks like nail art you’d see in a salon, not a Halloween design with a red twist.
Apply BIAB in deep black, cure, then top coat for a mirror shine. On accent nails, draw two red ribbon strips using a gel liner brush — one strip curves slightly upward and the other mirrors it, leaving a small gap where the bow knot will sit. Add a tiny knot in the center with red gel, then use a micro brush to place a thin white highlight along one edge for dimension. On the non-accent nails, paint a single thin red curve near the cuticle, about 1 mm thick. Cure and cap with top coat, making sure the ribbon edges are sealed.
Use a gel liner brush with a pointed tip and wipe it between strokes so the red line stays clean.
Don’t matte the black — matte makes the red look dull.
8. White Snow Base with Blue Foil Drifts and Tiny Silver Snowflakes
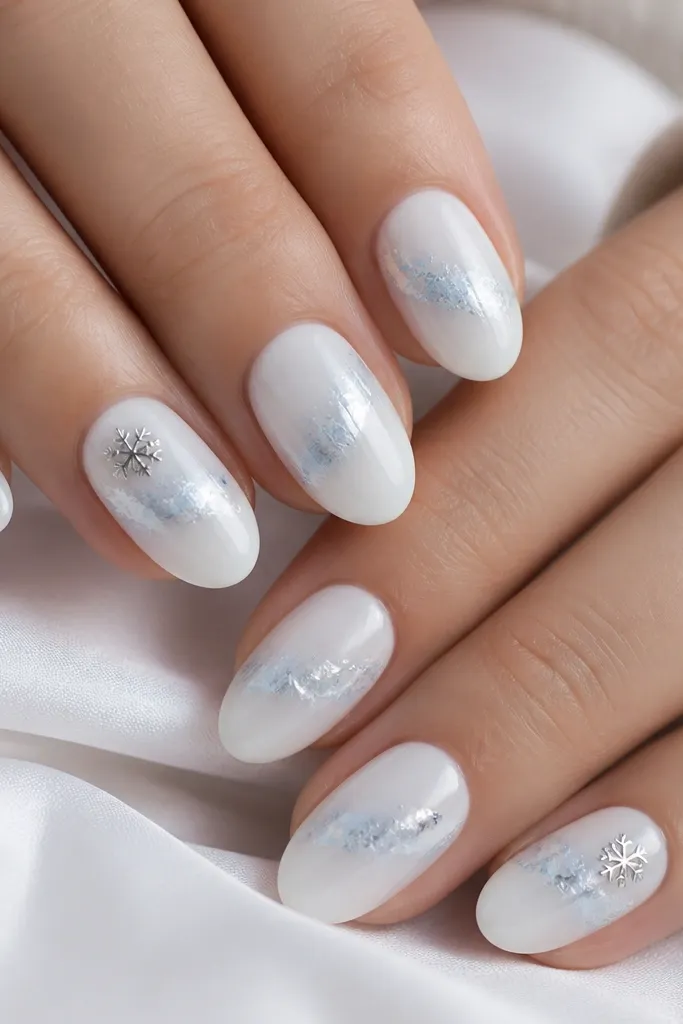
Apply BIAB in an opaque milky white, cure, then lightly buff the surface if needed for smoothness. Place blue foil pieces on top of a tack layer in a curved band across the middle, pressing with a silicone tool and leaving natural gaps like snow texture. Seal with a thin layer of clear gel and cure so the foil doesn’t lift. On the accent nails, add tiny silver snowflake decals using tweezers, then press and seal with top coat. Cap the free edge so the snowflake edges don’t catch.
This set is bright and photo-friendly because the milky white base reflects light instead of looking flat. Blue foil drifts mimic winter sky tones and keep the design from feeling purely “Christmas red and green.” Silver snowflakes at the cuticle level look neat because the art stays small and doesn’t overpower the nail shape. It’s also a good choice for short nails because the foil drift creates a visual stretch without needing long length.
Skip thisDon’t add chunky glitter on top of white — it can look dirty instead of snowy.
Editor's noteKeep the foil band width about 3-4 mm on short nails so it doesn’t swallow the nail.
9. Red Velvet BIAB with Gold Thread Lines and Half-Heart Accent
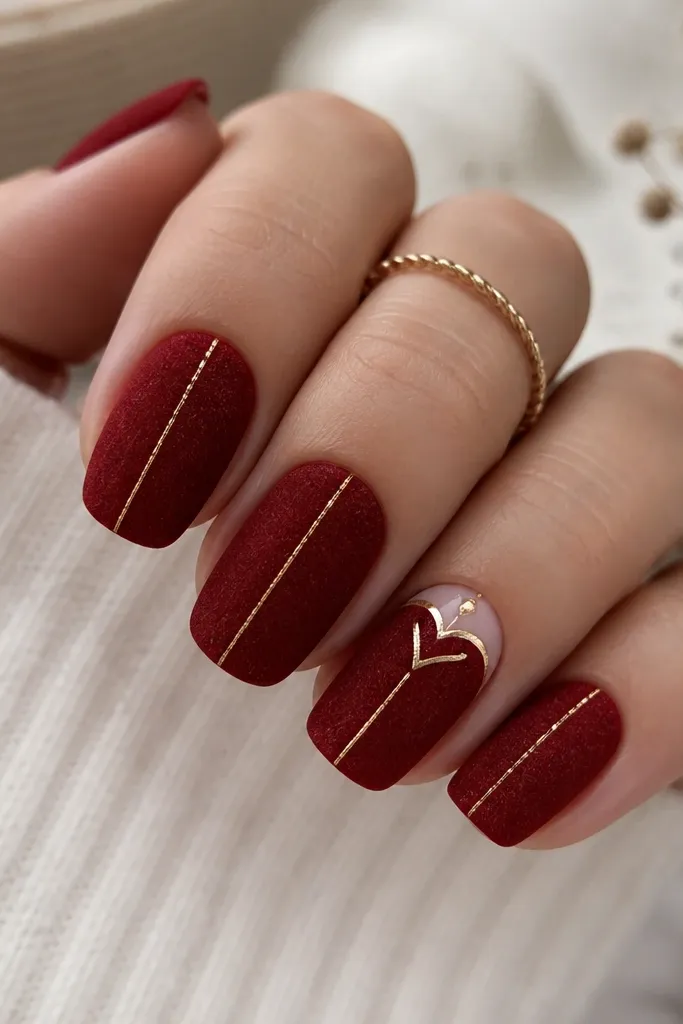
Apply BIAB in deep red and cure fully. Add velvet gel on top over the entire nail surface, then cure so the texture sets. Using a thin liner brush, paint gold gel thread lines from near the center down toward the tip, keeping them spaced about 2 mm apart. On one accent nail, paint a half-heart shape near the cuticle: start with a gold outline, then fill the inner curve with a thin white gel. Cure, then cap only the gold lines lightly — you want to keep the velvet texture on the surrounding red.
Velvet gel is my go-to when I want the set to feel cozy and different from standard glossy Christmas nails. The deep red looks rich without needing chrome, and the gold thread lines give it that “ornament string” vibe. The half-heart accent keeps it festive but still cute, not cheesy. This design flatters medium nail beds and looks great on hands with warmer skin tones because red and gold play nicely together.
Skip thisAvoid full glossy top coat over velvet — it removes the plush texture.
Editor's noteIf your velvet gel looks streaky, use a sponge applicator and tap, don’t swipe.
10. Champagne Nude BIAB with Green Wreath Arc and Pearl Beads
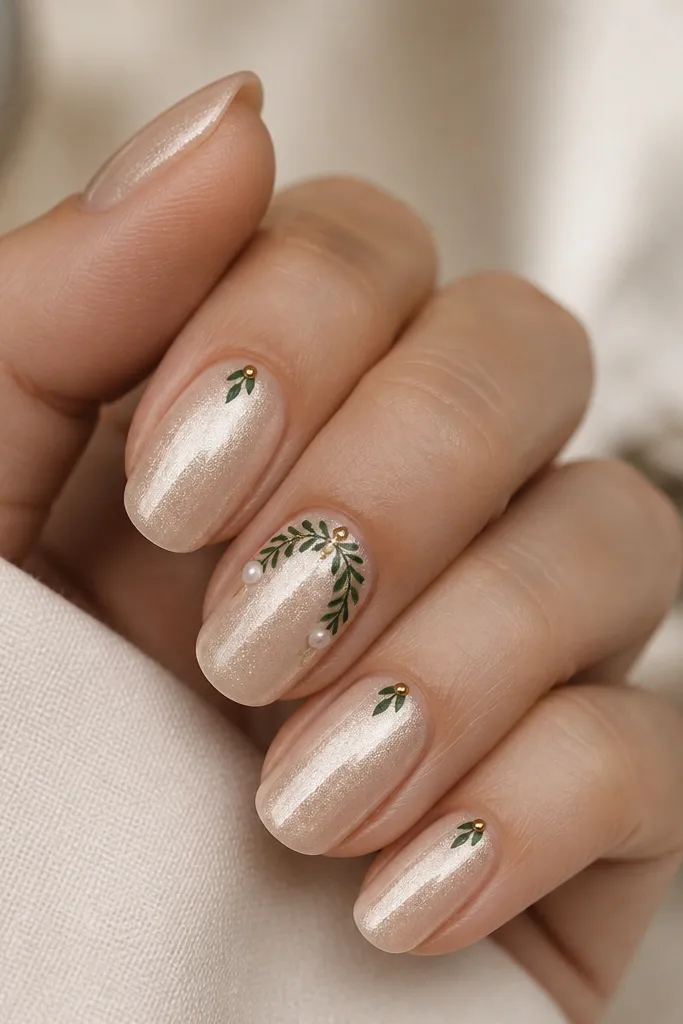
This is the “family dinner” Christmas set — pretty, clean, and still festive. Champagne nude makes the green look like a real holiday wreath instead of a random green stripe, and it suits fair through deep skin because it’s warm and neutral. The wreath arc placement across the upper nail creates a flattering curve that makes fingers look elegant. Pearl beads add a soft holiday feel that doesn’t scream glitter at every angle.
Build BIAB in a champagne nude, cure, then top coat for a smooth gloss. On accent nails, draw a green wreath arc with gel: start near one side of the upper nail, curve across, then stop before the other side so it doesn’t look like a full ring. Add two pearl beads on the arc ends using a gel adhesive and cure. Dot a few tiny gold points inside the wreath with a fine brush. On the other nails, place a single small green leaf near the cuticle and one gold dot beside it, then seal with top coat, making sure pearl bases are fully capped.
Choose pearls in the 1.0-1.3 mm range so they look like ornaments, not chunky beads.
Don’t place pearls at the very edge of the nail — they lift when you bump your fingers.



