
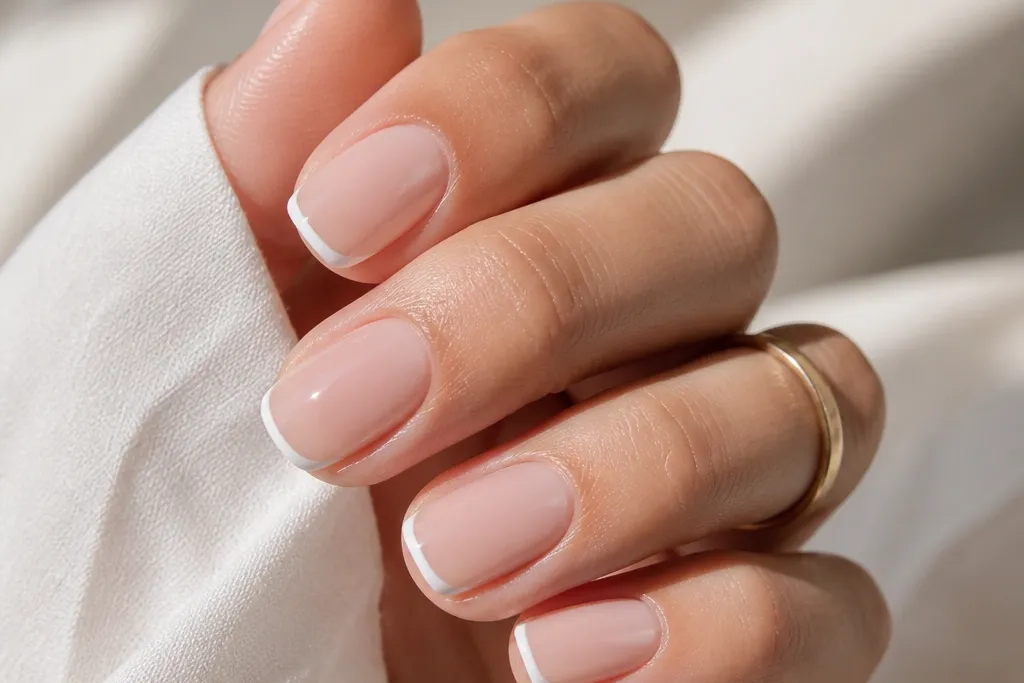
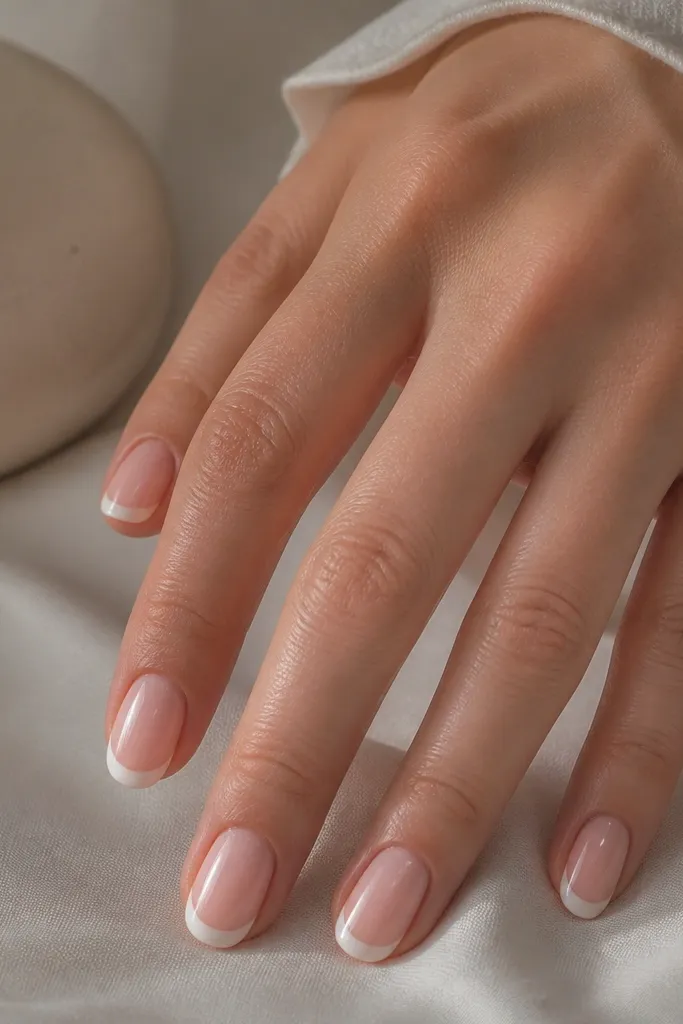
1. Classic sheer pink + opaque micro French
This is the French I reach for when I want “always works” nails. The milky sheer pink BIAB makes the nail look healthy, and the opaque micro tip keeps it from looking see-through or grown out. I like this on medium to short nail beds because the thin tip adds length without making the nail look wider. It also flatters warm and neutral skin tones since the pink isn’t too cool or too rosy. For everyday wear, it reads clean, not flashy.
Start by curing a sheer milky pink BIAB base thinly — you want a smooth foundation, not bulk. Build your apex with a slightly thicker layer at the center, then level so the surface is flat where you’ll paint. Paint a micro French line using a fine liner brush, keeping the line about 1/3 of the nail width at the sides. Cap just the tip edge with a thin layer of BIAB or top coat so the white doesn’t lift at the free edge. Finish with a glossy top coat and wipe the tacky layer clean if your system needs it.
Editor's noteUse a liner brush you can control at a 45-degree angle; tiny wrist movements keep the smile line even.
Skip thisDon’t make the tip too thick — chunky micro French looks bulky and cheap fast.
2. Soft off-white French with a higher smile line
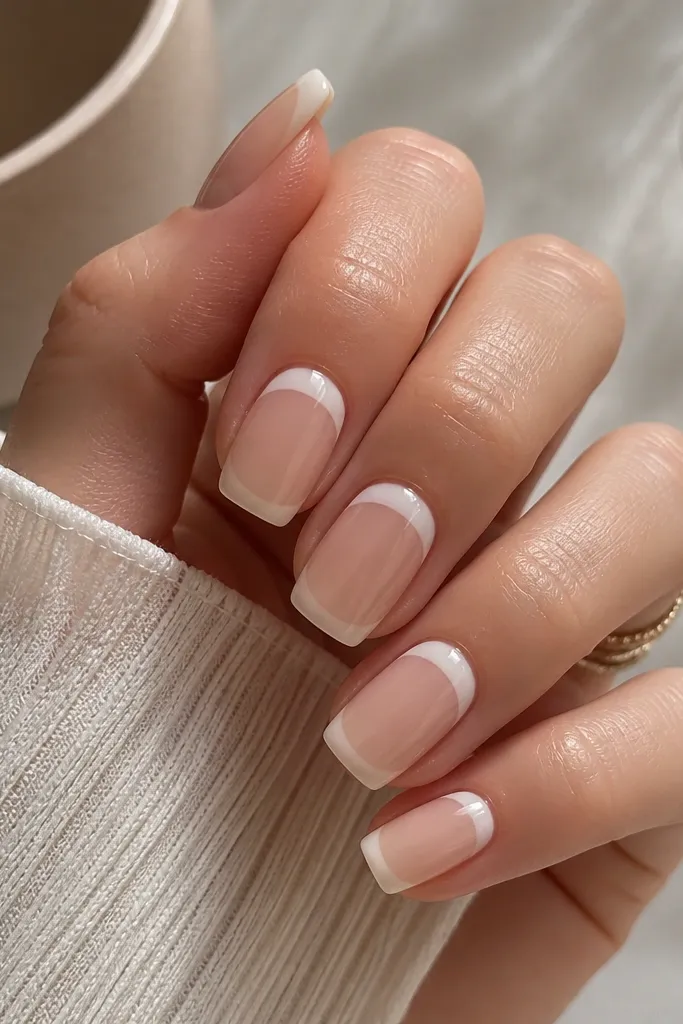
Higher smile lines are my go-to when nails feel visually “wide” on me. Off-white is softer than bright white, so it looks timeless instead of stark. This set flatters people with broader nail beds because the line sits higher and narrows the visible tip area. On cooler skin tones, the creamy white prevents the manicure from looking icy or harsh. It’s also great for work because it reads polished from a distance.
Apply a sheer nude BIAB base and cure fully. Sculpt BIAB slightly thicker at the center for strength, then level and file so the free edge is smooth. Mark your smile line lightly with the brush edge, then paint an off-white band that sits higher than you think — aim for a line that’s roughly 2-3 mm below the nail’s natural curve. Keep the sides clean by dragging the brush from center outward in one steady motion. Seal everything with a glossy top coat, then clean under the free edge with a small brush after curing.
If your off-white looks too opaque, thin it with a drop of gel medium so it stays creamy, not chalky.
Don’t let the smile line drop too low — it makes the nails look shorter and wider.
3. French fade (ombre) on the tips
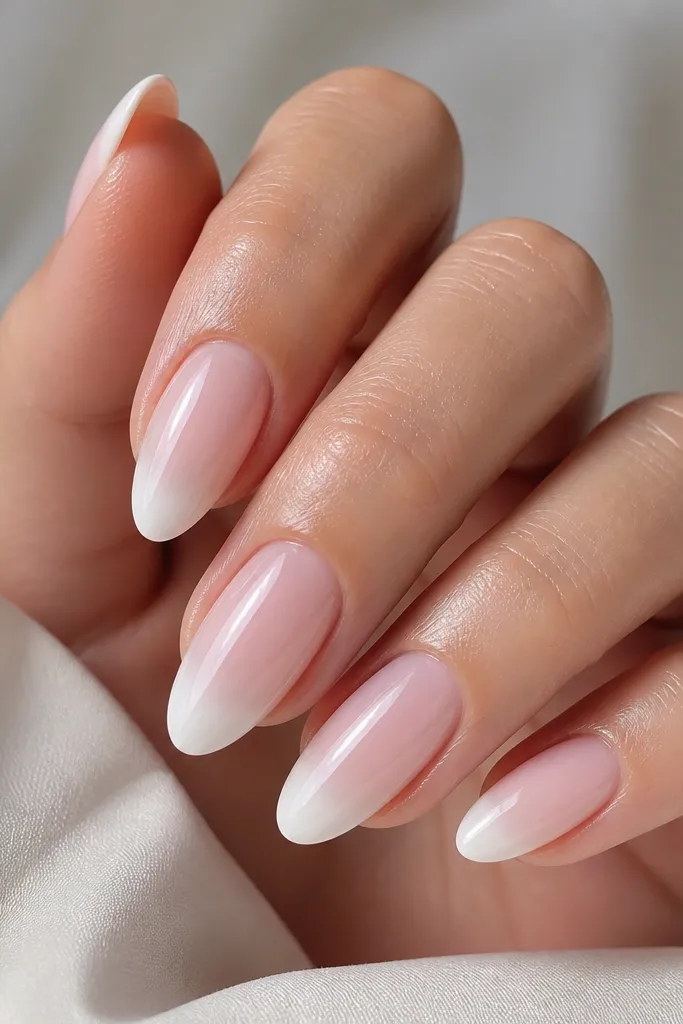
This is French that looks gentle even as it grows out. Instead of a hard smile line, you get a fade that hides small imperfections and keeps the set looking soft. The fade flatters hands with visible nail ridges because the gradient draws the eye away from straight-line flaws. I wear this when I want something timeless but not overly sharp. It also looks gorgeous on longer almond nails because the fade has room to blend.
Start with a sheer pink BIAB base and cure. Sculpt and level, then file the tip area so it’s smooth where you’ll blend color. Paint opaque white at the very free edge — just a band — then use a small makeup sponge or a dense blending brush to soften the top of that white into the nude. Work in thin layers, curing between each blend so the gradient stays smooth. Finish with top coat, and make sure the fade is sealed along the sidewalls for wear.
Blend with light pressure; heavy pressure lifts pigment and creates muddy edges.
Don’t skip curing between blends — one thick layer makes the gradient patchy.
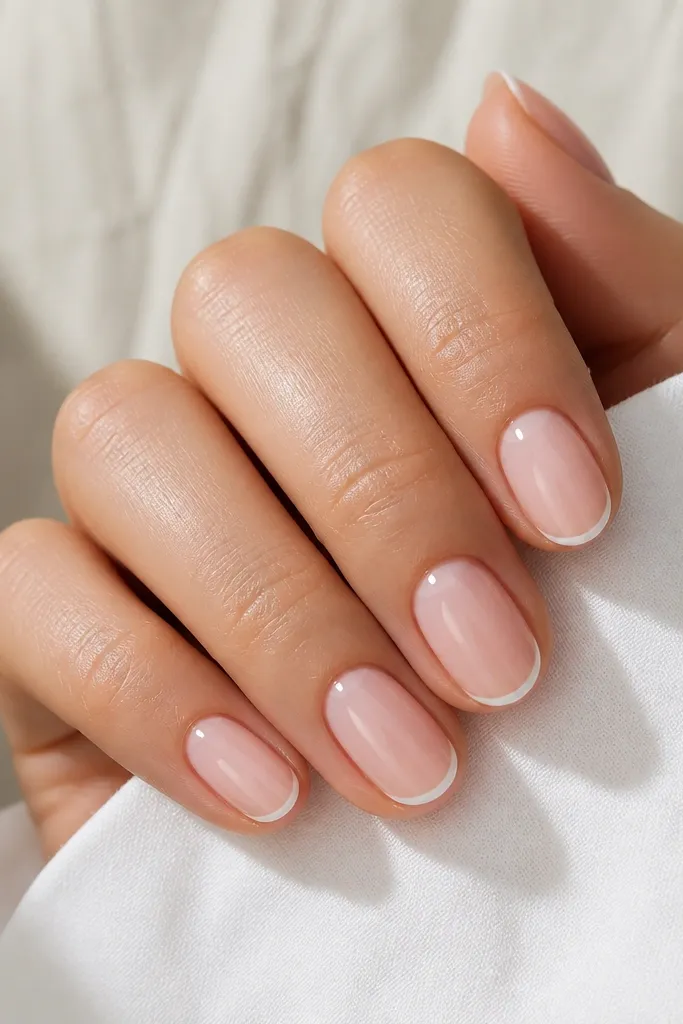
4. Reverse French (negative space) with BIAB structure
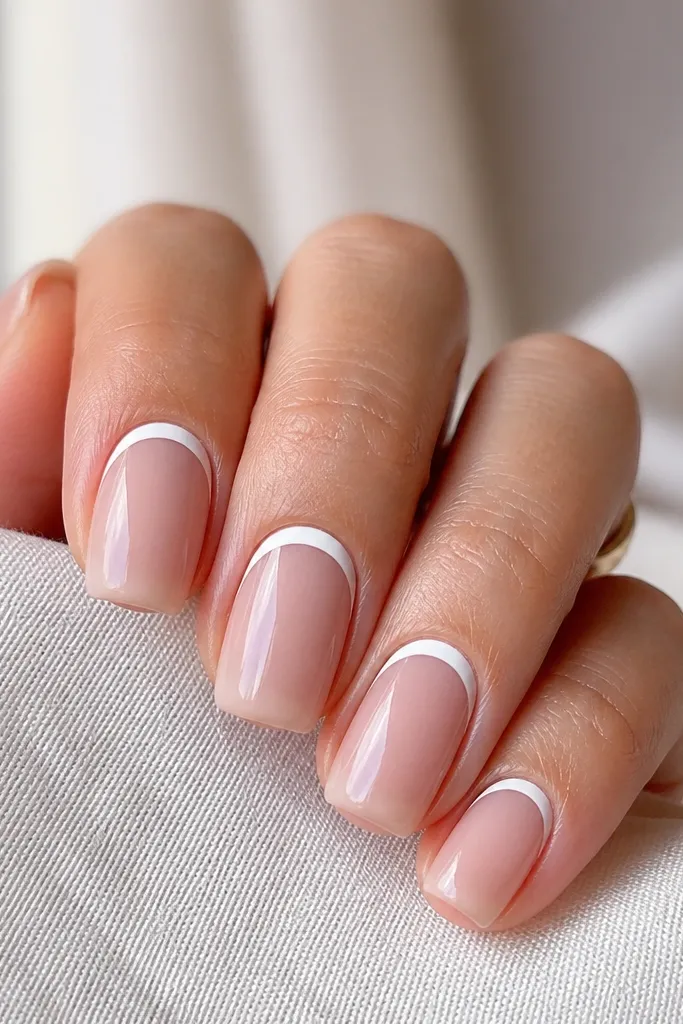
Reverse French looks fresh while still feeling classic when you keep it minimal. The negative space makes the set lighter, and the white cuticle line gives a tidy, structured look. This flatters short nail beds because the visual “length” comes from the center negative space, not the free edge. I also like it on hands with dry cuticles because the BIAB structure smooths the area before you paint. It’s timeless if you keep the reverse line thin and the base sheer.
Build your BIAB base first and cure — I keep it slightly thicker at the center so the nail doesn’t look flat near the cuticle. Gently push back and prep, then file so the cuticle area is smooth. Paint a thin off-white reverse French line right along the cuticle curve, leaving a clear negative-space center. Keep the line consistent in thickness across nails; use a guide by holding your brush at the same angle each time. Cure, then apply top coat carefully around the cuticle edge so the line doesn’t lift.
Use tape as a temporary guard for the negative space if your cuticle curve is hard to match freehand.
Don’t make the reverse line thick — thick cuticle French looks heavy and dated.
5. French with micro bow detail on the ring finger
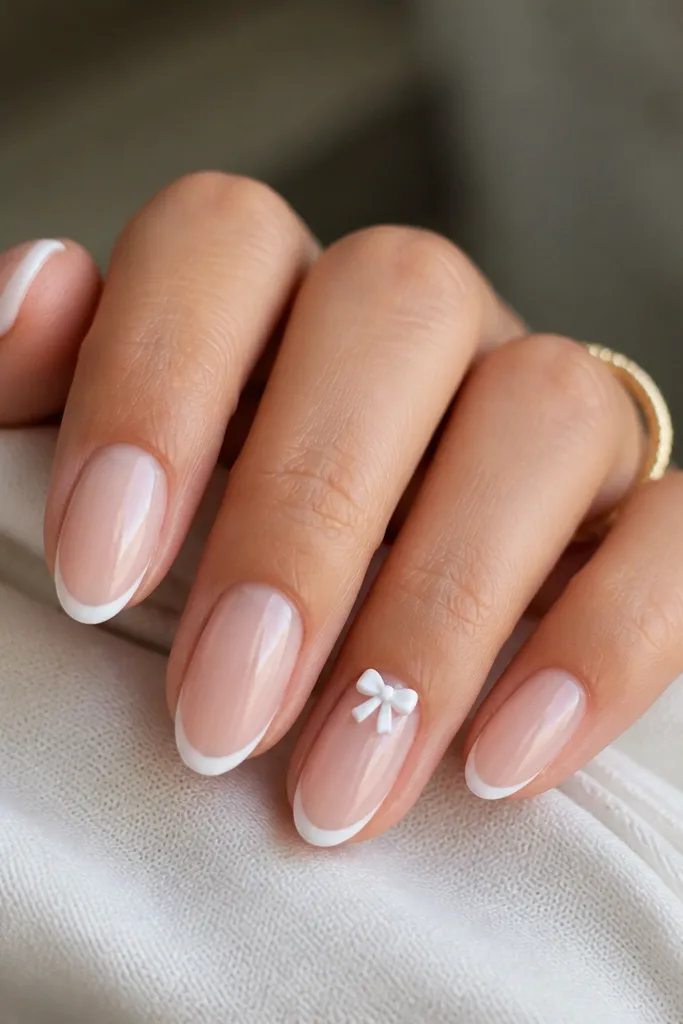
This is the only “cute” French I keep in my rotation because the bow is small and placed like jewelry. The base French stays timeless and the bow detail gives personality without turning the set into a theme. It flatters hands that look better with small accents — if you’re petite, the micro scale looks right. The bow also looks great on medium skin tones because the white pops cleanly. Keep the bow on one finger and the rest plain for a balanced look.
Do your classic sheer pink BIAB base and micro French tips first, then cure and top coat lightly. On the ring finger, place a tiny 3D bow charm with gel glue near the cuticle — not centered on the nail, slightly off to the side so it looks intentional. Cap the bow with a thin layer of clear BIAB so it feels smooth when you run your finger over it. Cure again, then finish with full glossy top coat on all nails, keeping the bow edges sealed. Clean the sides with a lint-free wipe and alcohol if your system requires it.
Editor's noteIf the bow catches fabric, buff it lightly after capping so it sits flat under top coat.
Skip thisDon’t put bow details on every nail — it stops reading as timeless French fast.
6. Double French with a thin gold inner line
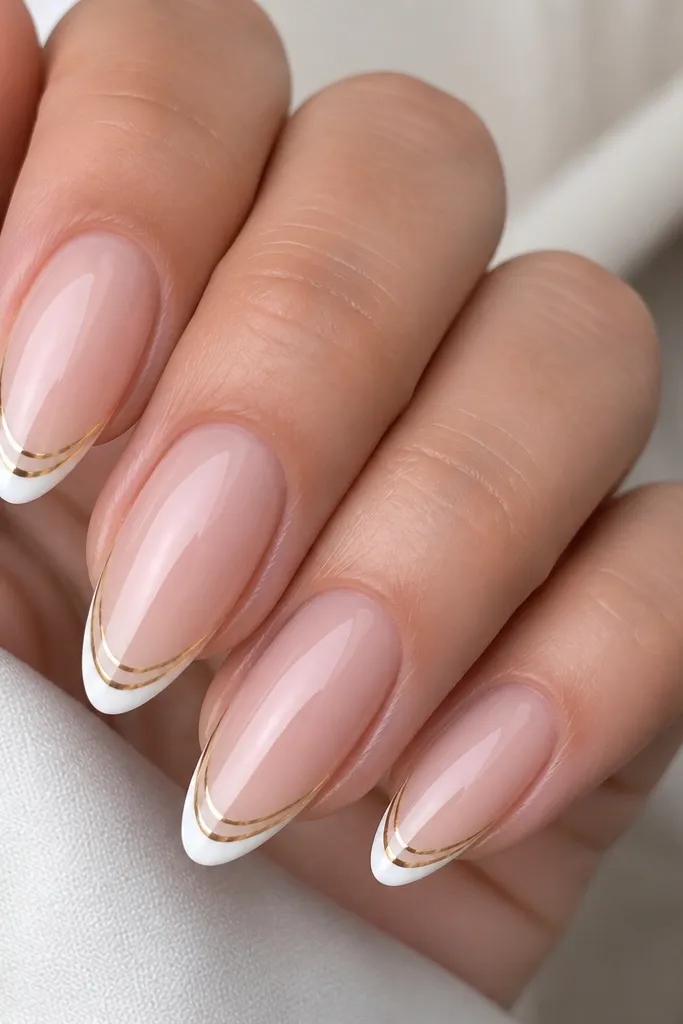
Gold inside the French makes it look dressed up without turning into a full glitter set. The white stays classic, and the thin gold line adds warmth, especially on neutral and olive skin tones. I like this for dinners and events because it photographs well yet still looks refined in real life. The trick is keeping the gold line thinner than the white so it reads like a highlight, not a second manicure. When you do it right, it feels timeless, not trendy.
Start with a sheer nude BIAB base and cure. Sculpt and level, then paint a classic white French tip as your outer line. Right after curing, apply a micro amount of gold striping gel or place gold foil in a thin band inside the white — about 1/2 the width of the white line. Press gently with a flat tool, then cure fully. Seal with a glossy top coat, and pay attention to the sidewalls so the gold doesn’t snag.
Editor's noteUse striping gel with a liner brush if foil lifts; it gives you a clean, straight hairline.
Skip thisDon’t let the gold line drift — uneven spacing makes the set look DIY in bad lighting.
7. French tip with pearlized white shimmer
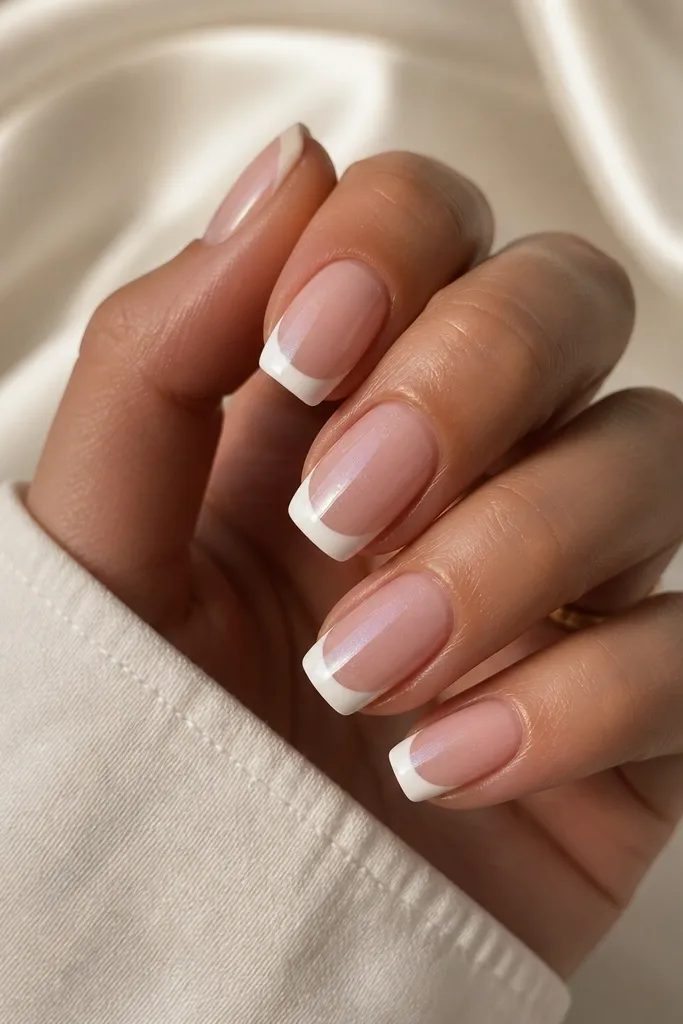
Pearlized white is my favorite upgrade when you want “timeless” but not boring. Under daylight it looks like a classic French; under warm indoor light it turns softly luminous. This flatters all skin tones because it’s not a stark pure white, it’s a white-with-dimension. It also looks great on nails that have a bit of natural ridging since the shimmer hides tiny unevenness. If you want something that feels polished for months, this one holds up.
Apply your sheer pink BIAB base and cure. Sculpt at the center and level so the tip surface is smooth and ready for color. Paint the French tips with a pearlized white gel — keep it opaque at the edge and smooth toward the smile line. Cure, then wipe tacky if needed. Finish with glossy top coat, and if your pearl gel is less glossy on its own, add one extra thin top coat layer for depth.
Editor's noteTest the pearl white on a nail tip first; some brands look icy, others look creamy.
Skip thisDon’t add chunky glitter on top — it turns a pearl French into a holiday look.
8. Matte base with glossy French tips
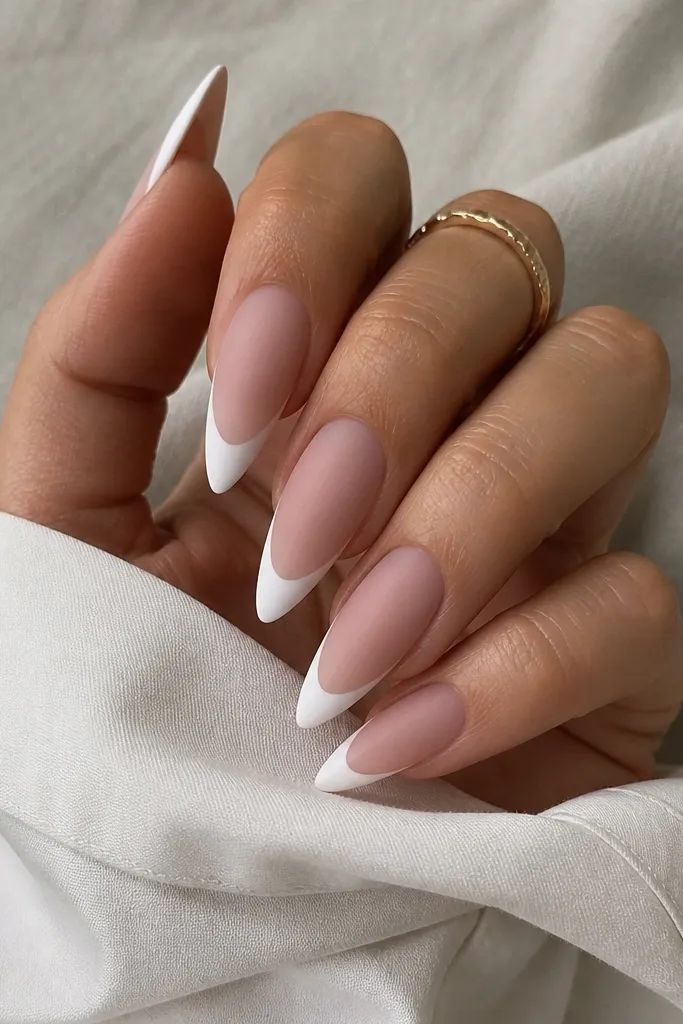
This contrast makes a French set look editorial while still staying clean. The matte base hides small texture and makes the nails look soft, while the glossy white tip looks sharp and intentional. I like it for people who get bored of mirror shine and want something different without adding art. This flatters hands with dry skin because the matte finish makes the nail look smoother overall. It also makes the French line look cleaner because gloss reflects light along the tip edge.
Build and cure your sheer nude BIAB base, then sculpt and level. Apply a matte top coat on the entire nail base area — avoid painting it over the tip where your glossy French will go. Paint opaque white French tips after the matte top coat cures, then cap and cure. Finally, apply glossy top coat only on the French tip zone and edges, keeping the rest matte. Clean around the cuticle with a small brush so the matte line stays crisp.
Use a matte top coat that doesn’t streak; cheap matte coats can look patchy on BIAB.
Don’t matte the whole nail after you paint white — it kills the contrast.
9. French with tiny crystal line at the tip edge
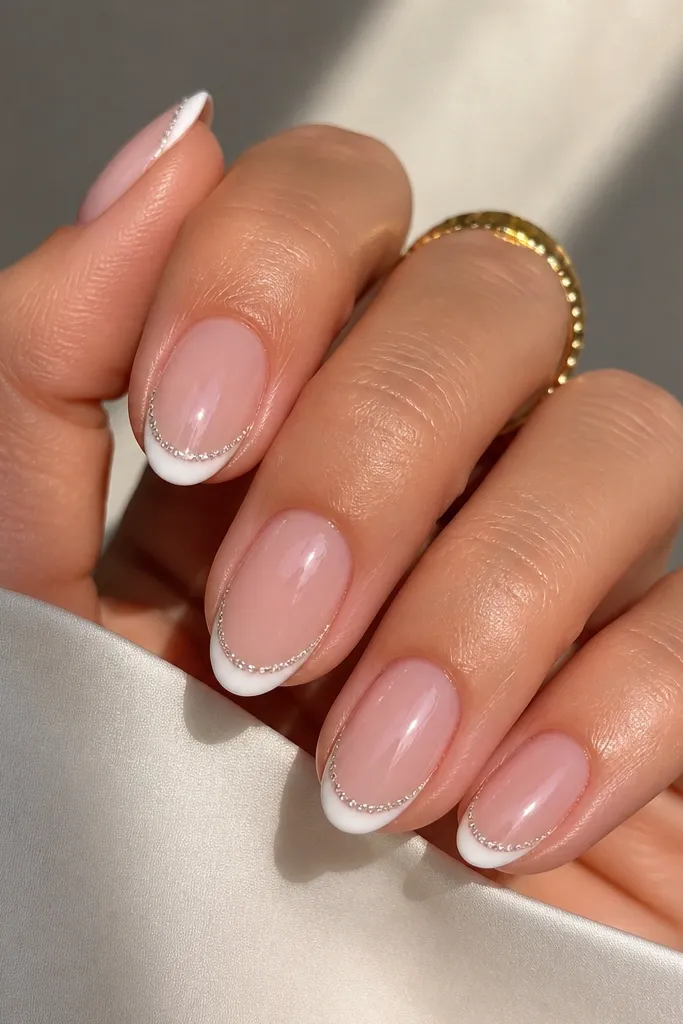
A micro crystal line turns standard French into something special without losing the timeless structure. The crystals sit at the free edge, so they catch light when you move — but they stay subtle because the row is thin. This flatters smaller hands and shorter nails since the accent is concentrated at the tip, not spread across the nail. It also works well for weddings because it reads like “jewelry,” not “glitter.” The key is using tiny stones, not big rhinestones.
Start with your sheer pink BIAB base and cure, then sculpt and level. Paint classic opaque white French tips and cure. Place tiny clear crystals along the very edge of the white using crystal gel or a small amount of thick clear gel glue. Space them evenly and keep the row straight — I check alignment by sighting from the side. Cure, then cap with clear BIAB or thick top coat so the crystals are sealed and won’t snag.
Editor's noteIf crystals spin on the gel, wait 15-20 seconds after placing them so the gel grabs before curing.
Skip thisDon’t use big stones — they make the French look costume-heavy.
10. Half-moon French (cuticle) with tiny white tip
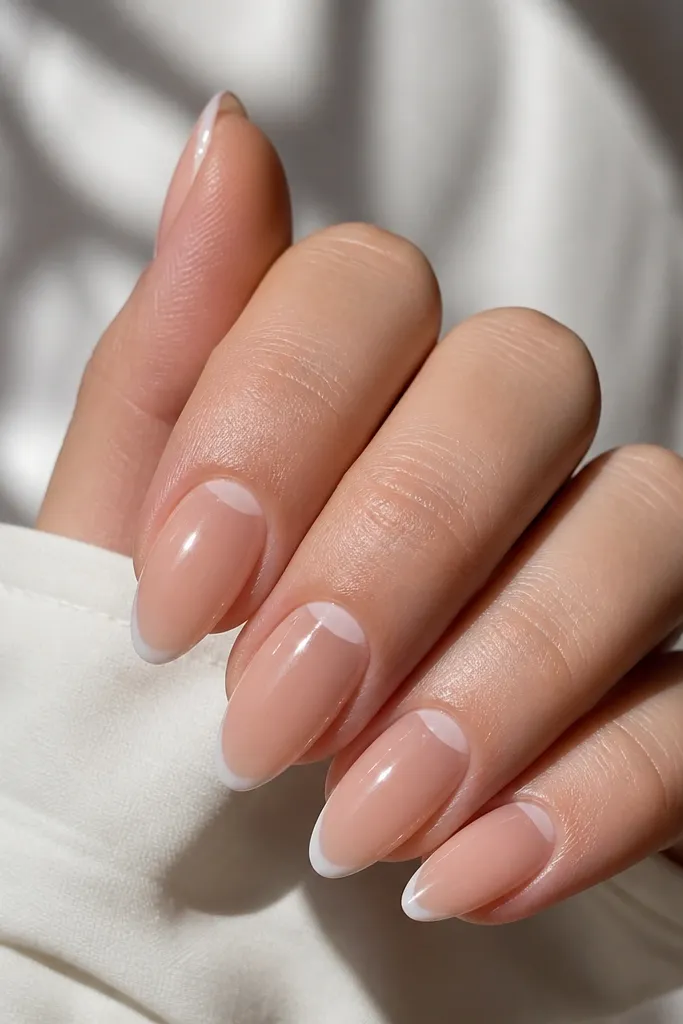
This design is timeless because it splits the French idea into two small, clean anchors. The half-moon at the cuticle brings attention upward, and the tiny free-edge accent keeps the look balanced. I love it on shorter nails because it keeps the nail from looking “cut off” by a wide tip. It also flatters hands that have uneven nail growth since the accent areas are smaller and easier to keep symmetrical. If you want something that feels intentional but not loud, this is it.
Apply sheer nude BIAB base and cure. Sculpt and level, then file the cuticle area smooth. Paint a thin off-white half-moon along the cuticle curve, leaving the center sheer. After curing, paint a tiny mini French at the free edge — keep it narrow and centered. Seal with glossy top coat, and cap the half-moon edge so it stays crisp through wear.
Editor's noteUse a dotting tool to place the starting and ending points of the half-moon, then connect with your liner brush.
Skip thisDon’t make the half-moon too wide — it can swallow the nail bed.
11. French with sheer baby pink tip overlay
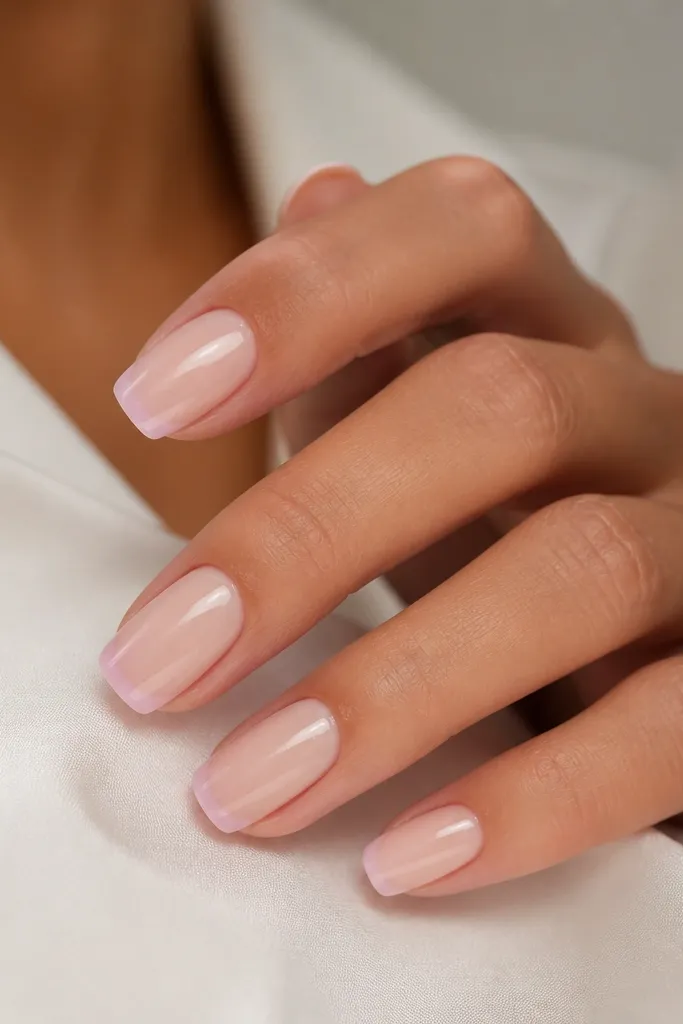
This is for the days you want “French” but hate harsh white. The baby pink overlay makes the tip look like a natural blush, and it still reads as a French because the tip boundary is clear. It’s flattering on every skin tone because it’s close to the nail’s own color family. I wear this when my hands look dry and I want the manicure to look gentle, not crisp. It also helps hide minor staining since the pink overlay is forgiving.
Start with a sheer nude BIAB base and cure. Sculpt and level the nail, then paint a thin opaque white base at the free edge — just enough to create the French boundary. Cure, then apply a sheer baby pink gel wash over the tip area, keeping the center slightly lighter so it looks blended. Use a thin brush to smooth the boundary so it doesn’t look like a sticker line. Finish with glossy top coat and cap the very edge of the tip.
Build the pink overlay in two thin coats so it stays translucent instead of milky.
Don’t use a fully opaque baby pink — you lose the airy French effect.
12. French with negative-space diagonal accent
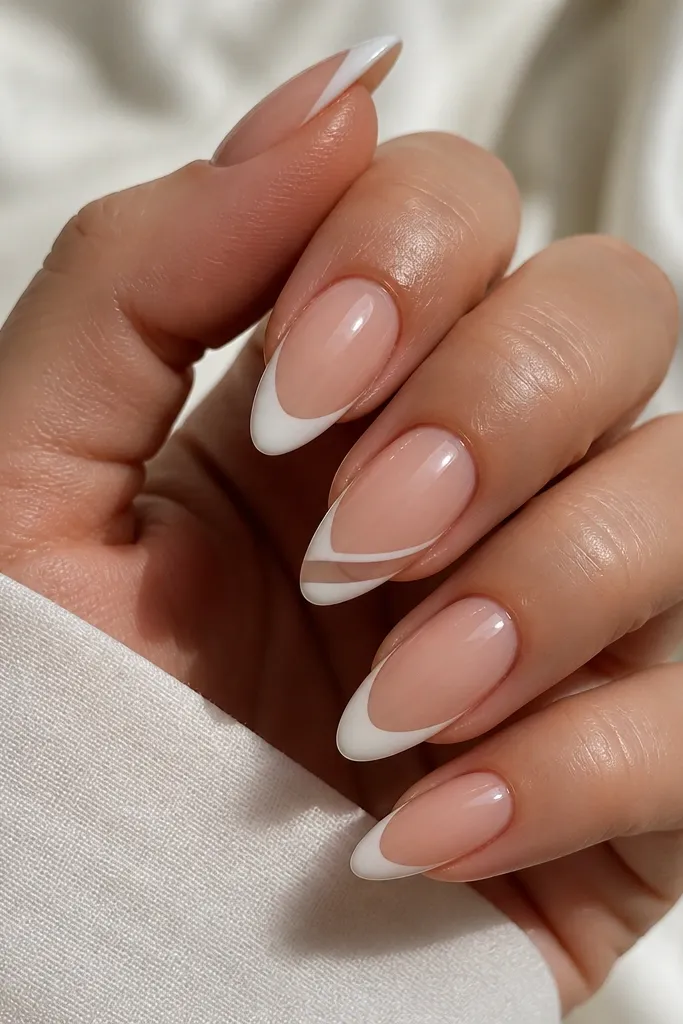
Diagonal negative space is subtle drama, and it still feels timeless because the base French is classic. The clear strip breaks up the white so it doesn’t look blocky, especially on wider nail beds. This design flatters hands with longer fingers because the diagonal line looks clean and intentional. It also hides slight asymmetry — if your smile line isn’t perfectly matched, the diagonal window draws the eye away. I keep this to one or two accent nails so it stays sophisticated.
Do a sheer nude BIAB base and sculpt, then paint classic white French tips on all nails. On the accent nails, leave a narrow diagonal gap by placing a tiny strip of flexible stencil tape along the diagonal before you paint the white. After curing, remove the tape so you get a crisp clear window. Clean the edges with a micro brush dipped in gel cleanser, then cap with top coat. Finish with full glossy top coat on every nail.
Editor's notePress stencil tape down with a flat silicone tool so the edge stays sharp — no bleeding.
Skip thisDon’t make the diagonal window too wide — then it looks like damage instead of design.
13. Thin French + floating half pearl at the sidewall
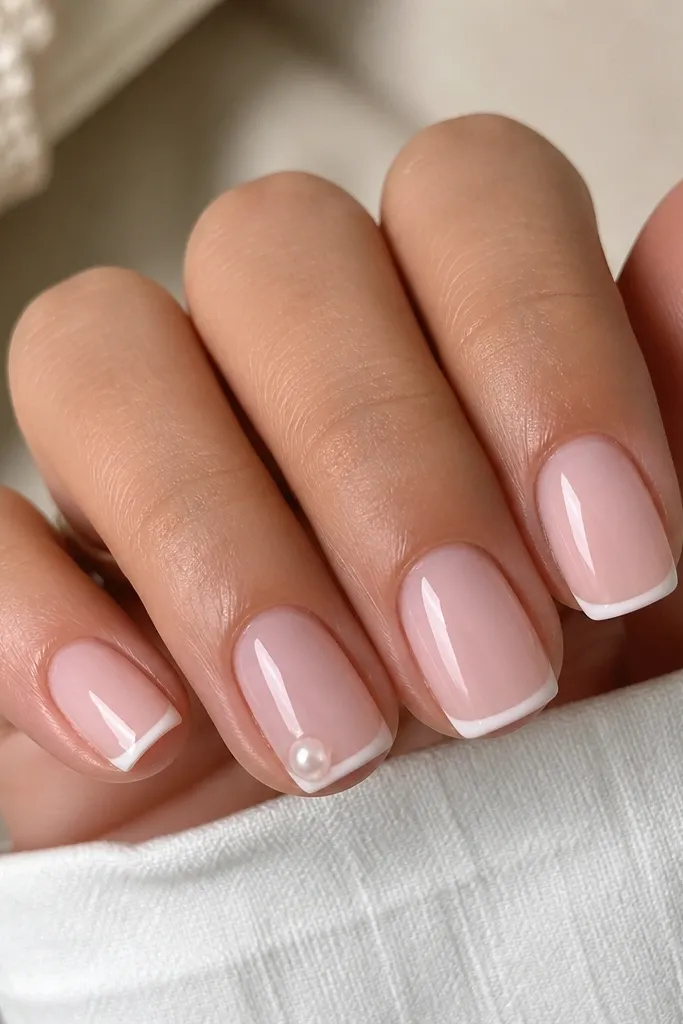
This is a tiny accessory trick that makes a simple French look styled. The thin French keeps everything classic, and one half pearl adds an elegant point of light. I like this placement near the sidewall because it elongates the nail visually and doesn’t crowd the cuticle. It flatters medium to deep skin tones because the pearl looks bright without being overly white. For events, it reads “tasteful jewelry,” not “kid’s craft.”
Apply sheer pink BIAB base and cure, then sculpt and level. Paint a thin white French tip and cure, keeping the smile line clean and narrow. On the accent nail, add a small dot of clear gel near the sidewall at the tip area. Place one half pearl so it sits slightly above the gel surface, then cap it with clear BIAB to lock it in. Cure fully, then apply glossy top coat over the entire nail, smoothing around the pearl so it doesn’t catch on fabric.
Use a gel that self-levels a bit; it helps the pearl look like it’s floating under the top coat.
Don’t use a whole pearl if your nail is short — it can look bulky at the sidewall.
14. French tip with micro line art in white (one nail)
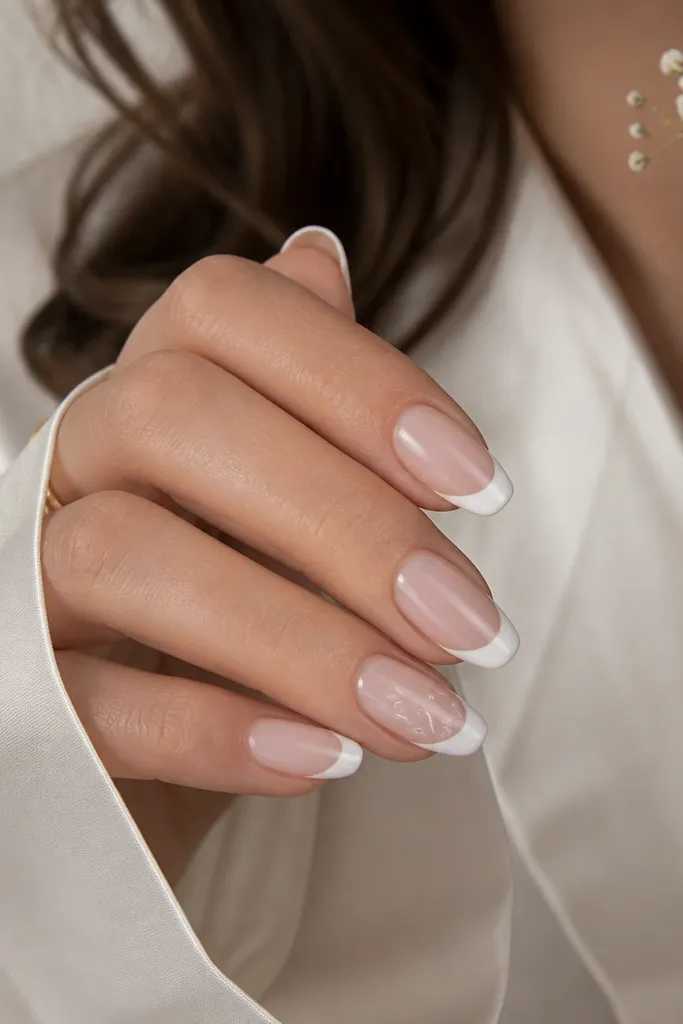
Micro line art keeps French timeless because it’s still mostly clean negative space. The line art is white-on-white, so it reads subtle in real life and only shows up in close-up. I love this for people who want something personal but don’t want rhinestones or glitter. It flatters any nail length because the art sits in a small zone above the tip. The look is also forgiving — if the line isn’t perfect, it still reads like intentional doodle.
Start with your sheer nude BIAB base and cure, then sculpt and level. Paint classic white French tips on all nails and cure. On the accent nail, use a fine liner brush to draw tiny white line art just above the smile line — keep it small, about 1/4 of the nail width. Add a couple of dots for balance, then cure. Finish with glossy top coat, and cap the art lightly so the lines stay crisp and don’t lift.
Editor's notePractice the swirl on a paper nail tip first; once you’re on the real nail, commit to one smooth motion.
Skip thisDon’t go thick with the line art — heavy lines make white-on-white look like a smudge.
15. French with thin rose-gold stripe and clear base
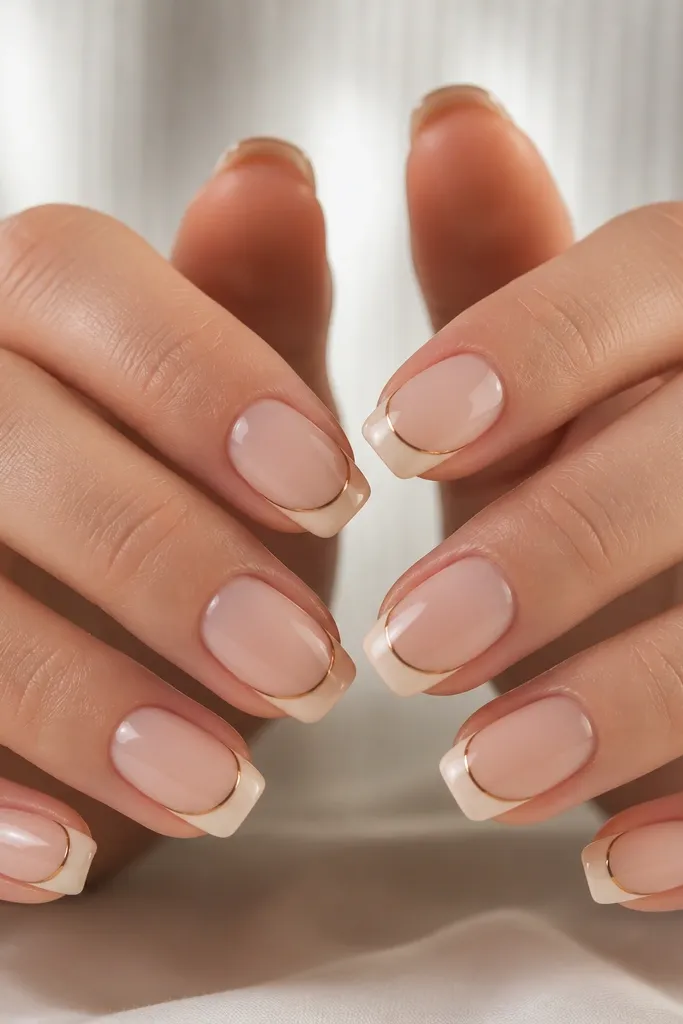
This is French that looks modern but still classic because the stripe is tiny and the base is transparent. I like a clear or near-clear BIAB base when my nails are naturally slender — it makes the whole hand look lighter. The rose-gold stripe adds warmth without going yellow like some gold foils. It flatters both cool and warm skin tones because rose-gold sits in the middle. Wear it to events when you want something refined that still feels wearable daily.
Apply a near-clear BIAB base and cure, then sculpt lightly so the nail stays flexible but strong. File the free edge cleanly. Paint a soft off-white French tip, keeping the tip edge smooth and the smile line tight. Add a thin rose-gold stripe gel right at the smile line — the stripe should be about 0.5 mm wide. Cure and seal with glossy top coat, making sure the stripe is fully covered so it doesn’t snag.
Editor's noteIf your rose-gold looks too dark, use a metallic striping gel instead of foil for a cleaner tone.
Skip thisDon’t place the stripe too low — it turns into a thick band and loses the timeless look.



