1. Classic Thin White French on Nude BIAB
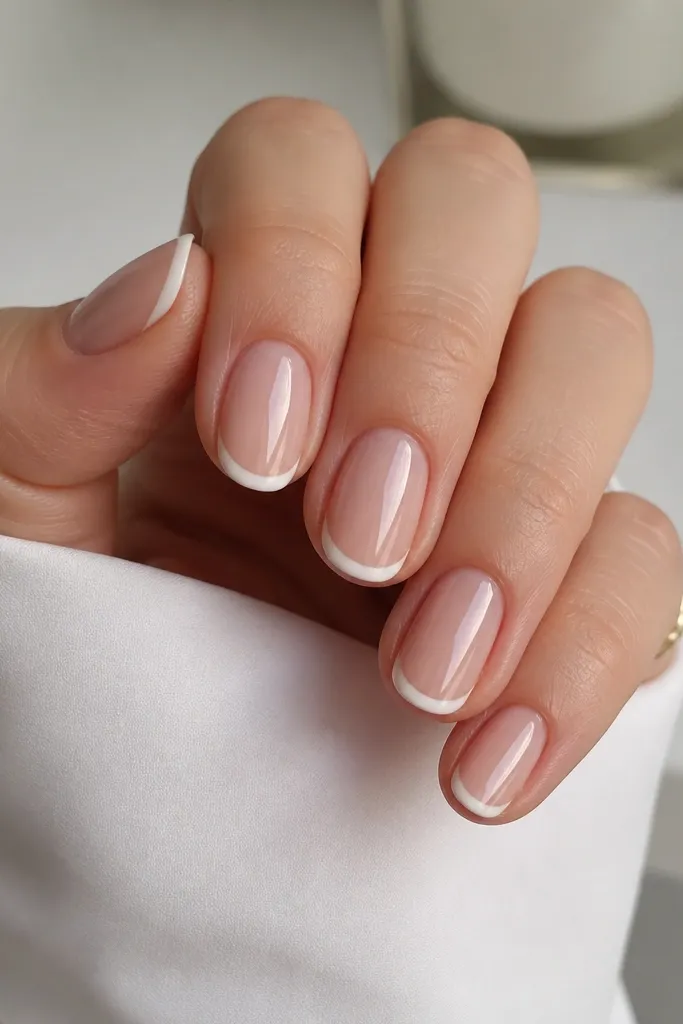
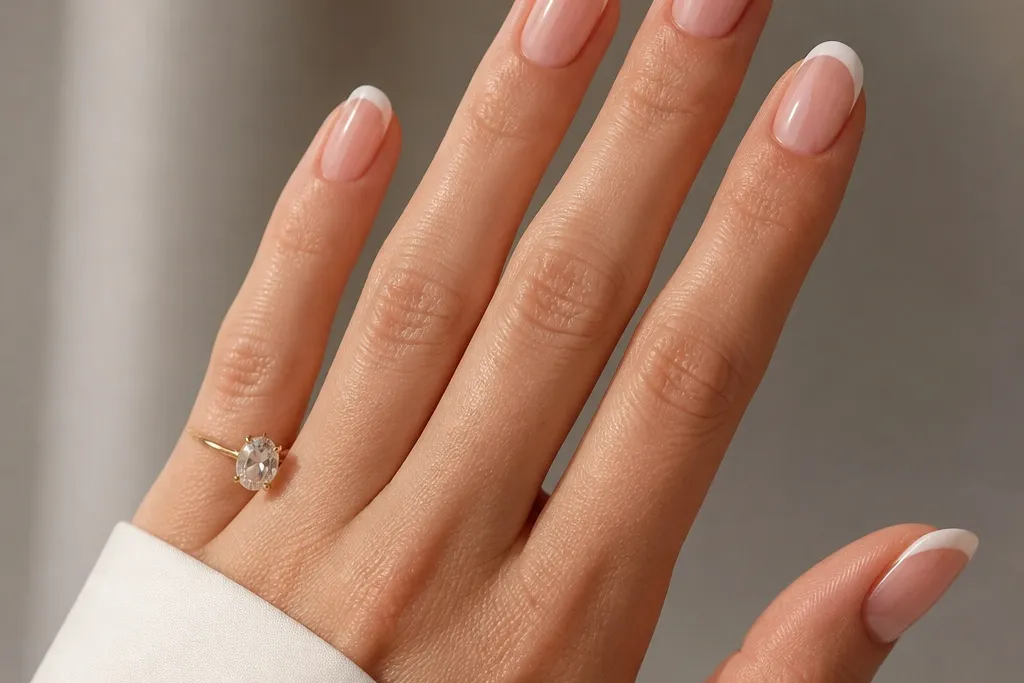
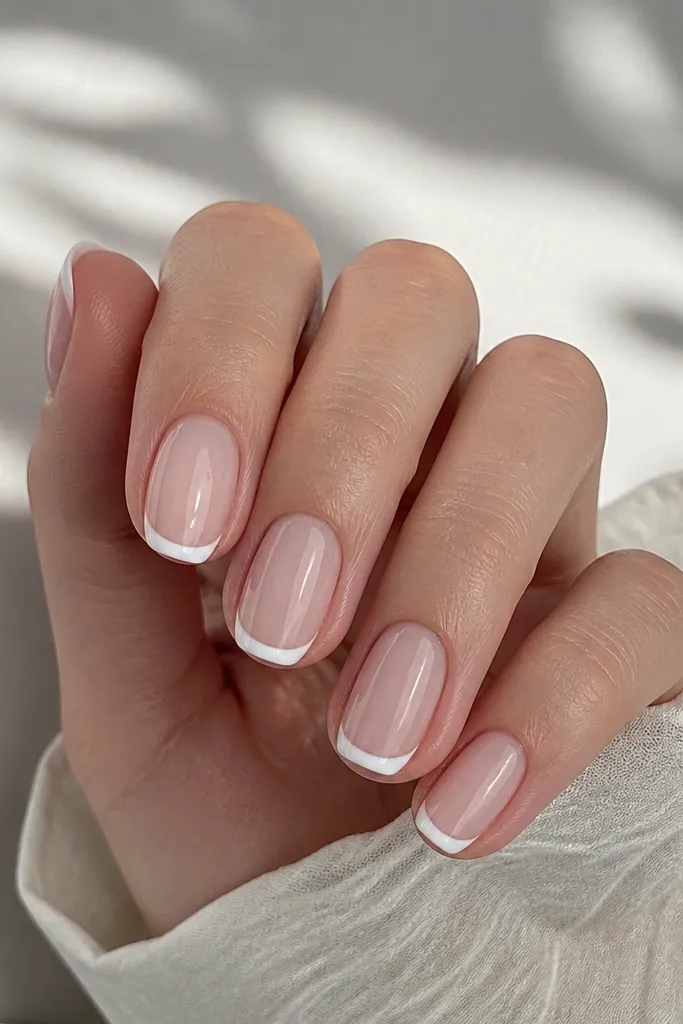
This is the clean French tip look that reads “polished” even when your nails are short. The base is a sheer nude BIAB that matches your skin tone — on fair skin it looks like a pink-beige, and on deeper skin it looks like a warm caramel nude. The white tip is kept thin, about 1.5-2 mm wide, and the smile curve sits close to the free edge so it doesn’t take over. I like this for work days, job interviews, and any time you want your hands to look neat without drawing attention to length. It flatters most nail shapes, especially short ovals and almond stubs, because the narrow line keeps the proportions balanced.
Start by filing your free edge into a soft oval and gently buffing for adhesion. Apply BIAB in a thin layer, cure, then add a second build only if you need more structure, curing each layer. Use a dotting tool to place three tiny dots: one at the center of the tip edge and one on each side about 1-2 mm inward. Then paint the white French from the center dot outward using a liner brush, keeping the line thickness consistent. Finally, cap the tip edge lightly with top coat and cure, then wipe and check the sidewalls for any stray white.
Use a liner brush that has a fine point and clean bristles — you should be able to drag the color without streaks.
Avoid painting a thick band and trying to “clean it up” later — that usually leaves ridges.
2. Micro French with Reverse Smile on Sheer Pink BIAB
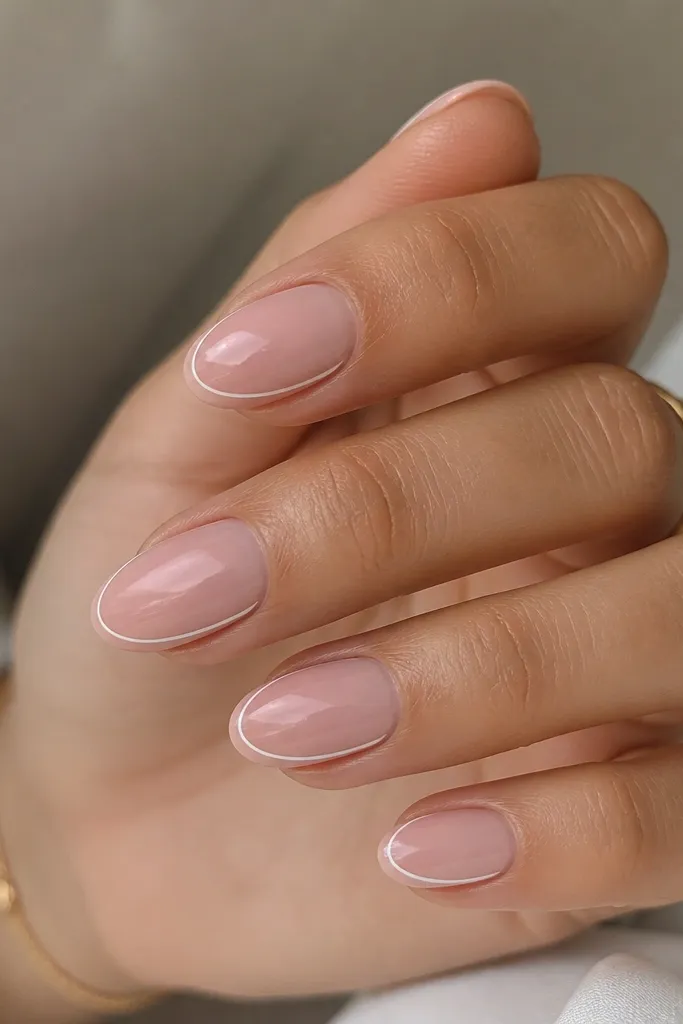
A reverse smile French looks clean because it creates a crisp boundary without a heavy white block. On sheer pink BIAB, the pink glow under the micro line makes your nails look fresh and healthy instead of stark. This style flatters medium almond and squoval shapes because the inner curve visually elongates the nail without making it look longer than you actually are. It’s also great if you don’t love a full white tip — the line feels delicate, not “grown out.” I’ve worn this to events where I needed my nails to match outfits with gold rings and neutral sleeves, and it always photographs well.
Build your sheer pink BIAB first and cure it fully, then lightly buff the surface so the liner sits flat. Mark the center with a dot, then lightly place two more dots where you want the inner curve to start on each side. With white gel and a liner brush, draw a thin inner smile line that sits about 1 mm above the very edge of the nail. Connect the line smoothly to the sidewalls, then cure. Finish with a glossy top coat, making sure the top coat covers the line without pooling on the edges.
If your reverse smile looks shaky, rest your hand on a folded towel and pull the brush in one smooth motion per side.
Don’t leave the inner line too far from the edge — it starts to look like a random stripe instead of a French detail.
3. French Tip Outline Only (White Border on Nude BIAB)
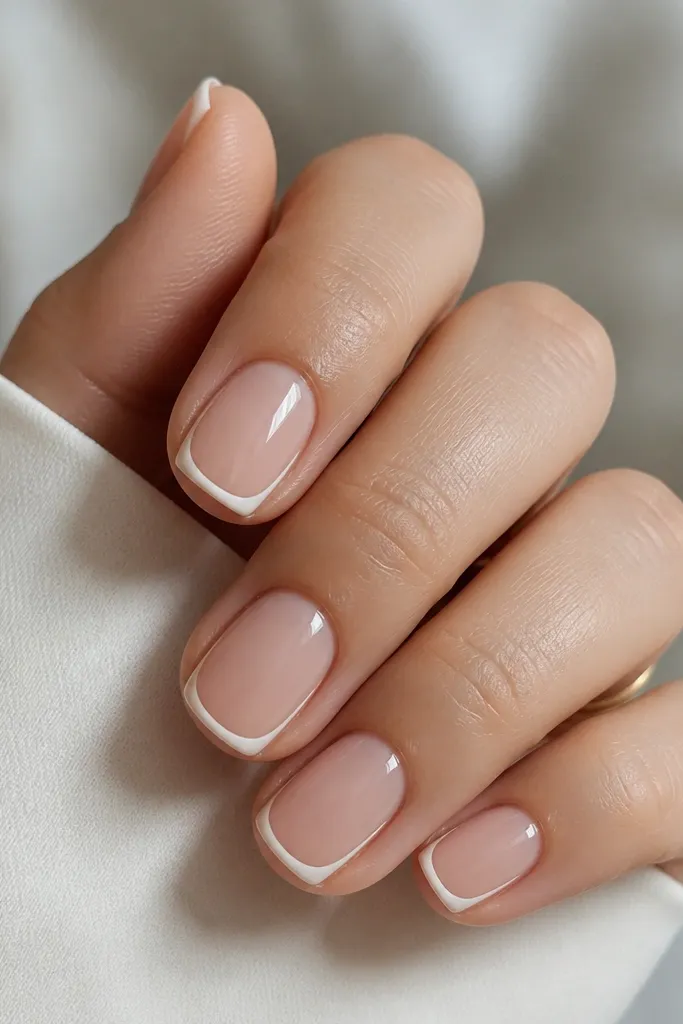
This is the cleanest version of French when you want something modern but still minimal. The tip area stays nude, so your nail bed looks longer and the outline gives structure without a thick color block. I use a sheer nude BIAB that matches my skin so the outline stands out sharply. It flatters straight-to-square nails because the side outline echoes the nail geometry. For people who hate thick white tips or want something that won’t grow out as noticeably, this one is a lifesaver.
Apply nude BIAB, cure, then file the free edge into a neat square with soft corners. Use a thin liner brush and white gel to draw the smile curve first — keep the curve tight and centered. Next, paint two short vertical side lines from the smile curve down toward the tip edge, stopping before the corners get messy. Cure, then top coat over the entire nail, pressing gently near the side lines so the gel doesn’t lift. Check under a light at an angle to confirm there’s no uneven border thickness.
Editor's noteOutline first, then fill nothing — your goal is a sharp border, not a filled tip.
Skip thisAvoid thickening the outline to “make it show” — it stops looking like a clean outline and starts looking like a mistake.
4. Ombre Nude to White Fade French (Clean Gradient)
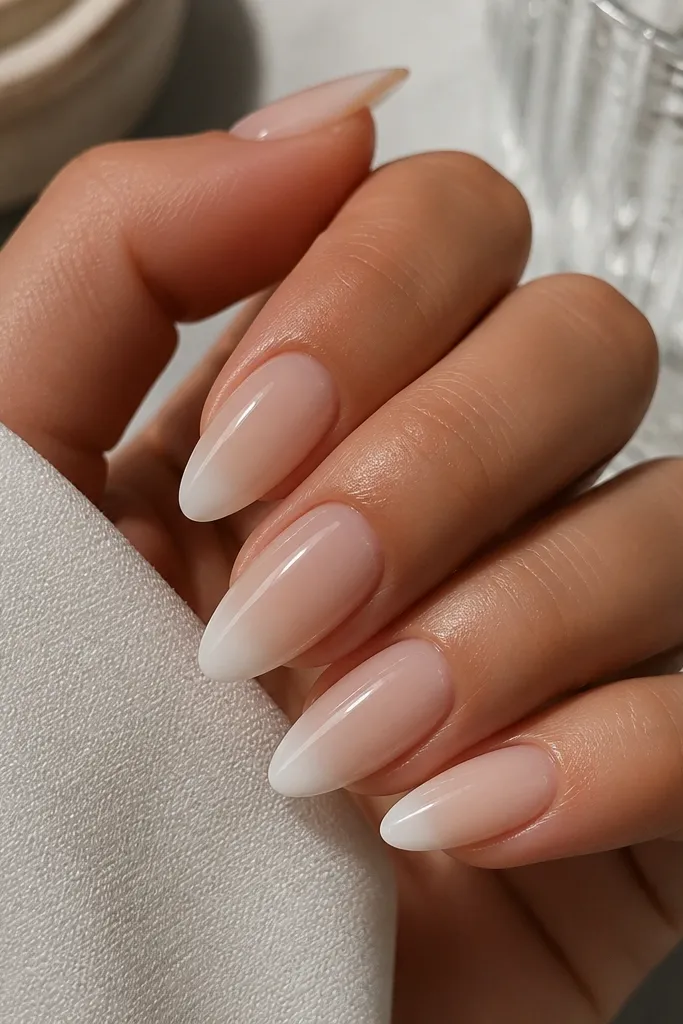
A clean ombre fade French looks classy because it softens the white while still keeping the tip line defined. The key is the outer edge — you still need a crisp boundary so it reads like a French tip, not a smudge. This works best on medium almond or soft oval because the gradient follows the nail’s natural taper. I love it for spring and summer because it looks airy, and it matches both warm and cool skin tones when you choose a nude base that matches your undertone. It’s also a good pick if you’re not confident drawing a perfect smile line yet.
Start with nude BIAB and cure it, then build structure where you need it without thickening the free edge. For the French fade, paint a thin white band at the tip edge first — about 2 mm — and cure briefly if your gel system allows flash curing. Then use a clean sponge or a small blending brush to feather the white upward into the nude, keeping the outer edge controlled. If you use a sponge, tap lightly and stop as soon as the fade looks smooth. Cure fully, then top coat and cap the very edge so the gradient stays locked.
Keep the sponge or brush mostly dry — wet blending makes the white spread and lose the crisp boundary.
Avoid a wide white start — if the initial band is too thick, the fade looks cloudy.
5. French Tip with Clear Negative Space Triangle
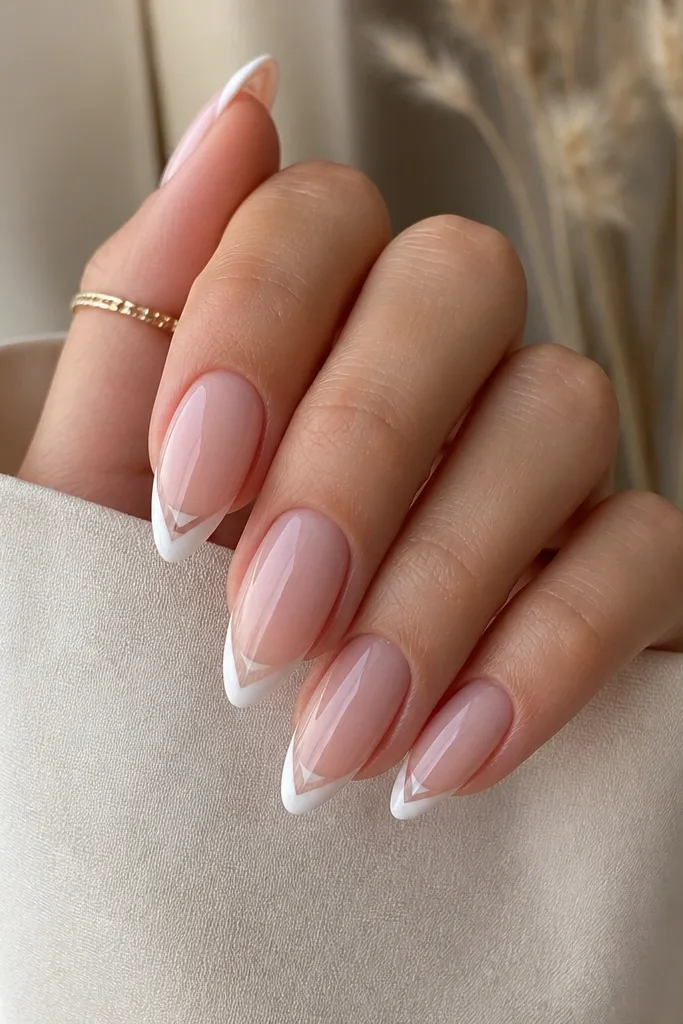
Negative space makes French tips look custom, and the tiny clear triangle keeps it clean instead of busy. The triangle breaks up the white band so your smile curve looks sharper and more intentional. This style flatters almond and tapered shapes because the triangle points naturally into the nail’s apex. It also looks great on medium skin tones where a full white tip can feel too stark. I’ve worn this with thin silver rings and it gives that “designer nail” look without needing gems.
Build your nude BIAB and cure it fully. Before you paint the white, place a small dot of clear gel at the center where you want the triangle to be — you can also use a piece of clear tape as a guide. Paint your French tip white around the triangle using a liner brush, keeping the band thin (about 2 mm). Pull the white into the side curves and stop cleanly at the triangle edges. Cure, then remove any guide, apply top coat, and seal the triangle area so it stays glossy and crisp.
Use striping tape for the triangle edges if your hand shakes — it’s faster than trying to freehand the negative space.
Avoid a triangle that’s too tall — it steals focus and makes the French line look crooked.
6. White French with Micro Chrome Half-Moon Accent
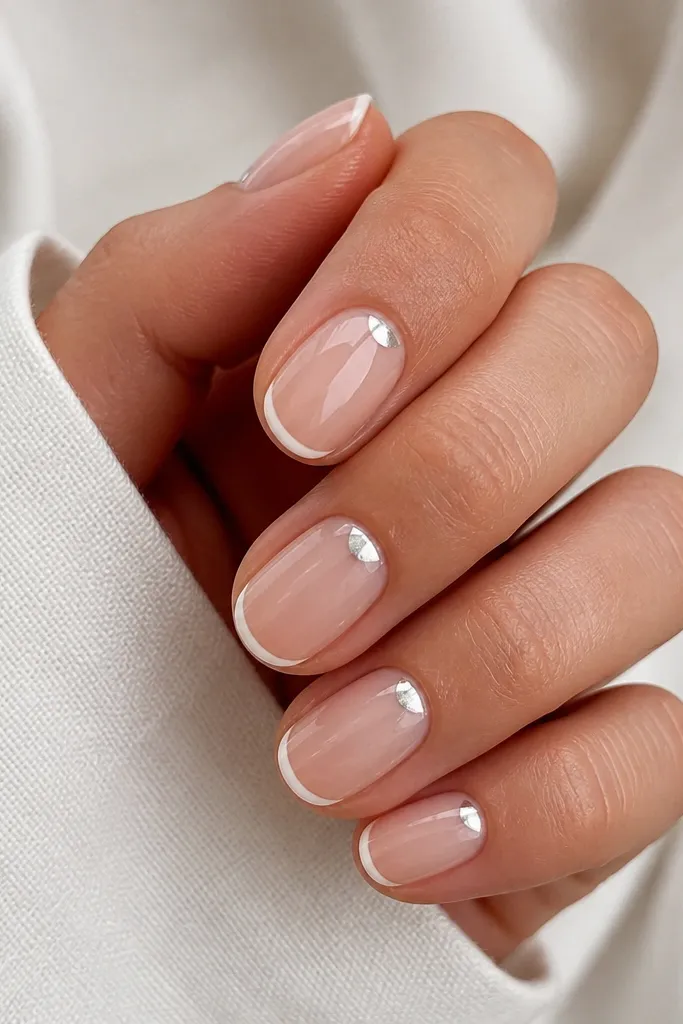
This is the clean French tip upgrade when you want one “spark” moment without ruining the neat lines. The micro chrome half-moon is small enough that the French stays the main event, and the silver reflects light in a controlled way. I like it on short ovals and soft almonds because the half-moon lifts the nail visually and balances the thin tip. It flatters both cool and warm skin tones since silver micro chrome doesn’t fight your undertone the way some pigments do. For weddings, holiday dinners, and nights out, it reads classy instead of costume.
Apply nude BIAB, cure, and shape as usual. Paint a thin white French tip with a liner brush, about 1.5-2 mm wide, and cure. Using a small sponge or fingertip applicator, dab a tiny amount of silver micro chrome onto a half-moon area near the cuticle center — keep it under 2 mm tall. Press lightly so it bonds, then seal with top coat, making sure the top coat covers the chrome without smearing the French line. Cure again and wipe if your system needs it.
Editor's noteWork one nail at a time so the chrome doesn’t shift while you’re still painting.
Skip thisAvoid putting chrome over the sidewalls — it makes the tip look less clean.
7. French Tip with Clear Jelly Pink Base (Glass Look)
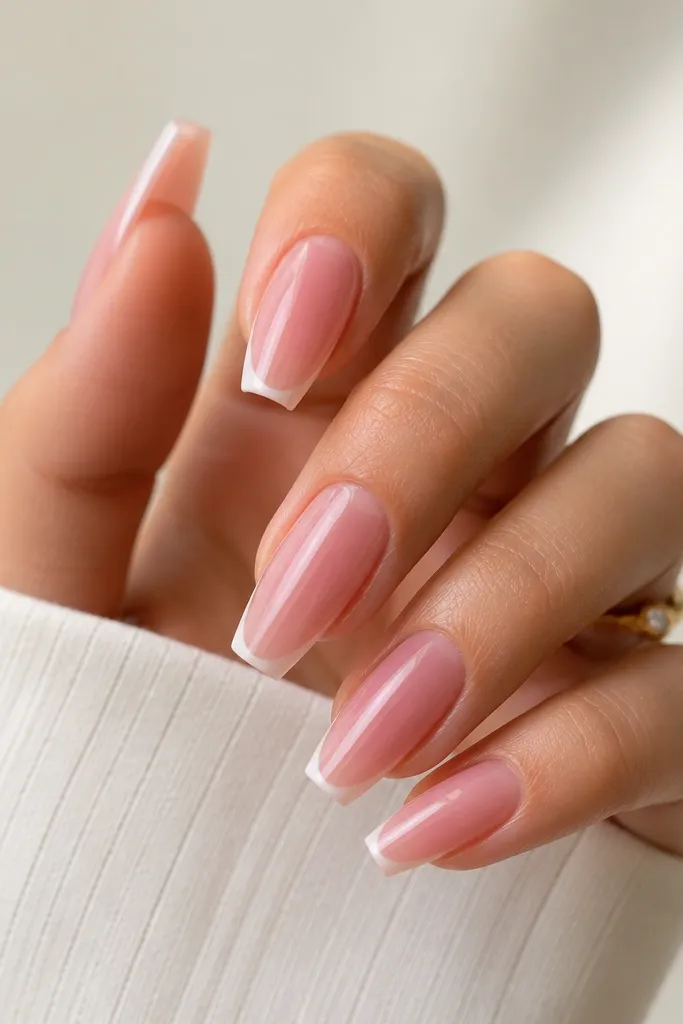
A jelly pink BIAB base makes the French tip look extra clean because it gives a smooth, glass-like glow under the white. The translucency makes your nail look healthy and not overly opaque, which matters when you’re doing thin lines. This style flatters long coffin and medium almond, especially if your natural nails are slightly dry — the jelly look makes them look hydrated. I like it for summer because it looks clean with tan skin and light makeup. It also photographs well because the shine catches at the smile curve.
Build a jelly pink BIAB in thin layers so it stays translucent — cure each layer. File the free edge lightly to keep it smooth, then paint a thin white French tip band close to the edge, about 2 mm. Use a liner brush and keep your stroke consistent from center to sides. Cure fully, then apply a thick, leveling top coat that seals the smile curve and removes any micro texture. Cure again and wipe the final tacky layer clean to keep the glass effect.
Editor's noteIf your jelly base looks streaky, add one extra thin layer instead of a thicker layer.
Skip thisAvoid matte top coat — it kills the clean glass effect and makes the white look flat.
8. French Tip with Gold Foil Edge (Only at the Smile)
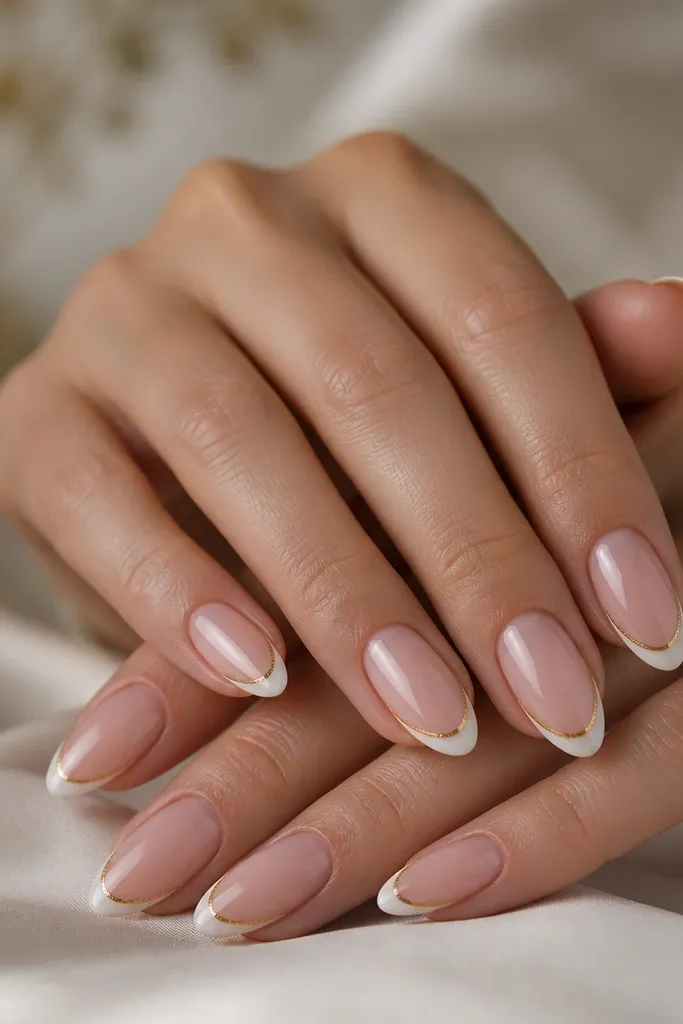
Gold foil at the smile line makes a French tip feel expensive without making it messy. The trick is placement: foil only on the edge where the smile curve sits, not spread across the entire tip. On nude BIAB, gold reads warm and flattering, especially if you wear gold jewelry. This looks great on almond and squoval shapes because the smile line is visually emphasized. It’s a good option for birthdays and dinners because it catches light when your hands move.
Cure your nude BIAB and shape the free edge. Paint a thin white French tip first, keeping it smooth and even — cure it. Add a tiny amount of foil glue or tacky layer only along the smile curve edge, then press gold foil onto that line and remove excess. Seal with top coat, making sure the top coat covers the foil completely so it doesn’t lift. Cure fully and check the sidewalls for any foil bits that might snag.
Editor's noteUse small pieces of foil and overlap them slightly so the smile line looks continuous.
Skip thisAvoid dragging foil across the tip — it turns into a smudge instead of a sharp edge.
9. White French with Tiny Black Dot at Each Side
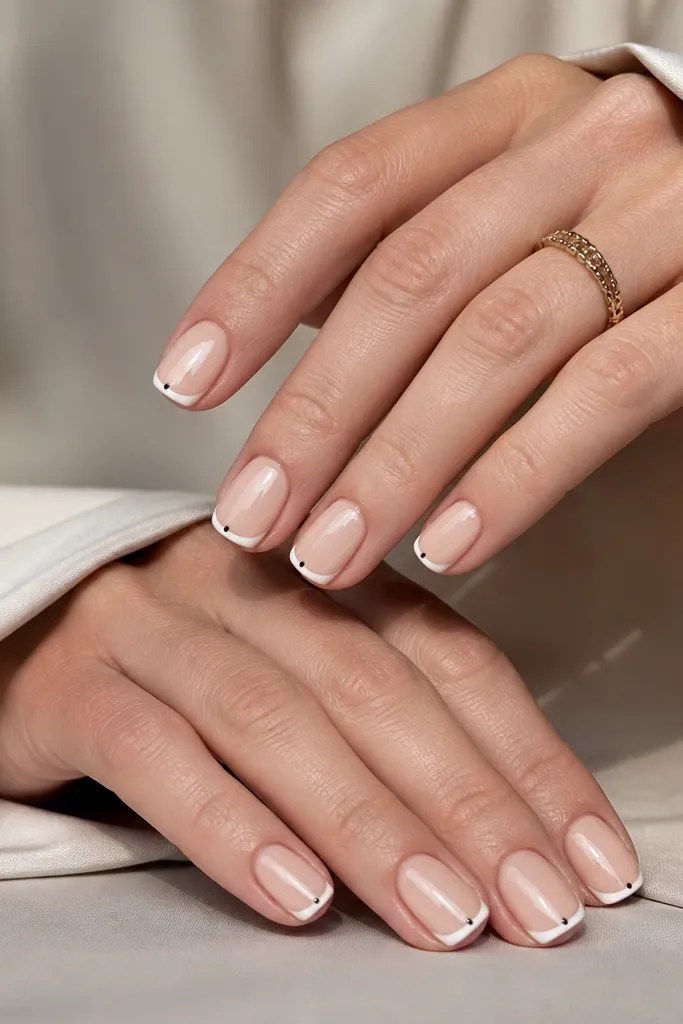
This is clean, graphic French with a minimal “point” detail. The black dots sit at the outer corners of the smile curve, which pulls the eye outward and makes short nails look more styled. It flatters cooler undertones and also works on warm skin tones because black is neutral. I like it for everyday wear because it’s not loud, just intentional. It also matches outfits with black eyeliner, striped tops, or simple gold hoops.
Start with nude BIAB and cure it, then shape your squoval tips. Paint a thin white French line, about 2 mm wide, and cure. With a dotting tool loaded with black gel, place one micro dot about 1 mm below the outer edge of the smile curve on each nail. Repeat on the other side if you want symmetry, but keep the dots small so they don’t look like polka nails. Cure, then top coat and cap the edges lightly.
Editor's noteWipe your dotting tool tip on a lint-free wipe so the dot lands in one precise spot.
Skip thisAvoid large dots — they make the French look like a sticker, not a painted detail.
10. French Tip with Clear Line Accent (No White Fill)
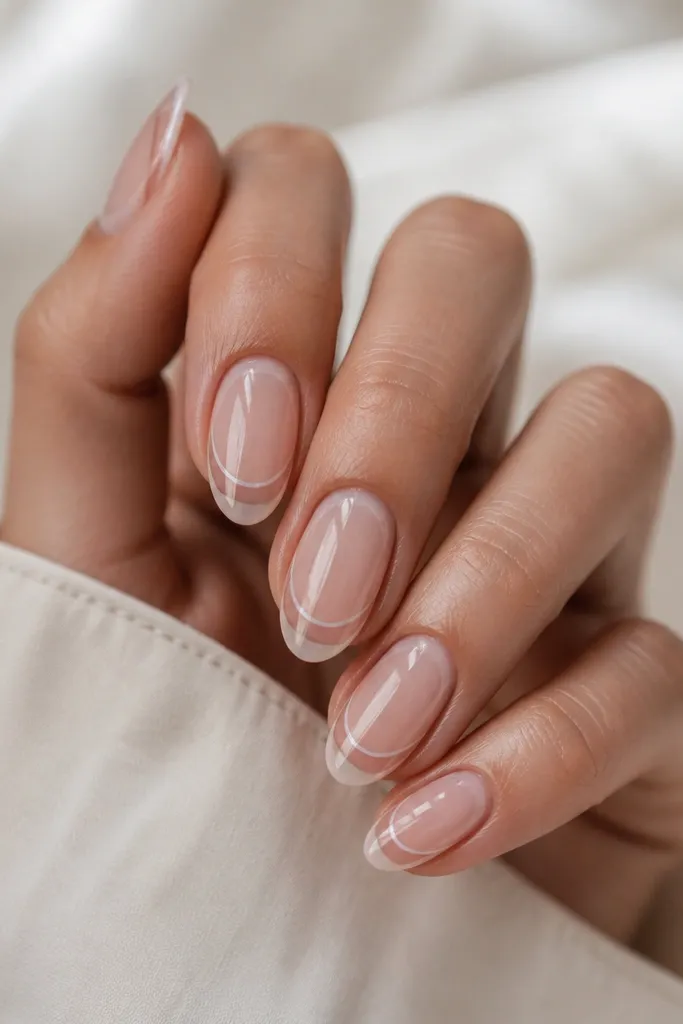
If you want French tip clean lines without a solid white tip, this version is for you. The outline gives structure, while the nude area keeps the nail looking longer and more natural. It flatters hands that look best with sheer coverage, and it’s a calm choice for clients who hate bold white. The effect is subtle in real life but still noticeable in photos because the line catches shine. I use this when someone’s nail bed is naturally pink or when they want a manicure that looks “fresh” for weeks.
Apply nude BIAB and cure, then lightly buff the surface so the line doesn’t drag. Use a liner brush to draw the smile curve with a semi-opaque white gel outline — keep it thin, around 1 mm. Do not fill the rest of the tip area; leave it nude. Cure fully, then apply top coat with a slightly thicker pass over the line so it looks crisp and glossy. Clean edges with a small brush dipped in acetone if your system allows, then cure again.
Editor's noteThin outline first, then add a second outline only if you need extra opacity — one thick pass looks messy.
Skip thisAvoid filling the tip area — it defeats the clean, airy look.
11. Reverse French Half-Moon Tip on Nude BIAB
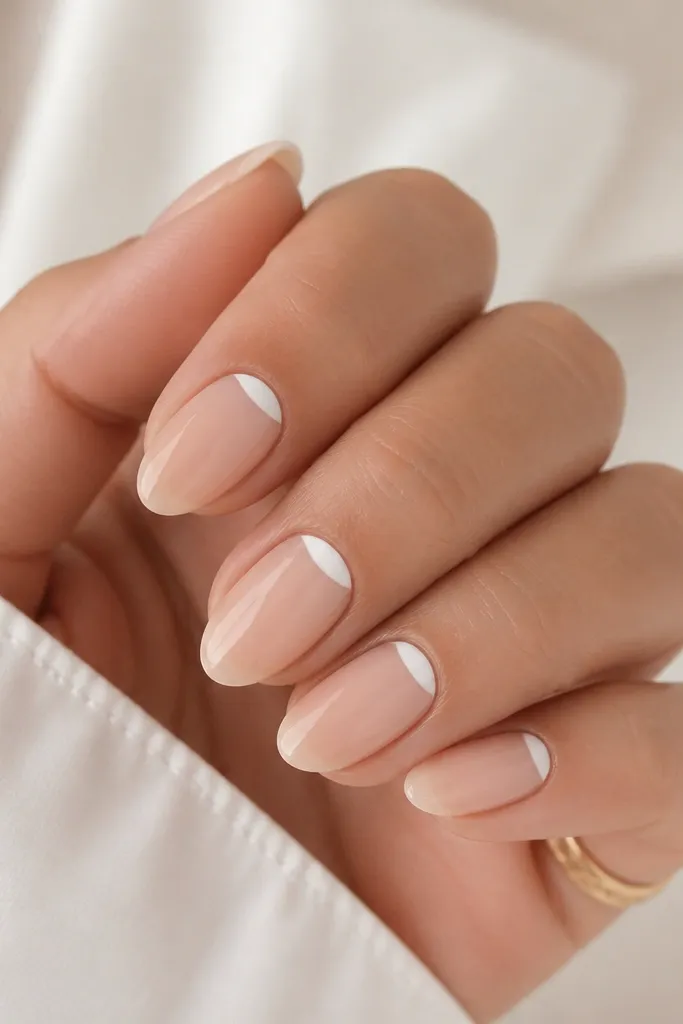
Reverse French can look very clean when the white sits on a neat half-moon and the rest stays nude. It flips the traditional French placement, so it feels fresh while still being tidy. This flatters short almond and squoval nails because the half-moon visually lifts the nail bed area. On warmer nude BIAB, the white half-moon looks bright without feeling harsh. I like this for minimal outfits because it looks intentional even when you’re not wearing jewelry.
Build and cure nude BIAB, then shape the nail. Decide on your half-moon size — keep it small, about 2-3 mm wide at the center. Use a liner brush to paint a white half-moon near the cuticle, leaving a clear gap to the skin line so it doesn’t flood. Cure, then apply top coat over everything, making sure the half-moon edges look smooth and sealed. If you see any unevenness, buff gently on the surface only after top coat cures, then re-top coat.
Editor's noteUse a nail guide card or a strip of paper to keep the half-moon curve even across all nails.
Skip thisAvoid letting the half-moon touch the cuticle — it makes the line look smudged.
12. French Tip with White Micro-Glitter Fade at the Edge
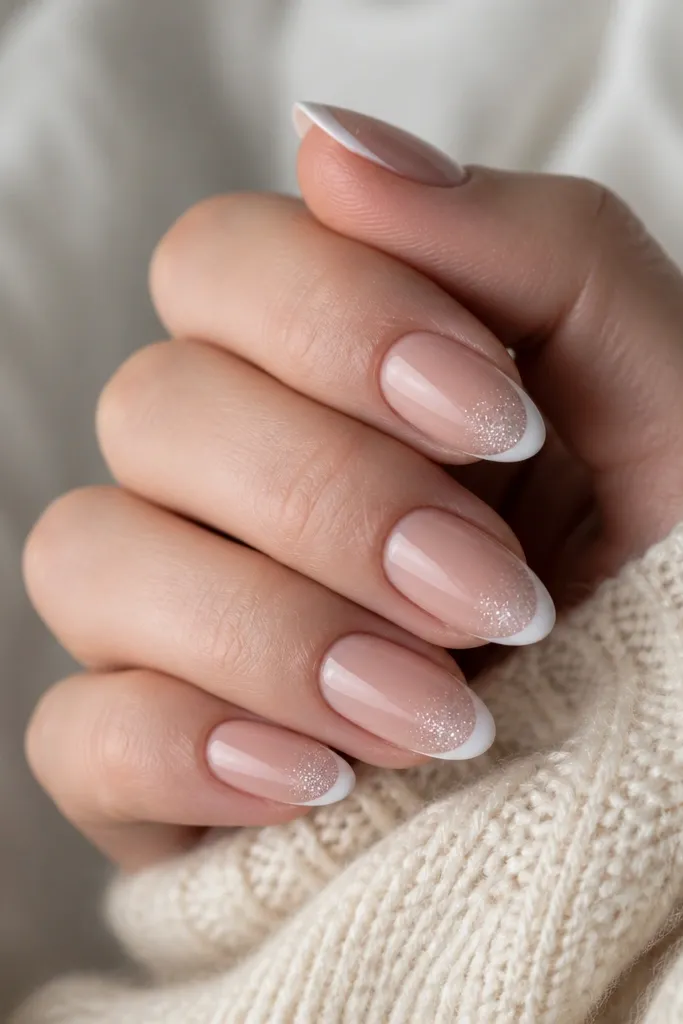
Micro glitter at the edge gives you a clean “icing” effect without turning your tips into a chunky sparkle layer. The trick is to fade it — glitter only on the outer edge so the inner tip stays smooth and white. This flatters medium oval and almond shapes because the glitter catches light along the curve. It looks especially good on fair to medium skin tones with warm undertones, but it works on deeper tones too when you choose a white micro glitter that isn’t yellow. I wear this when I want something special but still work-appropriate.
Cure nude BIAB and shape the free edge. Paint a thin white French tip band first, then cure. Tap white micro-glitter gel or loose micro glitter mixed with clear gel only onto the outer edge of the tip — about the outer third of the band. Use a small brush to feather the glitter inward just slightly, then cure thoroughly. Finish with top coat, and cap the sidewalls so loose glitter doesn’t snag.
If you’re using loose glitter, press it in with a silicone tool so it doesn’t lift at the edges.
Avoid full-tip glitter — it stops looking clean and starts looking textured and messy.
13. Matte Nude Base with Glossy White French (Two-Finish Clean Contrast)
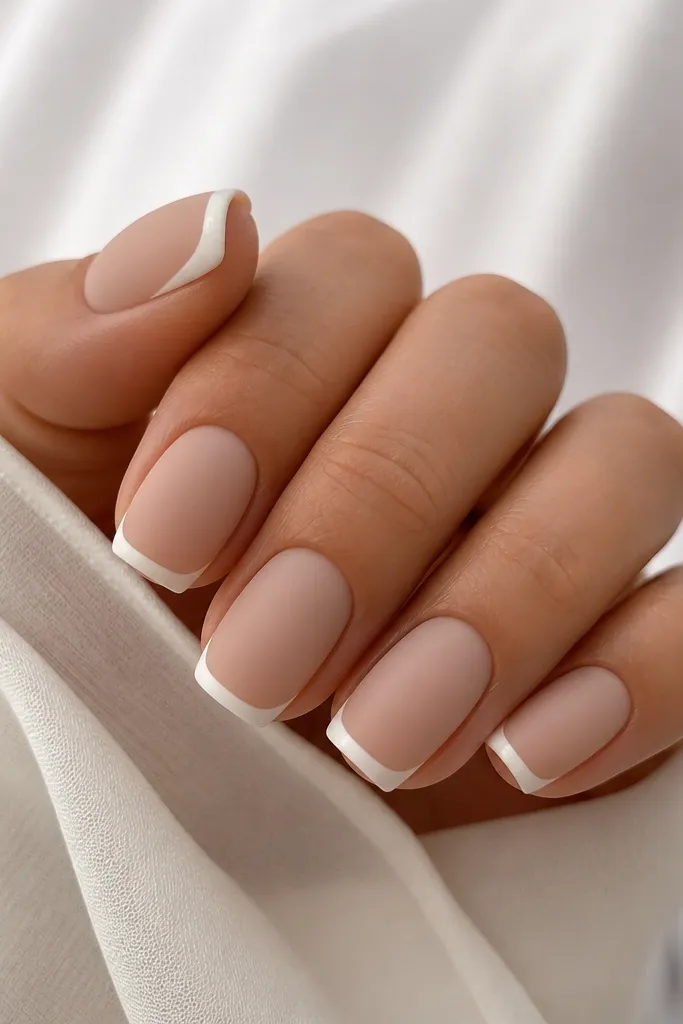
Mixing matte base with glossy white tips looks classy because your eye reads the French line first, then the matte softens everything around it. The white stays crisp and reflective, while the nude base looks velvety and neat. I love this for autumn outfits, but it also looks clean year-round with neutral sweaters. It flatters hands that have slight texture because matte can visually blur tiny bumps, and the gloss on the tip keeps the manicure looking intentional. This is a great pick if you get bored with all-gloss sets.
Build your nude BIAB and cure, then top coat with a matte top coat first, curing it fully. Paint thin white French tips on top of the matte finish — the key is using a gel that levels smoothly and doesn’t drag. Keep the French width around 2 mm and cure. Then seal the tips only with glossy top coat by applying it carefully just on the white area — avoid flooding the matte base. Cure again and check under a lamp to confirm the gloss line is clean.
Keep a separate brush for glossy gel so you don’t contaminate it with matte product.
Avoid painting glossy over matte everywhere — you lose the contrast and it turns into a dull, uneven sheen.
14. French Tip with Tiny Clear Border (Jelly Outline for Extra Clean)
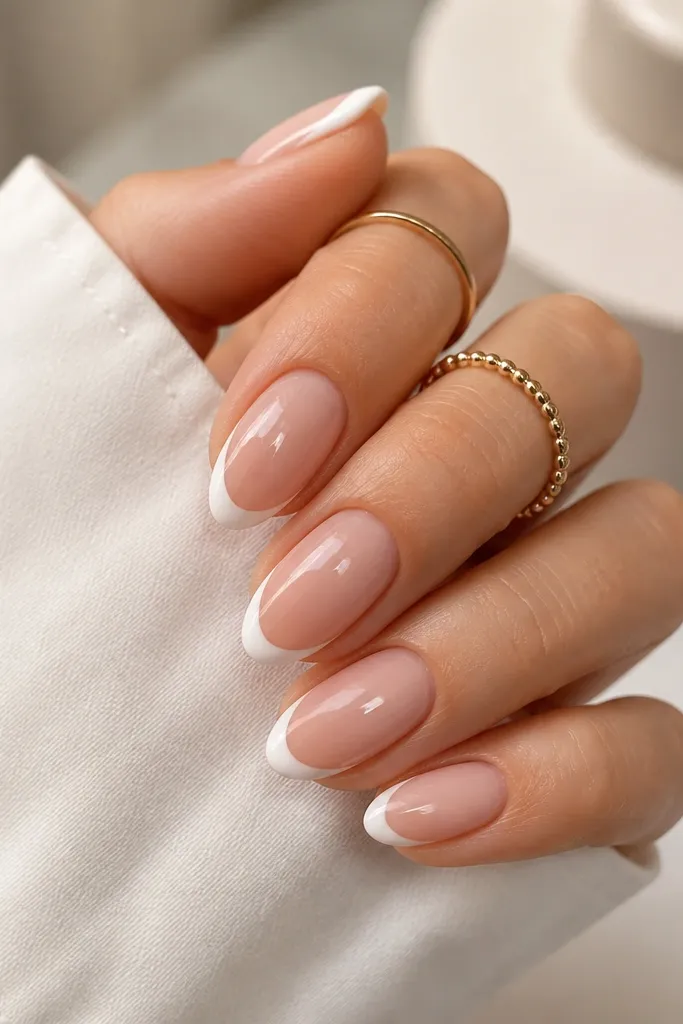
A clear jelly border around the white tip is one of those tricks that makes clean French look even cleaner. The border adds a dimensional edge so your smile line looks crisp, not flat. This works best when your white tip is already thin and even — the jelly border should act like a frame. It flatters short almond and oval shapes because the extra definition helps the nail look more structured. I like it for people who want a clean manicure that still looks “done” when the light hits it.
Apply nude BIAB and cure, then paint a thin white French tip band about 2 mm wide and cure. With clear jelly gel, trace a micro outline around the outer edge of the white tip — just a thin line, not a thick rim. Use a steady hand and let the jelly self-level slightly, then cure. After curing, apply full top coat over the whole nail so everything blends smoothly and the jelly border doesn’t peel. Clean up any stray clear gel on the sidewalls with a fine brush and acetone.
Editor's noteIf the clear border pulls too much, use a slightly thicker jelly gel so it stays on the line.
Skip thisAvoid over-applying the border — a thick rim looks like plastic and kills the clean French effect.
15. French Tip with Center Dot Accent (Minimal Dot, Maximum Neat)
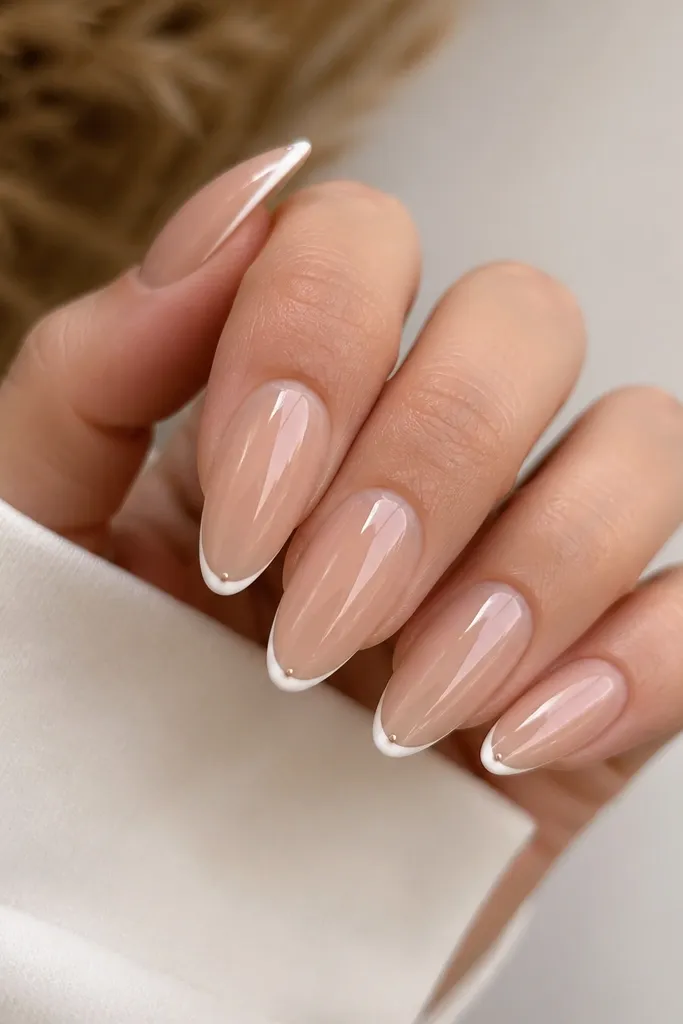
A single center dot is such a clean way to make French tip nails feel intentional. It gives your eye a focal point and makes the smile line look perfectly placed, even if your nails are slightly different lengths. I like it on long almond because the center dot echoes the nail’s natural apex and keeps the look balanced. It flatters most skin tones since the dot color is either silver (cool-neutral) or white (bright and classic). For evenings and photo days, this detail makes the manicure look styled without adding bulk.
Build and cure nude BIAB, then shape the free edge into a consistent almond. Paint a thin white French tip, about 2-2.5 mm wide, and cure. Use a toothpick or dotting tool to place one tiny dot exactly at the center of the smile curve — keep it under 1 mm wide. Cure again if needed, then apply top coat, sealing the dot so it stays smooth. Check the center dot alignment by viewing the nails straight on under bright light.
Editor's noteMark the center of the nail first with a light pencil dot on the nail tip area, then remove after painting.
Skip thisAvoid placing the dot too low — it turns into a random spot instead of a French accent.