
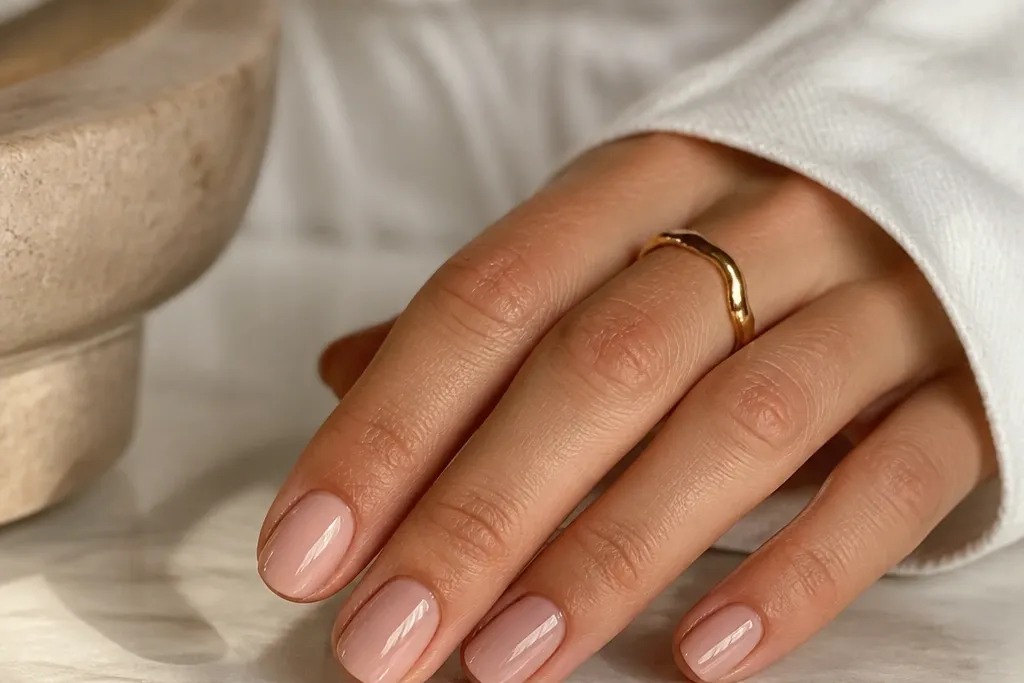
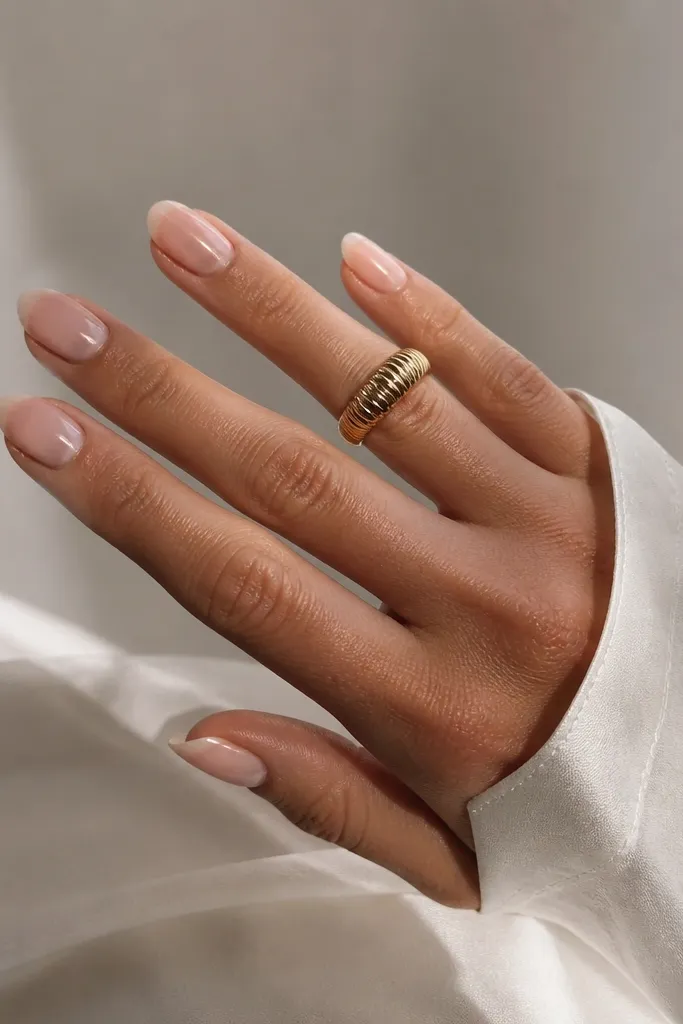
1. Milky Nude BIAB with a Thin Micro-French Line
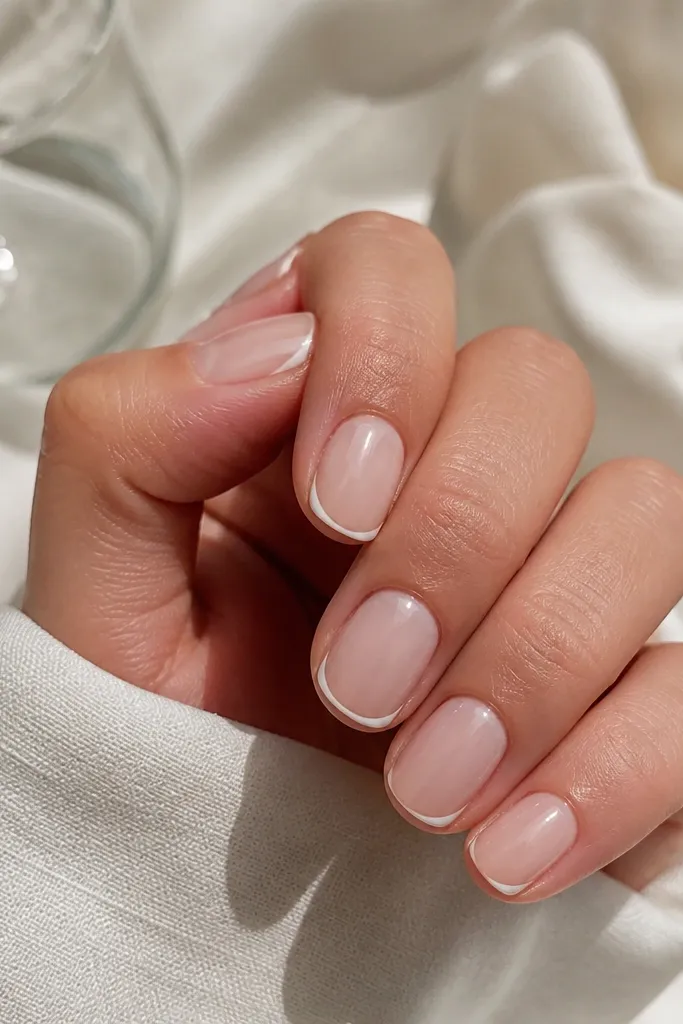
This look is my go-to when I want “put together” without thinking about it. The milky nude base blends with most skin tones, and the thin micro-French line gives definition without creating a thick edge that catches on fabric. On fair skin, the nude reads soft and clean; on deeper skin tones it looks like a warm pearl, especially under daylight. The thin line also stays forgiving as your nails grow because it’s a narrow band, not a big block of color. I wear this for work days, travel, and any week where I know I’ll be doing a lot of dishes and laundry.
Start by applying your BIAB in a sheer milky nude shade, then cap the free edge with a small brush pass so the tip is sealed. After curing, file to a short almond or rounded shape — keep the top flat and smooth, not sharp. For the micro-French, use a striping brush and place the white line about 1 mm from the tip edge, keeping it thin and even on every nail. Clean up around the sidewalls with a lint-free wipe and a little slip solution, then top coat twice, dragging the second coat over the free edge. Cure the top coat fully before you touch anything wet.
If you hate streaks, paint the French line in one light sweep instead of going back and forth.
Avoid thick white French — it chips faster and looks bulky on regrowth.
2. Warm Beige BIAB with One-Stripe Chrome Ring Finger
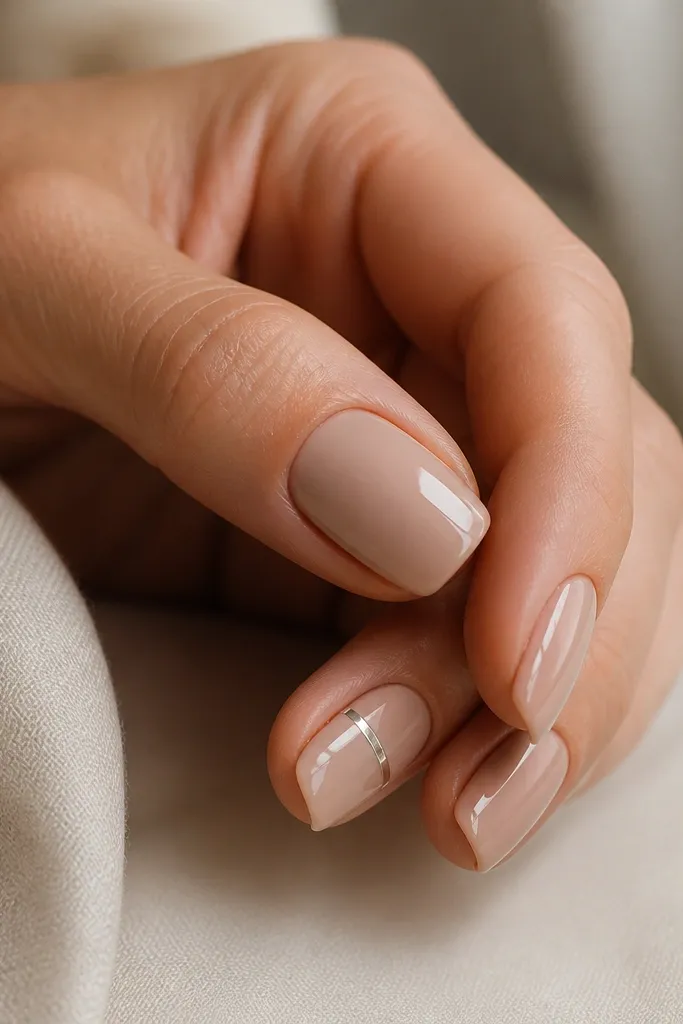
Warm beige is underrated for low maintenance because it matches your skin’s undertone better than icy nudes. The one chrome stripe on the ring finger gives you that “intentional detail” look, but it doesn’t require you to draw art on every nail. I like it on short to medium nails because the stripe visually lengthens without making the tip heavy. If your skin is cool-toned, choose a beige with a hint of pink; if you’re warm-toned, pick beige with a tan or caramel undertone. This design also photographs well because the chrome line stays sharp even when your nails grow out.
Apply BIAB in warm beige to all nails, keeping the builder layer even and slightly domed — not flat, not thick. Cure, then file with a gentle buffer so the surface is smooth enough for chrome adhesion. For the stripe, use a thin striping brush to paint a clear base (or a sticky top layer) where you want the chrome line, then press chrome powder foil or chrome pigment over it. Wipe off excess with a dry lint-free pad so only the stripe remains. Finish with a full top coat over every nail, but keep the stripe area clean so it doesn’t blur.
Use a matte paper towel to wipe chrome — it grips residue without scratching the smooth BIAB.
Skip putting chrome over a bumpy filing — it turns into a fuzzy line.
3. Sheer Rose BIAB with Cuticle Blush Dot Cluster
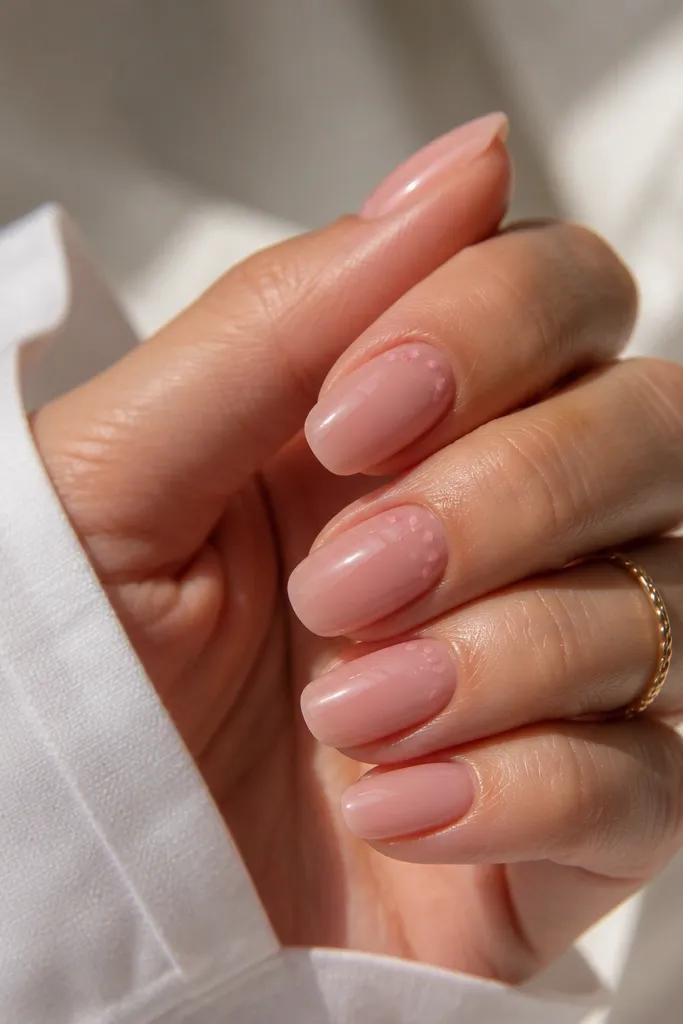
This is soft, pretty, and surprisingly forgiving. The sheer rose base keeps everything clean, and the cuticle dot cluster is placed where your regrowth still looks like part of the design. The dots are small enough that you don’t need perfect symmetry, and because they’re near the center top of the nail, they don’t get dragged around by filing at the tip. I like this for birthdays, date nights, and any time you want “cute” without feeling like you did a full nail art session. It flatters a wide range of skin tones because the blush dots sit on top of the natural warmth of your nails.
Start with sheer rose BIAB and keep the builder layer thin enough that your cuticle area stays smooth and close. Cure, then file lightly — you’re aiming for a satin smooth surface, not a sharp edge. Using a dotting tool, place 5-7 tiny blush dots about 1-2 mm away from the cuticle line, slightly grouped toward the side that matches your hand position. Let the dots sit for a few seconds so they don’t smear, then cure. Top coat all nails twice, focusing on sealing around the dot edges.
Editor's noteDot with a dry brush tip, not a dripping one — less product means cleaner circles.
Skip thisAvoid big dot clusters that reach the sidewalls — they catch on gloves and snag.
4. Clear BIAB with Nude Jelly Overlay and Edge Seal
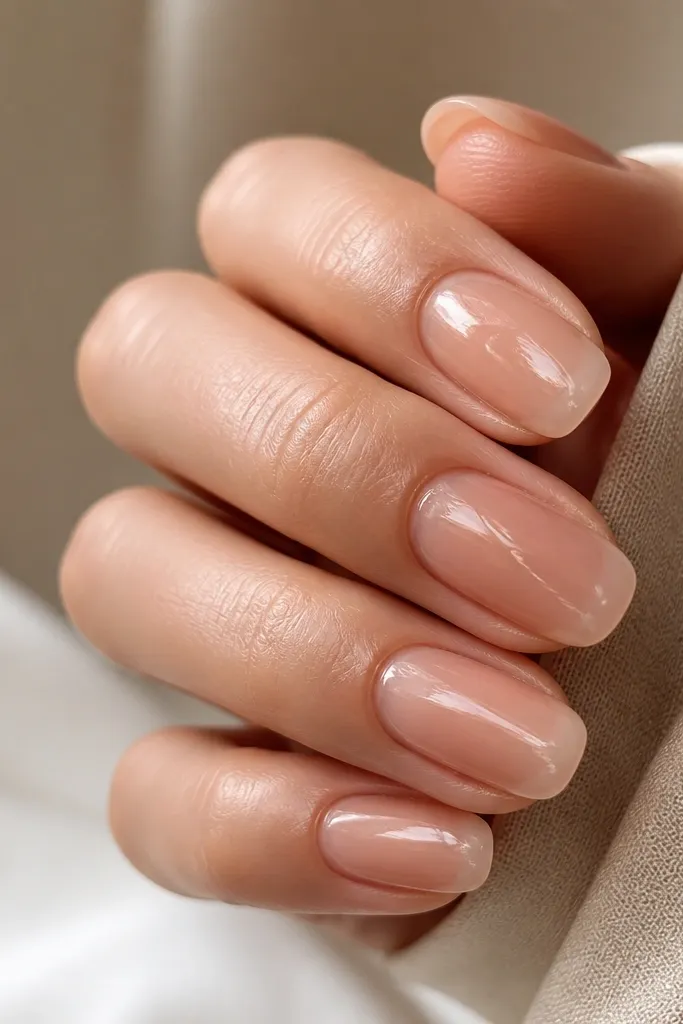
If you want low maintenance that still looks expensive, this “glassy jelly” build is it. Clear BIAB gives you that clean, hydrated look, while the nude jelly overlay adds warmth and hides minor imperfections without looking opaque. The best part is that it grows out more gracefully than full coverage color because your natural nail still peeks through slightly. This works beautifully on short nails and on hands that show dry cuticles — the glassy finish makes everything look smoother. I wear this when I’m between seasons and don’t want to commit to a bold color.
Apply a clear BIAB base and cure. Then take a nude jelly color and apply a thinner second layer, focusing on the center and slightly blending toward the sides — don’t flood the cuticle. Cure again, then file just enough to remove any texture and keep a rounded shape. For the edge seal, cap the free edge with a tiny amount of jelly or top coat and cure. Finish with a thick glossy top coat and cure fully so it stays glassy.
Keep the jelly overlay thin — thick jelly looks cloudy and chips faster.
Don’t skip the edge cap — clear builds lift at the tip if you leave it unsealed.
5. Chocolate Brown BIAB with Milky Half-Moon Accent
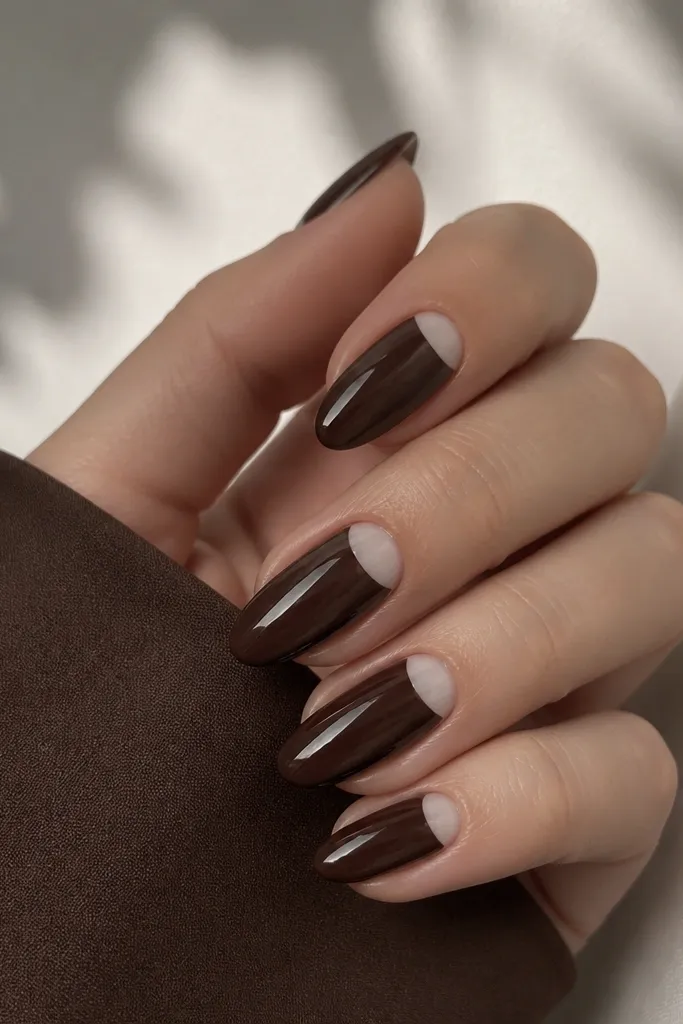
This is the kind of manicure that looks thoughtful even when you do zero touch-ups. Chocolate brown is darker than you think, so it hides staining and small scuffs better than light nudes. The milky half-moon at the cuticle is placed where it stays visible as you grow out, and it gives a retro French feel without drawing a full tip. It flatters olive and warm skin tones like crazy, and it also looks striking on fair skin because the contrast is clear. Wear it for fall, winter, or anytime you want your nails to look grounded and polished.
Apply chocolate brown BIAB as your base and cure, then file to a rounded square or short almond. For the half-moon, use a small detail brush and paint a milky white crescent right at the cuticle line, leaving a thin gap of brown so it looks crisp. If you’re nervous, place the crescent first on one nail and check the shape in daylight before doing the rest. Cure the half-moons, then top coat all nails with two coats, making sure the half-moon edges are sealed. Finish by gently cleaning the cuticle area with a wipe-soaked brush to remove any stray pigment.
Editor's noteUse milky white, not pure white — it looks softer and less harsh on grown-out nails.
Skip thisAvoid a half-moon that touches the sidewalls — it chips there first.
6. Soft Sage BIAB with Tiny Dot Outline on the Thumb
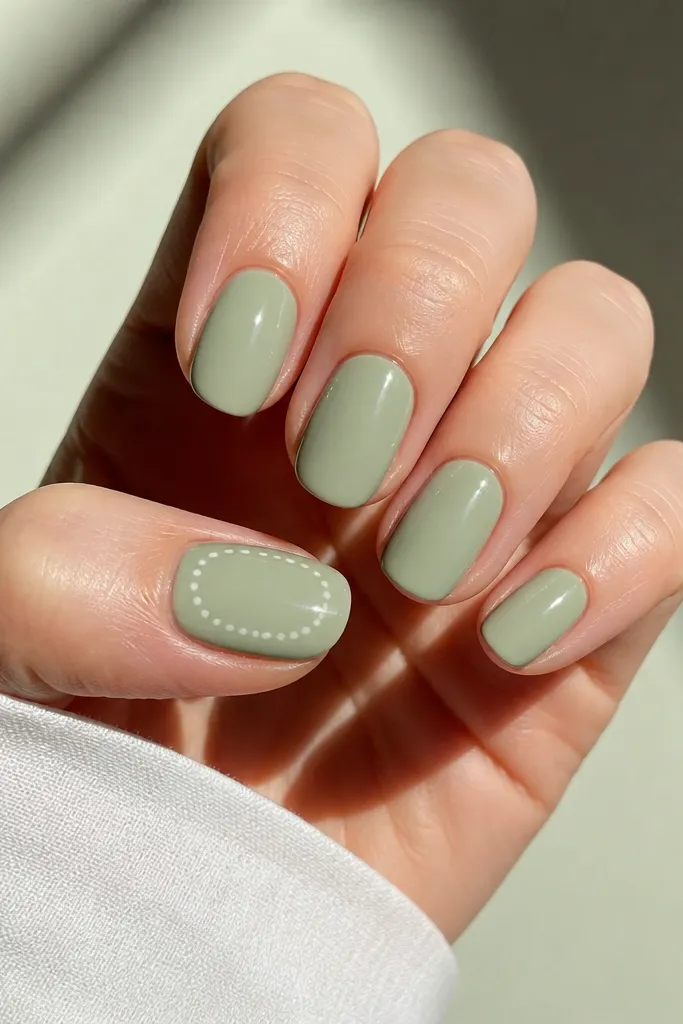
Sage is one of those colors that looks calm but still reads “nails done.” Keeping it plain on most nails makes the manicure low maintenance, and the dotted outline on the thumb gives you a fun focal point without turning into full nail art. This combo looks great on hands with warm or neutral undertones because sage sits nicely between green and grey. I also like it for everyday because the dotted outline is small and stays tidy even when your nails grow out a bit. It’s a great choice if you want something seasonal without going full holiday theme.
Apply soft sage BIAB to all nails and cure, then file to a short rounded shape. For the dotted outline, choose a cream or off-white dot color and use a dotting tool with a small tip. Place dots in a loose oval around the center of the thumb nail, keeping the oval about halfway between the cuticle and tip. Space the dots evenly by reloading the dotter with a tiny amount each time. Cure, then top coat the thumb carefully and seal the outline with a second top coat pass.
Editor's noteIf dots blur, wait 10-15 seconds after dotting before curing so the gel levels.
Skip thisSkip outlines that go too close to the tip — they lift and look uneven first.
7. Milky Pink BIAB with One Accent Nail in Matte Blush
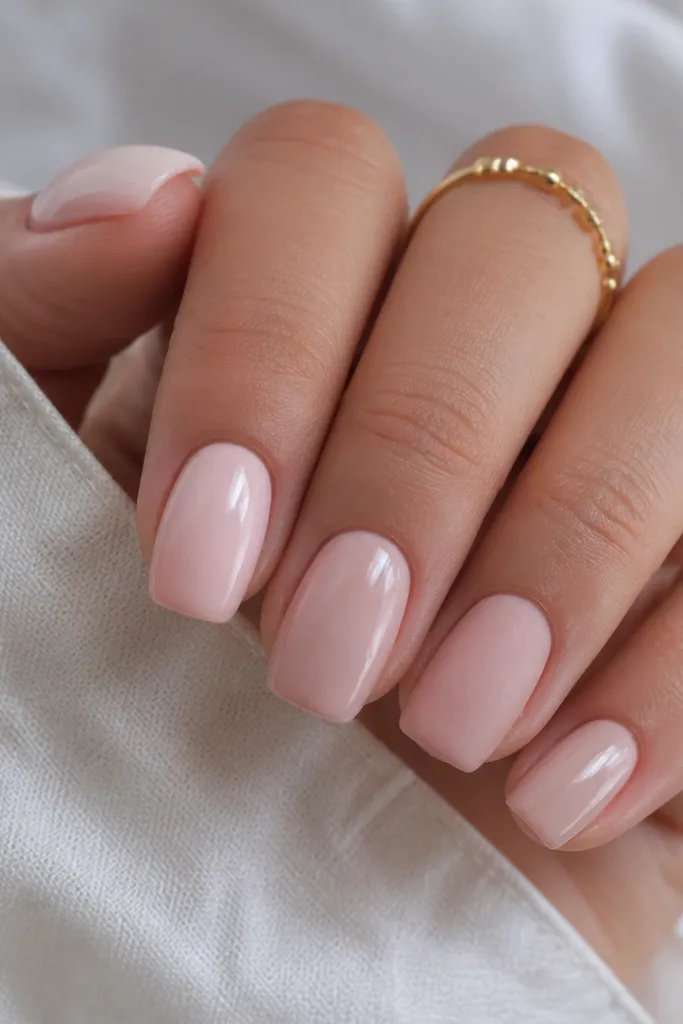
Matte + gloss is my favorite low effort combo because it looks intentional even if your hands are rough on nails. The milky pink base stays pretty through regrowth, and the single matte accent nail adds texture that hides tiny surface imperfections. I like matte blush because it reads soft, not dusty, and it matches warm and neutral skin tones. On short nails, matte looks especially clean because it doesn’t highlight small ridges the way super shiny finishes can. This is perfect for people who hate complicated art but want a manicure that doesn’t look plain.
Apply milky pink BIAB to all nails and cure. File to a smooth rounded shape and remove dust. Top coat everything glossy first, cure, then choose the accent nail and apply a matte top coat only on that nail — keep it away from the glossy nails so it doesn’t smudge. If you’re using matte top coat, cap the free edge with it too. Cure again, then check under a lamp — matte should look velvety, not patchy.
Editor's noteUse matte top coat in a thin layer — thick matte makes edges look chalky.
Skip thisDon’t buff the accent nail after matte — it kills the velvety finish.
8. Nude BIAB with Diagonal Taupe Stripe on Two Nails
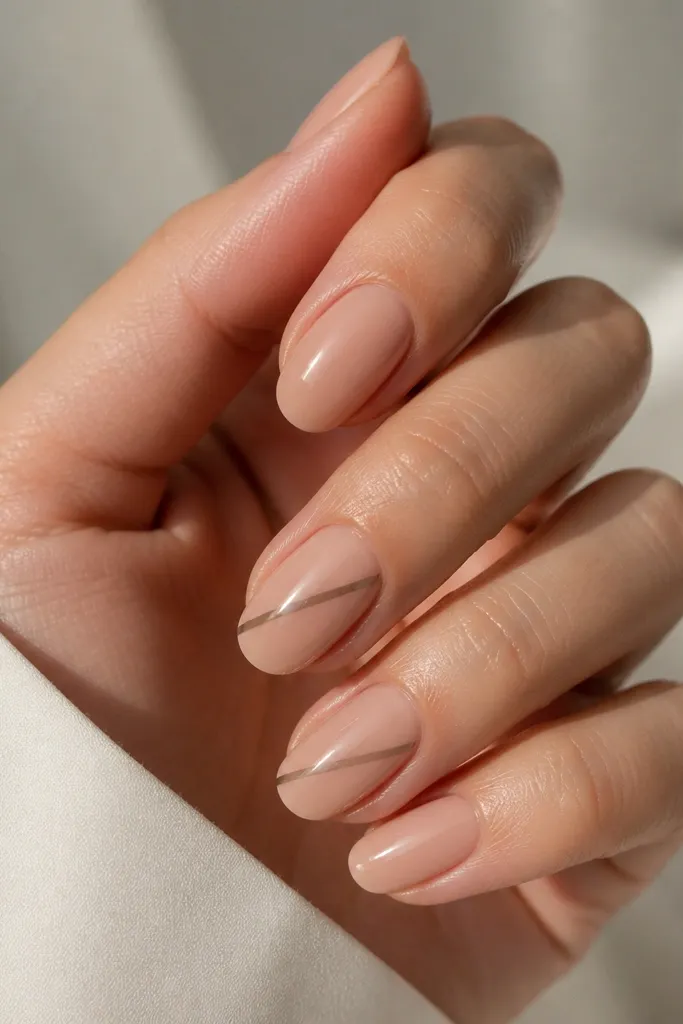
Diagonal stripes look harder than they are, and that’s why they’re great for low maintenance. The nude base keeps everything wearable, while the taupe stripe adds structure and makes your nails look longer. I prefer placing stripes on two nails only, usually the ring and middle fingers, because it balances attention without making you do art on every nail. Taupe is forgiving — it doesn’t look neon or harsh like some greys can. This works especially well if you wear lots of neutral outfits and want your nails to match without needing dark color every week.
Apply nude BIAB and cure, then file to a neat almond or short squoval. For the stripe, use striping tape if you want perfect edges: place tape diagonally, leaving about 1-2 mm gap from the sidewalls. Paint taupe gel over the taped area, cure, and remove tape while the gel is still fresh enough to lift cleanly. If you freehand, use a thin brush and keep the stripe width consistent — no thicker at the center. Top coat all nails with two coats, making sure the stripe edges are sealed.
Editor's noteIf your tape lifts gel, wipe the nail with alcohol before placing it so it grips.
Skip thisAvoid stripes that hit the tip at a sharp angle — they chip at the end first.
9. Sheer Peach BIAB with Micro Glitter Fade Near the Tip
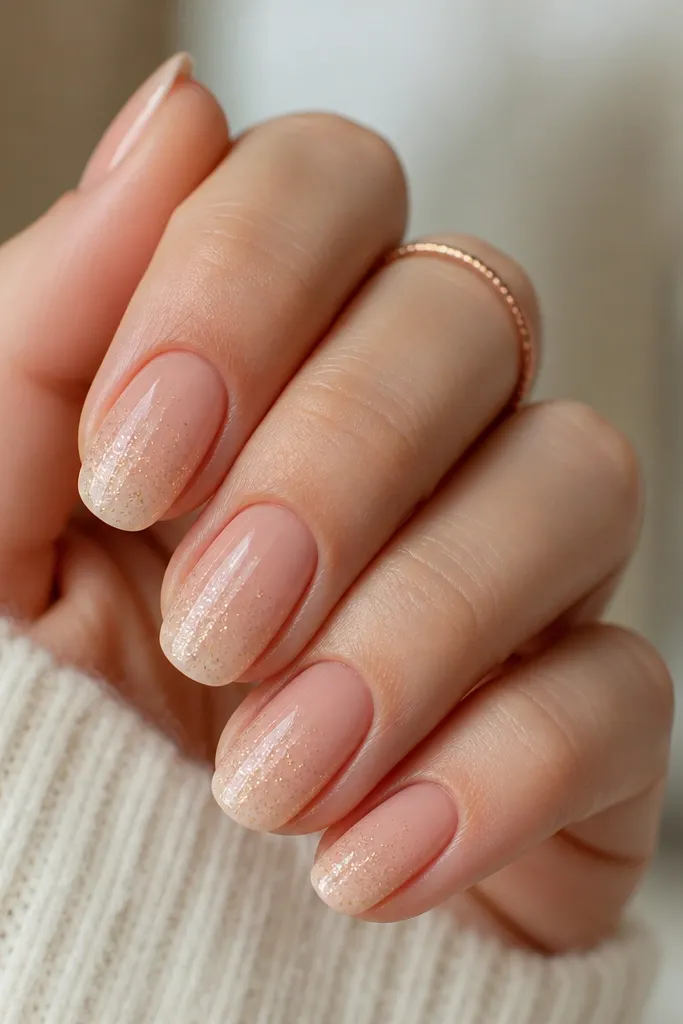
Glitter fades are low maintenance because they hide wear. When your nails grow, the sparkle still looks like part of the design instead of a patch you missed. Sheer peach is flattering for most skin tones because it warms up your nail bed without looking orange. The micro glitter matters too — fine glitter reflects light softly and doesn’t snag on fabric. I love this when I want something fun for nights out but I still need it to feel practical for daytime.
Start with sheer peach BIAB and cure, then file to a rounded shape. Apply a thin layer of builder or sticky layer only on the top third of the nail, then dab micro glitter into that area — press lightly so it packs at the tip. Use a clean brush to blend the glitter downward so it fades, not a hard line. Cure, then top coat twice, focusing on sealing the glitter so it stays smooth. Keep your top coat thicker at the free edge so the fade doesn’t catch.
Use a fan brush to dust off loose glitter before top coat — it prevents gritty texture.
Avoid chunky glitter — it feels rough and lifts faster on the tip.
10. Clear Pink BIAB with a Single Tiny Heart on the Side
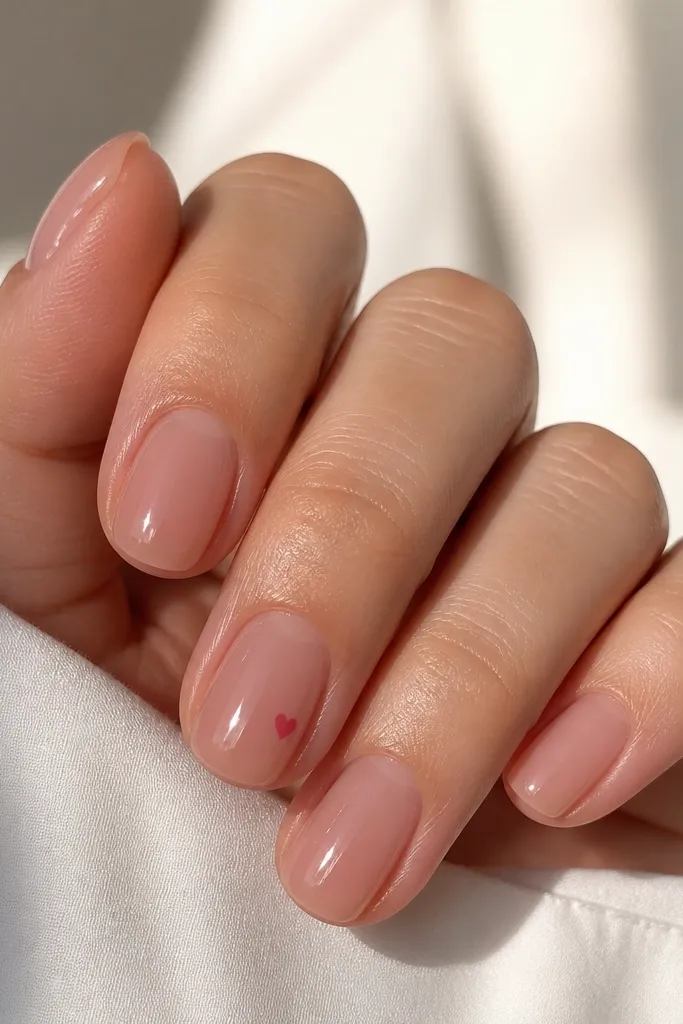
Hearts can look childish, but this version is grown-up because it’s tiny and placed on the side. Clear pink BIAB keeps the nail looking natural and makes the heart stand out without turning the whole manicure into a theme. Side placement helps because the heart stays visible as you grow out, and it doesn’t get worn down at the exact tip. I’ve done this for work events and casual weekends — it reads sweet without being loud. It also works on short nails better than big center hearts.
Apply clear pink BIAB and cure, then file to a rounded shape with smooth sidewalls. With a fine liner brush, place a small heart about halfway between cuticle and free edge, but closer to one side than the center. Use darker pink or a berry shade so it pops against the clear base. Cure the heart, then top coat all nails with two coats, sealing around the heart edges carefully so it doesn’t catch. Wipe the sidewall with a lint-free wipe to keep it clean.
Editor's notePaint half a heart first, cure for 10 seconds, then finish the second half — cleaner symmetry.
Skip thisSkip hearts that sit too close to the cuticle — gel shrink makes them look smeared.
11. Black BIAB with Sheer Top Coat and Reverse French Line
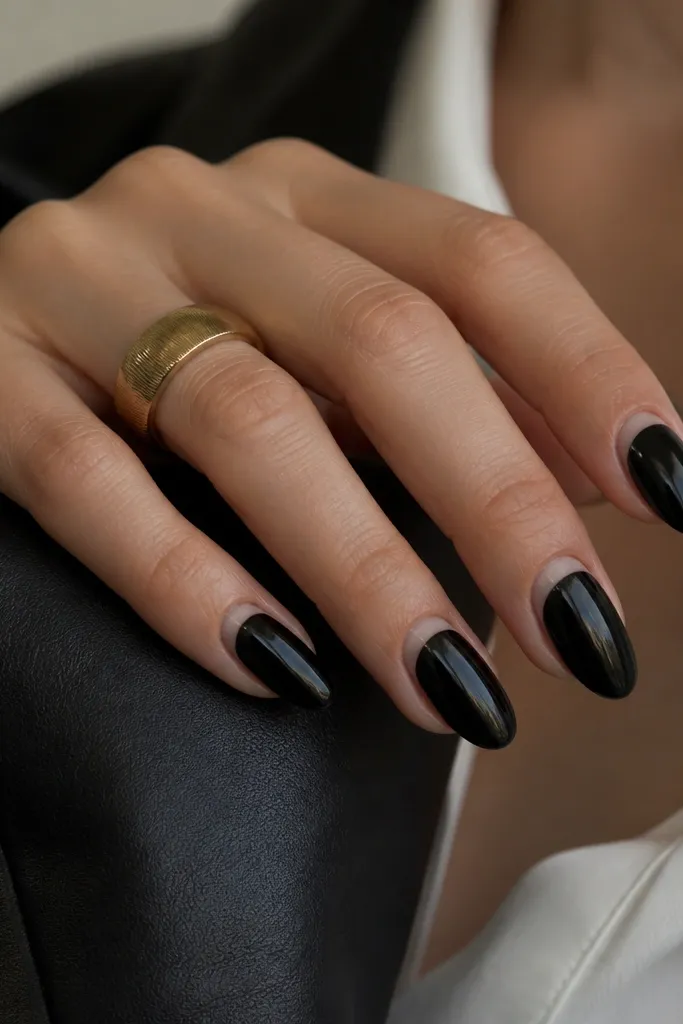
Reverse French is one of the most low maintenance ways to wear dark color because the design sits near the cuticle instead of the tip. The black base hides chips and stains, and the sheer nude reverse line gives a polished contrast that looks sharp even with regrowth. This is my pick for nights out or when you want a sleek look that still feels wearable. It flatters hands with longer nail beds because the reverse line makes the nail look structured. If your skin tone is deep or medium, the nude band looks extra crisp against the black.
Apply black BIAB as your base and cure, then file to a short almond or squoval shape. For the reverse French, use a sheer nude gel and paint a thin crescent right at the cuticle — keep it narrow so it doesn’t look like a thick band. Leave a tiny black gap between the crescent and the sidewalls so it stays clean. Cure, then top coat with a glossy top coat on every nail, sealing the crescent edges. If your black gel is prone to dullness, apply a slightly thicker top coat on the reverse line nails.
Keep the reverse line thin — 1 mm looks crisp; wider looks heavy fast.
Avoid over-filing the cuticle area — reverse French shows filing gaps instantly.
12. Iced Beige BIAB with Tiny Studs on the Index Finger Only
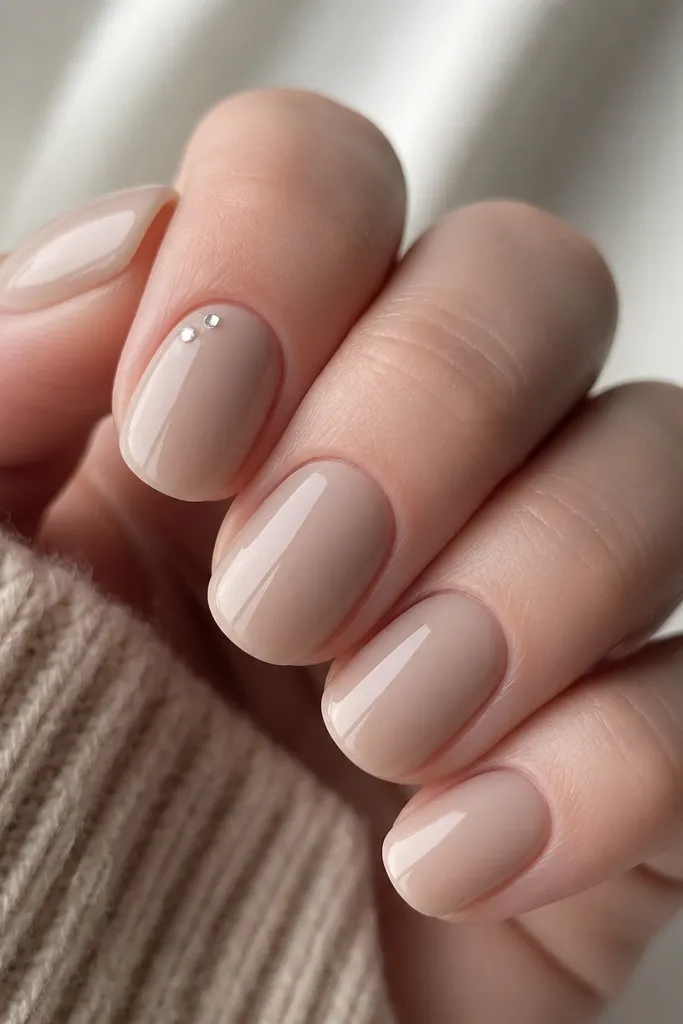
Studs usually feel high maintenance, but one or two tiny studs on a single nail is easy. Iced beige is a smart base because it’s bright enough to look clean but neutral enough to hide regrowth. The studs add a “spark” moment without requiring detailed painting across multiple nails. I like placing them on the index finger only because it balances attention with practical wear — fewer studs means fewer snag points. This looks great on fair to medium skin tones and pairs well with silver jewelry.
Apply iced beige BIAB to all nails and cure, then file to a smooth rounded shape. Place one small dot of clear gel or tacky base where you want the stud, then press the stud into it with a flat tool. Keep the studs close to the cuticle but not touching it — leave about 1 mm space so it doesn’t lift. Cure, then top coat all nails, but go slower over the stud nail and make sure the gel covers the base edge around the stud. Cap the free edge and cure fully so the manicure stays smooth.
Editor's noteIf you feel the stud with your finger, add a thin top coat layer — smooth beats shiny every time.
Skip thisAvoid placing studs near the tip — they snag on hair and fabric.
13. Soft Lavender BIAB with Wispy Accent Line on the Ring Finger
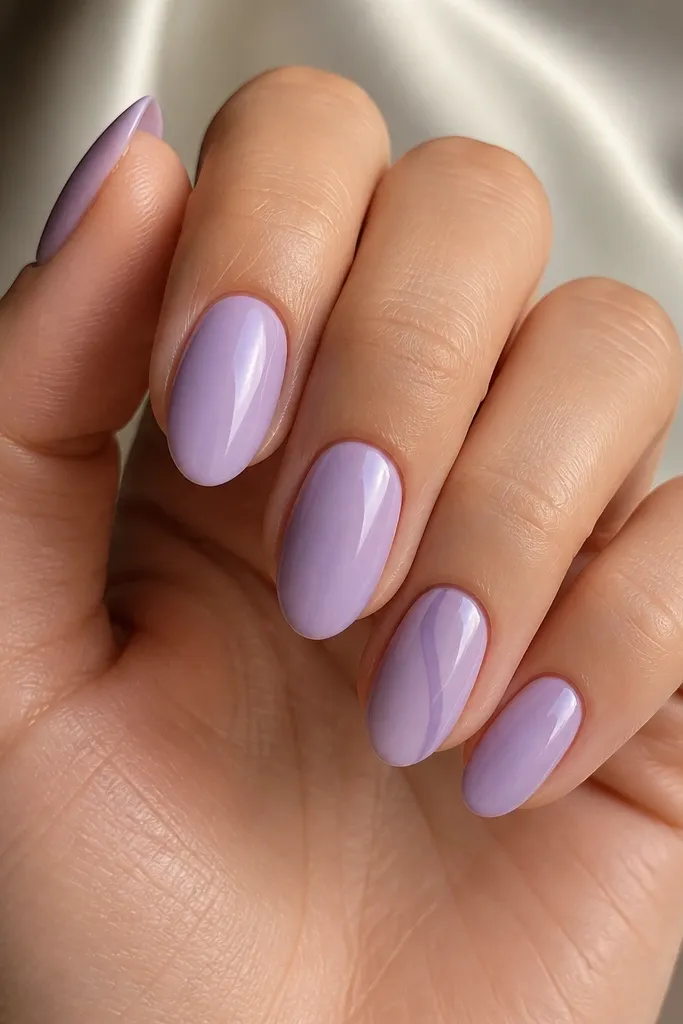
Wispy lines look artsy, but they’re actually low maintenance when you keep them small. Soft lavender is flattering and gives that “spring even when it’s cold” vibe, and because it’s a single color base, it grows out nicely. The ring finger accent is placed off-center so even if your nail grows unevenly, it still looks intentional. This style is great for people who like subtle details more than glitter and who want a manicure that doesn’t look busy. It also looks good on short nails because the accent line doesn’t crowd the tip.
Apply soft lavender BIAB and cure, then file to a rounded almond or short almond. For the accent, use a thin liner brush and a slightly darker lavender gel, then drag a light curved line starting near the cuticle and tapering as it moves down. Keep the line length to about 1/3 of the nail so it stays delicate. Cure the accent and top coat all nails with two coats, using extra care to seal over the line so it doesn’t catch. Clean the cuticle area after curing so the wispy line looks sharp.
Editor's noteUse less gel than you think — wispy lines look better when they’re airy and light.
Skip thisSkip thick swoops — they look heavy and start peeling at the edges.



