
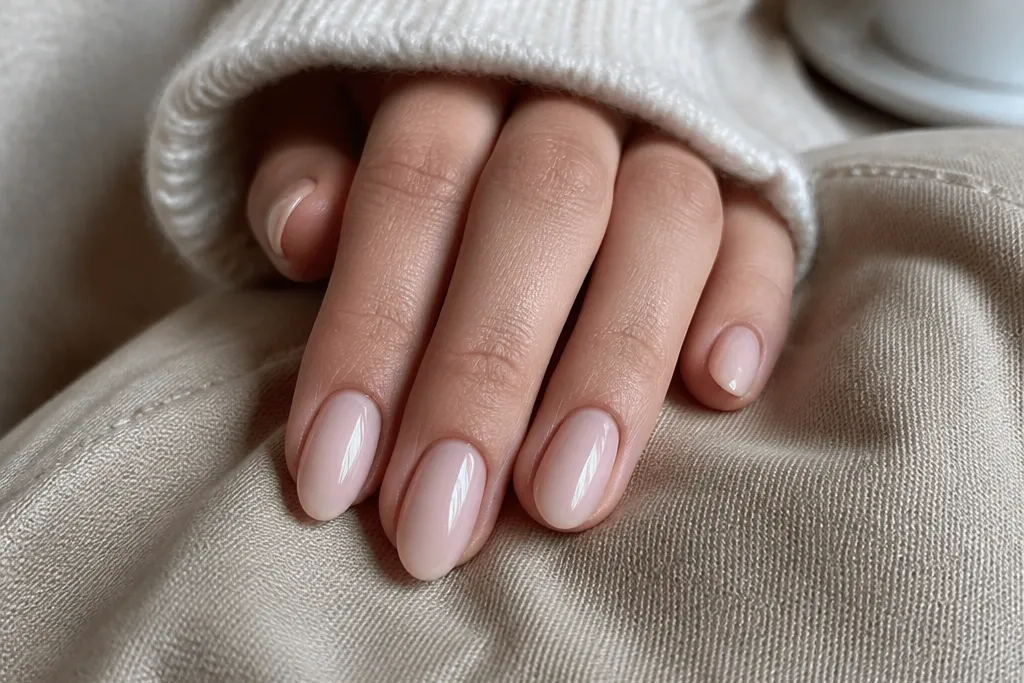
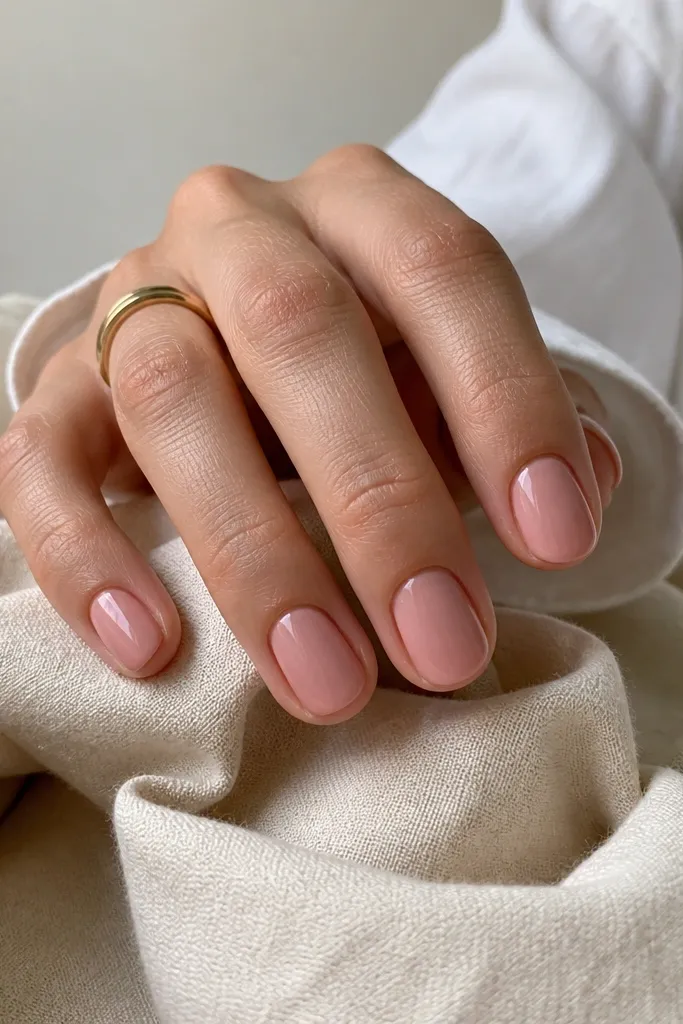
1. Micro French with Nude BIAB and a 1mm Smile Line
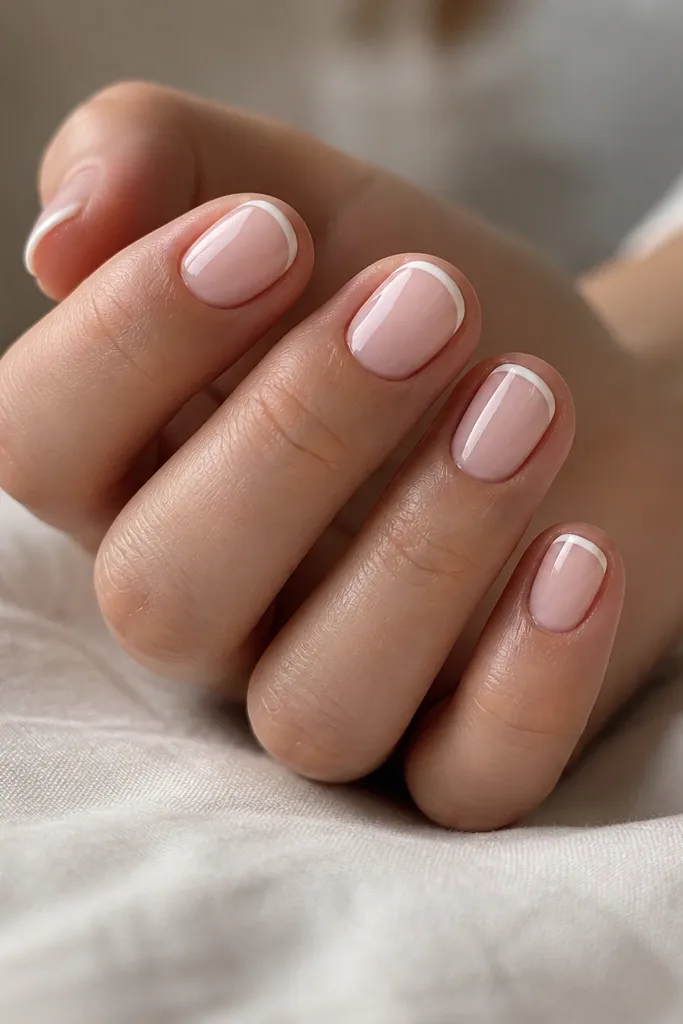
This is the French I reach for when I’m doing nails in a tight apartment space and I don’t want to chase symmetry across five nails. The sheer nude BIAB makes your nail bed look longer, and the micro white line keeps the whole set light on the hands. I like it on warm skin tones because the nude base blends instead of turning ashy, but the white still pops in photos. It also flatters shorter nails because you’re not adding height with a thick tip.
Start by applying a sheer nude BIAB base in thin layers, curing each layer so the cuticle area stays flat. Use a fine liner brush to paint a 1mm smile line in white, keeping the curve centered and leaving the side edges slightly thinner. Cure, then seal with a glossy topcoat, making sure you cap the free edge lightly. If your lines look wobbly, file only the top surface after the first topcoat — it tightens the edges without removing color.
Editor's noteUse a striping brush with a short handle so your wrist doesn’t drift when you’re working near a wall or small table.
Skip thisDon’t make the French tip thicker than 1mm on short nails — it turns the set chunky fast.
2. Half-Moon Negative Space with Clear BIAB Base
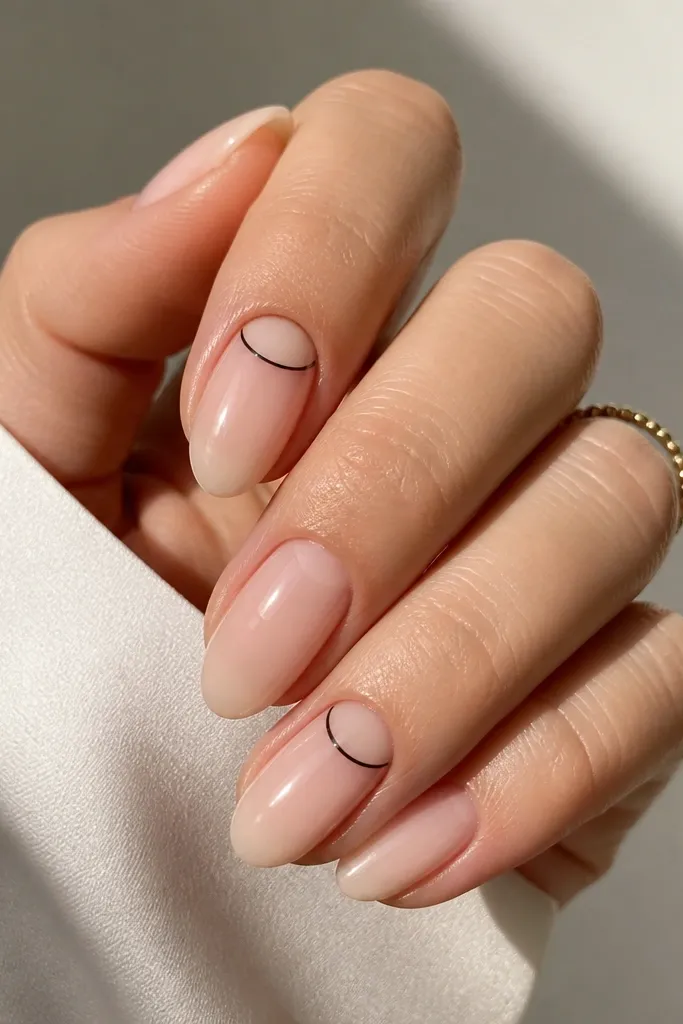
Negative space is my apartment hack because it hides tiny filing differences. A half-moon cutout keeps the design intentional while letting your natural nail shape show through where you’d otherwise need heavy detail. The clear BIAB base makes hands look clean and fresh, and the thin black outline adds contrast without turning the set into full art. This works well on medium to deep skin tones because the negative space reads crisp instead of dull.
Start with a clear BIAB base and cure it. Place a half-moon guide sticker or use a small curved liner stencil at the cuticle, then leave that area unpainted. Paint the rest of the nail with clear or a sheer nude, then remove the guide to reveal the negative space. Outline the half-moon with a thin black gel line on two nails only, cure, and finish with glossy topcoat.
Lightly wipe the guide area with alcohol before you place the sticker so it doesn’t lift and smear.
Don’t extend the outline all the way to the sidewalls — it looks messy when your cuticle line isn’t perfectly straight.
3. Milky Pink BIAB with Cat-Eye Stripe Through the Center
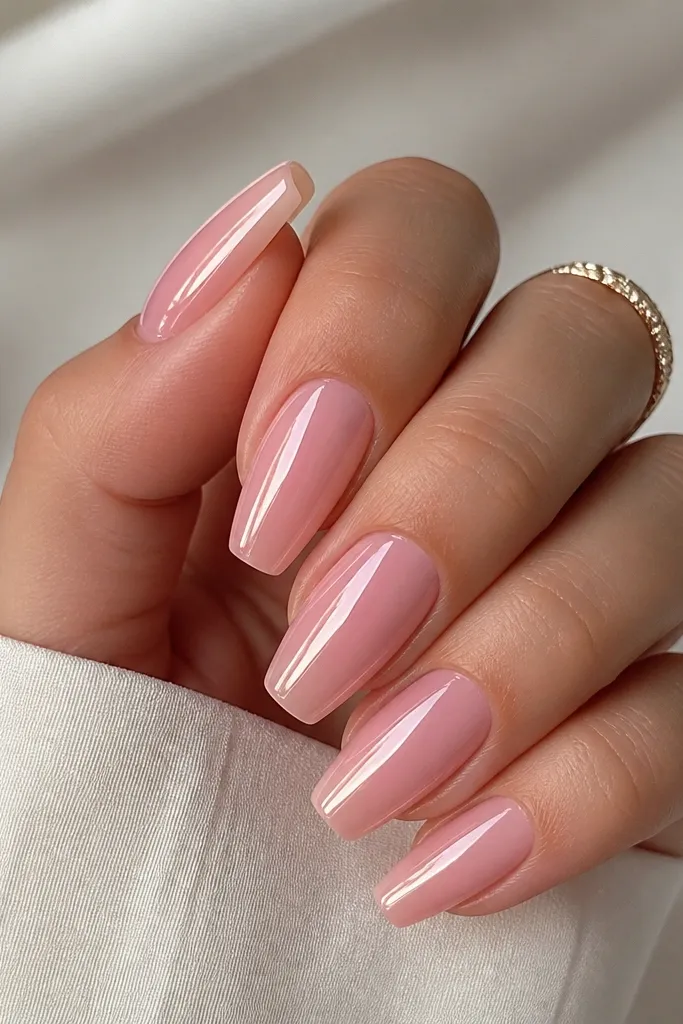
Cat-eye polish looks like you paid for a fancy magnetic set, but it’s actually controlled and fast once you know the magnet timing. Milky pink BIAB makes the stripe look like light, not glitter, and the center placement keeps everything balanced even if your nails aren’t identical. I use this for dates and weekends because it looks soft and expensive without needing nail stickers. It flatters all skin tones, but it’s especially flattering if you like a natural-looking manicure that still catches attention.
Apply milky pink BIAB in thin layers and cure. Work one nail at a time with magnetic cat-eye gel: paint a medium layer, then hold the magnet directly above the nail for 5-8 seconds until the stripe forms. Cure fully under your lamp, then wipe residue if your system leaves tackiness. Finish with a glossy topcoat that spreads smoothly over the stripe so it doesn’t snag.
Editor's noteMark your magnet position on the table with a small piece of tape so every nail gets the same stripe strength.
Skip thisDon’t move the magnet while the gel is still spreading — that makes the stripe wobble.
4. Sheer Rosy BIAB with Tiny Gold Dot Cluster (3 Dots Only)
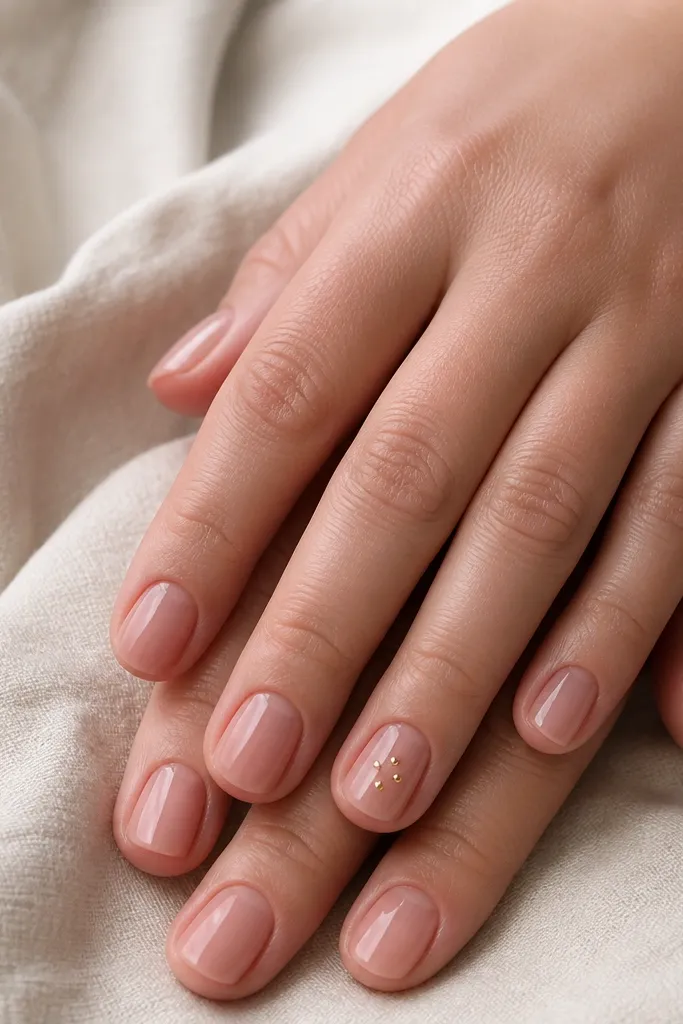
This is the “small space” design because it’s tiny, repeatable, and doesn’t demand perfect lines. The sheer rosy BIAB makes your nails look healthy while the gold dots add a little jewelry effect. I like clusters of three because they look intentional instead of random, and placing them near the center keeps your nails looking longer. It works on fair to deep skin tones because gold sits warm against rosy bases.
Start by applying sheer rosy BIAB and cure. Add a single ring finger accent: place three gold dots using a dotting tool — one at the center, two slightly lower left and right. Cure, then topcoat all nails with glossy gel, spreading carefully around the dot edges. If the dots look too flat, add a thin second topcoat layer only on the accent nail to smooth the surface.
Use a metal dotting tool, not plastic — it holds pigment better for tiny dots.
Don’t add more than three dots per cluster — extra dots make the design look like it smeared.
5. Matte Nude BIAB with One Glossy Red Bow Accent
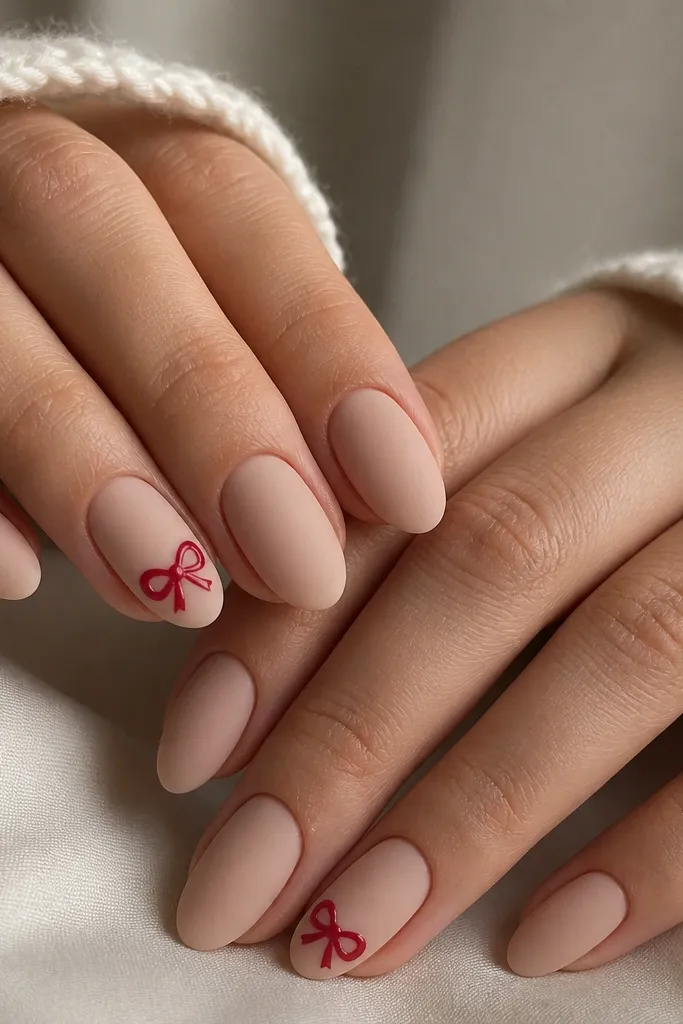
Matte topcoat plus a single glossy accent is the fastest way I know to make a manicure look styled instead of plain. The matte nude base hides minor unevenness in your polish thickness, which matters when you’re working quickly in a small space. The red bow reads like nail jewelry and gives a strong focal point without covering the whole nail with art. This flatters hands with shorter nail beds because the matte finish looks smooth and the bow sits high near the tip.
Apply nude BIAB, cure, then buff lightly for a smooth surface. Topcoat with matte topcoat on all nails and cure. On one accent nail per hand, paint the bow with red gel: first the two loops (curved teardrops), then add a tiny center knot. Cure again, then apply glossy topcoat only over the bow so it stays shiny against the matte background.
Editor's noteMake the bow about 2/3 the width of your nail — if it’s too big, it looks like a sticker.
6. Clear BIAB with Iridescent Foil Confetti on One Nail
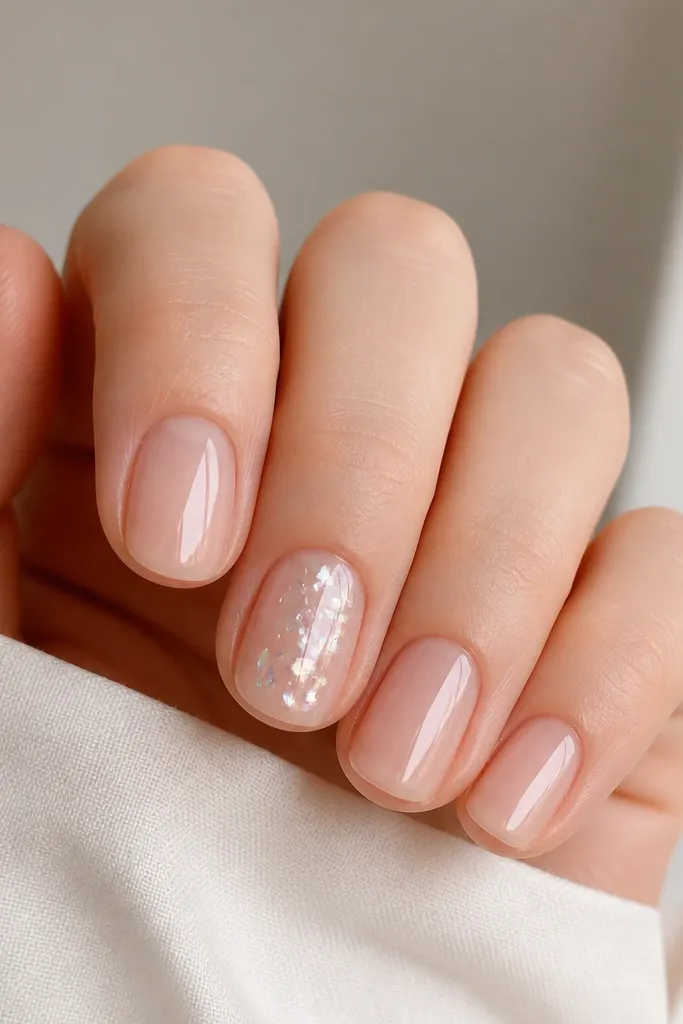
Foil confetti looks expensive because it catches light from different angles, and you don’t need coverage across every nail. Clear BIAB makes the foil look suspended, not stuck on top, which is the difference between “pretty” and “cheap.” I like this on hands that get photographed under overhead lighting because the foil still sparkles when the room is dim. It works for all skin tones and any outfit, especially if you wear simple rings.
Apply clear BIAB to all nails and cure. Choose one accent nail and brush a thin layer of clear topcoat or tacky BIAB where you want the foil. Use foil tweezers to place small pieces — keep them mostly in the center so the nail doesn’t look busy at the edges. Press gently, cure, then seal with two thin glossy topcoat layers to lock the foil down and prevent snagging.
If foil lifts at the sides, file only after the second topcoat — that’s when it’s fully locked.
Don’t put foil on all five nails — the set starts to look heavy and messy fast.
7. Chocolate Brown BIAB with Micro Caramel Swirl Tips
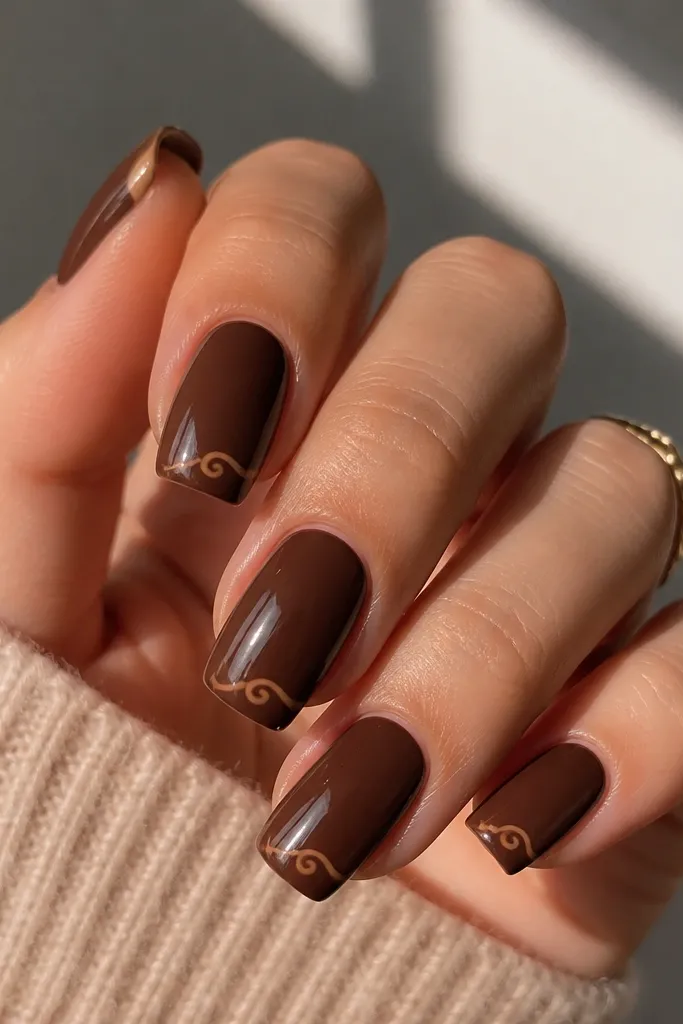
This is the “cozy” set that still looks clean. Chocolate brown BIAB makes your hands look grounded and tidy, and micro caramel swirls keep it from becoming a full marble mess. The swirl is small enough that you don’t need perfect symmetry across all nails, which is a lifesaver in a small apartment where you’re not setting up a flat work station. I love it for fall and winter, and it flatters olive and warm undertones.
Apply chocolate brown BIAB in thin layers and cure. With a striping brush, draw one caramel swirl starting at the side of the tip, then curve toward the center and back out — keep it only in the top 1/3 of the nail. Let the caramel gel self-level for a second, then cure. Finish with a glossy topcoat, and cap the free edge so the swirl doesn’t catch on fabric.
Editor's noteWipe your brush with gel cleaner between nails so caramel stays crisp, not muddy.
Skip thisDon’t drag the caramel line through the brown — it turns into a smudge instead of a swirl.
8. White BIAB with Vertical Nude Stripe Down the Center
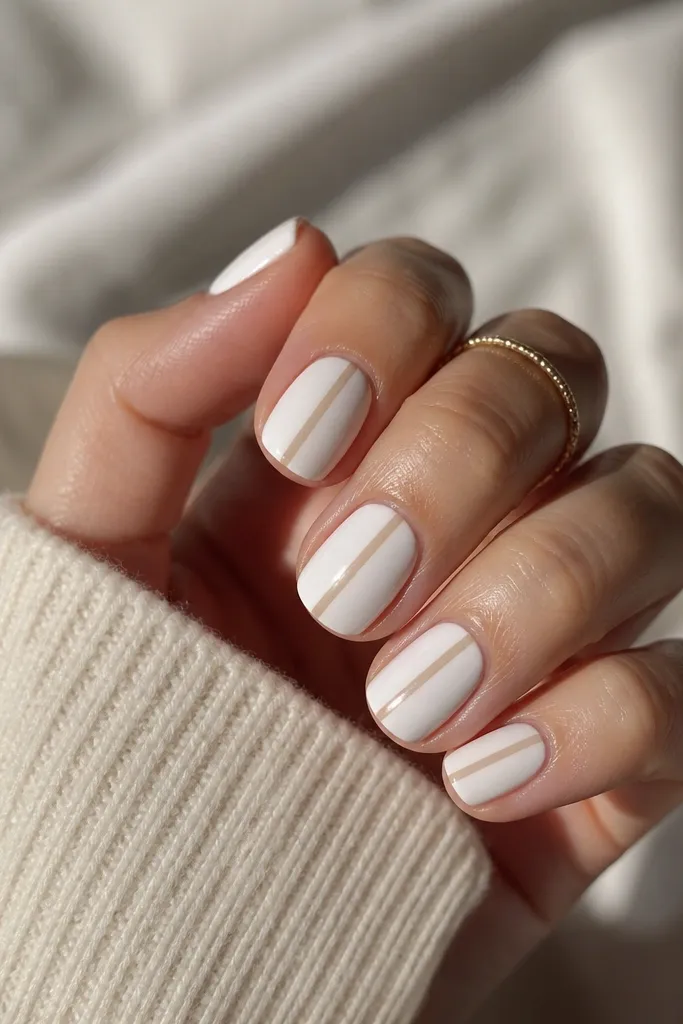
A vertical stripe makes short nails look longer, and it’s one of the few designs that still reads polished if your room lighting is harsh. White BIAB can look streaky if the application is thick, so keep it smooth and thin; then the nude stripe gives the eye a clean path. This design flatters hands with shorter nail beds because it pulls the eye upward. It also works on fair to deep skin tones because the nude stripe is close to your skin tone, not a random beige.
Apply white BIAB in two thin layers and cure between. Mix or choose a nude gel close to your skin undertone, then paint a vertical stripe down the center — start just below the cuticle line and stop about 1mm above the free edge. Cure, check straightness from the side, then topcoat with a glossy layer. If the stripe looks slightly uneven, add a thin topcoat and let it level before curing.
Hold the nail under your phone flashlight — you’ll see stripe wobble before you cure the final topcoat.
Don’t make the stripe too wide — it stops elongating and starts looking like a mistake.
9. Pastel Rainbow Tips in a Single Row (No Full Art)
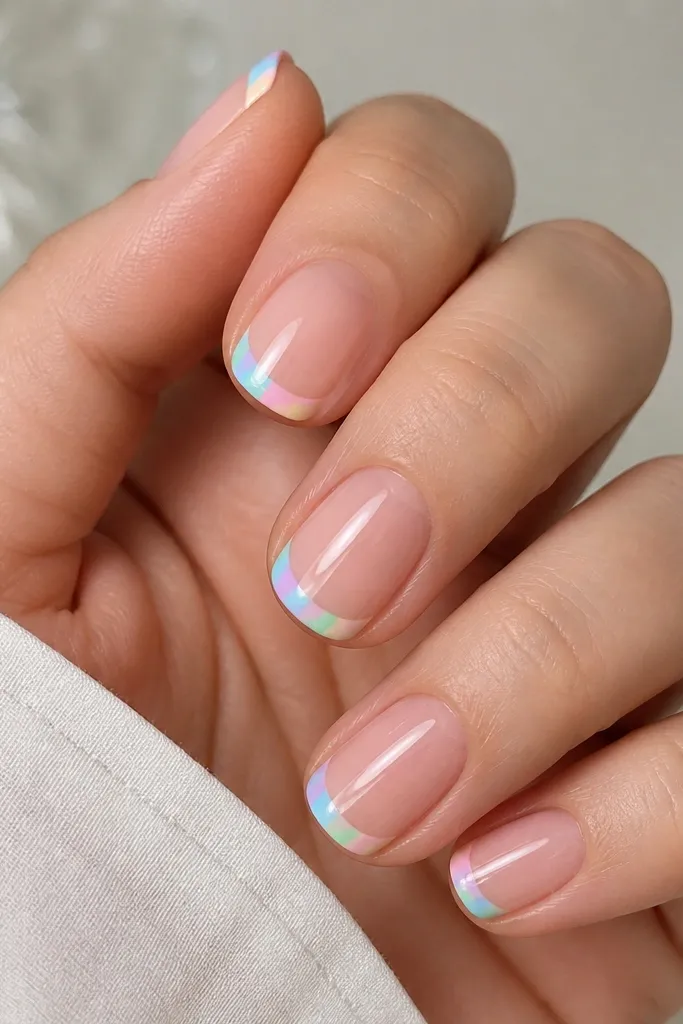
This is a fun set that doesn’t require complex nail stamping or hand painting full rainbows across the nail. The sheer pink base keeps it wearable, and the rainbow row is concentrated at the tip where you can control spacing. Because it’s a single row, it looks intentional even if your apartment mirror is far away. I like it on medium to fair skin tones because pastel colors show clearly, but it works on deeper tones too if your base is a warmer sheer.
Apply sheer pink BIAB, cure, then thin-buff the surface lightly. Use a thin liner brush to paint the tip area in four pastel segments, keeping each segment about 1/4 of the tip width. Cure and clean edges with a small cleanup brush dipped in gel cleaner. Finish with glossy topcoat, focusing on the tip so the colors look sealed and smooth.
Paint the colors in this order: mint to yellow — it keeps your hand from smearing when you switch colors.
Don’t blend the pastels too much — muddy gradients look cheap on short nails.
10. Nude BIAB with Black Micro Stars at the Cuticle Corner
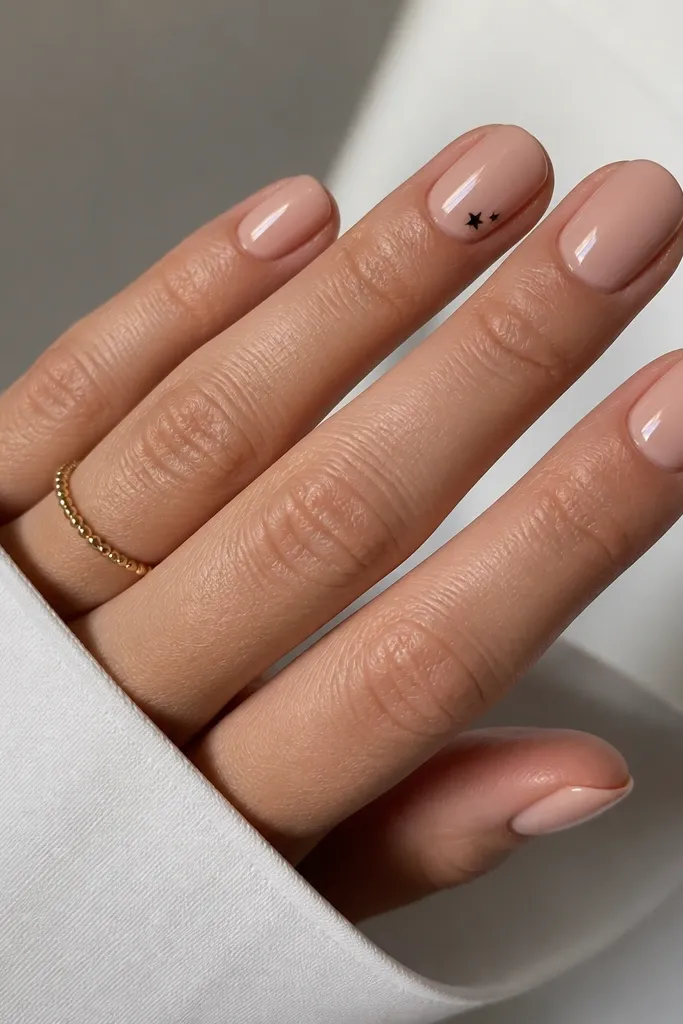
Micro stars feel playful without turning into full nail art. Placing the star near the cuticle corner looks cute and keeps the rest of the nail clean, which is perfect when you’re working in a space where you can’t spread out tools. The black pigment gives crisp definition, and the nude BIAB keeps it from looking harsh. This is flattering on hands that have a slightly shorter nail bed because the accent sits high and draws the eye upward.
Apply nude BIAB, cure, and seal with a glossy or slightly tacky surface depending on your gel system. Paint one micro star using a star stamp or a dot-star method: place a dot, then pull four tiny points out with a needle tool. Cure immediately after each nail. Topcoat all nails with glossy topcoat, and cap the edges around the star so it doesn’t catch.
Editor's noteIf your stars look too big, reduce the point length — small stars look sharper on short nails.
Skip thisDon’t place stars in the center of every nail — it becomes cluttered fast.
11. Sheer Peach BIAB with Orange Polka Dots Only on the Ring Finger
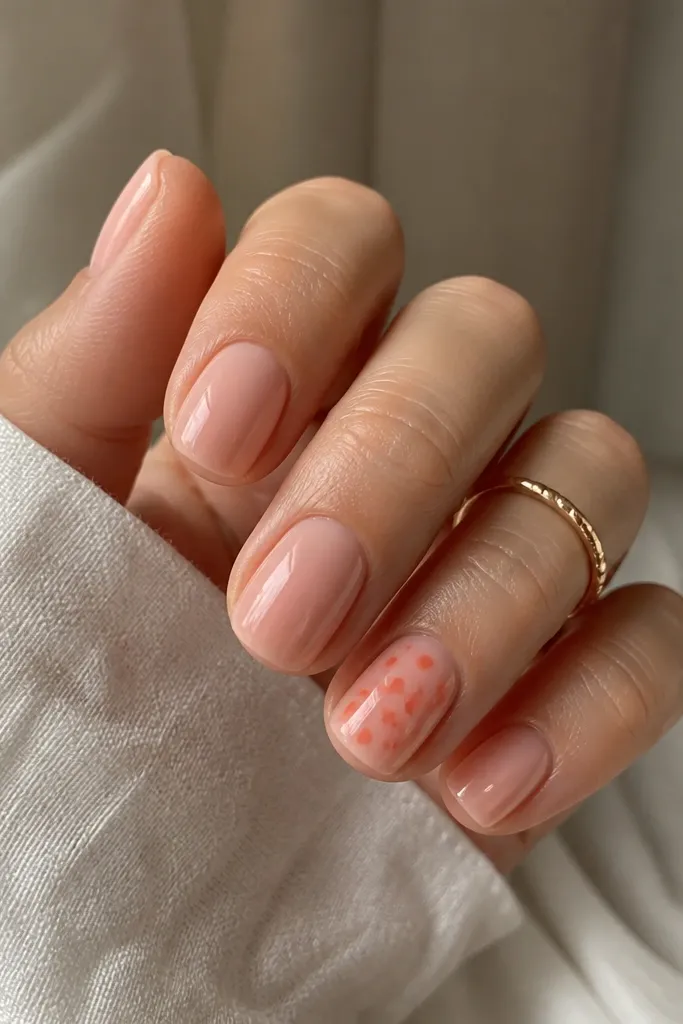
Peach and orange dots look bright without needing a full design across every nail. I do this when I want a manicure that grows out well because the dots are concentrated, not covering the entire nail plate. Sheer peach BIAB makes skin look warm and healthy, and the ring finger accent keeps it balanced. This works great for everyday wear and looks especially nice with gold jewelry.
Apply sheer peach BIAB to all nails and cure. On the ring finger, add a dot cluster with orange gel: start with three larger dots, then fill in two smaller ones between them. Keep the cluster about the size of a pea — small enough that it doesn’t feel busy. Cure, then finish with glossy topcoat on every nail. If you notice a dot edge feels raised, add a second thin topcoat only on the ring finger.
Editor's noteUse the same dot size for the first three dots so the cluster looks designed, not accidental.
Skip thisDon’t place dots too close to the sidewalls — they catch and chip first.
12. Light Grey BIAB with White Marble Vein on One Accent Nail
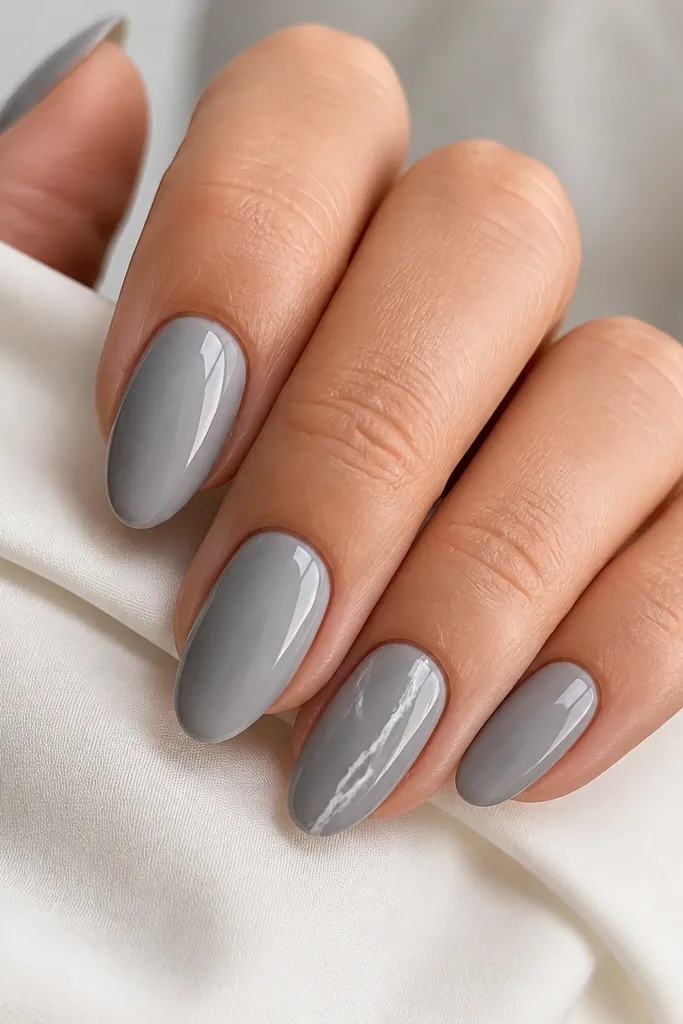
Marble can look messy if you try to do it on every nail, so I keep it to one accent. The light grey base is neutral and looks clean in almost any lighting, while the white vein gives that high-end effect. Diagonal placement makes short nails look more dynamic without needing long lines. If you have cool undertones, this set makes your hands look crisp instead of washed out.
Apply light grey BIAB in thin layers and cure. On the accent nail, use white gel and a liner brush to draw one main vein, then add two tiny wisps that branch off lightly. Drag a tiny amount of white gel with the brush tip to soften the vein edges — don’t fully blend. Cure and seal with glossy topcoat, then cap the free edge carefully.
Editor's noteDo the vein in one direction and stop early — marble looks better when it’s incomplete, not overworked.
Skip thisDon’t add heavy white patches across the whole nail — it turns into chalky blotches.
13. Deep Teal BIAB with Silver Chrome Half-Swoosh
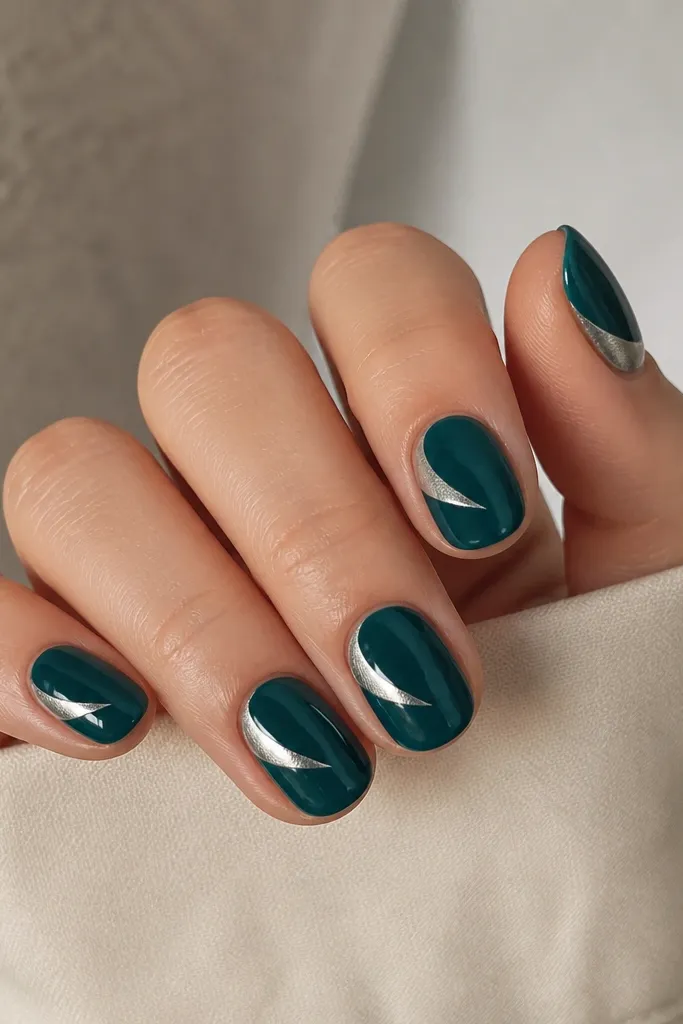
Chrome on a deep teal base is the fastest way to get a “going out” look without spending hours. The half-swoosh shape is easy to repeat and looks intentional even if your hand shakes slightly — it only needs a smooth curve, not perfect symmetry. The silver reflects light strongly, which is great when your apartment lighting is warm and dim. This flatters hands with cooler undertones and looks stunning with silver rings.
Apply deep teal BIAB, cure, then topcoat lightly if your chrome system needs a tack layer. Paint a crescent arc with a thin striping gel where you want the swoosh. Cure briefly or apply chrome adhesive per your product directions, then rub silver chrome powder over the arc with an applicator sponge. Brush off excess, cure if required, and seal with a thin topcoat that won’t dull the chrome too much.
Editor's notePractice the curve on a fake nail tip first — the arc shape is what makes it look expensive.
Skip thisDon’t cover the whole nail in chrome — it looks flat and can chip faster.
14. Lavender BIAB with White Crochet-Look Texture on One Nail
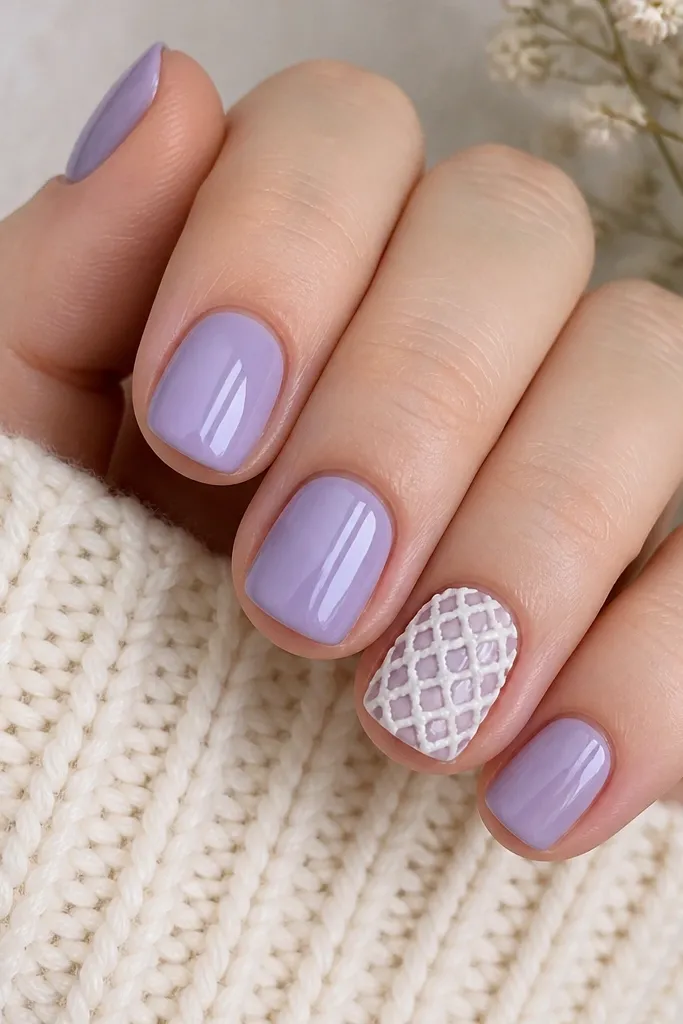
This is the texture set I do when I want something different but still apartment-friendly. Texture looks impressive because it catches light, and keeping it on one nail prevents bulky build-up on every finger. The lavender base stays soft and feminine, while the white raised lattice reads like cozy knitwear. It flatters fair to medium skin tones and looks great with sweaters and simple rings.
Apply lavender BIAB to all nails and cure. On one accent nail, add a thin layer of white gel and use a dotting tool to create small loop points along a grid — you’re building a raised pattern, not a flat drawing. Connect the loops with tiny lines using a toothpick or liner brush, then cure thoroughly. Seal with a topcoat that’s designed for texture or use two thin coats so the lattice stays defined instead of flattening.
Editor's noteKeep the texture only in the center third of the nail — it looks intentional and avoids bulky cuticle area.
Skip thisDon’t put texture near the cuticle — it lifts first and looks uneven after a week.
15. Clear Jelly BIAB with Tiny Red Heart Outline (One Heart per Nail)
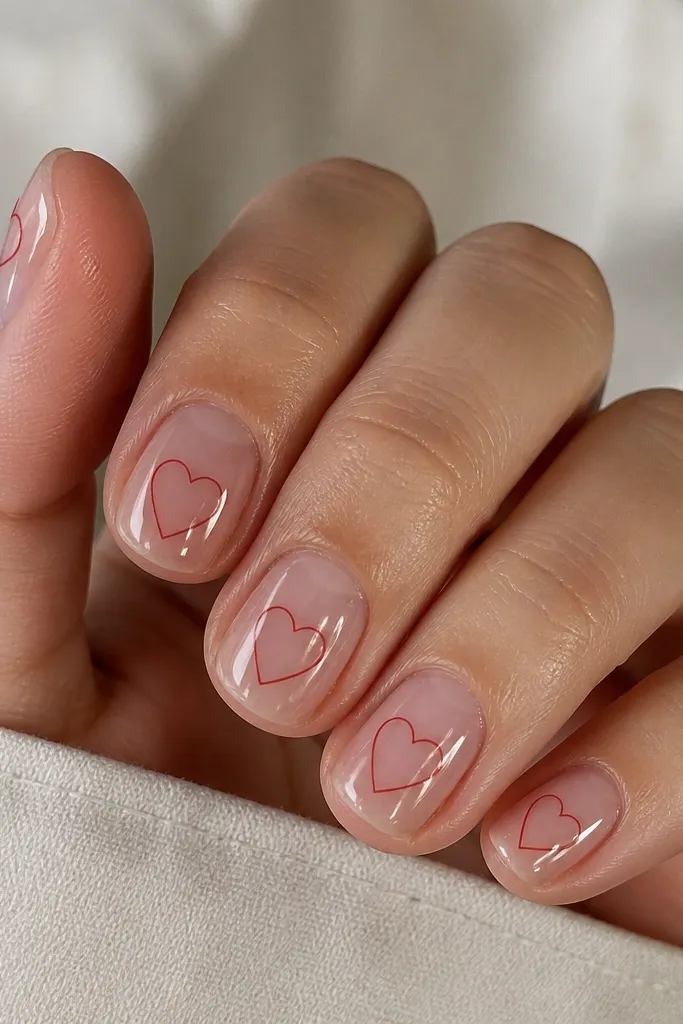
A heart outline is cute, but the key is keeping it thin and centered so it looks like a design, not a doodle. Clear jelly BIAB makes the hearts look floating, which I love because it makes the manicure look fresh even when it grows out. Red hearts look great against cool skin tones and make your hands look “done” for Valentine season or just because. This is also beginner-friendly because you can correct small mistakes with a cleanup brush before curing.
Apply clear jelly BIAB, cure, and wipe residue. Use a fine liner brush to draw a heart outline: start with a small V shape at the bottom, then curve two arcs up to meet at the top point. Keep the heart about 3-4mm tall on short nails. Cure and repeat on each nail, then finish with glossy topcoat, making sure the outline edges are sealed.
If the line breaks, add a tiny second pass over the break — don’t redo the whole heart.
16. Nude BIAB with One-Sided Black "Wing" at the Tip
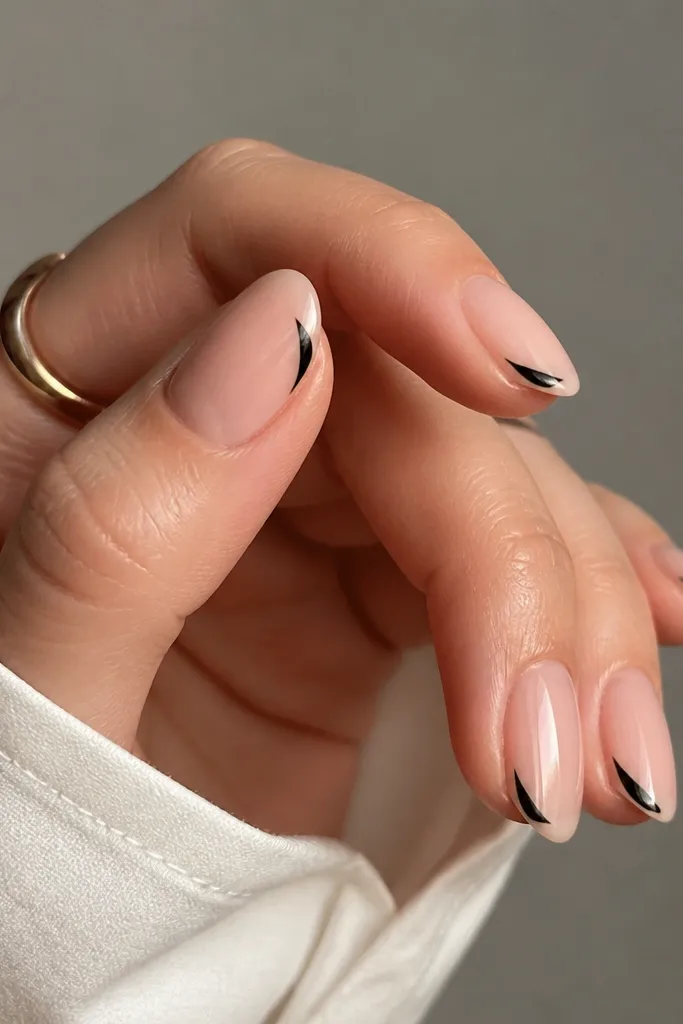
This is a graphic look that still works on short nails because it’s one-sided. The wing draws attention to the outer corner and makes the nail look sharper, like a tiny cat-eye effect. Nude BIAB keeps it wearable, and black gel gives crisp contrast that looks good in photos and in real life under apartment lighting. It flatters hands that like bold details but don’t want glitter or heavy art.
Apply nude BIAB and cure. With black gel and a fine brush, draw a small wing starting at the outer smile line and flicking up slightly — keep it only on the outer half of the nail. Cure, then use a cleanup brush to sharpen the wing edge if needed. Topcoat with glossy gel, sealing the wing area and the free edge.
Editor's noteAngle your brush from the side of your nail, not straight down — it helps you get a smooth wing curve.
Skip thisDon’t make the wing too long — it overwhelms short nails and looks disproportionate.
17. Soft Green BIAB with White Dot "Pearl" Ring Around the Cuticle
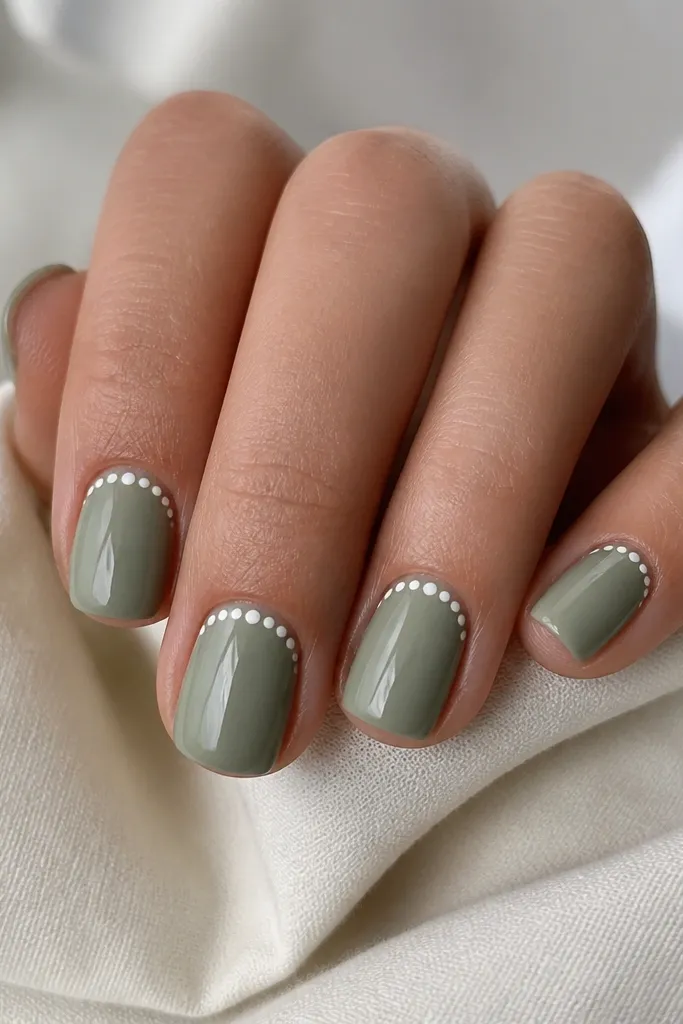
Pearl rings look fancy but they’re really just dot placement. The even dot ring frames the cuticle and makes the nail look finished, even if your apartment lighting isn’t great. Sage green is flattering because it’s muted, not harsh, and the white dots pop without screaming. This works across skin tones, and it’s especially pretty if you wear gold or mixed metals because white dots mimic jewelry.
Apply soft green BIAB, cure, and wipe residue. Using a dotting tool, place dots around the cuticle ring — stay consistent: about 1 dot every 2-3mm, with a small gap at the center top. Cure after you place the dots, then topcoat with glossy gel, keeping the topcoat layer thin so the dots don’t blur. If dots sink, add a second thin topcoat only after the first one is fully cured.
Editor's noteUse the same dotting tool for every nail; swapping tools changes dot size and makes the ring look uneven.
Skip thisDon’t overcrowd the dots — too many makes it look like a sticker texture instead of pearls.
18. Pink BIAB with Micro Rhinestone Line on Only the Index Finger
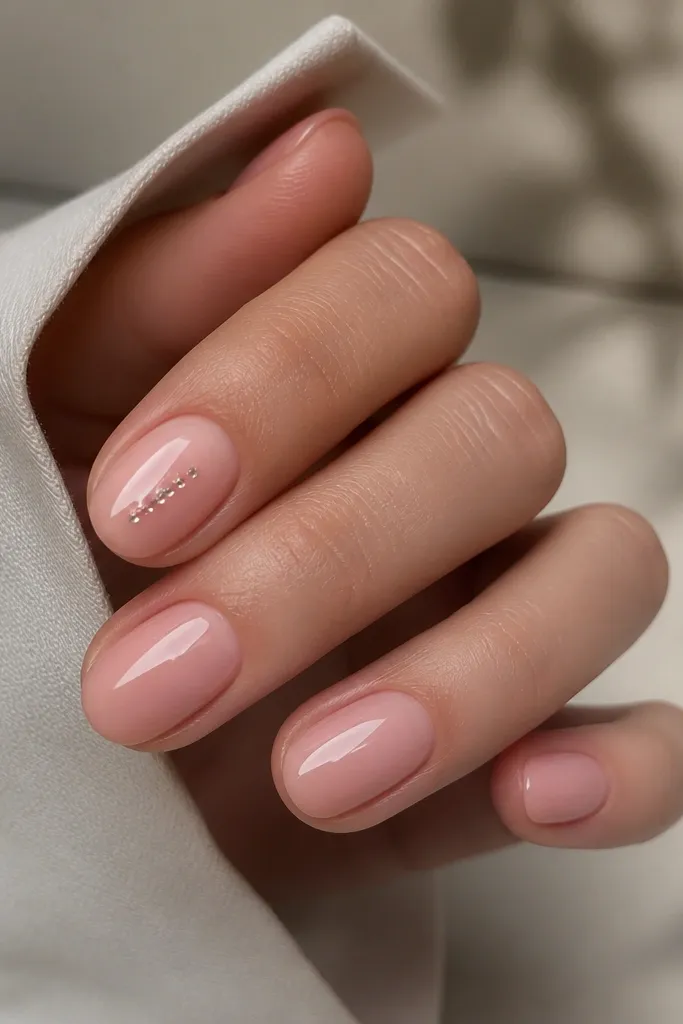
Rhinestones look best when they’re controlled. One thin line of four stones gives sparkle without turning your nails into a “grabby” texture that catches on sweaters. Pink BIAB keeps the set sweet, and the diagonal placement makes the nail look longer. I do this when I want a party-ready manicure but I still need it practical for daily life in a small apartment where I’m constantly picking things up.
Apply glossy pink BIAB to all nails and cure. On the index finger, mark a diagonal placement using a dot as a guide, then set four rhinestones with rhinestone gel — start with the top stone, then place the rest in a straight-ish line. Press lightly with tweezers so they sit flat, cure, and wipe any residue. Seal with a thin topcoat layer over the stones, then do a second thin topcoat to smooth the surface.
Editor's notePut the stones slightly above the nail’s center line — it looks better on short nails than placing them too low.
Skip thisDon’t cover rhinestones with thick gel — it turns into a bulky ridge.
19. Warm Tan BIAB with White "Brick" Lines (1 Nail Accent)
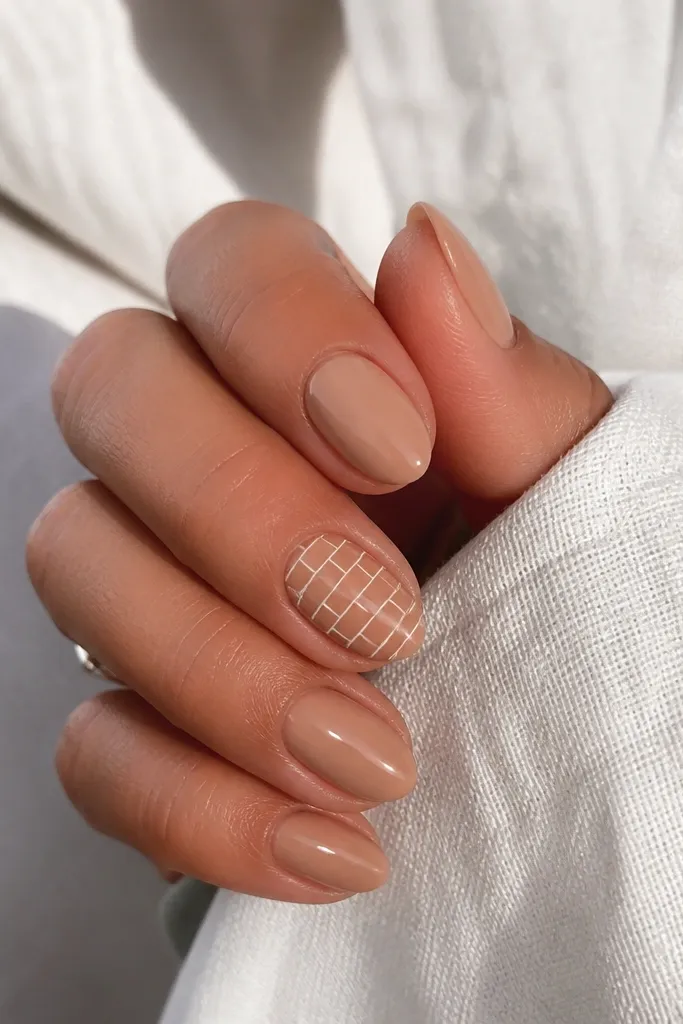
Brick lines sound weird, but they look cool because the pattern creates structure. Warm tan BIAB gives a smooth, neutral base, and white brick lines add graphic contrast without needing gradients. I use this when I want a design that looks intentional even if my nail shape varies slightly from finger to finger. It flatters medium to deep skin tones because the warm base avoids looking washed out.
Apply warm tan BIAB, cure, and topcoat lightly if your system needs it. On the accent nail, use a fine liner brush to draw horizontal lines first, then add vertical lines to create small rectangles. Keep the grid imperfect on purpose — real walls aren’t perfect, and it looks more natural. Cure, then finish with glossy topcoat, sealing the lines so they don’t snag.
Editor's noteMake the rectangles wider than they are tall so the pattern stays readable on short nails.
Skip thisDon’t cram tiny bricks too close together — it turns into a blur.
20. Ocean Blue BIAB with White Wave Cutout at the Tip
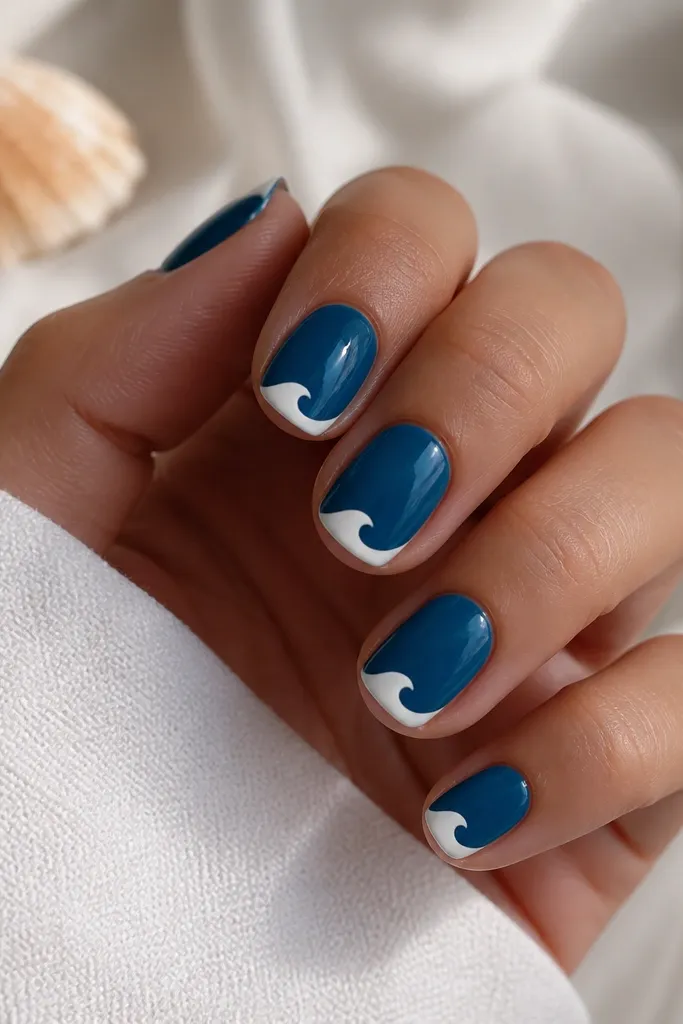
Wave cutouts look like nail art from a beach resort, but the trick is making the wave simple. Ocean blue gives depth, and a single wave shape at the tip keeps the design apartment-friendly because it’s one curve you can repeat. The white shoreline effect makes short nails look crisp and longer, especially when your smile line is a bit uneven. This looks great on fair and medium skin tones, and it also works on deeper tones because blue stays saturated.
Apply ocean blue BIAB in thin layers and cure. Use a small wave stencil or freehand with a liner brush to create a wave at the tip — either paint the white edge or leave negative space depending on your comfort. If you use negative space, cover the area with a removable stencil and cure the blue first, then remove to reveal the cutout. Topcoat with glossy gel, making sure the wave edge is sealed so it stays sharp.
Editor's noteIf you freehand the wave, start at the center point and work outward — your curve stays balanced.
Skip thisDon’t make the wave too tall — a tiny shoreline looks cleaner on short nails.



