
1. Milky Peach Jelly Gradient with Thin White Web
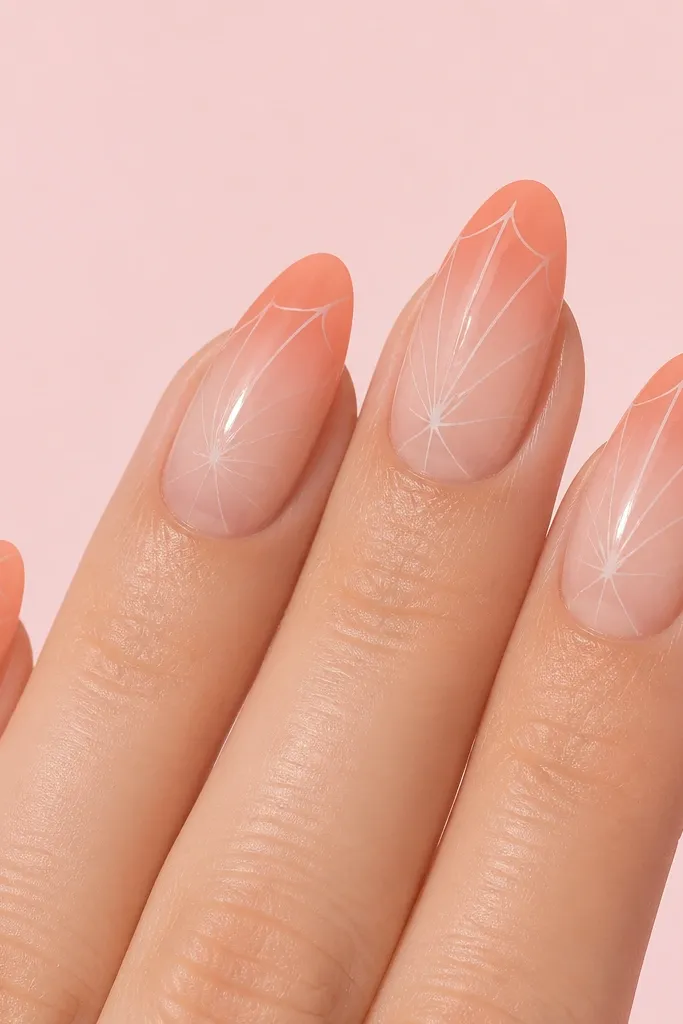
Start by prepping and shaping to a soft squoval or almond, then push back cuticles and buff lightly so the BIAB grips. Apply a sheer milky peach BIAB as your base in two thin layers, curing fully each time. Add a second jelly layer only on the outer third of the nail, blending upward with a gentle brush swipe. Cure, then use a fine detail brush with white gel to pull 3-5 thin lines from mid-nail toward the sides, leaving gaps so it looks like a web. Finish with a glossy top coat and cap the free edge on every nail.
This look is spring feminine because it reads soft and juicy even when it grows. The base is a milky peach jelly that matches warm skin tones beautifully — it brightens without looking neon. I like it on almond or soft squoval because the gradient naturally follows the shape and looks smooth, not streaky. The thin white web lines add a delicate “airy” texture, the kind you’d expect on a sheer spring dress. For photos, the jelly base catches light and makes your hands look hydrated.
Skip thisSkipping the blend between the outer third and the base makes the gradient look like a sticker.
Editor's noteIf the web lines get too thick, wipe your brush on a lint-free wipe so the gel comes out thinner.
2. Soft Lilac Micro French with Pearl Dot Halo
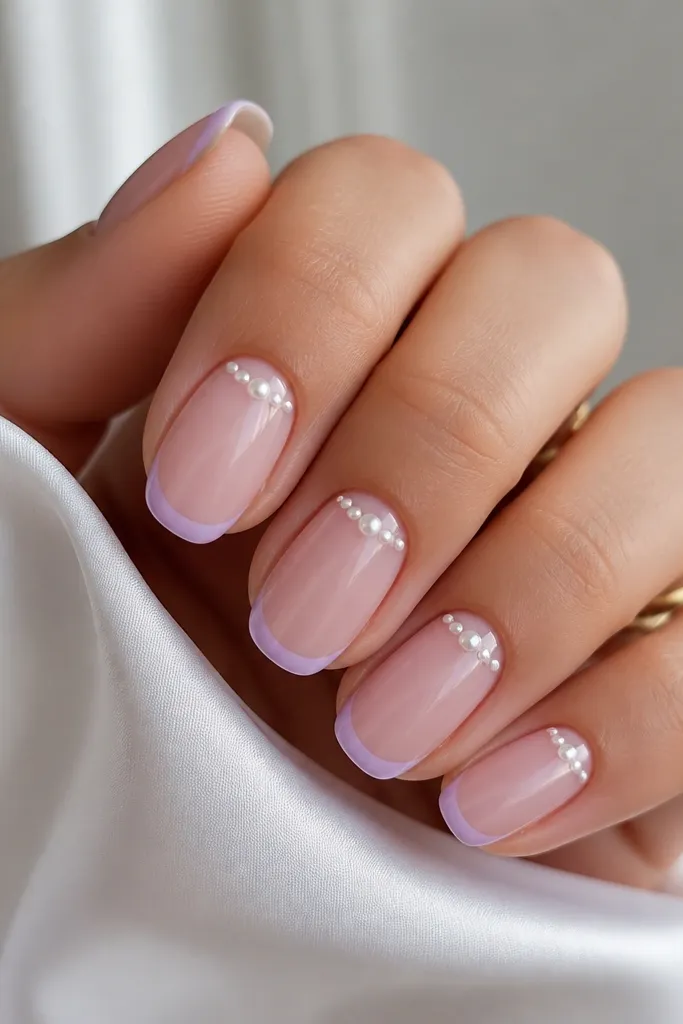
Apply a sheer pink BIAB base and cure, then add a thin BIAB overlay only if you need extra smoothness. With a striping brush, paint micro French lines in pale lilac — keep the line about 1-2mm wide so it stays delicate. Cure, then place tiny pearl dots near the cuticle: one dot centered and a second dot slightly angled to each side, leaving space between them. If you’re using pearl studs, pick them up with a dotting tool and press lightly before curing. Seal everything with glossy top coat, and run the brush along the pearl edges so they don’t snag.
Micro French is feminine because it frames the nail without covering your natural nail bed. Soft lilac keeps it spring-forward, and it flatters cool skin tones especially well — it makes your hands look brighter without turning chalky. The pearl dot halo gives the “pretty but not heavy” effect. I love this for weddings, baby showers, or any event where you want your nails to look polished in close-up photos. The halo placement keeps it from feeling too busy at the tip.
Skip thisDragging lilac gel too far down the nail turns micro French into a chunky French.
Editor's noteUse a slightly thicker top coat on the pearl dots so they lock in flat and don’t lift.
3. Rose Quartz BIAB with Faint Crackle Veins
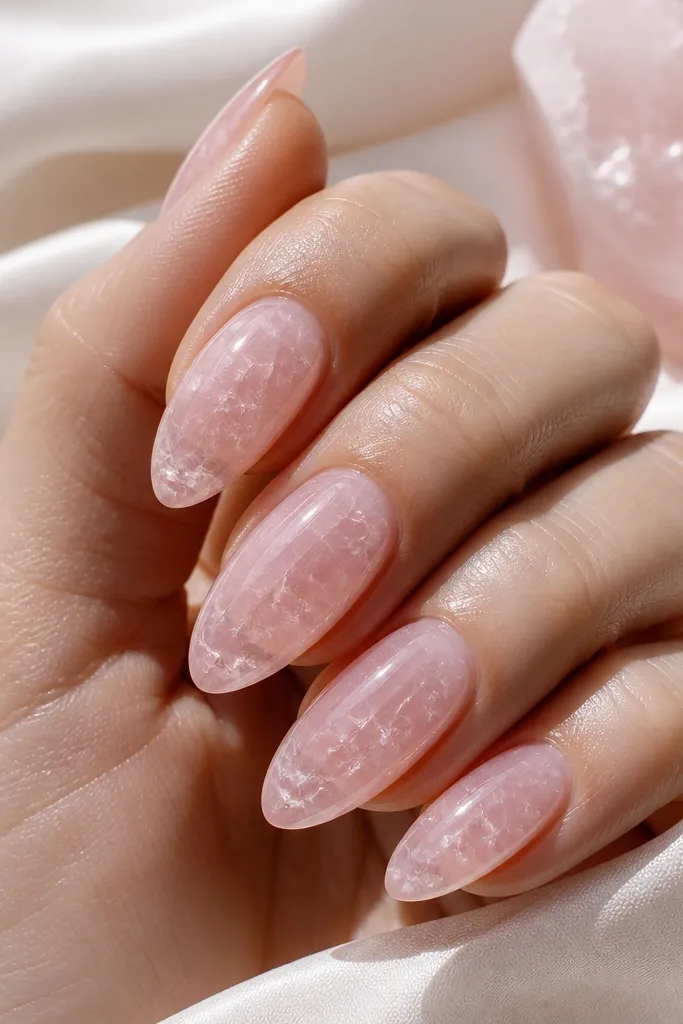
This is one of my go-to biab nails inspiration spring feminine looks because it looks expensive without needing full nail art coverage. The translucent rose quartz base flatters almost every skin tone — it looks like a soft filter over your nail bed. The faint crackle veins add movement, but because they’re light and scattered, the design stays airy. I wear it when I want something “pretty” that still looks grown-up at work. The glossy BIAB finish makes the quartz effect look layered instead of painted on.
Start with a sheer rosy pink BIAB base in one thin layer, then add a second thin layer for depth, curing each time. Mix or choose a slightly darker rose gel for the veins and keep it diluted so the lines look cloudy, not bold. Use a toothpick or fine liner brush to draw irregular crackle lines that start near the center and taper out. Add a couple of tiny breaks in each vein so it resembles mineral fractures. Cure fully, then apply a glossy top coat and cap the free edge for a smooth, glass-like surface.
If the veins look too dark, blend them with a sheer top coat before curing.
Filling every space with lines — it turns into messy scribbles instead of quartz.
4. Sheer Nude BIAB with Peachy Orange Half-Moon
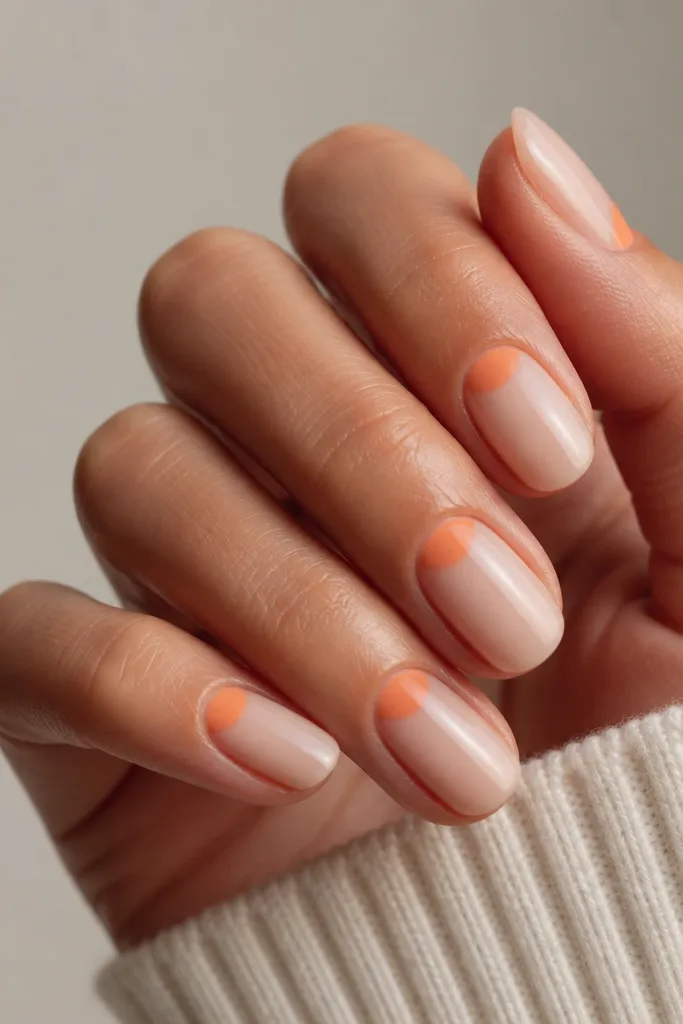
Half-moons look spring feminine because they’re graphic but still subtle. The sheer nude base keeps things wearable, and the peachy orange half-moon adds warmth that feels like sunlight on your hands. This one flatters medium to tan skin tones beautifully because the orange pops without clashing. It also works great if you grow out your nails — the sheer base hides it, and the half-moon stays consistent. I wear this style when I want my nails to look intentional without full coverage art.
Prep and shape, then apply a sheer nude BIAB in two thin layers for an even, skin-tone match. Cure. For the half-moon, use a small angled brush and paint a crescent directly under the cuticle line — aim for a smooth arc about 2-3mm wide. Keep the orange only in the crescent area, not down the sides. Cure again, then finish with glossy top coat and make sure the top coat covers the half-moon edges so there’s no sharp lip.
Use a silicone cuticle pusher to lightly clean the crescent edge while the gel is still workable before curing.
Overfilling the half-moon — if it spreads across the nail bed, it stops looking chic.
5. Butter Yellow Jelly Tips with Micro Daisy Accent
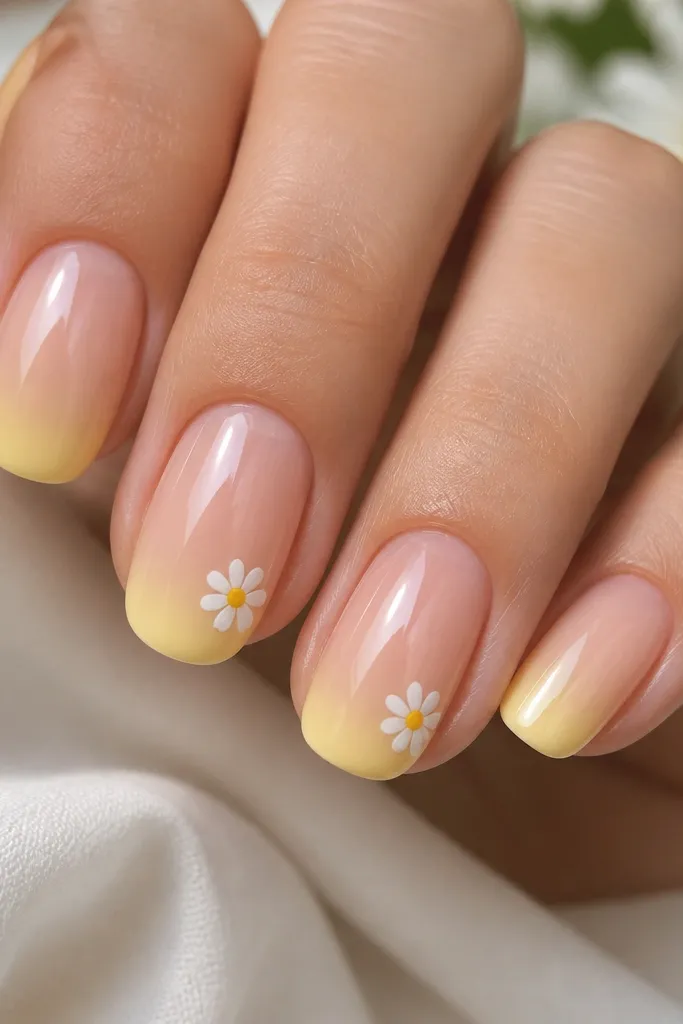
Butter yellow jelly tips read like spring because they look light, not heavy. The jelly effect makes the yellow feel airy and not opaque, which means it still looks feminine on short to medium nails. I love this for fair to light-medium skin tones because the yellow warms the overall look. The micro daisy accent gives you that garden feeling without turning into a full floral mural. If you want something cute for weekends but still clean enough for work, this is the balance.
Apply a sheer pink BIAB base and cure, then build the nails to your preferred thickness with thin layers. For the jelly tips, apply butter yellow jelly gel starting at the tip and blend upward with a soft brush — keep the gradient smooth and semi-transparent. Cure. On two nails, add micro daisies: paint five tiny white petals around a small yellow dot center using a dotting tool, then outline lightly if needed. Cure and seal with glossy top coat, making sure the daisy edges are fully coated so they don’t snag.
Keep daisy petals small — if they’re even slightly oversized, the look starts to feel childish.
Using fully opaque yellow — it makes the tips look painted and thick.
6. Clear Pink BIAB with Rose Chrome Fade
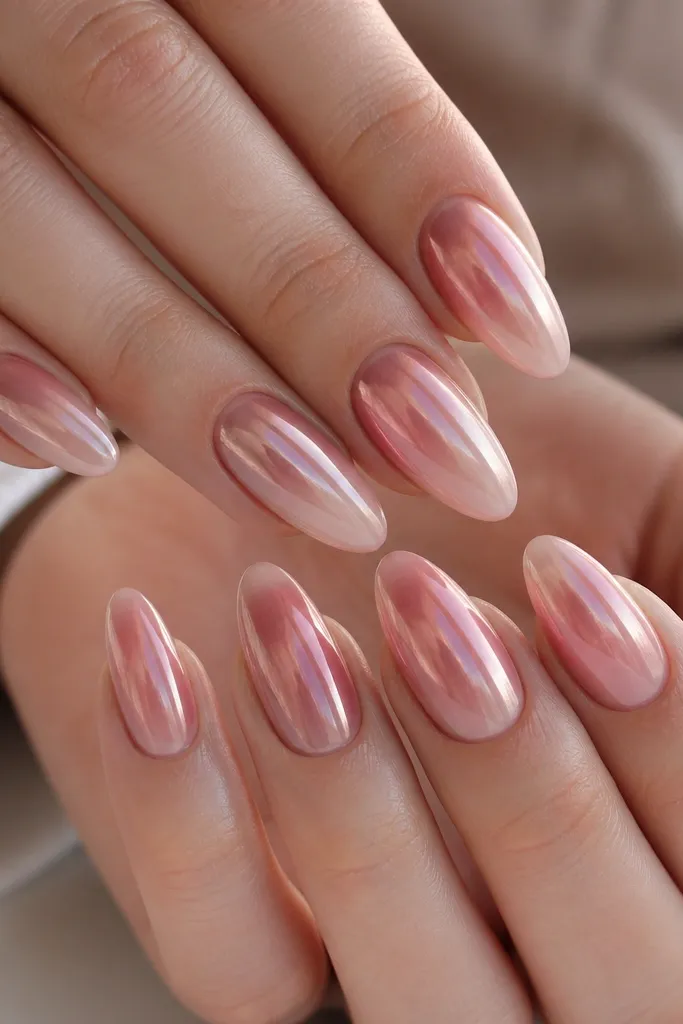
Chrome fade is feminine when it’s controlled — not when it covers the whole nail like a mirror. The clear-pink BIAB base gives you that glassy spring vibe, and rose chrome adds a soft shimmer that looks good in daylight and at night. This flatters a wide range of skin tones because the base is neutral and the chrome is pink-leaning. I like it for date nights, dinners, and anytime you want your hands to catch attention without loud art. The gradient fade also helps it look intentional as the nails grow.
Start with a clear-pink BIAB base and cure, then lightly buff only if you need to remove any tackiness. Apply a thin layer of rose chrome gel or a chrome-ready base gel in a horizontal band across the nail — place it around the middle. Cure, then rub rose chrome powder lightly and blend it upward and downward with a soft applicator so you get a fade. Brush off excess carefully, then seal with glossy top coat. Cap the free edge so the chrome doesn’t wear at the tip.
Do chrome on a fully cured layer — if your BIAB is still soft, the fade turns patchy.
Going too close to the cuticle with chrome — it can look harsh and less feminine.
7. Pink Vanilla Ombré with Fine Gold Edge
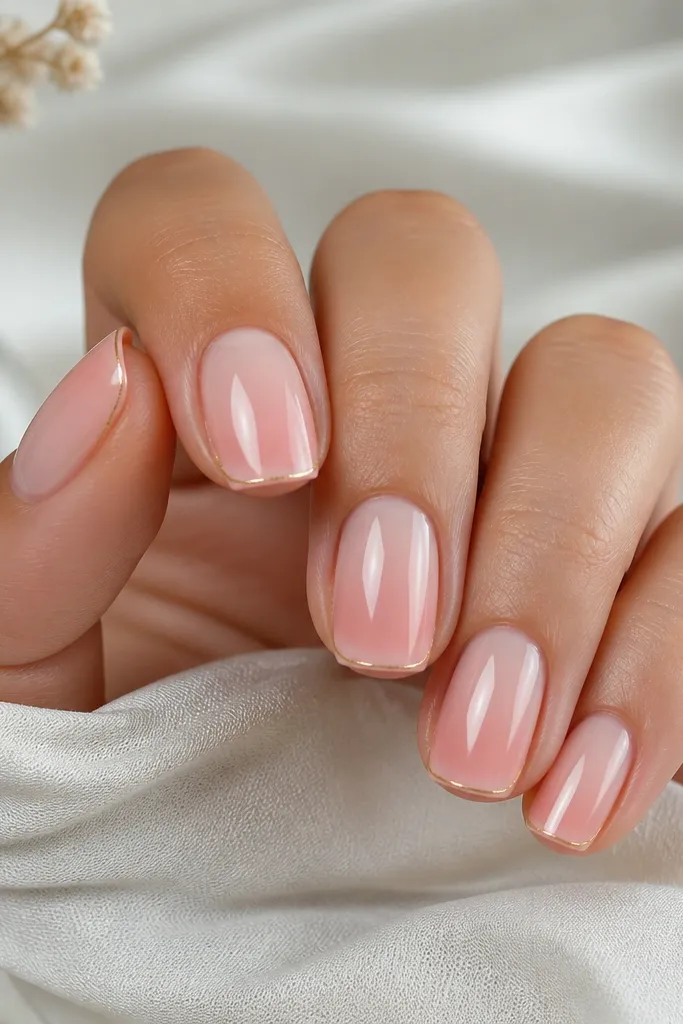
Apply a sheer nude BIAB base and cure. Build the ombré by adding pink gel only on the outer third, then blend toward the center with a clean brush so the transition disappears. Cure. Use a fine liner brush to paint a single line along the very edge of the tip — keep it 0.5-1mm thick and avoid flooding the corners. Cure again if needed, then apply glossy top coat to smooth everything and cap the free edge.
This look is spring feminine because it’s warm, sweet, and clean. Pink vanilla ombré is flattering on every skin tone because it sits between nude and blush. The fine gold edge makes it feel like jewelry, and gold always reads “spring event” to me. It’s especially nice if you have short nails — the gold line elongates visually without adding bulk. The key is keeping the gold line thin so it looks like a highlight, not a frame.
Skip thisMaking the gold line too wide — it turns into a chunky border.
Editor's noteIf your gold looks streaky, thin it with a tiny drop of gold gel and re-paint the line in one steady pass.
8. White Milk Marble with Peach Dot Clusters
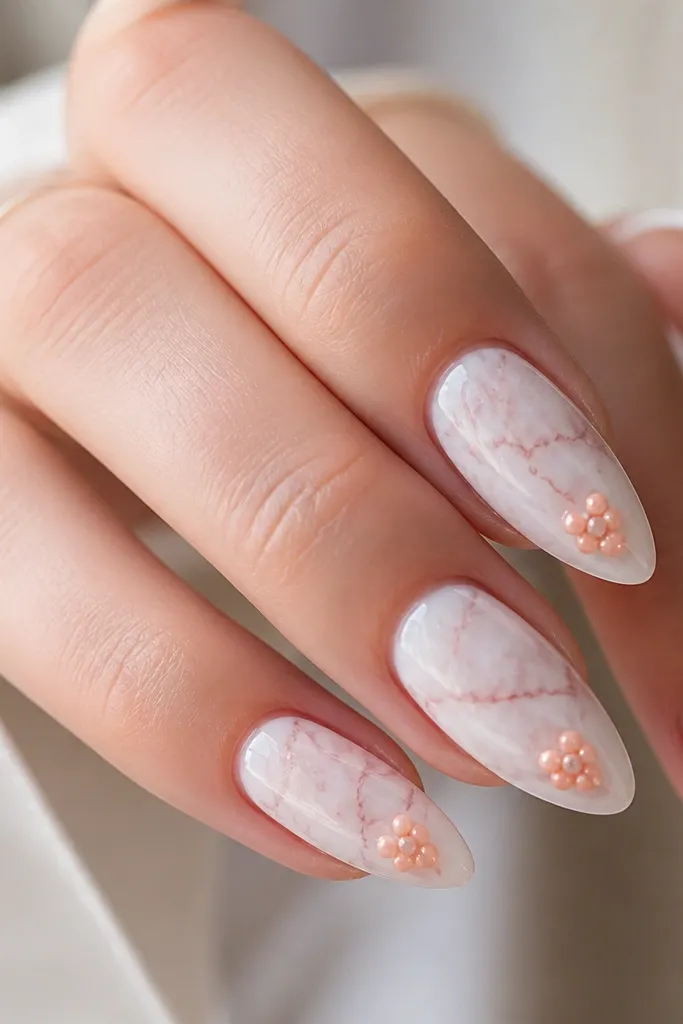
Milk marble feels springy because it’s bright and airy, and the peach dot clusters keep it feminine without going full floral. The milky white base makes your hands look clean and fresh, while the peach adds warmth that reads like spring fruit. This style looks good on both short and medium lengths because the marble gives texture and the dots give focus. I like it for brunch photos — it looks crisp against warm outfits like cream, tan, and soft denim. The gloss makes the marble look like it has depth.
Start with a milky white BIAB base and cure in thin layers for an even, glassy look. To marble, mix a light grey-pink gel and swipe it in thin streaks, then drag gently with a clean liner brush to create cloudy veins. Cure. Place peach dot clusters near the lower center of each nail: use a dotting tool to make 3-5 dots that touch slightly, forming a small group. Cure and seal with glossy top coat, then cap the free edge so the marble doesn’t wear down first.
Use a slightly different peach shade on one accent nail so the dots look intentional, not identical everywhere.
Marbling too dark — heavy veins make it look wintery instead of spring milk.
9. Sheer Pink BIAB with Sage Green Micro Leaf
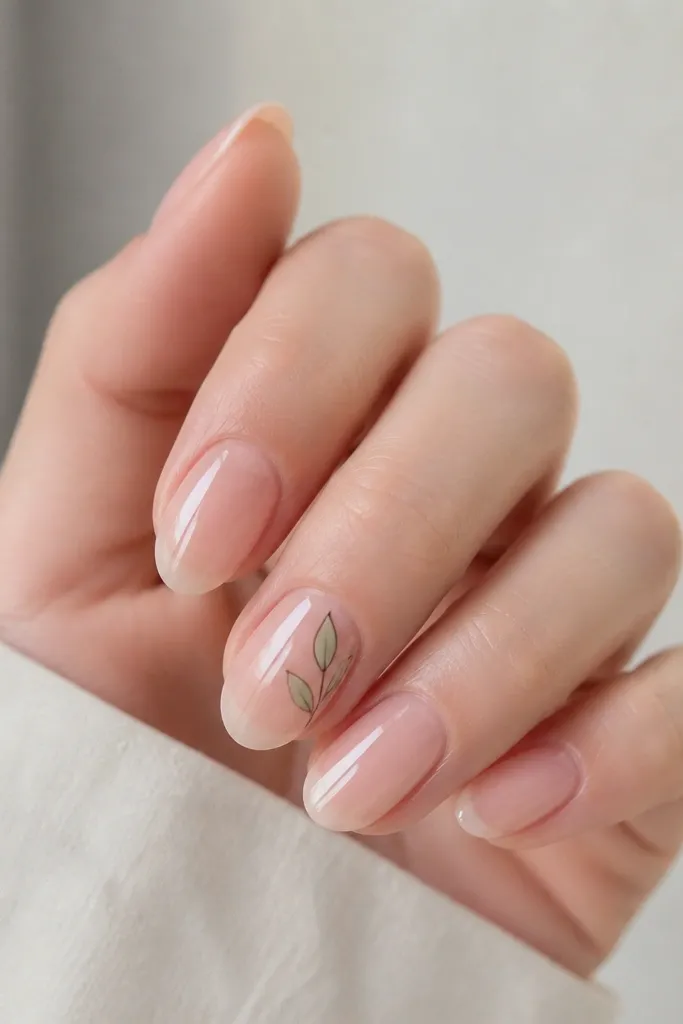
Apply a sheer pink BIAB base and cure, then add a thin overlay if you need extra leveling. On accent nails only, use a fine liner brush to draw 2-3 tiny leaf shapes along one side of the nail — about 1/3 down from the cuticle. Outline each leaf with darker sage, then fill lightly with a slightly lighter sage gel so it looks dimensional. Add a tiny stem line if you want, then cure. Finish with glossy top coat across all nails and cap the free edge, especially on the accent nails.
Micro leaves are feminine because they’re delicate and they bring in that fresh spring garden feeling without bold coverage. Sage green is a soft, calming color that works beautifully with sheer pink — it looks like minty air against blush skin. I like this on fair and light-medium skin tones because sage adds contrast without looking harsh. Keep the leaf placement to one or two nails so it looks styled, not random. It also works when you want something “different” from the usual florals.
Skip thisPutting leaves on every nail — it makes the set feel busy and less feminine.
Editor's noteIf your leaves look wobbly, draw one leaf, cure for 10 seconds, then finish the second — it gives you control.
10. Strawberry Milk Sides with Negative Space Heart
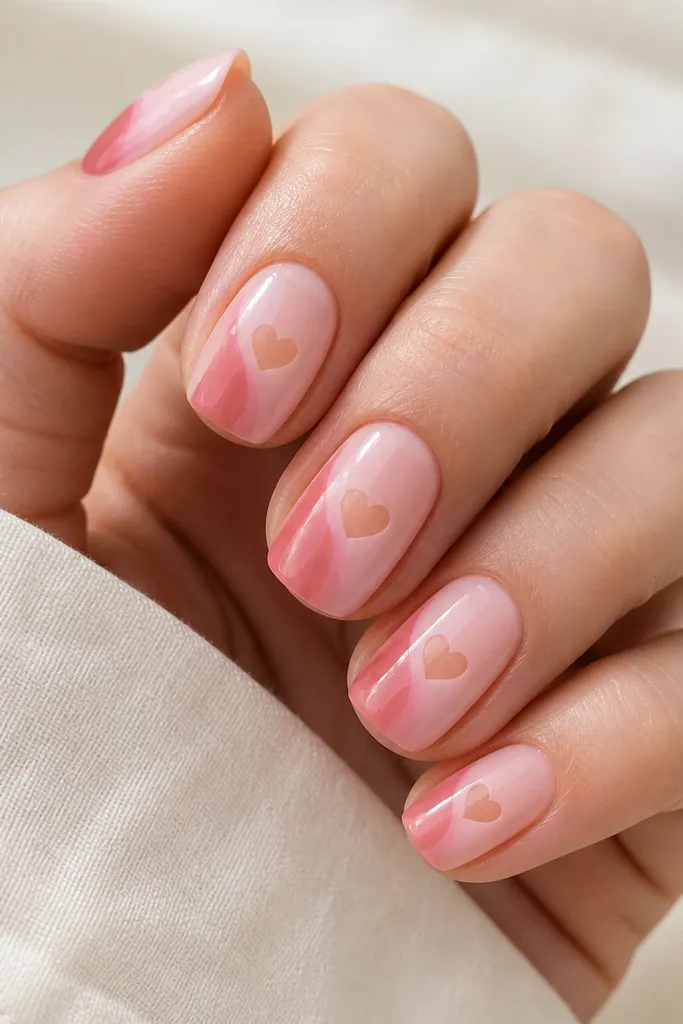
Start with a semi-sheer strawberry milk BIAB base and cure. Paint a deeper berry swoop on just one side of each nail — keep it thin and fade it slightly so it doesn’t look like a stripe. Cure. For the heart, use a small heart stencil or freehand with a thin brush: outline the heart in a gel-free area by painting around it, leaving bare nail as the heart. Cure again, then apply glossy top coat over everything except the negative space area where the heart should stay clear. Seal carefully at the heart edges so it doesn’t fill in during top coat.
This design is spring feminine because it looks sweet but modern. The strawberry milk pink base keeps it soft and wearable, and the deeper berry swoop on the side adds movement like a berry smear on glass. The negative space heart is the trick — it creates a cute focal point without adding extra layers or thickness. I like it for short nails because negative space makes the nail look longer. It also photographs well because the heart shape reads clearly even from a distance.
Skip thisLetting top coat flood the heart shape — it turns the heart into a solid blob.
Editor's noteUse a strip of tape to mask the negative space heart while you paint — it keeps the edges sharp.



