
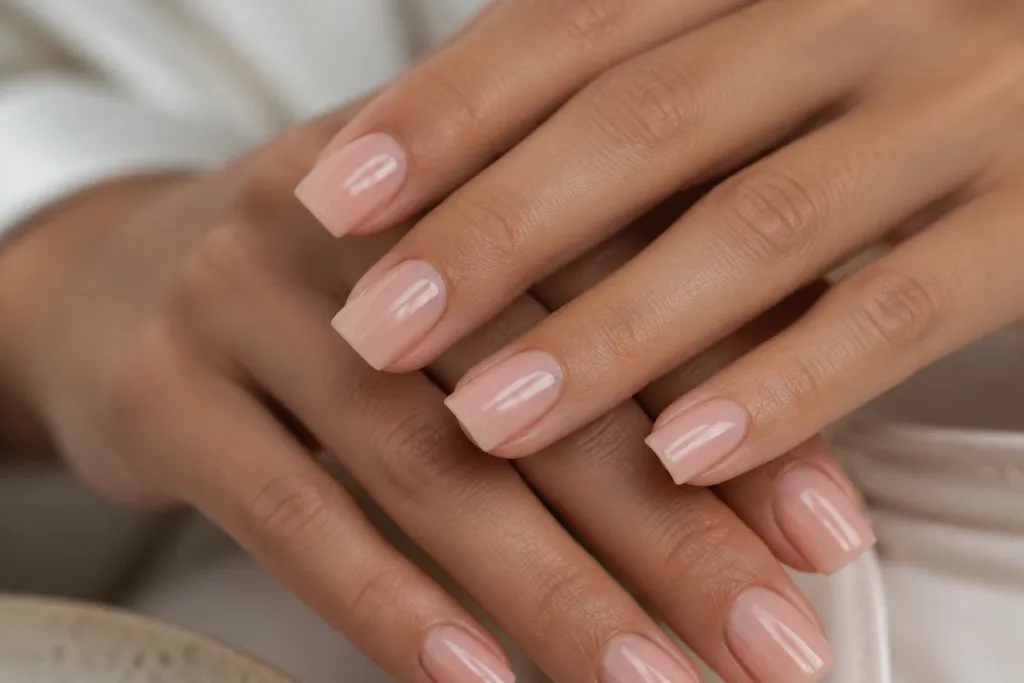
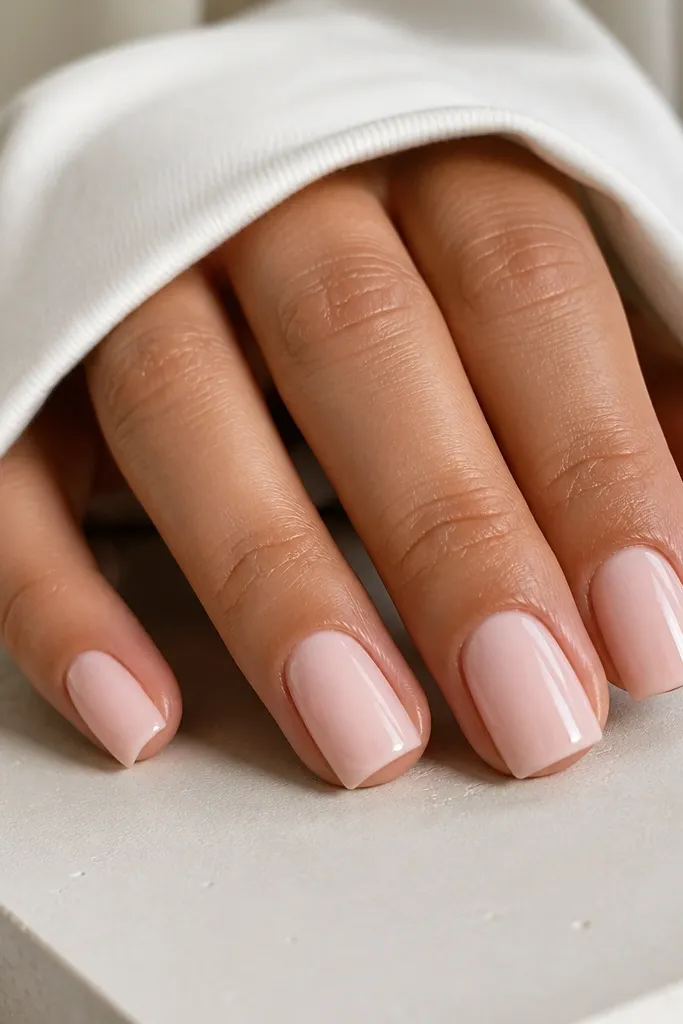
1. Micro French with milky nude base and smoked gray tips
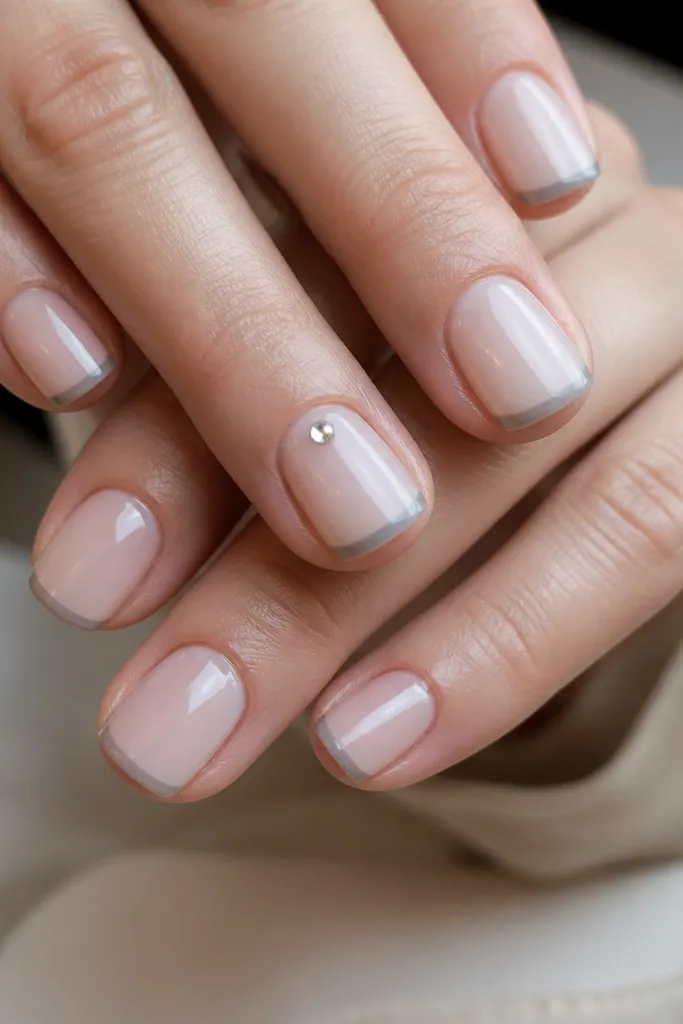
This set is the one I reach for when my hands look tired but I still want “put together.” The milky nude base smooths out uneven pigmentation, and the smoky gray tip line adds a modern edge without turning the nails into full-on goth. The micro French width is thin enough to make short squares look longer, especially if your nail bed is a bit flat. It flatters most skin tones because gray sits cleanly against nude — fair to deep — and the milky layer keeps it from looking stark. I also like it for work weeks because it reads polished even when your cuticles grow out.
Start by applying BIAB to your natural nails and shaping square with slightly softened corners. Paint a milky nude base (think opaque but not pinky) and cure fully. Using a striping brush, draw a micro French line at the free edge, keeping it centered and even left to right. Fill the tip area lightly with the smoky gray, then pull the color just to the sidewalls so the square shape stays crisp. Finish with a glossy topcoat and place one tiny rhinestone on the accent nail, then seal over it.
Editor's noteUse a striping brush with very short bristles so the gray line stays hair-thin and doesn’t flood the corners.
Skip thisAvoid a thick French — it makes square corners look chunky and can shorten the nail visually.
2. Clear glass square with nude jelly overlay and one chrome center line
This is modern minimalism for people who hate heavy color. The clear glass base makes the nails look fresh and strong, while the nude jelly overlay gives you that “my nails but better” tone. The chrome center line elongates the nail bed because it pulls the eye straight up. It flatters hands with shorter nail beds because the nude jelly blends the nail into skin instead of creating a harsh block of color. It also looks great on cooler undertones — the chrome doesn’t fight pinks or taupes.
Start with a clear BIAB layer, then cure and shape square. Apply a nude jelly overlay thin enough to keep the “glass” look — you should see a slight translucence at the edges. With chrome powder or a foil transfer, create a clean vertical center line using a thin gel strip or chrome gel. Cure after the line is formed, then wipe any excess and topcoat. Add a small black dot near the cuticle on one accent nail before final topcoat.
Editor's noteWhen you apply chrome, keep the gel line narrow — 1 mm or less — so it reads as sleek, not thick.
Skip thisDon’t overbuild the jelly — a thick nude layer kills the glass effect and makes it look like regular opaque polish.
3. Black micro checkerboard on a sheer pink BIAB base
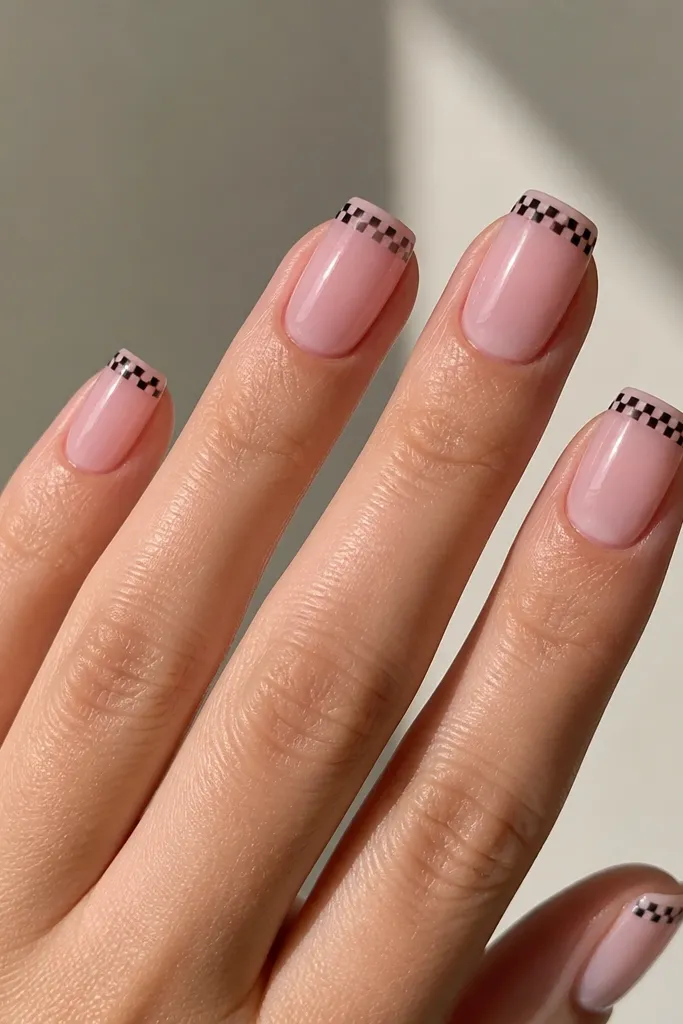
Checkerboard can go tacky fast, but micro-scale looks clean and modern. The sheer pink BIAB base keeps it feminine and soft, while black micro squares add graphic definition. I like this on medium-short nails because the pattern sits near the tip where your attention naturally goes. It flatters warm and neutral skin tones since the pink undertone makes black feel intentional, not harsh. For dates or nights out, it still looks wearable because the base is sheer and the pattern is small.
Apply BIAB, shape into square, and cure. Paint a sheer pink layer so you can still see your natural nail tone through it. With a striping brush or a dotting tool, place tiny black squares in a grid across the top third of the nail — keep them consistent size. Alternate the squares so you get a true checker pattern, then cure. Seal with a glossy topcoat, making sure you brush over the checker areas without dragging the pattern.
Editor's noteUse a light touch with your dot tool. Press once, lift straight up, and you’ll keep the squares sharp.
Skip thisAvoid big squares — they make the design look like a sticker and can blur at the corners.
4. Soft taupe matte base with glossy latte swirl on ring finger
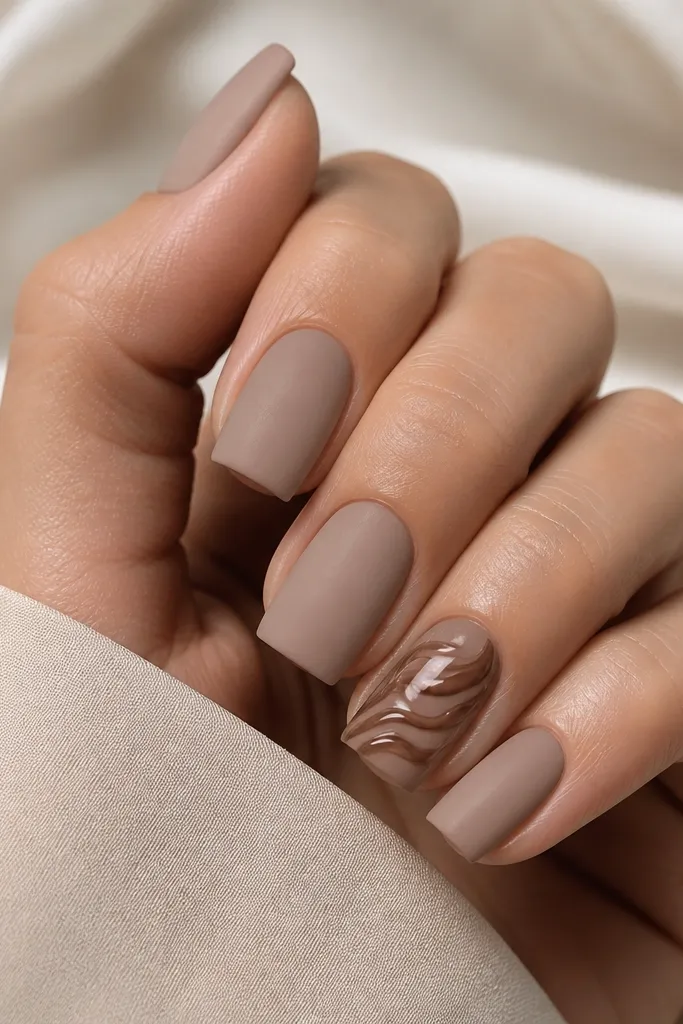
Matte taupe makes square nails look expensive without needing extra gems. The key is contrast: matte everywhere, then one glossy moment so your eye has something to catch. The latte swirl is forgiving because it’s freehand-friendly — you’re not drawing straight lines that need perfect symmetry. This set flatters olive and neutral undertones because taupe doesn’t pull too pink or too gray. It also looks great on hands with shorter nails since matte makes the surface even and smooth.
Build your BIAB and shape square. Paint all nails with a soft taupe matte color and cure. For the ring finger, switch to a glossy latte-brown gel and draw a loose S-shaped swirl down the center, keeping the line width thin. Add a second thinner line slightly offset to create a highlight look, then cure. Finish with matte topcoat on the non-ring nails and glossy topcoat only over the swirl area.
Editor's noteIf you’re swirly-line challenged, use painter’s tape as a center guide for your first pass.
Skip thisDon’t put matte topcoat over glossy line art — it kills the shine and makes the swirl blend in.
5. Half-moon cuticle frame in chrome gold over milky base
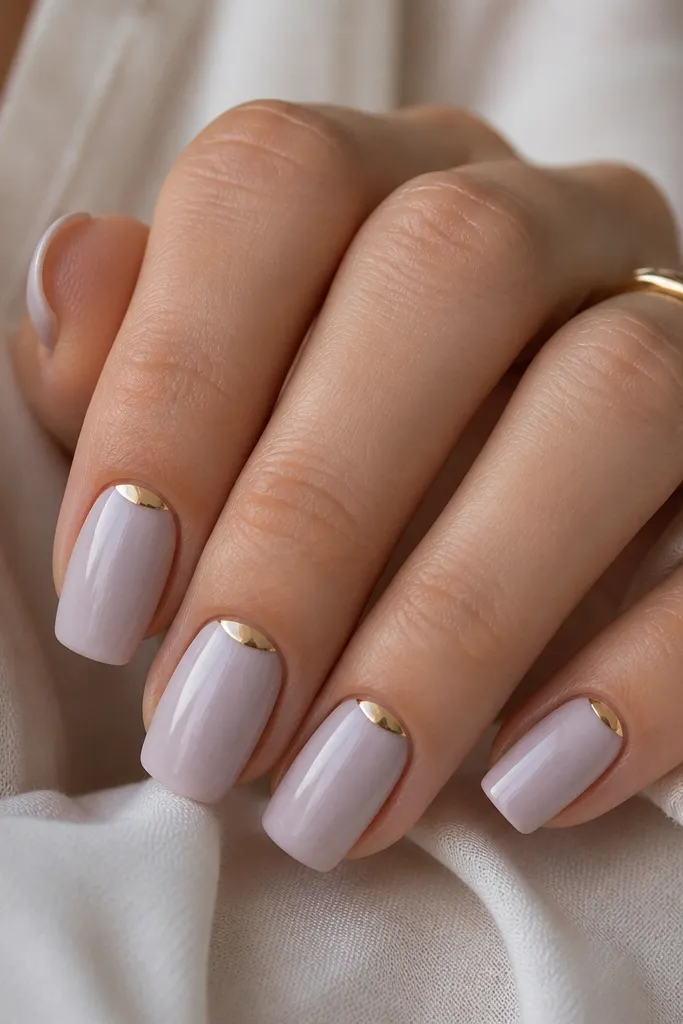
Half-moon frames look clean because they give you structure at the cuticle, where growth is most noticeable. The milky base keeps it airy and soft, while chrome gold adds warmth and a modern “jewelry” feel. This design flatters almost everyone because it doesn’t rely on a strong color block. If you have short nail beds, the cuticle frame visually lifts them upward. I also love it for weddings, because it reads classy even when your nails aren’t super long.
Apply BIAB and shape a neat square with slightly rounded corners. Paint a milky base — opaque enough to cover but still soft, like a white-mauve blend. Using chrome gel and a small angled brush, outline a half-moon at the cuticle on each nail, leaving the center clear. Cure, then apply gold chrome powder over the wet gel and wipe off excess. Add glossy topcoat and cap the edges lightly so the chrome doesn’t snag.
Editor's noteKeep the half-moon thin. A 1 mm line looks jewelry-like; thicker lines look heavy.
Skip thisAvoid covering the whole cuticle area. You want a frame, not a gold blob.
6. Clear base with emerald foil shards and black micro dots
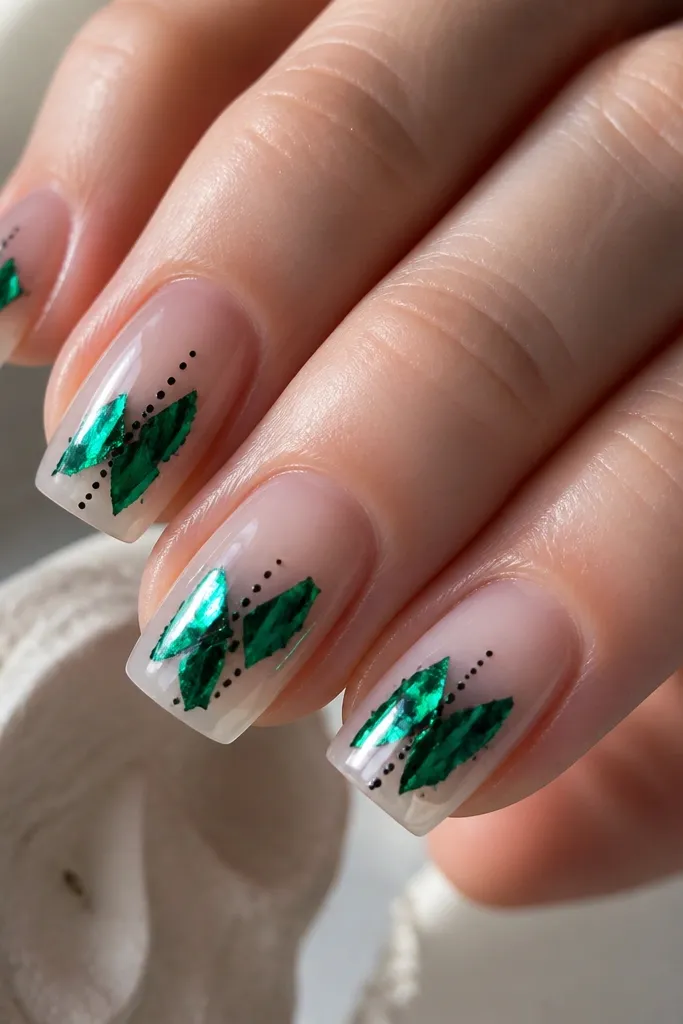
Emerald foil shards look modern when you keep them scattered but controlled. Clear BIAB makes the foil pop without turning the nails into a thick block of color. The tiny black dots act like anchors, so the foil doesn’t look like accidental glitter. This set flatters deep skin tones because emerald has contrast, but it also looks stunning on fair skin because the clear base keeps it light. It’s a great choice for evenings since the foil catches light every time you move your hands.
Start with clear BIAB and cure. Place small pieces of emerald foil using foil transfer gel — press the foil only where you want it, then cure. Add black micro dots underneath or beside the foil with a dotting tool and black gel polish. Cure again to set the dots, then seal with a glossy topcoat in two thin layers so the foil doesn’t get dull or raised.
Editor's noteTrim foil pieces smaller than you think. Oversized shards make square corners look messy.
Skip thisDon’t place foil all the way to the sidewalls — it makes lifting more likely at the corners.
7. Nude pink BIAB with diagonal chrome stripe and tiny pearl at the tip
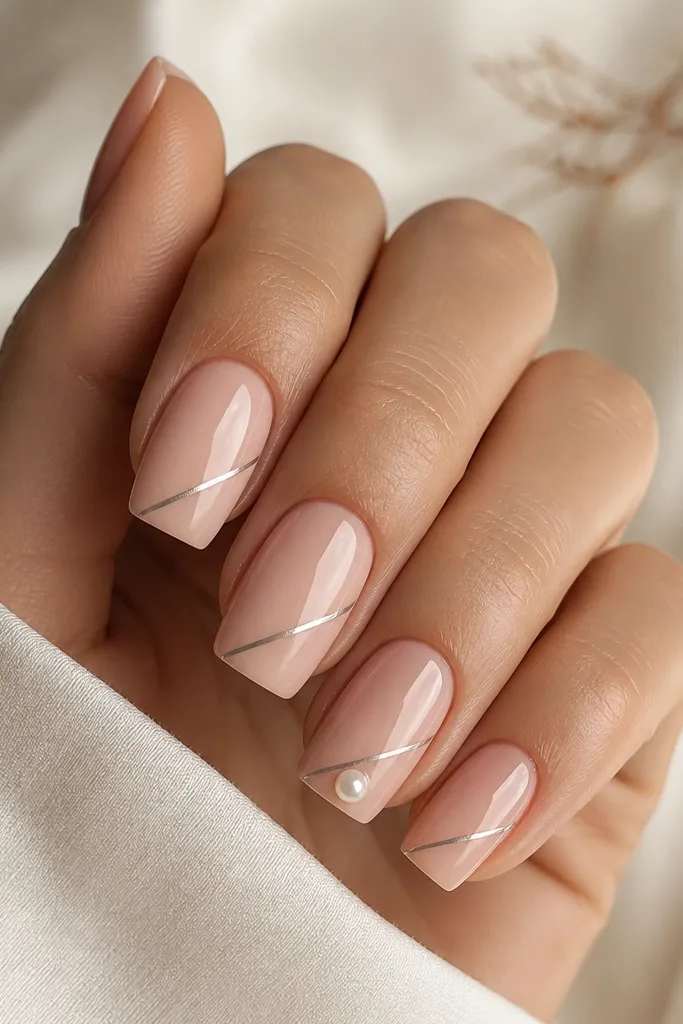
A diagonal chrome stripe gives you motion while still looking tidy on square nails. The nude pink base keeps it soft and wearable, and the stripe adds a modern “line” effect that makes your nails look longer. The tiny pearl at the tip is small enough to feel current, not bridal-only. This flatters medium to deep skin tones especially well because the nude stays warm and the chrome reads bright. It also looks good on short squares because the stripe creates a visual diagonal path.
Apply BIAB, shape square, and paint a nude pink glossy base. With chrome gel and an angled striping brush, place a diagonal line starting near the lower sidewall and ending about halfway up the nail center. Cure and apply chrome powder, then wipe excess. On the ring finger, place one tiny pearl at the center of the free edge, then cure. Finish with topcoat over everything, keeping the pearl sealed so it doesn’t snag.
Editor's noteIf your diagonal line wobbles, use a thin strip of tape as a temporary guide for the first stroke.
Skip thisSkip chunky pearls. Big pearls make square nails look like costume jewelry.
8. Chocolate brown glossy base with caramel drip accent on one nail
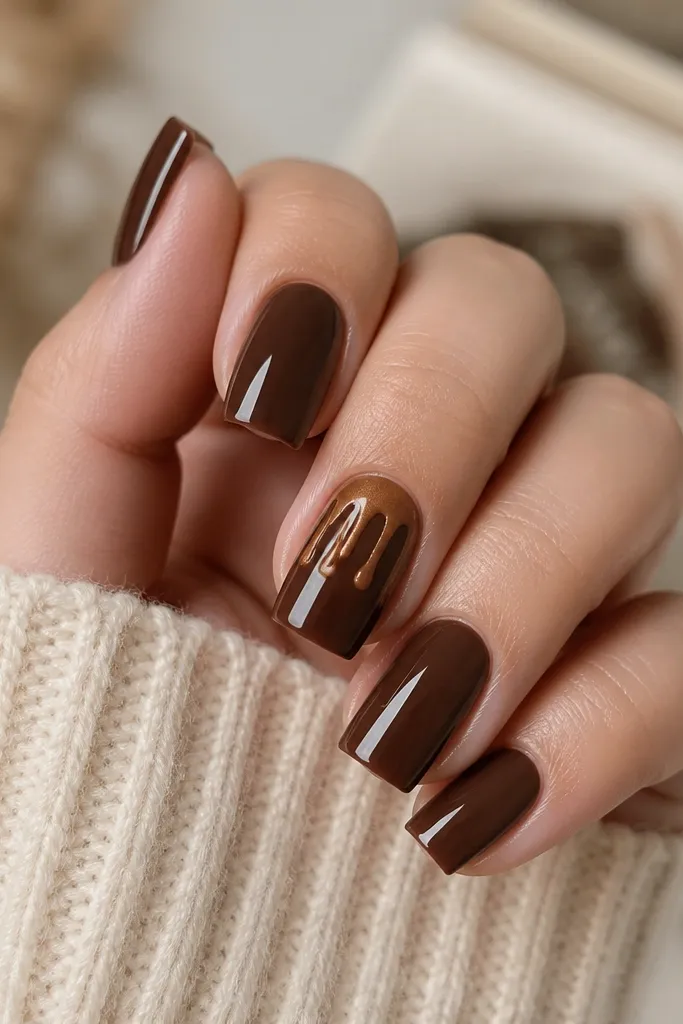
This design reads modern because it keeps the main color solid and lets the drip happen in just one spot. Chocolate brown is flattering because it grounds the hand and makes skin look smoother in photos. Caramel drip adds warmth and a touch of fun without turning the set into messy nail splatter. I like it for fall and winter, but the glossy finish makes it wearable year-round. It’s also good if you want something different but don’t want art on every nail.
Build BIAB and shape square. Paint all nails with chocolate brown gel, curing each nail. Choose one accent nail and use a lighter caramel-gold gel to draw a small “start” point near the cuticle center. Then pull thin drip lines downward with the brush tip, keeping them narrow so they don’t flood the nail. Cure and topcoat over the entire set, with an extra careful pass around the drip edges to keep it smooth.
Do the drip with gel, not polish, because gel levels better and stays glossy after cure.
Don’t drip across the whole nail. One accent nail keeps it modern instead of chaotic.
9. Soft nude ombre (airbrushed look) with black outline edges
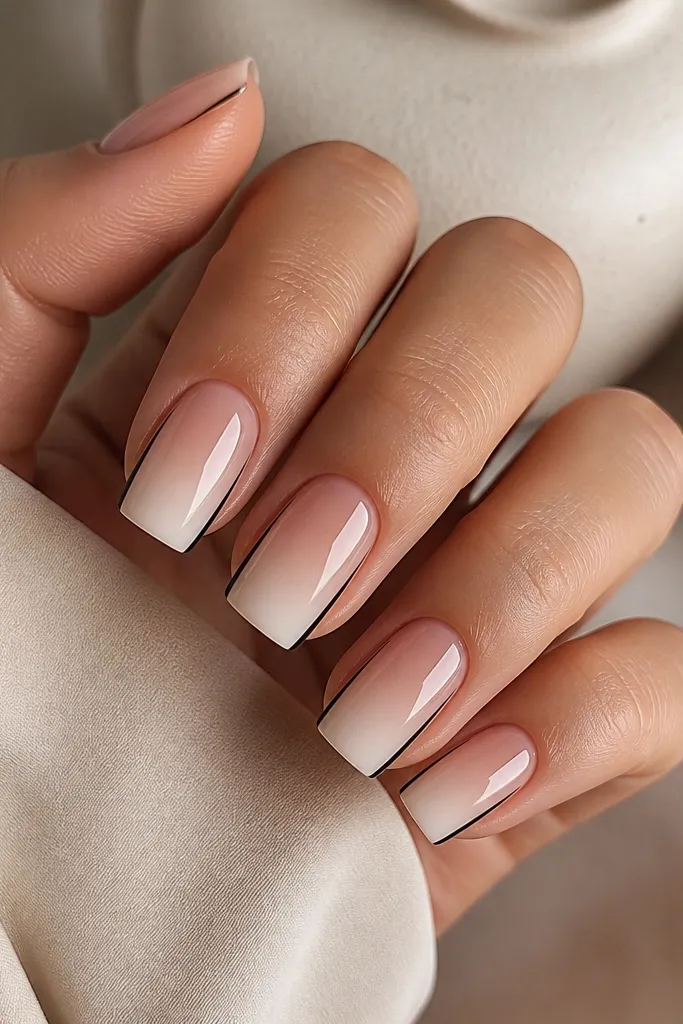
This is the “I want length” design. The ombre fades upward so the nail looks like it has more space between cuticle and tip. The black outline edges add definition and make square corners look sharper without adding extra thickness. It flatters pale and medium skin tones because the nude ombre keeps it soft while black brings crisp contrast. If you have uneven nail texture, the ombre camouflage works well — you’re not relying on a perfect solid color block.
After BIAB and square shaping, apply a nude ombre base with an airbrush or sponge gradient method. Keep the darkest part at the cuticle very subtle, then blend into a lighter tip. Cure, then with a fine liner brush and black gel, draw thin lines along each side edge from mid-nail to near the free edge. Keep the outline even thickness and do not connect them at the corners. Cure again and finish with glossy topcoat, sealing the edges so the liner stays crisp.
Editor's noteIf you don’t have an airbrush, use a makeup sponge and wipe off excess gel before stamping on the blend area.
Skip thisDon’t make the outline thick — thick black makes square nails look boxy.
10. Matte black base with silver dotted arc half-moon
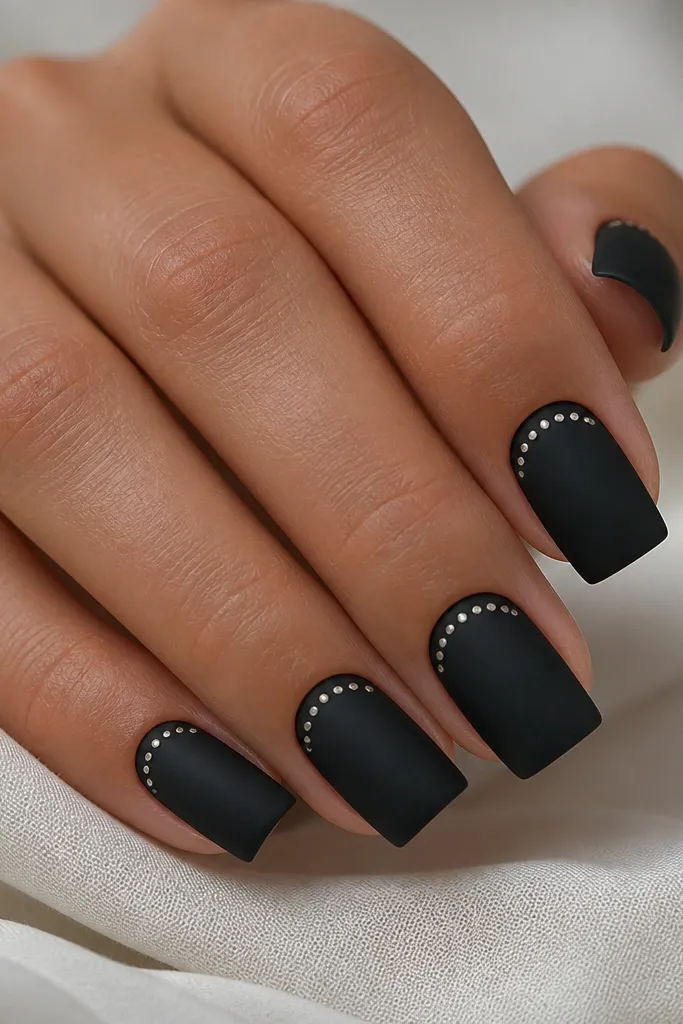
Matte black plus a dotted arc looks modern because the dots add texture without clutter. The half-moon placement is intentional: it frames the cuticle and draws attention upward. Silver dots read clean and cool, which makes the set look sharp on warm skin tones too. This design is especially flattering if you like bold color but want it to look neat, not heavy. I’ve worn this to concerts and dinners and it still looks tidy when the nails start growing out.
Apply BIAB, shape square, and paint with matte black gel polish. Cure and do not topcoat yet if your matte system needs it — follow your matte top instructions. With a dotting tool, place tiny silver dots in an arc under the cuticle on each nail, leaving a small gap in the center. Keep the arc size consistent from nail to nail. Cure and finish with a matte topcoat, or if you want extra shine, use glossy top only over the dots.
Editor's noteUse a slightly smaller dotting tool than you think. Smaller dots keep the arc looking delicate.
Skip thisAvoid uneven dot spacing. If the dots wander, the arc looks sloppy.
11. Soft sage matte with thin white vertical lines
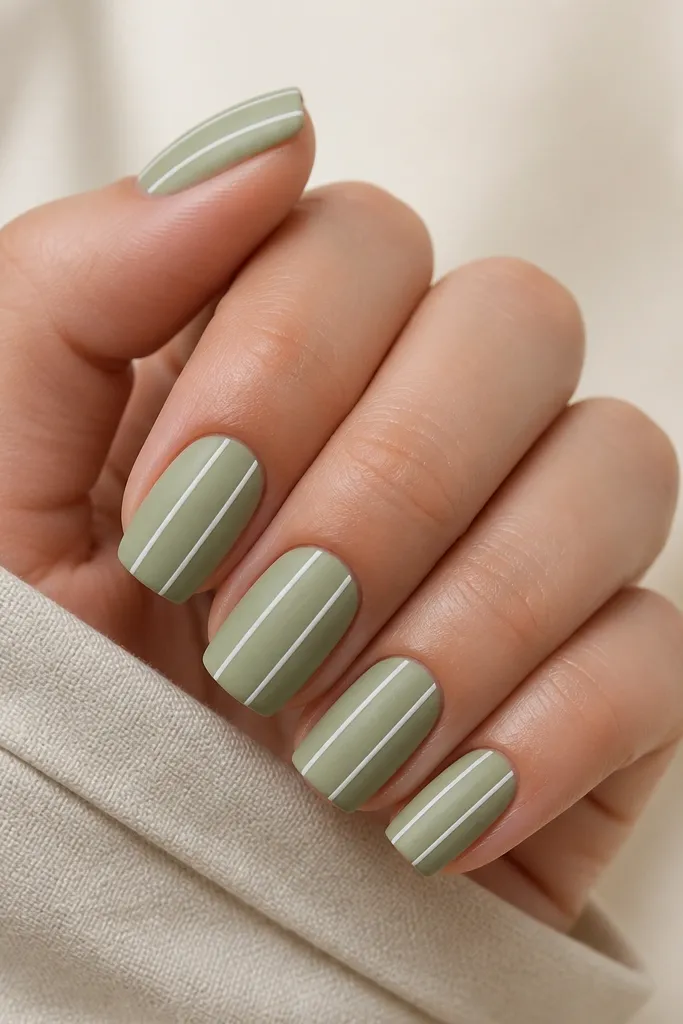
Soft sage is one of those colors that makes hands look calmer without going boring. Matte keeps it understated, and the thin vertical white lines add structure that makes square nails look longer. This set flatters cool undertones and also looks great on neutral skin because sage doesn’t clash. It’s a nice choice when you want something “springy” but still clean and structured. The vertical line direction also helps if your nail plates are slightly wider — it visually narrows the look.
Build BIAB and shape square. Paint soft sage matte and cure. With a striping brush and white gel, add 2-3 vertical lines centered on each nail, starting just below the cuticle and stopping 1-2 mm before the free edge. Keep lines thin and straight; don’t let them connect into a block. Cure and seal with matte topcoat, keeping the lines matte too unless you want them glossy.
Editor's noteMark the centerline lightly on the nail with a dot at the cuticle and tip. Then paint lines from those points.
Skip thisDon’t use thick lines. Thick white on sage looks like stripes on a painted wall.
12. Clear pink jelly with tiny rose gold studs at the corners
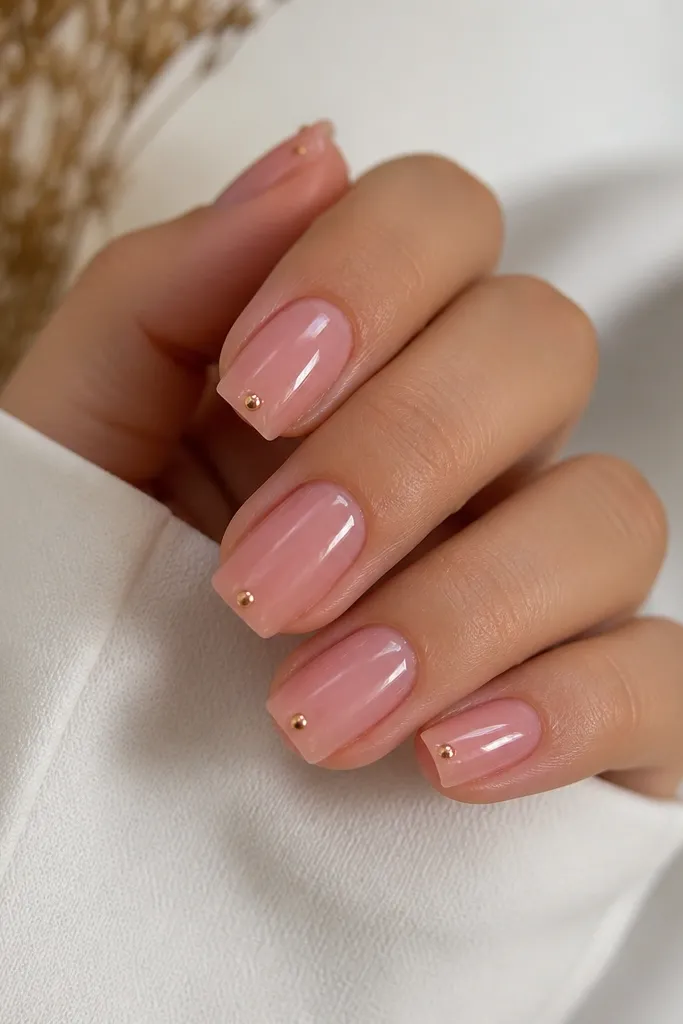
This is a corner-detail set, and it’s why it looks so neat. The clear pink jelly base gives you that soft “healthy nail” look, while rose gold studs at the corners add sparkle exactly where square nails show shape. It flatters fair to deep skin because the jelly tone blends and the rose gold warms. If you have short nails, stud placement at the corners visually widens the free edge in a flattering way. It also works for everyday because the design is tiny, not loud.
Start with BIAB and shape square. Apply clear pink jelly gel thinly so you can still see a hint of nail line through it. Cure, then place one small rose gold stud on each outer corner near the free edge, keeping studs symmetrical left and right. Press gently so the stud sits flush. Cure again and topcoat with a slightly thicker top layer over the studs to smooth the surface — two thin coats work better than one thick coat.
If studs lift, cap the stud with gel like you’re building a tiny ramp over it.
Avoid placing studs too close to the center. Corners keep the design modern and balanced.
13. One-tone navy glossy with silver half-tip line
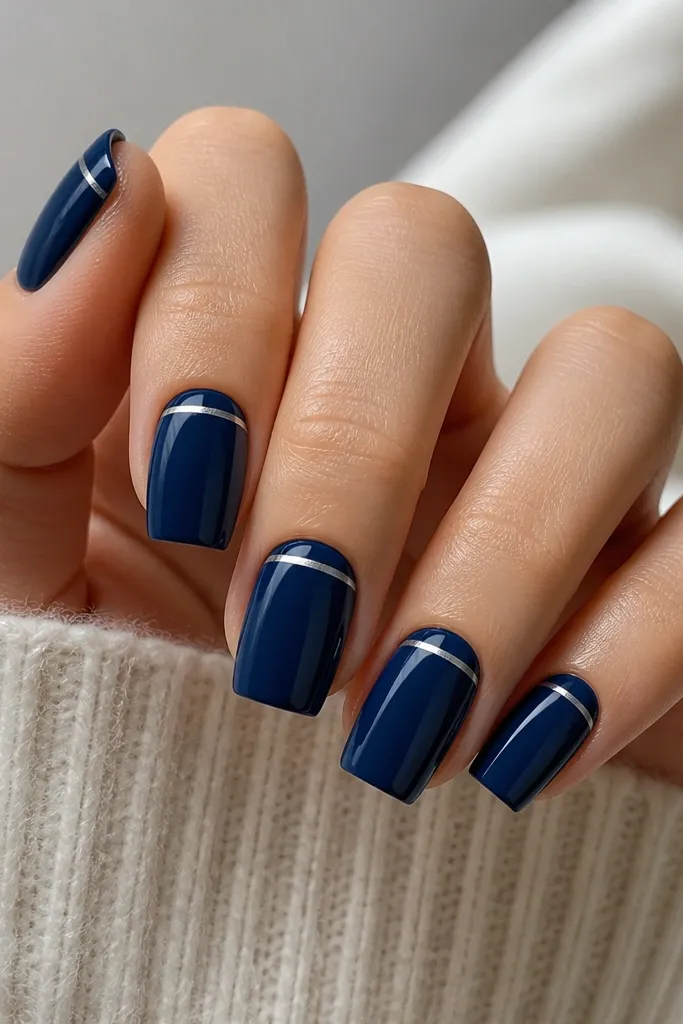
Deep navy is the fastest way to look sharp without thinking too hard. The silver half-tip line gives it a modern graphic finish that still feels classic. I like the band stopping just shy of the corners because it keeps the square shape clean and prevents the line from looking messy at your sidewalls. This flatters all skin tones because navy has enough depth to make skin look brighter. It also hides small growth lines since the color is uniform.
Apply BIAB and shape square with clean straight sidewalls. Paint all nails deep navy glossy and cure. With a striping brush and silver gel, draw a thin band across the upper portion of the tip — around halfway down the free edge. Stop the band about 0.5 mm before each corner so the corners stay crisp. Cure and finish with a glossy topcoat, then lightly cap the silver line so it doesn’t wear off quickly.
Use gel striping tape as a guide for your band if your hand shakes — press it down, paint, cure, then remove.
Don’t let the silver touch the cuticle. This design stays modern when it lives on the tip.
14. Matte nude base with glossy caramel bow tie on ring fingers
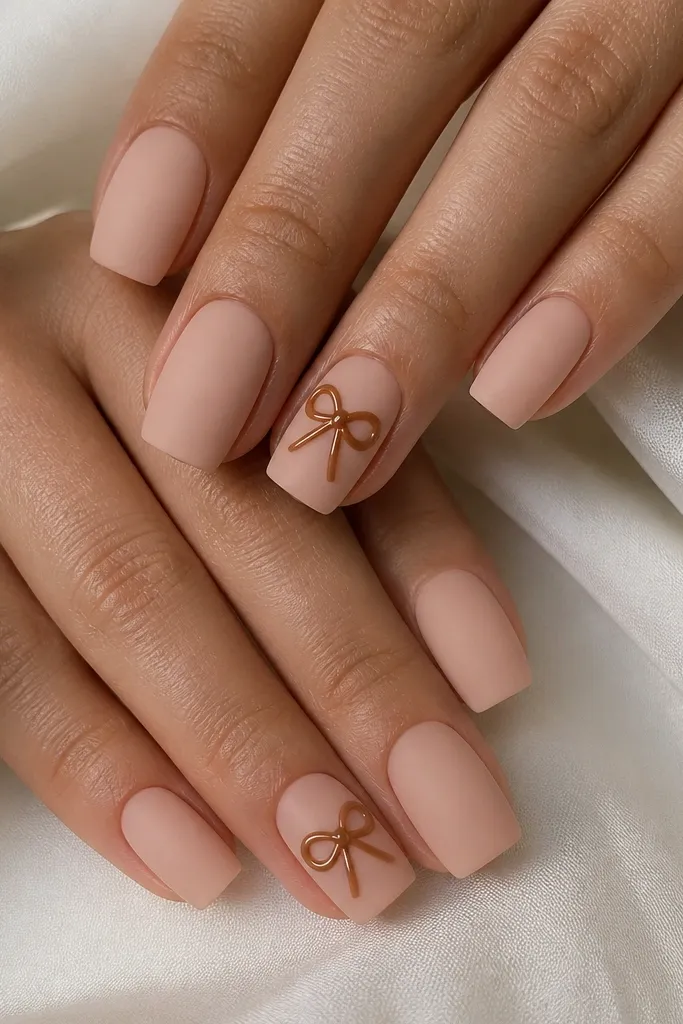
Bow tie art can look childish, but the matte nude base and small glossy caramel bow make it feel fashion-forward. Keeping the bow only on ring fingers makes it look intentional instead of cluttered. The glossy caramel color pops against nude because it has warmth and shine, and the bow placement in the center visually lengthens the nail. This flatters hands with short-to-medium nails because the bow sits where your eye naturally focuses. It also looks good on both fair and deeper skin tones since nude and caramel stay neutral enough.
Build BIAB, shape square, and paint a matte nude on all nails. Cure and let it fully set so the surface is dry-matte. On the ring fingers, use glossy caramel gel to paint a small bow: two loops left and right, then a thin knot in the center. Keep the bow about 3-4 mm wide so it doesn’t take over the nail. Cure and topcoat: matte top on the non-ring nails, and glossy top only over the bow area so the shine stays crisp.
Editor's noteUse a toothpick to place the knot — it gives you a tighter center than a brush.
Skip thisAvoid big bows. Anything wider than 4-5 mm starts to look costume-y on square tips.
15. Pearlized white shimmer with slim rose gold border around the square
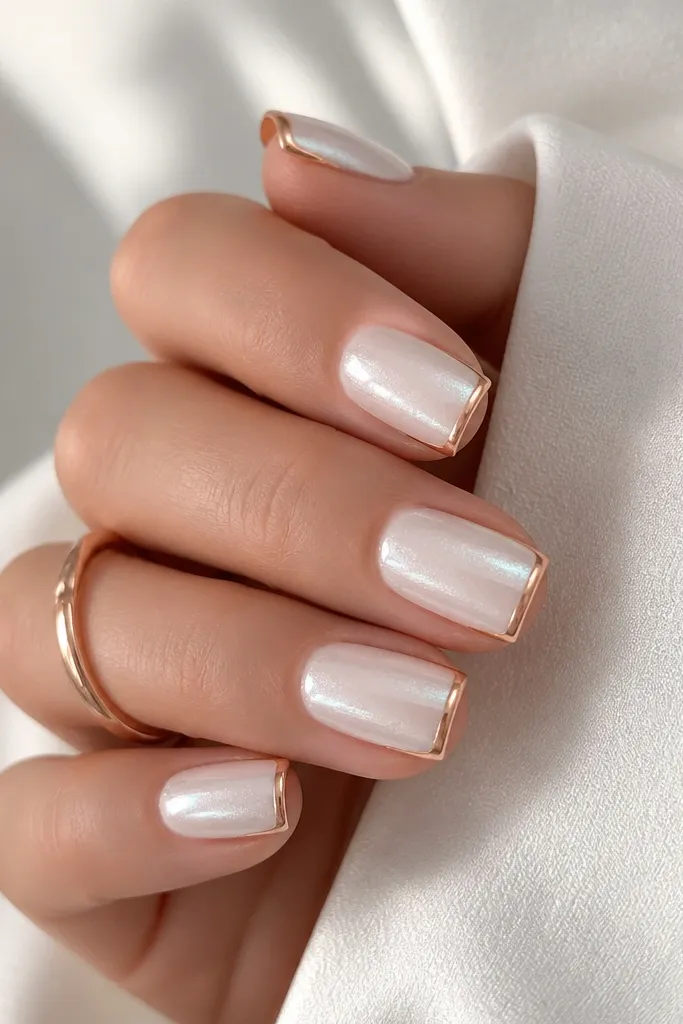
This set looks like jewelry because it outlines the nail shape instead of filling it with patterns. Pearlized white shimmer brightens the hand and makes skin look smoother in photos, while the rose gold border adds warmth and a modern frame. The border makes square nails look extra crisp, especially if your natural nails are wider near the cuticle. It flatters fair, neutral, and warm undertones because rose gold warms the whole look. I also like it for events because it reads polished even with shorter length.
Apply BIAB and shape square. Paint pearlized white shimmer and cure until it’s fully opaque in two thin layers. With rose gold gel and a thin liner brush, draw a border around the nail: start at one sidewall mid-height, go up and around the corner, then continue to the next sidewall. Finally, add a thin line across the free edge to connect the frame. Keep the border about 0.5-1 mm thick and cure. Seal with glossy topcoat, making sure the border edges are capped so they don’t chip.
Editor's noteIf your border looks uneven, do it in two passes: first trace the outline lightly, then go back to even the thickness.
Skip thisDon’t paint a thick frame. Thick borders make square nails look like they’re wearing a plastic sticker.



