
1. Coral Jelly Tips with Micro-Glitter Bridge
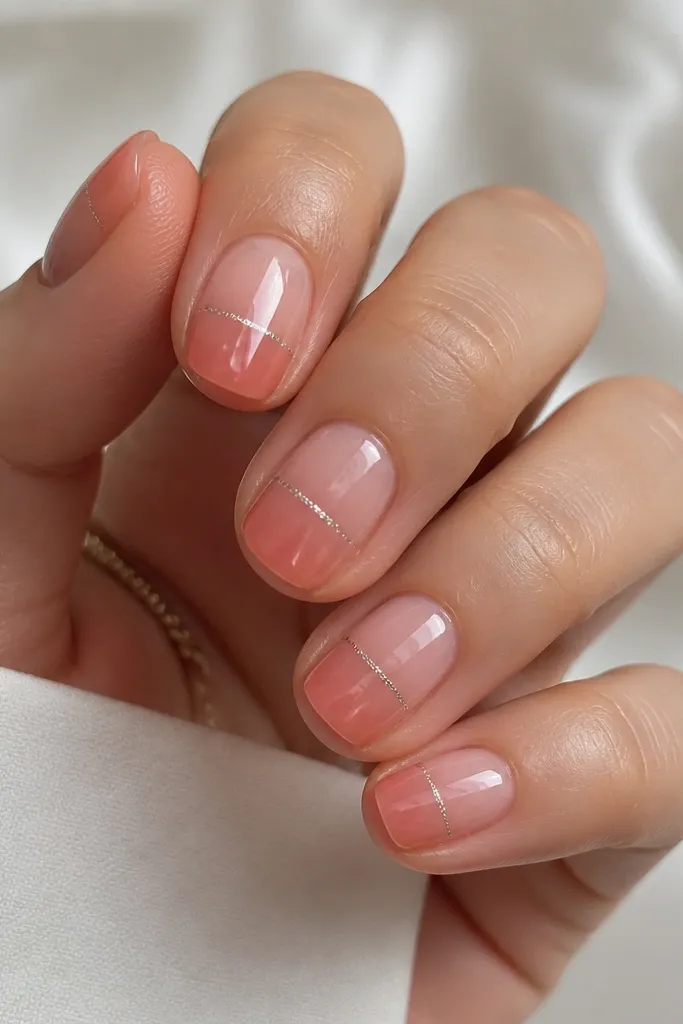
This is the summer BIAB set I reach for when my nails feel dry but I still want colour. The coral jelly tips look juicy and fresh because they’re semi-sheer, so they don’t overpower your nail bed. The micro-glitter bridge is placed in the middle, where the eye naturally reads “spark,” and it makes the whole set feel finished without extra bulk. It suits warm undertones especially, but cool undertones look great too because coral has enough pink in it to harmonize. For short rounded nails, it also visually stretches the nail — the fade does the work.
Start with a sheer nude-pink BIAB overlay, cured fully. Then apply the coral jelly colour only on the tip area, using a sponge or a small brush to fade the edge into the nude — keep the transition soft, not streaky. Add a micro-glitter line across the center of each nail using a thin gel brush; keep it narrow, about 1-2 mm wide. Seal with top coat, then cap the free edge and cure. After curing, check the surface under a lamp and buff only if you see a ridge from the glitter line.
If your coral looks too opaque, mix it with a drop of clear gel before applying — jelly should look see-through at the edges.
Don’t put glitter right at the cuticle — it lifts faster and makes the set look messy.
2. Mint to Sky Ombre with White "Sunbeam" Stripe
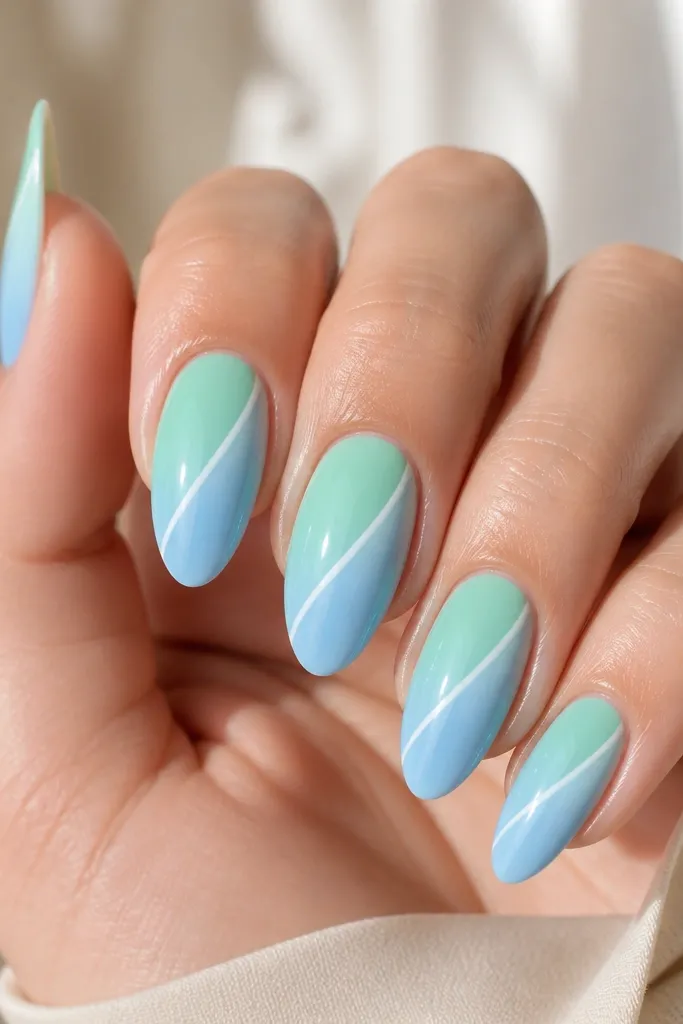
This one looks like summer photos — light, airy, and crisp. Mint to sky ombre flatters most skin tones because mint brightens warm skin and sky blue cools down rosy undertones. The white sunbeam stripe is key: it creates direction, so your nails look longer and more “styled” than a plain ombre. I like it for medium almond nails because the diagonal stripe shows off the nail shape without needing long nails. It also works for everyday wear because the colours are pastel, not neon.
Apply BIAB in a natural nude base and cure. For the ombre, use mint near the cuticle and blend toward sky blue at the tip — I do it with a makeup sponge dab method so the gradient stays smooth. Keep the fade clean at the sidewalls by wiping the brush edge on a lint-free wipe before blending. Cure each layer as you go if your system requires it, then draw the white sunbeam stripe with a fine detail brush, starting near the lower center and lifting off before the top edge. Finish with a thick top coat and cure hard, then wipe inhibition if needed.
Editor's noteUse a nail art striping brush and practice one line on a paper towel first — the stripe should be confident and thin.
Skip thisDon’t over-blend until it looks smoky; pastel ombre should still show a clear mint-to-blue direction.
3. Strawberry Milkshake Half-Moon Nails
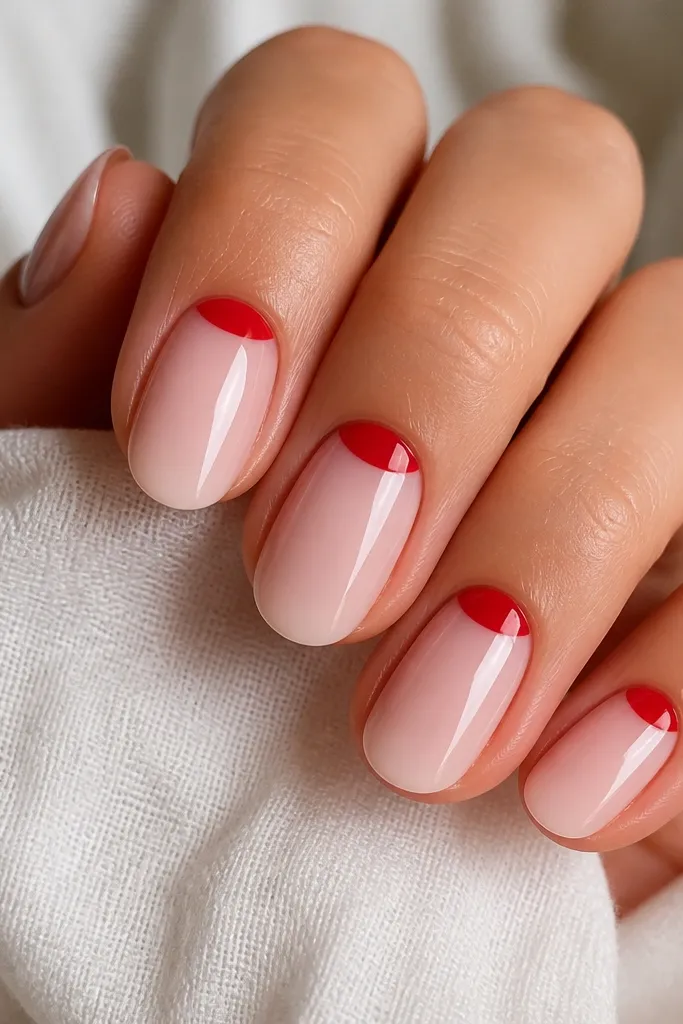
Half-moon designs look sharp in summer because they frame the nail like a mini window. The strawberry milkshake combo is strawberry red paired with a milky nude, and it makes nails look healthy instead of flat. I like it on short square or rounded nails because the half-moon gives structure and helps your cuticle area look neat. If you’ve got pink undertones, the red pops cleanly; if you’re warm-toned, the milky base keeps it from looking too cool. This set also hides minor growth lines because the design anchors at the cuticle.
Start by building BIAB with a sheer milky nude layer, cured smooth. Use a small stencil or freehand with a cuticle guide to paint the half-moon — the red should sit about 1 mm away from the sidewalls so it doesn’t smear. Cure the red layer, then wipe and apply a thin second coat only where the red looks thin. Seal with top coat, focusing on the cuticle edges so the red doesn’t lift. If you’re prone to lifting, lightly buff the surface after BIAB and before colour, then cleanse again.
Editor's noteFor ultra-crisp edges, use a gel liner and cure with the nail held steady under the lamp — don’t move while it’s curing.
Skip thisSkip thick red at the half-moon — thick gel there makes the edge catch on hair and lifts sooner.
4. Tropical Palm Leaf Accent on Lime Base
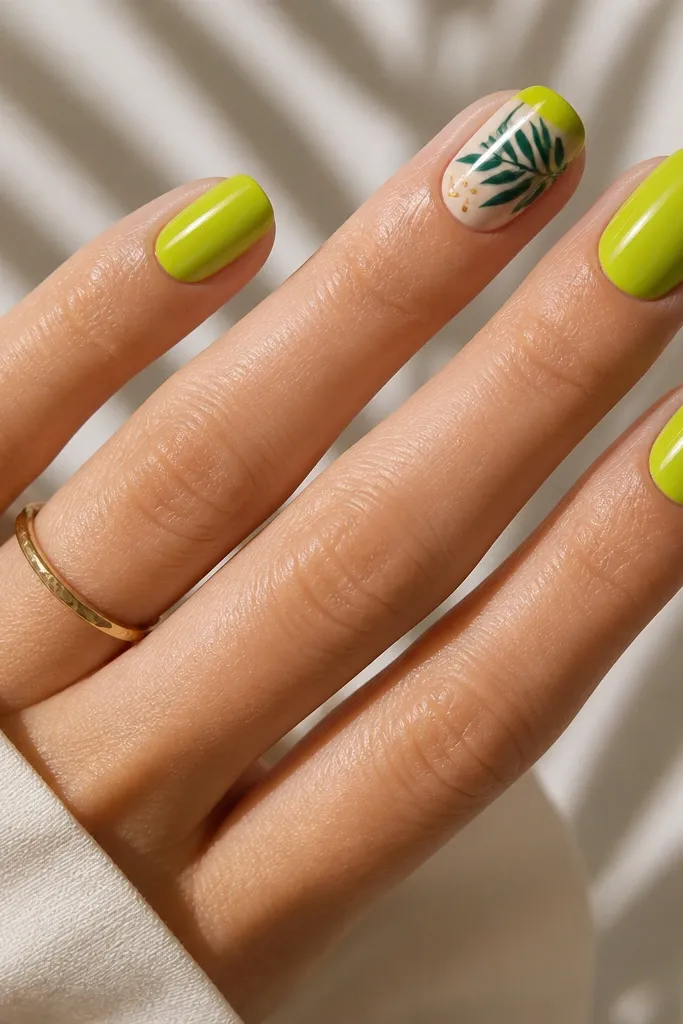
If you want summer BIAB nails inspiration summer fresh that feels fun without looking costume-y, this is it. The lime base is loud in a good way, but it stays wearable because it’s solid on most nails and only one nail gets the art. The palm leaves add movement — dark green and teal give depth, and the tiny gold dots act like sun specks. This flat painting style looks best on medium-length nails, especially if you keep the accent nail slightly more sparse. It flatters people who wear bright colours well, and it also works on neutral outfits because the nails give the colour hit.
Build BIAB with a thin nude base and cure. Apply lime green gel on four nails in two thin layers so it stays opaque without flooding the cuticle. On the accent nail, keep the base milky nude, then paint palm leaves using a fine liner brush: start with a midrib line, then add leaf segments on each side. Add teal highlights on two leaves so it doesn’t look flat, then place three tiny gold dots near where the leaves meet. Top coat everything, making sure the palm-leaf lines are sealed but not raised.
Editor's noteIf your lime looks streaky, apply the first layer super thin and cure longer — it evens out as it builds.
Skip thisDon’t paint palm leaves on every nail; it turns into clutter fast and looks less fresh.
5. Blueberry Glaze with Clear "Berries" Specks
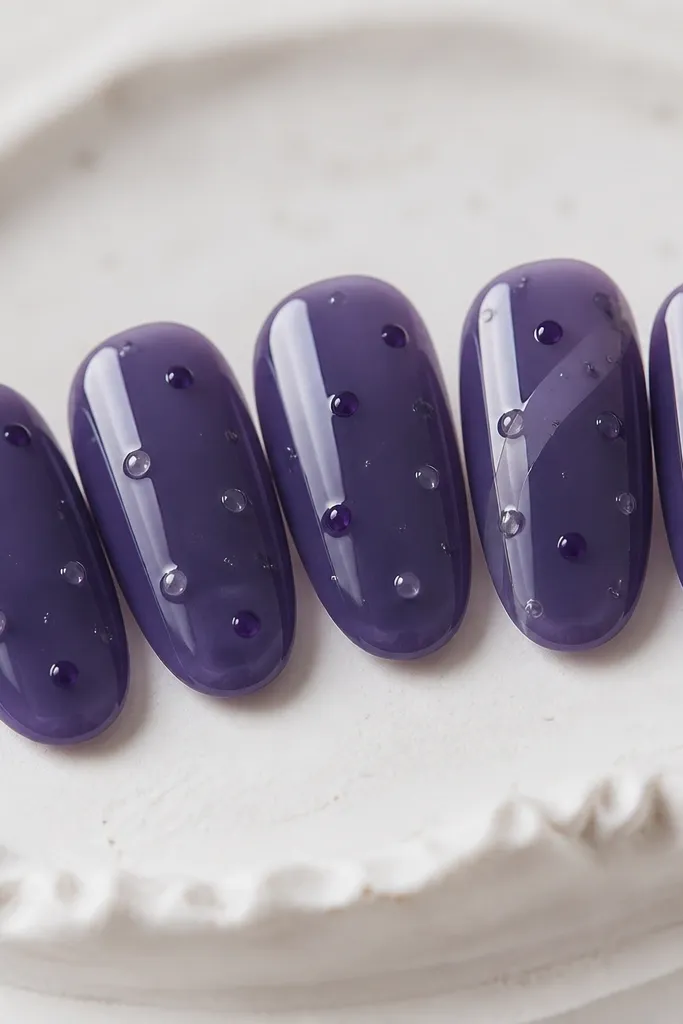
This set looks like fruit candy — glossy, rich-looking, and still summer. The blueberry glaze works because the purple is translucent enough to let light pass through, so it doesn’t look like a heavy block of colour. The clear gel specks mimic berry highlights and add texture without needing stones. I like it on medium oval nails because the curved shape makes the glaze catch light in a smooth curve. It flatters both warm and cool undertones since purple sits in the sweet spot for many skin tones. For nights out, it looks dressed up even with short jewellery.
Apply BIAB in a natural base and cure, then overlay a translucent blueberry purple layer. Build it in thin coats until you get even colour, about two to three layers depending on pigment strength. For the “berries,” dot a clear gel (or clear builder) randomly across the nail, then cure — keep the dots small so they look like highlights, not bumps. Add a few tiny darker purple seed dots around the clear ones for contrast. Top coat over everything and fully cure; if your system is thick, use a brush to smooth the surface after the first top coat.
Editor's noteMake your highlight dots slightly off-center — perfectly spaced dots look artificial.
Skip thisDon’t skip top coat thickness — the glaze needs a smooth seal so the dots don’t snag.
6. Peachy Nude BIAB with Tangerine Side French
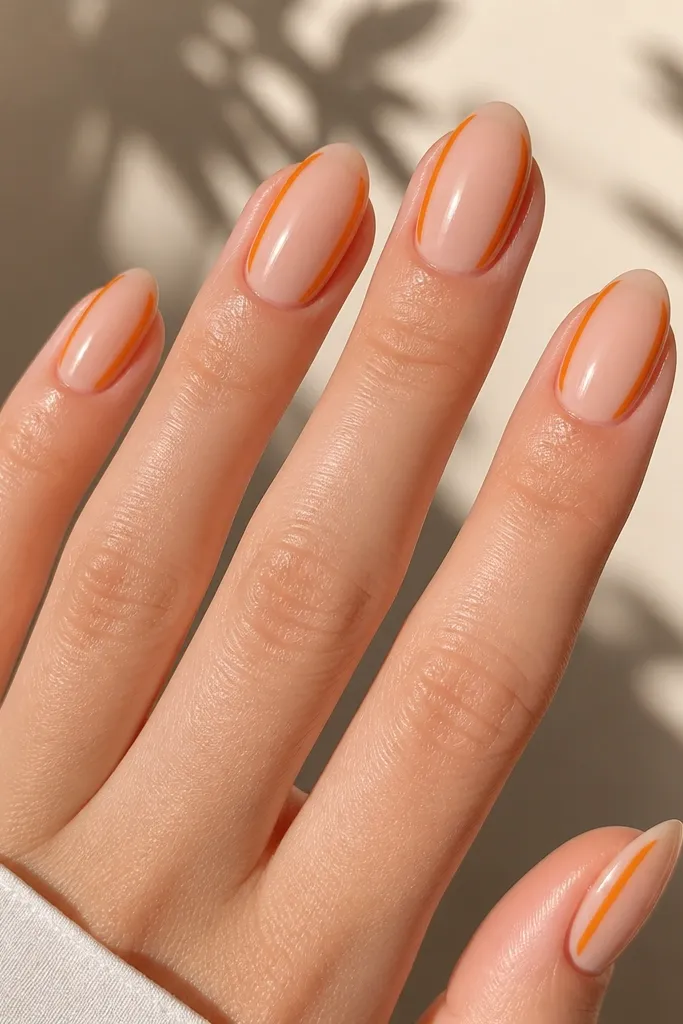
A side French twist looks fresh because it’s clean and modern, not the classic straight line. Peachy nude keeps everything soft, and tangerine along the sides adds a summer pop without covering the whole nail. This design is flattering on short nails because the line placement elongates visually — your eye tracks along the sides. It also hides minor unevenness at the free edge since the centre stays nude. If you wear gold jewellery, this set looks especially good because tangerine reads warm and matches gold tones.
Start with a peachy nude BIAB layer and cure it smooth. Use gel tape strips or just steady your hand and paint thin tangerine lines on both side edges, stopping about 1-2 mm before the very tip center. Keep the lines symmetrical — if one side is thicker, it throws off the whole look. Cure, then wipe and apply a thin second tangerine pass only if the line looks patchy. Finish with top coat, and cap the tip edge so the side lines don’t lift where they meet the free edge.
Editor's noteUse a liner brush that’s 1-2 mm wide at the ferrule — wider brushes make the French lines look chunky.
Skip thisDon’t paint tangerine across the tip center; that turns it into a half-coverage look and loses the elongating effect.
7. Hot Pink Micro-Foil Confetti on Clear BIAB
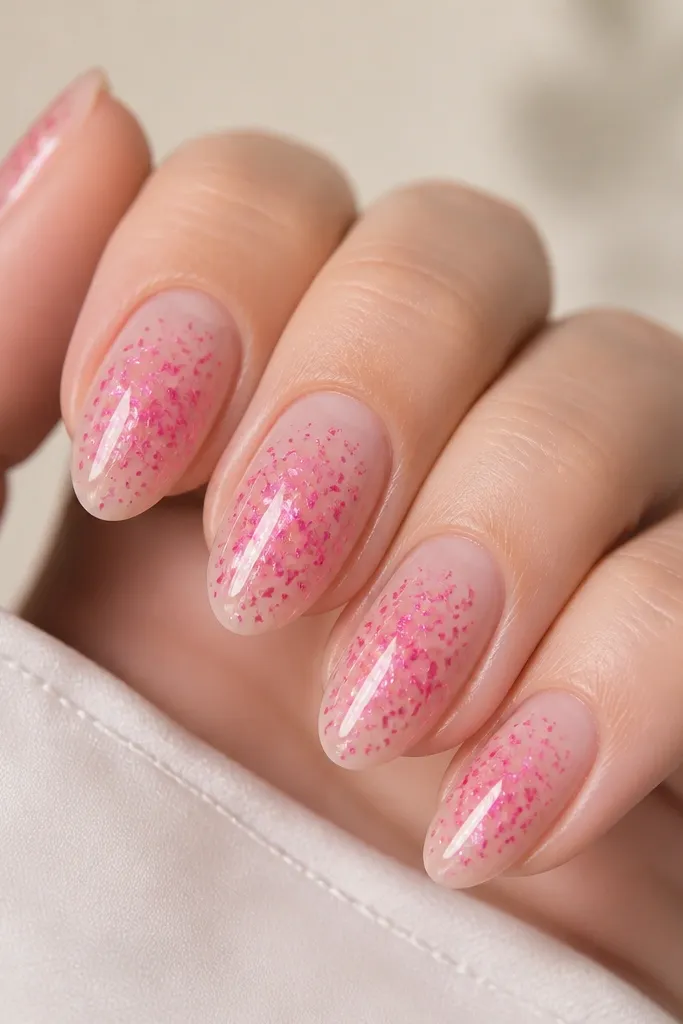
Clear BIAB makes summer foil look extra bright because light passes through. The hot pink confetti gives that party vibe without needing nail art that takes forever. I like concentrating the foil near the center because it makes the nail look fuller, not sparse. This design flatters all undertones because the base is clear and the foil colour is the only strong element. It also works on shorter nails since you’re not drawing lines that need length. If you hate bulky rhinestones, micro-foil is your friend.
Build a clear BIAB layer and cure, then wipe and lightly buff if needed for smoothness. Apply a thin tacky layer (or use a no-wipe gel layer if your system does that) and press micro-foil pieces into it using a silicone tool or tweezers. Scatter so it looks random but still balanced — aim for 10-20 pieces per nail, not 60. Cure, then seal with top coat in two thin coats so the surface stays glassy and flat. After the second top coat cures, run a brush along the free edge to cap it well.
Editor's noteIf foil lifts at the edges, add one extra thin top coat layer and cure longer for that nail.
Skip thisSkip pressing foil too hard — smashed foil looks dull and you get uneven texture.
8. Lemon Sorbet Gradient with White Outline Tips
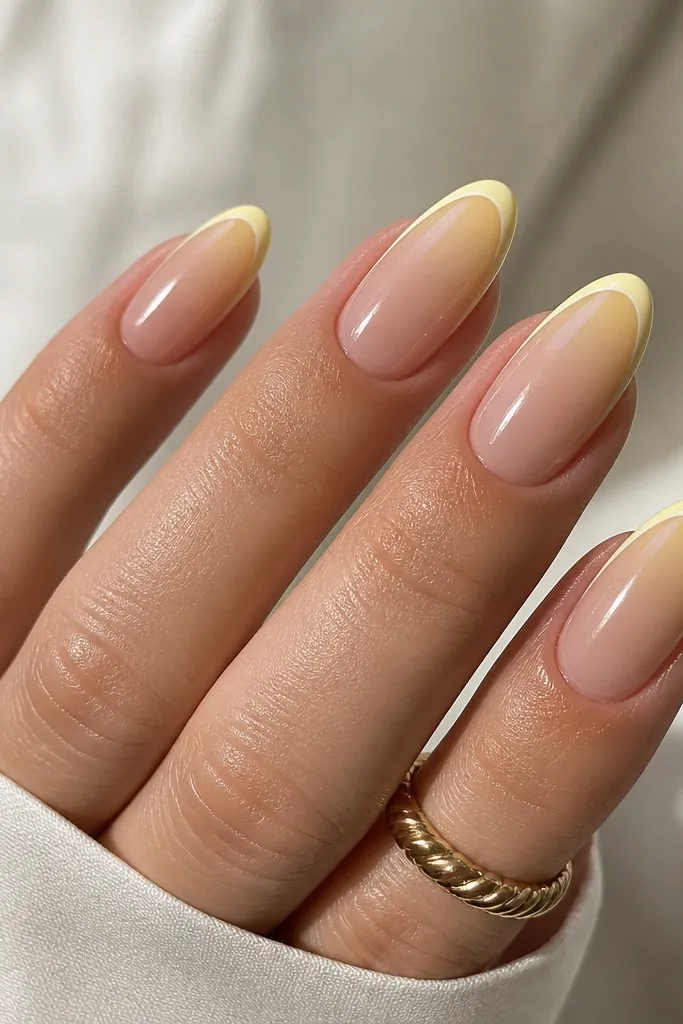
Graphic outlines make bright gradients look polished, not childish. Lemon sorbet is cheerful but still wearable because the gradient fades into a nude base, so your nail bed stays visible. The thin white outline acts like a border, which makes the lemon colour look crisp against skin tones. This set is flattering for medium almond shapes because the outline follows the curve and makes the nail look sharper. It also looks great when you wear neutral outfits — the outline gives it that “designer” feel without trying too hard.
Start with a sheer nude BIAB base and cure. Sponge on lemon gel at the tip and blend upward, aiming for a fade that covers about the last third of the nail. Cure and add a second thin lemon layer only where the gradient needs more brightness. Use a fine liner brush to draw a thin white outline following the free edge curve, leaving a tiny gap between outline and the main lemon colour so it looks like a frame. Top coat twice thinly for a smooth finish.
Do the outline after the lemon is fully cured — wet gel smears and the line loses sharpness.
Don’t make the white outline too thick; thick outlines look like marker and can chip at the edge.
9. Sea Glass Teal with Nude Negative Space Center
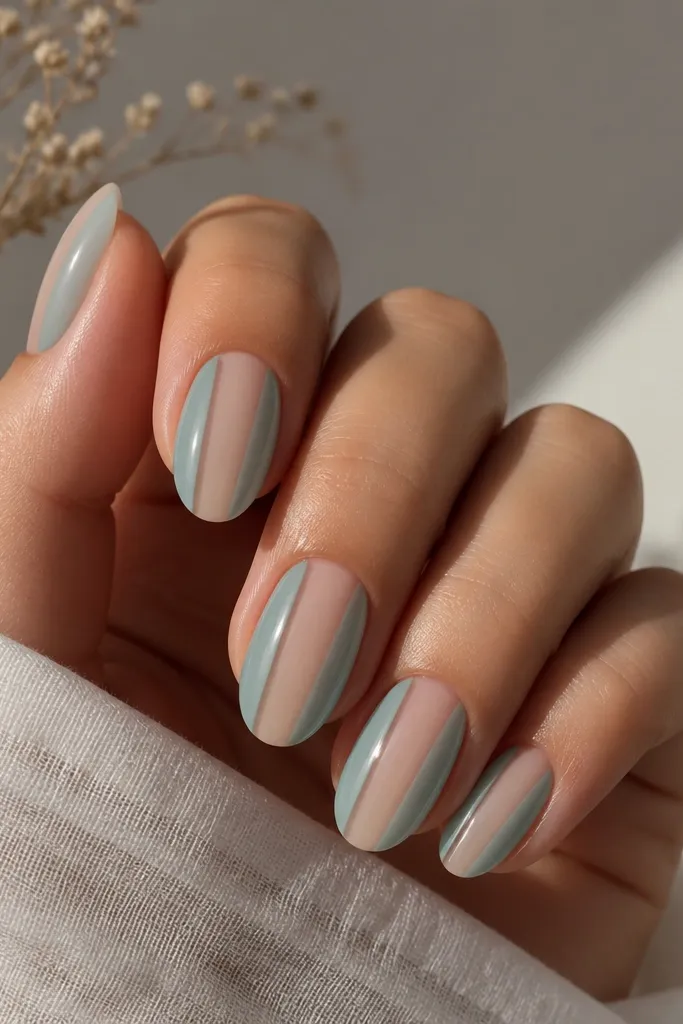
Negative space looks extra fresh in summer because it keeps the design airy. The sea glass teal is translucent, so it reads soft instead of harsh, and it matches both warm and cool skin tones. By leaving a nude center stripe, you create a clean vertical line that makes nails look longer and slimmer. I like this on short-to-medium nails because it gives shape without needing length. It’s also a great option if you want colour but your nails chip easily — the design places colour on the sidewalls where you can cap carefully.
Build BIAB with a nude base and cure, then keep that nude center clean. Paint sea glass teal on both sides of the nail, staying about 2 mm away from the center nude stripe. Keep the teal semi-sheer at first, then add a second thin layer for even coverage. Cure fully and check the center line — use a small brush with cleanser to clean any teal that creeps into the negative space. Finish with top coat, and cap the free edge carefully so the teal doesn’t lift along the side lines.
Use a striping tape as a guide for the nude stripe — peel it off right after you finish painting, before curing.
Don’t cover the center stripe with top coat colour by accident — if you flood it, the negative space disappears.
10. Rose Quartz Shimmer with Copper Dot Cuticle
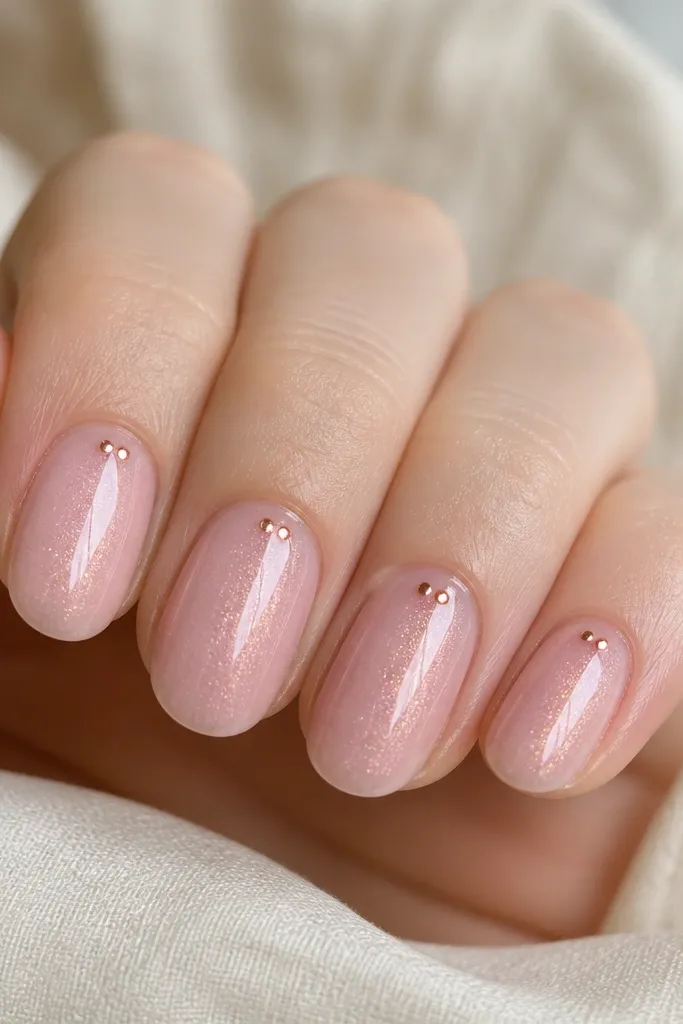
This is soft-summer sparkle for people who get tired of neon. The rose quartz base has a pale pink glow that looks flattering on almost everyone because it sits close to natural nail colour. The shimmer is fine, not chunky, so it looks like light reflecting off glass. Copper dots at the cuticle add warmth and a “jewelled” touch without needing stones. I like it for short squoval or oval nails because the cuticle detail creates a focal point and makes the nail look tidy. It also pairs well with both silver and gold jewellery because copper reads warm but still bright.
Start with a pale rose BIAB layer and cure, then add a second thin shimmer layer if your base needs more glow. Apply shimmer only to the main nail plate — keep it even, with no thick spots near the cuticle. For the dots, use a dotting tool to place two small copper gel dots near the cuticle on each nail, spaced symmetrically. Cure and then add a thin top coat, making sure you seal around the dots without smearing them. Cure again and wipe if needed, then check under a bright lamp to confirm the shimmer catches smoothly.
Editor's noteIf copper dots look too dark, mix copper powder with clear gel so they land as a soft metallic glow.
Skip thisDon’t add more than two dot clusters — too many dots turn into a stripe of clutter.



