
1. Cinnamon Cream Almond with Honey Micro-Glitter Fade
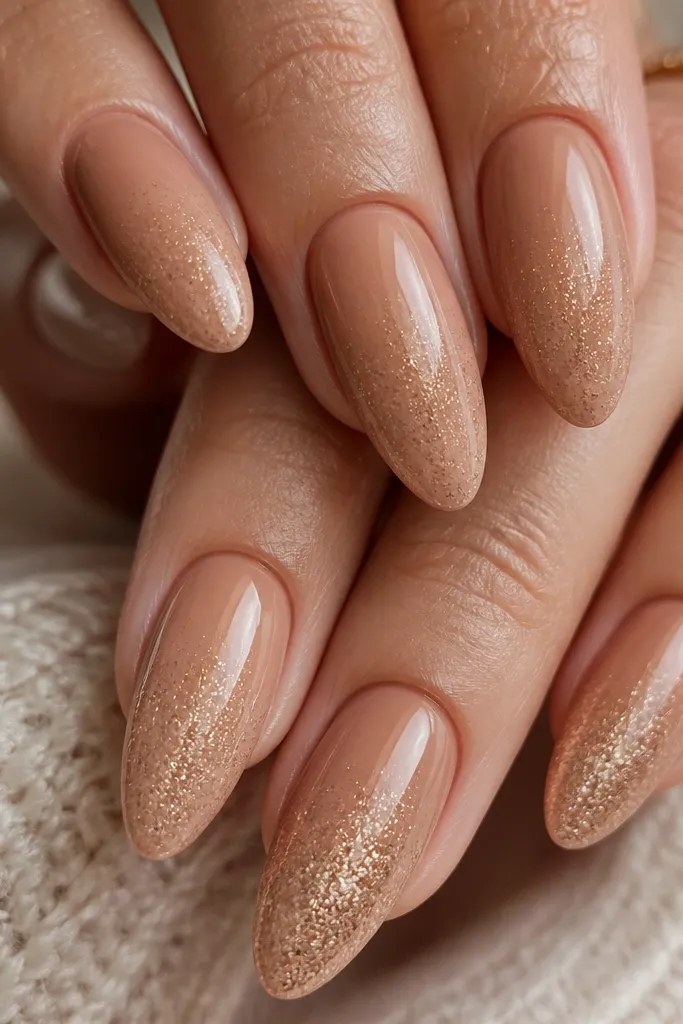
This set is my go-to when you want fall nails that look classy in daylight. The base is a creamy cinnamon nude that sits between beige and warm brown, so it flatters hands without turning orange. The honey micro-glitter fade gives that “cozy glow” while staying subtle enough for work. I’ve worn it with both fair and medium skin — it looks best when the nude base is close to your natural nail tone, not starkly lighter. The luxe part is the smooth gradient: glitter starts softly, then concentrates only at the tip so your nails look longer.
Start by prepping and buffing lightly, then apply a rubberized base coat. Paint two thin coats of cinnamon cream; cure fully between coats so the color stays even. For the glitter fade, load a flat brush with honey micro-glitter polish and dab at mid-nail, then drag lightly toward the tip. Keep the cuticle clean with a small edge-cleaning pass using acetone on a thin brush. Finish with a glossy top coat in two layers — the first cures clear, the second seals the glitter so it doesn’t feel gritty.
Editor's noteIf your glitter feels chunky, mix one drop of clear gel top coat into the glitter polish on a palette before applying.
Skip thisSkipping a second top coat over micro-glitter leaves texture that catches on sleeves and looks cheap.
2. Pumpkin Caramel Almond with One Nail Foil Leaf Accent
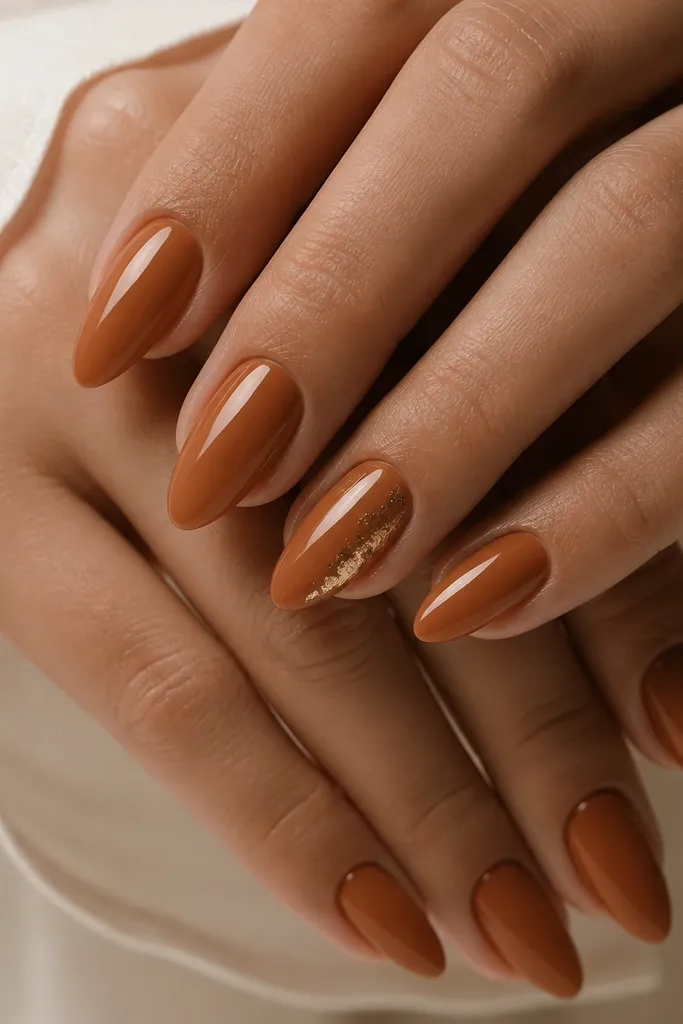
Pumpkin caramel is the fall shade that makes skin look healthier — it has enough warmth to brighten without looking neon. This works especially well on medium to deep skin tones, where caramel reads rich instead of pale. The foil leaf accent adds movement and looks expensive because it catches light at different angles. I like placing the foil diagonally rather than centered, since it visually lengthens the nail. The manicure stays elegant because only one nail gets the statement — everything else stays smooth and glossy.
Apply a nude-warm base coat, then do two coats of pumpkin caramel, keeping the first coat slightly sheer and the second opaque. For the foil nail, press a small piece of gold foil leaf onto a tacky gel layer near the cuticle on the ring finger. Use a cotton swab to press and lift until you get crisp edges — you want thin, irregular foil pieces, not a thick blob. Seal the foil with a thin layer of top coat, then add a full second top coat over all nails. Cure thoroughly so the foil doesn’t lift at the edges.
Use foil on a tacky layer, not wet polish — foil sticks better and edges stay cleaner.
Don’t cover foil with a thick first top coat or it will dull the shine and make the accent look flat.
3. Terracotta French Twist on Almond with Clear Gloss
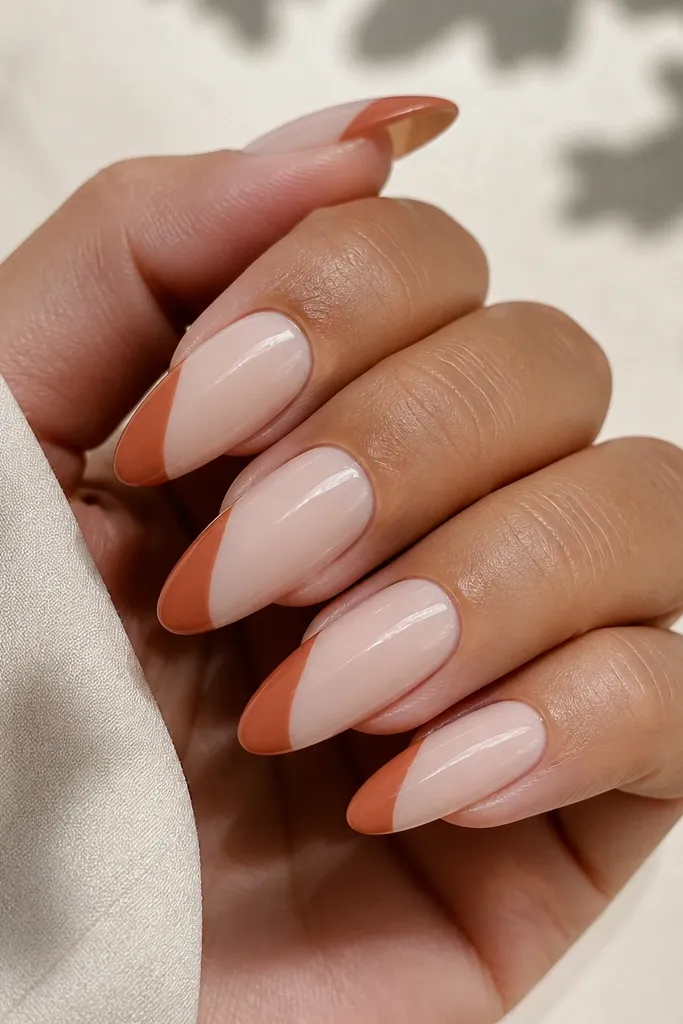
A terracotta French twist makes your nails look styled even if you keep the rest of your outfit simple. The milky sheer base softens the terracotta so it flatters hands of any tone — it looks especially good on cool undertones because the warmth balances the skin. The diagonal twist is more interesting than a straight tip and it makes the nail look longer. I’ve worn this with sweaters and boots and it always looks pulled together without feeling “Halloween.” The luxe effect is the crisp line and the glassy clear top coat.
Start with a sheer milky base; two thin coats give opacity without turning chalky. Tape a guide with a thin strip at a diagonal angle, then paint the terracotta tip in one smooth pass. Remove the guide immediately so the edge stays sharp. Clean up the sides with a small brush dipped in acetone, then let it dry fully. Finish with a thick glossy top coat — I do two thin coats because the second makes the French line look sealed under glass.
Editor's noteIf you’re free-handing the twist, lightly mark the diagonal with a dotting tool first, then connect the line.
Skip thisSkipping cuticle cleanup makes the twist look messy and can smell like old polish after curing.
4. Deep Plum-Brown Almond with Copper Chrome Half-Moon
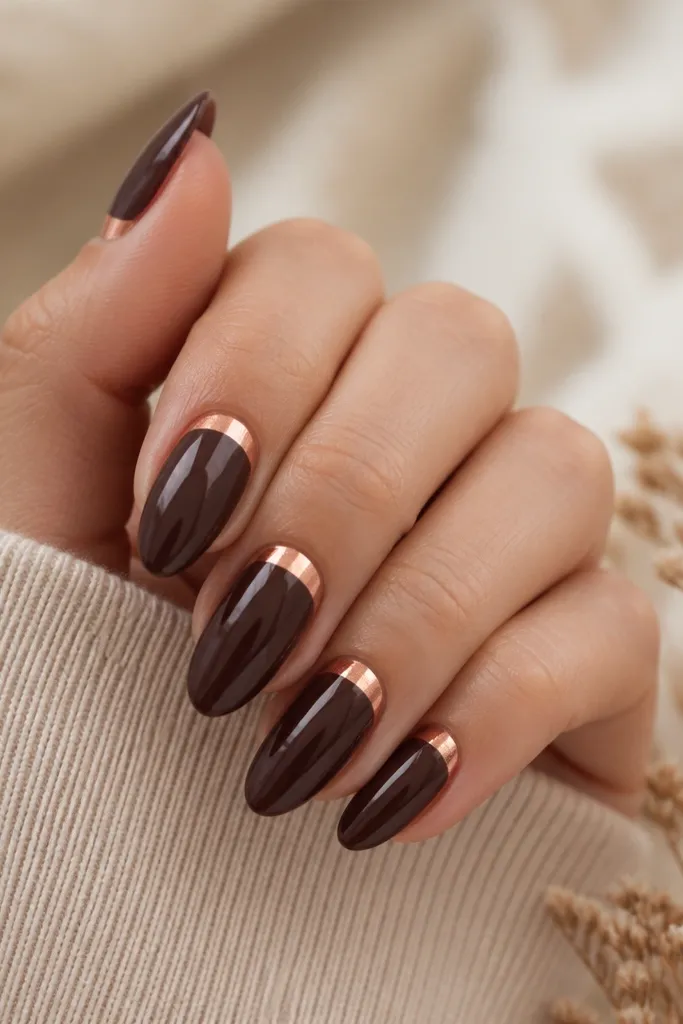
This is the set for nights out when you want fall but still want it to look sharp. Deep plum-brown flatters cool undertones and also looks stunning on warm skin because the copper pulls it golden. The copper chrome half-moon is a small detail that reads expensive because chrome reflects light in a tight, clean band. Leave a narrow negative space around the cuticle — that ring of skin-like clarity makes the nails look custom. The almond shape keeps everything elongated and elegant.
Apply a deep plum-brown base in two coats, keeping the cuticle area smooth and not flooded. For chrome, rub a thin layer of chrome gel or adhesive around the cuticle half-moon — keep it narrow so it doesn’t look like a thick bar. Press copper chrome powder onto the tacky area with a firm foam applicator, then buff lightly to remove excess. Seal with a gel top coat made for chrome so you don’t dull it. Finish with one more clear coat on top of the whole nail for a uniform gloss.
Use a makeup sponge for the half-moon if your brush tends to smear near the cuticle.
Don’t buff too hard over chrome or you’ll lose the mirror effect and it looks dusty.
5. Chocolate Swirl Almond with Warm Beige Marble Tips
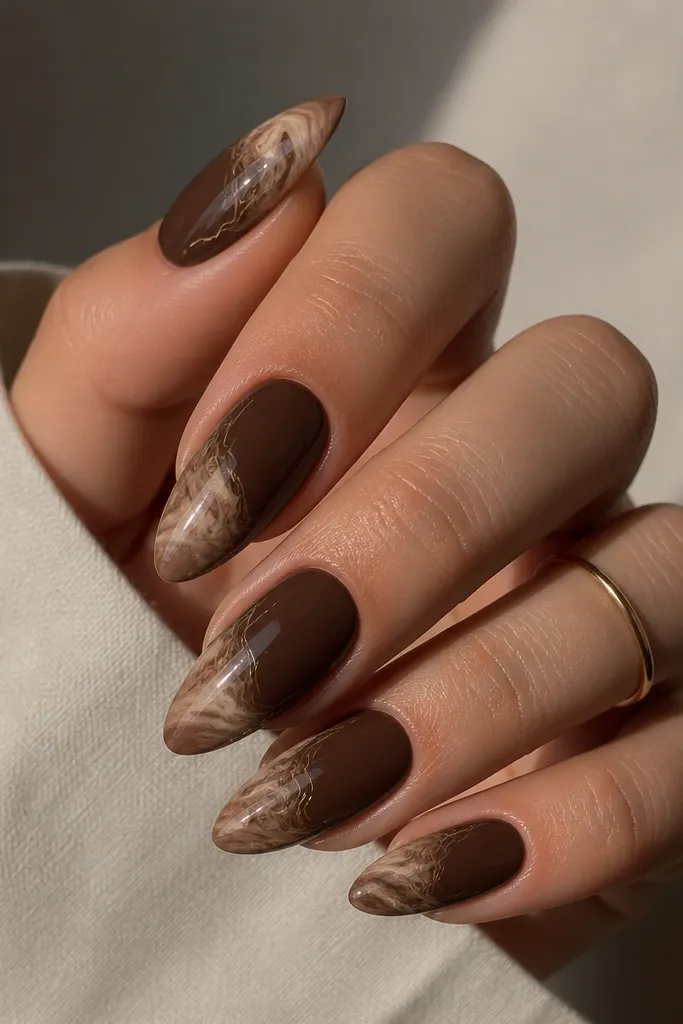
Chocolate swirl with beige marble is cozy without looking heavy. The chocolate base looks rich on all skin tones, and the warm beige tip keeps it from feeling too dark. I love this for fall evenings because it looks like your nails belong to a sweater — warm and dimensional. The key is where the marble lives: only the outer third so the nail still reads long. This design flatters short almond nails because the marble edge creates a visual extension.
Paint a chocolate brown base in two coats, then cure fully. On the tip area, apply a thin layer of warm beige polish or gel. Use a marbling tool or a fine liner brush to drag chocolate lines through the beige while it’s slightly tacky, creating soft swirls. Add tiny beige-white breaks with a dotting tool for marble veining. Seal with a glossy top coat and cure — keep the marble lines thin so they don’t turn into blobs.
Editor's noteIf your marble looks muddy, wipe your brush on a paper towel before each new line.
Skip thisAvoid putting marble all the way to the cuticle — it shrinks the nail visually.
6. Sage Smoke Almond with Matte Base and Glossy Dot Accents
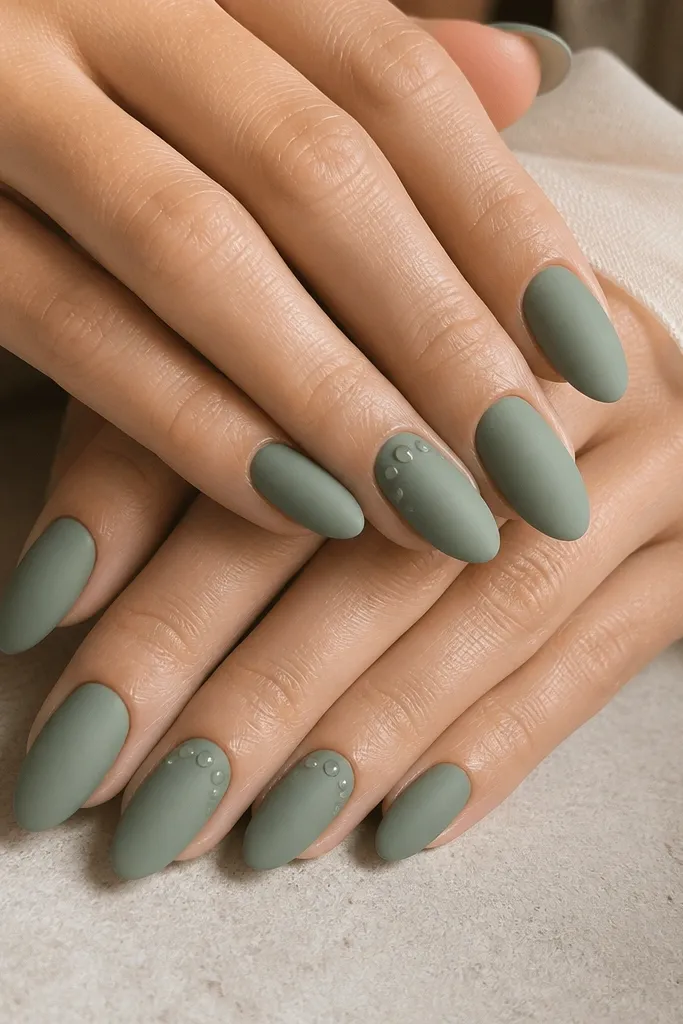
Sage smoke is the calm, grown-up fall color that looks great when your wardrobe is neutral. The matte finish hides minor imperfections and makes the green look velvety. On medium and deep skin tones, sage reads sophisticated instead of muted. The glossy dots give you a small reflective moment so the matte doesn’t feel flat. I like placing dots near the cuticle because it draws the eye upward and makes the nail look neat.
Start with two coats of sage smoke green, then apply a matte top coat on all nails. For dot accents, use a dotting tool with glossy top coat mixed with a drop of clear gel, then place three dots near the cuticle on the ring and middle fingers. Cure those dot areas separately if your matte top coat needs full curing time. After dots cure, spot-seal with a glossy layer only over the dots, not the whole nail. Keep the dots small — about the size of a half grain of rice.
Editor's noteTest the matte top coat on one nail first; some brands dry with a slightly different green tone.
Skip thisDon’t mix glossy and matte on the same nail without sealing — it can look streaky after wear.
7. Cranberry Jelly Almond with Floating Gold Micro-Specks
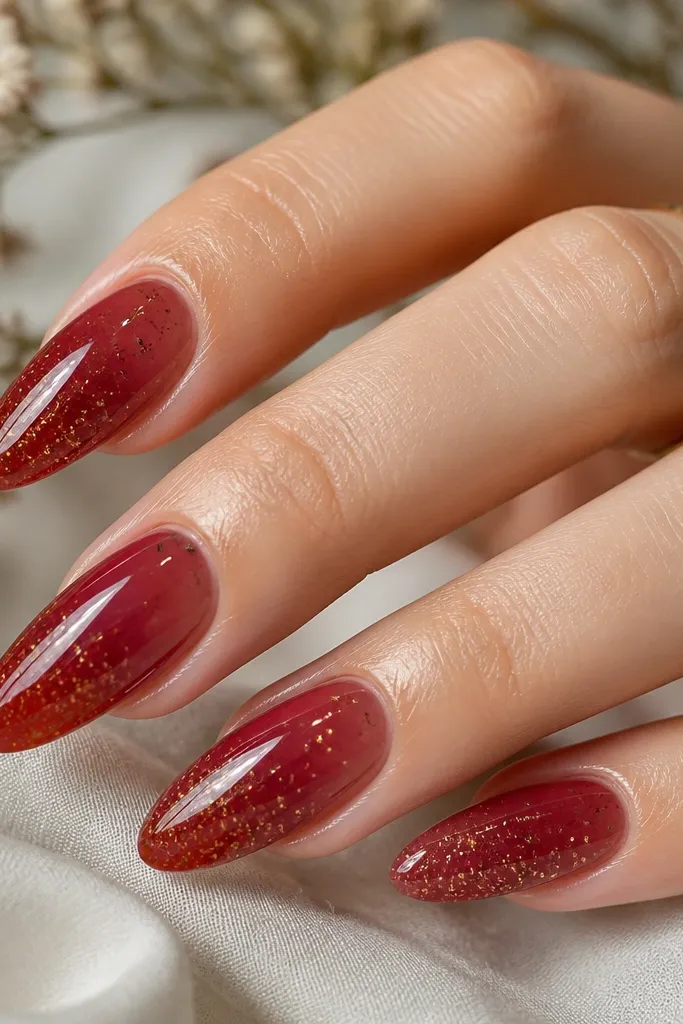
Cranberry jelly makes your nails look juicy and fresh, even in cold weather. Jelly polish flatters hands because it doesn’t cover the nail bed completely — it creates a soft, elongated look. This looks best on fair to medium skin tones, where cranberry turns bright instead of muddy. The gold micro-specks feel like tiny confetti, but because they’re suspended, they look luxe rather than sparkly. The almond shape + jelly depth is the trick: it reads expensive because light travels through the color.
Apply a clear base or jelly nude base first, then two thin coats of cranberry jelly. Keep coats thin so the jelly stays glassy — thick coats look cloudy. For the specks, sprinkle gold micro-specks onto a slightly tacky second coat near the tip, then gently blow off excess. Seal with a high-gloss top coat in one thick layer, then check for any specks that need a second seal. Cure fully and avoid soaking right after so the jelly stays smooth.
Editor's noteIf you have trouble with specks sticking, dab the tip with a thin layer of tacky gel before sprinkling.
Skip thisAvoid thick glitter dust — it sinks and looks gritty instead of suspended.
8. Autumn Maple Almond with Orange-Gold Linear Foil Stripe
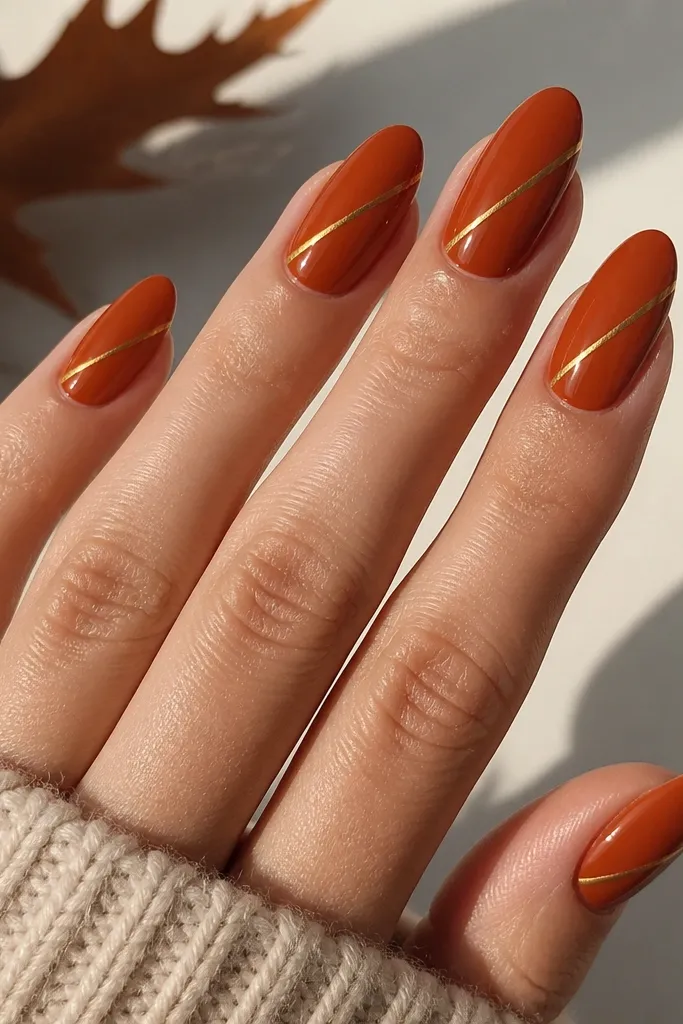
Maple orange-brown is the color that makes your hands look like fall leaves. It’s flattering when it sits between orange and caramel, not too bright and not too rusty. The thin linear foil stripe adds a “designer” touch without covering the whole nail. I like it on almond because the diagonal stripe makes the nail look longer and more sculpted. This design works for both short and medium almond — the stripe scales with the nail length.
Paint two coats of maple orange-brown and cure. Add a strip of thin foil or apply foil transfer tape diagonally using tweezers — aim for a stripe width of about 1 mm. Press the foil down firmly, then lift to reveal the line. Clean the edges by brushing a tiny amount of base gel around the stripe area, keeping it crisp. Finish with two coats of glossy top coat so the foil is sealed and doesn’t catch on knit sleeves.
Editor's noteUse a cuticle pusher to press foil edges — it gives you cleaner contact than your fingertip.
Skip thisDon’t place the stripe too close to the cuticle line or it can look like a grown-out line.
9. Smoked Olive Almond with Black Lace Stamping
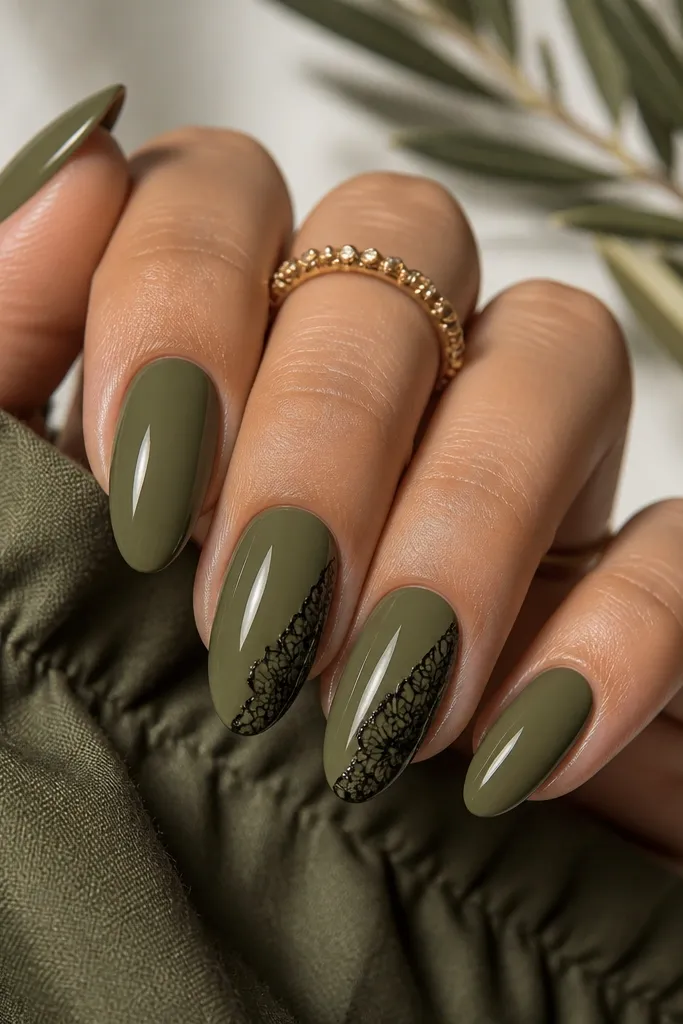
Smoked olive with black lace is one of those combinations that looks like you planned it, even if you didn’t. The olive base reads modern and makes the black lace feel intentional instead of goth. I’ve worn it on both light and deep skin; the contrast is what makes it pop, and almond keeps the lace from looking bulky. The lace stamping looks luxe when the pattern lines are crisp and thin, not filled in. This is great for dinner plans, but it still feels wearable because the base is muted.
Apply two coats of smoked olive green, cure, and top coat lightly. Choose a lace stamping plate with thin linework, then apply stamping polish in black. Scrape the plate clean, then press the stamp onto the nail for a crisp transfer on the outer third. Clean any extra with a small brush dipped in acetone. Seal with glossy top coat — don’t use matte here, since lace needs shine to look sharp.
Editor's noteWarm the stamping plate slightly with your hands before stamping — it helps thin polish transfer cleanly.
Skip thisAvoid using thick stamping polish; it fills the lace lines and looks blurry.
10. Oat Milk Nude Almond with Caramel Micro-French Tips
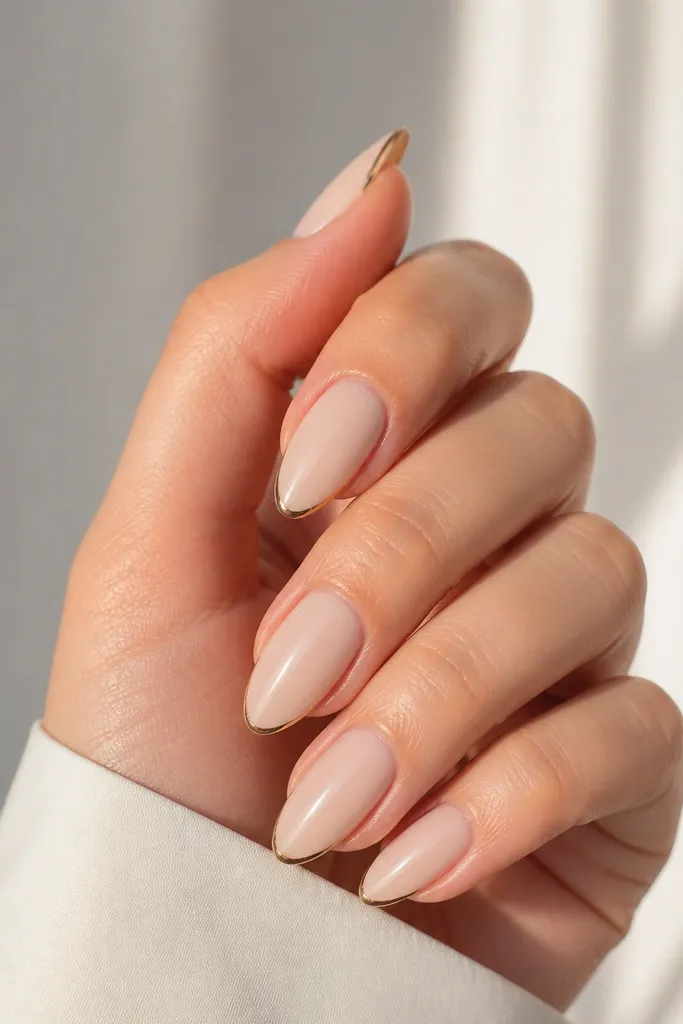
This is the “quiet luxe” set that looks expensive on everyone. The oat milk nude base is creamy, not too pink, so it looks natural and flattering. Caramel micro-French adds warmth without turning the whole nail into a solid block of color. I love it for short almond nails because the thin tip keeps the nail looking long. This design is also super forgiving when your cuticles grow — it still reads intentional because the accent is small.
Start with an oat milk nude base in two coats, then cure. Use a thin liner brush to paint micro French tips in caramel — keep the line narrow and centered. For a clean edge, place the brush at the side wall and pull toward the tip, then repeat on the other side to meet in the middle. Add a second micro line only if you need opacity, keeping it thin. Seal with glossy top coat and cap the free edge so chips don’t start at the corners.
If your liner brush is too thick, trim the bristles slightly with scissors for tighter control.
Don’t thicken the French line — thick tips make short almonds look stubby.
11. Rust Velvet Almond with Soft Focus Smoothing Top Coat
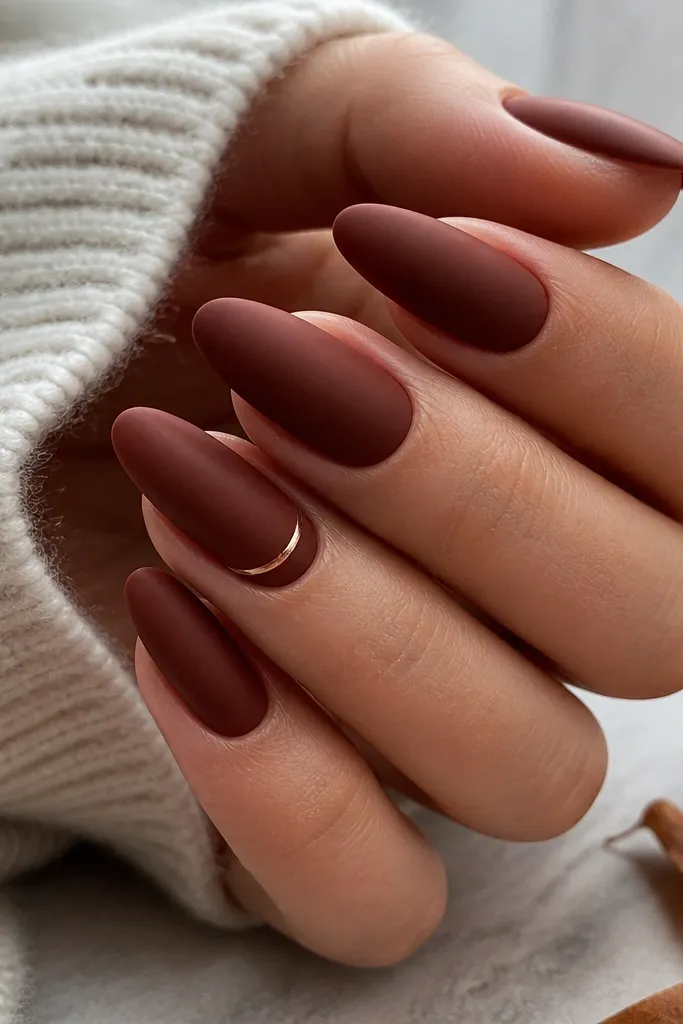
Rust velvet is the fall shade that makes your hands look warm even when the weather is gray. The color sits between terracotta and dark copper, so it flatters warm undertones and looks bold on cool skin. The soft-focus smoothing finish hides tiny ridges and makes the color look like fabric. It’s also forgiving if your nails are uneven because the smoothing coat reduces the appearance of texture. I add one thin gold line near the tip on an accent nail because it keeps the set from feeling flat while still staying elegant.
Paint two coats of rust velvet polish, cure, and check for any streaks under a lamp. Apply a smoothing top coat that has a soft-focus effect — I use a thicker brush-on style so it levels. On the accent nail, draw a single thin gold line at the outer third with a liner brush. Let that line set for a minute, then cover with a second smoothing layer. Cure fully so the finish stays velvety and doesn’t turn glossy.
Editor's noteUse a lamp to inspect your nails at a 45-degree angle — you’ll catch ridges before you cure the final coat.
Skip thisSkip the smoothing coat if your rust polish already looks thick — it can turn gummy and drag.
12. Autumn Berry Almond with Blackened Red Crystals
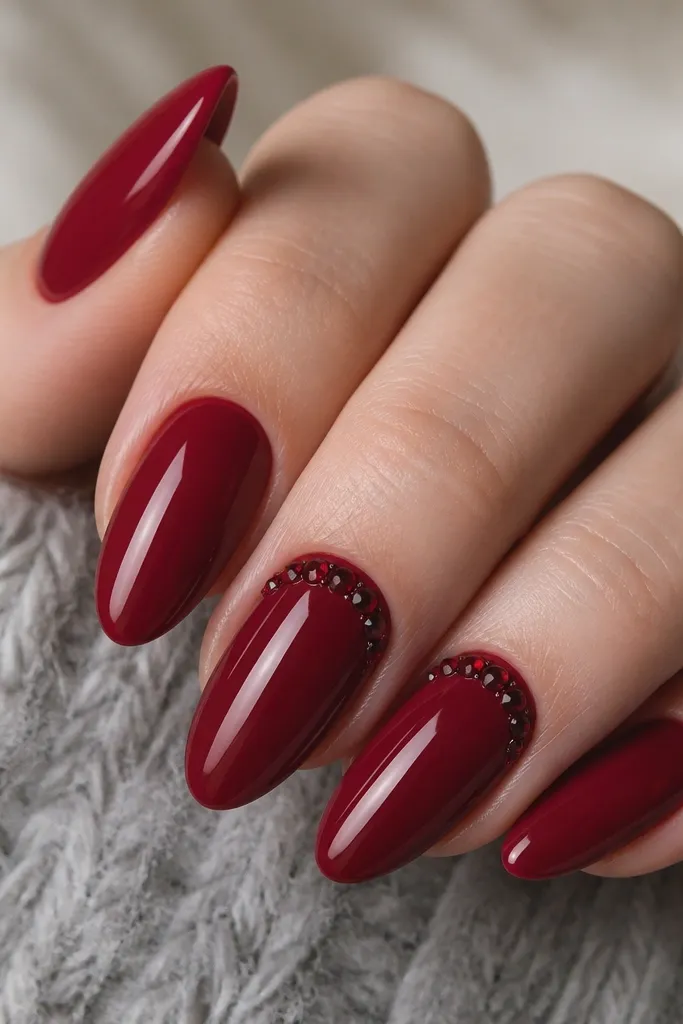
Autumn berry red is richer than classic cherry, so it reads fall without looking festive in a childish way. The blackened red crystals add sparkle that looks more grown-up than bright rhinestones. This is a great set for date nights or holiday dinners because it has dimension. It flatters fair to deep skin because the base is dark enough to anchor the crystals. Keep the crystals small and clustered — that’s what makes it luxe instead of crowded.
Apply two coats of autumn berry red and cure. For the crystal placement, dot a tiny amount of gel near the cuticle on the ring and middle fingers, then pick up crystals with a wax pencil or gel applicator. Place them in an arc, leaving a clean gap between the cluster and the sidewalls. Cure in short bursts so the gel doesn’t flood. Finish with glossy top coat around the crystal edges, then one more seal pass only over the crystal bases.
Use a wax pencil to press crystals into gel — it gives you better control than tweezers.
Don’t cover crystals completely with thick top coat or they lose their sparkle.
13. Mocha Latte Almond with White Cocoa Outline Art
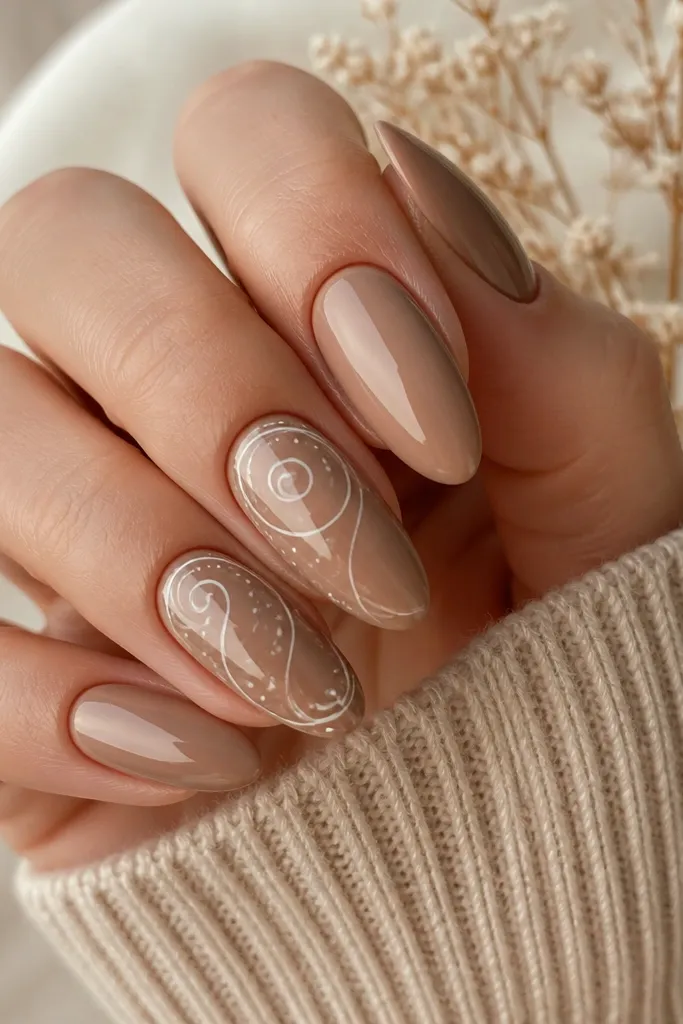
Mocha latte is a neutral fall tone that looks clean and expensive. It flatters most skin tones because it’s close to a warm taupe — not too gray, not too orange. The white cocoa outline art looks like delicate drawings, which is why it feels “luxe” instead of themed. I place the art on two nails only so the look stays wearable and doesn’t compete with rings. Almond shape helps the outline stay elegant because the taper gives the lines a natural guide.
Paint mocha latte in two coats, cure, and top coat lightly. On the accent nails, use a fine liner gel in white and sketch tiny swirls near the center of the nail — keep lines under 1 mm thick. Add a few micro dots to mimic cocoa dust, then cure. Clean around the art with a brush dipped in acetone to keep edges sharp. Finish with a full glossy top coat over all nails, sealing the line art so it doesn’t lift.
If your white gel is too opaque or thick, thin it with a gel medium so lines stay hair-fine.
Avoid heavy doodles — thick white lines make the manicure look like sticker art.
14. Golden Olive Almond with Crisscross Thread Chrome
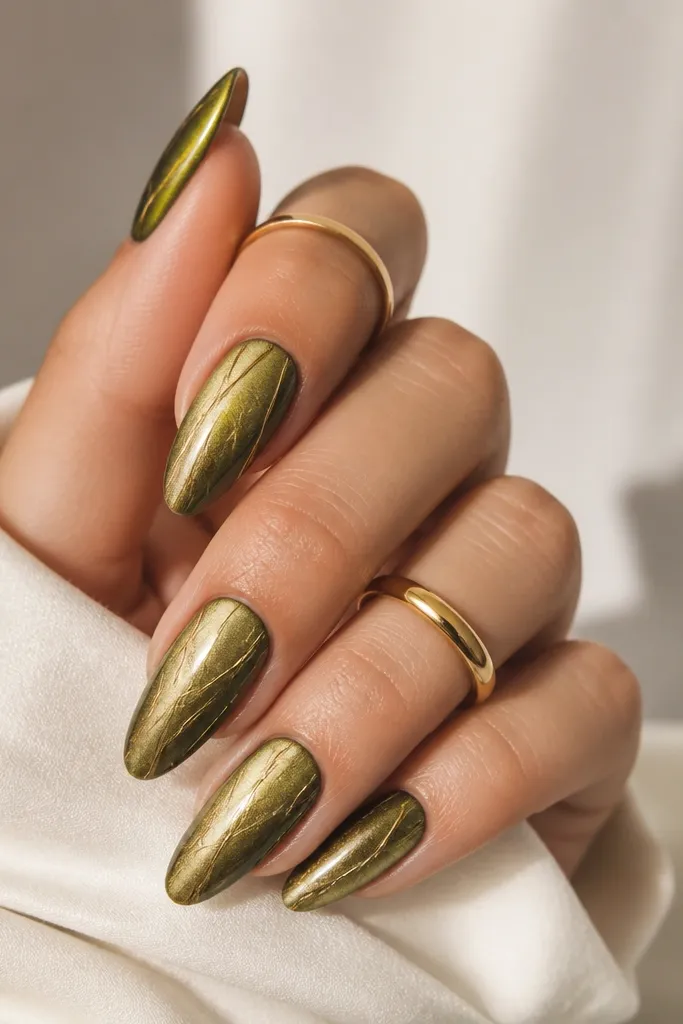
Golden olive is the fall metal that looks like leaves under streetlights. It’s flattering on warm and neutral undertones because the gold pulls everything warmer. The crisscross thread chrome is a pattern detail that reads high-end because it’s thin and evenly spaced. I like it most on longer almond, but it still works on medium length if the lines don’t spread too wide. This design is bold, so you keep everything else simple — rings and bracelets should be gold-toned to match.
Apply two coats of golden olive metallic, cure, and wipe any tack residue if your system needs it. Use a fine liner brush to draw two diagonal lines on each nail, then add two more lines crossing them — keep the spacing consistent so it looks like thread. Rub gold chrome powder over the lines while the gel is tacky, then buff gently. Seal with a chrome-friendly top coat so the lines stay reflective. After curing, check the crisscross edges under a lamp and re-seal any spots that look raised.
Editor's noteUse striping tape as a guide for the first diagonal — it makes the pattern look symmetrical fast.
Skip thisDon’t paint the whole nail with chrome — the thread look disappears if everything is reflective.
15. Classic Burgundy Almond with Tiny Rose-Gold Studs
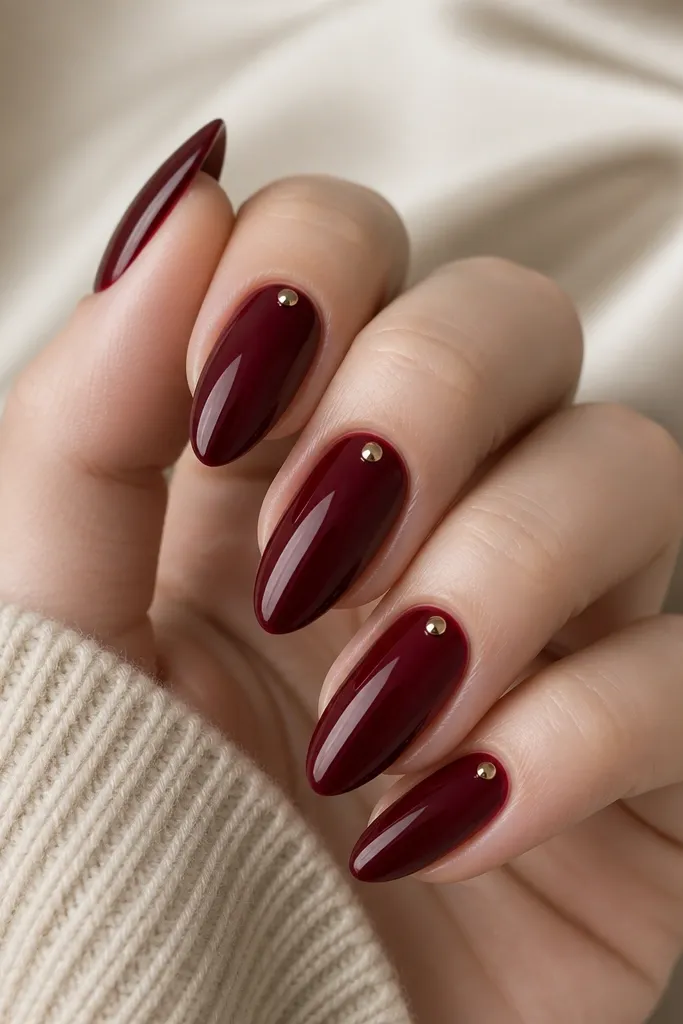
Burgundy is the fall constant, and it looks especially sharp on almond because the color concentrates toward the tapered tip. This version uses a deep, true burgundy — not purple and not cherry — so it looks polished on every skin tone. The tiny rose-gold stud adds a quiet jewelry vibe without going full rhinestone. I like placing the stud near the outer cuticle edge because it looks like a ring catching light. It’s also practical: one stud is less likely to snag than a full crystal cluster.
Paint burgundy in two coats, cure, and keep the cuticle edge crisp. Place one tiny rose-gold stud on each nail using a small dot of gel or nail glue — position it about 1 mm from the cuticle and slightly toward the outer sidewall. Press gently and cure. Seal with a glossy top coat, but keep the first coat thin so you don’t drown the stud sparkle. Add a second full top coat once the stud is secure.
Editor's noteIf studs pop off, roughen the top of the stud lightly with a nail file and re-seal with gel.
Skip thisDon’t place studs too close to the cuticle — they lift faster and look messy as they grow.



