1. Cinnamon French with Cocoa Corners
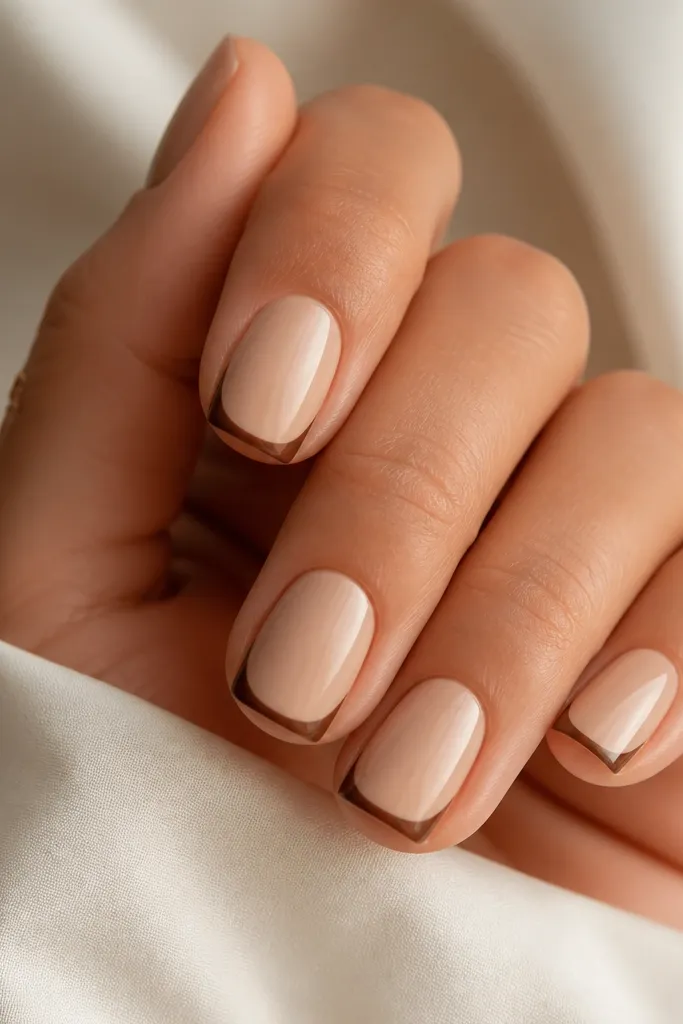
Start with a creamy beige nude that matches your skin tone closely — I like it slightly warm (think oat milk) so the cinnamon reads soft, not harsh. The French line should be thin on square nails because wide tips make short nails look stubby. I add cocoa corners at the outer edges of the tip, so each nail has a “frame” that looks intentional in close-up. This set flatters most hands because it lengthens visually while keeping the fall color concentrated at the edge.
First, apply two thin coats of the creamy nude and cure/dry fully. Then place nail guides and paint a narrow cinnamon French across the free edge, keeping it even from left to right. After that, use a fine liner brush to fill the top-left and top-right corners of the French with cocoa brown, staying inside the tip line. Finish with a high-gloss top coat so the cinnamon looks crisp against the nude.
Editor's noteWipe your liner brush on a lint-free wipe before you touch the nail — less pigment means sharper lines on square tips.
Skip thisDon’t make the French too thick — it turns square nails into blocks instead of frames.
2. Burnt Orange Jelly Base with Clear Cuticle Spark
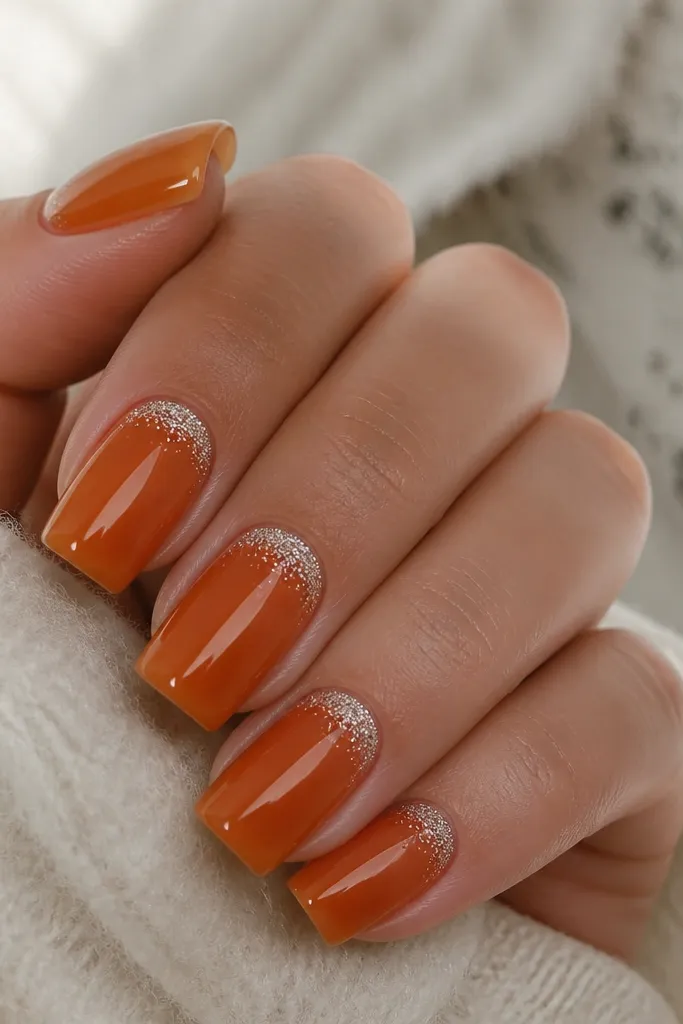
Jelly bases are my go-to for compact fall nails because they keep the color airy. Burnt orange reads autumn without looking heavy when it’s translucent, and it flatters both light and medium skin tones. The clear cuticle spark gives you a focal point where your nail naturally draws attention, so the set looks dressed up even on short length. It also photographs well because the glitter catches light without turning the orange dull.
Apply a sheer jelly burnt orange in two coats, keeping the first coat thin so your cuticle stays clean. Then add a small clear glitter strip at the cuticle line using a dotting tool, stopping about 1 mm away from the sidewalls. If you’re wearing this to events, add a second glitter layer only on the center of the cuticle for a brighter flash. Seal everything with a glossy top coat, and cap the free edge so the jelly doesn’t scuff.
Editor's noteUse a clear glitter top coat instead of loose glitter if you hate cleanup — it lays flatter on square edges.
Skip thisAvoid glitter that spreads across the middle of the nail — it makes the set look busy and cheap fast.
3. Taupe Velvet Matte with Micro Rust Dots
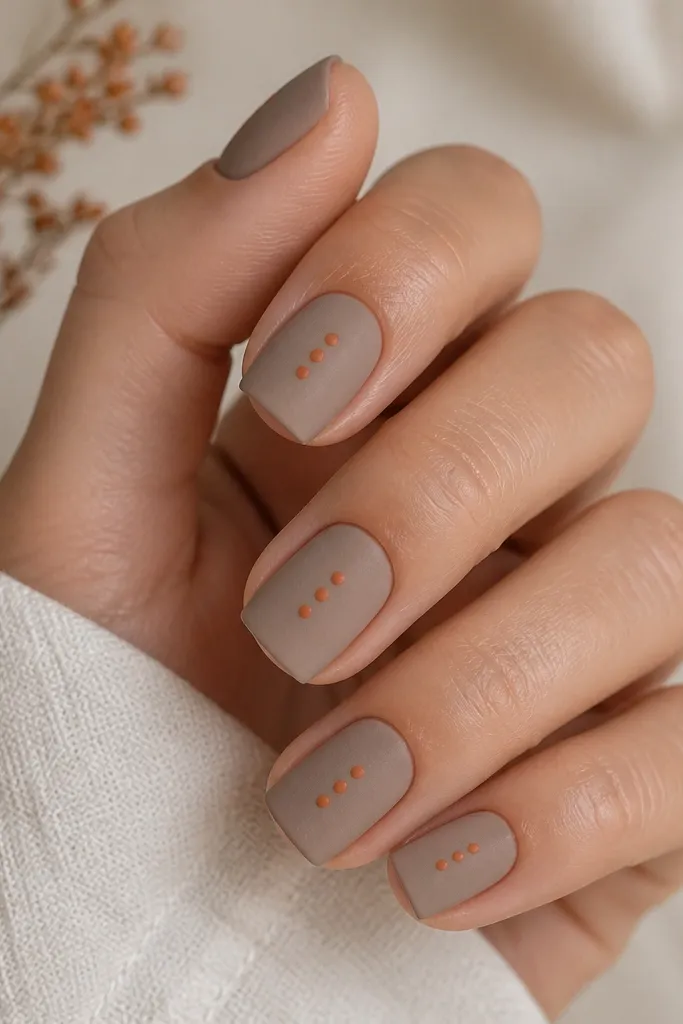
Matte velvet taupe makes fall feel classy instead of costume-y. Taupe is forgiving on different undertones and looks good with everything — from jeans to suede boots. The micro rust dots give you a warm accent without filling the nail, which is exactly what compact square nails need. The dot placement keeps the eye on the nail length, so your fingers look longer and more polished.
Start with two coats of taupe polish and let it dry completely, then apply a matte velvet top coat. Use a dotting tool to place three micro rust dots down the center of each nail, about 2-3 mm apart. Keep the dot size tiny — you want “pepper” dots, not blobs. Finally, add a thin glossy top coat only over the dots if you want them to look like raised beads.
If you’re doing gel, cure the matte top coat fully — an under-cured matte can turn gritty when you dot.
Don’t use big dots on short square nails — they widen the nail and hide the shape.
4. Deep Plum Half-Moon with Nude Center
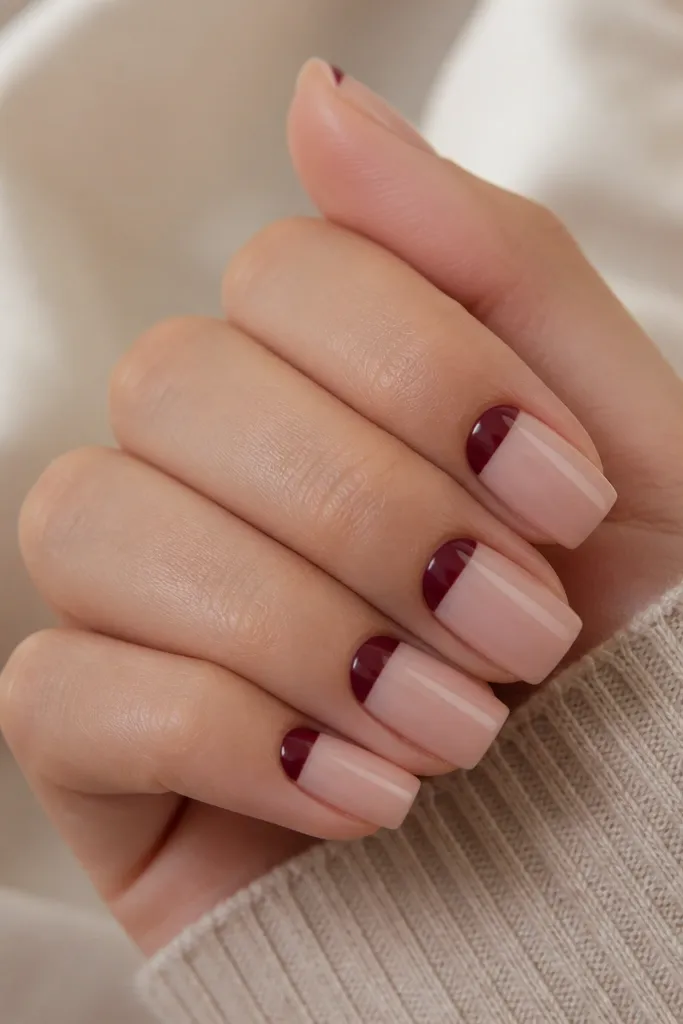
This design looks clean because it uses negative space on purpose. A nude center keeps the nail looking fresh, while the deep plum half-moon gives you that fall depth right at the cuticle where it frames your hand. It’s especially flattering if you have medium to long nail beds because the half-moon draws attention upward. The glossy finish makes the plum look rich instead of flat.
Apply two coats of your nude base, then clean up the cuticle edges so the half-moon has a crisp border. Use a small half-moon stencil or a steady curved brush to paint the deep plum arc about 1/3 of the way across the nail near the cuticle. Leave the center untouched so the negative space stays bright. Seal with a glossy top coat and cap the free edge for smooth wear.
If your cuticle area is uneven, use a smaller half-moon — it hides imperfections better than a wide arc.
Don’t paint the plum all the way to the sidewalls — it makes the nail look thicker than it is.
5. Olive Chrome Accent on Chocolate Base
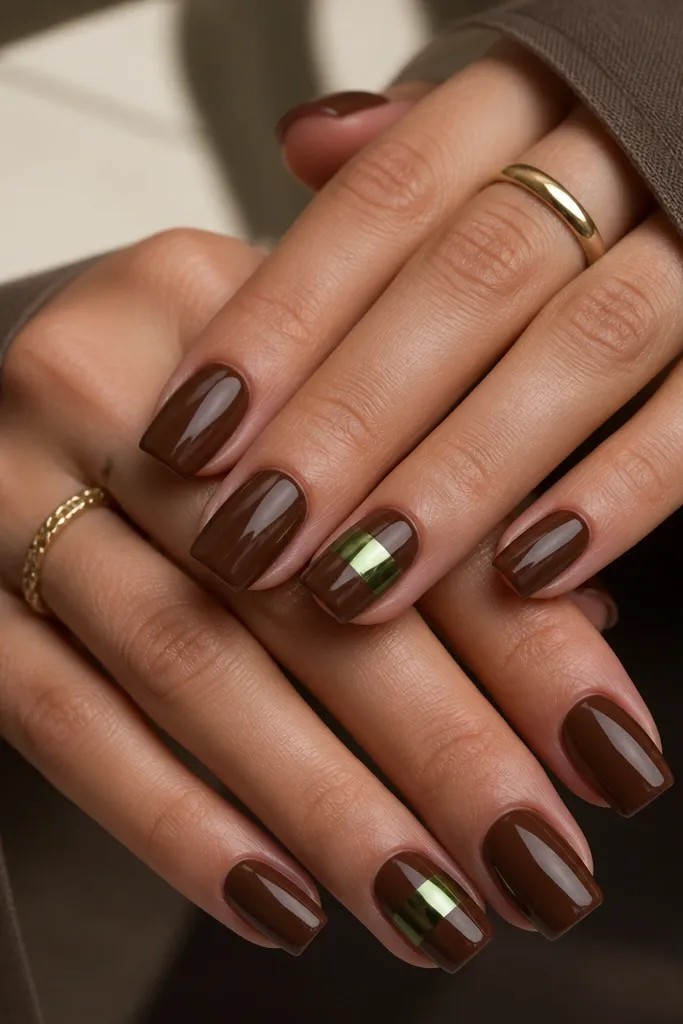
Chocolate brown is the fall neutral that always looks expensive. Olive chrome adds a strange-but-perfect autumn twist because it looks like aged metal under warm light. I like this set when you want something sleek for work but still seasonal. The chrome stripe keeps the design compact and controlled, so it doesn’t overwhelm short square nails.
Paint all nails chocolate brown in two glossy coats and cure/dry fully. Pick two nails as accents and apply a thin chrome adhesive stripe down the center, roughly the width of a pencil line. Press the olive chrome powder or rub-on chrome onto the stripe, then buff lightly so it stays sharp. Finish with a glossy top coat over everything except the chrome stripe if your system needs it — use the right top coat for your chrome so it doesn’t dull.
Use a striping brush to keep the chrome stripe perfectly straight — square nails show crooked lines immediately.
Don’t add chrome to every nail — one stripe is what keeps it chic.
6. Autumn Leaf Tip with Clear Gloss Overcoat
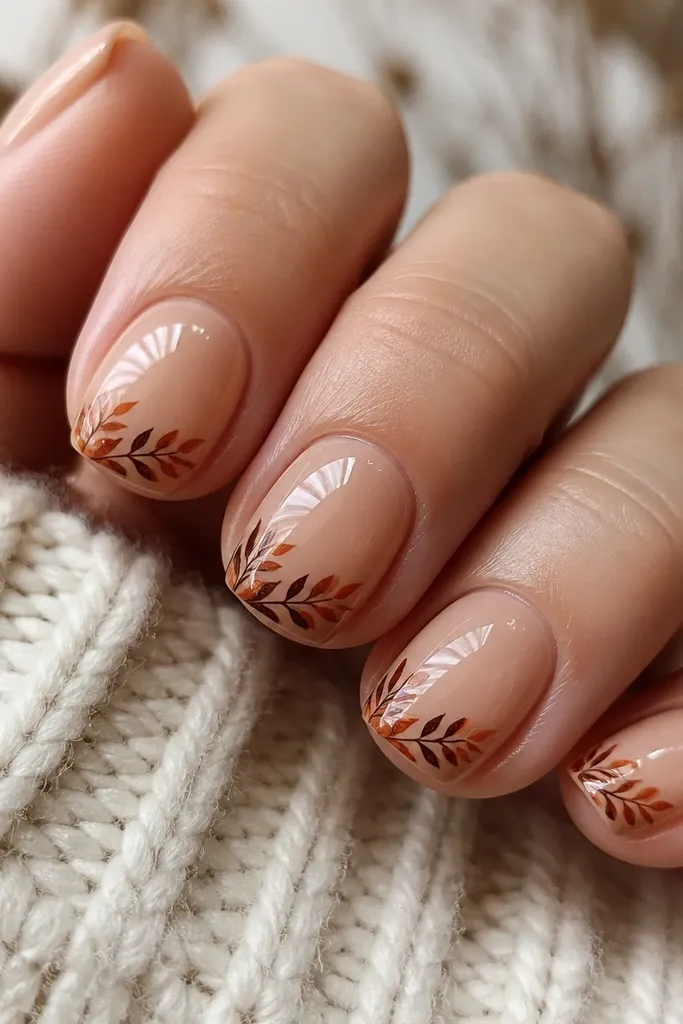
Leaf art can look messy, so I keep it tip-only and small. A warm nude base makes the leaf colors look like they’re lit from within, and the leaf silhouettes at the corners create an L-shape effect that makes square tips look intentional. This set flatters hands with shorter nail beds because the art sits where your eye expects detail. The domed glossy top coat makes the leaves look like they’re under glass, not printed on top.
Start with a warm nude base and let it level out in two coats. Paint tiny leaf shapes at each outer tip corner using a dark brown first, then glaze burnt orange over the center vein area. Keep the leaves smaller than your thumbnail — they should fit inside the tip corners without touching the sidewalls. Add a clear top coat in two layers, building a slight dome over the art so it stays smooth.
Editor's noteIf your leaf edges look shaky, trace the outline lightly with a gray-brown first, then fill with color.
Skip thisAvoid full-leaf coverage across the whole nail — compact square nails can’t carry that much detail.
7. Matte Black Base with Cocoa Geometric Lines
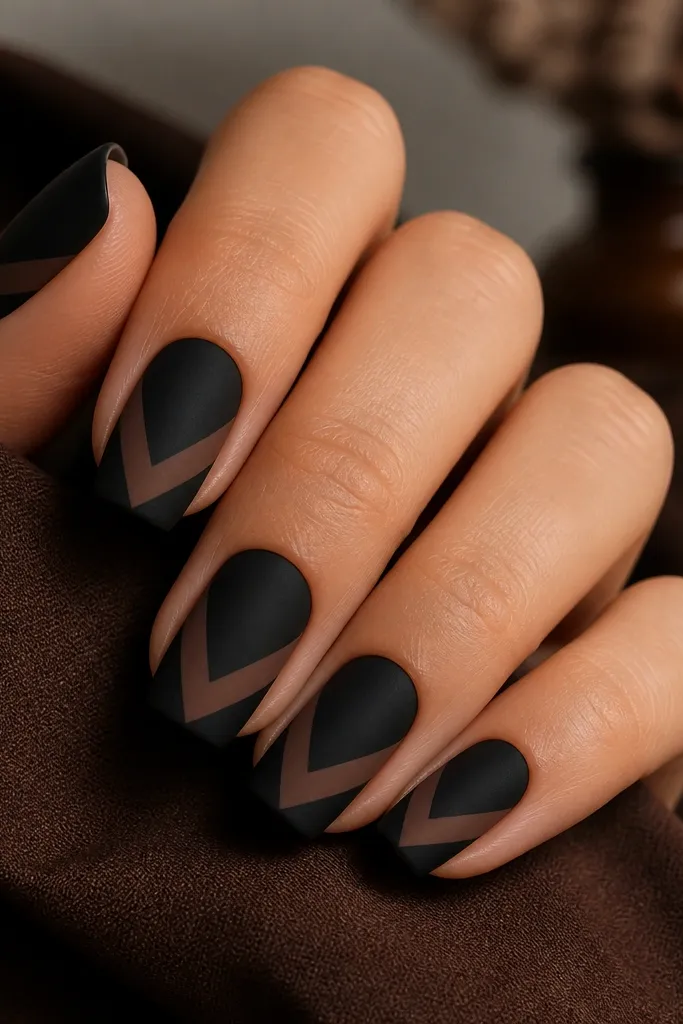
Matte black makes fall feel modern and dramatic without turning into a Halloween set. Cocoa geometric lines keep it warm, not icy, and the V-shape pulls the eye toward the center of your nail. This design is flattering if you like a stronger look, especially on medium to deeper skin tones where matte black reads smooth. It also works for short nails because the lines guide the eye without requiring length.
Paint two coats of matte black and cure/dry fully. Use a striping tape to create a V angle — place tape from upper left to center and upper right to center, leaving a small gap between tapes. Paint cocoa brown inside the V lines and remove tape while the polish is still slightly tacky for crisp edges. Finish with a matte top coat or a glossy top coat only over the lines if you want contrast.
Press the tape down hard on the square corners so the edges don’t bleed.
Don’t freehand the lines on the first try — tape gives you that sharp, expensive look.
8. Creamy Oat Nude with Rust Outline French
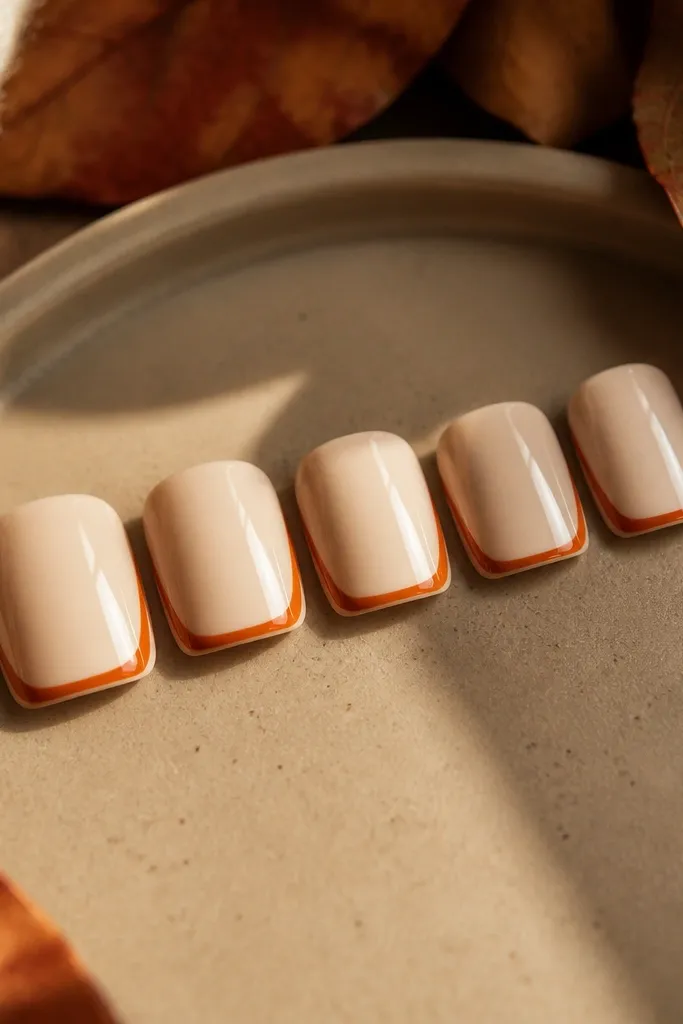
This is a French idea that keeps the nail looking long even when it’s short. The creamy oat nude is soft and forgiving, and the rust outline gives you that autumn color without filling the whole tip. Leaving the tip center nude keeps things airy, which looks better on square nails than heavy solid tips. It flatters pretty much everyone because it matches your natural nail tone and adds color only where it counts.
Apply two coats of creamy oat nude and make sure the finish is smooth. With a fine liner brush, draw a rust line along the outer edge of the free tip, then add a second parallel line about 1 mm inward. Leave the middle of the tip completely nude. Top coat with glossy finish to make the outline look clean and sharp.
Use a liner brush that holds a point — a flat brush smears on square edges.
Avoid filling the tip center with rust — it turns into a chunky French.
9. Glazed Terracotta with Micro Gold Flecks
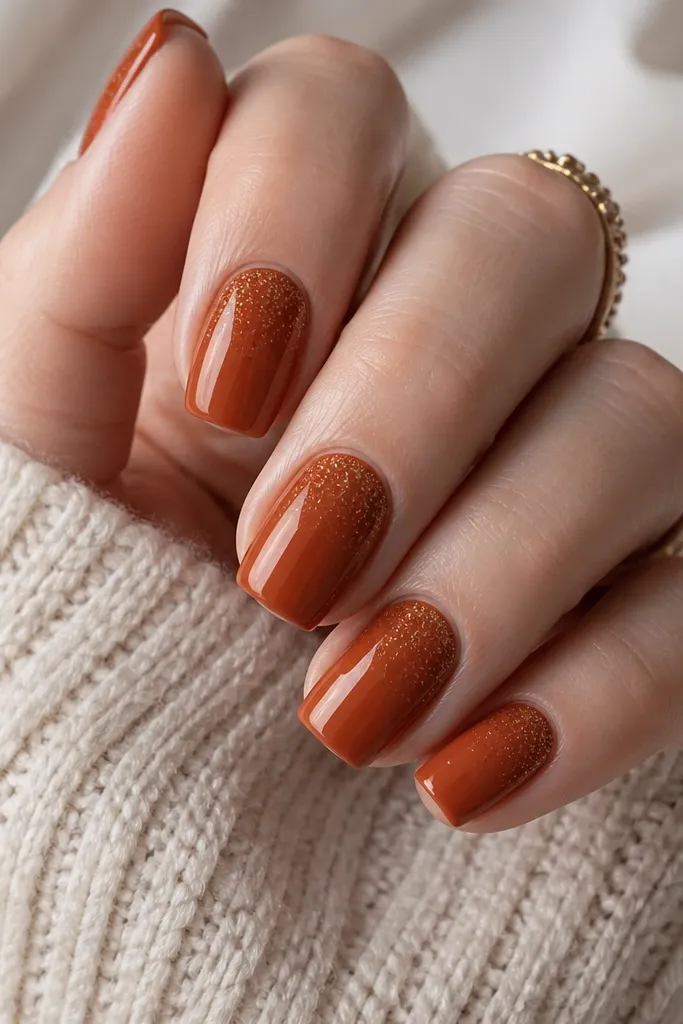
Terracotta is the fall color that reads warm, but it still looks wearable. The glazed gloss makes it look like ceramic under light, and micro gold flecks add warmth without turning the whole set into glitter. I like this on short square nails because the flecks are small and the gloss does the heavy lifting. It flatters warm undertones and also looks great on cool undertones when the terracotta is more peach than red.
Paint two coats of terracotta gel polish and cure each layer until it’s fully set. Use a fine brush to place micro gold flecks near the cuticle, then drag them slightly down with the brush tip so they taper. Don’t cover more than half the nail — keep it airy. Seal with a thick glossy top coat and cap the corners so the flecks stay trapped.
Scatter flecks with a stiff brush by tapping once — you get control instead of a snowstorm.
Don’t do chunky gold flakes — they snag and look uneven on square edges.
10. Espresso Marble Swirl on Nude Square
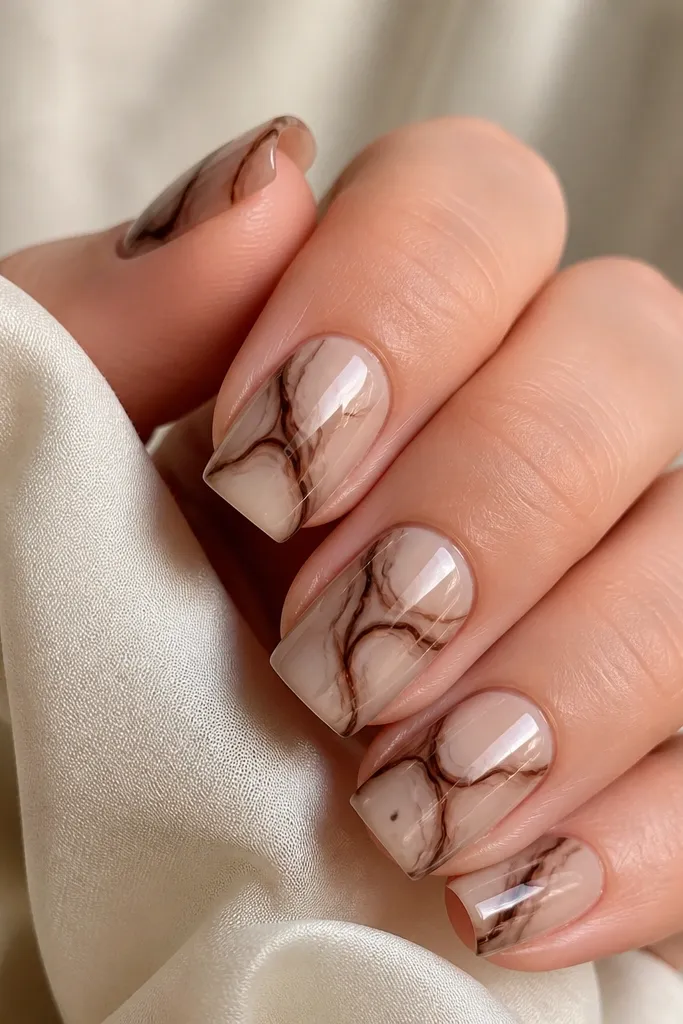
Marble works on square nails when the swirls are thin and the background is nude. Espresso brown gives a fall tone that feels grounded, and the glossy finish makes the marble look like gel “ink.” This set is flattering because the diagonal swirl adds movement and length, especially if you keep the base semi-sheer. It also looks great for photos because the marbling catches light differently across each nail.
Start with a nude base that’s slightly milky, not fully opaque, in two thin coats. Place a drop of espresso polish on a palette and add a tiny amount of clear polish to thin it. Use a thin liner brush to drag swirling lines diagonally, then add one thicker vein line per nail for depth. Finish with a glossy top coat, and don’t overwork the swirls — the randomness is the point.
Make one nail a little stronger than the rest — it gives the set a natural focal point.
Avoid big, cloudy marble blocks — they look like smudges on square tips.
11. Deep Emerald Base with Copper Stripe
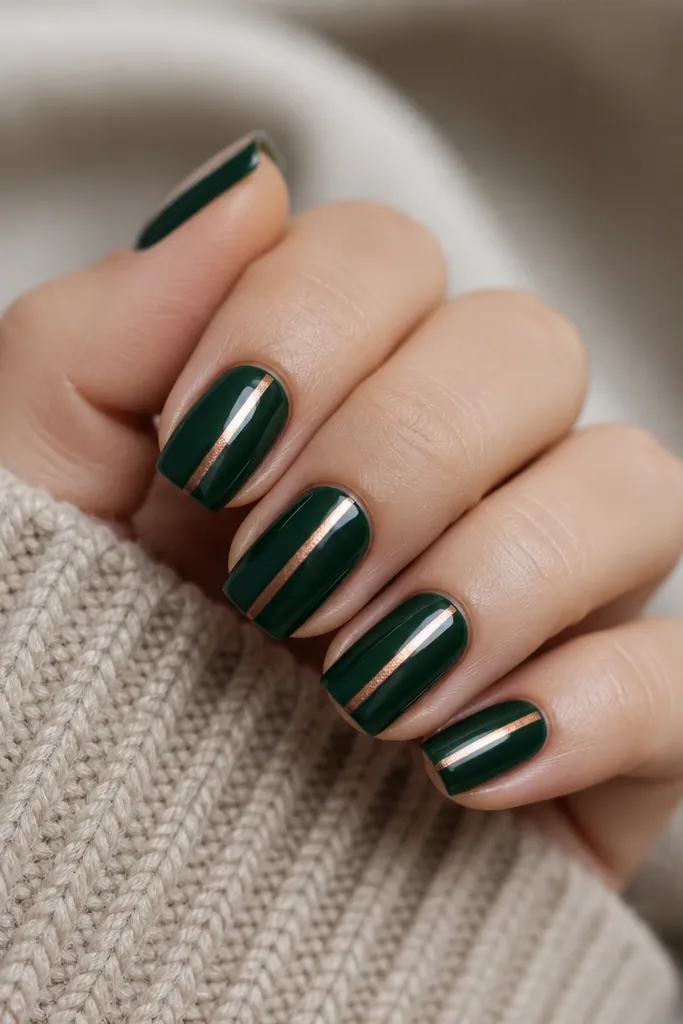
Deep emerald is a fall shade people skip, but it looks incredible once the weather turns cold. Copper stripe gives you that autumn metal feel, and the vertical placement makes nails look longer. This set flatters hands with broader nail beds because the stripe draws the eye down the center. It also works for both casual and dressy events because emerald reads rich without needing extra art.
Apply two glossy coats of deep emerald and cure fully. Use striping tape or a guide card to keep the copper stripe perfectly centered. Apply copper metallic polish or rub-on metallic along the stripe area, then remove tape carefully once it’s tacky. Seal with a glossy top coat to lock the stripe in and keep the copper from dulling.
Editor's noteIf your stripe looks thick, fix it now by wiping the edge with a clean brush dipped in remover — copper shows every mistake.
Skip thisDon’t use a dark brown stripe on emerald — it turns muddy instead of metallic.
12. Moss Green Matte with Chocolate Leaf Veins
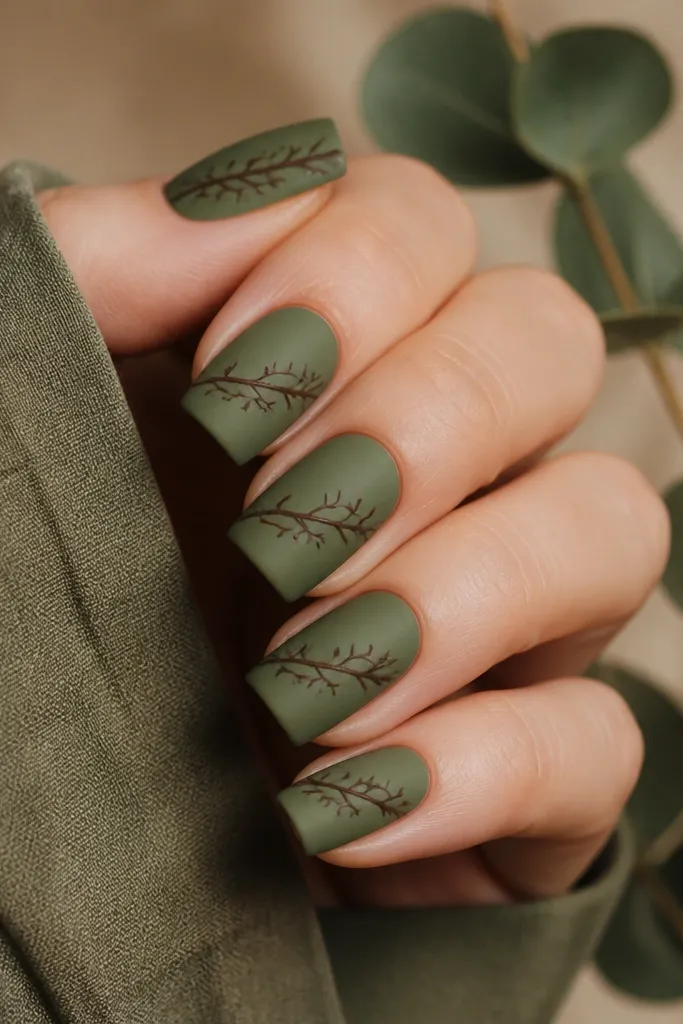
Moss green matte feels like fallen leaves on damp ground — it’s autumn without the orange overload. The chocolate leaf veins read as natural detail, and the branching pattern keeps it from looking like a random doodle. This design flatters medium to dark skin because moss has enough depth to show contrast, and it also looks good on fair skin when the moss is slightly muted rather than neon. The matte finish makes the veins look like they’re etched.
Paint moss green in two coats and apply a matte top coat. With a fine liner brush, draw a simple leaf-vein stem down the center, then add two to three branching lines on each side. Keep the veins thin — they should look like linework, not filled shapes. Add a matte top coat again, and if you want a raised look, add a tiny glossy top coat only on the stem line.
Use a liner brush with a sharp point and practice on a paper scrap first — vein patterns need control.
Avoid filling the leaf shape — matte + solid fills can look heavy on short square nails.
13. Warm Nude Base with Blackened Orange Tip Fade
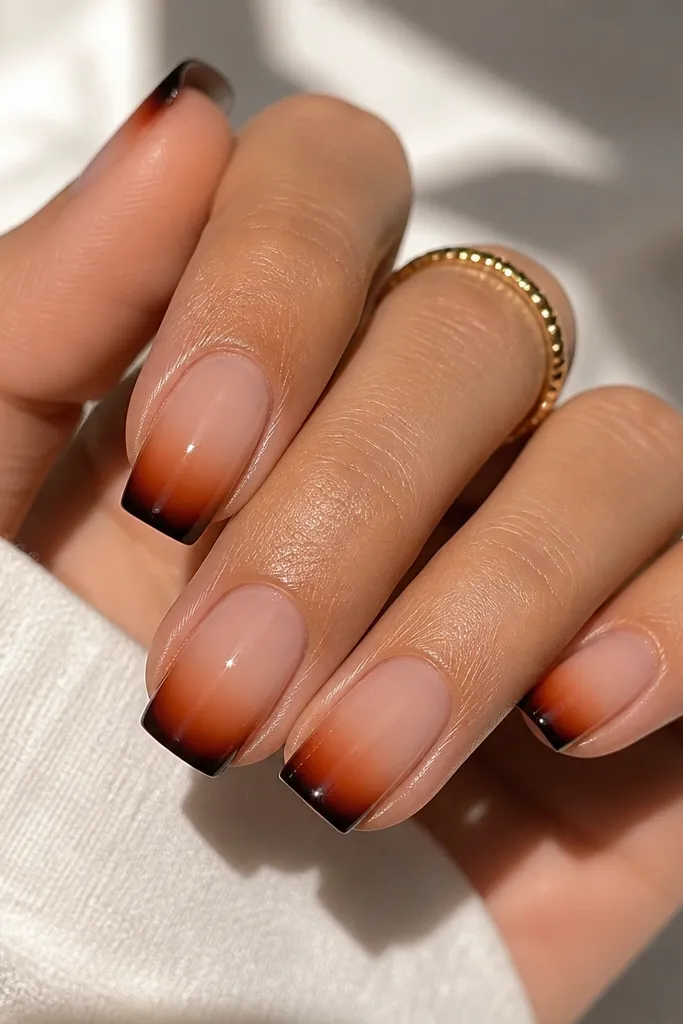
This is an ombre that looks like autumn smoke. The warm nude base keeps it wearable, and the blackened orange at the tip adds depth without turning it into bright Halloween orange. A smooth fade looks expensive on square nails because the edges stay soft instead of harsh. It flatters short nails because the gradient pulls the eye upward, creating a length illusion.
Apply warm nude in two coats and keep it glossy or apply a glossy base if you’re using gel. Use a small sponge to dab blackened orange at the very tip edge, then blend inward with light taps — stop before the middle so it stays compact. Clean up the sidewalls with a brush dipped in remover before the polish fully sets. Seal with a glossy top coat to smooth the gradient and make it look like one even layer.
Do the ombre in two light sessions instead of one heavy sponge pass — control is everything here.
Don’t let the orange climb too far up — if it covers half the nail, square tips look wider.
14. Cream Base with Rust Striped Side Panels
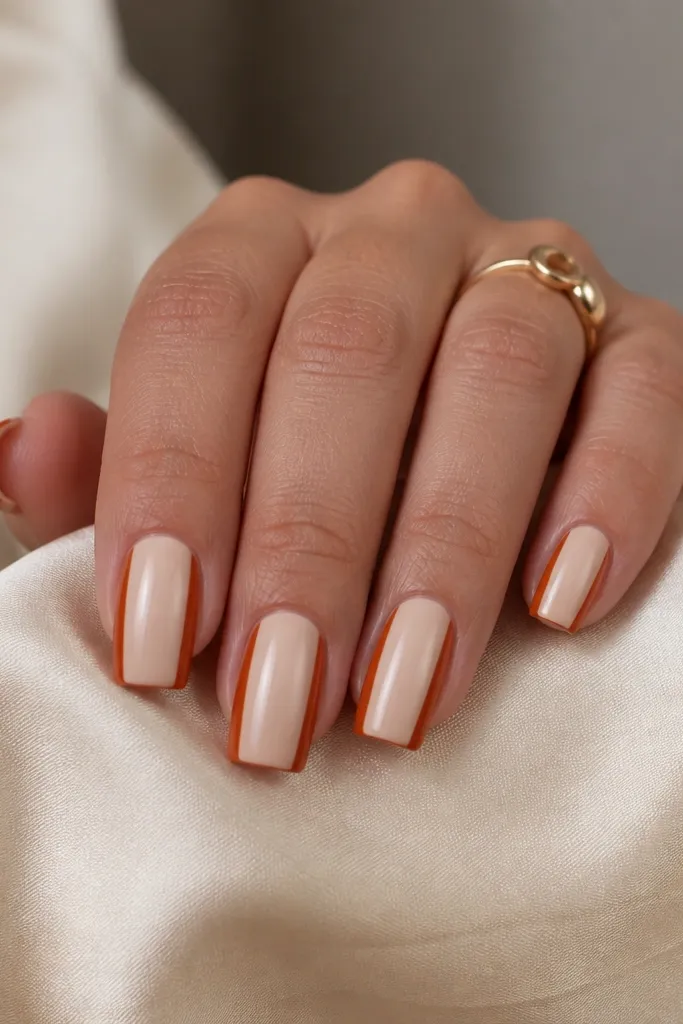
Side-panel striping gives square nails that “tailored” look. A creamy nude base keeps your nail looking clean and close to natural, and the rust stripes add autumn color without crowding the center. This works especially well if you like minimal art but still want a fall set that looks planned. It flatters hands with shorter nails because the vertical lines draw your eye lengthwise.
Apply two coats of creamy nude and cure/dry fully, then top coat lightly if needed for smooth striping. Use striping tape to mark two thin side zones, about 1 mm from the sidewalls. Paint rust polish inside the taped areas, then remove tape while the paint is still slightly tacky for crisp edges. Finish with a glossy top coat and check from the side — the stripes should look flush, not raised.
Editor's noteIf your tape lifts on square corners, switch to a thin striping brush and paint one stripe at a time.
Skip thisDon’t make the stripes too wide — wide side panels turn the nails into rectangles.
15. Autumn Checkered Accent with Cocoa Base
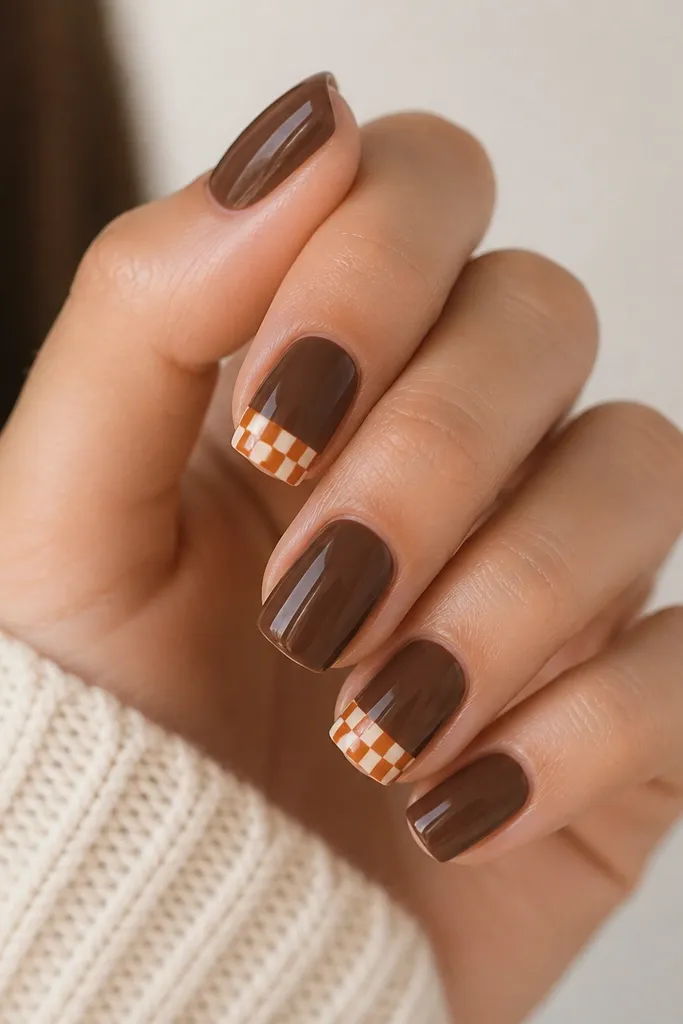
Checkers look fun, but on short square nails they need to stay small and placed correctly. Cocoa brown is the perfect dark anchor so the checkered accent pops instead of looking busy. I like using only two accent nails because it keeps the set chic and wearable. This design flatters all skin tones since the warm cream balances cocoa and the burnt orange reads autumn without being neon.
Paint all nails cocoa brown in two glossy coats. On two chosen nails, add a small checkered zone starting about 2-3 mm from the tip — use a guide line so it stays compact. Paint alternating tiny squares in warm cream and burnt orange, keeping each square about the width of a fine brush tip. Seal with a thick glossy top coat, and cap the free edge so the checker pattern stays smooth.
Use nail vinyls or pre-cut striping tape to create the grid — freehand checks get crooked fast.
Avoid checkers that take over the whole nail — they start looking like Halloween candy.