
1. Cinnamon Latte Micro-French with Gloss Topcoat
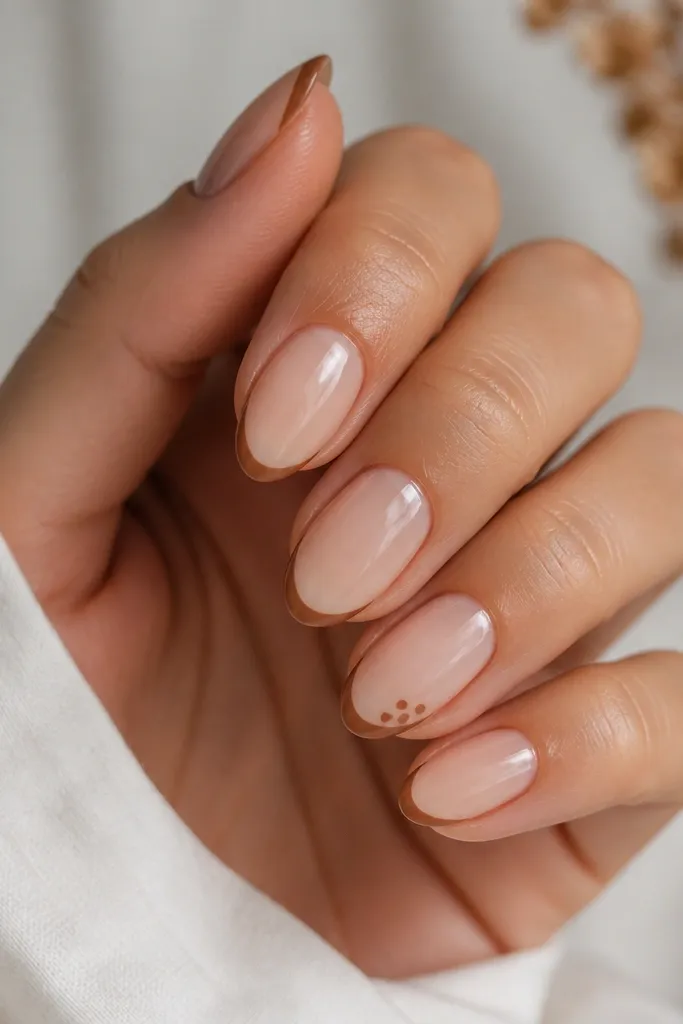
This is the fall look I reach for when I want “done” nails without babysitting them. The base is a warm nude (not pinky, more like beige-leaning), and the micro-French stays narrow so it doesn’t fight your nail bed as it grows. Cinnamon brown reads cozy in every lighting — kitchen lights, daylight, even car headlights. If you have shorter nails or you’re prone to hangnails, the thin tip line feels smooth and doesn’t catch on sweaters. It also flatters medium to deeper skin tones because the brown sits cleanly against the nude instead of turning gray.
Start by filing your acrylic into a short almond shape, keeping the sidewalls slightly rounded. Apply a warm nude acrylic or gel base and cap the free edge so it looks even from the side. Then paint a micro-French line using a thin brush — the line should be about 1 to 2 mm thick and placed close to the tip edge, not halfway down the nail. Finish with a glossy topcoat on every nail, and add the tiny caramel dot cluster on the ring finger only.
If your nails chip at the corners, ask for a slightly stronger clear cap over the tip before the French line goes on.
Don’t make the French thick — a wide tip line shows regrowth and makes the set look bulky.
2. Burnt Orange Half-Moon Accent on Nude Acrylic
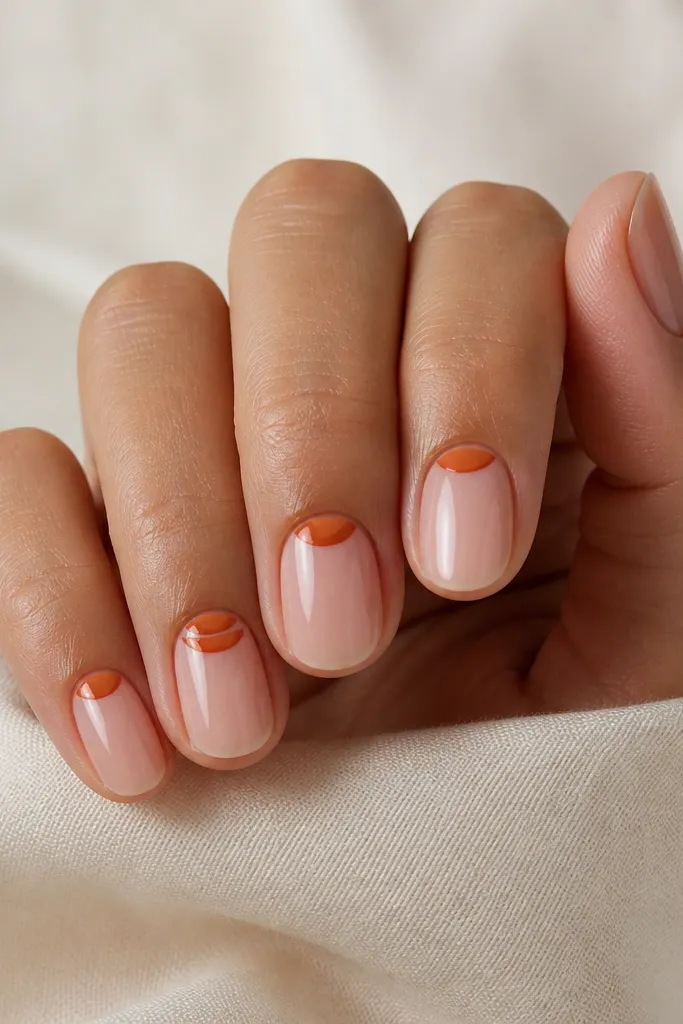
This half-moon placement is low maintenance because it’s small and it’s not drawn straight across the cuticle. Burnt orange warms up your hands without going neon, and it looks especially good if your skin has golden undertones. I like this for everyday fall because it pops when you’re holding coffee, but it stays subtle enough for work. The nude base also makes your nails look longer, even if you keep the acrylic extension short. It’s flattering on most nail beds because the shape is controlled and doesn’t require big gradients.
Start with a nude acrylic base that matches your skin tone — beige nude for light-medium, deeper caramel nude for medium-deep. Keep your cuticle area clean and slightly “coved” so the acrylic doesn’t look bulky there. Paint the burnt orange half-moon on the side of the cuticle, leaving the center of the cuticle line uncovered — aim for a curve that’s about 2 to 3 mm wide. Do the same placement on every nail, then add a second smaller half-moon on the ring finger for contrast.
Editor's noteUse a gel paint or very pigmented polish for the half-moon so you don’t need three coats that can look thick.
Skip thisSkip half-moons that touch the cuticle all the way around — they look messy as your nail grows out.
3. Deep Wine Chrome on One Statement Nail
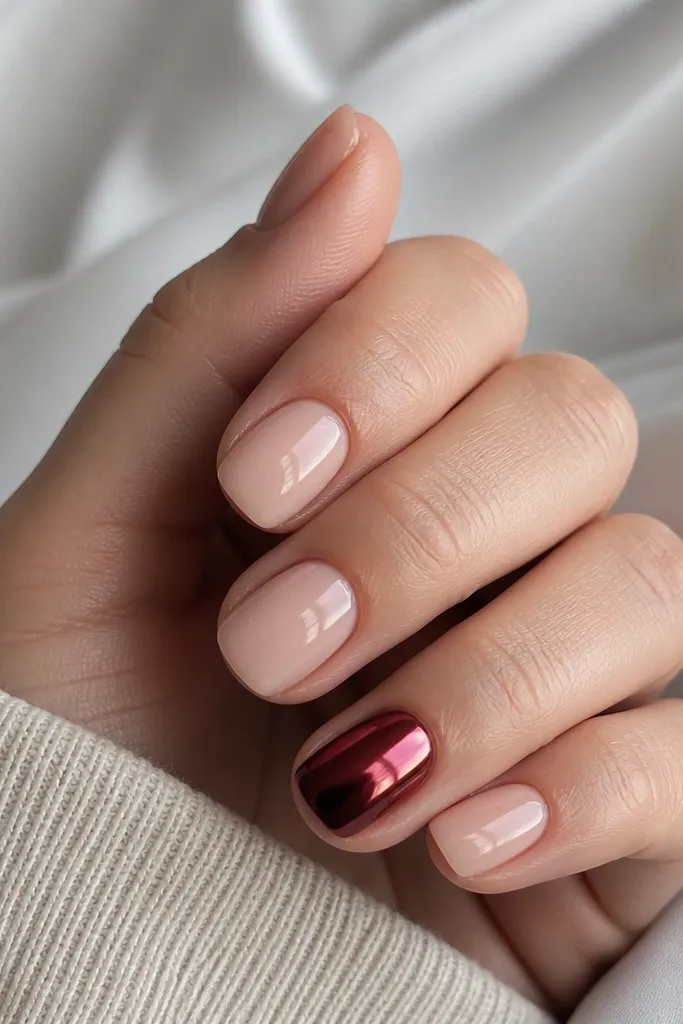
This is the “I did my nails but I didn’t overdo it” set. The base keeps everything wearable, while the deep wine chrome gives you that fall party energy without needing complex art on every nail. Chrome also hides tiny surface wear because it reflects light — scuffs show less than they do on flat matte. This looks best on medium to deep skin tones, where the wine reads rich instead of dusty. I’ve worn it to dinners and it still looks fresh even after a week of daily life.
Start by building a sheer nude base that looks like your nail but smoother. Shape the nails short square so the chrome has a flat surface to catch reflections. On the statement nail, apply a deep wine base color and cure it fully. Then rub the wine chrome powder or chrome gel over that surface and buff lightly with a soft applicator until the shine is even. Seal everything with a glossy topcoat, and keep the other nails nude only.
Editor's noteIf you use chrome powder, press gently and cure right away so the finish doesn’t patch.
Skip thisDon’t put chrome on every nail — it looks heavy and chips show faster on high-attention areas.
4. Olive Velvet Matte with Micro Gold Flecks
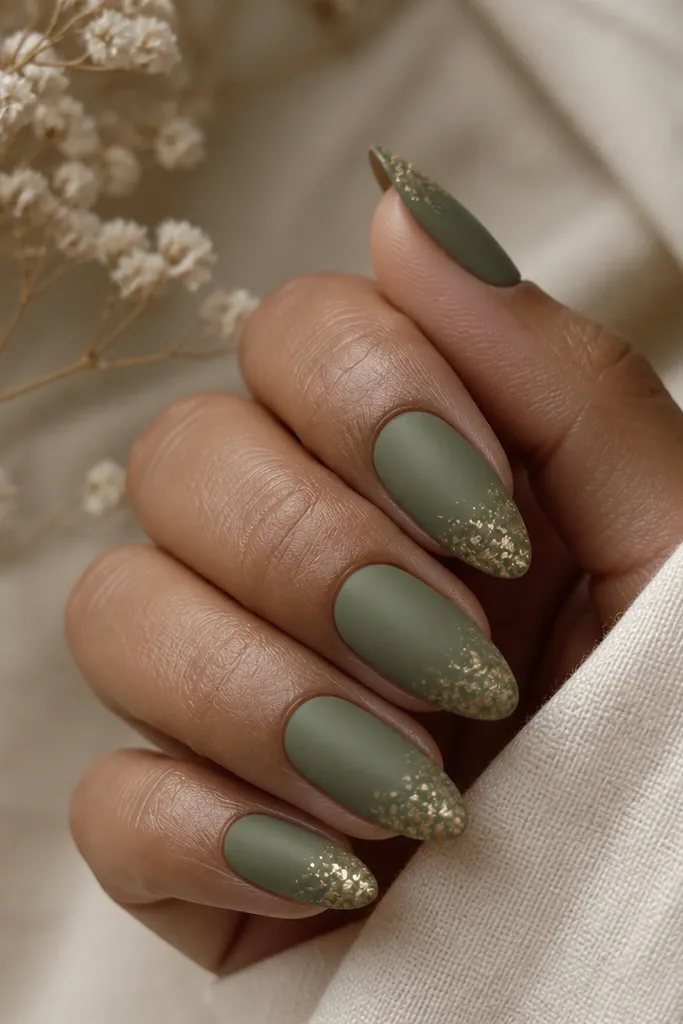
Olive velvet matte is pure autumn without the usual orange overload. The muted green flatters warm skin tones and also looks sharp on cool undertones because it’s not neon. Matte finishes hide small surface oils and fingerprints better than glossy, which means your nails look cleaner between sets. The micro gold flecks add warmth without turning into full glitter, so regrowth still reads intentional. This is my pick for people who want “cozy” but hate loud nail art.
Start with an olive base color and build it with acrylic or a dense gel so it looks opaque in one to two layers. Shape into a medium almond and keep the tip slightly rounded for less snagging. After curing, apply a matte topcoat over the entire set — you want true velvety coverage. Then add tiny gold flecks near the tip only, using a small dotting tool or the end of a makeup brush. Seal with a matte topcoat again only if your flecks need it; otherwise, spot-seal to avoid dulling the gold too much.
Use matte topcoat on the base, but keep gold flecks under control — fewer flecks look more expensive.
Don’t add big glitter pieces on matte — they snag and catch on fabric.
5. Terracotta Skittle Tips with Soft Fade
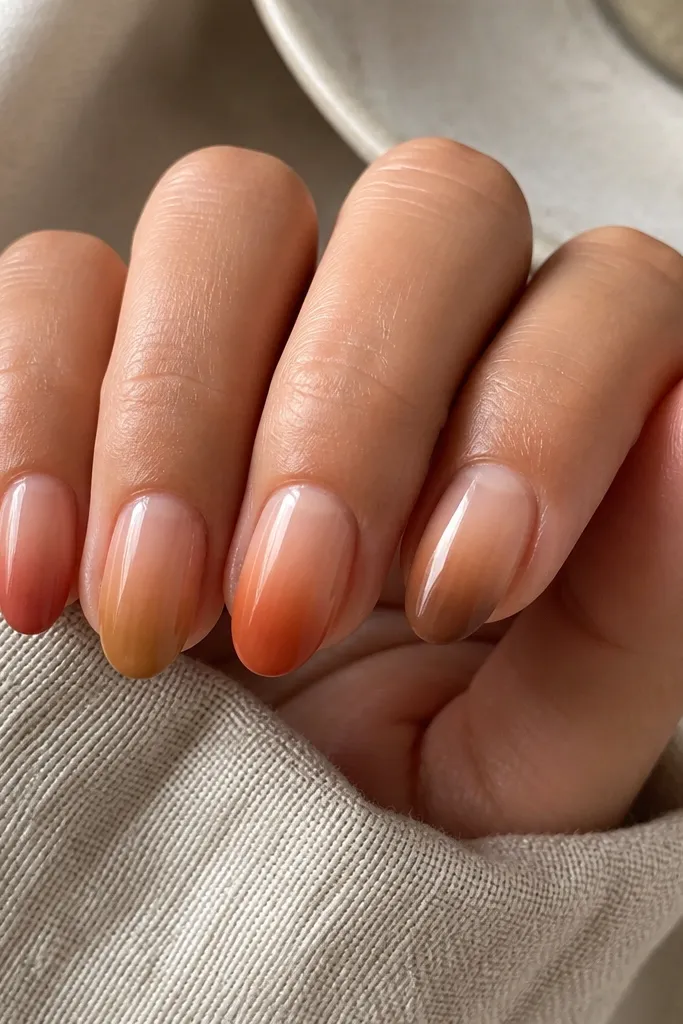
This is the low maintenance fall look that still feels fun. The secret is the soft fade — there’s no crisp line for regrowth to ruin. Terracotta, caramel, burnt orange, and cocoa brown all sit in the same warm family, so it looks coordinated even when your nails grow out. I like this for hands that get dry in fall because the nude base keeps everything looking clean. If you’re fair, the caramel and cocoa shades keep it from looking too orange; if you’re deeper, the terracotta still pops without going bright.
Start with a nude base that matches your undertone — warm nude for warm tones, deeper nude for richer skin. Shape short almond and keep your free edge even across nails. Create each tip shade as a fade by placing the color at the very tip and blending upward with a sponge or soft brush, leaving the lower half nude. Keep the fade height consistent, about 2 to 3 mm from the tip edge. Finish with a glossy topcoat so the fades look smooth and not powdery.
Editor's noteDo one extra thin coat on the nude base if you see any patchiness — it makes the fade look blended.
Skip thisSkip hard ombré borders — they look like tape lines once your nails move.
6. Chocolate Swirl Accent on One Nail
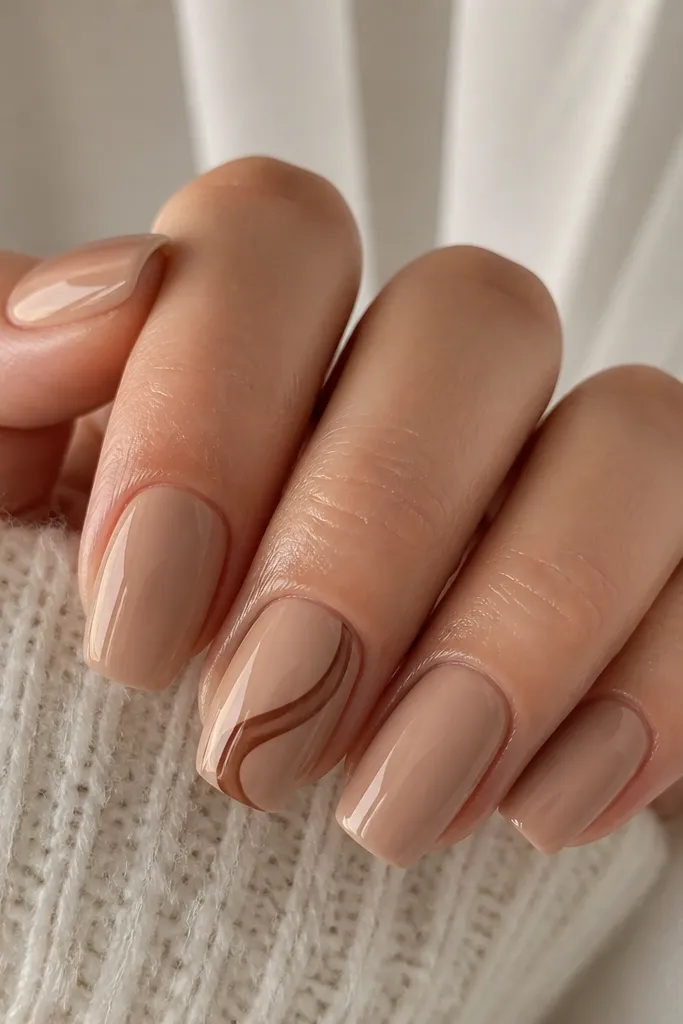
If you love nail art but don’t want to repaint half your set every time, this one is perfect. The swirl is placed on a single accent nail, so your grow-out stays tidy. Chocolate brown feels fall without turning “Halloween” because it’s rich and slightly muted. The glazed nude base reflects light and makes your nails look healthier than they are. This set flatters hands that look best with longer lines, since the swirl draws the eye vertically.
Start by filing your nails short coffin — not super long, just enough to keep the corners from digging in. Apply a glazed nude base in two thin layers and cure fully. Choose one accent nail per hand (I usually do ring fingers) and draw a chocolate swirl using a fine liner brush. Keep the swirl centered and about 60 percent of the nail length; don’t extend it to the sidewalls. Topcoat everything glossy, and add a second thin topcoat only over the swirl so it stays smooth.
Practice the swirl on a nail form first — the best ones look like one continuous motion.
Don’t put the swirl on every nail — it turns into clutter fast and chips show more.
7. Rusty French with Clear Cuticle Gap
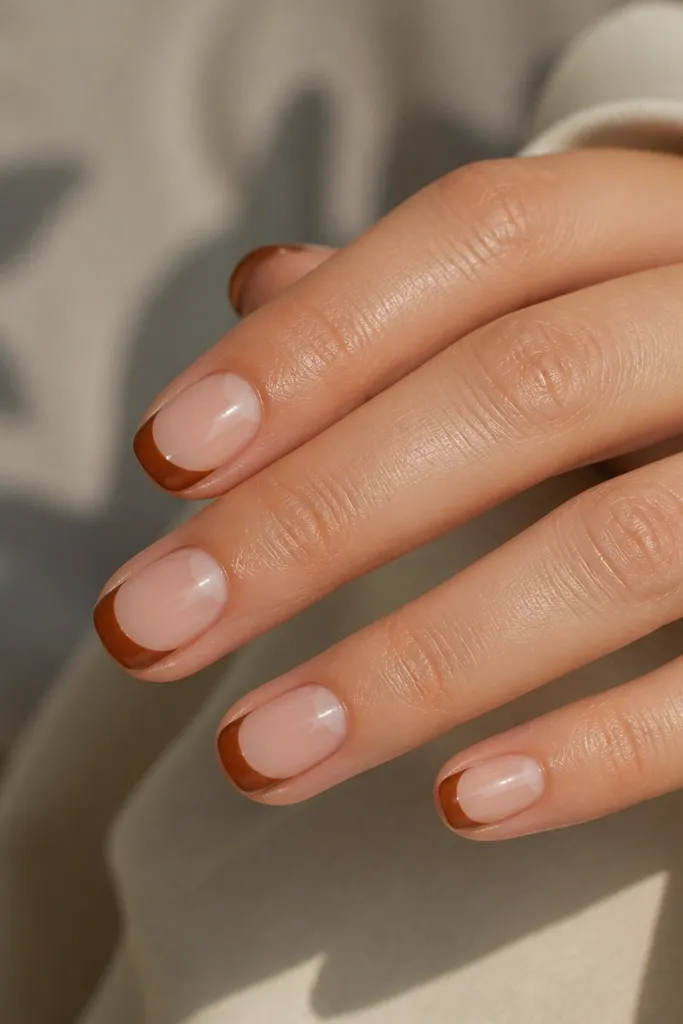
This looks fancy because the copper-brown French tip is bold, but it’s low maintenance because you keep a clear gap at the cuticle. That gap hides regrowth better than a full cuticle-cover design. Rusty copper reads autumn in a wearable way — it’s warmer than deep red and more forgiving than orange. I like it on almost everyone because the clear gap elongates the nail bed. It also works well if you have shorter nail beds since the tip color is controlled and the rest stays nude.
Start with a nude base and build it so it’s smooth right up to the cuticle line, leaving a tiny space where you will keep it clear. Shape into a rounded almond or soft oval so the French sits evenly. Paint the rusty French tip with a thin brush, focusing on a clean arc along the free edge, about 2 mm thick. Leave the cuticle gap untouched so it stays clear — you should be able to see your natural nail line there. Seal with a glossy topcoat and wipe any stray copper off the sidewalls before curing.
Editor's noteUse a liner brush that holds pigment — watery polish makes copper look patchy at the edges.
Skip thisDon’t bring the French too far down toward the cuticle — it makes regrowth obvious.
8. Sage and Nude Diagonal Bow Tie Accent
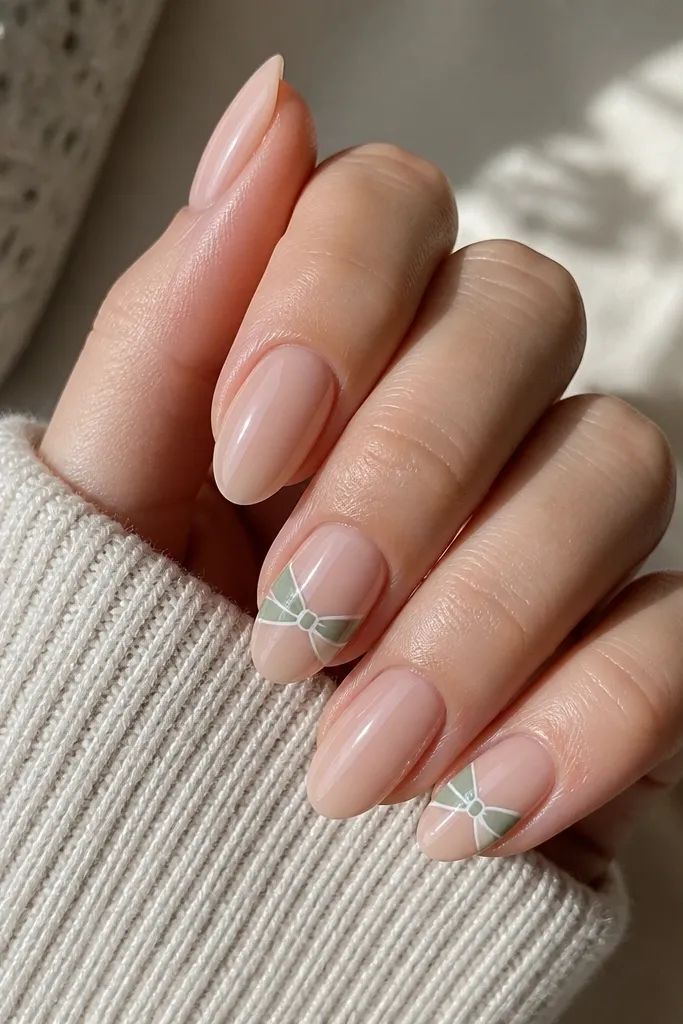
Diagonal accents are my favorite for fall because they look graphic and intentional even when your nails grow. Sage green keeps things muted and modern, and the nude base keeps it wearable. The bow-tie shape is small, so it doesn’t add bulk or snag on sleeves. This set flatters hands with olive undertones and also looks great on fair skin because sage creates a clean contrast without screaming orange. I’ve worn it at work and got compliments that felt genuinely specific, not “cute nails” generic.
Start with a glossy nude base and cure fully. Pick one nail per hand for the diagonal design, usually middle and ring fingers. Paint a diagonal sage band across the center from lower left to upper right, keeping it about 2.5 to 3 mm wide. Add a tiny bow-tie by creating two small inward V shapes at the center where the band tightens, then outline those edges with a thin white line for crisp definition. Finish with glossy topcoat over everything, and do a careful topcoat pass around the bow-tie so the edges feel smooth.
Editor's noteIf your diagonal line shakes, tape a small strip of clear nail tape to guide the angle, then remove it before topcoat.
Skip thisSkip thick white outlines — they look chalky and show texture under light.
9. Plum Jelly Base with Sheer Gold Foil Half Coverage
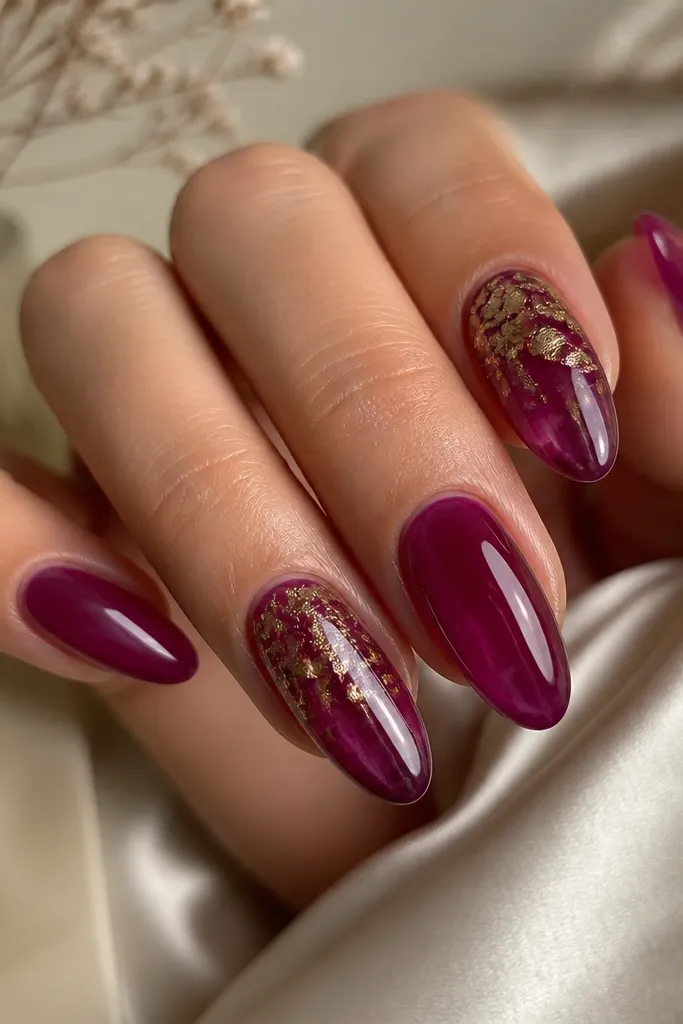
Jelly bases are a cheat code for low maintenance because they blend regrowth better than opaque solids. Plum jelly looks rich in autumn and still feels light, not heavy. Gold foil over the upper half gives you that fall glow without making every nail look like a disco ball. This flatters cool undertones and looks especially good when your hands are a little dry, since the jelly finish looks smooth. It also hides minor surface bumps because the foil breaks up the reflection.
Start by building a translucent plum jelly base — use a thinner layer and cure, then add a second layer for even coverage without going too thick. Shape into medium almond for a clean oval line. Apply sheer gold foil only on the upper half of the nail, leaving the lower half fully jelly — I aim for about 40 to 50 percent coverage. Press the foil gently with a foil applicator and dab to place broken pieces, then seal with a thin layer of topcoat to lock it down. Keep the remaining nails full jelly with no foil so your set looks intentional.
Use a slightly thicker topcoat over the foil area so it doesn’t lift at the edges after a few days.
Don’t cover the whole nail in foil — it chips and it looks rough at the edges.
10. Chocolate Almond Tips with Nude Negative Space
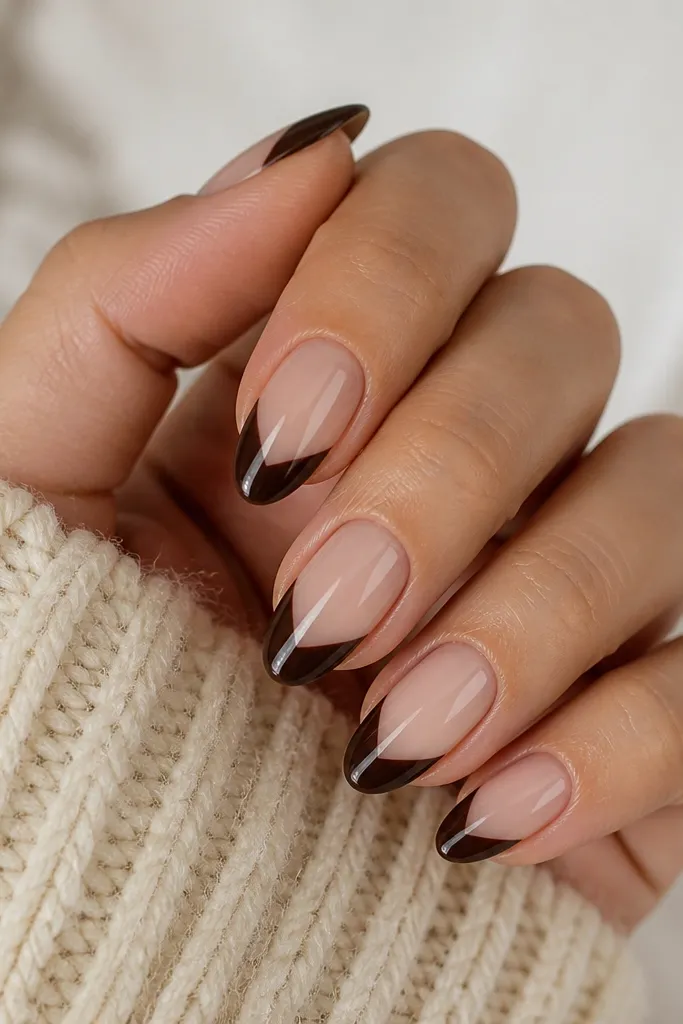
Negative space makes fall nails look sharp without adding a ton of product. The chocolate tips are strong and autumn, but the clear V line keeps the design light and prevents a bulky, over-colored look. This is great if you want your nails to look longer — the negative space visually stretches your nail bed. It flatters nearly every skin tone because the nude base anchors the design, and the chocolate stays grounded instead of turning too red. I also like this one for people who file their nails down during the week — the tip pattern still reads clean even as it wears.
Start with a nude base in a glossy finish so the negative space looks crisp. Shape into short almond and keep the tip edge even. Paint chocolate brown on the tip area like a cap, covering the sides and tip edge but leaving the center clear. Create the negative-space V by leaving a thin channel down the middle — about 1.5 to 2 mm wide at the top, narrowing slightly as it goes down. Topcoat glossy and cap the free edge carefully so the chocolate layer doesn’t peel at the corners.
Editor's noteUse a striping brush for the V channel — it gives you a clean taper instead of a blob.
Skip thisDon’t let the chocolate touch the V edges unevenly — sloppy negative space looks cheap fast.



