
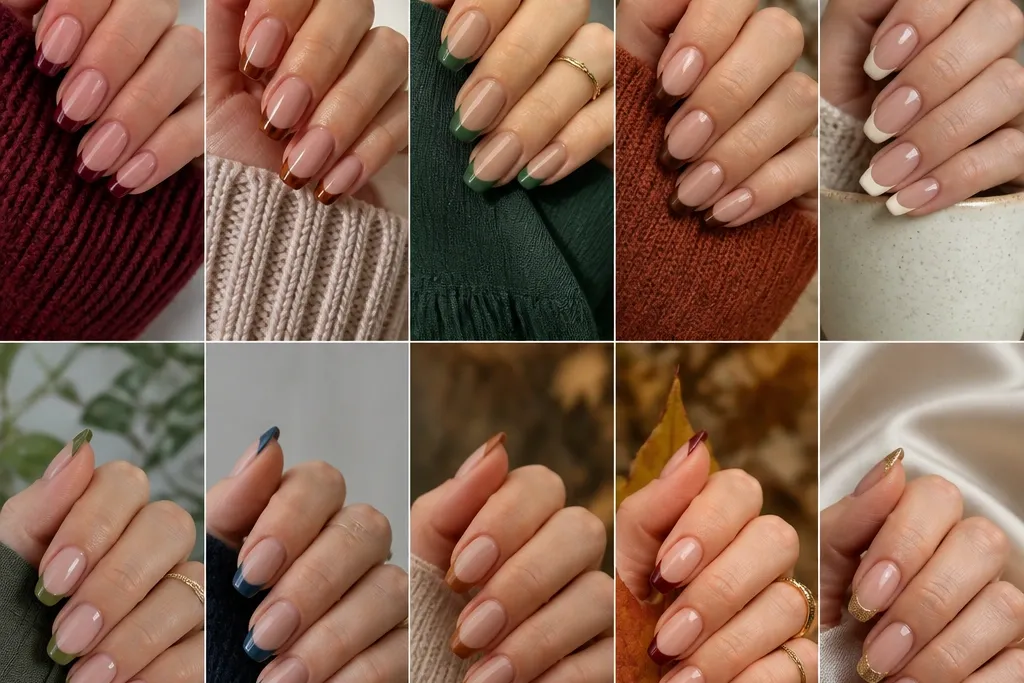
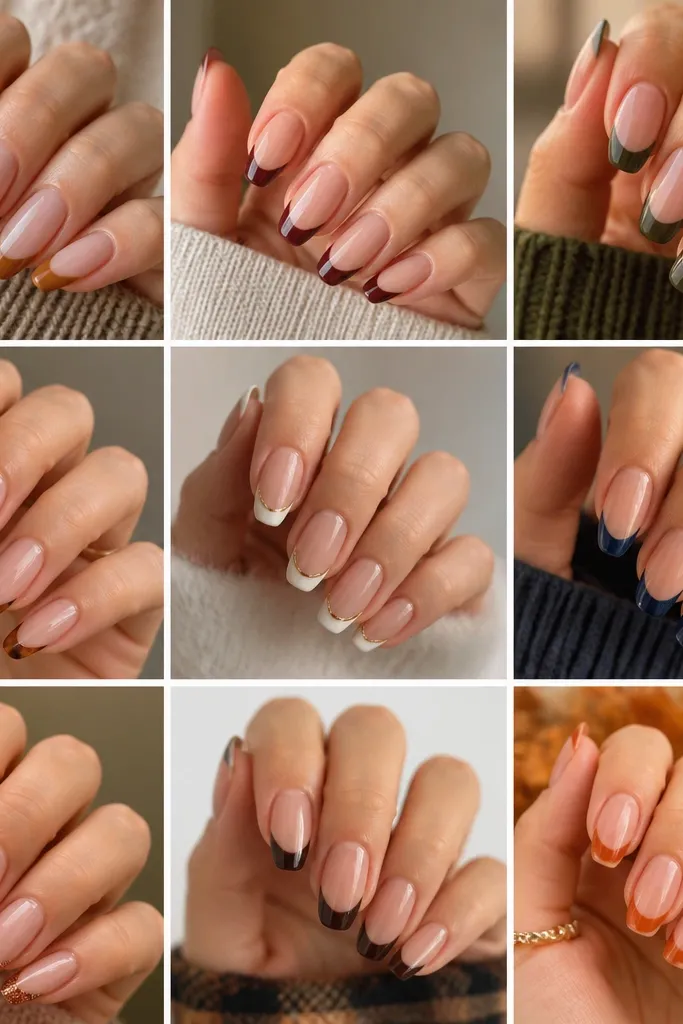
1. Oxblood Micro-French with Sheer Milky Base
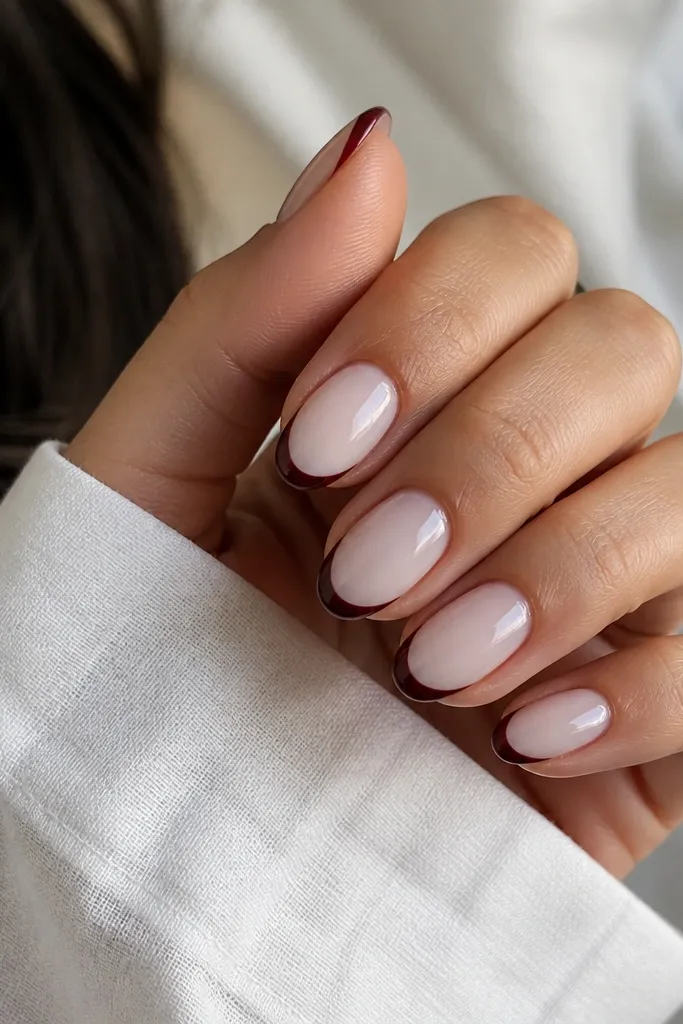
This look is my go-to when fall comes in fast and you still want your nails to look polished at work. The sheer milky base keeps your nail bed looking longer and lighter, while the oxblood tip gives that deep autumn mood without turning orange. I like it on medium or short nails because the micro width makes the nail shape look intentional instead of heavy. On warm or olive skin, the oxblood reads rich; on fair skin, it looks crisp and slightly dramatic. The key principle is contrast — a pale base plus a tight, clean tip line.
Start by prepping nails and pushing back cuticles, then apply a thin sheer milky base gel and cure. Paint the French tip in a narrow band, keeping it about 1.5 mm above the natural edge, and taper the corners so the smile line looks like a smooth arc. Use two thin coats of oxblood so it stays opaque but doesn’t flood the edges. Finally, cap the tip edge with top coat and run the brush along the free edge once for extra chip resistance.
Editor's noteIf your oxblood looks too dark, add a single coat of a red-burgundy gel over the same tip — it warms the tone without losing the fall depth.
Skip thisAvoid painting the tip too wide — thick French tips in fall colors can look like a costume.
2. Smoky Taupe French with Glossy Top Over Matte Base
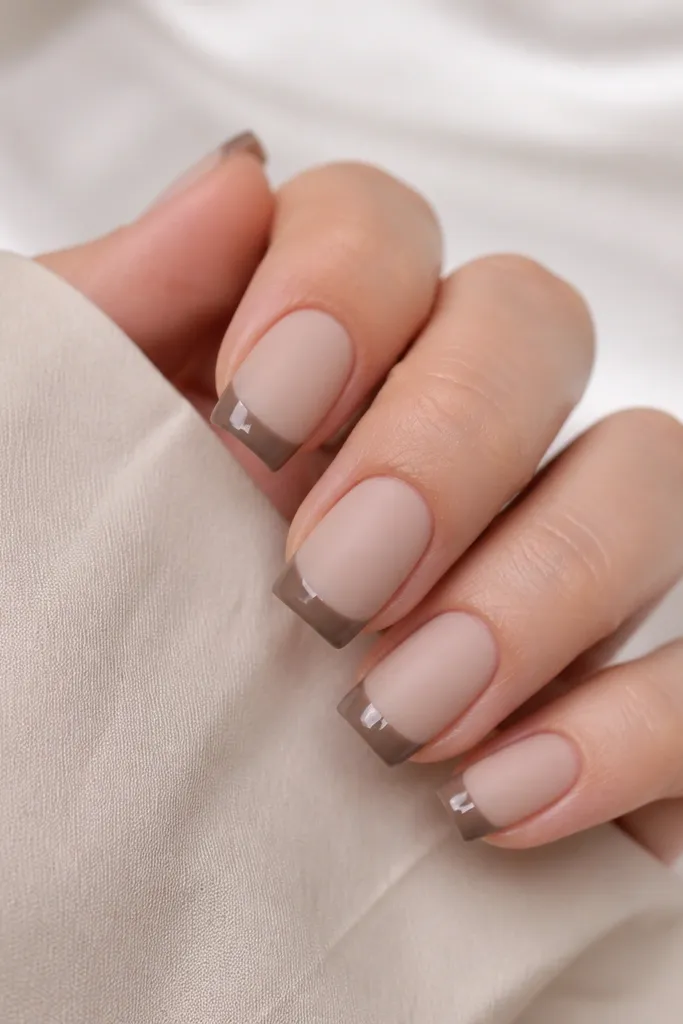
This is the modern autumn French combo that looks expensive in photos because of the finish contrast. The matte base kills shine and makes the smoky taupe feel soft and foggy, like early fall mornings. The glossy tips bring the “French” moment back so the smile line still reads crisp. It flatters most skin tones, especially cool undertones, because smoky taupe doesn’t fight your complexion. If you wear neutral outfits a lot, this gives you texture without adding loud color.
Apply a milky beige base gel and cure, then use a matte top coat over the whole nail (not just the tips). Once the matte is set, paint the French tips in smoky taupe with a fine brush, keeping the line narrow and slightly higher at the center. Cure, then add glossy top coat only on the French tips — keep it off the matte base or you’ll lose the contrast. Finish by sealing the tip edges with the glossy top coat so the shine doesn’t peel.
Use a liquid matte top coat, not a matte powder — powder textures can make the base look grainy under flash.
Don’t let glossy top coat touch the matte areas — it creates shiny patches that look messy.
3. Terracotta Fade French with Reverse Ombre Base
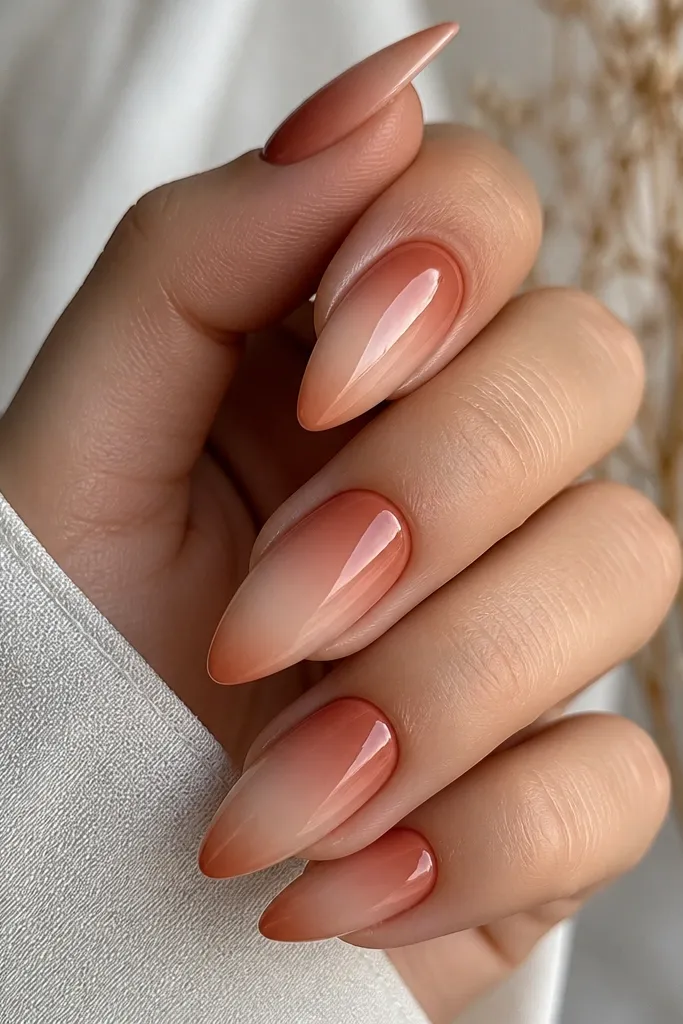
If you hate a hard French line, this fade version feels modern and still screams autumn. The terracotta at the cuticle makes your fingers look warmer and longer, while the French area stays airy so it doesn’t feel heavy. I love it on long almond nails because the fade has room to look smooth instead of striped. On medium and deep skin tones, terracotta looks earthy and flattering; on fair skin, it reads like a warm sweater color. The principle here is blending — the French tip is a gradient, not a block.
Start with a reverse ombre base: apply terracotta gel near the cuticle in a thin crescent, then feather it out with a sponge so it fades to sheer nude. Cure fully, then use a thin brush to create a terracotta fade along the free edge, keeping it lighter at the corners. Blend the edge by rolling the brush lightly from tip to center, then cure. Seal with a glossy top coat to smooth the gradient and make the terracotta pop.
Editor's noteDo the gradient in two thin layers instead of one thick one — it prevents streaks and keeps the fade smooth.
Skip thisAvoid using a thick terracotta gel for the fade — it dries with hard edges.
4. Forest Green French with Gold Leaf Half-Moons
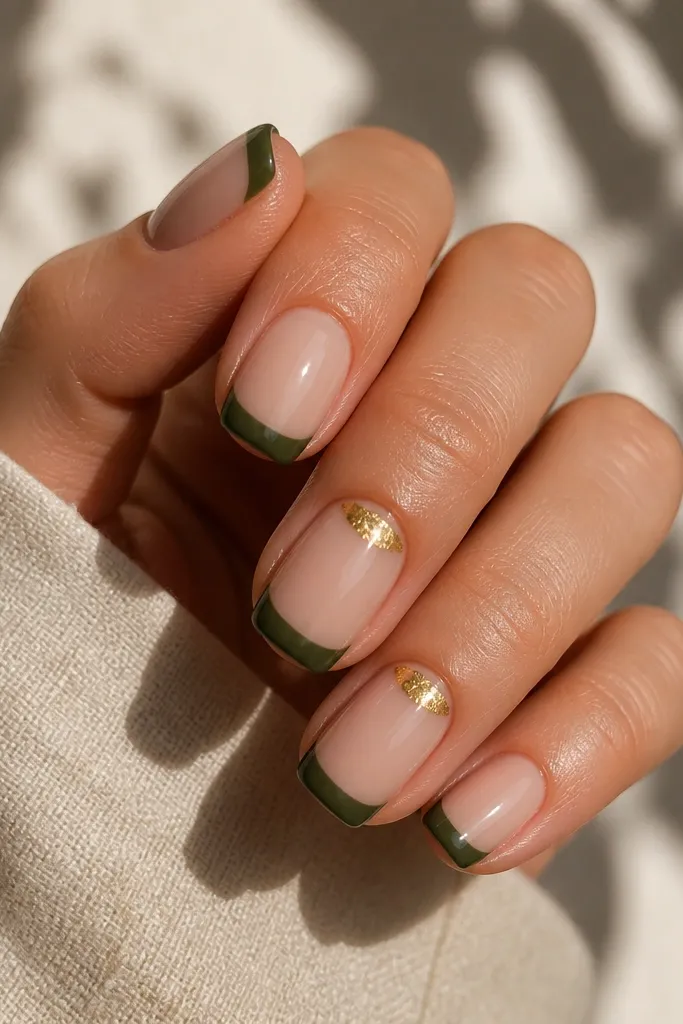
This one is for when you want fall nails that look like you planned them. Forest green is the perfect “autumn forest” tone, and the gold leaf half-moons at the smile line make the French tip feel like jewelry. I do it on two accent nails because gold leaf can look busy if you spread it everywhere. It flatters hands with longer nail beds because the gold catches attention at the center line. On warmer skin tones, green looks extra rich; on cooler skin, it still reads deep and classy.
Apply a sheer nude base and cure, then paint glossy forest green French tips in a classic narrow width. While the tip color is fully cured, add a small dab of clear tacky gel right at the smile line on your accent nails only. Press irregular gold leaf pieces onto the tacky gel, then tap off excess with a soft brush. Seal with two coats of top coat, dragging the brush over the leaf edges so it doesn’t lift.
Editor's noteChoose gold leaf that’s thin and flaky, not chunky — chunky leaf makes ridges that snag on sweaters.
Skip thisDon’t skip sealing — gold leaf lifts fast if you don’t cover it with a proper top coat.
5. Creamy Beige French with Cinnamon Brown Speckle
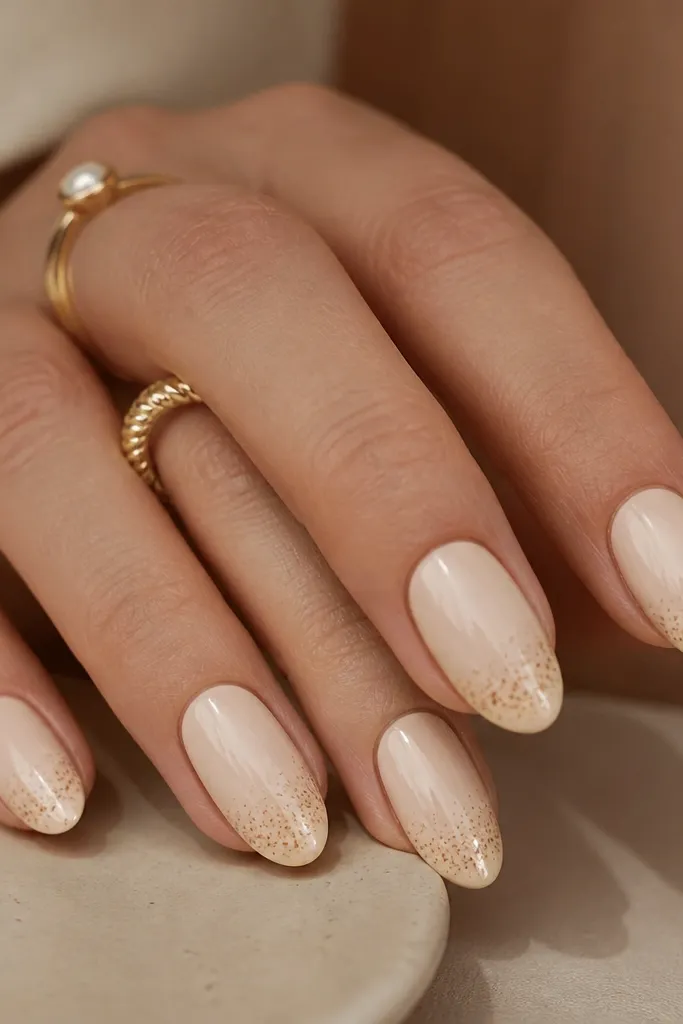
This is the “cozy but modern” French tip that looks hand-painted even if you’re not an art person. The creamy beige base matches fall neutrals without turning dull, and the cinnamon speckle gives texture without needing gems. I like it for medium oval nails because the speckles sit nicely on the curved tip and look like a gradient of spice. It flatters most skin tones because the palette is warm-neutral, not saturated. The principle is controlled texture — speckle only on the tip so it doesn’t smear into the base.
Start with a creamy beige base and cure, then paint French tips in a slightly lighter cream than the base so the line still looks intentional. For speckles, dip a dotting tool or the tip of a makeup brush into cinnamon-brown gel, then tap lightly so you get micro dots. Build density at the center of the tip and thin it out near the corners. Cure and finish with glossy top coat to lock the speckles in and smooth the surface.
Editor's notePractice the speckle on a spare nail form first — your tap strength controls the dot size.
Skip thisAvoid big blobs of speckle gel — they look like accidental smudges.
6. Plum French with Frosted Clear Negative Space
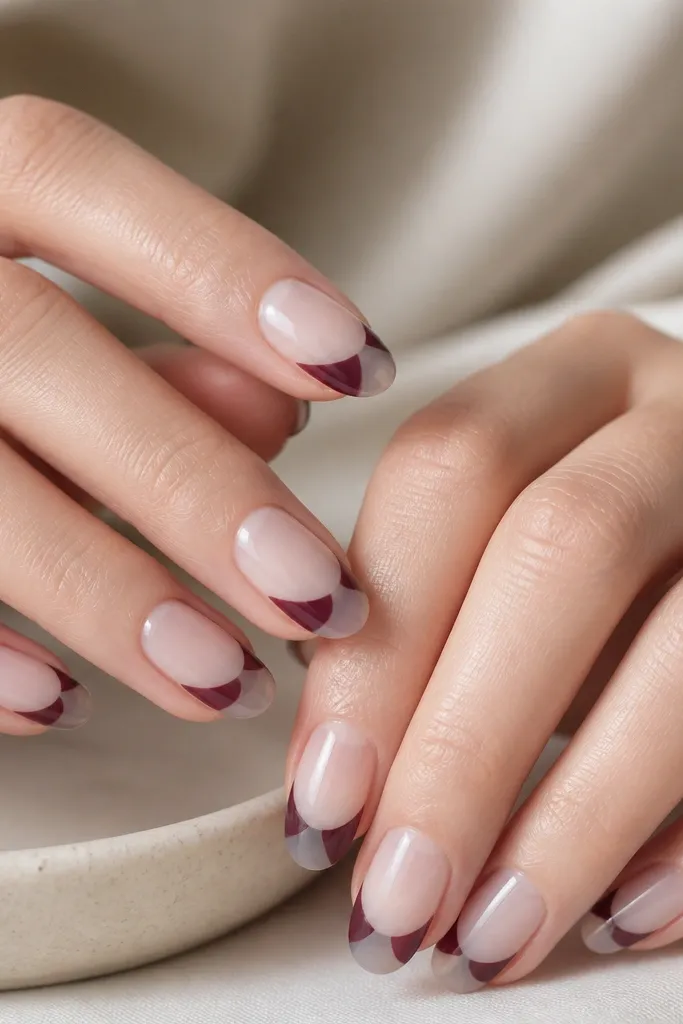
This one looks modern because it breaks the classic solid tip rule. The plum color gives you that fall drama, but the frosted clear negative space keeps it light and airy, so it doesn’t feel heavy on short nails. I’ve worn this to events where you want something different but still wearable. It flatters fair to medium skin especially, because the clear frosted section adds brightness at the front of the nail. The principle is negative space — it makes the design look clean instead of crowded.
Apply a sheer nude base and cure, then paint a plum French outline leaving a gap in the center of the tip. To create the frosted clear section, use a clear jelly builder gel and mix in a tiny amount of white pigment or frosted gel until it looks milky but transparent. Fill the center gap with that frosted jelly, cure, then cap the entire nail with top coat. If you want extra clarity, do the frosted area in two thin layers so it stays smooth.
Keep the plum outline thin — a thick outline makes the negative space look like a mistake.
Avoid flooding the frosted gel into the plum — you want a clean separation.
7. Chocolate Brown French with Tiny Pearl Dots
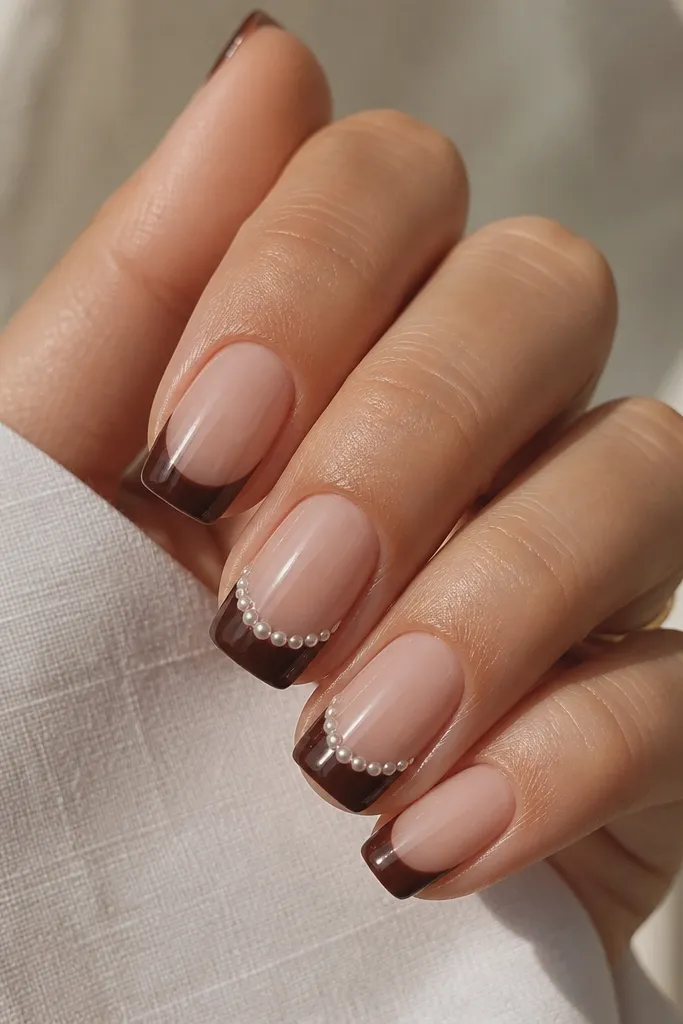
This look is for fall dinners, holiday parties, and any time you want your manicure to look “done” without being loud. Chocolate brown French tips look grounded and flattering, and the tiny pearl dots add a soft highlight that feels autumn-modern. I keep pearls to two nails because the design reads cleaner and your hands still look sleek. On warm skin tones, chocolate looks rich and natural; on cool skin tones, it looks crisp and refined. The principle is restraint — solid tip plus small detail only where the eye lands.
Start with a sheer nude base and cure, then paint glossy chocolate brown French tips with a narrow smile line. Cure fully and make sure the tip is smooth and even, since pearls sit best on flat color. Place flat-back micro pearls on the smile curve using tacky gel or nail glue, then press lightly with tweezers. Seal with top coat in two layers, dragging gently around each pearl so they don’t catch on fabric.
Editor's noteUse pearl dots that are the smallest you can find (around 1 mm). Bigger pearls make the French line look bulky.
Skip thisDon’t place pearls on every nail — it turns the manicure into a heavy 3D look.
8. Rust Orange French with Matte Tip and Glossy Base
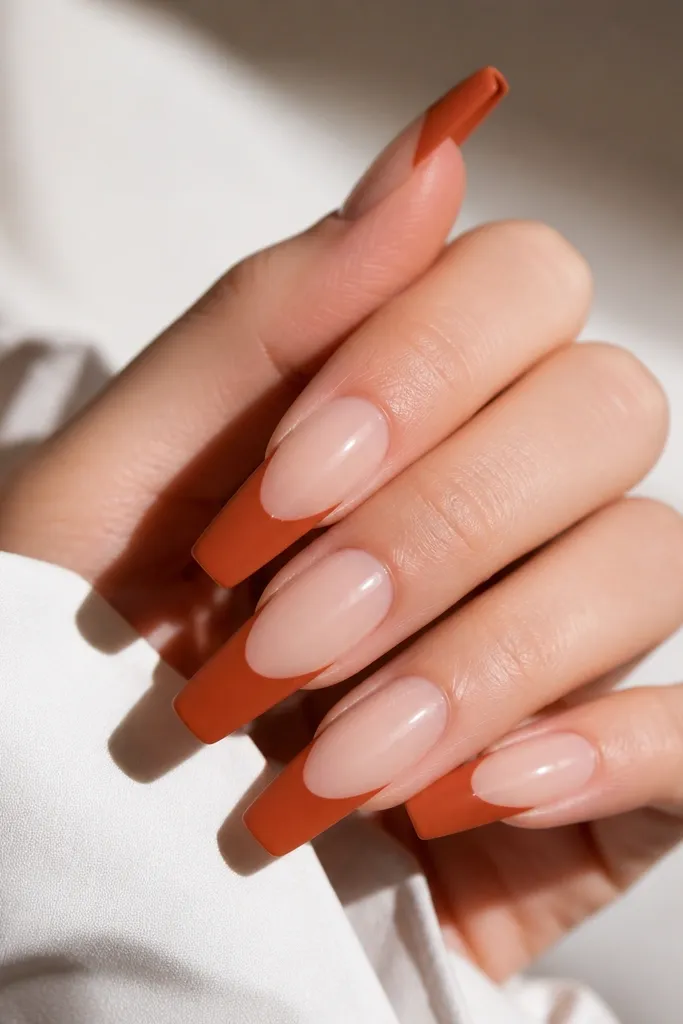
Rust orange is peak autumn without leaning into scary orange-red. The matte tips make the rust feel like clay or dried leaves, and the glossy base keeps everything looking fresh. I love this on longer shapes because the matte edge looks crisp and intentional instead of dull. It flatters all skin tones, but it’s extra flattering on medium to deep complexions because rust has the right amount of brightness. The principle is finish contrast again, but with a warm hue instead of taupe.
Apply a sheer nude glossy base gel and cure, then paint rust orange French tips in a classic narrow width. Cure and let the color set fully, then apply matte top coat only to the tips — avoid the base. If your matte top coat runs, wipe the brush and work in thin coats. Finally, cap the free edge with the matte top coat so the tip edge stays sealed.
Editor's noteIf the rust looks too neon, mix in a tiny drop of brown gel to bring it back to leaf color.
Skip thisAvoid matte top coat over the whole nail — it makes the manicure look flat and less modern.
9. Blackened Olive French with Thin White Outline
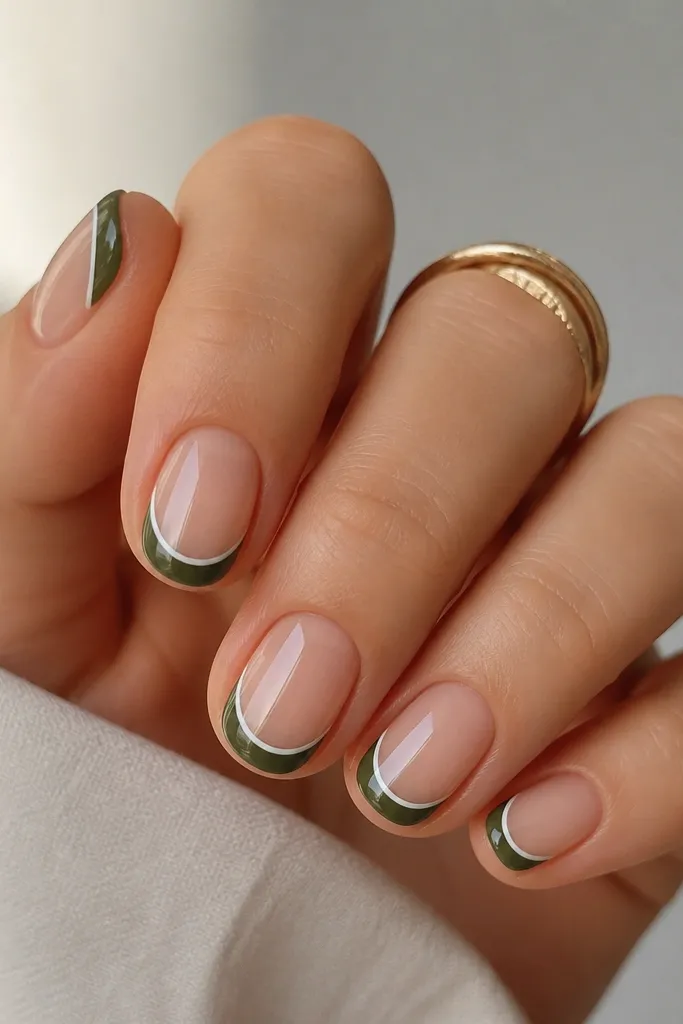
This is the “graphic” modern French idea that still feels autumn. Blackened olive is darker and calmer than bright green, and the thin white outline makes the tip look super crisp. I do this when I want my nails to look bold without using glitter or rhinestones. It flatters medium and olive skin tones because the white border adds contrast, and it also looks good on fair skin because the olive isn’t too harsh. The principle is a double-edge line — the white border turns the French curve into a clean design element.
Paint a sheer nude base and cure, then apply blackened olive gel French tips in a narrow width. Cure, then use a striping brush to draw a thin white line along the outer edge of the tip — keep the line consistent and don’t flood it. Cure again, then seal with glossy top coat over the whole nail, making sure the white line doesn’t shrink back. Clean up the edges with a lint-free wipe and acetone-free remover on a small brush.
Editor's noteUse white gel, not white polish, for a smoother border that doesn’t crack at the smile line.
Skip thisAvoid thick white borders — they make the French tip look like a sticker.
10. Smoke Plum French with Copper Chrome Dust
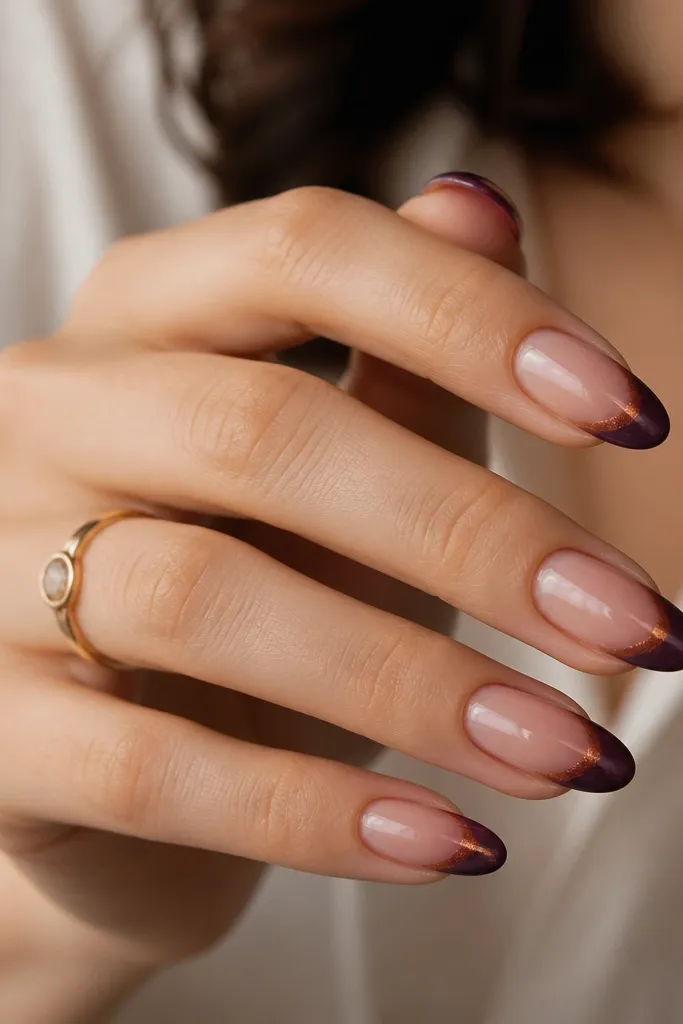
This is my favorite “night fall” manicure. Smoke plum feels moody but still wearable, and copper chrome dust adds that warm autumn shine without looking like full-on glitter. I place the chrome mainly in the center of the tip so it looks dimensional, not chaotic. This looks especially good on medium and deep skin because copper warms the plum and makes your nails look lit from within. On fair skin, it still works because the plum is dark enough to hold the contrast. The principle is placement of metallic — concentrate it where the light hits.
Start with a sheer nude glossy base and cure, then paint smoke plum French tips with a slightly darker center and lighter outer edge using two thin coats. Cure fully. For copper chrome, rub a small amount of chrome powder onto the center of the tips with an applicator sponge, then buff gently so you don’t smear it into the sides. Seal with a chrome-friendly top coat or a thin layer of regular top coat that you apply carefully so the shine stays bright.
Editor's noteIf your chrome looks dull, wait 30 seconds after applying it before sealing — it grabs better and reflects more evenly.
Skip thisAvoid pressing too hard with chrome — it can drag the gel and create uneven texture.



