
1. Burnt Orange Micro French with Clear Storage-Friendly Caps
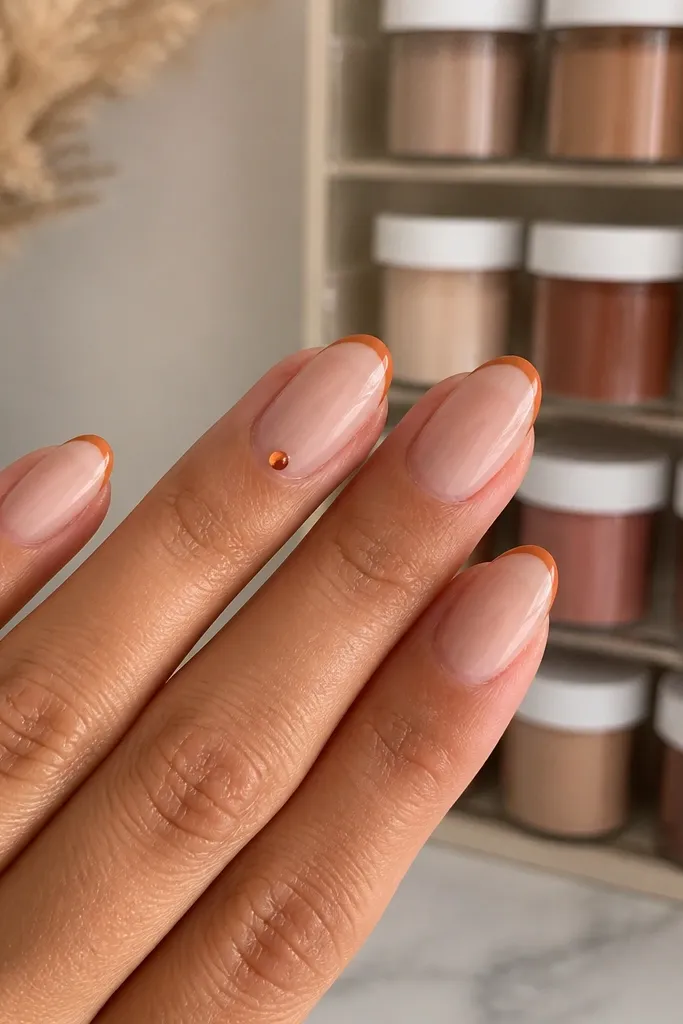
This look is the fastest way to get “fall nails” without making your whole manicure thick. The burnt orange sits warm against a nude base, so your nails look polished even when they grow out. I’ve worn it on fair skin and medium olive tones, and it always reads autumn because the orange isn’t neon. Keep the French line thin and crisp — dip can get bulky if the tip line is too wide. The styling principle is contrast: a clean nude base plus a narrow color accent so your growth stays visually neat.
Start by applying your nude dip base and cap the free edge with nude powder. Then place striping tape at the tip line — I use a piece just 2-3 mm wide and align it with the smile curve. Dip or paint the burnt orange only inside the taped area, remove tape while it’s still slightly tacky, and cap the edge again with a thin burnt orange layer. Finish with a glossy top coat on the whole nail. Store the burnt orange jar upright in a rack and keep your striping tape in a small lidded box so the powder doesn’t spill onto your tape roll.
Do one extra pass on the sidewall cap with a tiny brush so the orange edge doesn’t lift first.
Skip a thick French — if the tip line is wider than 1/8 inch, it looks heavy and chips sooner.
2. Chocolate Swirl Marble with Pantry-Brown Storage Labels
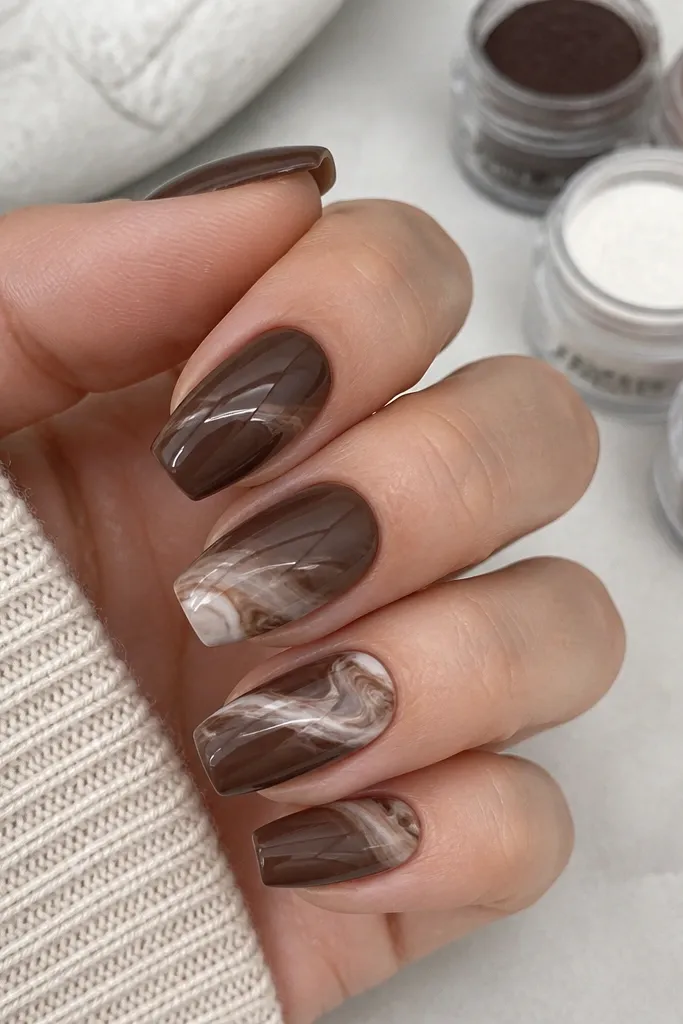
Marble works in fall because it looks layered even when your nails are simple. Chocolate brown has enough depth to hide minor imperfections, and the lighter swirls catch indoor light like stone. I love this on medium and deep skin tones because the brown looks richer without turning muddy. For shorter nails, marble still reads because the swirls are diagonal and move the eye. The principle here is movement: diagonal lines make your nail look longer and less “flat” as it grows out.
Start with a chocolate brown dip base and cap the free edge. For the marble, mix a slightly lighter cocoa shade (or dust a lighter brown powder into a clear gel/activator) and use a thin nail art brush to pull 2-3 diagonal swirls. Then add smaller “vein” lines by dragging a near-white brown along the swirl edges. Cure/set between steps so the lines stay sharp. Finally, top coat glossy. Store your lighter-brown jar right next to the chocolate jar but label them clearly — I keep mine as “Cocoa 01” and “Cocoa 02” so I never grab the wrong one halfway through.
Editor's noteUse a damp brush for the veining lines — it keeps the pigment from flooding and turning into one blob.
Skip thisDon’t marble on a wet top coat — it smears and looks cloudy instead of stone-like.
3. Forest Olive Velvet Dip with Matte Top and Tiny Gold Specks
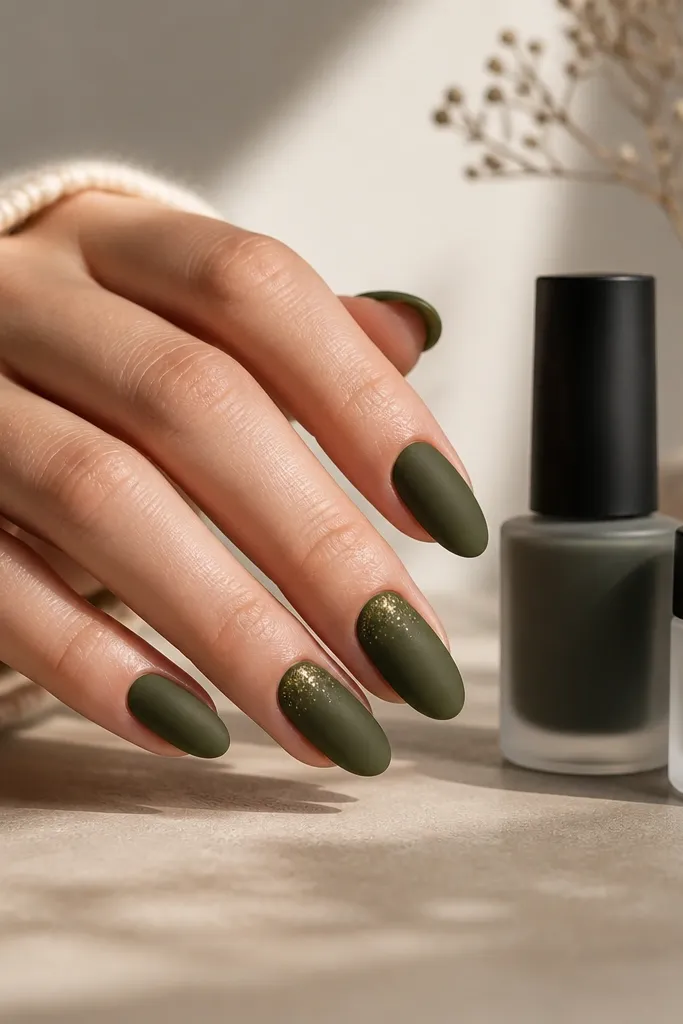
Velvet matte in olive is the fall mood I always reach for when I want something that looks expensive without a complicated design. The matte finish removes shine, so the olive reads like soft fabric instead of “paint.” I’ve worn this on cool-toned and warm-toned skin and it stays flattering because olive has both — green base with a muted undertone. Tiny gold specks give just enough sparkle for dinners without turning it into a party set. The principle is texture contrast: matte base plus minimal metallic points.
Apply two to three thin dip layers of forest olive, then cap the free edge with the same olive powder. Lightly buff the surface smooth, then wipe with a lint-free wipe. Paint a matte top coat over the whole nail — I do two thin coats because dip can look slightly patchy under matte if you only do one. Add gold specks on one or two nails using a dotting tool, keeping them concentrated within 2-3 mm of the cuticle. Store matte powder and top coat in separate bins so dust from matte powders doesn’t settle on your glossy items.
Editor's noteIf your matte looks streaky, wipe the nail with a dry lint-free wipe before the second matte coat.
Skip thisSkip heavy glitter in matte — large chunks look gritty once the shine is gone.
4. Oxblood Base with Copper Foil Half-Moons
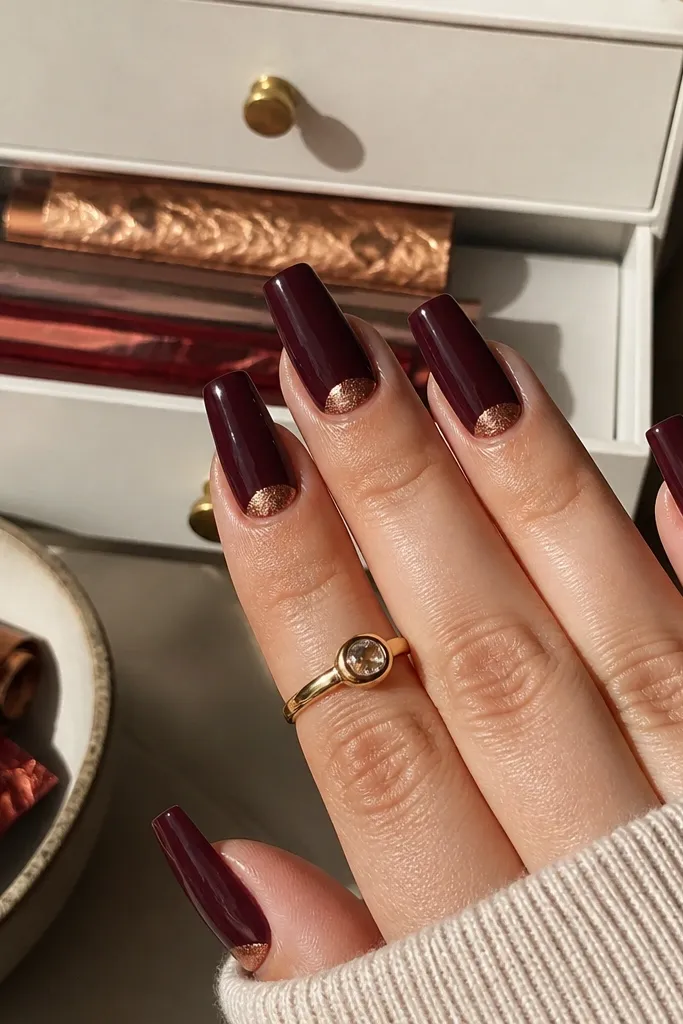
Oxblood plus copper makes your nails look like autumn jewelry. The copper half-moon at the cuticle frames your nail bed and draws attention upward, which looks great on hands with shorter nail beds too. I’ve seen it work beautifully across fair, tan, and deeper skin because the copper warms the overall look. Keep the foil limited to a half-moon so it stays classy and doesn’t feel like costume glitter. The principle is framing: a cuticle crescent makes the manicure look intentional even when you’re busy.
Start with an oxblood dip base and cap the free edge. After buffing, apply a thin layer of clear gel near the cuticle area where you want the half-moon, staying about 1 mm away from the sidewalls. Press copper foil onto the tack zone, then remove gently to keep the crescent shape. Seal with a clear top coat and cap the edge again. For storage, roll foil sheets tightly and keep them in a labeled envelope so they don’t crease and crack during use.
Cut the foil into smaller crescents first — it’s easier to place and you waste less.
Don’t let foil touch the sidewall — it lifts faster and looks ragged at two weeks.
5. Cinnamon Brown Ombre Fade into Nude
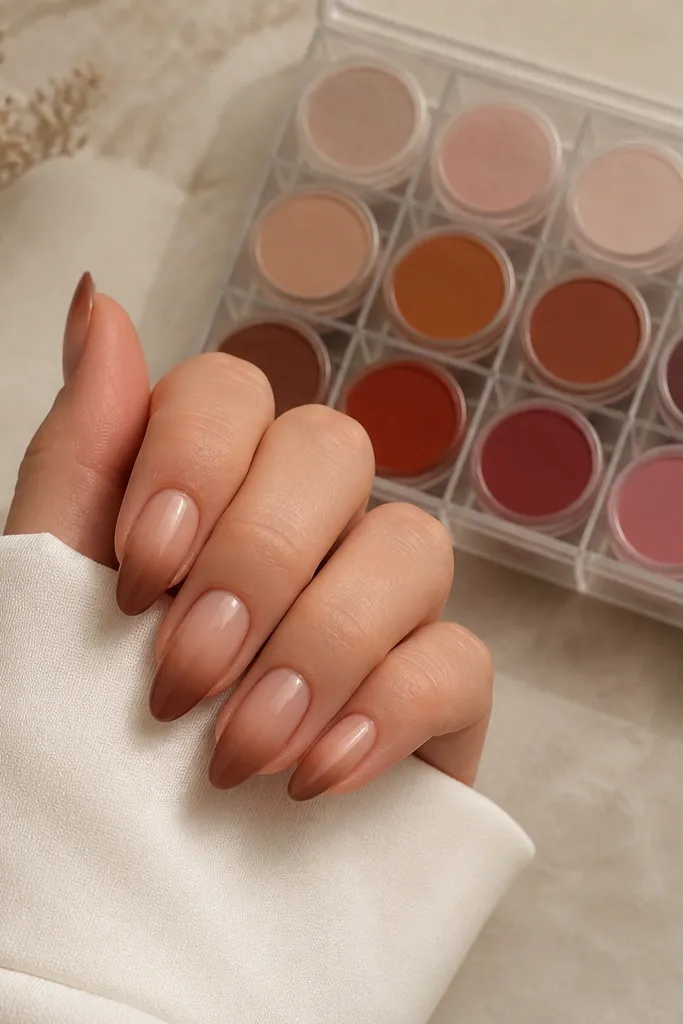
This ombre is fall without the fuss. Cinnamon brown over nude makes your nails look softer than chocolate and it flatters a lot of skin tones because nude keeps it grounded. I’ve worn it to work and then out at night by adding a glossy top coat — the brown deepens under shine. Ombré also grows out more gracefully because there’s no sharp tip line to show uneven growth. The principle is gradual transition: keep the fade thin near the tip and blend upward with control.
Start with a nude dip base and cap the free edge with nude. Build cinnamon brown near the tips using a gradient technique — I apply the brown powder more heavily at the free edge, then use a soft brush to feather it upward before sealing. Add a second cinnamon layer only if you need more depth, then cap the edge with cinnamon so the tip stays sealed. Buff lightly to remove ridges, then top coat glossy. Store nude and cinnamon powders in the same bin, but keep a divider between them so stray brown powder doesn’t tint your nude jar.
Editor's noteUse a makeup sponge to dab-buff the blend area lightly before you seal — it smooths the transition.
Skip thisSkip a hard line at the fade — if you can see where brown starts, it reads cheap.
6. Smoky Mauve Dip with One Nail Glossy Marble Cap
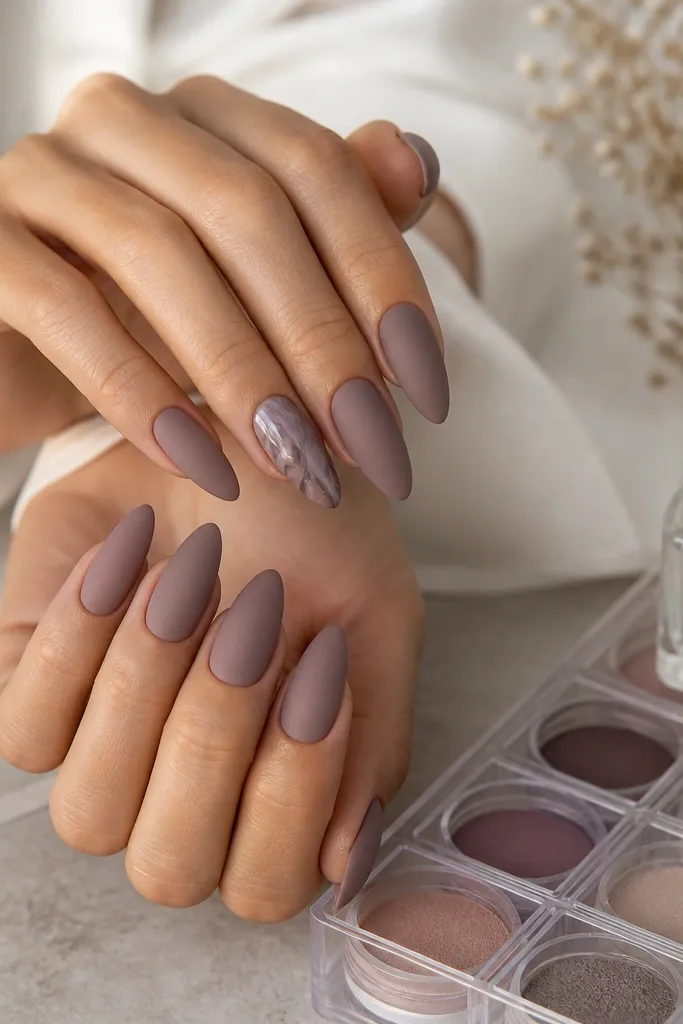
Smoky mauve is one of those fall shades that looks good even when the weather is gray. Matte mauve gives a soft, velvety vibe, and the glossy marble cap on one nail adds depth without covering all ten nails. I like it on hands that run dry because matte hides tiny texture, and the glossy accent makes the set look intentional. The styling principle is contrast in finish: matte for most nails, shiny for the detail nail.
Dip all nails in smoky mauve and cap the edges. Once you buff, apply a matte top coat to every nail except the chosen accent nail. For the accent, add a thin clear layer near the top half, then drag gray and mauve swirls with a fine brush — keep the pattern only on the upper third. Seal the marble with glossy top coat so it looks like a glassy dome. Store your gray powder separately and keep your fine liner brush in a small case — gray dust spreads fast and ruins solid matte sets.
Editor's noteChoose the accent nail based on your dominant hand — place the detail on the thumb or ring so it’s the first thing you see.
Skip thisDon’t marble the entire nail if you’re new — it takes longer to buff and chips sooner if it’s too thick.
7. Tangerine Orange Dots on Nude Base with Clear Top Edge Seal
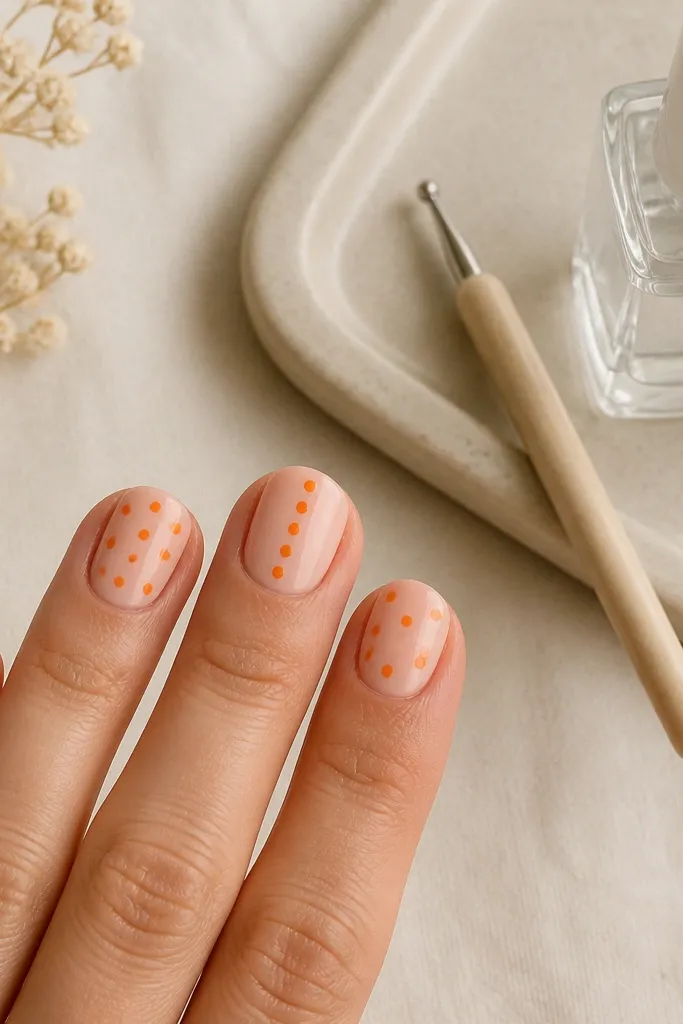
Dot nail art is beginner-friendly, and tangerine dots look fall-appropriate when they’re not too bright. A nude base keeps your nails looking clean, while the dots give that warm autumn pop you want in October. I’ve worn this on short nails and it still reads clearly because the dot size stays consistent. The principle is spacing: keep dots slightly spaced so negative space shows through as your manicure grows out.
Start with a nude dip base and cap the free edge with nude powder. Use a dotting tool to place tangerine dots on two accent nails — I do 6-9 dots total, varying size by pressing lighter for small ones. For a structured look, keep dots mostly in the top half of the nail and leave the cuticle area clean. Seal with top coat, then do an extra thin clear top pass along the free edge to lock in the dot border. Store dotting tools in a small divider tray so you never mix the metal tips across sets.
Editor's noteIf dots look streaky, wipe the dotting tool with alcohol and dry it fully before the next dot color.
Skip thisSkip overloading dots — too many thick dots create ridges that catch on fabric and lift.
8. Blackened Teal Dip with Leaf Silhouette Accent
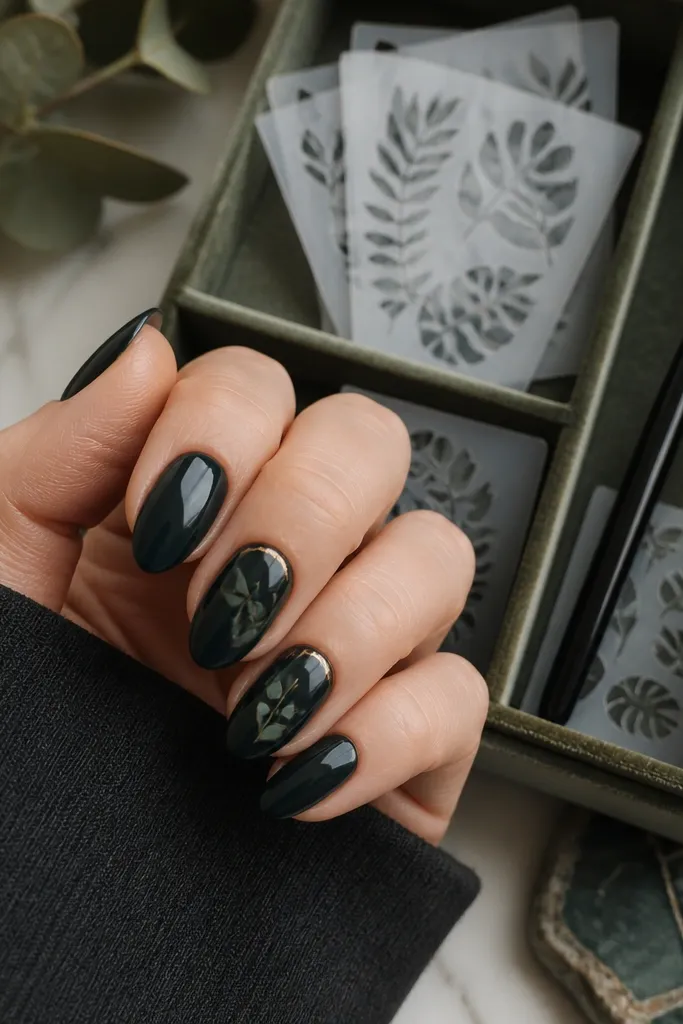
Blackened teal reads like late-fall evenings — dark, moody, and not as expected as basic green. The leaf silhouette adds an autumn cue without using obvious pumpkins or florals. I love it on medium and deep skin tones because the teal stays rich instead of turning gray. Keep the leaf near the cuticle and limit it to one or two nails, and your manicure stays wearable for work. The principle is negative space around the leaf so it stays crisp as it grows out.
Apply blackened teal dip to all nails, then cap the free edge. On one or two nails, apply a thin line of dark green gel or clear base where the leaf sits. Use a fine brush to paint a simple leaf shape — one central vein line and two side curves — then outline lightly with gold striping gel for definition. Seal with top coat and wipe any gold dust from the cuticle before curing. Store stencils and brushes together by shape and keep them dry — teal pigment stains everything if it gets into your brush handle.
Editor's notePractice the leaf outline on a spare nail tip first — leaf shapes look better when you keep the center vein straight.
Skip thisDon’t paint leaves too close to the sidewalls — they lift and look frayed at the edges.
9. Taupe Nude Base with Burnt Umber Side Stripes
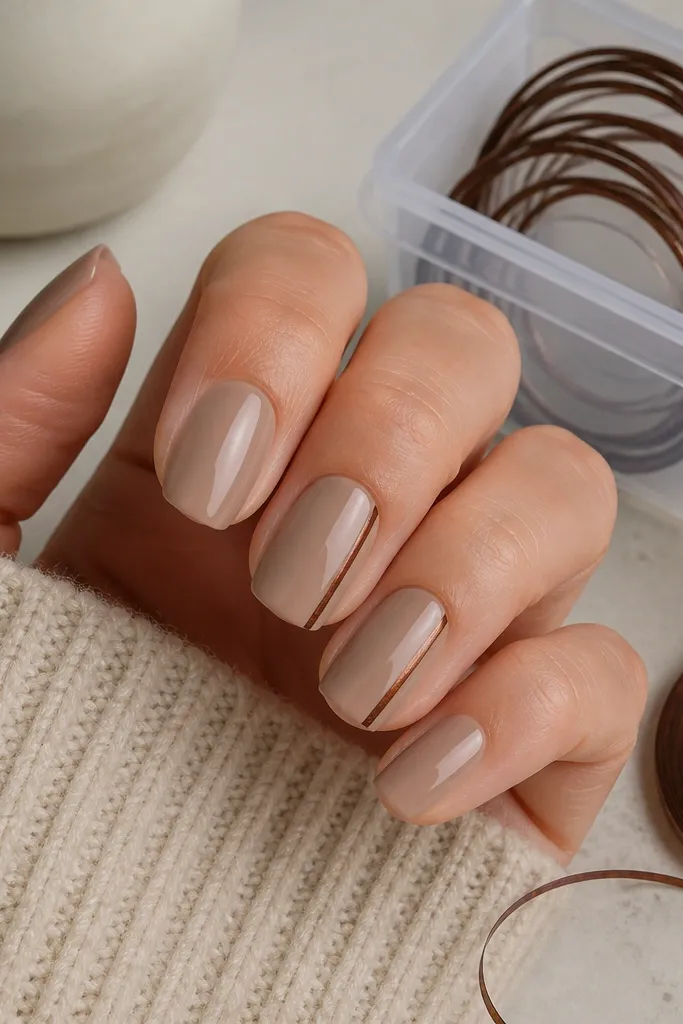
This one is for people who want fall nails that look classy, not seasonal. Taupe nude makes your hands look smoother, and the side stripe adds length because it pulls the eye vertically. I’ve done this for friends with short nail beds and it makes them look longer without adding extra width. The stripe also hides growth better than a full French because the center stays simple. The principle is vertical line placement — put the stripe near the sidewall, not in the middle.
Start with a taupe nude dip base and cap the free edge. Apply a tiny strip of striping tape along one side — I place it so it sits 1-2 mm off the cuticle and follows the nail’s natural curve. Paint or dip burnt umber inside the tape, cure/set, then remove tape while the surface is still slightly tacky. Seal with glossy top coat. Store striping tape in a small lidded bin and keep it flat — curled tape makes stripes wobble and look cheap.
Editor's notePress the tape down firmly with a silicone tool so the line stays razor straight.
Skip thisSkip centering the stripe — a centered line can make the nail look wider as it grows.
10. Glazed Ginger Topper Over Nude Dip
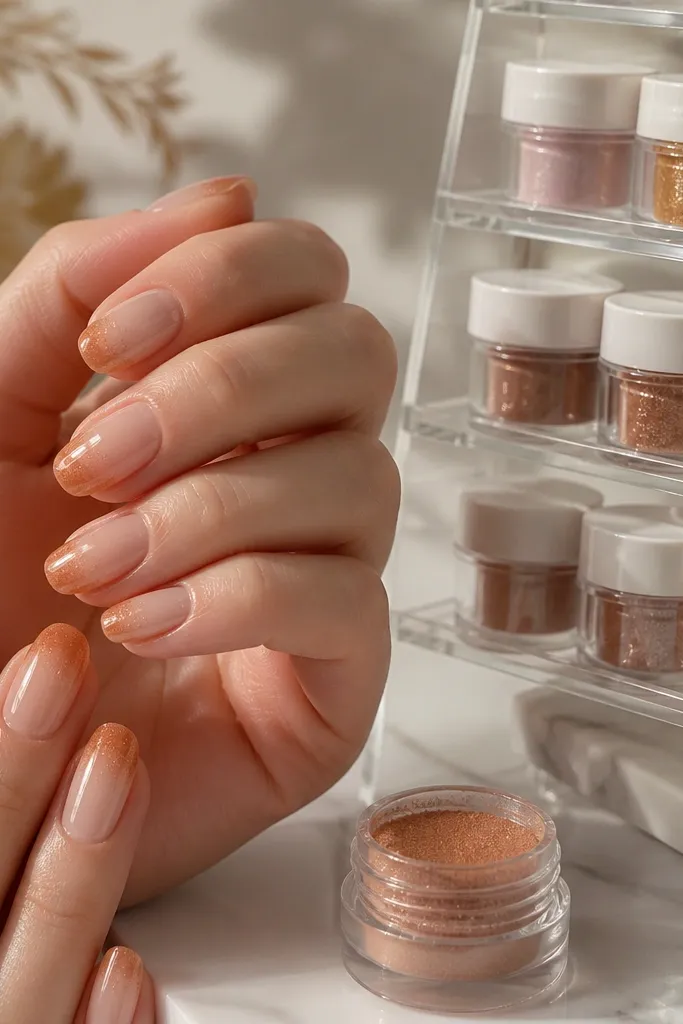
A glazed topper is the easiest way to make dip nails look like fall dessert. The ginger shimmer sits over nude, so it looks expensive in daylight and turns deeper under warm lamps. I’ve worn this on short and medium lengths, and it always looks tidy because it’s translucent. It’s also forgiving when you’re growing out — shimmer hides tiny ridges better than flat color. The principle is sheer layering: keep the topper thin and build only where you want glow.
Dip your nails in a nude base and cap the edges with nude. For the glaze, apply a thin clear layer near the tips, then dust ginger shimmer powder and brush it into a soft gradient. Add a second thin shimmer layer only if you need more opacity, then seal with glossy top coat. If you want extra depth, add one more micro layer just at the very edge of the tip. Store shimmer powders in a separate upright section because they shed — I keep them away from matte colors so they don’t drift.
Use a soft fan brush to dust shimmer off the nail surface before top coat — it prevents gritty texture.
Skip heavy shimmer coverage — thick glitter blocks look rough and catch on sleeves.
11. Rust Red Base with Matte Half-and-Gloss Accent
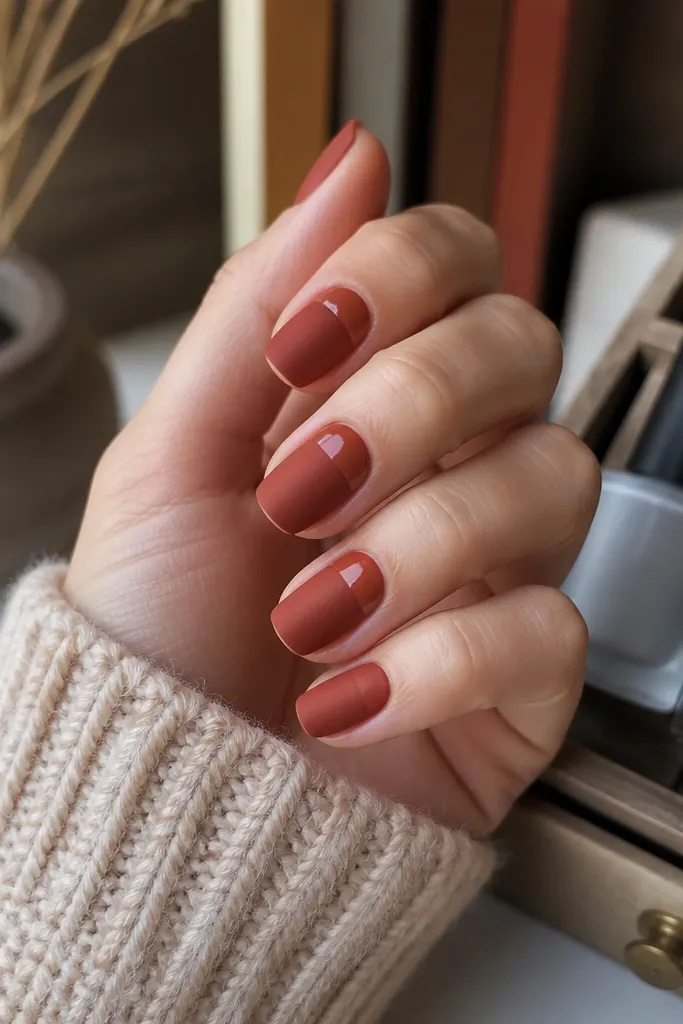
Rust red is the fall color that never looks out of place, and the half-matte/half-gloss trick makes it look intentional. The clean horizontal split changes the way light hits your nails, so even simple shapes look styled. I like it on almond and short coffin because the line has room to sit without crowding the cuticle. This also flatters hands that have dry cuticles — matte hides little dryness on the nail surface while the glossy top half draws attention away from the lower area. The principle is light control: matte absorbs, gloss reflects.
Apply rust red dip to all nails and cap the free edge. Buff smooth, then top coat with matte for all nails except your accent ones. For the accent nails, use a horizontal striping tape at mid-nail, paint or seal the top half with glossy top coat, remove tape, then finish the bottom half with matte. Cure both finishes fully. Store matte and glossy top coats in separate compartments so you don’t accidentally grab the wrong bottle mid-step.
Editor's notePress the tape down with a flat silicone tool so the line stays clean after curing.
Skip thisDon’t mix matte on top of gloss before curing — you’ll get a cloudy band.
12. Olive and Nude Cuticle Frame with Tiny Rhinestone
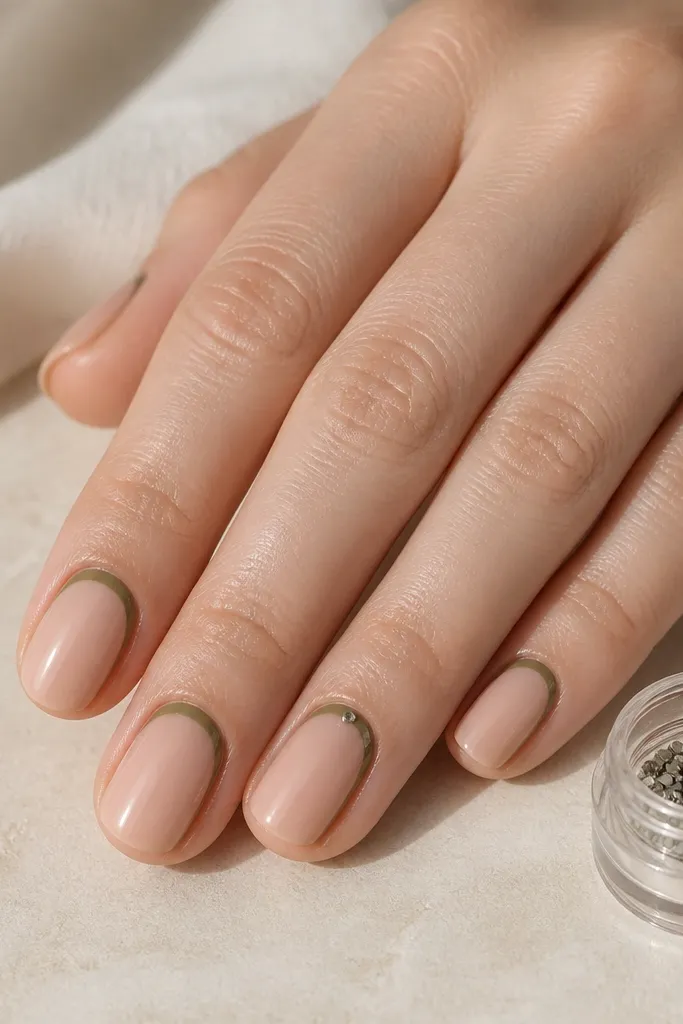
A cuticle frame is a fall idea that looks neat even when your nails grow out. The olive border gives that autumn green cue, but the nude center keeps your nails bright and clean. I’ve done this on both short squares and medium almonds; the border looks best when it’s thin enough to show the natural curve of your cuticle. The single rhinestone adds a focal point without turning the set into a heavy sparkle mess. The principle is a clean outline: thin lines and one controlled accent.
Start with a nude dip base and cap the free edge with nude. Use a fine liner brush to paint an olive border around the cuticle, leaving a small gap in the center so your nail still looks airy. Place one tiny rhinestone on the border with clear gel, then cure. Seal the whole nail with glossy top coat, and cap the edges carefully so the border doesn’t lift at the sides. For storage, keep rhinestones in a small cap container with a tight lid — loose stones scatter into every jar.
Editor's noteIf the border looks thicker than you want, wipe the brush tip on a lint-free wipe before you go back in for another pass.
Skip thisSkip a thick cuticle ring — it looks like paste and lifts faster.
13. Sooty Charcoal with Copper Outline French Tips
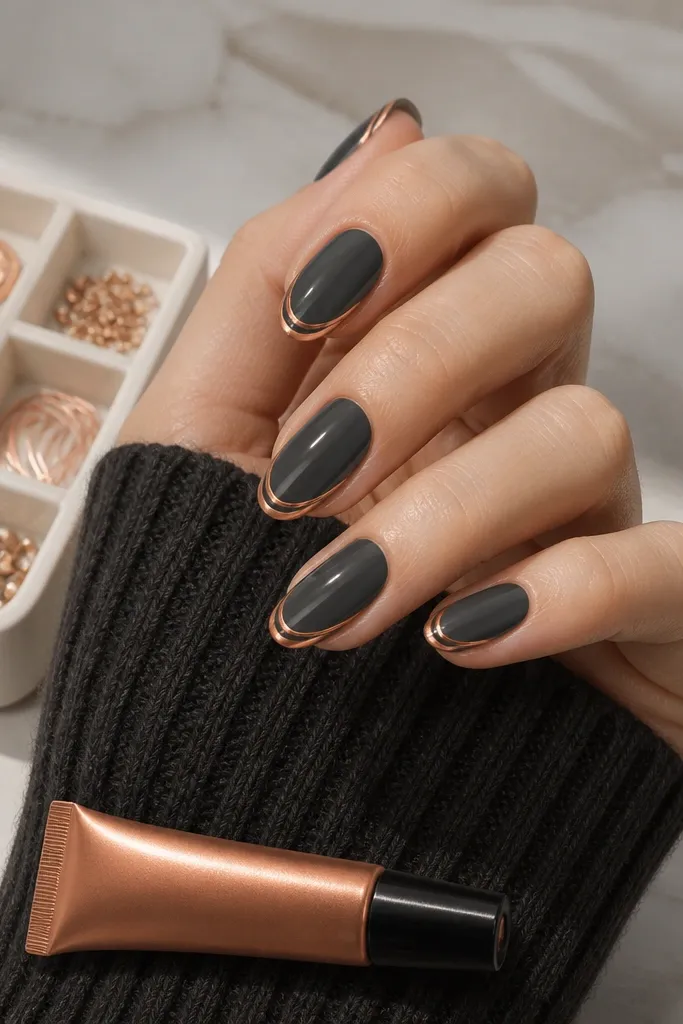
Charcoal in fall is moody and flattering, especially when you keep the design minimal. The copper outline French makes the nails look like they have jewelry framing the tip, not like you painted a full block of color. I’ve worn this to fall weddings and got compliments because it looks sharp in photos with warm lighting. It also grows out cleanly because the copper line stays thin and doesn’t create a thick ridge. The principle is outline design: line work stays crisp longer than filled shapes.
Dip the nails in sooty charcoal and cap the free edge. After buffing, apply striping tape at the French curve so you get a clean arc, then paint copper striping gel only along the taped edge — keep it as a line, not a fill. Remove tape after a short cure or when it’s tacky enough to peel cleanly. Add a glossy top coat over everything to smooth the surface. Store striping tape and copper gel in the same organizer section so you don’t leave tape out where charcoal dust can land.
Editor's noteUse fewer strokes for the copper line — two steady passes look cleaner than ten light ones.
Skip thisDon’t fill the tip with copper — it turns into chunky glittery buildup at the edge.
14. Pecan Brown Base with Tiny Pumpkin Accent Nail
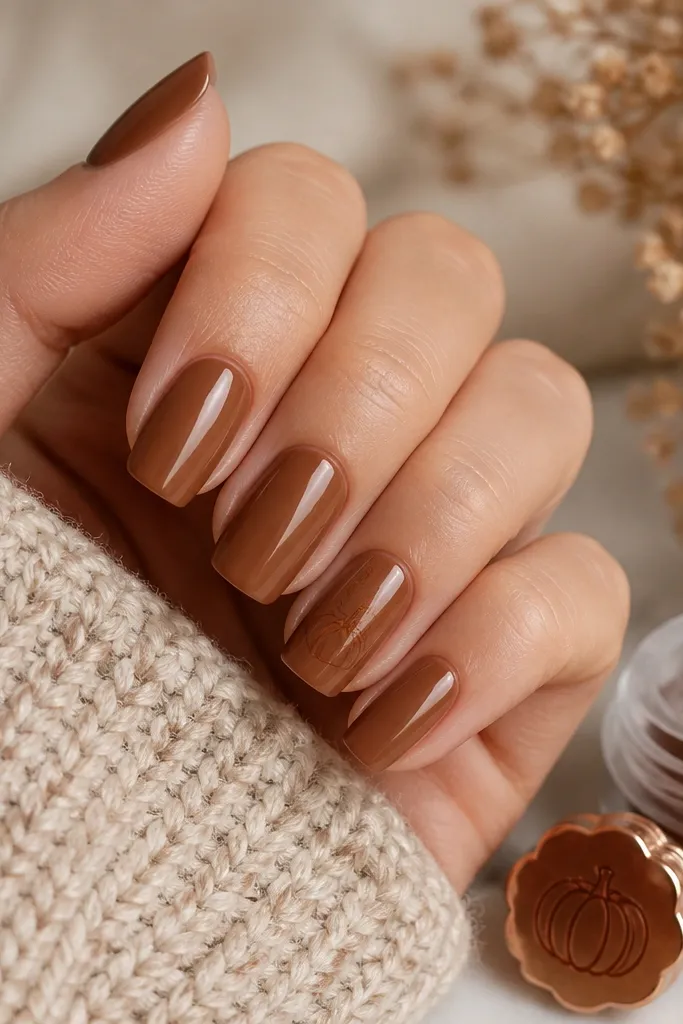
If you want a true autumn cue but you hate loud designs, this is it. Pecan brown is earthy and flattering on most skin tones because it’s warm and not too red. The tiny pumpkin sketch is small enough to look cute, not childish, and it sits near the cuticle so it stays visible as your nails grow. I like this for short nails because big pumpkin art would take over the whole nail. The principle is scale control: keep the art small and let the base do the heavy lifting.
Dip all nails in pecan brown and cap the free edge. On the accent nail, place a tiny dot of clear gel where you want the pumpkin, then paint a simple pumpkin outline with dark orange and add two vertical ridges. Finish with a tiny stem in deep brown and a small highlight line to make it pop. Seal with glossy top coat. Store your orange pigments separately from your brown powders in an upright rack so orange dust doesn’t tint your pecan jar.
Editor's noteUse a nail art liner brush with a sharp tip and keep your pumpkin about the size of a small pea on the nail.
Skip thisSkip full pumpkin decals — they look bulky under dip and lift at the edges.
15. Mocha Nude with Negative Space Leaf Vein on Accent Nail
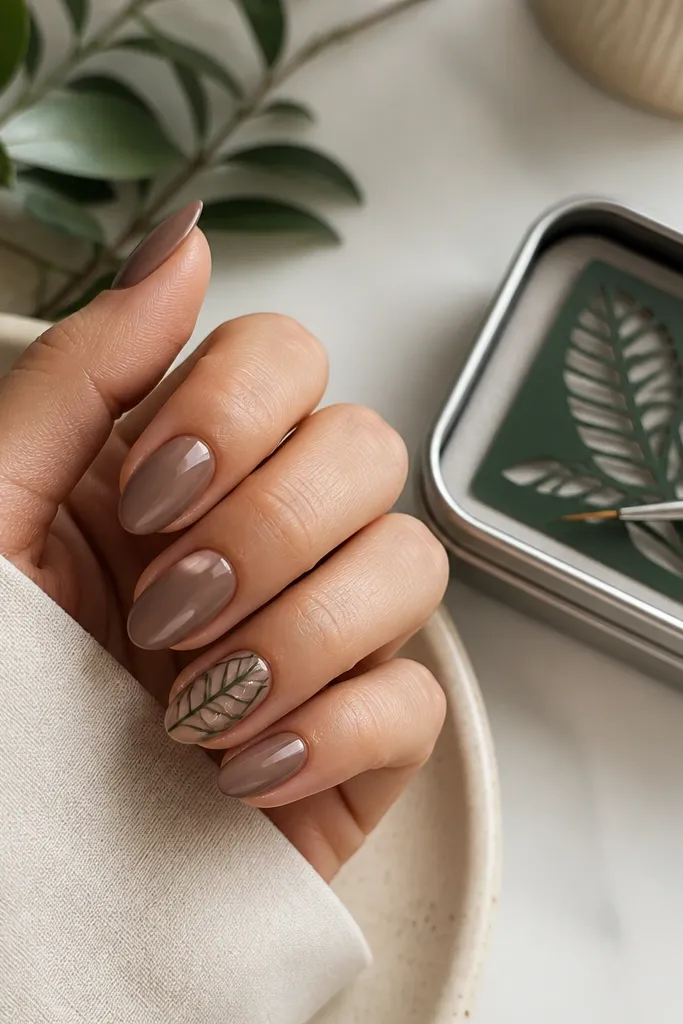
Negative space leaf lines look clean and modern, and they fit fall without going full theme. The mocha nude base warms up your hands, and the leaf vein design gives that “nature” cue that matches autumn foliage. I’ve done this on both short squoval and medium almond; it looks best when the leaf sits diagonally so your nail doesn’t look boxed in. The leaf lines also hide minor growth because there’s no big block color at the tip. The principle is airy design: keep lines thin and let the nude show through.
Start with a mocha nude dip base and cap the free edge with nude. On the accent nail, use a fine brush to paint dark green leaf veins that start near the cuticle and angle toward the sidewall, leaving the center negative. Add one or two thin vein branches only — don’t overfill. Cure/set between line work steps if your gel smears. Finish with glossy top coat on all nails. For storage, keep your fine brush in a dedicated case and don’t reuse it across dark green and other colors — leaf lines get muddy when brushes carry pigment.
Editor's noteIf your lines wobble, rest your hand on a folded towel and move the brush, not your wrist.
Skip thisDon’t thicken the leaf lines — thick lines look like stickers and peel sooner.



