
1. Cinnamon Micro French with a Single Gold Dot
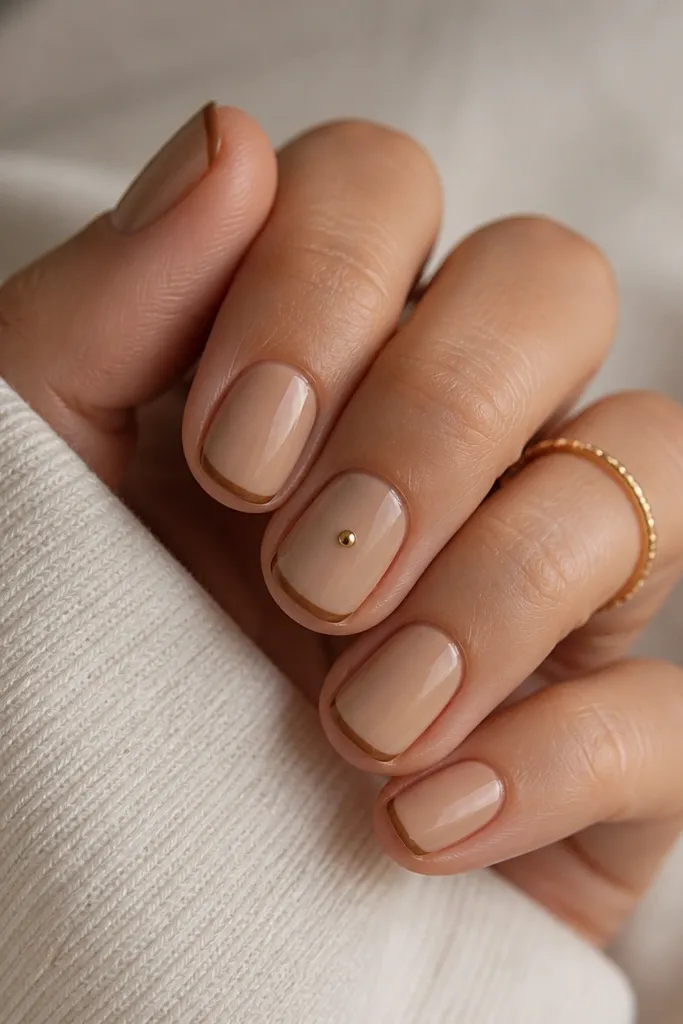
Start by painting a solid base in cinnamon-beige and let it dry fully. Then place two tiny strokes for the micro French tip using a fine brush or a French guide strip, keeping the tip line about 1-2 mm wide. Cure or dry, then add one gold dot on your ring finger (or middle finger) using a dotting tool. Finally, seal everything with a glossy top coat so the brown tip looks crisp and smooth.
This one is my go-to when I want fall without busy art. The base is a creamy cinnamon-beige so it looks cozy instead of flat, and the micro French tip stays narrow so your nails don’t look chopped up. The single gold dot adds warmth and a little sparkle without turning the set into glitter overload. It flatters short nails because the thinnest line is at the tip, where your eye expects it, and the dot gives a focal point in the center.
Skip thisAvoid a wide French tip; anything thicker than 2 mm makes short nails look stubby.
Editor's noteIf your micro French line keeps bleeding, wipe your brush on a lint-free pad before touching the nail — it tightens the edge fast.
2. Terracotta Half-Moon Cuticle Glow
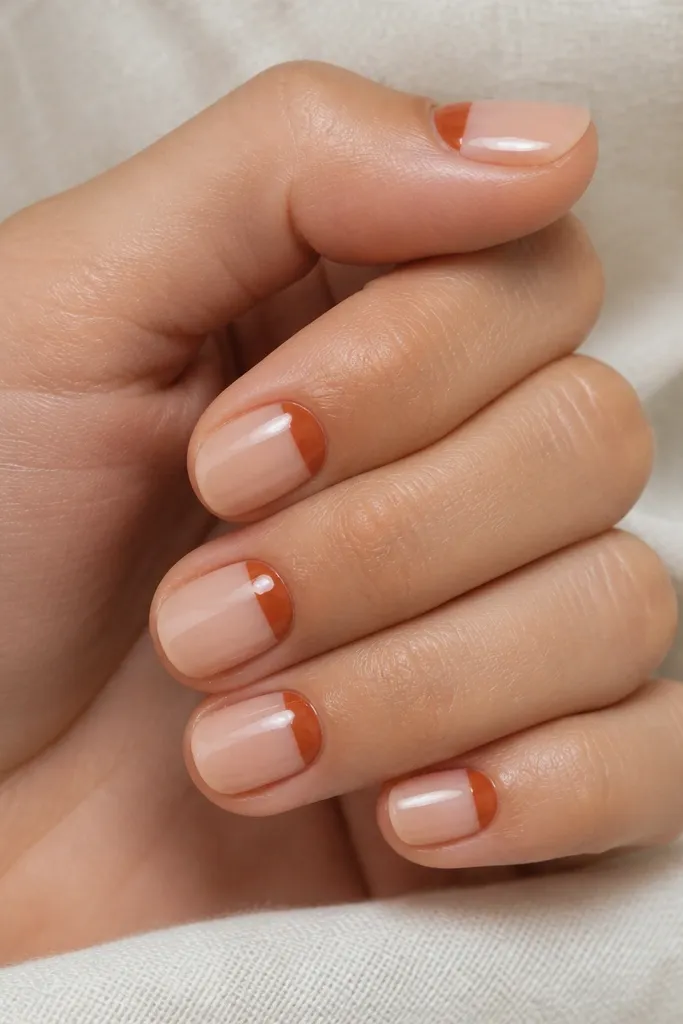
Start by applying two thin coats of sheer nude and let it level out. Use a half-moon stencil or freehand with a small brush to paint a curved terracotta shape that covers about 1/3 of the nail width at the cuticle. Keep the half-moon centered and stop it before it reaches the sidewalls. Once it’s dry, add a glossy top coat; the gloss makes the terracotta look like it’s glowing against the nude.
This design makes short nails look intentional and slightly longer because the color sits near the cuticle where the eye naturally starts. The sheer nude base gives you a clean, wearable look, and terracotta adds that unmistakable autumn warmth. It also works well on medium to fair skin tones because the nude base can match your natural nail color, so the half-moon looks like a highlight. On deeper skin tones, choose a richer terracotta and keep the base more opaque so the contrast stays visible.
Skip thisSkip a thick cuticle shape; a chunky half-moon can look messy on short nails.
Editor's noteFor extra neat edges, dab a tiny bit of terracotta on a palette first, then reload your brush from there instead of dipping into the bottle.
3. Olive Sage Dots Over Oat Milk Nude
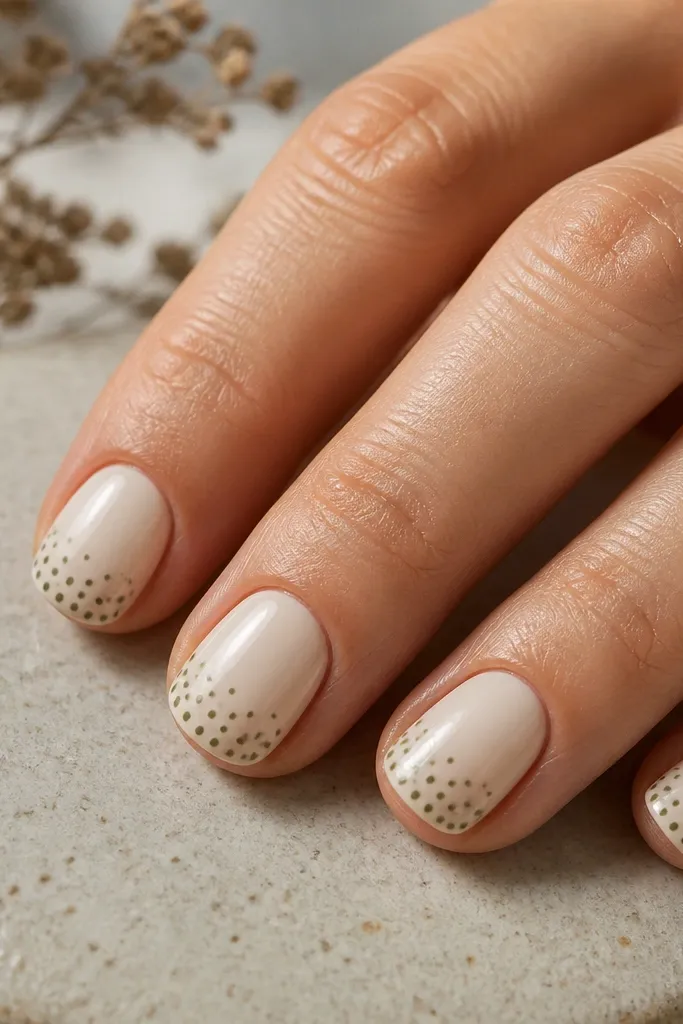
Apply two coats of oat milk nude, then let it dry until it’s tack-free if you’re using gel. Using a dotting tool, place a small dot row near the cuticle on each nail — start with 4 dots, spaced evenly across the center. Add 1-2 extra dots toward the middle so the cluster looks like it’s drifting downward. Seal with a glossy top coat so the dot edges look rounded, not textured.
Dots are the easiest fall pattern that still looks “done,” and sage olive makes it feel autumn without going full orange. The oat milk nude base keeps everything soft, so the green reads wearable rather than harsh. This set flatters all skin tones because the nude base can mimic your natural shade, and the dots are small enough to avoid overpowering short nails. I like it for casual days and sweater weather because it looks fresh even when you don’t wear makeup.
Skip thisDon’t make dots the same size across the whole nail; uniform dots can look like stamp marks.
Editor's noteUse a slightly smaller dot for the last dot on each nail; it makes the cluster look intentional instead of accidental.
4. Burnt Umber One-Strip Accent
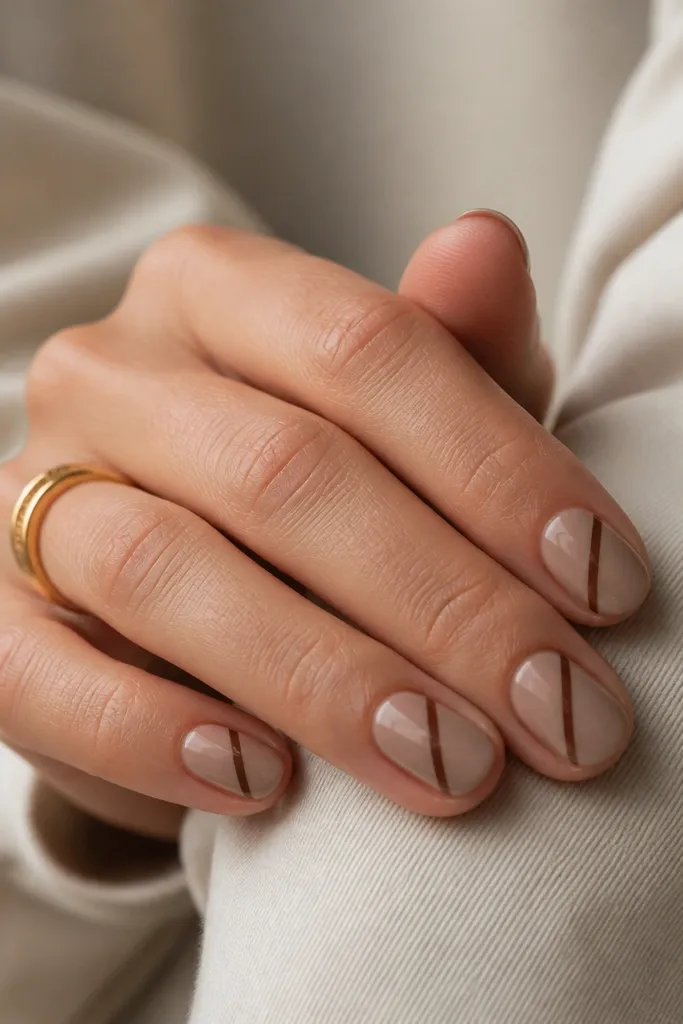
A single diagonal stripe is the fastest way I know to make short nails look longer. The warm taupe nude base keeps it subtle, while the burnt umber stripe adds that grounded fall tone. This works especially well if you have wider nail beds because the stripe visually narrows the nail — your eye follows the line. It also photographs well because the stripe creates a clean highlight under light.
Paint your base with two coats of warm taupe nude and let it fully dry. Then take a striping brush and draw one diagonal line on each nail, starting about halfway up from the cuticle and ending just inside the tip edge. Keep the stripe narrow, around 1 mm, and center it so it doesn’t crowd the sidewalls. Finish with a glossy top coat; the shine makes the stripe look smooth and salon-neat.
If you’re freehanding, mark the start and end points with tiny dot taps first, then connect them.
Avoid stripes that touch the sidewalls; that’s where short nails start to look wider than they are.
5. Deep Berry Tiny Leaf on One Accent Nail
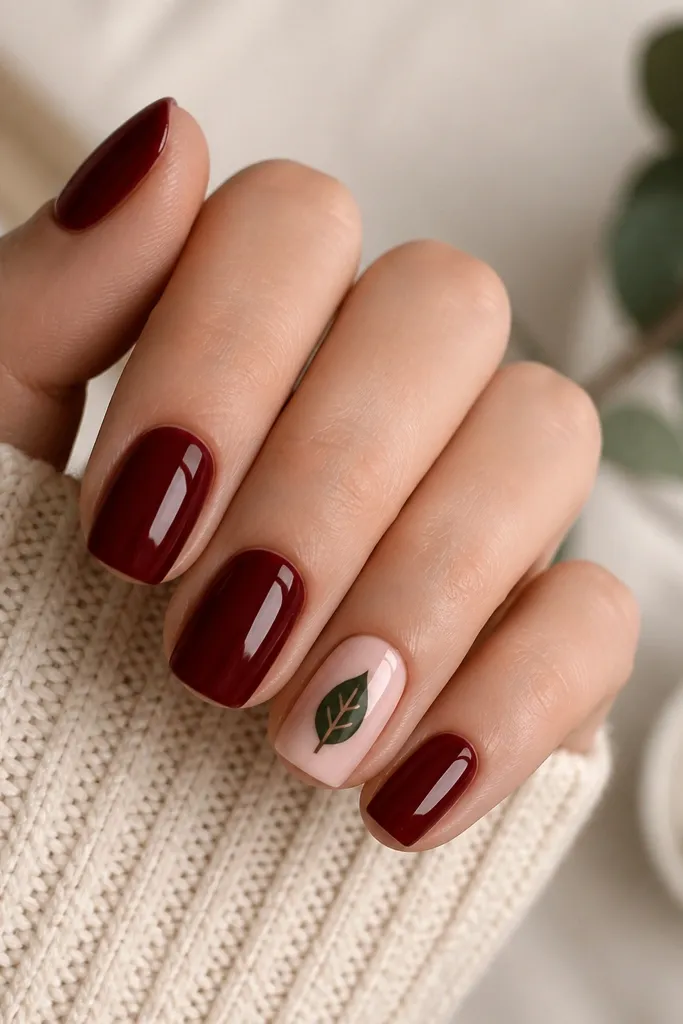
Start with two coats of deep berry on all nails. Choose one accent nail and paint it the same berry, then add a matte top coat only on that accent nail if you want the leaf to pop more. Use a dot and a fine brush to draw a tiny leaf: one teardrop shape with a pointed tip, then add a thin vein line. Keep the leaf centered within the top third of the nail. Seal with a glossy top coat over the berry parts, leaving the leaf matte if you did that step.
This is a fall set that feels seasonal without turning into full-on Halloween. The deep berry base reads autumn immediately, and the tiny leaf near the cuticle adds a natural detail that looks expensive. I like it on short nails because the leaf is small enough to keep the nail visually long, and the matte leaf against the glossy berry gives you texture contrast. It flatters hands with cooler undertones because berry looks crisp and clean, especially under indoor light.
Skip thisSkip a full leaf over the whole nail; large silhouettes swallow the nail length.
Editor's noteIf your leaf looks too big, shrink it — a leaf that fits within the width of the cuticle looks right on short nails.
6. Pumpkin Orange Fade with Nude Tip
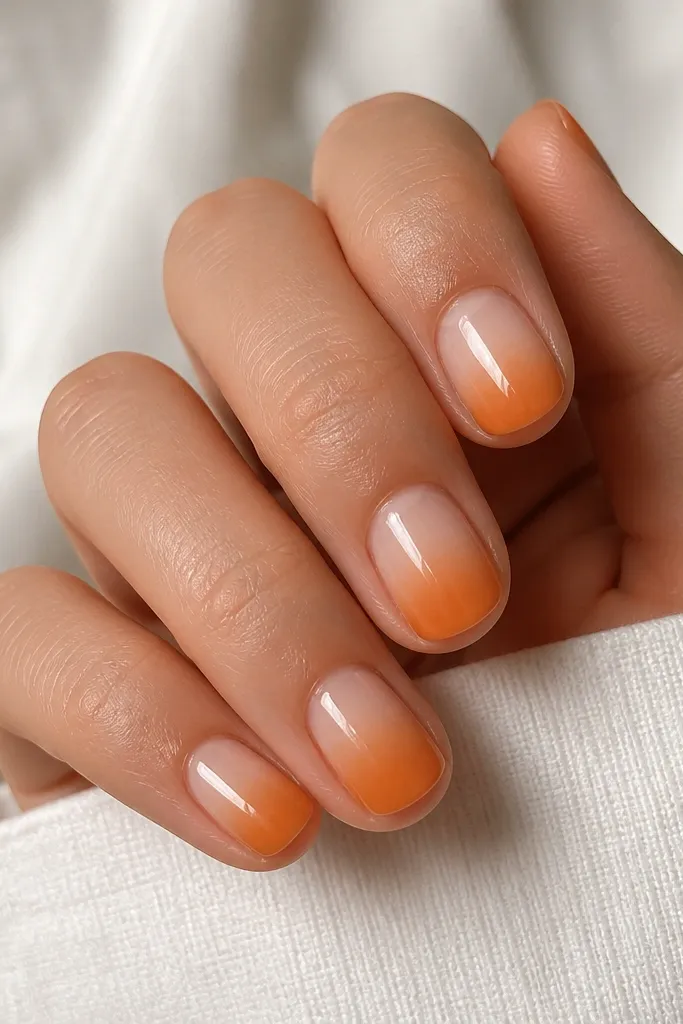
Apply two coats of nude base and let them dry fully. Use a makeup sponge to dab pumpkin orange at the tip area first, then drag the sponge lightly upward to blend about 1/3 of the nail. Work in thin layers so you don’t get muddy edges — re-dab until the fade looks smooth. Clean up around the cuticle with a small brush dipped in acetone or polish remover. Finish with a glossy top coat to lock in the gradient.
This fade makes short nails look like they have more space, because the strongest color is at the tip where your eye expects it. Pumpkin orange is the classic fall shade, but the fade keeps it from looking too heavy. The nude cuticle area also makes the set look clean as your nails grow out. I’ve worn this to work and had people ask where I got my nails done, even though the design is just a sponge gradient.
Skip thisDon’t load the sponge with too much pigment; thick gradients look patchy on short nails.
Editor's noteUse a small section of the sponge each time so the blend stays controlled and doesn’t get streaky.
7. Mocha Velvet Matte with Glossy Chocolate Tips
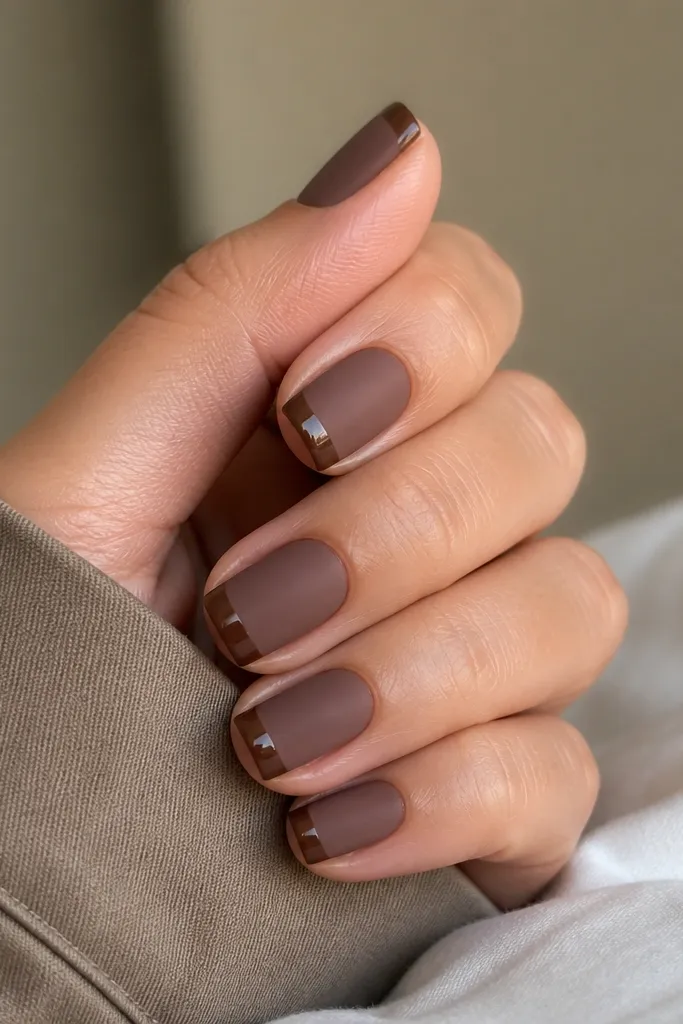
Paint a solid mocha brown base and let it cure or dry. Apply a matte top coat to the entire nail and wait for it to set fully. Then add a glossy chocolate layer only at the tips using a French guide or a thin strip of tape, keeping the tip width about 2-3 mm. Cure or dry the glossy tips and clean the edges. Seal the tips with one more glossy coat if you want extra shine.
Texture is what makes this look feel like fall even before you add art. A mocha matte base looks like suede, and the glossy chocolate tips add a highlight that makes short nails look dressed up. This combo flatters medium to deep skin tones because the brown tones show strong contrast against natural hands. On fair skin, it still works — just choose a slightly warmer mocha so it doesn’t read gray.
Skip thisAvoid mixing matte and gloss on the whole nail; the look turns flat and messy on short lengths.
Editor's noteIf matte top coat makes your color look dull, add one glossy coat only to the tips — the contrast brings it back fast.
8. Rust Orange Scattered Glitter Only at the Center
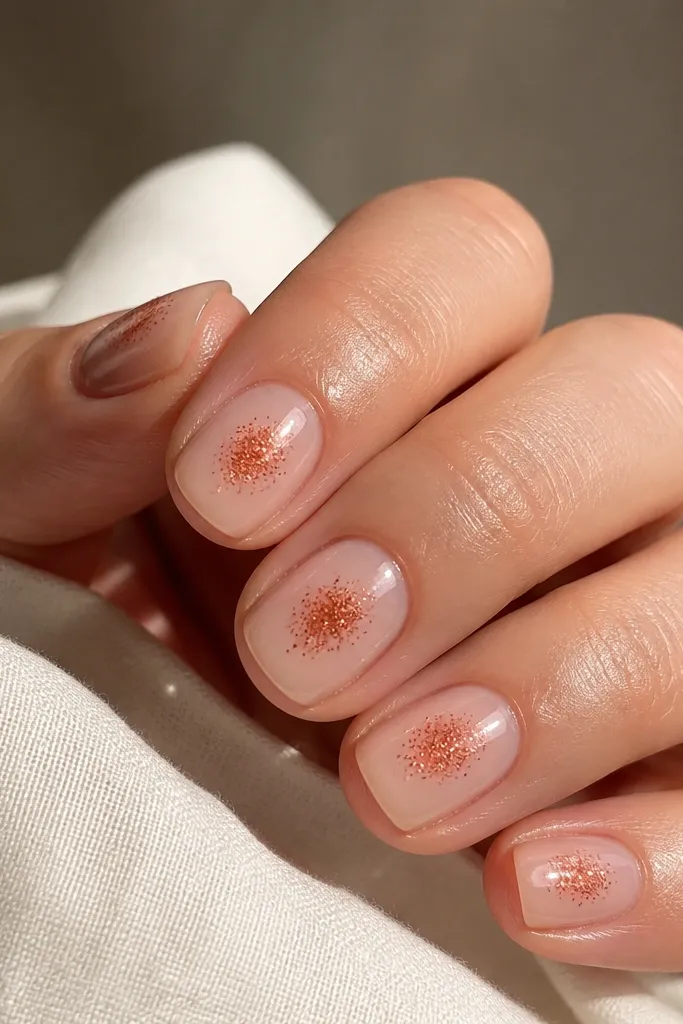
Start with a sheer nude base and build it to opacity with two thin coats. Add a tiny amount of rust-orange glitter gel or loose glitter mixed into clear gel just in the center — think a small oval, not a full nail. Use a dotting tool or a small brush to keep glitter away from the sidewalls. Cure, then apply a glossy top coat that smooths over the glitter so it doesn’t catch on fabric.
Glitter can look amazing on short nails if you keep it controlled. Concentrating rust-orange micro glitter in the center gives you that fall sparkle without the “all over” effect that makes nails look shorter. The sheer nude base keeps your nail bed visible, which visually lengthens. This is a great choice for holiday dinners because it looks festive but still clean enough for daytime.
Skip thisSkip full-nail glitter; it makes short nails look thicker and shorter.
Editor's notePress a piece of tissue lightly on the nail before top coat — it knocks down stray glitter that would otherwise look messy.
9. Chocolate Swirl Accent with Caramel Outline
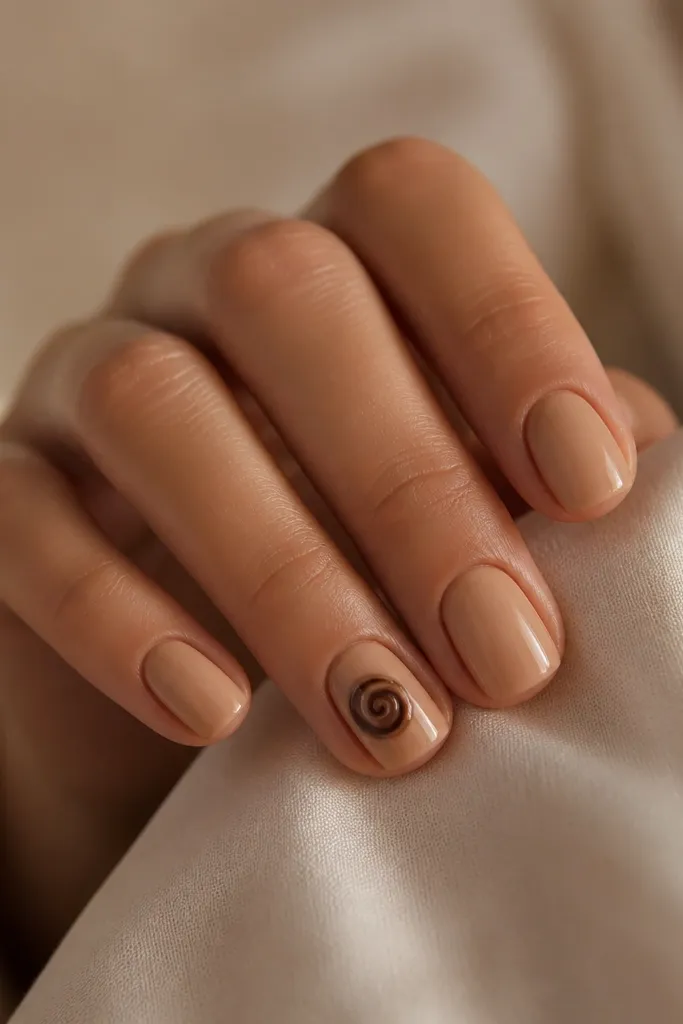
Paint all nails with caramel nude and cure or dry fully. Choose one accent nail and draw a small swirl in chocolate-brown using a fine brush — keep it within the center third of the nail. Then outline the swirl with caramel polish or gel, staying just outside your chocolate line. Add a tiny highlight dot at one end of the swirl if you want it to look more dimensional. Finish with one glossy top coat on every nail.
Swirls feel fancy, but you need them small on short nails. The caramel nude base keeps it warm and wearable, while the chocolate swirl adds depth. Outlining the swirl in caramel makes it look intentional and prevents the chocolate from blending into the base. This set flatters hands that like warm tones — it’s especially flattering on nails with slight ridges because the glossy base smooths the look.
Skip thisAvoid large swirls that hit the tip; they overwhelm short nail shapes.
Editor's noteIf the swirl looks shaky, draw it lightly first, then trace over the darkest part once it’s dry to the touch.
10. Autumn Plaid with Two Colors on an Accent Nail
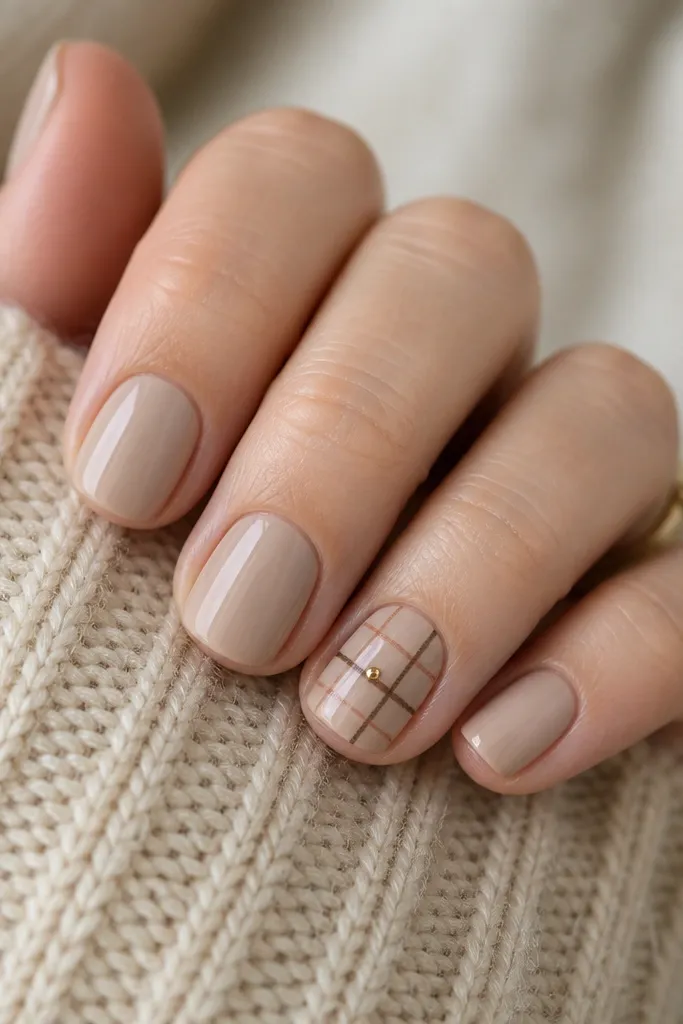
Paint all nails with oat-nude and cure or dry completely. On one accent nail only, add a burnt orange grid using a striping brush: one vertical line set and one horizontal line set, keeping the lines thin (about 0.5-1 mm). Let those lines dry, then add dark brown lines crossing to form small squares in the top half of the nail. Place one tiny gold dot in the center square as a focal point. Seal with glossy top coat, and be extra careful around the plaid edges so they stay smooth.
Plaid is a fall staple, and the secret is keeping it minimal. Two-color plaid on one accent nail gives you that cozy sweater vibe without turning every finger into a pattern overload. The oat-nude base makes the plaid look crisp, and the thin lines stay readable on short nails. I like this for autumn weekends because it looks cute with boots and a chunky knit, but it still feels neat when you wear it to brunch.
Skip thisAvoid plaid on every nail; short nails need breathing room.
Editor's noteUse nail tape for the first grid if your freehand lines wobble; remove the tape while the polish is still slightly tacky for cleaner corners.



