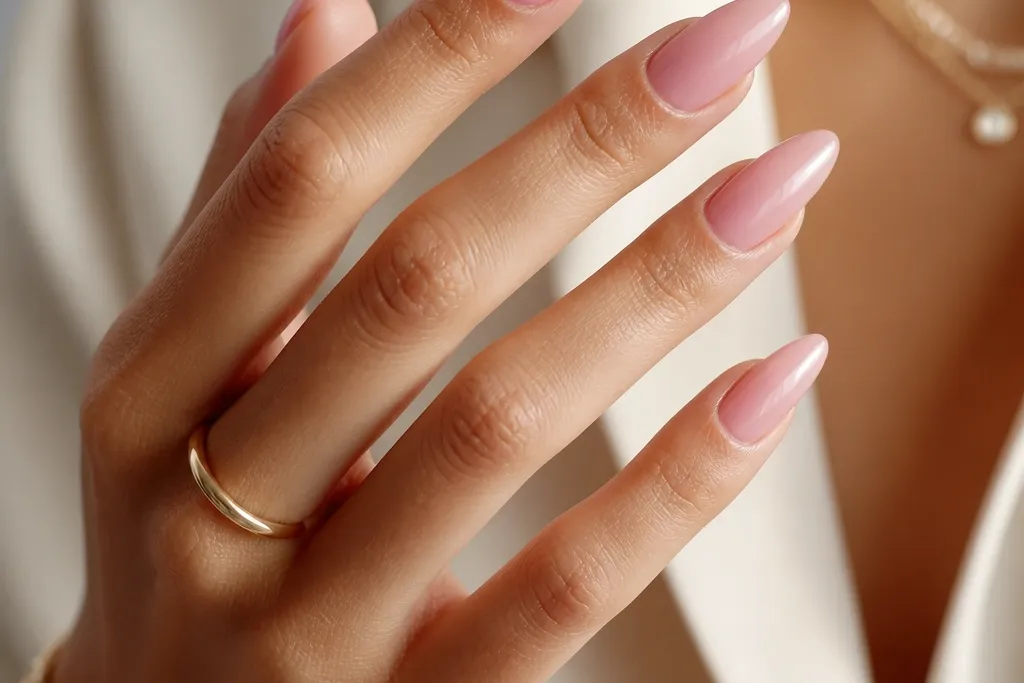
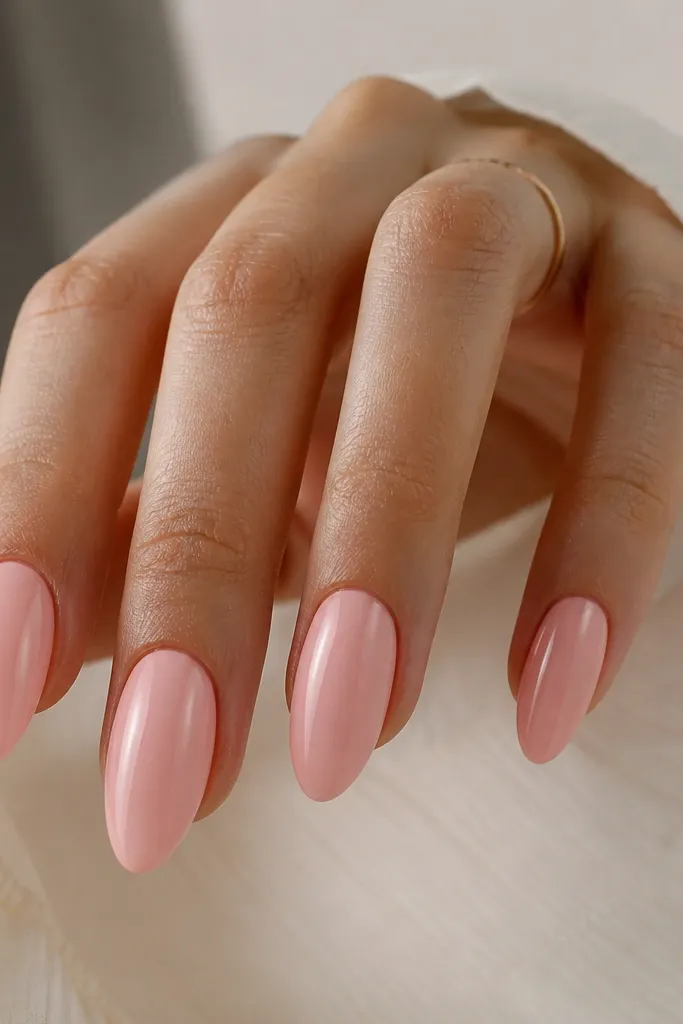
1. Sheer Blush Base with Micro-White French Arc
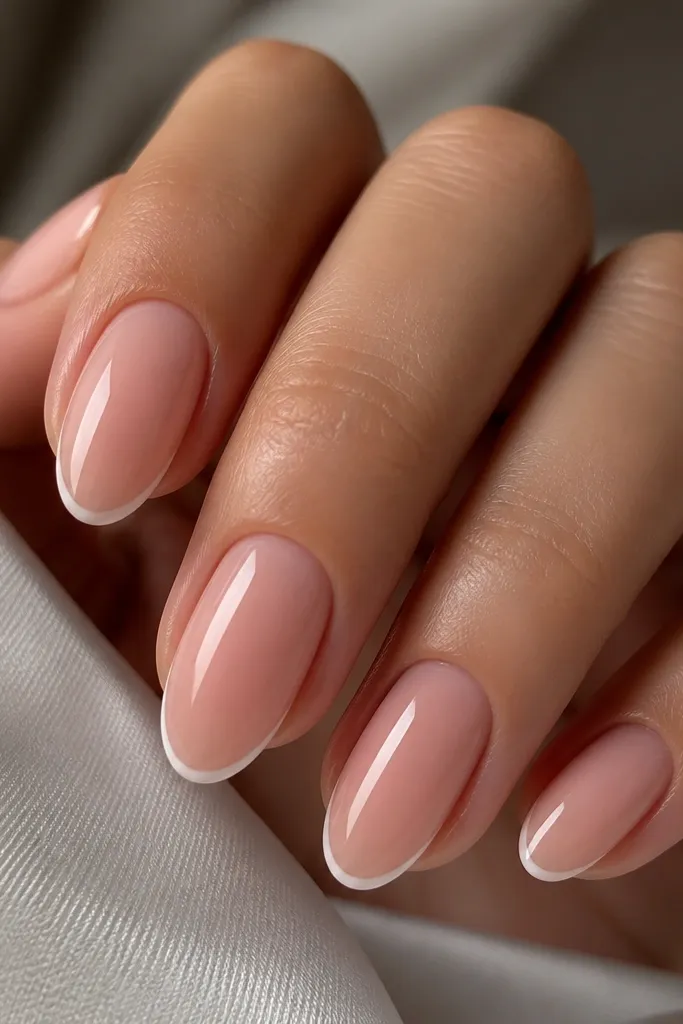
This is the “looks like you were born with perfect nails” version. The base is a sheer blush pink that shows a little nail line underneath, so it reads airy instead of heavy. The French tip is micro-thin white, not a thick band, and the arc is tight and centered for that salon-fresh precision. I like it on light to medium skin tones because the pink warms the hand without washing it out; on deeper skin tones it still pops because the pink stays translucent rather than gray. Wear it to work, dates, and anything where you want polished without decoration.
Start by prepping the nail surface and filing to an almond shape with a narrow apex — stop the width before it looks pointy. Apply a sheer blush pink gel in two thin coats, curing each time, then wipe the tacky layer if your system uses it. Use a striping gel and a gel liner brush to draw the French arc starting about 1 mm inside each sidewall, then make the center line slightly thinner. Fill the tip with a second light layer of white gel so it stays crisp and doesn’t flood the sides. Finish with a glossy top coat and clean the edges with a detail brush dipped in gel cleanser.
Editor's noteIf your white looks chalky, switch to a gel white that’s labeled “opaque” and keep your coats thin — thick white is what turns cheap-looking.
Skip thisAvoid painting white straight to the sidewalls; it makes the tip look wide and blocky.
2. Pink Gradient French with Clear Jelly Smile
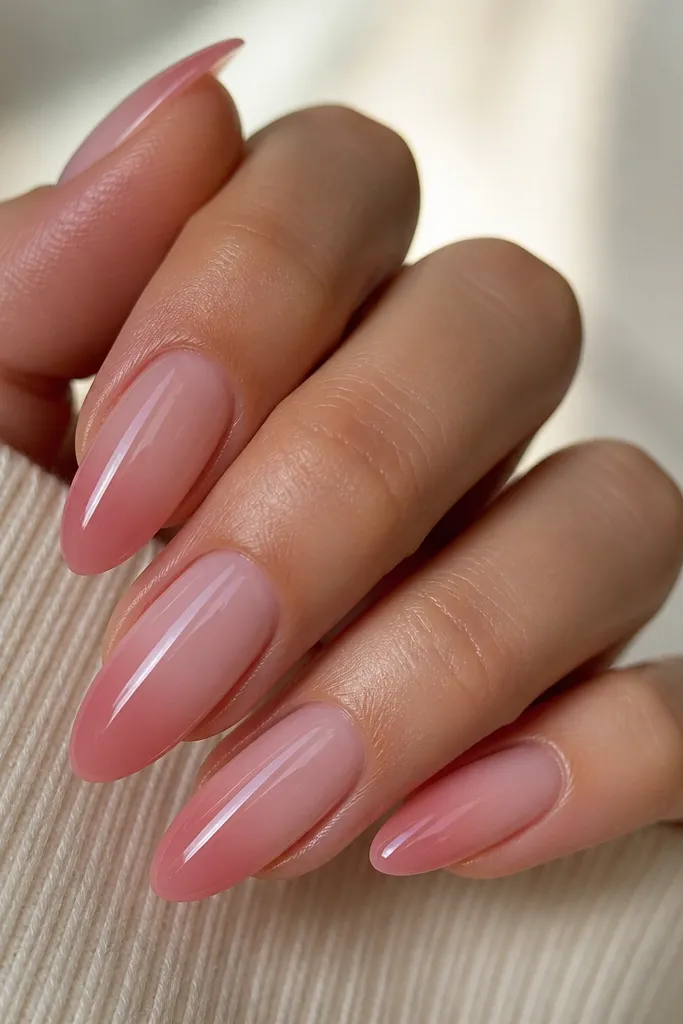
This design looks expensive because it doesn’t rely on a single flat color. The base stays semi-sheer and the French tip is built as a gradient: clear jelly near the smile, then baby pink, then a slightly deeper rosy blush at the free edge. The clear center makes the nail look longer and gives a glassy dimension under flash. It flatters hands with shorter nail beds because the jelly area visually stretches the middle. It’s also flattering on cool and neutral undertones since the pink stays soft instead of warm-orange.
Start with a sheer pink base gel, two thin coats, cured fully. Next, apply a clear jelly layer across the upper mid-nail where you want the smile line to sit, then cure. With a slightly deeper blush gel, tap color onto the outer edge and blend inward with a silicone blending tool or the brush tip, keeping the center clearer. Build one more blush layer at the very tip so the free edge is the deepest tone. Seal with a thick, high-gloss top coat to smooth the gradient and make it look like glass.
Editor's noteUse a dotting tool to place the deepest blush at the tip first, then blend outward — it keeps the gradient controlled.
Skip thisSkip the thick “marbled” blending; muddy gradients come from overworking the gel.
3. Classic French with Rose Quartz Pink Base
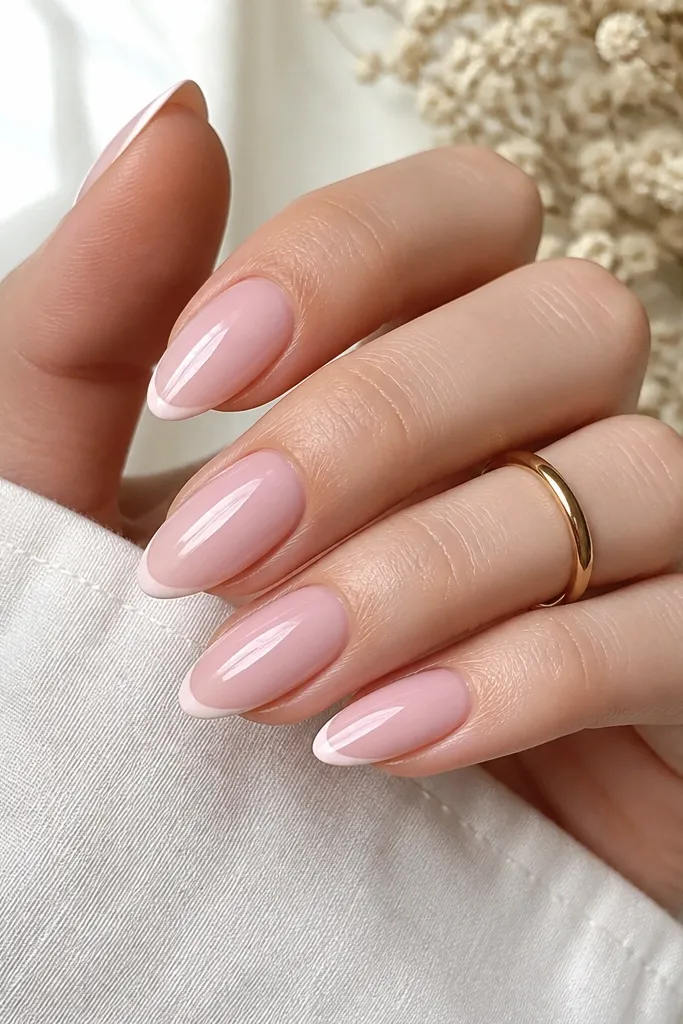
This one is for when you want classic French but with a more elevated pink. The rose-quartz base is slightly milky and rosy, so it looks luxe even with no extra beads or gems. The white tip is narrow and clean, and the contrast is strong enough to look sharp on camera. I’ve worn this on hands with dry cuticles because the milky base helps hide unevenness after prep. It also looks great on both short-to-medium almond lengths since the milky pink gives coverage without making the nail look bulky.
File to almond, then clean the cuticle area carefully so the base can sit flat. Apply a rose-quartz milky pink gel in two coats, curing each, and make sure the second coat is smooth over the sidewalls. Draw the French arc with a thin liner brush and gel white, keeping the line about 1 mm inset from the sidewalls. Fill only the free edge with a light layer of white so the arc stays crisp. Finish with top coat, then cure and wipe if your system requires it.
Editor's noteAfter curing, run a lint-free wipe lightly over the sidewalls and check under a lamp — you want no white fuzz at the edges.
Skip thisDon’t use a super sheer base here; the rose-quartz look needs a little milky coverage to read luxe.
4. Gold Foil Half-Moon at the French Smile
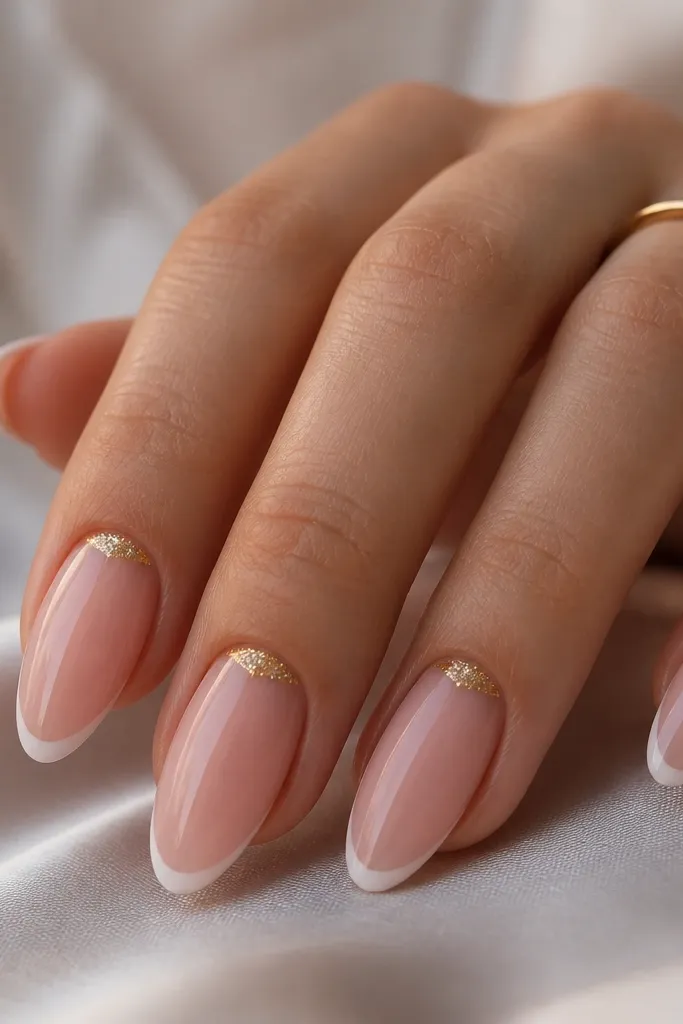
Gold foil at the smile line is the fastest way I know to make pink French feel high-end. The trick is keeping the gold small — a half-moon centered where the smile arc sits — so it looks intentional, not like you spilled glitter. The sheer pink base keeps the gold from overpowering, and the thin white tip stays crisp. This flatters most skin tones because gold reflects warm light, and the pink base softens the contrast. It’s perfect for events where you want “pretty nails” without full rhinestone chaos.
Prep and shape your almond nails, then apply a sheer pink base in two thin coats. Paint the French tip with a micro-thin white arc, keeping it inset from the sidewalls. For the gold, place a small strip of gold foil transfer or tiny foil flakes on a thin layer of tacky gel right at the center of the smile line, then cure. Use a top coat to encapsulate the foil so it feels smooth, not scratchy. After curing, clean the edges with a detail brush so the foil doesn’t smear into the white.
Press the foil with the flat back of a silicone tool for 2-3 seconds, then stop. Over-pressing makes it spread too far.
Avoid covering the entire smile; a small half-moon looks expensive, a full band looks busy.
5. Pearlized Pink Base with White French and Tiny Dots
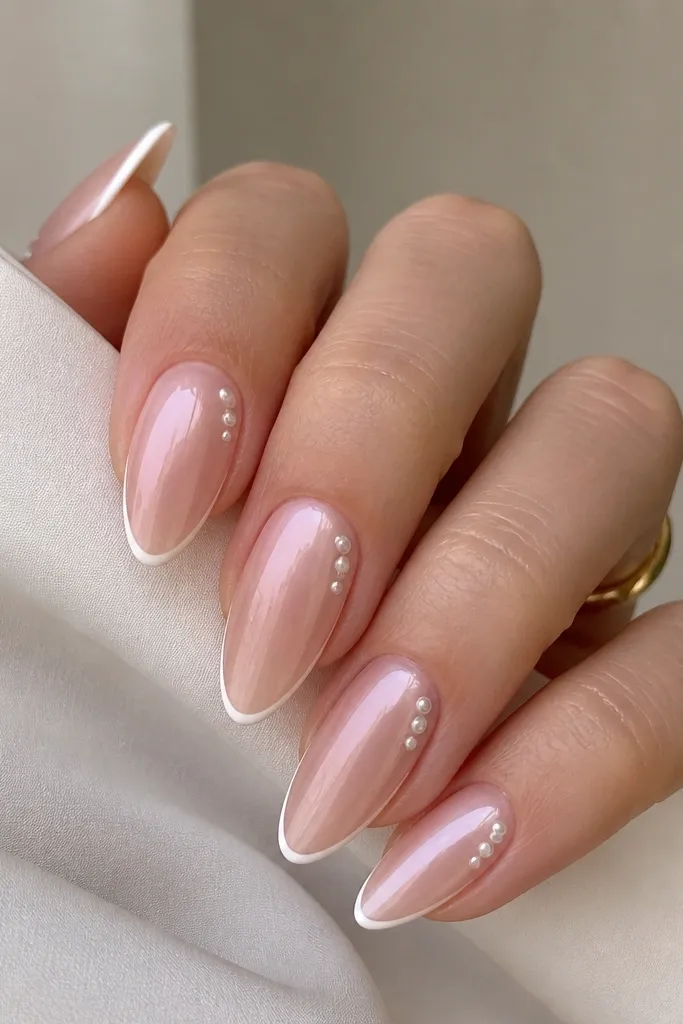
Pearlized pink changes the whole mood because it adds a soft glow under light without looking like glitter. The base has a subtle pearly sheen, then the French tip stays clean and white so the design reads sharp. Tiny dots near the apex give a “jewelry” feel, especially on hands that show a bit of nail bed when you gesture. I like it on medium to deep skin tones because the pearl glow looks dimensional rather than pale. It’s also a great option if you hate full rhinestones but still want something special.
Apply a pearlized pink gel base in two coats, making sure the finish is smooth and not gritty. Paint a micro-thin white French tip, cured and cleaned at the edges. With a dotting tool and a small amount of builder gel, place 2-3 micro pearls (or pearl gel dots) on one side of the nail near the apex, spacing them evenly. Cure carefully, then apply a thin top coat over the pearls to lock them in. Finish with a full top coat for uniform shine.
Use micro pearls that are labeled “SS3 or smaller” so they sit flat and don’t snag on hair or clothing.
Skip big pearl beads; they lift at the edges and make the set look DIY.
6. Rose Pink French with Chrome Center Line
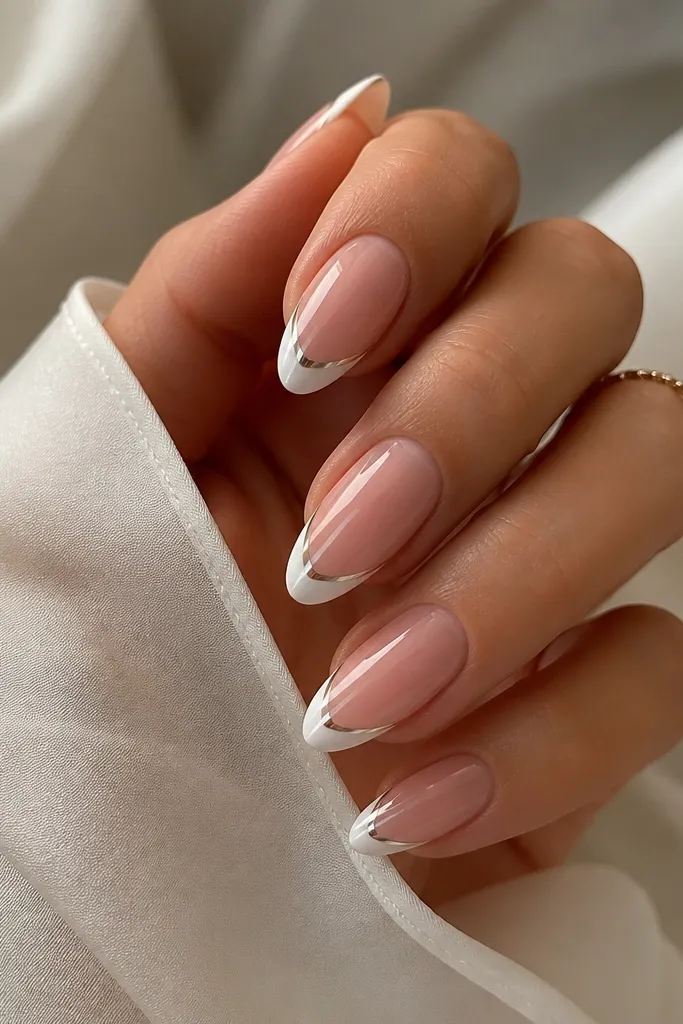
This is the one I reach for when I want modern and luxe at the same time. The rose-pink base gives warmth, the French tip stays crisp, and the chrome center line adds a clean, high-fashion highlight. It flatters hands with a longer almond shape because the center line elongates the nail visually. If your skin tone runs cool, silver chrome looks especially crisp; warm undertones still work because the rose base balances it. Wear it with silver rings or a simple bracelet so the details don’t fight your jewelry.
Start with a rose-pink gel base in two thin coats, curing fully. Paint the French tip in white using a liner brush and keep the line narrow and centered. Apply a thin strip of clear tacky gel exactly down the center of the white tip, then cure briefly if your system needs it (follow your gel brand timing). Buff chrome powder over the tacky strip and press lightly, then tap off excess. Seal with top coat in a careful layer so you don’t smear chrome into the white edges.
Editor's noteSeal with a slightly thicker top coat only after you’ve checked the chrome line under a lamp — you want it crisp before encapsulating.
Skip thisDon’t drag chrome powder across the whole French tip; it turns the look from chic to cloudy.
7. Blush Pink French with Glitter Fade Edge
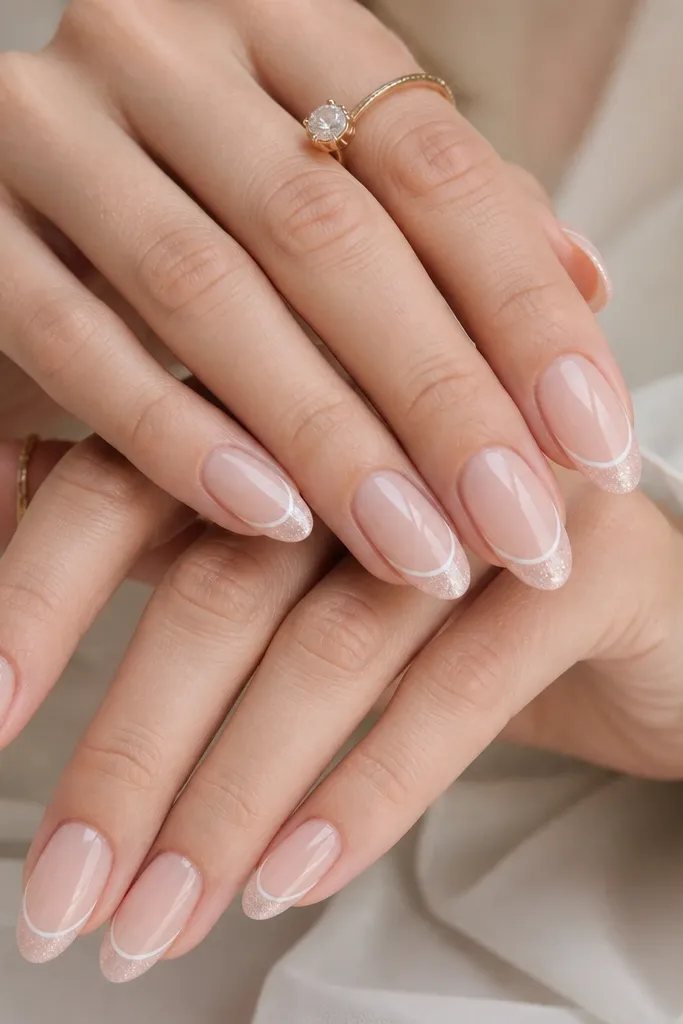
A glitter fade tip reads luxe because it’s controlled, not scattered. The base is sheer blush, the French is still crisp, and then the very edge gets a whisper of sparkle. That fade makes the nails look like they catch light naturally, not like you dumped glitter on top. This flatters short-to-medium almond lengths because the glitter stays at the free edge and doesn’t take up the nail bed. It also looks good on cooler undertones because the glitter is usually silver-pink rather than warm gold.
Paint a sheer blush base in two thin coats and cure. Create the French tip with micro-thin white, making sure the smile arc is even. For the glitter, use a fine pink-silver glitter gel and apply it only at the extreme tip — about 1-2 mm wide. Blend backward slightly with the brush tip so it fades into the white, then cure. Finish with a glossy top coat, applying a gentle second coat if the glitter needs full encapsulation.
Editor's noteUse a flat brush to “sweep” the glitter fade backward once, then stop. Repeated strokes pull glitter into streaks.
Skip thisAvoid chunky glitter; it sits unevenly and makes the French line look messy.
8. Negative Space French with Pink Almond Tips
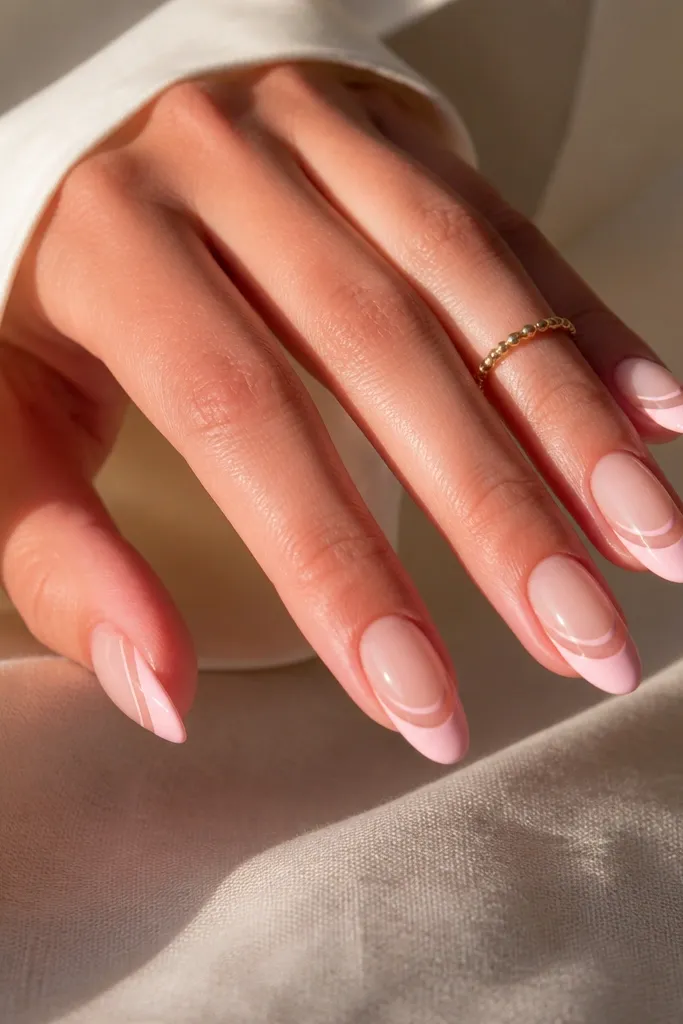
Negative space makes French look modern and expensive because your natural nail becomes part of the design. Instead of covering everything with pink, you keep the center clearer and let the almond shape do the work. The pink tip is still defined — it’s just not painted like a solid slab. This is flattering on nails that already have a nice natural shape, and it looks great on hands that show some nail bed length. If you hate heavy coverage, this is the set that feels light but still looks styled.
Start with a clean natural base and a thin layer of clear gel for adhesion. Map your French arc, but keep the area under the smile more transparent. Apply a sheer pink gel only on the free edge, keeping the sides crisp and the apex thin. Cure, then add a second thin pink layer at the very tip if you need more opacity. Seal with top coat, and use a detail brush to remove any pink smears from the negative-space window.
Editor's noteOutline the arc with a thin line first before you fill the pink tip — it keeps the negative space clean.
Skip thisDon’t let the pink touch the sidewalls unevenly; uneven negative space reads sloppy.
9. Soft Pink French with Faint Rose Vein Lines
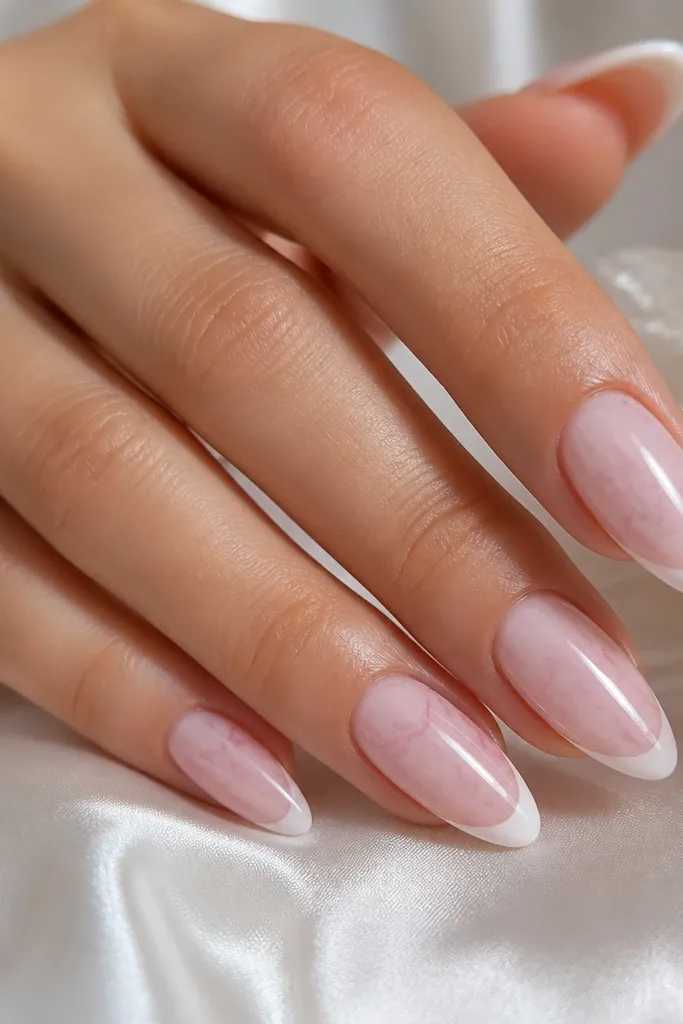
This looks like rose quartz without the chunky sparkle. The base is milky soft pink, and the French tip stays crisp white so the veins don’t overpower. The marble-like lines are thin and faint — just enough to add movement when you tilt your hand. I like it for spring events and vacations because it feels romantic but still neat. It flatters most skin tones since the palette stays in the same pink family. It’s also great if you want something more interesting than plain French but still wearable.
Apply a milky soft pink base in two coats and cure, then paint your micro-thin white French arc. With a fine liner brush, draw 2-3 faint rose vein lines on the pink area just above the French tip, using a slightly deeper pink gel. Keep the lines broken and thin so they look like natural stone, not thick stripes. Cure and check under light, then add one more ultra-thin line only if it looks too plain. Finish with top coat, making sure the lines are sealed smoothly.
Editor's noteUse a lighter touch than you think — the veins should whisper, not shout.
Skip thisAvoid bold marble swirls; thick lines turn the whole set into a sticker look.
10. Blush Pink French with Tiny Rhinestone Cluster
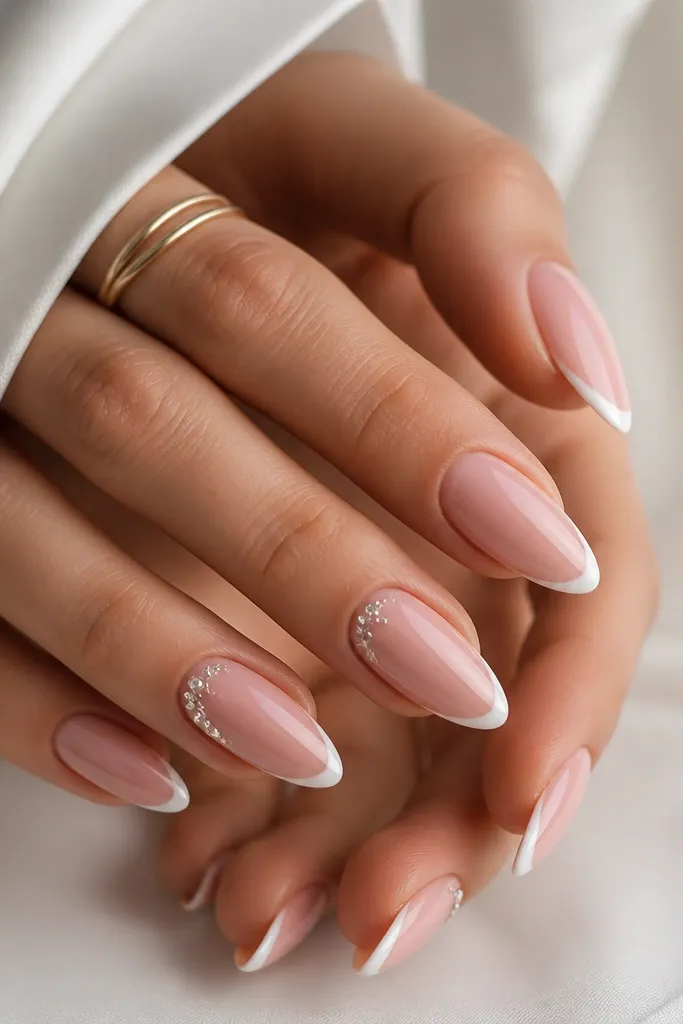
A tiny rhinestone cluster is how you get “high-end bridal” without going full bedazzle. Keep the rhinestones micro and place them only on one side near the apex so your nails still look clean. The sheer blush base and thin white French line keep the set from feeling heavy. This flatters hands that need a little lift — the apex placement draws the eye upward. It also looks great for weddings because the clear stones catch light like jewelry. Wear it with pearl earrings or a simple gold chain bracelet.
Start with a sheer blush base in two coats and cure. Paint a micro-thin white French tip, keeping the arc sharp. For the stones, use a small amount of clear builder gel at the apex area and place 3-5 micro rhinestones in a tight cluster, cured in place. Cap with a thin top coat over the stones so they feel smooth. Repeat only on accent nails (like ring fingers and possibly thumbs) so the set stays chic.
Editor's notePlace stones on the side where your hand naturally shows the most when you hold your phone — it makes the sparkle land where you notice it.
Skip thisAvoid one huge stone in the center; it looks like a craft project.
11. Hot Pink Accent French on a Nude Almond Base
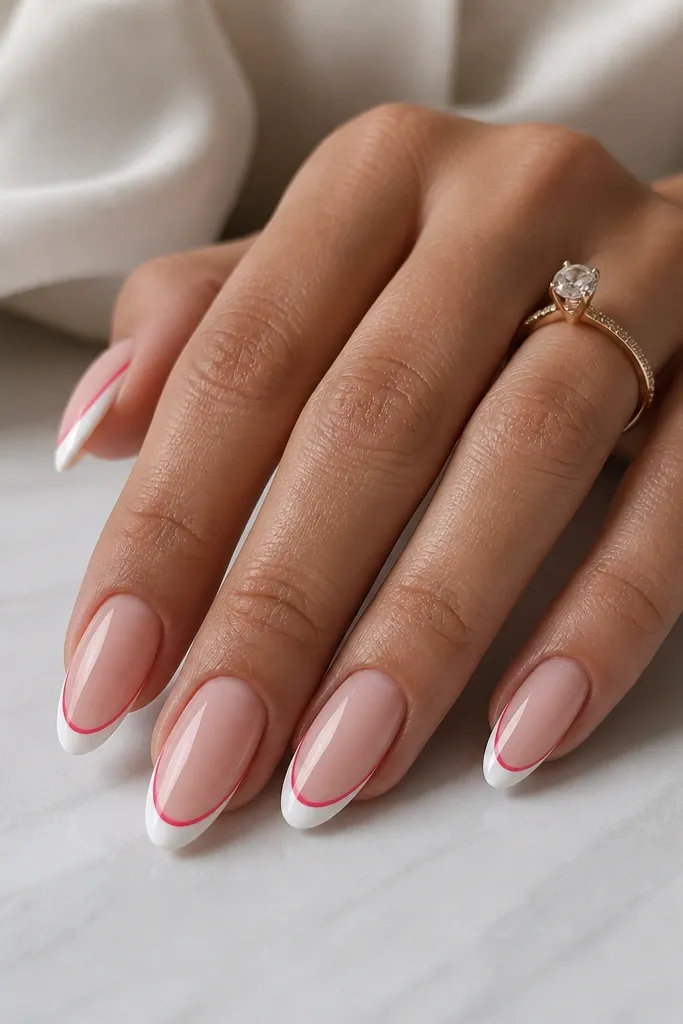
This is luxe because it’s controlled contrast. You get the clean French look from the white tip, but a thin hot pink inner line adds a modern edge that looks designer in photos. The base stays nude-blush so the hot pink doesn’t overpower your hand. I like this for people who want something fun without going full color-block. It flatters warm skin tones especially, but cool undertones still look good because hot pink is bright and intentional. It’s perfect for nights out, birthdays, and summer outfits.
File almond shape and apply a nude-blush base gel in two coats. Paint the standard French tip in crisp white and cure. Now add the accent: with a fine liner brush, draw a second line about 0.5 mm inside the white edge using hot pink gel. Keep the accent line straight and even across each nail, then cure again. Seal with a glossy top coat, and wipe any stray hot pink from the nail sides with a detail brush.
Editor's noteUse a gel liner brush that’s at least 6-8 mm wide tip — you want control, not spiky lines.
Skip thisAvoid thick inner lines; chunky double French looks juvenile.
12. Pink Almond French with Matte Blush Base and Gloss Tips
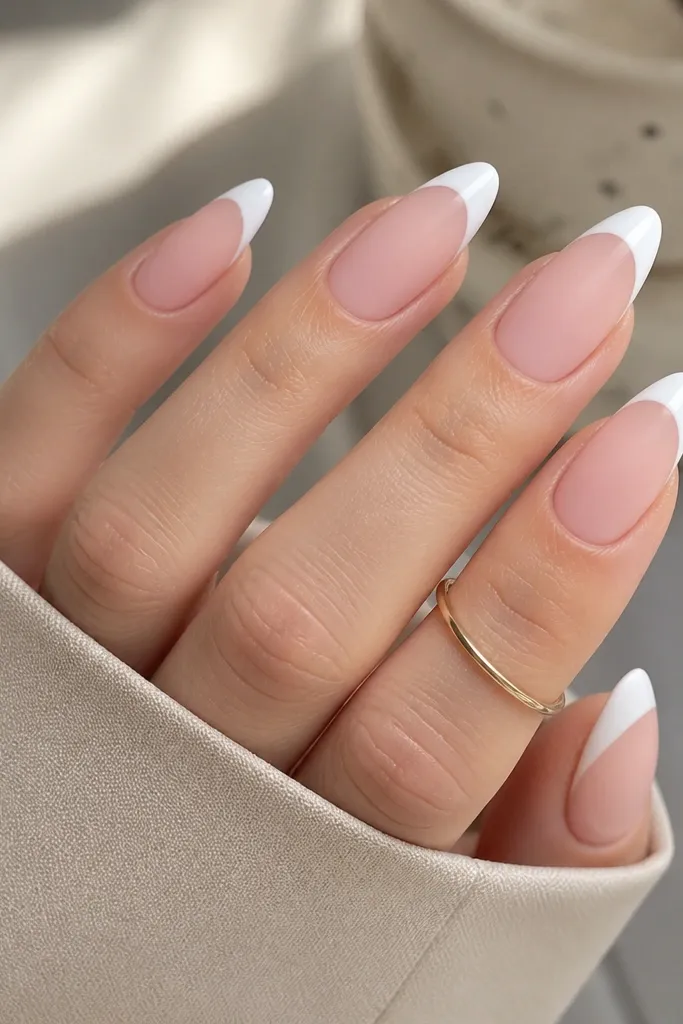
Matte base plus glossy French tip looks high-end because it creates texture contrast without adding extra decoration. The matte blush makes the pink feel soft and “velvet,” while the glossy white keeps the French line crisp and photo-ready. This design flatters hands with fine lines or slight nail texture because matte hides tiny surface imperfections better than full gloss. It also looks great on medium to deep skin tones because the matte blush reads warm and the gloss tip reflects light. Wear it for fall events or anytime you want something different from standard shiny gel.
Prep and shape your almond nails, then apply blush gel base in two thin coats and cure. Skip the top coat at first and use a matte top coat only over the pink base area, avoiding the French tip area. Paint the French tip in white gel and cure, then apply glossy top coat over just the French tip. Clean the transition line between matte and gloss with a small brush dipped in cleanser. Cure fully and check under light to make sure the arc line stays sharp.
Editor's noteDo the matte top coat after your French is painted so you don’t accidentally dull the white.
Skip thisAvoid matte on the whole nail; the French tip loses its crisp, luxe contrast.
13. Blush Pink French with Micro-Glitter Halo at the Apex
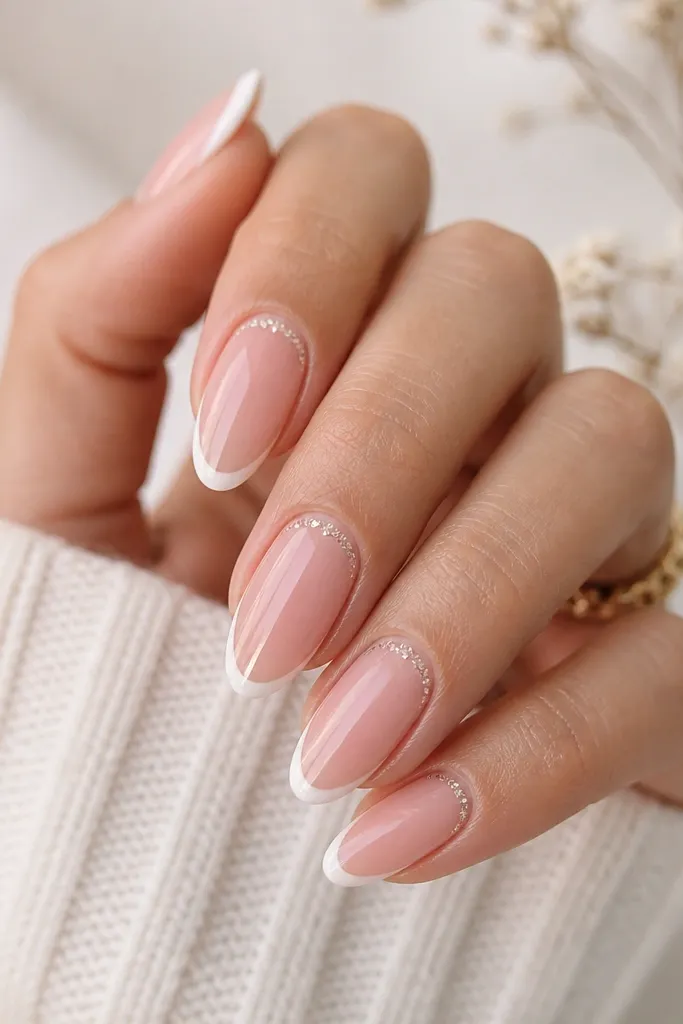
A micro-glitter halo at the apex is a subtle way to add drama without turning the whole nail into glitter. The base stays sheer and clean, the French tip is thin and bright, and the glitter sits only at the top point where your eye naturally lands. It flatters short almond lengths because the halo pulls attention upward. I also like it for hands with short nail beds since the glitter crown creates a visual lift. It’s a great choice if you want something fun for holidays but still want a clean, modern French shape.
Apply a sheer blush base in two coats and cure. Paint micro-thin white French tips and cure, then clean the edges. For the halo, use a tiny amount of clear builder gel at the apex area, then place fine micro-glitter so it forms a crescent/crown shape. Use a small brush to shape the glitter, then cure. Finish with a glossy top coat, capping carefully so the glitter doesn’t catch on fabric.
Editor's noteKeep the halo smaller than a sesame seed — if it’s too big, it looks like a mistake instead of a design.
Skip thisDon’t sprinkle glitter randomly across the tip; it kills the crisp French effect.
14. Pink French with Matte Rose-Satin Side Panels
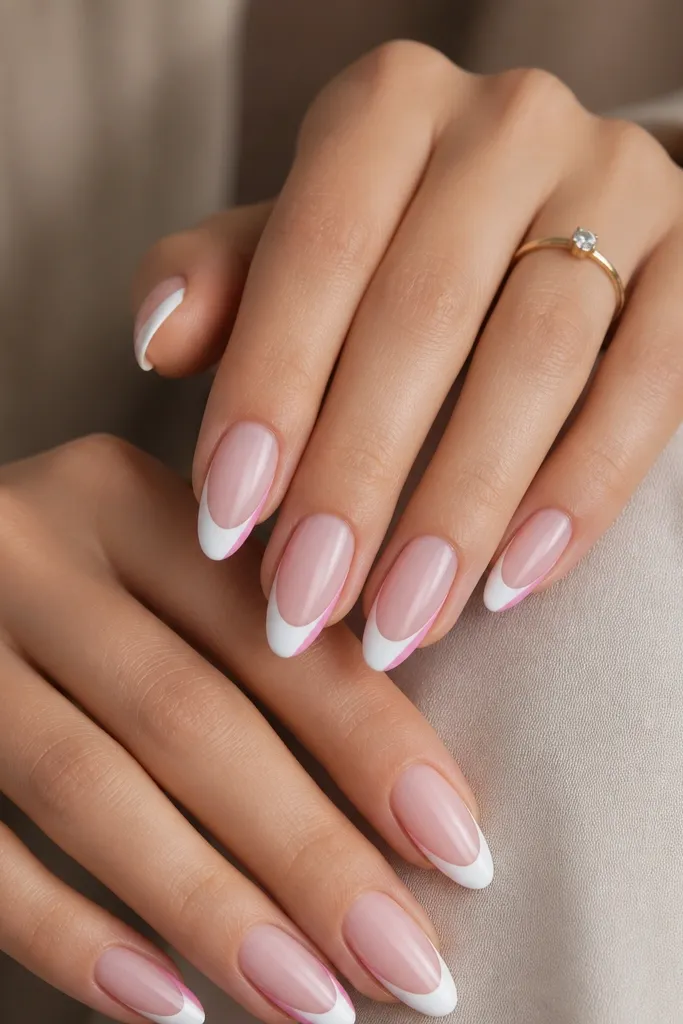
This one feels designer because it adds structure. The side panels are matte rose-satin, which gives a soft, controlled texture on the sides while keeping the center lighter. The glossy white French tip stays crisp and bright, so the whole nail looks intentional and sculpted. I like it on hands that have wider nail beds because the matte side panels visually slim the nail. It also looks great for formal events since the texture contrast reads expensive even without stones. Pair it with simple rings so the nails stay the focus.
Start with a translucent sheer pink base, two thin coats. Paint the French tip in glossy white and cure. For the side panels, use a matte rose-satin gel and brush it along the sidewalls only — keep it about 1-2 mm wide from the center. Cure each nail, then apply glossy top coat only over the French tip and a thin clear top coat over the center so it stays smooth. Avoid flooding the matte panels with gloss, or they lose the satin look.
Editor's noteUse a striping brush and keep your strokes vertical — horizontal smears make the side panels look uneven.
Skip thisAvoid matte product on the cuticle area; it can look chalky right where you need it clean.
15. Pearl-Edge French Tip with Blush Center Glow
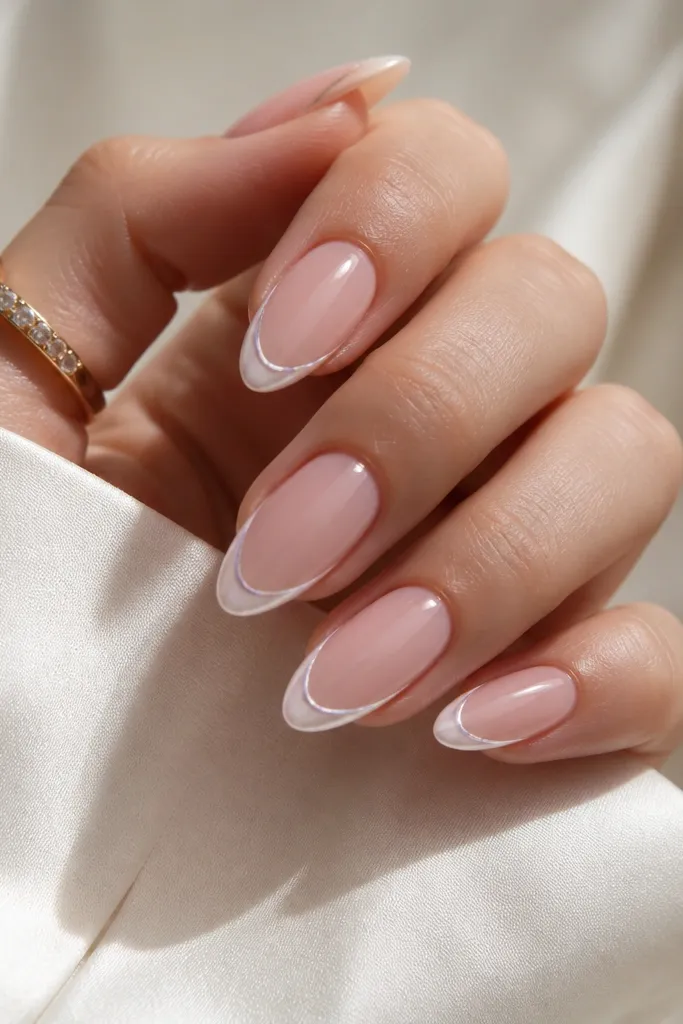
A pearl-edge rim is a classy way to make French tips look custom. The blush center glow keeps the pink from looking flat, while the pearlized rim at the outer edge adds dimension that looks expensive under flash. The white tip stays clean, and the pearl rim gives a jewelry-like border effect. This flatters nearly everyone because the pearl rim is subtle and matches both gold and silver jewelry. It’s perfect for bridal parties and holiday dinners when you want nails that look “put together” in every photo.
Apply a blush pink base gel in two coats, keeping it smooth and slightly sheer. Paint the French tip in white and cure. Now add the pearl rim: use a pearlized white or opal pigment gel and draw a very thin line along the outer free-edge border only, about 0.3-0.5 mm wide. Cure, then cap with a glossy top coat to seal and smooth. Clean the edges with a detail brush so the pearl rim doesn’t smear onto the nail face.
Editor's noteZoom in under a lamp and check the rim thickness — it should be a hairline, not a band.
Skip thisDon’t cover the whole French tip in pearl; the rim is what makes it feel high-end.