1. Milk Pink Glazed Chrome Almonds
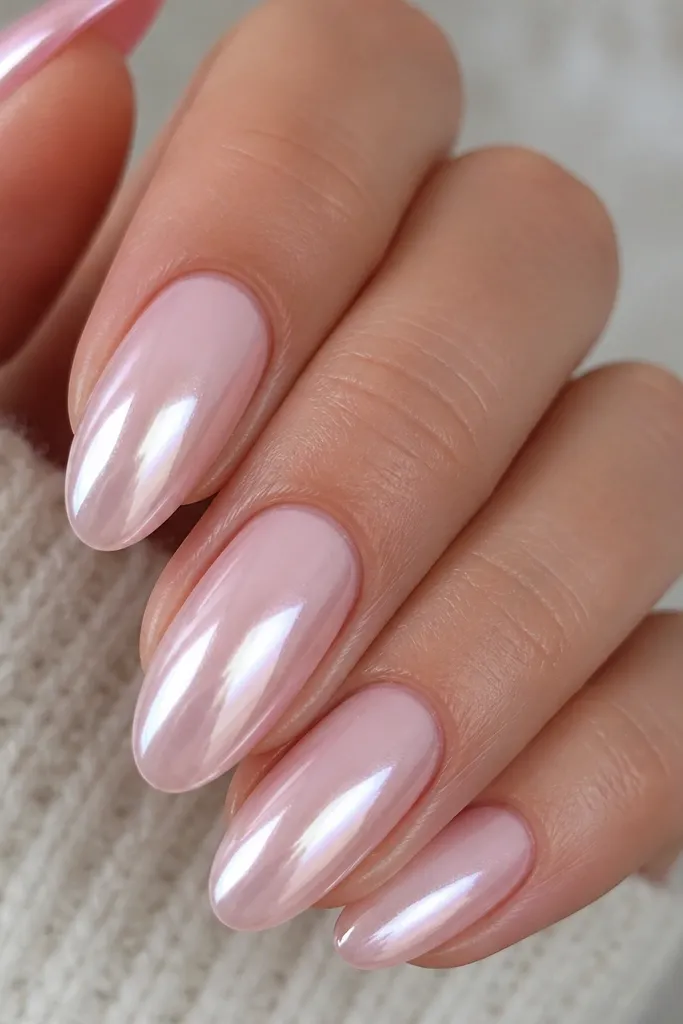
This one is the glazed glam option that looks expensive even with a simple outfit. The pink is milky and creamy, not transparent, so the chrome reads as “lit” rather than dusty. I use a silver chrome that’s finely milled, then I buff it into a soft gradient so it brightens toward the free edge. It flatters most skin tones because the base is neutral-pink and the chrome is cool-toned. If you have shorter almond nails, this design still elongates because the chrome gradient pulls the eye down the nail.
Start by filing your almond shape and pushing back the cuticle, then apply a thin pink builder layer and cure fully. Next, add a slightly tacky layer of clear or sheer builder, then tap silver chrome lightly in the middle and blend it with a soft silicone tool so it fades toward the tip. Wipe away extra chrome from the sides so the sidewalls stay clean. Finally, seal with a no-wipe high-shine top coat in thin strokes, then cap the free edge.
Editor's noteFor extra glass, do a second thin top coat after 2 minutes of curing and let it self-level before full cure.
Skip thisDon’t rub chrome hard against the nail — it creates flat patches that look like powder.
2. Rose Quartz Pink + Mirror Chrome Center Stripe
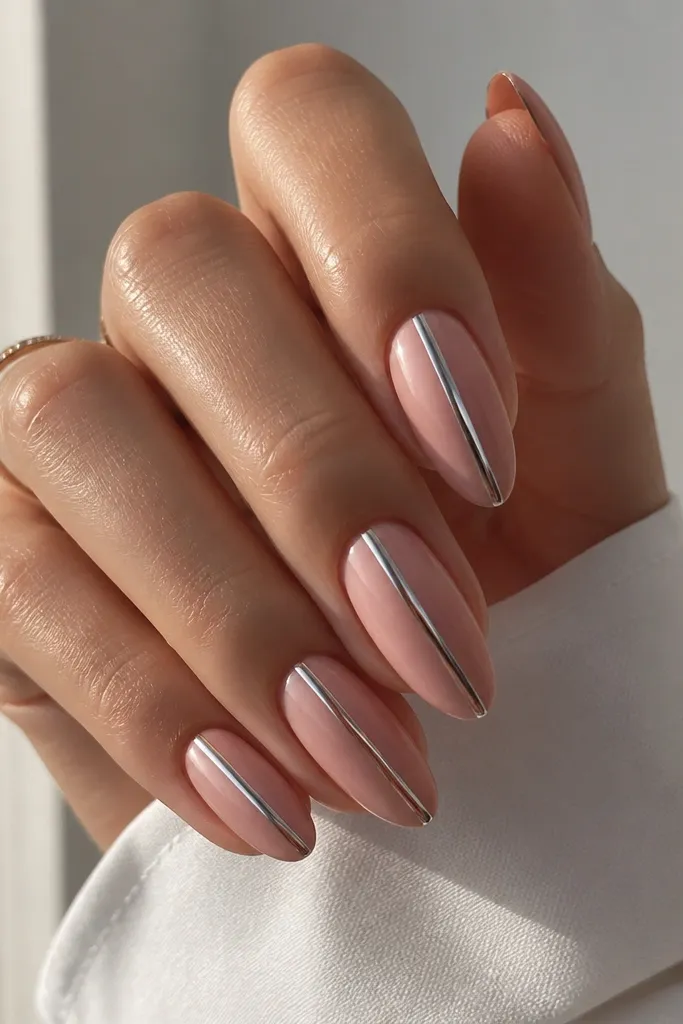
A center stripe is my go-to when someone wants “pink but not too much.” The rose quartz pink has a touch more warmth than the milky pink, so it looks gorgeous on medium to deep skin tones. The mirror chrome is placed only down the center, which keeps the nail looking longer and slimmer. The stripe also hides small imperfections because it draws attention to one crisp line. For photos, the stripe catches light even when you’re not in direct sun, so your nails look sharp in indoor lighting.
Start with a rose-pink base that’s smooth and self-leveling, then cure. Use a thin strip of clear builder or gel along the center of the nail, staying about 1/3 of the nail width so it doesn’t spill toward the sidewalls. Press mirror chrome onto that center line, then gently tap off excess with a dry sponge applicator. Seal with a glossy top coat, and cap the stripe edges so the chrome doesn’t lift.
Editor's noteIf your stripe looks too thick, scrape the gel off the side with a small brush before applying chrome.
Skip thisDon’t let chrome touch the sidewalls — it makes almond nails look wider and shorter.
3. Blush Pink Half-Moon Chrome Almonds
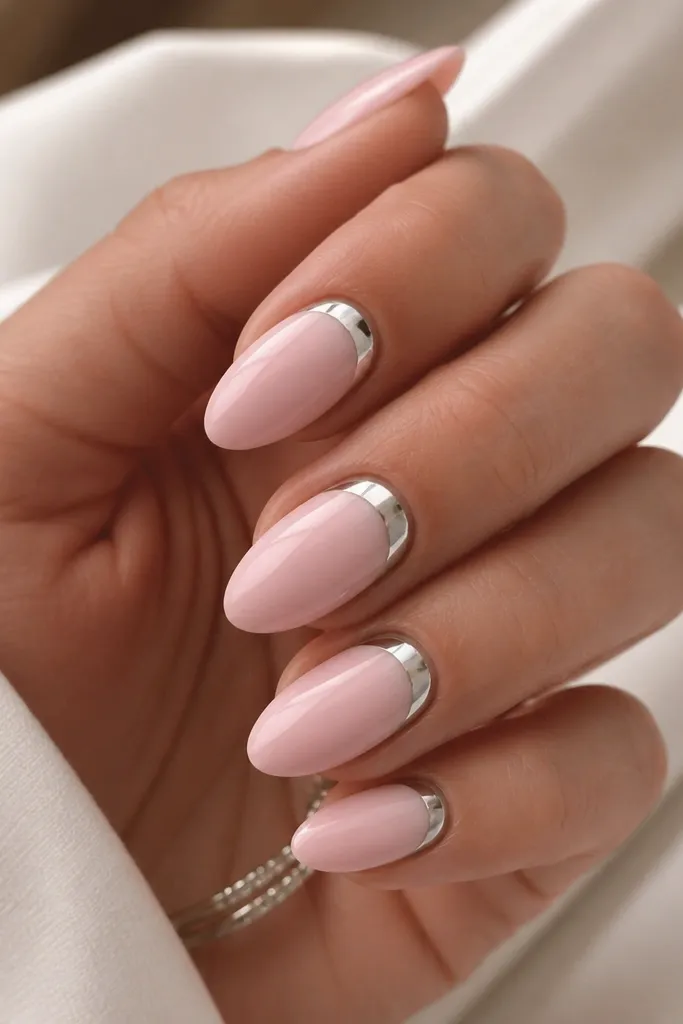
Half-moon chrome is the cleanest “best vs” choice when you want glam without full coverage. The blush pink is light and slightly warm, so the chrome crescent looks like jewelry instead of glitter. I like this for hands that have dry cuticles — the chrome area draws the eye upward and away from the edges. It also flatters nails with a natural curve because the crescent follows the cuticle line. If you prefer subtle sparkle for work, this design reads professional in any lighting.
Apply a blush pink base and cure, then use a striping brush to paint a thin crescent of clear gel directly at the cuticle. Press silver chrome onto the crescent while the gel is tacky, then use a clean brush to tidy the edges. Keep the crescent slightly higher on the sides so the almond shape stays balanced. Finish with a glossy top coat, but brush carefully around the crescent so you don’t blur the crescent outline.
Editor's noteUse a tiny dotting tool to correct the crescent edges before curing.
Skip thisSkip thick gel at the cuticle — it makes the crescent look bulky.
4. Peachy Pink Chromed French Almond Tips
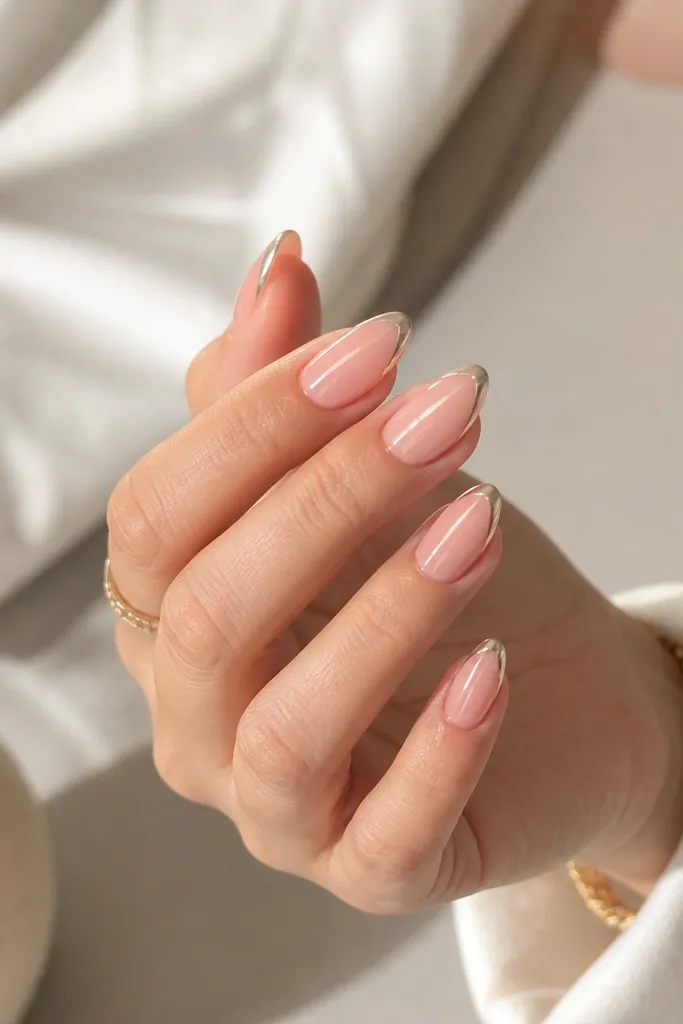
This is the “French but with a glow” look that always gets compliments. The base is peach-pink instead of pure pink, so it looks flattering on warm undertones and makes your hands look healthier. The chrome French line is only at the very tip, which lengthens the nail and keeps it modern. I use a slightly thicker line at the center and thinner lines toward the sides so it looks natural. It’s great for short almond nails because the tip detail does the elongation work.
Start with a peachy pink base and cure. Then paint a thin French tip line using a gel liner brush, keeping the line about 1 mm wide at the center and slightly narrower at the sidewalls. Apply mirror chrome to the tip gel while tacky, press lightly, and wipe off any stray chrome from the top surface. Seal with a high-gloss top coat, and cap the free edge so the chrome line doesn’t wear first.
Let your French line gel sit for 20-30 seconds before chrome so it grabs without flooding.
Don’t make the French line too high up the nail — it shortens the almond shape.
5. Pink Chrome Aura Fade Almonds
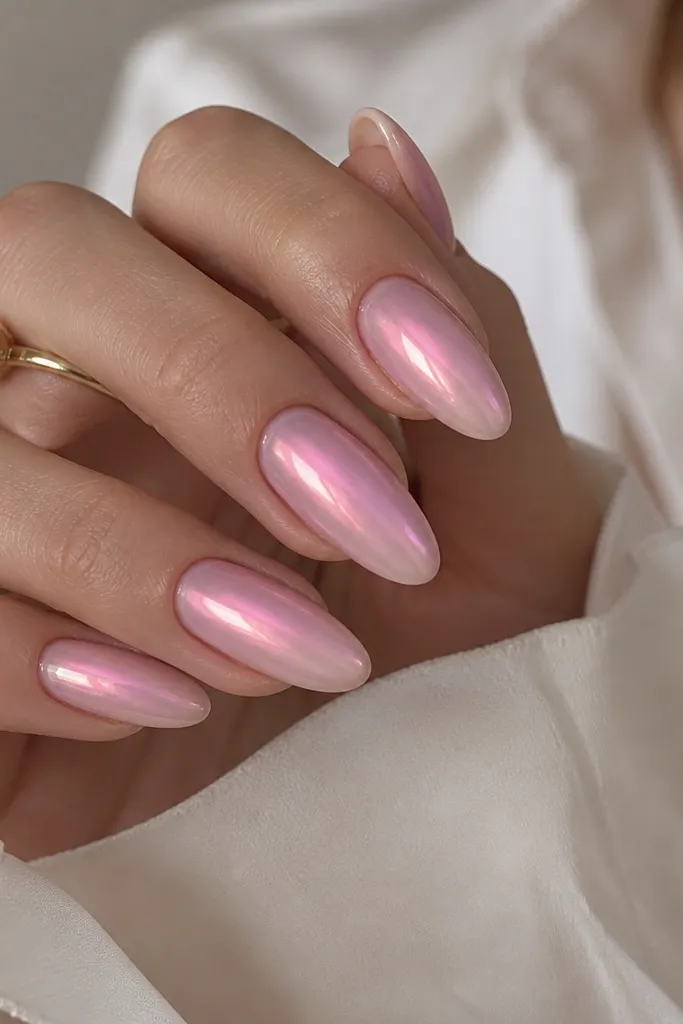
Aura fades look soft and expensive because the light spreads instead of sitting in one block. I use a light pink base, then add chrome only in a halo around the center, fading it out with gentle blending. This works especially well when you want something photo-ready but not busy. It flatters long almond nails because the aura makes the nail look fuller in the middle, like a glass sculpture. On medium-length nails, it still works because the glow keeps attention off the cuticle line.
Start by applying a milky pink base and cure. Add a thin layer of clear gel at the middle third of the nail, then press fine chrome into the center of that zone. Use a makeup sponge or a silicone tool to dab outward, creating a smooth fade into the pink. Wipe stray chrome off the sides and seal with a glossy top coat in two thin passes.
Editor's noteDo one nail first and check the fade under a lamp — you’ll instantly see if it needs more center or more blending.
Skip thisDon’t drag chrome with a brush — it turns into streaks.
6. Glazed Pink Micro-Glitter Almonds with Chrome Edge
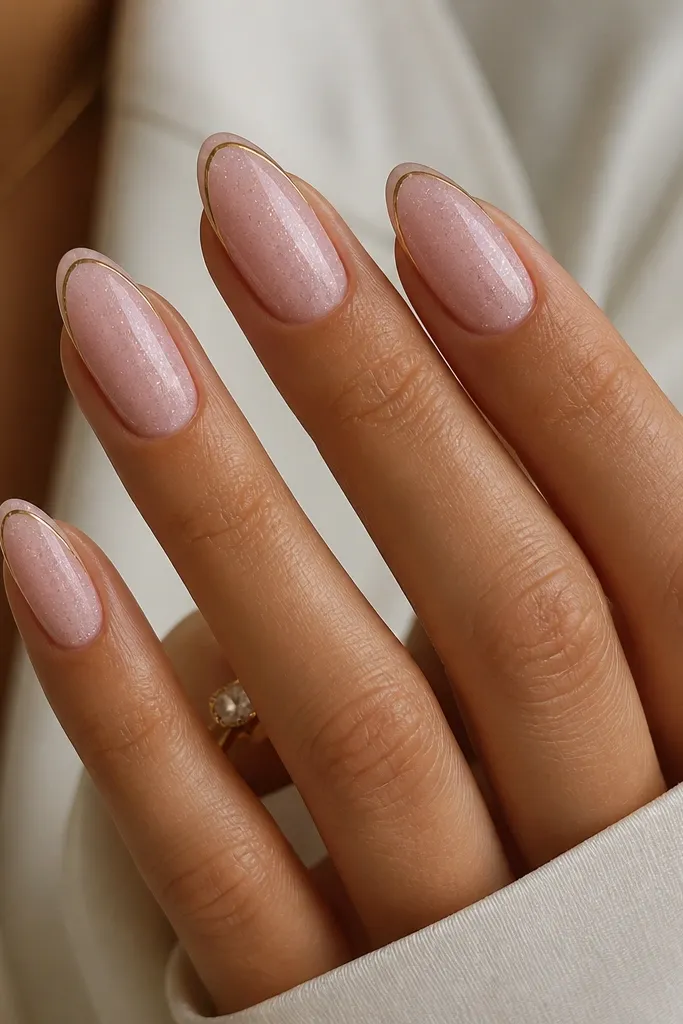
This is my favorite “glazed but not mirror” look. The micro glitter gives you a soft sparkle that stays pretty even when the chrome isn’t hitting directly. I keep the chrome only along the outer edge near the tip so the nail looks sculpted, not coated. The result looks flattering on most skin tones because the glitter is neutral-pink and silver. It also hides tiny filing marks because the micro sparkle diffuses light.
Apply a milky pink base and cure, then mix a tiny amount of micro glitter into a clear gel and paint a thin layer over the nail. Cure again, then paint a very thin clear gel line along the outer edge of the tip (about 1 mm in from the side). Press chrome onto that edge line, tap off excess, and seal with a glossy top coat that covers the micro glitter without turning it gritty.
Editor's noteUse a soft fan brush to clean glitter dust from the sidewalls before top coat.
Skip thisDon’t use chunky glitter — it catches and makes the almond look bumpy.
7. Light Pink Chrome Cat-Eye Center Dot Almonds
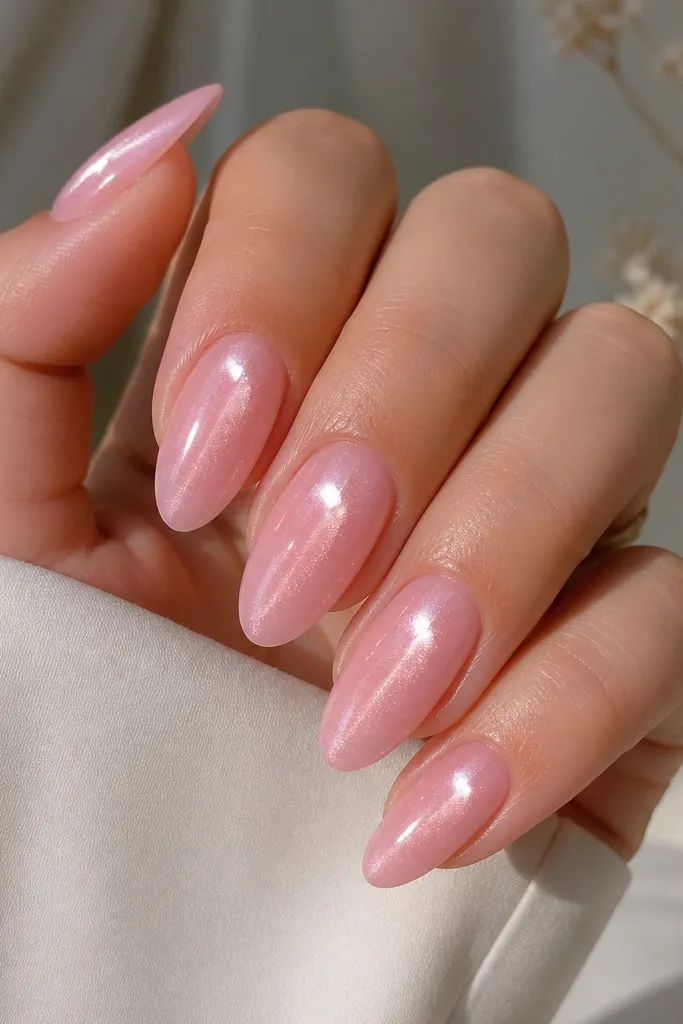
Cat-eye with a single dot looks playful but still clean, and it’s super flattering on almond shapes. The light pink base keeps it airy, while the cat-eye shimmer gives that “laser glow” when you tilt your hand. I place a small brighter dot near the center so the nail has a focal point instead of looking like random shimmer. This design looks great on fair and cool undertones because it keeps the pink fresh instead of turning orange. For events, it photographs like you used more effort than you did.
Start with a light pink gel base and cure. Apply cat-eye gel over the nail, but only magnetize it so the shimmer streak points toward the tip — hold the magnet 2-3 mm above the nail for the full curing time. Then, add a tiny clear gel dot at the center and press fine chrome onto that dot while tacky. Seal with a glossy top coat, keeping it thin so the magnetic lines stay crisp.
If the cat-eye looks too strong, reduce the magnet time by 5-10 seconds and cure again.
Don’t magnetize after adding top coat — it smears the effect.
8. Pink Almond Nails with Shimmer Jelly Base + Mirror Tip Cap
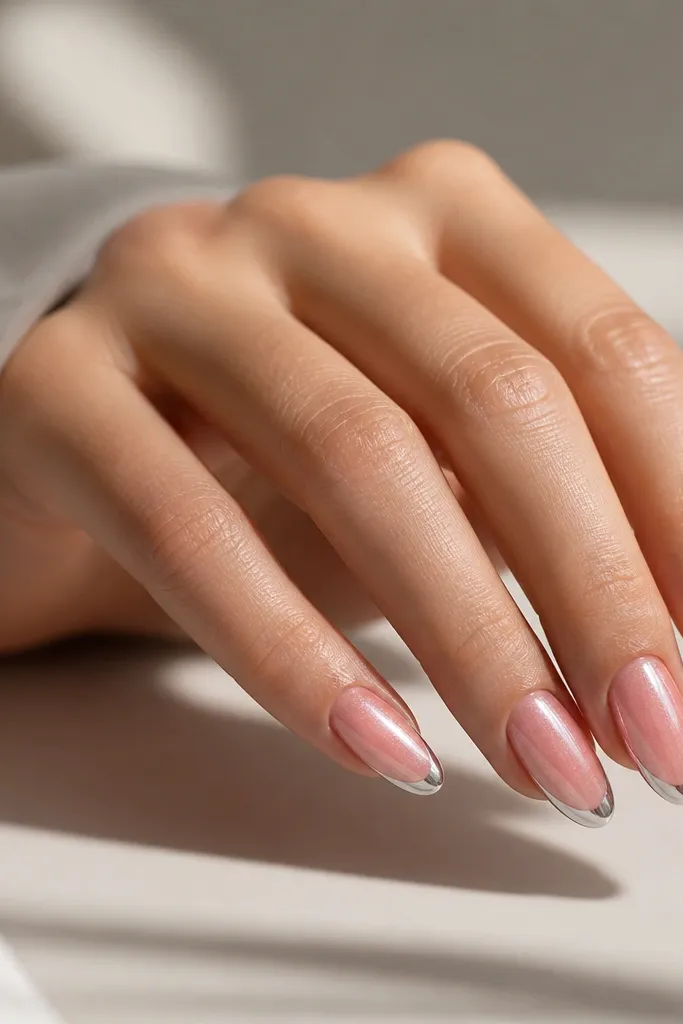
A shimmer jelly base looks like your nails have a glow under the surface. I use a light pink jelly that’s slightly translucent with fine shimmer, then I cap only the tip with mirror chrome. This combination makes the nail look extra smooth because the jelly levels out and the chrome tip adds sharp contrast. It flatters people who hate a heavy chrome look but still want “glazed glam” in pictures. On shorter almonds, the chrome cap keeps the tip looking clean and intentional.
Apply the shimmer jelly base in thin layers, curing each time so it doesn’t flood the cuticle line. Shape your almond and file lightly so the surface stays glassy. Paint a thin layer of clear gel at the tip cap area, then press mirror chrome onto it and smooth the surface with a soft brush. Finish with a glossy top coat that keeps the jelly glow intact — use thin strokes so you don’t dull the shimmer.
Editor's noteCap the chrome tip edge with top coat twice. It wears longer than one coat.
Skip thisAvoid thick jelly layers — they cause shrinkage and the chrome cap ends up uneven.
9. Candy Pink Chrome Swirl Almonds
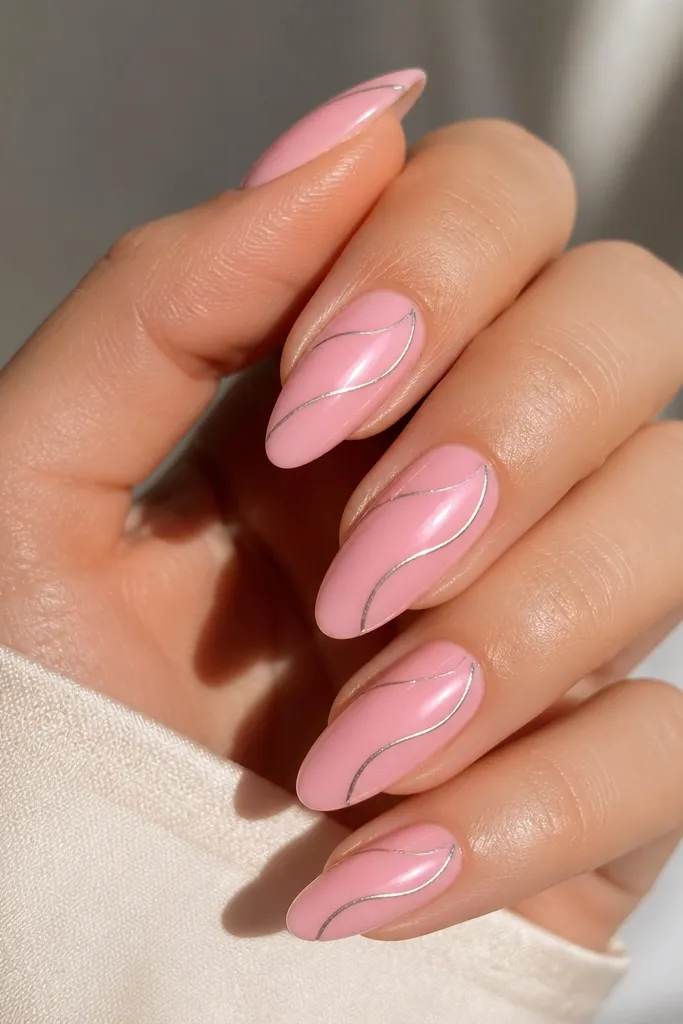
Swirls make almond nails feel custom without turning into nail art chaos. The candy pink base is a little brighter than milky pink, which makes the chrome swirl look like it’s drawn with silver ink. I keep the swirl thin and placed off-center so your nail still looks long. This design is flattering on hands that have longer fingers because the swirl follows that natural line. It also works for date nights because the chrome catches movement when you gesture.
Start with a glossy candy pink base and cure. Use a striping gel in clear or pale pink to draw a thin swirl that begins near the cuticle and curves toward the outer side of the nail. Press chrome onto the wet gel, then use a clean liner brush to remove chrome that spreads beyond the swirl line. Seal with a glossy top coat, and cap the swirl ends so the line stays crisp.
Editor's notePractice the swirl on a fake nail tip first — your curve will look cleaner on the first try.
Skip thisDon’t make the swirl too wide — thick lines make almond nails look stubby.
10. Powder Pink Chrome Tips with Negative Space Half-Moon
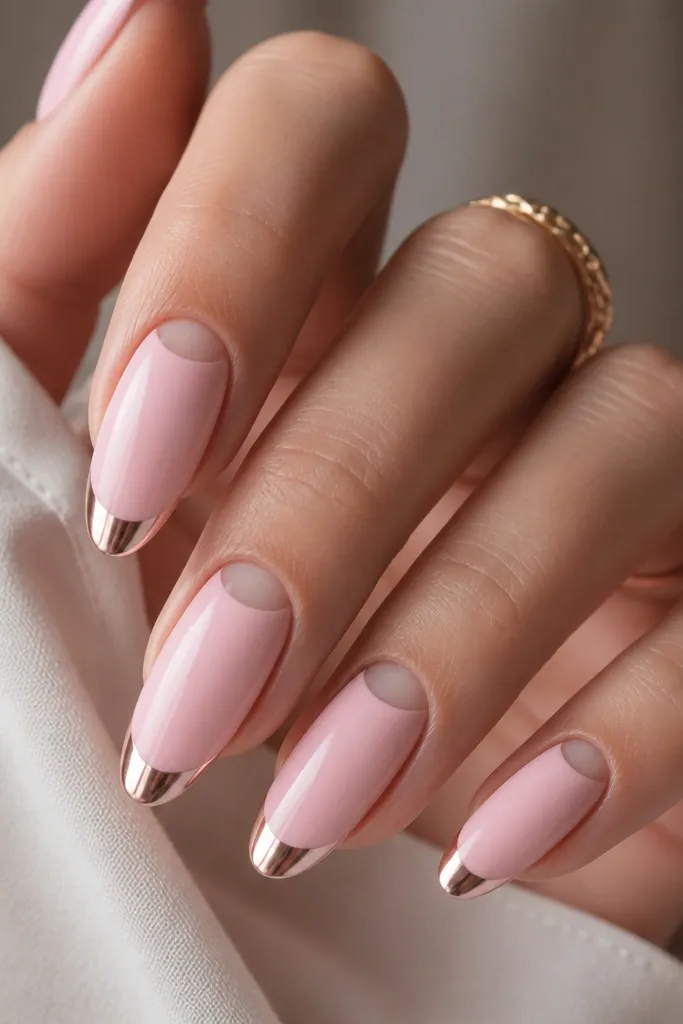
Negative space makes nails look fresh and modern, and it’s also a practical trick. The bare half-moon hides any cuticle growth line, so your set looks better for longer between fills. The powder pink is soft and light, and the chrome is only on the tip, which keeps the look clean. This design is flattering on almost everyone because it creates a visual “window” that draws the eye up and down. I like it for people who want chrome but don’t want it all over their nail bed.
Start by prepping and applying a nude-bare base only where you want pink, leaving a small half-moon at the cuticle uncovered. Build the powder pink from mid-nail down and cure. Then paint clear gel in a thin band at the tip and press chrome onto it, keeping the chrome band straight and tidy. Seal with top coat over the pink and chrome, but keep the half-moon area free so it stays crisp.
Editor's noteUse painter’s tape to block the half-moon while you apply tip gel so you don’t accidentally cover it.
Skip thisDon’t overfill the negative space — it should stay small and intentional.
11. Soft Pink Chrome Marble Vein Almonds
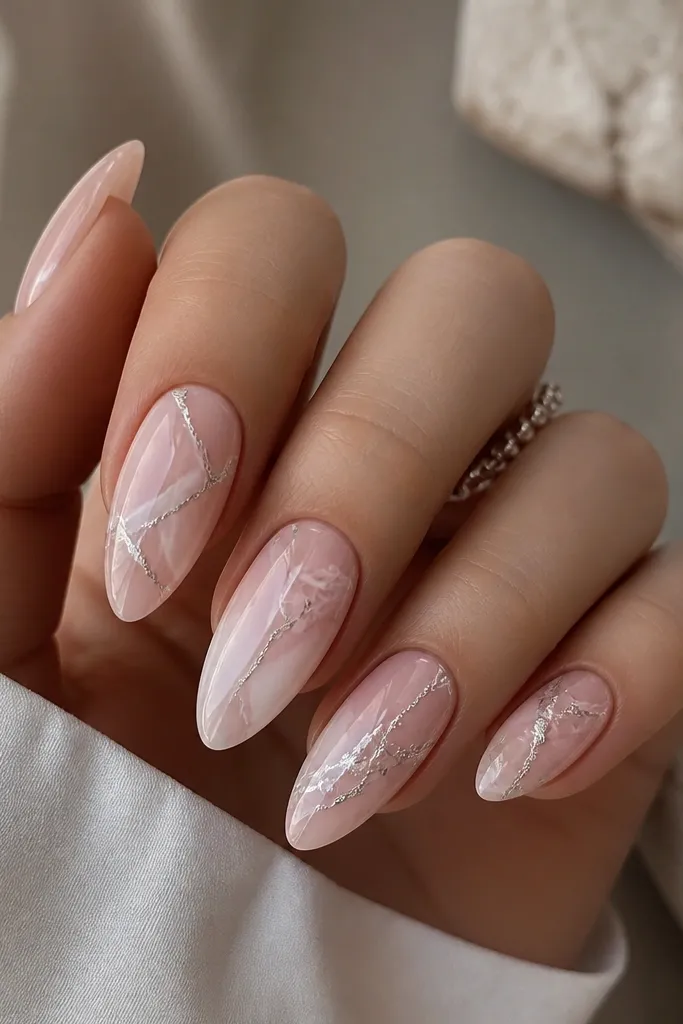
Marble veins look more detailed than they are, and chrome makes them pop without needing lots of colors. I use a soft pink base and add thin veining lines in white-pink gel, then I place chrome only on the thickest vein. That keeps the design from turning into random glitter. This looks amazing on fair to medium skin tones because the veining brightens the nail bed. If your nails tend to look plain in photos, marble veins give you texture that reads clearly.
Apply a soft pink base and cure. Use a thin liner brush to draw 2-3 marble veins across the nail — keep them slightly curved to match the almond shape. Add a small amount of clear gel along the main vein and press silver chrome into just that area. Gently wipe any stray chrome dust from the surface, then seal with glossy top coat in two thin layers.
Keep the veins thinner near the cuticle and thicker toward the tip for a natural look.
Don’t cover the entire nail with chrome — marble looks best when only the veins glow.
12. Pink Chrome Dot Matrix Almonds
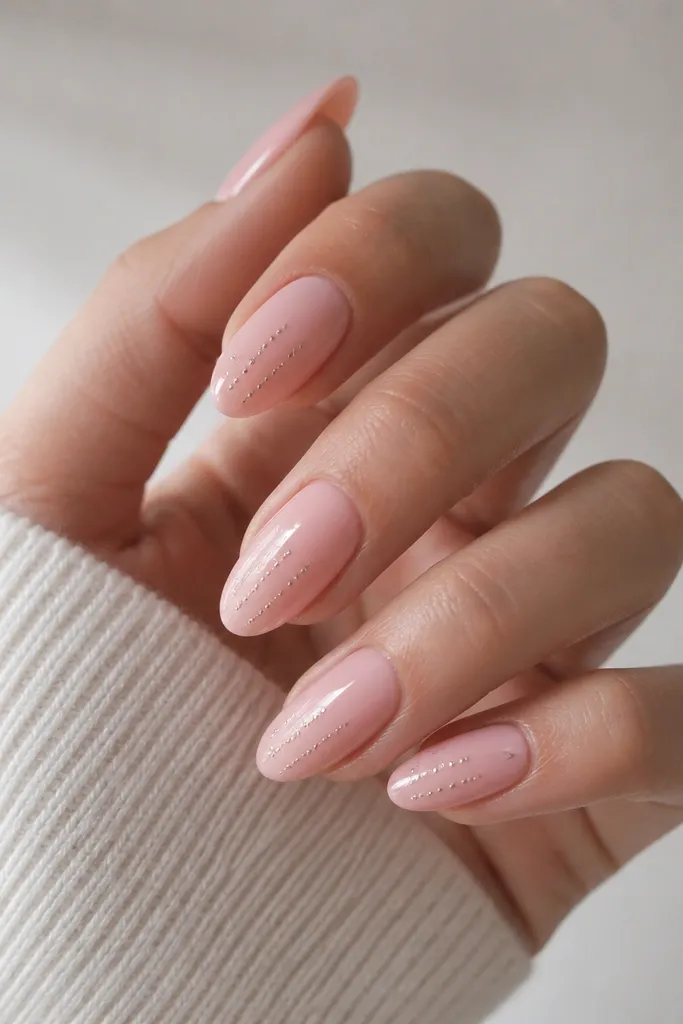
Dot matrices are the best compromise between plain and fully decorated. The light pink base keeps it soft, and the tiny chrome dots add sparkle without heavy coverage. I place dots in a vertical pattern because almond nails already have a strong length line — the dots should follow it. This design flatters hands that want something “cute” but still grown-up. It also works for short almond nails because the dots create a vertical rhythm without needing long art.
Start with a glossy milky pink base and cure. Use a dotting tool to place small dots of clear gel in a vertical line pattern — aim for 6-10 dots per nail depending on length. Press fine chrome onto the dots while the gel is tacky, then tap off excess so the surface stays smooth. Seal with a glossy top coat and cap the tip so the dots don’t lift at the edges.
Editor's noteIf dots look uneven, scrape your dotting tool once on a paper towel before reloading chrome.
Skip thisDon’t make dots too big — oversized dots turn the nail into a textured mess.
13. Glazed Pink Chrome Ombre Side Fade Almonds
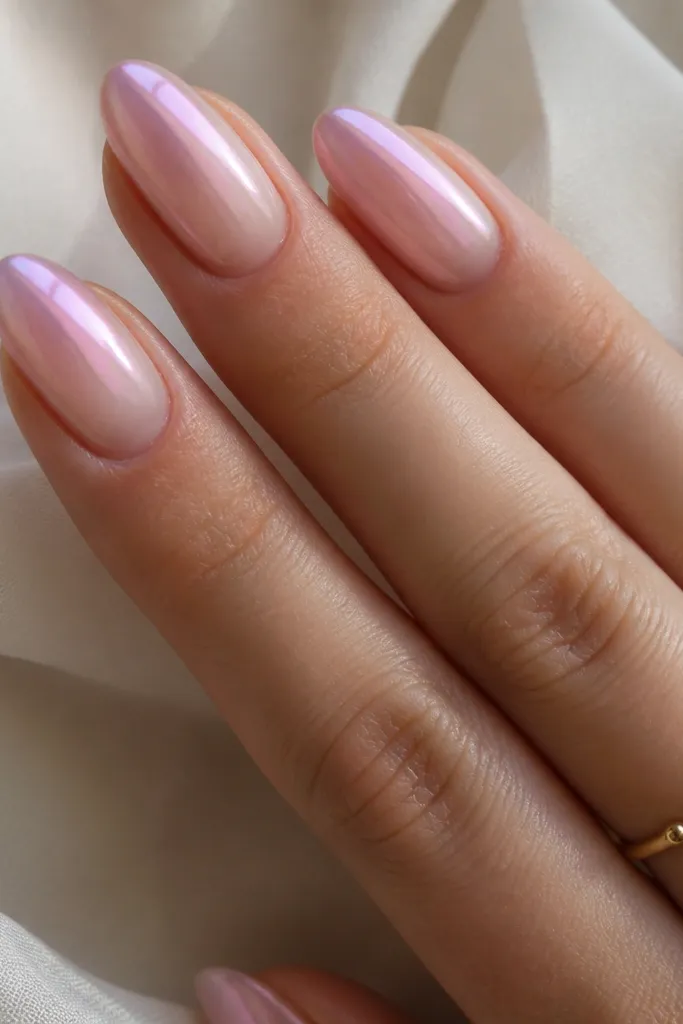
Side fades look so flattering because they mimic contouring on the nail. I use a light pink base, then concentrate chrome on one sidewall area and blend it toward the center so it looks like a soft beam. This is my pick for people who want the chrome effect but don’t want full mirror coverage. It also makes the nail look slimmer because the brightest part sits slightly off-center. For medium to deep skin tones, the silver chrome looks extra crisp against the pale pink.
Apply a smooth milky light pink base and cure. Add clear gel on only one side of the nail — think the outer half, not the whole nail — then press chrome and blend with a silicone tool so it fades toward the center. Wipe the sidewall clean so you don’t get a messy halo. Finish with a glossy top coat, brushing from cuticle to tip to keep the blend smooth.
Editor's noteRotate the hand under a lamp while blending chrome so you can see the fade line early.
Skip thisDon’t let chrome wrap too far around the nail — it ruins the side-contour effect.
14. Pink Almond Nails with Gold-Silver Dual Glaze
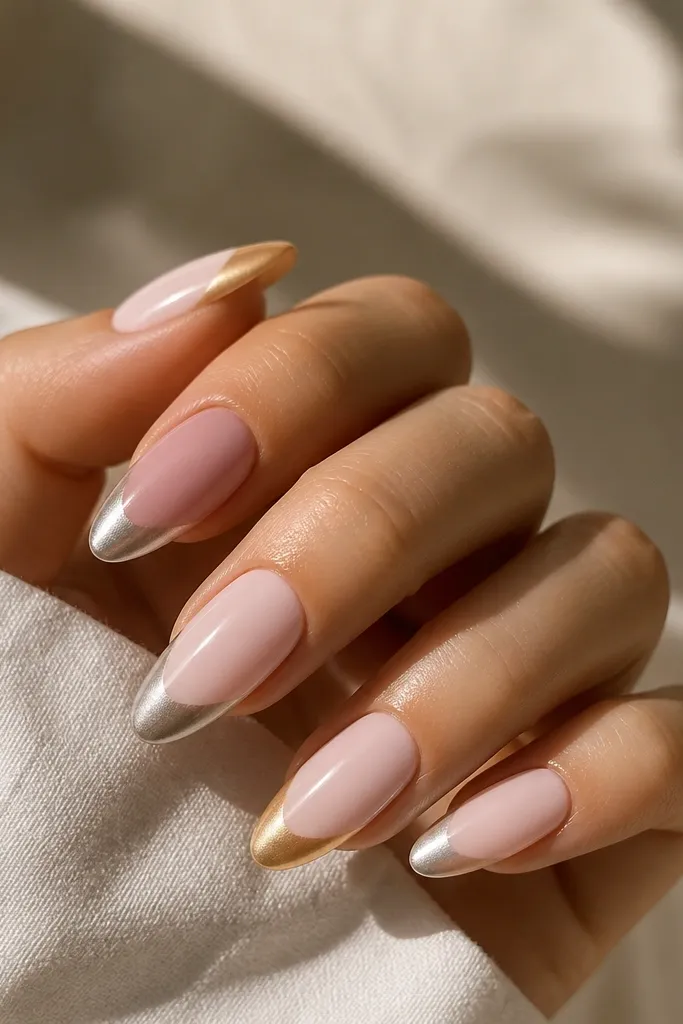
Dual glaze is the “special occasion” version of glazed chrome, and it looks better than you’d think on a light pink base. I do a split where silver sits slightly more on the inner half and gold sits more toward the outer half, then I blend them in the center so it doesn’t look like a hard line. The light pink base keeps everything soft, so the gold doesn’t turn brassy. This design flatters warmer skin undertones but still works on cool undertones because silver balances it. It’s also amazing for holiday photos because it reflects both warm and cool light.
Start with a milky pink base and cure. Paint clear gel in the tip half of the nail, then press silver chrome onto the inner portion and gold chrome onto the outer portion while the gel is tacky. Use a light dabbing motion to blend the two tones at the center. Wipe away chrome dust from the sidewalls, then seal with a high-shine top coat that covers the blend without dulling the chrome.
If your gold looks too warm, use a darker gold chrome instead of bright yellow — it reads more “glaze” and less “foil.”
Don’t combine gold and silver on the whole nail — the center gets muddy fast.
15. Barely-There Pink with Clear Glazed Overcoat and Chrome Ghost
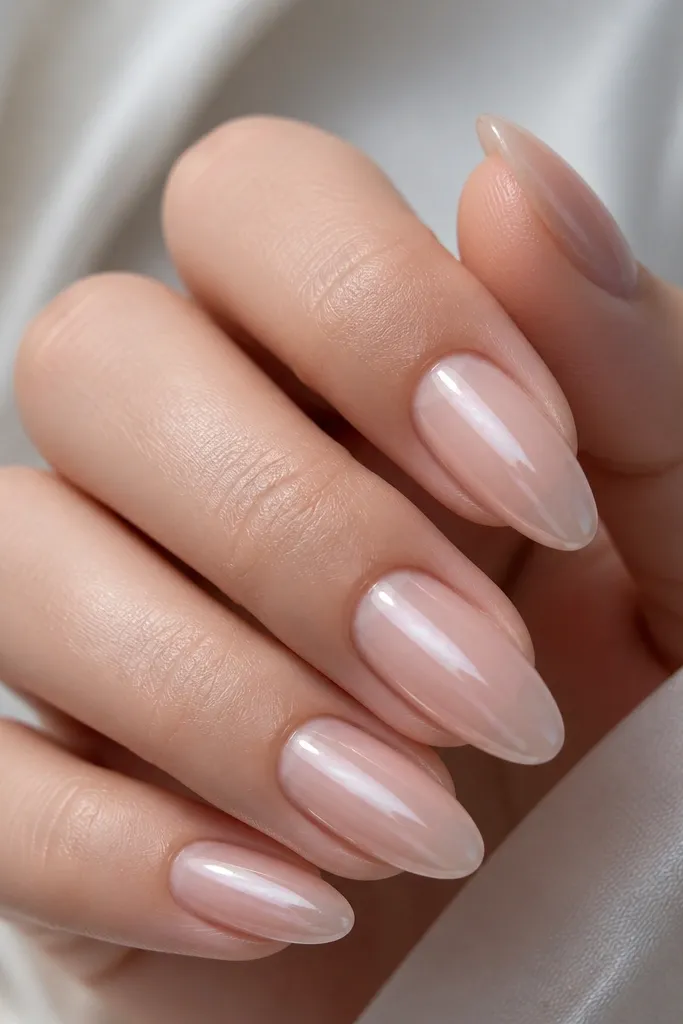
This is for when you want the vibe of chrome but hate the look of obvious chrome. The base is barely-there pink, so your nail bed shows through, and the chrome is applied as a faint ghost layer only in the middle. I keep the chrome light so it looks like a reflection, not a coating. It’s flattering on short almond nails because it doesn’t add bulk, and it looks natural on hands with slim nail beds. This one also works great if you’re growing out nails — the sheer base looks clean as it grows.
Prep and apply a sheer barely-there pink layer, then cure. Add a thin clear gel glaze layer on the middle third only. Press very light silver chrome into the center and immediately tap off so it fades quickly; you want a ghost, not a mirror. Seal with a glossy top coat in thin layers, and cap the tip with a careful brush to keep it smooth.
Editor's noteTest the chrome pressure on one finger — ghost chrome needs less pressure than full glaze.
Skip thisDon’t overbuild the sheer base — thick sheer layers look cloudy.