
1. Micro French Tip in Baby Pink
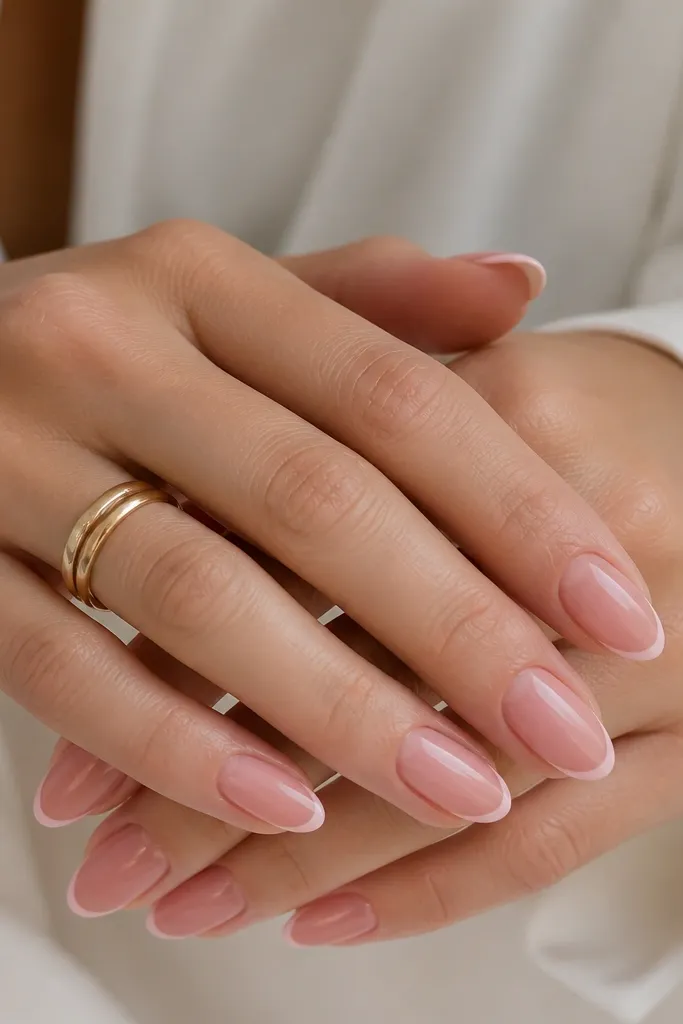
This is the design I reach for when I want “soft” but I don’t want to draw full tips. Start with a sheer blush pink base so the nail looks like it’s naturally rosy, then add a micro French line that’s just 1-2 millimeters wide at the free edge. The thin tip keeps the almond shape looking longer and clean, especially on fair skin where bold white tips can look harsh. On deeper skin tones, the baby-pink line still reads gentle because the base stays translucent. It also photographs well because the accent sits exactly where the nail tapers, so the shape stays the star.
First, paint two thin coats of sheer blush pink, letting each coat level for 20-40 seconds before you top it. Next, load a detail brush with a slightly lighter pink than your base and draw a straight micro line across the tip, then lightly connect it to the sidewalls so it follows the almond curve. Keep the line narrow — if it’s thicker than a swipe of mascara, it’s too wide. Finally, cap the tip with a glossy top coat and wipe any stray edge with a cotton bud dipped in polish remover.
If you don’t have a detail brush, use the polish brush and clean the edge with a thin strip of tape right after you paint the tip.
Don’t make the French line wide or opaque — thick tips turn this from soft to chunky fast.
2. Sheer Blush with One Rhinestone Dot
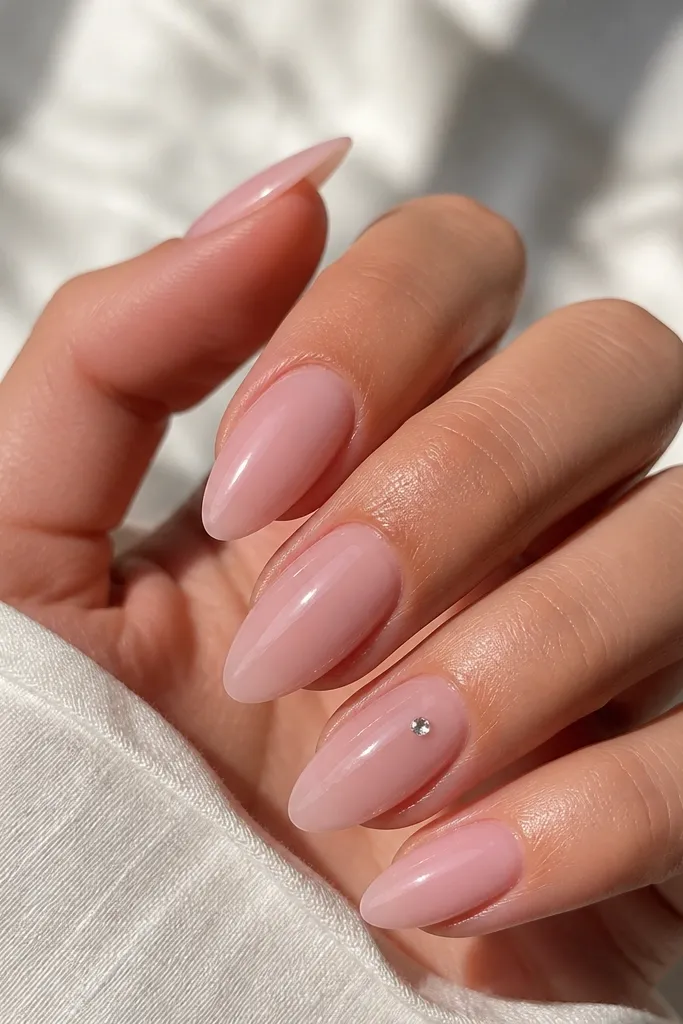
This design looks “done” because the light catches one tiny point, not because you painted a whole pattern. The sheer blush base gives you that soft, clean look, and the rhinestone adds sparkle without adding color noise. I like placing it slightly below the middle of the nail, not at the cuticle, because it balances the almond taper and makes the nail look longer. On warm undertones, blush pink makes skin look smoother; on cool undertones, it still reads soft because the base is sheer and glossy. It’s perfect for events where you want something pretty but not loud.
Start by applying two thin coats of sheer blush pink, then let it fully dry or cure. Dot a small amount of clear gel or nail glue exactly where you want the stone, about halfway between the center and the lower half of the nail. Press the rhinestone down gently with tweezers, then cap over it with a clear top coat so it doesn’t snag. Keep the rest of the nails plain and glossy — no glitter, no second stones.
Use a flat-bottom rhinestone if possible; it sits cleaner on almond curves than round ones.
Don’t place the stone too close to the cuticle or it will look heavy and messy as your nails grow.
3. Glossy Blush with Side-Stripe Accent
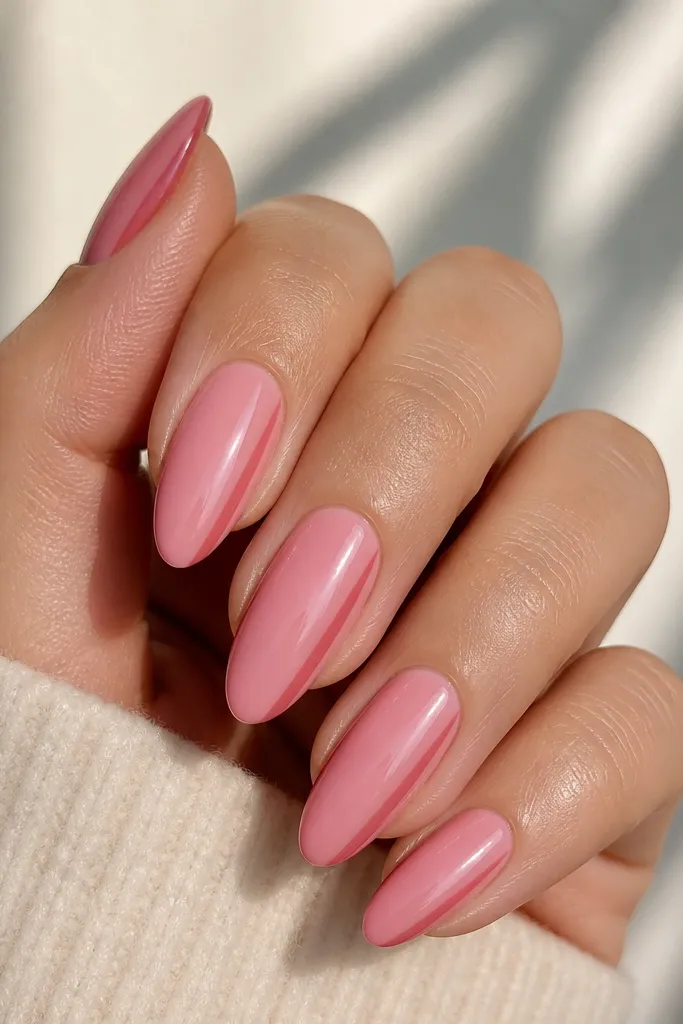
A side stripe is the fastest way I know to make almond nails look sleek instead of plain. Your base stays a soft blush pink, then the stripe adds a “lengthening” effect because it follows the nail’s vertical shape. I use a deeper pink that’s still in the same family, so it doesn’t look like a separate color block. This works on all skin tones, but it’s especially flattering if your hands are on the fair side because the deeper pink creates gentle contrast. The key is keeping the stripe narrow; wide stripes start to look like a sticker.
Editor's noteIf your stripe wobbles, clean the side edge with a cotton bud wrapped in remover so you keep the line sharp.
First, paint two thin coats of rosy blush pink and top with a glossy finish if you’re working with gel. Next, load a striping brush with a deeper pink and draw a single line down the nail, leaving a tiny gap between the stripe and the sidewall so it looks crisp. Keep the line thinner than the brush width you think you need — about the thickness of a sewing thread. Finally, add top coat over everything and cap the tip so the stripe doesn’t lift.
Skip thisDon’t center the stripe dead in the middle — on almond nails it can look like a stripe across a taper instead of a lengthening line.
4. Pink Almond Nails with Tiny White V at the Tip
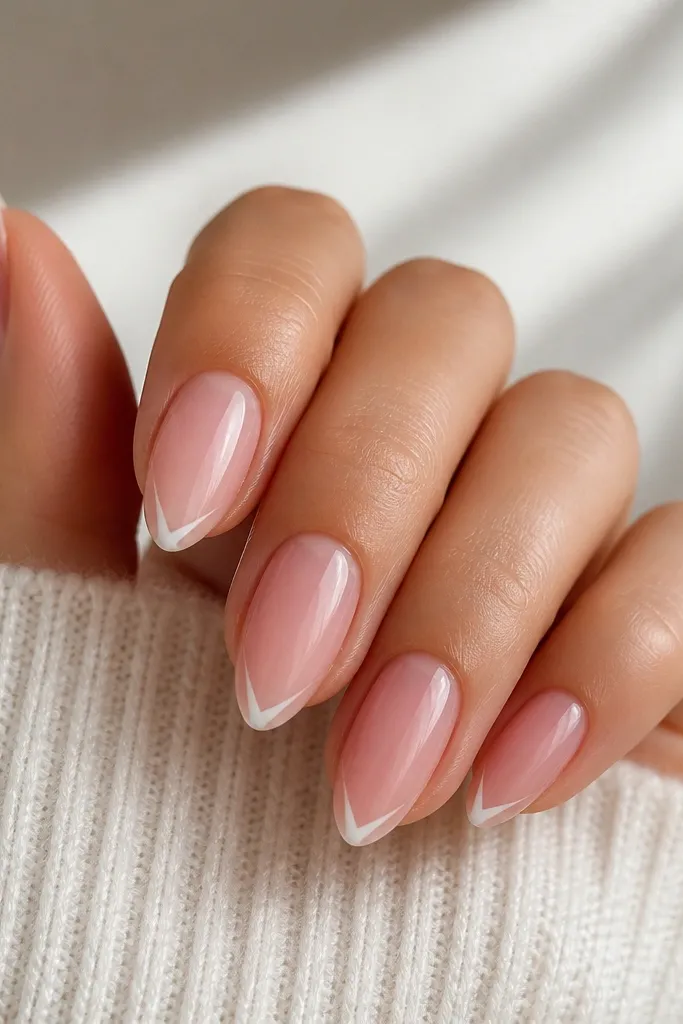
That little V is basically a micro French idea, but it feels sweeter and more modern. The base stays soft pink, and the white V gives just enough contrast to make the almond tip look crisp. I place the V centered and keep it small so it doesn’t turn into a full nail art moment. This design looks flattering on hands that have shorter nail beds because the V draws the eye upward. On deeper skin tones, the white pops cleanly without needing a thick coat because the base is sheer.
Start with two thin coats of sheer pink, then wait for it to dry or cure. Use a dotting tool or the tip of a fine liner brush to place two tiny white points at the left and right corners of the tip, then connect them with a short line to form a V. Keep the V height under one-third of the nail tip length so it stays delicate. Finish with a glossy top coat and cap the free edge to seal the paint.
For steadier lines, rest your hand on a table and keep your brush movements short and controlled.
Don’t make the V wide or thick — that turns it into a chunky chevron.
5. Blush Pink with Diagonal Nude Glaze Band
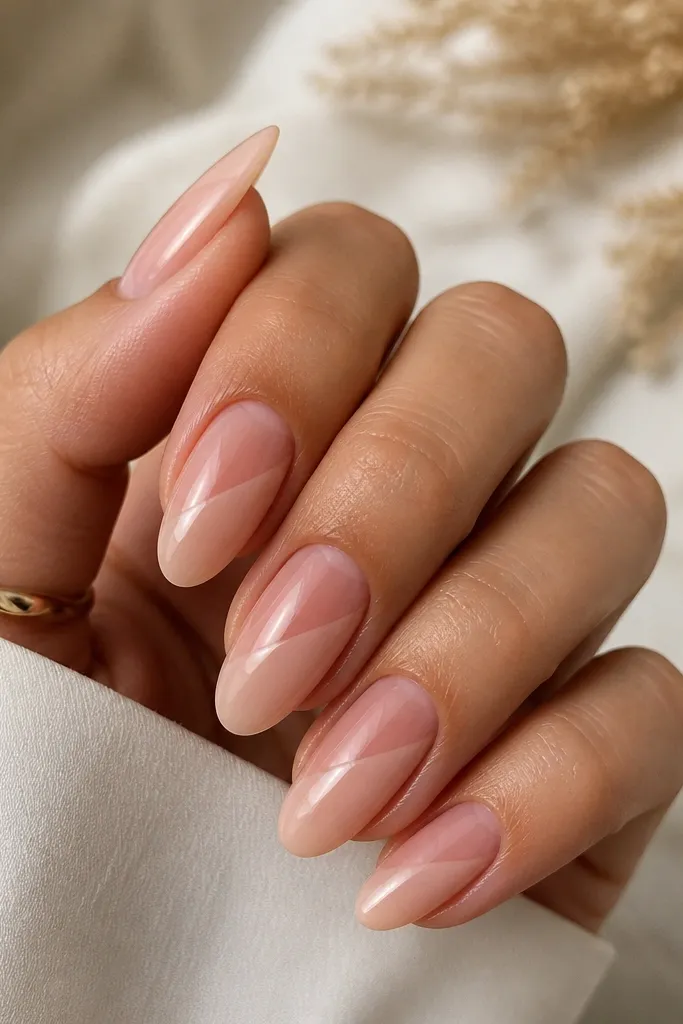
This is my “soft sophistication” pick when you want something different from French tips but still quick. The diagonal nude glaze band creates a fashion look without feeling loud, because it’s in the same family as your base. I use a nude beige that’s slightly darker than the blush, so it shows as a stripe but still feels airy. It looks good on fair skin because it doesn’t overpower your hand; on medium to deep skin, the nude band still reads smooth and clean rather than chalky. The diagonal placement also makes almond tips look sharper.
Paint two thin coats of glossy blush pink and let it level. Then, using a sheer nude-beige polish or a thin gel color mix, paint a diagonal band that starts around the mid-lower area and ends near the top tip — keep it narrow, about 2-3 millimeters. Feather the edges with the brush tip so the band looks like a glaze, not a sticker line. Finally, add top coat and cap the diagonal line so it doesn’t catch on hair or fabric.
If your band looks too opaque, thin it with a clear gel top or a drop of non-acid gel cleanser and try again.
Don’t use a flat, opaque nude strip — it will look like masking tape.
6. Pink Almond Nails with Pearly Center Dot
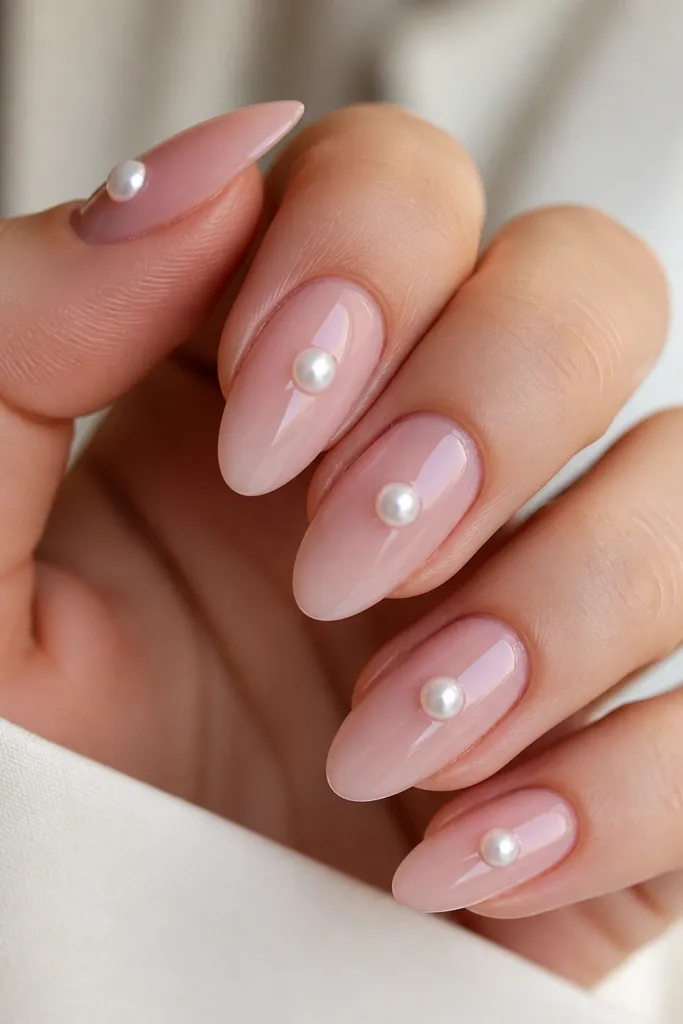
A center dot is a trick I use when I want symmetry without spending time on line work. The pearly dot adds dimension and a soft glow, and because it sits in the center it follows the nail’s natural taper. I use pearly white or very pale champagne, not bright white, so it stays gentle on camera. This design flatters hands with narrow nail beds because the dot gives a focal point without widening the nail visually. It’s also great for short-to-medium almonds because the dot scales down nicely.
Editor's noteTo keep dots perfectly round, touch the tool lightly and lift straight up — don’t drag across the nail.
Apply two thin coats of sheer blush pink and let it dry or cure fully. Dip a dotting tool into pearly white or champagne polish, remove excess, and place the dot dead center of each nail — keep it small enough that you can cover it with top coat without smearing. If the dot spreads, wait 30 seconds, then add a second micro layer to build the round shape. Finish with one thicker top coat so the dot looks like it’s under glass.
Skip thisDon’t use glitter polish for the dot — textured glitter looks rough and cheap under a quick top coat.
7. Soft Pink Almond Nails with Tiny Heart Outline
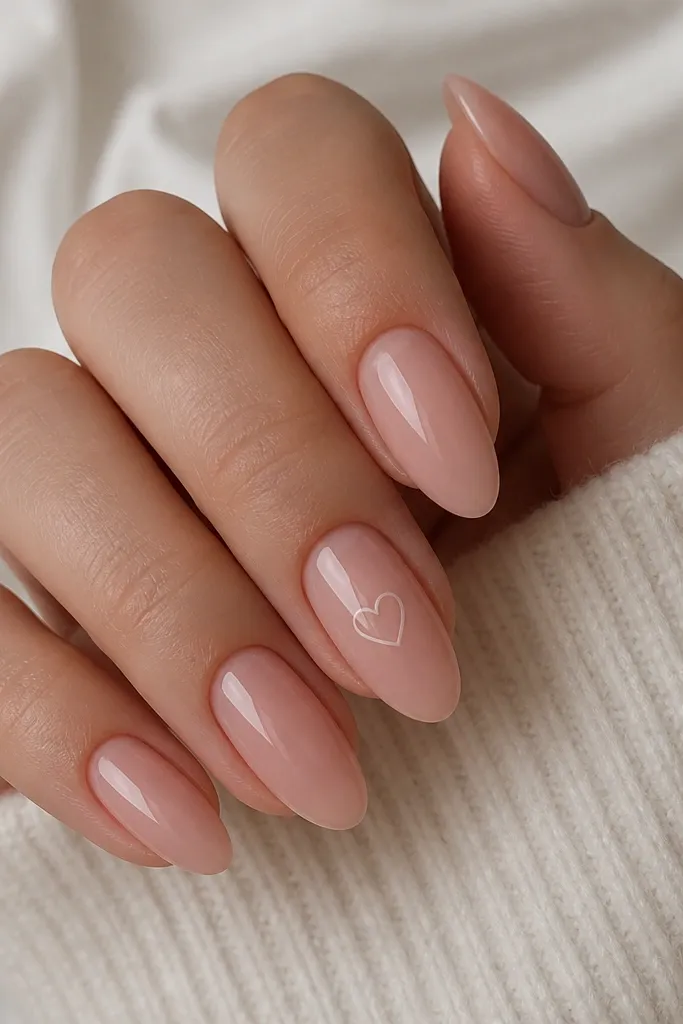
A tiny heart outline looks sweet without turning into a full Valentine set. Because it’s an outline, it stays airy and soft, and it doesn’t cover your nail’s natural shine. I keep the heart small and placed slightly below the center so it doesn’t feel childish near the cuticle. This works great for office settings because the line is thin and the color is pale — it reads as romantic, not loud. On all skin tones, the blush base makes the heart look like it belongs, not like an added sticker.
Editor's noteIf you can’t draw hearts, use a nail stencil for one nail and freehand the outline on the next set.
Start with two thin coats of sheer blush pink and top if needed. Use a fine liner brush to draw a small heart outline: first two curves at the top, then a point at the bottom, keeping the lines thin. Place it on the ring finger only, centered and about one-third of the nail height from the tip. Cure or dry fully, then apply a careful layer of top coat without flooding the heart lines.
Skip thisDon’t fill the heart in solid — filled hearts look heavy and take longer to clean up.
8. Blush Pink with Faint Glitter Fade at the Tips
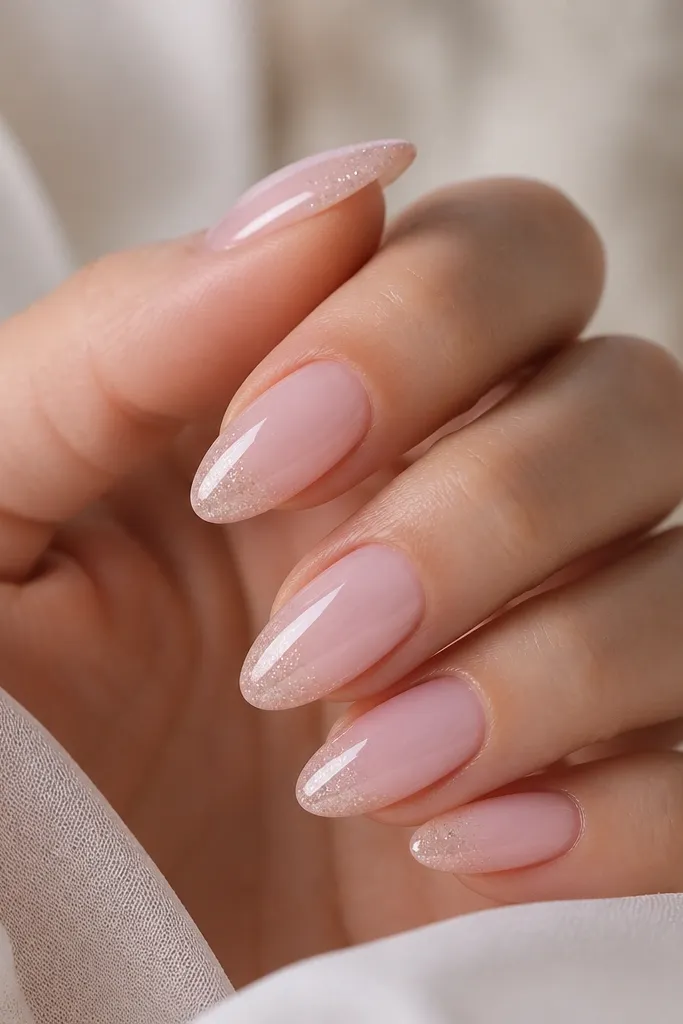
A glitter fade gives that “celebration” look while still feeling soft and controlled. The trick is using fine glitter in a translucent way and keeping it confined to the tip, so your base stays clean. I use a blush-tinted glitter or a pale champagne micro-glitter so it blends into the pink instead of sitting on top. This design flatters every skin tone because the glitter catches light without harsh color contrast. It’s also perfect when you want a little sparkle but you’re short on time.
Paint two thin coats of sheer blush pink and cure or dry until fully set. Then sponge a tiny amount of micro-glitter polish onto the tip area, starting about one-third up from the free edge and fading it as you go — use a light touch so the base still shows through. Tap off extra glitter with a clean sponge corner or a dry brush. Seal with a glossy top coat, and cap the free edge so the glitter doesn’t snag.
Use a makeup sponge, not a brush, for the fade — it makes the transition look natural in seconds.
Don’t use chunky glitter — it catches on hair and makes quick nails feel rough.
9. Rose Pink Ombre Fade into Clear Tip
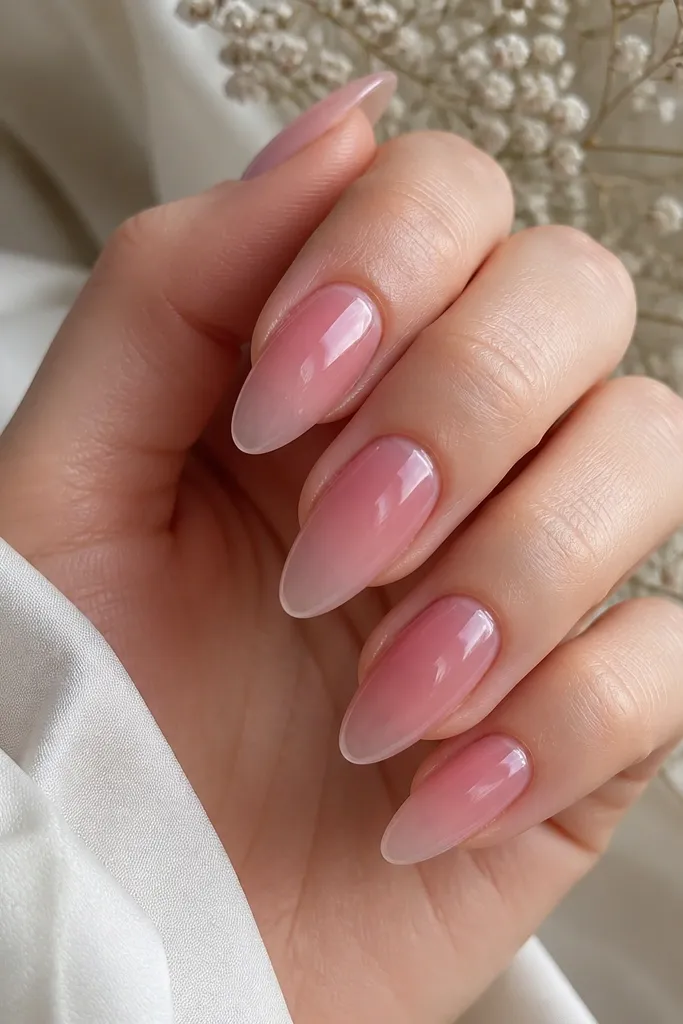
Ombre can look hard, but a quick ombre is all about the gradient order and thin layers. This design keeps the tip clearer, which makes almond nails look longer and more airy. I use a rose pink that’s slightly darker than your blush base, then blend it outward with a sponge so there’s no hard line. It’s flattering on hands that have uneven nail beds because the clear tip reduces the look of ridges. On camera, the fade reads sophisticated because there’s depth without heavy art.
Editor's noteWipe your sponge edge on a paper towel before blending so you don’t get a dark blob at the tip.
Start with a sheer base coat or sheer blush pink that matches your nail bed tone. Then, using a makeup sponge, dab rose pink starting at the mid-nail and blending upward and outward — keep the tip mostly clear. Build the color slowly with 2-3 thin sponge passes instead of one thick swipe. Finish with a glossy top coat that smooths the gradient and caps the tip area.
Skip thisDon’t leave a visible line where the sponge stops — blend until the color disappears.
10. Soft Pink Half-Moon Cuticle Accent
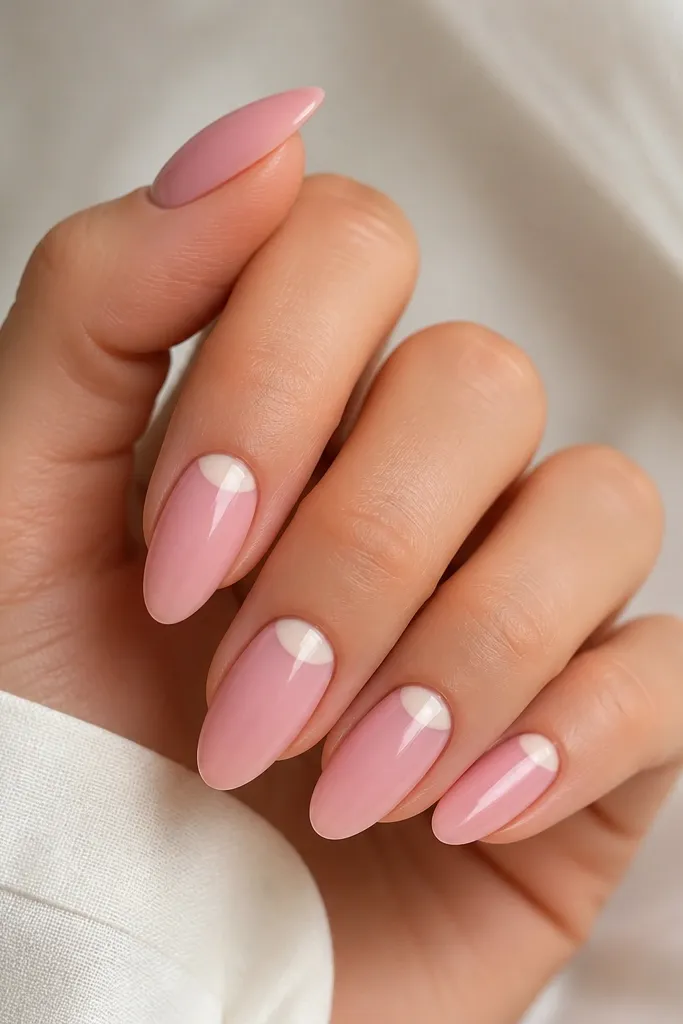
The half-moon cuticle accent is small, fast, and it makes the nail look “cleanly designed” even when you’re not. You paint a pale half-moon right under the cuticle curve, which frames the nail without covering most of it. I like pale nude or milky white for the half-moon, because it stays soft and doesn’t overpower the blush. This looks good on short almond nails because the accent draws attention to the base and makes the nail look intentional. It also works for both warm and cool undertones since the half-moon is neutral.
Paint two thin coats of glossy soft pink and let them set. Then, with a tiny detail brush, paint a curved half-moon shape at the cuticle line — follow your natural cuticle arc and keep the half-moon about 1-2 millimeters tall. Fill it in lightly so you can still see your pink through if you’re using a sheer milky color. Finally, top coat carefully around the cuticle so the edges look smooth and sealed.
If you’re worried about messy cuticles, use a cuticle pusher to push back gently before you paint, then clean the edge with a tiny remover brush.
Don’t make the half-moon too big — oversized cuticle art looks crowded on almond nails.



